topic 8 life saving first aid quick find - safety & training
TRANSCRIPT

TOPIC 8Life Saving First Aid
Topic 8 1
TOPIC 8Life Saving First Aid
The information provided here will help to ensure that you can
cope with an emergency situation that requires life saving first
aid treatment. Completion of this topic gives you competency
as an initial response first aider. It seeks to provide you with
sufficient information and skills to sustain life until qualified first
aid help arrives. On most mine sites, this should only take a few
minutes.
This topic also provides information on providing basic care
for those suffering from some of the more common workplace
injuries.
1. BASIC LIFE SUPPORT
All mine sites have a fully equipped first aid room, which is
staffed by people who are fully trained in first aid. They may be
summoned to deal with injuries to people who cannot be moved,
or alternatively, coal mine workers may present themselves at
the first aid room for treatment.
The first aid room is equipped to deal with injuries ranging from
splinters and minor cuts through to the stabilising of major
traumas (amputations, etc.) prior to the casualty’s evacuation.
You should ensure you are familiar with the location of the first
aid room and the methods by which help can be summoned.
Your life, or the life of a workmate, could depend on this
knowledge.
Despite the provision of first aid facilities, you may find yourself
in the position of having to administer some emergency first aid
treatment. Again, this section provides you with some basic first
aid information so that you can provide basic assistance until
you can either get the victim to qualified medical assistance or
get qualified medical assistance to the victim.
a) DRABC
The accident or emergency scene may be quite traumatic and
lives can depend on how you react. The most important actions
you can take to help the situation are to control your emotions
and to think clearly.
By following a simple five point procedure, known as DRABC,
you will ensure your own safety as well as significantly improving
the accident victim’s chance of survival and minimising the
damage caused by injury.
Contents ofthis Topic
1. Basic Life Support
a) DRABC
b) Rescue Breathing
c) Compressions
d) Cardio-Pulmonary
Resuscitation
(CPR)
2. Basic Care for the
injured
i) Clinical Shock
ii) Bleeding Control
iii) Penetrating Chest
Wounds
iv) Snake Bite
v) Burns
vi) Electric Shock
vii) Foreign Body
in the Eye
viii) Crush Injuries
ix) Choking
Quick Find

2 Topic 8
Danger
• Quickly assess the situation for danger.
• Ensure the safety of yourself, bystanders and the victim in that order.
• Call for help
• Move the victim as little as possible. If they can be treated where they are, do not
move them. The victim should be moved only if they are in further danger or it is
necessary to establish and maintain a clear airway.
Response
Assess the victim’s state of consciousness and responsiveness, ensuring that this does not
aggravate their injury. Give simple commands such as ‘open your eyes, squeeze my hands,
and let them go”. A person who fails to respond, or a person who shows only a minor
response (eg. groans without opening their eyes) should be managed as unconscious.
Where there is more than one victim in an emergency situation, the care of an unconscious
victim has priority. The rescuer should not be distracted by victims calling out; their needs
are less urgent since they are breathing.
BASIC LIFE SUPPORT FLOW CHART
Check for Danger
Responsive? (Unconscious?)
Open AirwayLook for signs of life
Give two intitial Breaths if not breathing normally
Give 30 chest Compressions(almost two compressions/second)
followed by 2 breaths
Continue CPR until qualified personnelarrive or signs of life return
DR
A
B
C
NO SIGNS OF LIFE= Unconscious, Unresponsive, Not Breathing Normally, Not Moving
Hazards/Risks/Safety?
If not, call for help

TOPIC 8Life Saving First Aid
Topic 8 3
Airway Management
Once the rescuer has checked the response of the casualty the next step is to ensure the
casualty has a clear airway. Airway management is required to provide an open airway
when the casualty:
• is unconscious • has an obstructed airway • needs rescue breathing
When a victim is unconscious, all muscles are relaxed. If the victim is left lying on their
back, the tongue, which is attached to the back of the jaw, falls against the back wall of the
throat and blocks air from entering the lungs. Other soft tissues of the airway may worsen
this obstruction. The mouth falls open but this tends to block, rather than open, the airway.
The obstruction to the airway by these soft tissues may be overcome by applying a
Backward Head Tilt in combination with Chin Lift.
Note of Caution:
With the unresponsive casualty on their back, the mouth should be opened first
to see if any foreign substance/s (eg blood, vomit) are present prior to tilting the
head, as any presence of fluids may result in obstruction to the airway.
Once the mouth has been checked and no foreign substances are present, proceed with
backward head tilt and chin lift.
In the event of any foreign substance/s in the mouth, casualties should be carefully
positioned on their side with head tilted slightly down and back and with the finger sweep
method being used to remove any foreign substances.
The victim should not be routinely rolled onto the side to assess airway and
breathing - leave them on their back or in the position they have been found to
avoid movement and save valuable time.
Breathing
Check if the victim is breathing (more than an occasional gasp). You should:
• LOOK and FEEL for movement of the upper abdomen or lower chest and;
• LISTEN and FEEL for the escape of air from the nose and mouth.
• If not breathing, give 2 initial breaths.
• Quickly check for signs of life. If no signs of life are present the rescuer will need to
commence chest compressions immediately.
No Signs of life = unconscious (unresponsive), not breathing normally and
not moving

4 Topic 8
Compression
Give 30 chest compressions (almost 2 compressions per second) followed by 2 breaths.
Further details on rescue breathing and compressions follow.
b) RESCUE BREATHING
As stated above, if the unconscious victim is not breathing normally after the airway has
been opened and cleared, the rescuer must immediately commence Rescue Breathing by
giving two initial breaths allowing about one second per inspiration and then check for
signs of life.
This may be mouth-to-mouth, mouth-to-nose or mouth to mask. All are equally effective.
To ensure the rescuer’s safety, mouth-to-mask rescue breathing should be administered
when available and if the rescuer is trained to use a mask.
Mouth-To-Mouth Rescue Breathing
Backward Head Tilt / Chin Lift
Kneel beside the victim’s head and maintain an open airway by applying
the Backward Head Tilt technique in combination with Chin Lift. Place
the palm of one hand on top of the head, support the chin with the other
hand, and firmly but gently tilt the head backwards avoiding excessive
force to the neck.
The chin is held up by the rescuer’s thumb and fingers. Placing the
thumb over the chin below the lip and supporting the tip of the jaw with
the knuckle of the middle finger. Care is required to ensure the little and
ring fingers are clear of the neck and jaw.
Blow
Take a deep breath, place your wide-open mouth over the victim’s
slightly open mouth, sealing his/her nose with your cheek or by pinching
the victims nostril and blow to inflate the victim’s lungs.
Look, Listen and Feel
• Look for a rise in the victims chest during each inflation, if the chest
does not rise possible causes are:
• Obstruction in the airway (inadequate head tilt, chin lift, tongue or
foreign material)
• Insufficient air being blown into the lungs
• Inadequate air seal around mouth and or nose
Following the inflation of the victim’s lungs, and an obvious rise to the
chest, lift your mouth from the victim’s, turn your head towards his/her
chest and listen and feel for air being exhaled from the mouth and nose.
Observe the victim’s stomach to ensure it has not been distended
with air. If the stomach is distended, check the airway for obstruction
and ensure you are not over-inflating the victim’s lungs. Do not apply
pressure to the stomach.

TOPIC 8Life Saving First Aid
Topic 8 5
Mouth-to-Nose
The technique for mouth-to-nose is similar to that for mouth-to-mouth, except for the
method of sealing the airway. To seal the airway, close the victim’s mouth and seal the lips
by pressing the lower lip on to the upper lip with your thumb. Take a deep breath and place
your wide-open mouth over the victim’s nose. Ensure that your mouth encloses the bridge
of the victim’s nose. Do not compress the soft part of the victim’s nose with your lips.
Continue as for mouth-to-mouth.
The mouth-to-nose technique should be used:
• when the rescuer prefers to use this method
• when the jaws are clenched
• for resuscitation in deep water
• in the resuscitation of infants and small children when the rescuer covers the mouth
and nose.
c) COMPRESSION
As mentioned in the airway section above, rescuers should start chest compressions if
the victim has no sign of life - unconscious (unresponsive), not moving and not breathing
normally.
• Locating the Chest Compression Point
Direct visualisation may be used to locate the compression point and should be around the
lower half of the sternum in all age groups. The lower half of the sternum equates to the
‘centre of the chest’.
More exactly, the position of the compression point on the sternum (breast bone) is found by:
- Place the index finder of one hand at the notch at the top of the sternum (breast bone)
- Place the index finger of the other hand at the
bottom of the sternum where the ribs join
- Use your thumbs to divide the sternum into
two equal parts (see diagram)
- The pressure point is between the thumb and
the finger on the lower hand
- The compression point can also be located
by drawing an imaginary line connecting the
nipples in most cases.
Avoid compression applied beyond the lower limit of the sternum. Compression applied too
high is ineffective and if applied too low may cause regurgitation and/or damage to internal
organs.

6 Topic 8
• Method of Compression
Once the compression point is found, the rescuer places the
heel of their hand on this point, with the fingers parallel to
the ribs and preferably slightly raised, so that pressure is not
exerted directly on the ribs. The rescuer then places their
other hand securely on top of the first.
All pressure is exerted through the heel of the bottom hand
and the rescuer’s body weight is the compressing force
therefore the rescuer’s shoulders should be vertically over
the sternum and the compressing arm kept straight
Compressions should be rhythmic with equal time for
compression and relaxation. The rescuer must avoid
rocking backwards or forwards, using thumps or quick
jabs and should allow complete recoil of the chest after
each compression.
• Depth of Compression
The lower half of the sternum should be depressed by one
third of the depth of the chest with each compression.
This equates to at least 4-5cm in adults
• Rate of Chest Compressions
Rescuers should perform chest compressions for all ages at a rate of approximately 100
compressions per minute (almost 2 compressions/second). This does not imply that
100 compressions will be delivered each minute since the number will be reduced by
interruptions for breaths given by rescue breathing.
d) CARDIO-PULMONARY RESUSCITATION (CPR)
Cardio-pulmonary Resuscitation (CPR) is a technique using rescue breathing combined
with chest compressions. The purpose of cardio-pulmonary resuscitation is to temporarily
maintain circulation sufficient enough to preserve brain and organ function until specialised
treatment is available.
Rescuers should start CPR if the victim has ‘no signs of life’. If the victim takes occasional
gasps, rescuers should suspect that cardiac arrest has occurred and start CPR.
• Compression - Ventilation Ratio
A universal compression-ventilation ratio of 30:2 is recommended for all ages regardless of
the numbers of rescuers present. Compressions must be paused to allow for ventilations.
30:2 Ratio = 30 compressions followed by 2 ventilations
When providing 30 compressions at approximately 100/min and giving 2 breaths (each
breath is given over 1 second per inspiration) this should result in the delivery of 5 cycles in
approximately 2 minutes.
1/3rd (4-5cm in Adults)

TOPIC 8Life Saving First Aid
Topic 8 7
Do not interrupt the cycle to check the victim’s breathing or circulation. Constantly watch
for the signs of life returning.
• Compression only
If the victim’s face is badly injured or if the rescuer is unwilling or unable to do rescue
breathing, they should do chest compressions only. If chest compressions only are given,
they should be continuous at a rate of approximately 100 compressions per minute.
• Multiple Rescuers
If there is more than one rescuer available ensure the following:
- that an ambulance is called
- all available equipment has been obtained eg. defibrillator
- frequent rotation of rescuers is undertaken approximately every 2 minutes to
reduce fatigue
• When to cease CPR
The rescuer should continue CPR until:
• Signs of life return
• Qualified help arrives
• It is impossible to continue from exhaustion
• An authorised person pronounces life extinct or the rescuer finds themselves in a
dangerous situation.
Remember that any attempt at resuscitation is better than no attempt.
Recovery Position
Once the victim is showing signs of life, they should be
placed on their side in the lateral or recovery position.
Continue to monitor the victim to ensure their situation
remains stable, and manage any injuries.
The information contained within has been taken from the Australian Resuscitation
Council guidelines by permission and reflects the current February 2006
Guidelines 4 / 5 / 6 / 7 and Guideline 8.9.1 February 2005
2. BASIC CARE FOR THE INJURED
i) CLINICAL SHOCK
Victims of accidents or traumas may go into shock.
Shock is a medical term used to describe the ashen pallor,
sweating clammy skin and bluish extremities, mental confusion
(sometimes unconsciousness), rapid thready (feeble) pulse and
erratic breathing that can occur after a trauma.
8 Topic 8
Shock may be caused by any of the following.
• Loss of blood — reduced circulating volume.
• Loss of plasma in the blood (as may occur in burns
accidents).
• Loss of fluids due to vomiting or dehydration.
• Reduction in the heart’s pumping ability.
• Blood pooling caused by toxins (e.g. with some infections).
Treatment
• If the casualty is unconscious, turn them on to their side.
• Ensure the airway is clear and breathing and circulation are okay.
• Stop any bleeding.
• Elevate the legs, if possible, but keep the rest of the body lying flat — the head should
be level with the heart.
• Do not allow the casualty to become either excessively hot or cold.
• Do not give anything by mouth, but the lips may be moistened.
• Do not give the casualty any alcohol.
• Obtain qualified medical help as soon as possible.
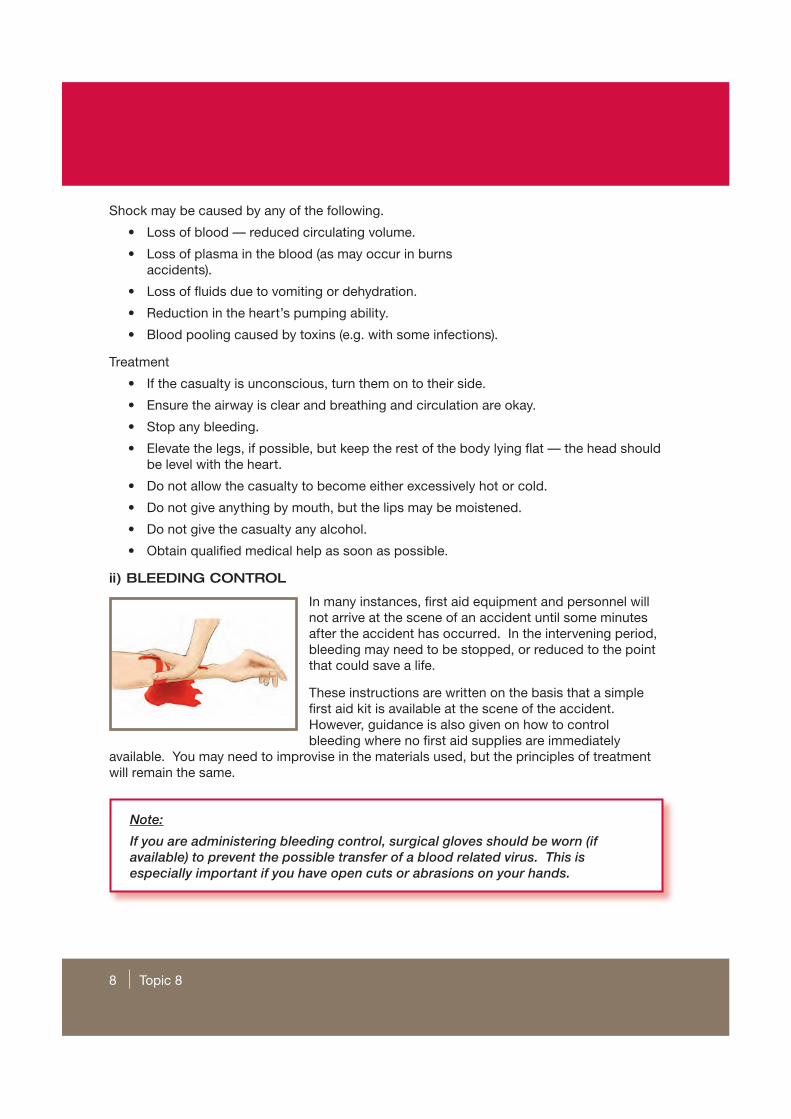
ii) BLEEDING CONTROL
In many instances, first aid equipment and personnel will
not arrive at the scene of an accident until some minutes
after the accident has occurred. In the intervening period,
bleeding may need to be stopped, or reduced to the point
that could save a life.
These instructions are written on the basis that a simple
first aid kit is available at the scene of the accident.
However, guidance is also given on how to control
bleeding where no first aid supplies are immediately
available. You may need to improvise in the materials used, but the principles of treatment
will remain the same.
Note:
If you are administering bleeding control, surgical gloves should be worn (if
available) to prevent the possible transfer of a blood related virus. This is
especially important if you have open cuts or abrasions on your hands.

TOPIC 8Life Saving First Aid
Topic 8 9
External Bleeding
Sufficient pressure applied to the wound will almost always control bleeding by
compressing the blood vessels leading to the wound, and retaining blood in the wound long
enough for it to clot. Inspect the wound for embedded objects that may increase damage if
pushed further into the wound. If no embedded object is evident, apply direct pressure. If
an embedded object is present, apply indirect pressure.
• Direct Pressure method
If a specific bleeding point can be identified, apply direct
pressure to that point using your hand or a pad, or instruct
the victim to apply pressure. Squeeze the edges of the
wound together if possible. This could introduce infection
but it is justified and may be life-saving where bleeding is
severe.
If you have a pad, place it over the wound. It should
extend well beyond the edges of the wound and be held
in position by a firm bandage. If bleeding is not controlled
by the initial pad, leave it in place and apply a second
pad and bandage over the first. Never remove a dressing
once applied unless major bleeding continues. This will only lead to further bleeding by
dislodging the blood clot.
Occasionally, when a large artery is involved, bleeding can only be controlled by constant
pressure with the hand over the cut vessel. This pressure should not be released until
the casualty receives qualified medical assistance.
Elevate the bleeding part in order to decrease the blood flow to the affected area. With
minor bleeding the casualty may rest, partly sitting up, with the bleeding part elevated if
possible. In cases of severe bleeding, elevate the casualty’s lower limbs and keep them
elevated to allow venous blood from the legs to drain to the main circulating system. Do not
elevate the legs if they are broken.
• Indirect Pressure Method
Do not attempt to remove the embedded object because
it may be plugging the wound and restricting bleeding.
Removal may also cause further tissue injury.
Control bleeding by applying pressure to the surrounding
areas but not on the impaling foreign body. Place padding
or a ring pad around the object and bandage firmly over
the padding.
If bleeding is not controlled by the first pad, apply a
second pad and bandage over the first.
Do not exert any pressure on the object itself.
Do not try to shorten an impaling object unless its size makes it unmanageable.

10 Topic 8
• Constrictive Bandage
Occasionally, in major limb injuries such as amputations, or severe crush injuries, life
threatening bleeding cannot be controlled by the measures outlined above. Only then, is it
permissible to resort to the application of a constrictive bandage above the elbow or knee.
Apply a wide bandage (at least 5cm) directly above the elbow or knee. The bandage should
be tight enough to stop circulation to the injured limb and control the bleeding.
Note the time of application and inform the medical aid of this when they arrive.
Internal Bleeding
Internal bleeding may be difficult to recognize, but should always be suspected after an
injury. Symptoms and signs may include:
• Obvious symptoms of clinical shock
• Pain, tenderness or swelling over or around the affected area
• Appearance of blood from a body opening
Internal bleeding cannot be controlled by a first aider, but you should administer the
following basic care:
• reassure the victim to minimise anxiety and stress.
• make the victim lie down.
• elevate the legs if injuries permit.
• monitor airway, breathing and circulation at frequent intervals
• make the casualty comfortable but do not allow them to get too hot.
• loosen any tight clothing.
• do not give any medications or alcohol.
• do not permit any food or drink, but lips may be moistened.
iii) PENETRATING CHEST WOUNDS
An open chest wound is a very serious condition which,
if not treated correctly, could result in death. An open
chest injury may result in air being sucked into the
spaces between the chest wall and the lungs, and not
into the lungs themselves, during inspiration, and forced
out of the chest cavity during expiration. There may be
a ‘sucking noise’. As air moves into the chest cavity it
causes collapse of the lung on the injured side and internal
bleeding often results in blood accumulating between the
collapsed lung and the chest wall.
Symptoms:
• pain at the site of the injury
• shortness of breath, increasing.

TOPIC 8Life Saving First Aid
Topic 8 11
Signs may include:
• the presence of a wound, blood on clothing
• bluish colour of the lips, which is becoming more
pronounced
• breathing difficulty, which is increasing
• sucking noise
• unconsciousness developing
Management of Chest Wounds
The aim is to prevent air from entering the chest and to encourage air trapped within the
chest to be expelled.
• If there is more than one chest wound, treat the most serious one first.
• If conscious, place the casualty in a comfortable position, normally half-sitting with
the injured side down (this will make breathing easier). If the casualty is unconscious,
they should be laid in the recovery position with the injured side down.
• Expose the wound.
• Place your hand over the wound until an airtight dressing is available — plastic sheet,
a plastic bag or aluminium foil are ideal materials for such a dressing.
• Apply the airtight dressing to the wound and tape down the top and both sides but do
not tape the bottom edge; this acts as a one-way valve, allowing the air to escape
from the chest cavity but not to enter. The dressing should extend at least 5cm
beyond the edges of the wound.
If an airtight dressing and adhesive tape are not available:
• place an ordinary sterile (or clean) dressing over the wound and bandage or hold in
place.
• if the casualty’s breathing becomes worse or distress increases, remove the dressing/
your hand
• it may be necessary to assist the casualty’s breathing with rescue breathing
iv) SNAKE BITE
Snake bites may be painless and without visible marks. Other
symptoms or signs may include:
• paired fang marks, a single mark, or a scratch
• headache
• nausea and vomiting
• initial collapse or confusion
• abdominal pain
• blurred or double vision

12 Topic 8
• difficulty in speaking, swallowing or breathing
• swollen tender glands in the groin or armpit
• limb weakness or paralysis
• respiratory weakness or arrest
In the treatment of snake and spider bites it is important to slow the movement of venom
through the blood stream.
Apply DRABC – resuscitation takes precedence.
Keep the casualty calm and do not let them move
around.
If the bite is on a limb, apply a pressure bandage
over the bite site as soon as possible. The bandage
should be as tight as one applied to a sprained
ankle. If the bite is not on a limb, apply firm
pressure to the site of the bite.
Apply a second pressure bandage, commencing at
the fingers or toes and extending as far as possible
along the limb to the armpit or groin. This firm
bandaging above the bite limits the spread of
venom. Leave the bandage on - some components
of the venom remain active at the site of the bite for
several hours.
Splint the limb to keep it as still as possible. Do not elevate it. If the bite is on the
hand or forearm, put the splinted forearm in a sling.
Keep the victim and limb completely at rest.
Closely observe the casualty and if breathing or circulation fails, resuscitation should
be commenced.
Bring emergency transport to the victim if possible – minimize the victim’s activity.
Manage pain by applying ice packs or a cold compress.
Do not use an arterial tourniquet when treating snake bite.
Do not attempt to ‘cut and suck’ the bite area to remove venom.
Do not wash the wound since venom on the skin can be used to identify the snake or
spider.
✔
✔
✔
✔
✔
✔
✔
✔
✔
✘
✘
✘

TOPIC 8Life Saving First Aid
Topic 8 13
v) BURNS
This section provides basic information on the treatment of burns. Burns can be
categorised under a number of different headings as follows:
• flame burns
• electric burns
• scalds
• chemical burns
• airway burns.
Essentially, a burn is damage caused to the skin, and
sometimes the deeper tissues, by heat or chemical agents. Depending on the severity of
the burn, one of the biggest risks is that the casualty may go into shock. Immediate and
correct treatment of burns will help to minimise any long-term damage to the casualty.
In the event of burn injuries, the following procedures should be adopted.
• General treatment
The following steps and precautions apply to all types of burns except airway burns.
DO:
flush the burnt area of skin with cool water for at
least 20 minutes until the burning sensation stops or
qualified help arrives. Do not overcool.
if no water is available, remove any smouldering, wet
or contaminated clothing
get the casualty to qualified medical attention as
soon as possible
DO NOT:
pull smouldering or contaminated garments over the face
attempt to peel away any melted clothing or other substance which is sticking
to the skin
break any blisters
apply any lotions, creams or powders because this makes later assessment of
the injury very difficult.
• Flame Burns
If the victim’s clothes are still burning, you should put out the flames as quickly as possible
using a safety shower or a coat or cloth as a smothering agent. This may require you to
force the victim on to the floor. Once the flames are out or the flame source has been
removed you should cover the burnt area with a clean dry cloth, if available.
✔
✔
✔
✘
✘
✘
✘

14 Topic 8
• Electric Burns
Electric burns may be deceptive. Frequently, the only physical evidence may be small entry
and exit burns which do not indicate the severe damage that has occurred to deeper tissue.
In the event of an electric burn you must not proceed with treatment until you have:
• Disconnected the power source from the victim.
• Checked for breathing and circulation — commence resuscitation techniques as
necessary.
Caution:
Do not use water unless you are certain that you and the casualty are fully
isolated from any electrical power source.
• Scalds
Scalds are caused by an area of the body being burned by hot liquids. The severity of the
burn will vary with the type and temperature of the liquid. In the event of a scald burn, you
should also be sure to check for “pools” of hot liquid trapped in natural body creases (neck,
groin, inner elbow etc)
• Chemical Burns
Chemical burns may be caused by either strong acid
or strong alkali substances. Importantly, you should
remember that the damaging effect can continue long after
immersion or contamination by the substance. Flooding
the affected area with water is critical in dealing with
chemical burns – often a safety shower is the ideal way of
flushing the chemical away. If the chemical is powdered,
brush any remaining chemical from the skin prior to
flooding with water. You should also identify the chemical,
if possible, so that correct neutralization can take place
when medical help arrives.
Note:
In areas where certain chemicals are used regularly, specific procedures will have
been put in place to deal with chemical contamination. If you work in such an
area, ensure you familiarise yourself with the appropriate procedure.
• Airway Burns
These are burns to the inner lining of the throat and lungs through the inhalation of hot
gases or smoke. If the victim has suffered burns to the face or the front of the body’s trunk,
you should suspect that the airways have been burnt.
CA
UT
ION
Da
ng
ero
us
Ch
em
ica
l
ACID

TOPIC 8Life Saving First Aid
Topic 8 15
If there is any risk that the casualty has received burns to the airways they should be
checked as soon as possible by qualified medical personnel.
Caution:
In these cases, medical assessment is critical because symptoms and breathing
difficulties may not develop for hours or even days after the incident.
vi) ELECTRIC SHOCK
In the cases of electric shock, you may have no external indication of what has caused
the problem. Therefore you may need to make careful observations to establish what has
occurred.
Examine the area to establish the cause of the situation. The symptoms of severe electric
shock are as follows.
• Breathing ceases or becomes inadequate.
• Heart function may cease.
• Burns may be present from electrical heat production.
Electric shock should be handled as follows.
1. Assess the danger — do not add to the problem by becoming a victim yourself. Stay
well clear of any energized material (the victim, machinery, pools of water, etc).
2. Turn off or isolate the electric current as soon as possible. If the power cannot be
turned off, do not attempt to remove the victim from the power source as they may
be energised.
3. Assess the victim’s condition — follow the DRABC regime until qualified help arrives.
Warning:
Take care not to become a victim of electric shock yourself.
vii) FOREIGN BODY IN THE EYE
Despite the requirement to wear eye protection around the site, it is possible that you may
encounter a situation in which a person has a foreign body in the eye. In this case, the
following procedure should be adopted.
• Advise the casualty not to rub the eye.
• If the foreign body is on the inner surface of the lower lid it may be removed using
the moistened corner of a clean handkerchief.
• If the foreign body is on the inner surface of the upper lid it may be removed by
pulling the upper lid over the lower lid — the lower eyelash may ‘sweep’ the speck out.

16 Topic 8
A second method of dealing with the problem is to attempt to flush the eye with water. This
may be done using an eyewash station, a sterile eyebath or using water collected in cupped
hands. In this case, it is probably easier for the casualty to administer the treatment him/
herself.
If the foreign body is on the surface of the eyeball, leave it there.
Cover both eyes with eye pads or clean gauze and obtain qualified medical assistance as
soon as possible. Once you have covered both eyes do not lose physical contact with the
casualty, as having both eyes covered can be extremely stressful.
Caution:
An untrained person attempting to remove a foreign body from the eyeball can
inflict further damage to the eye.
viii) CRUSH INJURIES
In the event of an accident in which a crushing force is
being applied to the casualty, you should observe the
following procedures for the removal of the crushing
force and the management of the crushed victim.
The procedure for the removal of a crushing force is:
• All crushing forces should be removed within 30
minutes after the crush injury if this is physically
possible. After 30 minutes there is the potential
that the sudden removal of the crushing force will cause immediate death due to the
sudden release of toxins into the blood. This effect is known as ‘crush syndrome’.
If more than 30 minutes has passed since the crushing injury, seek urgent medical
advice before removing the force.
• If a crushing force is applied to the head, neck, chest or abdomen, and is not removed
promptly , death may occur from breathing failure, heart failure or blood loss
• An object crushing a limb should be removed immediately
• If it is physically impossible to remove the crushing force, you should send for the
appropriate emergency services, including a medical team.
The first aid management of a crush casualty is:
• relieve the crushing force as quickly and gently as possible, while exercising caution
to prevent further injury to the victim or to other personnel
• send for an emergency medical team, especially if the victim cannot be released
without assistance
• keep the victim comfortable
• assist the emergency medical team in the resuscitation and extrication of the
crushed victim.

TOPIC 8Life Saving First Aid
Topic 8 17
ix) CHOKING
The first aid treatment for choking is as follows:
Australian Resuscitation Council
SUMMARY
This topic has provided some basic information on how to deal with certain first aid
emergencies. You should re-read this topic periodically to refresh your memory so that you
can provide adequate assistance should the need arise.
Assess Severity
Unconscious
Call for helpCommence CPR
Conscious
Call for helpGive up to 5 back blows
If not effectiveGive up to 5 chest thrusts
Encourage coughingContinue to check victim
until recovery or deteriorationCall for help
Effective coughMild airway obstruction
Severe airway obstructionIneffective cough