tm · 2019-07-31 · free catalog! mooring pendants poly nylon double braid with galvanized thimble...
TRANSCRIPT
0 762825 97035
06
$800 (Canada $800CDN)
www.goodoldboat.com Issue 84 May/June 2012
TM

Speaking seriously
Sailboats 101 14 Boom Vangs 101
The lowdown on your boom’s hold-downby Don Launer
Exterior improvements 22 Cockpit mats for dogs
They protect brightwork and give paws a gripby Stephen Thompson
Testing testing 24 How sticky is your sealant?
Marine adhesive caulks are put to the testby Ferman Wardell
Voice of experience 28 Boats are teachers
And we carry their lessons far from the waterby Richard Smith
Vendor profile 56 Finger Lakes Sailing Services
A family business makes old boats good againby Susan Peterson Gateley
Skillful sailing 60 Landfalls with bull’s-eye precision
Timing is everything when picking out a lightby John Jamieson
Spotlight on . . .
Making your own 34 Affordable housing
An autopilot gets an inexpensive podby Al Lorman
37 Homemade deck prismsCast resin is a clear alternative to glassby David Lynn
41 An inexpensive whisker pole Raid the hardware store, not your walletby Clarence Jones
37
Typographical errors are unintentional and subject to correction.800-639-2715 hamiltonmarine.com
MHAMILTONMARINE
PORTLAND ROCKLAND SEARSPORT SOUTHWEST HARBOR JONESPORT
H GREAT PRICES!GREAT STUFF!
Sign up today!FREE
Catalog!
Mooring Pendants
Poly Nylon Double Braid with Galvanized Thimble
Premium Super Strength with Stainless Steel Thimble
Many sizes in stock!
PVC Toe and Rub Rails Dozens of Styles in Stock!
Takes 1/4" fastener. Base dimen-sions: 1-7/8" x 7". SPT-C-206Order# 131548 LIST 70.00 SELL 58.99
1" Rail ChockThe overall length is 10-1/8" with a 1" width. Chock opening is 3-1/2" x 1-3/8". Max rope diameter is 1". Sold by the each.
Locking Chock
Part# Order# Finish List SELLSPT-C-232 131552 Burnished 55.00 45.99SPT-C-232PB 131554 Polished 105.00 104.99SPT-C-232CB 131553 Chrome 175.00 167.99
Bronze Jam Cleat3" Jam cleat adequately handles up to 1/4" line. Two hole mounting for #8 fasteners. Burnished bronze. SPT-C-187 Order# 131540 LIST 20.00 SELL 16.99
Part# Order# Size Description List SELLSPT-C-203 131546 6" Burnished Bronze 42.00 35.99SPT-C-203PB 131547 6" Polished Bronze 58.00 52.99SPT-C-197 131542 7" Burnished Bronze 61.00 50.99SPT-C-197PB 131543 7" Polished Bronze 77.00 69.99SPT-C-207 131550 8" Burnished Bronze 60.00 49.99
Deck Cleats Traditional styling. Four hole mounting.
Ph. D Cruiser Fid KitsPre-packaged lengths, either 50 or 100 feet, of Ph. D Cruiser line that includes an aluminum Yale fid for splicing.
Towing BridleOffers more stable and secure tow-ing of inflatables and tenders than single tow line. 3800 lb red nylon webbing absorbs shock. Stainless hardware. Order# 140309 List 67.45 SELL 39.99
LightShipA small, portable solar powered light that you can stick just about anywhere. Bright white & red LEDs. Lasts up to 8 hours on a full charge of sunshine. Weather-proof. 5" diameter. SPL-5408 Order# 743569 List 24.95 SELL 22.99
6 Day: Ultra bright, compact & lightweight. Will run for 48 hrs on high setting and up to an amazing 144 hrs on low. Water resistant. Takes 4 AA batteries. 5.2" x 4.5". RVS-LT1304002 Order# 743605 List 19.95 SELL 17.9910 Day: This ultra bright lantern has 240 hrs burn time on low setting. 40 hrs burn time on high setting. Uses 4 D batteries. Weather-Resistant. 360° light. 10.8" x 6.3". RVS-LT1301200 Order# 743604 List 39.95 SELL 36.99
6 Day
10 Day
Part# Order# Size SELLKBA-KG02MAR 741107 2 oz 18.99KBA-KG04MAR 741108 4 oz 29.99KBA-KG08MAR 741109 8 oz 47.99
Kanberra™ Odor Eliminator GelUses the power of Tea Tree Oil to leave your air odor free and clean while working to prevent and inhibit mold, mildew, fungus, and bacteria in the air and on surfaces of the room. Eliminates odors at the source.
Winches
Lewmar’s full line is available.
Oar Leathers and Buttons7" x 6-1/2". Buttons are 1/2" x 13". Each pair consists of two leathers and two but-tons. Sold by the pair. PKO-233001 Order# 126962 LIST 38.18 SELL 23.75/pairCopper Tack KitIncludes 1 oz. of 3/4" and 2 oz. of 1/2" tacks. HMK-TACKS Order# 173066 List 19.33 SELL 12.99
Stainless Steel Wire, Hand
Swaging Sleeves, Terminals & Turnbuckles.
LED Lanterns
Stainless Steel Wire by the foot or reel. 1 x 19, 7 x 7, 7 x 19. Sleeves. 316 Stainless hand-swage fittings.
15%
OFF!
The foundry that outfitted the hardware for Cape Dory and others is still going strong! Traditional. Rugged. Made in Maine.
Marelon®, Aluminum and Chrome.
Review boat 10 Caliber 28
A lot of boat in a small, stout packageby Tom Wells
29 Cabo Rico 38A Latin beauty for bluewater cruisingby Paul Ring
Feature boat 16 Alberg 35: Love requited
A life’s love of sailboats summed up in Finesseby Karen Larson
29
Contents Boat comparison
20 The Alberg 35 . . .. . . with a contemporary and a successorby Ted Brewer and Dan Spurr
Refit boat 50 My journey with the Vera May
A plan for the future and a project for todayby Stephen Thompson
May/JuNe 2012

Contents May/JuNe 2012
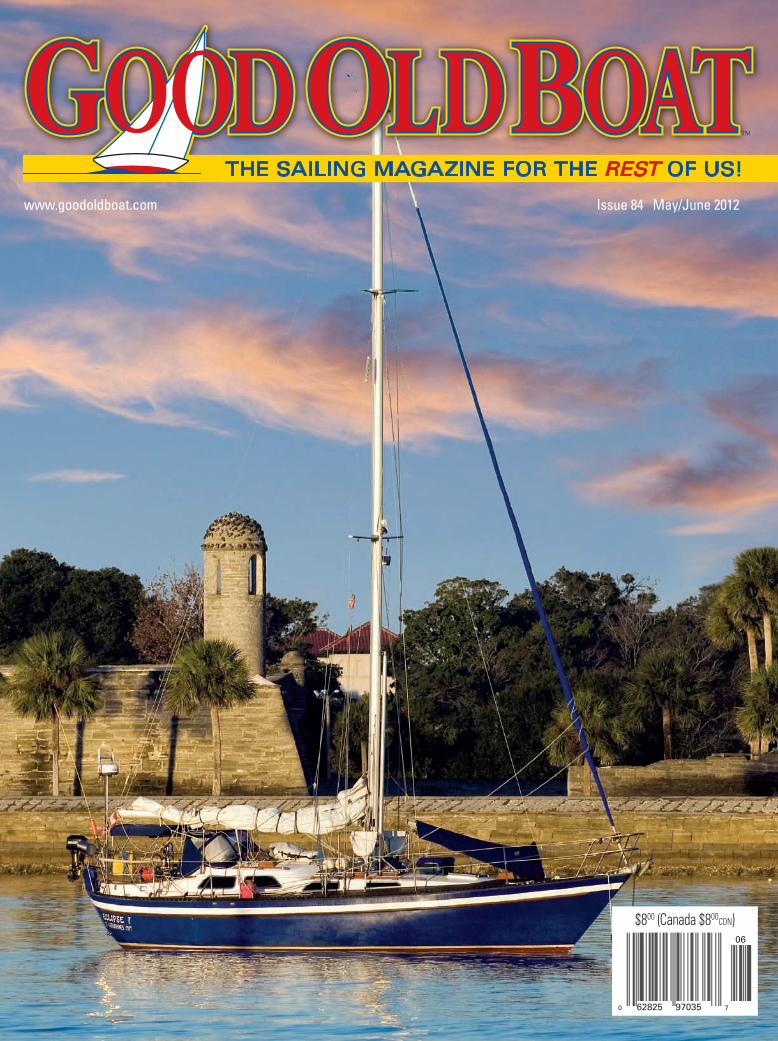
About the cover . . . Solo sailor, photographer, and adventurer Charles Scott sends us cover photos from his travels all over the world. This one, of Eclipse, was taken somewhat closer to home one morning in St. augustine, Florida.
What’s more
Web sightings 5 What’s to see and download on Good Old Boat’s websites
The view from here 7 Collecting stories
We are the yarns we spinby Karen Larson
Mail buoy 8 LED lessons, fridge disaster, and a sewing solution
Cruising memories 26 Cruising in the golden years
Age and patience make up for fading youth and verveby John Vigor
Audio Sea Stories 45 Voyages in Desperate Times
by Jule Miller
Simple solutions 62 No longer a non-starter
New wires bring a Yanmar diesel back to lifeby Harry Hungate
Quick and easy 64 Amazing transparent bags
They let you see what you seekby Benjy Benjamin
65 Refinishing rackVarnishing grabrails the easy wayby Ferman Wardell
66 Get a grip . . .. . . and take a dent out of your bottom cleaningby Kevin Alles
68 Good old classifieds
Product launchings 75 Solar gadget charger, stretchy straps, and LED lighting
Reflections 77 Going nowhere
An enjoyable voyage needs no destinationby George Bollenbacher
64
26
66
www.audioseastories.com May/June 2012 Good Old Boat 3
Making your own Affordable housing Making your own
Cast resin is a clear alternative to glass by david lynn
W e have a love/hate relationship with deck prisms. We love the warm, diffused light they provide but they are downright
annoying when they start to leak. On Nine of Cups, our 1986 Liberty cutter, not only were most of the prisms leaking, they were also chipped or cracked. What’s more, when we began the process of removing the teak from the decks, the prisms now stood proud of the deck. We had to either remove the prisms, and fill, fair, and paint the laminated deck openings and repair the headers below, or replace them with prisms that had a lower profile. It was an easy decision.
We were in Ecuador at the time and soon after I began my search for replacement prisms I deter-mined I would not find them locally. I looked through our catalogs, contacted all the consignment shops I knew of, and spent hours on the Internet. I found a number of prisms, but none were the size we needed.
A fellow cruiser told me a craftsman in Trinidad had fabricated new prisms for him using a clear resin. I researched the subject online and compiled an amazing amount of information on resins, mold making, and casting techniques. The process looked straightforward and simple enough that I could prob-ably manage it myself.
The first step is to make a mold, then mix a casting resin and pour it in the mold. Once it has cured, pop the new prism out, polish it a bit, and it’s ready to install. This is an oversimplification, but the project was not too difficult and, after a few attempts and refinements in the process, I turned out prisms that are quite satisfactory. My replacements have been in our decks for more than five years and have been exposed to everything from equatorial tropical heat and sun to the cold and wet of Tierra del Fuego. So far, none has leaked and we’re quite pleased with them.
Mold-making materialTwo ways for making the mold seemed practicable. One was to form the mold around the master using polyester cloth and resin. The other was to pour a low-durometer molding compound around the master. In both cases, the male master for the mold would be one of the existing glass prisms. I chose to use the molding compound because I thought the overall process would be easier and would produce a smoother surface.
From my research, I determined that either of two types of liquid molding compound would work well for our application. Silicone mold material yields optically perfect parts and does not require a mold-release agent but is expensive and requires three to seven days to fully cure. Urethane-rubber mold material is less
Homemadedeck prisms
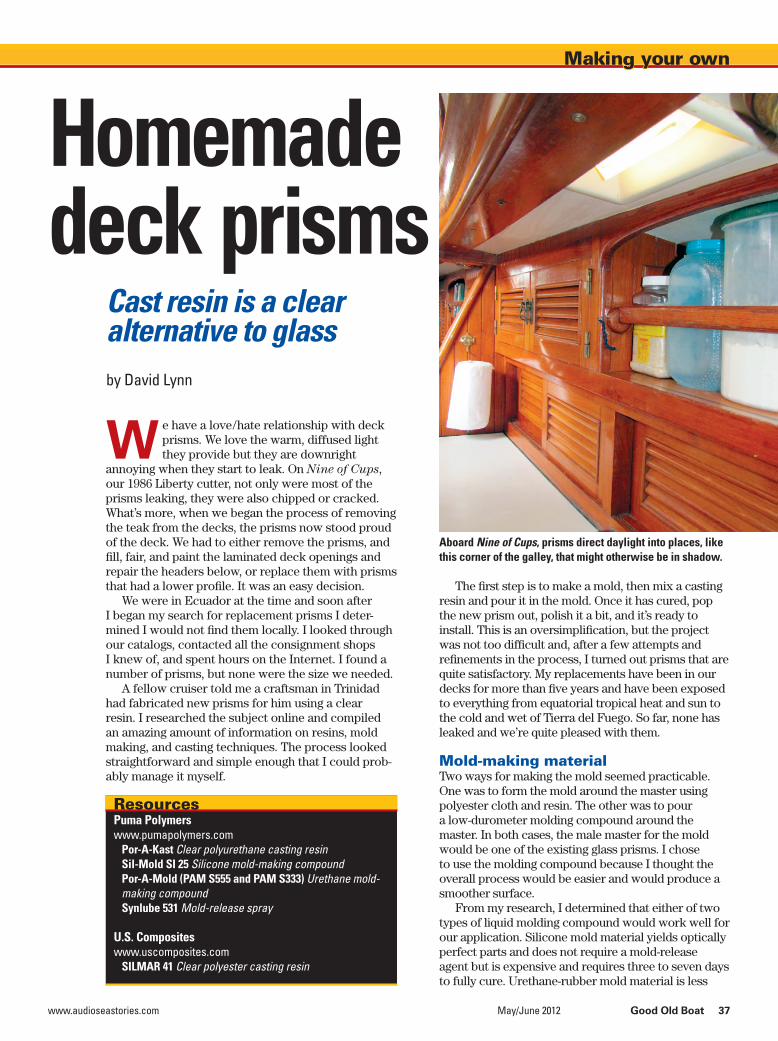
Aboard Nine of Cups, prisms direct daylight into places, like this corner of the galley, that might otherwise be in shadow.
ResourcesPuma Polymerswww.pumapolymers.com
Por-A-Kast Clear polyurethane casting resinSil-mold SI 25 Silicone mold-making compoundPor-A-Mold (PAM S555 and PAM S333) Urethane mold-making compoundSynlube 531 Mold-release spray
u.S. Compositeswww.uscomposites.com
SIlmaR 41 Clear polyester casting resin
www.audioseastories.com May/June 2012 Good Old Boat 37

expensive and cures in 24 hours, but its optical clarity is not as high. Because we were on a tight schedule (and budget!), I chose urethane mold compounds made by Synair. The cost was about $23 for two quarts (the smallest size available), plenty for four to five molds of this size (approximately 9 x 3 inches).
Making the moldFirst, I assembled a wooden enclosure in which to make the mold. Because of the odd shape of the prism, I constructed the enclosure in several layers to reduce the amount of mold compound I would have to use.
On my first attempt, I learned that the liquid mold material contained trapped air that became bubbles and rose to the surface as the material cured, resulting in an imperfect surface. I determined it was best to build the mold upside down so any bubbles would flow away from the prism surface.
Casting resins shrink as they cure: 3 to 5 percent for the polyester resin I tried and slightly less for poly-urethane resins. It’s advisable, therefore, to make the mold slightly oversize to compensate for the shrinkage. The cured resin can be trimmed if necessary.
We also had to compensate for some irregularities. Our prisms had an undercut that would have been difficult to mold. I laminated tongue depressors together and attached these to the ends and sides of the master with hot-melt glue to compensate for shrinkage and to eliminate the undercut. I shaped the tongue depressors with sandpaper.
The surface of the master prism had several chips and cracks that we did not want to replicate. I filled these and other imperfections with modeling clay.
I sprayed the master prism with a mold-release compound and placed it on the mold base. If the mold base is a smooth and non-porous material, such as countertop laminate, spraying it with mold release will allow the mold cavity and mold base to separate easily after curing. If the base is not smooth and non-porous, a layer of wax paper placed on the surface of the mold base will produce the same result.
I carefully stacked and nailed together the layers of the mold cavity and was then ready to pour the mold compound.
The directions for mixing the two-part mold mate-rial were straightforward (1:1) and the material was easy to work with. The pot life is about 20 minutes, which allows time to mix it thoroughly without rushing. I “folded” the two parts together slowly, creating as few bubbles as possible, then poured the liquid, which has about the same consis-tency as honey, slowly into the mold until it was full.
The mold material cures in 24 hours. The recommended temperature range is 65 to 105 F and, if desired, you can hasten the process by putting it in an oven preheated to 100 F. We were going to make multiple parts from this mold, and I found that curing the mold an extra couple of days made it more durable.
After the material had cured, I lifted the cavity off the base. When I flipped the mold over and ran a tongue depressor between the edge of the prism master and the mold cavity, the master popped out with a little coaxing. I inspected the mold carefully, as I wanted the optical surfaces to be blemish-free.
Casting the prismsMy web search produced the names of manufac-turers of resins and their dealers. Several companies offered clear resins, but I narrowed down the field by choosing two that touted high UV resistance and non-yellowing characteristics. One was a clear-polyester casting resin; the other was a clear-polyurethane casting resin. I ordered resin materials from both.
The polyurethane was a two-part resin made by Puma Polymers. This product has a 1:1 mixing ratio, is easy to mix and work with, and produces only a slightly unpleasant odor.
The polyester resin, from U.S. Composites, needed to be mixed with a catalyst (MEK peroxide) at a nominal ratio of 0.015:1 by weight (not volume!). Since I didn’t have access to a precision scale, this required lots of experimentation and, in addition, I found that the optimum ratio varied depending upon the thickness of the molded parts. The prisms were, of course, thin at some points and relatively
Making your own Homemade deck prisms
The illustration, at top, shows the principle of the master mold. To reduce the amount of compound needed to surround the master prism, David built the box in layers, at left. He set the prism on the base, clamped the mold box down, and poured the compound, above. Prism and mold separated easily, above right.
FRiT
z Se
eGeR
S
38 Good Old Boat May/June 2012 www.goodoldboat.com

thick at others. I found that, since this is an exothermic process, a too-low catalyst ratio prevented proper curing. A too-high ratio generated too much heat, which distorted the final product.
I resorted to counting drops of catalyst per 100 ml of resin. After several rounds of experimentation with different ratios, I found 50 to 60 drops of MEK peroxide per 100 ml of resin to be the optimum ratio for our application.
The manufacturer’s directions clearly state that the product should be used only with adequate venti-lation and recommend the use of a respirator. Good advice. This stuff is toxic! If using it indoors, it would probably be necessary to vent the fumes outdoors.
We did trial runs with both resins and, while either resin seemed to produce acceptable parts, I thought
Making your own Homemade deck prisms
the polyester-resin prisms were superior enough to be worth the extra trouble. They were more
scratch-resistant and had better clarity than those made with polyurethane resin.
Casting the parts was similar to laying that last coat of glossy varnish on brightwork. Any dust
particles or bubbles in the resin spoil the best of efforts. I vacuumed the area thoroughly and wiped everything down with a damp rag to remove as much dust as possible.
I sprayed the mold with mold release about 10 minutes before I was ready to start pouring the resin compound. The resin and catalyst should be gently mixed together in the proper ratio, avoiding bubbles as much as possible.
After ensuring the mold was level, I poured the catalyzed resin into the mold until it was level with the top. Spraying the top surface of the resin with mold release breaks the surface tension enough
to dissipate any small air bubbles that rise. The curing process required about 8 hours.
When it had cured, I used a wooden tongue depressor to break the bond between the mold and the molded part. I had to pry and tap the upside-down mold until the part came free.
I needed to cut a rabbet into the prism’s top surface to fit the stainless-steel mounting bezel.
Cutting and drilling were easy, but the heat caused by a router melted the prism. After some experimen-
tation, I cut the rabbet on a table saw, making several passes. To remove any traces of sprayed-on mold release, I washed the finished product well using warm water and dishwashing soap, then rinsed and dried it.
Installing the prismsOur decks are cored and, prior to installing the prisms, I wanted to protect the core from delamina-tion if the prisms leaked. I made a thick paste with two-part epoxy and filler to fill any voids in the core and coated the exposed core with two coats of epoxy.
Installing the new prisms was straightforward. Before applying the sealant, I checked the fit by placing each prism in place with its bezel and
after experimenting with resin/catalyst ratios, david mixed the resin carefully to avoid introducing bubbles, above left. He leveled the mold, then gently filled it with resin, above right. The cured prism released easily from the mold, at right, and is remarkably clear.
David fenced off the prism’s undercut to ensure easy release from the mold.
www.audioseastories.com May/June 2012 Good Old Boat 39
partially tightening each screw. Ideally, there should be at least a 1/4-inch gap between the top of the prism and the bottom of the bezel to leave adequate space for the sealant. After checking the alignment, both on deck and below, I carefully masked each bezel and prism and the surrounding deck. Below deck, I masked the bottom of each bezel as well as the surrounding header. I also placed news-papers under the prism area in case the sealant oozed out and dripped. After one more alignment check top and bottom, I removed each bezel and prism.
I bedded the prisms in a polyurethane-based sealant.
I rarely complete a bedding project without getting sealant on my forehead, elbows, and half a dozen places on the deck, so I kept a small container of alcohol, a few paper towels, and a couple of plastic grocery bags at hand for cleanup.
When everything was ready, I put on latex gloves and laid a 1/4-inch bead of sealant on the underside of the first prism. I set the prism in place and checked below to adjust the alignment if that was necessary. I then filled the gaps between the sides of the prism and the deck core. I applied another 1/4-inch bead of sealant to the top of the prism and positioned the bezel. I started, but did not tighten, the screws. I made one more check of the alignment, top and bottom, then tightened the screws evenly. Sealant oozed out all around the bezel and I wiped it off with a paper towel and alcohol. I removed the masking tape at this point before the surface of the sealant dried.
Finally, I went below, removed the excess sealant and the tape, and cleaned everything as necessary.
Time well investedThe entire project took about a month to complete, but this included quite a bit of time incurred due to my learning curve and the “trial and error” aspects of the project. For example, I lost several days experimenting with different resins and determining the proper catalyst ratio for the polyester resin. If I were to do the project again, I think it would take two to three days to make the mold, then one day for each prism. Add to this a day to prep the deck openings with epoxy and one to two days to rebed the prisms. Since Cups has five prisms, the entire project would take about 12 to 14 days to complete, once all the materials were at hand. Of course, no boat project ever goes as planned, so I would budget another week or two just to be safe.
Making your own Homemade deck prisms Making your own
In the five years they have been in place, our prisms have never leaked, but we have seen a slight yellowing on the top surface. Once a year or so, I give them an aggressive polishing, consisting of a light sanding with 320-grit sandpaper, progressing to 400- and 600-grit paper, and finishing with a polish. This takes about 30 to 45 minutes per prism, removes the slight yellowing, and leaves them looking like new. Overall, I have been quite pleased with them.
David and Marcie Lynn have lived aboard Nine of Cups, their 1986 Liberty 458, since purchasing her in Kemah, Texas, in 2000, and have sailed over 65,000 nautical miles. As this issue was going to press, they were cruising Tasmania. Follow their adventures at <www.nineofcups.com>.
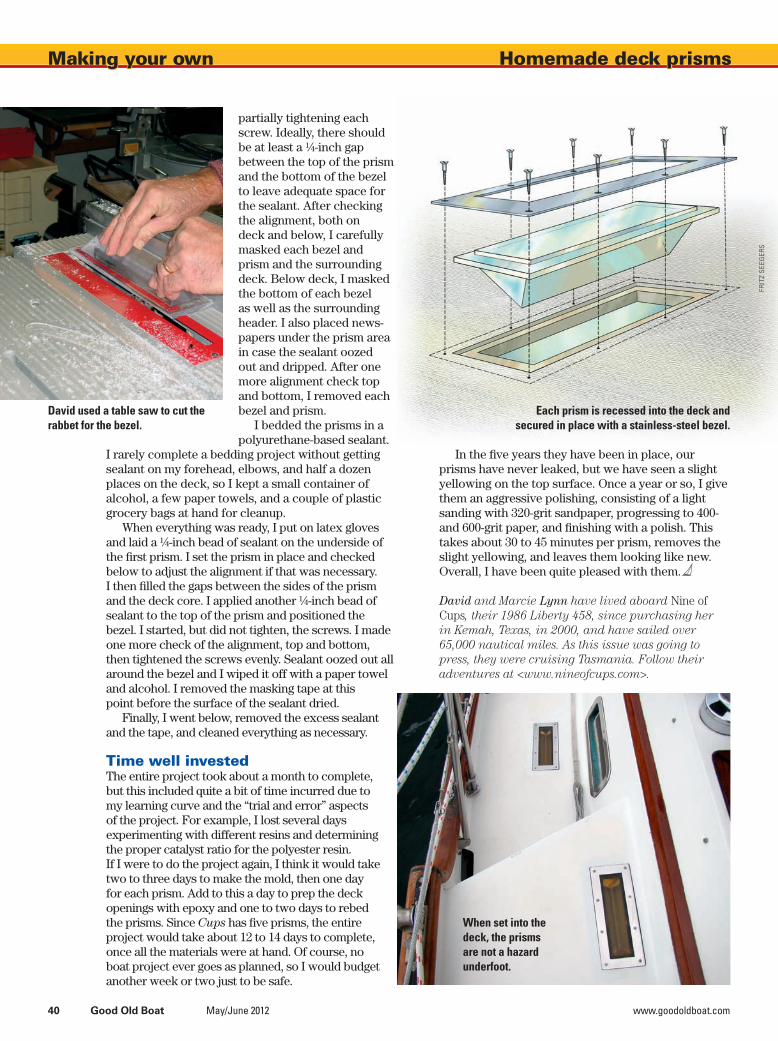
David used a table saw to cut the rabbet for the bezel.
Each prism is recessed into the deck and secured in place with a stainless-steel bezel.
When set into the deck, the prisms are not a hazard underfoot.
FRiT
z Se
eGeR
S
40 Good Old Boat May/June 2012 www.goodoldboat.com