title: the phantastic photon and leds (combined lab) the phantastic photon and leds ... fluorescent...
TRANSCRIPT

Center for Nanoscale Systems Institute for Physics Teachers (CIPT)
632 Clark Hall, Cornell University, Ithaca, NY 14853
www.cns.cornell.edu/cipt
Title: The Phantastic Photon and LEDs (combined lab)
Original:
Revision:
8 July 2009
27 June 2010
Authors: Jim Overhiser, Gil Toombes (Phantastic Photon)
Preeti Chalsani, Ralph Greco (LED Lab)
Appropriate Level: High School Physics
Abstract: This is actually two labs that work very well in combination. In
the first, students investigate the relationships among color,
frequency, energy, and wavelength of light using spectroscopes,
colored LEDs, phosphorescent, and fluorescent materials. They
observe characteristics, measure wavelengths, and observe and
calculate photon energies.
The second lab has students investigate the conversion of electrical
energy into light and vice versa. It uses electrical measurements
on super-bight LEDs to determine the energy of various
frequencies (colors) of light By graphically comparing the energy
lost per electron with the frequency of the emitted light for several
LED colors, students estimate Plank's constant, a fundamental
value in quantum mechanics.
Time Required: Two 40 minute class periods
NY Standards Met: 4.1a All energy transfers are governed by the law of conservation
of energy.
5.3c On the atomic level, energy is emitted or absorbed in
discrete packets called photons.
5.3d The energy of a photon is proportional to its frequency.
Special Notes: The Phantastic Photon/LEDs is a kit available from the CIPT
Equipment Lending Library, www.cns.cornell.edu/cipt/. It is also
available commercially from West Hill Biological Resources, Inc.,
www.westhillbio.com.

Page 2
Teacher Section – The Phantastic Photon and LEDs
Behavioral Objectives
Upon completion of this lab, a student should be able to:
define the terms: photon, discrete packet, excited state
explain the basic concepts of the particle nature of light
explain how energy, frequency, wavelength, and color of photons are related.
describe the appearance of the spectra of LEDs
solve basic problems using the formulas c = f and E = h f
compare and contrast phosphorescent and fluorescent materials, and explain the excitation of
each by light photons.
explain how distance from a light source influences illuminated of a surface and resulting
excitation.
describe the appearance of materials containing excited quantum dots, and state the size-color
relationship of quantum dots.
explain the reversible conversion of energy between electrical and light energy by LEDs
describe the electrical energy lost and frequency of light emitted by different colored LEDs
measure frequency and electrical energy data from LEDs, and analyze that data to estimate
Planck‘s constant
Class Time Required:
Three 40-minute periods.
Teacher Preparation Time:
Prep time is 5-10 minutes. Set out materials needed.
Materials Needed:
The Phantastic Photon kits are available through the CIPT lending library and can be requested on-
line at our website www.cns.cornell.edu/cipt after receiving training. Kits are also available for
purchase from West Hill Biological Resources at www.westhillbio.com. In addition, each student
group needs: a meter stick, a digital multimeter, individual red and green LEDs, 2 alligator clip
leads, and a small length of plastic drinking straw.
Assumed Prior Knowledge of Students:
Relationship between frequency and wavelength ( cf )
Conservation of energy
Background Information for Teacher:
Fluorescent and phosphorescent materials are all around us. They contain molecules that can
absorb and release photons. When such a molecule absorbs a photon, gaining its energy, it enters
an excited molecular state. At a later time, the molecule loses some of its energy by emitting a
visible photon of lower energy and entering a lower molecular energy state. These emitted photons
are what make glow-in-the-dark objects glow and fluorescent materials look very bright.

Page 3
Teacher Section – The Phantastic Photon and LEDs
The primary difference between fluorescent and phosphorescent materials is the mean time that a
newly excited molecule spends in the excited state. Phosphorescent materials typically take much
longer to emit photons from the excited state than fluorescent materials. Glow-in-the-dark
(phosphorescent) objects continue to emit photons for minutes or even hours after exposure to light
while fluorescent molecules emit photons very quickly, within nanoseconds of absorbing energy
from photons.
Phosphorescent molecules take a long time to return to the ground state because the excited electron
has the ‗wrong‘ spin. Recall that the Pauli Exclusion Principle forbids two electrons of the same
spin to occupy the same state. If the excited electron has the same spin as the other electron in the
lower energy level, it must flip its spin before it is allowed to occupy that energy level. Since
interactions in which an electron flips its spin are very rare, the electron in the higher energy level
has to wait a long time to lose its energy and give off a photon.
Why do fluorescent and phosphorescent materials emit photons of lower energy than what they
absorb instead of emitting a photon at the same energy? The answer lies in the fact that some of the
energy of the excited molecule is converted to a different (non-photon or lower energy photon)
form. Some energy can go to a visible photon while another portion of the energy goes to a
neighboring atom or molecule through atomic collisions. An excited molecule can also emit a low-
energy infrared photon (not visible) and lose a small amount of energy, leaving it in an intermediate
state which is at a lower energy than the original excitation caused.
LEDs:
Figure 1. A light-emitting diode (LED).
Figure 1 shows the structure of a light-emitting diode (LED)—a device that emits light when
electric current flows through it. Unlike a light bulb, an LED converts electrical energy into light
energy at the interface between two different semiconductor materials called a p-n junction. The
reason for this name is that one of the materials has a chemical composition that furnishes excess
mobile electrons (the negative or n-type material), while the other has a different composition with a
deficiency of mobile electrons (the positive or p-type material).

Page 4
Teacher Section – The Phantastic Photon and LEDs
This lab explores the energy conversion:
Electrical energy Photons (bundles of light energy)
This lab is not a detailed investigation of the structure and mechanisms of p-n junctions; however
the following simple physical model does help explain how the junction works. Some of the
electrons at the junction diffuse across the interface from the n-type material to the p-type material.
This leads to the situation, shown in Figure 2, where a slight excess of negatively charged ions (with
bound electrons) appear on the p-side in the region close to the junction, and a slight excess of
positively charged ions (missing electrons) appear on the n-side in the region close to the junction.
The curve shows the potential energy of mobile electrons on both sides and in the junction region.
Figure 2. Operation of an LED
Mobile electrons on the p-side of the junction occupy energy levels that lie an amount E above
empty energy states there. When a large enough external voltage difference V is applied to the
junction with the proper polarity, mobile electrons from the n-side can be driven up the energy hill
and across the interface to the p-side. When an electron finds an empty state there and falls into it,
the electron loses energy E. This energy can then be carried off in the form of a photon of light,
provided competing processes don't absorb the energy and that the p-type layer is thin enough for
the light to escape. The key idea here is that Ephoton = | Eelectron|.
If the external voltage is applied to the LED with the opposite polarity, no electron current flows
because electrons on the n-side are now driven away from the junction rather than across it. This
one-way current flow leads to another important use of the p-n junction, the one-way rectifying
diode often used to convert alternating current electricity to pulsating direct current electricity. The
light-emitting diode or LED combines these two properties: Electric current can only flow across
the junction in one direction, and when it does, the energy e V gained by an electron from the
applied voltage V can be released as a photon of light. This simple model leads to the expectation
that if we gradually increase the applied voltage V, light should appear when e V = E, and the
frequency f of the light should follow the relationship E = hf, where h = Planck's constant.

Page 5
Teacher Section – The Phantastic Photon and LEDs
One nice thing about LEDs is that the materials used to make the p-n junction determine the value
of E and can be "tuned" to give different colors of emitted light. Put another way, the height of the
energy hill ( E) depends on the materials used, and the color of emitted light depends on E. Red
LEDs (and red lasers) are made from gallium arsenide (GaAs) with small concentrations of
phosphorus impurity added. Blue LEDs are made from a different material.
Figure 3. A solar cell.
The solar cell is a wonderfully variation on the LED. In a solar cell, light directed at the very thin
top layer of a p-n junction penetrates to the junction interface. Here, if the photon energy (Ephoton =
hf) is greater than or equal to the electron energy level difference ( E), then bound electrons on the
p-side can absorb these photons and be freed. The freed electrons raise in energy by Eelectron =
Ephoton to become mobile electrons which are then driven down the energy hill shown in Figure 2.
This is opposite to the direction of electron flow that makes an LED light up. In other words, a
solar cell is an LED run backwards. The electric current (called a "photocurrent") produced by a
solar cell depends on the intensity of light illuminating it.
Answers to Questions: send request for answers to [email protected]

Page 1
Equipment – The Phantastic Photon and LEDs
Equipment
Item Number Quantity Item
1 1 Spectrometer
2 1 Phosphorescent tape
3 1 Quantum Dots
4 1 Power adapter (24V, 0.25A)
5 2 Alligator clip leads
6 1 LED board holder
7 1 Diffraction grating
8 1 LED board
9 1 Fluorescent paint card
Not pictured 2 Alligator clip leads
Not pictured 1 Red LED
Not pictures 1 Green LED
Not Pictures 1 Digital multimeter
1
2
3 4
5
6
7
8
9

Page 1
Student Section – The Phantastic Photon and LEDs
UV
VIO
BLU
GRN
YEL
ORN
RED
IR
POS
LOW HI CURRENT
R1
R2
+ 24V
- NEG
to wall socket
THE PHANTASTIC PHOTON
Introduction:
Why does ink from a fluorescent highlighter appear so bright? What makes glow-in-the-
dark objects glow? How do optical brighteners in laundry detergent make your clothes
look whiter? The answer to these and many other questions can be found in the photon
theory of light, first proposed by Albert Einstein in 1905. By exposing fluorescent and
glow-in-the-dark materials to different colors and intensities of light, you will see
photons at work.
Light Emitting Diodes (LEDs) - You have the LED card shown below. There are eight
LEDs of different colors, as labeled on the right side. The ‗UV‘ (ultraviolet) and ‗IR‘
(infrared) LEDs emit most of their light at wavelengths your eye cannot see. The other
six LEDs have the different colors of the rainbow.
Your teacher will give you instructions on how to light the lights on the board. Refer to
the illustration below as a reference.
Experiment with lighting up other LEDs. Can you light more than one at a time?
Disconnect a wire to turn off the LED card when you are not using it.
Warning!! Do not stare into the ultraviolet (UV)
LED when it is lit. This can cause eye damage.

Page 2
Student Section – The Phantastic Photon and LEDs
A. Glow-in-the-right color
A glow-in-the-dark object only glows after it is exposed to light. How does the color of
the light affect a glow-in-the-dark object? You can test this with the LEDs and piece of
glow-in-the-dark tape enclosed in black paper. Keep the tape covered when it is not in
use.
Hook up the blue LED using the ―Hi‖ current setting.
Shine the blue LED on the tape for a couple seconds.
Move the LED away from the tape and see if the tape is glowing.
Record your observation for the blue LED in the middle column of the table below
(‗yes‘ it makes the tape glow or ‗no‘ it does not), and then test the other LED colors.
If the tape glows, wait ~ 30 seconds before testing the next LED color to allow the
tape to stop glowing.
LED color Tape glows?
(YES or NO)
LED wavelength
(nm)
blue
red
green
orange
infrared 875 nm
violet
yellow
ultraviolet 395 nm
B. Exploring the Wavelengths of Colors
Disconnect the wires from the LED circuit board and slide it into the holder on the
back of the spectrometer so that the LEDs face the slit.
Reconnect the wires to light all the LEDs except the ultraviolet (U.V.) using the ―HI‖
current positive terminal, as shown in the picture. The bottom wire connections are
made through the holes in the bottom of the holder.
Hold the spectroscope up and look through the diffraction grating (the slide mounted
in the front). As you look towards the paper scale on either side of the LEDs, you
should see the portion of the spectrum which is produced by each LED. If the bands
of colors aren‘t horizontal, rotate the diffraction grating slide ¼ turn in the holder.
Read the wavelengths of the six visible LEDs using the nanometer (nm) scales to the
left and right of the LED strip. Since each LED produces a range of colors, use the
center of the brightest color the LED produces. Record the wavelength you observe
in the last column of the table in section A. (Hint: For some LEDs, the ‗LOW‘
current setting will provide more accurate results.)

Page 3
Student Section – The Phantastic Photon and LEDs
Answer the following questions:
1. What do you notice about the wavelengths of the LEDs that make the tape glow?
2. Light is a form of energy. Which wavelengths do you think contain the most energy?
Explain.
3. Notice that the tape always glows the same color no matter what color activates it.
Write the color that it glows ____________________.
4. Estimate the wavelength of light emitted by the tape ________________.
5. How does the wavelength of the light emitted by the glowing tape compare with the
wavelength of the LED light used to activate the tape?
6. Why do you think some of the colors of light did not activate the tape?
C. This is intense!
The light from an LED gets more intense as you move the LED closer. Is intensity an
important factor in whether or not the glow-in-the-dark tape glows?
With the lights dimmed, place a piece of paper so that it covers half of the glow-tape,
blocking it from exposure to the LED light.
Expose the tape for a few seconds to one combination of distance and LED color at a
time, as outlined in the table below.
After each trial, remove the paper and immediately examine the entire tape to see if
the paper left a shadow. If the exposed part of the tape is glowing; write "Yes" in the
space provided. If there is no difference, the exposed tape is not glowing; write "No."
Distance Blue LED Yellow LED Red LED Ultraviolet LED
0.01 m
0.10 m
1.0 m

Page 4
Student Section – The Phantastic Photon and LEDs
Answer the following questions:
7. Does the intensity of the LED light make a difference in how brightly the tape glows?
Describe your results.
8. Does the intensity of the LED light make a difference in whether the tape glows or
not? Describe your results.
9. Do you think the tape would glow if it received only a single particle of light from the
ultraviolet LED? Explain.
D. Look at What Popped Out!
What makes fluorescent colors look so bright? Do fluorescent colors look bright in all
kinds of light? You can test this with the LEDs and the manila card with different colors
of fluorescent poster paint.
Shine light from the UV LED on the
fluorescent paints. Then shine light
from the red LED on the fluorescent
paints. Which light makes the paints
"pop out" or look brighter?
Let's take a closer look. Shine the
light from the UV LED on the card
where there are no paints. It should
look violet. Now shine the light from
the UV LED on the yellow
fluorescent paint. The light should
look yellow.
Do the same thing with the red LED.
Does the red light also change color
on the yellow paint?
Let's analyze this. Shine the light
from the UV LED on the card where there are no paints. Take the spectrometer
(without the LED holder) and aim it so that you can see a pool of violet light on the
card when you look through the diffraction grating and the slit. You should see the
diffracted light fall on the scale to either side of the slit.
area
illuminated
by LED
card with
fluorescent paints
fluorescent
paints
move illumination area
from bare card to paint

Page 5
Student Section – The Phantastic Photon and LEDs
Now shine the light from the UV LED on the yellow fluorescent paint. Aim the
spectrometer at the yellow paint where the LED illuminates it. Did the wavelength of
the light change?
Try the same thing with the red LED, analyzing the light from the card and from the
paint with the spectrometer. Does the wavelength shift as it did for the UV LED?
The diagram below shows that the light from the LED gets absorbed by the fluorescent
paint. Then the paint emits light, some of which reaches your eye.
Answer the following questions:
10. Predict the color of light that will be emitted from the yellow fluorescent paint for
each LED. Write your predictions in the table below. Then test your predictions using
the LEDs and the spectrometer to analyze the color from the paint. Record your results
below.
LED color Predicted color of light
from yellow paint
Observed color of light
from yellow paint
Red -- red
Orange
Yellow
Green
Blue
Violet
Ultraviolet -- yellow
11. Why does the ultraviolet light get converted to yellow light by the yellow fluorescent
paint, but the red light remains red?
fluorescent paint (absorbs light from LED)
observer
light emitted by fluorescent paint
LED
light emitted by LED

Page 6
Student Section – The Phantastic Photon and LEDs
12. White light is composed of all colors of light. Explain why white light makes yellow
fluorescent paint look so intensely yellow.
13. Predict the color of light that will be emitted from the different fluorescent paints for
a green LED. Write your predictions in the table below. Then test your predictions using
the green LED and the spectrometer to analyze the color from the paint. Record your
results below.
Paint color Predicted color of
light from paint
Observed color of
light from paint
Red
Orange
Yellow
Green
Blue
14. Explain your observations from the table above.
E. Quantum Dots
Semiconductor nanocrystals or quantum dots are tiny nanometer-sized semiconductor
particles (containing roughly 100 to 1000 atoms) that emit light when excited. Quantum
dot diameters range from about 2 to 6 nm, which is about 40,000 times smaller than the
diameter of human hair! The color of light emitted by these recently discovered structures
depends on the diameter of the nanoparticles, with larger diameter particles emitting
lower energy light. You have four different samples of CdSe quantum dots, each
containing millions of nanoparticles of uniform size.
Shine light from the UV LED on the four quantum dot samples. This will excite the
quantum dots. What colors do the quantum dots emit?
Now shine light from the RED LED on the quantum dot samples. Can you excite the
quantum dots with red light?

Page 7
Student Section – The Phantastic Photon and LEDs
Answer the following questions:
15. What colors of light did each of the four quantum dot samples emit?
16. Which quantum dots have the largest diameter? Which have the smallest? Why?
17. Predict which quantum dots will be excited by each LED color and write your
predictions in the table below. Then test your predictions and record the results.
LED color
PREDICTIONS:
List the quantum dots you expect
will be excited by each LED
OBSERVATIONS
List the quantum dots that are
actually excited by each LED
Red
Orange
Yellow
Green
Blue
Violet
Ultraviolet
18. Why can‘t the red LED excite the green quantum dots?
19. What determines whether a particular quantum dot will be excited by a particular
LED?
F. Post-lab Questions
According to Einstein‘s theory, light is composed of tiny particles called ―photons.‖ A
photon is the smallest possible amount of light. You can think of it as a really tiny packet
of energy. The energy of a single photon is proportional to the frequency of the light. If
E is the energy of a single photon and f is its frequency, then
hfE

Page 8
Student Section – The Phantastic Photon and LEDs
where h is an extremely important physical constant called Planck‘s constant. Planck‘s
constant is equal to 6.6 x10⁻³⁴
J•s.
20. Complete the chart below by calculating the energy of a single photon of light for
each of the LEDs in your set. Remember that the frequency of light f is related to its
wavelength through the formula cf where c is 3.0 x 10⁸ m/s.
LED color Wavelength
(nm)
Wavelength
(m)
Frequency
(Hz)
Photon energy
(J)
infrared
red
orange
yellow
green
blue
violet
ultraviolet
21. As wavelength increases, what happens to the energy of a photon?
22. As the number of photons increases, what happens to the total energy of the light?
23. The red LEDs used here convert most of their ~0.03W of power into light. (1 W = 1
J/s) Estimate the number of photons per second produced by the red LED.
24. Use the concept of photons to explain why red light, even if it is intense, cannot make
the glow-in-the-dark tape glow (emit light).

Page 9
Student Section – The Phantastic Photon and LEDs
25. When the glow-in-the-dark tape absorbs blue photons, it emits lower energy yellow-
green photons. If energy is always conserved, explain how the energy emitted can be less
than the energy absorbed.
26. Use the concept of photons to explain why a yellow fluorescent highlighter appears
much brighter than a regular yellow marker in normal lighting conditions.
27. Some clubs use black lights (ultraviolet lights) for a special effect to make white
clothing glow. Explain how this works.
28. Photoresist, a chemical used in making computer chips, changes its solubility when
exposed to ultraviolet light. Why are cleanrooms where photoresist is used illuminated
with yellow light?
29. A silicon photodiode used as a light detector can only absorb photons of energy
greater than 1.1 eV. Will it absorb photons from the infrared LED?
(Hint: 1.0 J = 1.6 x 10⁻¹⁹
eV)
Page 10
Student Section – The Phantastic Photon and LEDs
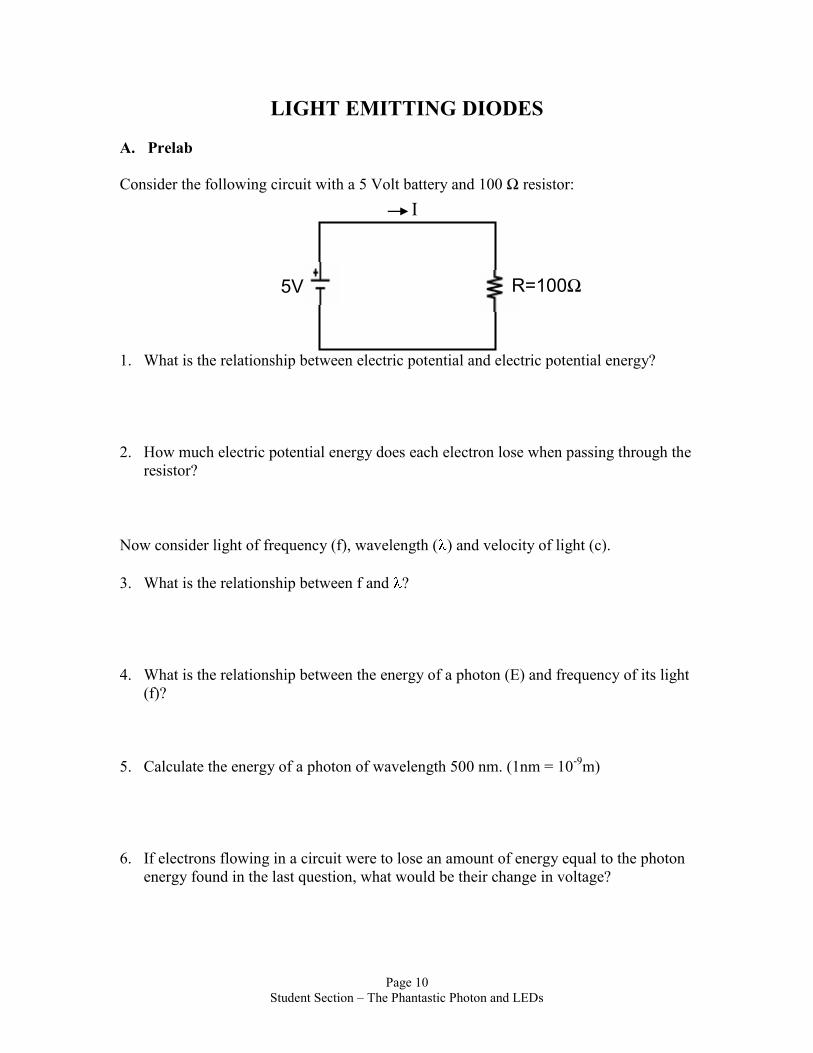
LIGHT EMITTING DIODES
A. Prelab
Consider the following circuit with a 5 Volt battery and 100 Ω resistor:
1. What is the relationship between electric potential and electric potential energy?
2. How much electric potential energy does each electron lose when passing through the
resistor?
Now consider light of frequency (f), wavelength ( ) and velocity of light (c).
3. What is the relationship between f and ?
4. What is the relationship between the energy of a photon (E) and frequency of its light
(f)?
5. Calculate the energy of a photon of wavelength 500 nm. (1nm = 10-9
m)
6. If electrons flowing in a circuit were to lose an amount of energy equal to the photon
energy found in the last question, what would be their change in voltage?
I
5V R=100Ω

Page 11
Student Section – The Phantastic Photon and LEDs
Introduction:
Light Emitting Diodes (LEDs) are in use everywhere you look! They are found in digital
clocks, TVs, VCRs, coffee makers, cell phones, computers, digital books, etc., etc. LEDs
emit light by converting electrical potential energy into light energy, a property which
makes LEDs useful as indicators. The color of light that an LED emits depends on its
material composition. By lighting up LEDs of different colors and measuring some of
their electrical and optical properties, you will estimate the value of Planck‘s constant.
B. Making LEDs Light Up
7. Try hooking up the positive and negative leads both ways to the LED. Does it matter
which way you hook them up?
8. What is the voltage across the red LED when it is lit?
9. What is the voltage across the blue LED when it is lit?
10. Based on your voltage measurements, do electrons in the red LED or the blue LED
lose the most energy?
11. Which color of light contains photons of greater energy, red or blue?
12. What is the qualitative relationship between voltage drop across an LED and the color
of light it emits?
C. LEDs in Reverse
You will need one red LED, one green LED, and one LED card for this activity.
Light the green LED on the LED card using "HI CURRENT" terminal.
Place a voltmeter across the terminals of the individual red LED.
Orient the two LEDs so that light from the green LED can shine directly into the
red LED. Make sure the axes of the two LEDs are aligned and parallel.
Adjust the two LEDs until you find the maximum voltage across the red LED
with green light shining into it.
13. What is the maximum voltage?
14. What is the voltage across the red LED when the green LED is turned off?
15. Explain the last two voltage measurements.
Now do the reverse experiment.

Page 12
Student Section – The Phantastic Photon and LEDs
Light the red LED on the LED card using "HI CURRENT" terminal.
Place a voltmeter across the terminals of the individual green LED.
Orient the two LEDs so that light from the red LED can shine directly into the
green LED. Make sure the axes of the two LEDs are aligned and parallel.
Adjust the two LEDs until you find the maximum voltage across the green LED
with red light shining into it.
16. What is the voltage across the green LED with the red light shining into it?
17. Explain your observations from the previous question.
18. Predict what will happen if you shine ultraviolet light into a green LED.
19. Try the experiment from the last question and describe your results.
D. Measuring Planck’s Constant
Copy the frequencies you calculated in question #20 of the first part of this lab (The
Phantastic Photon) from that table into the table below. Do not copy the energy … it
will be determined experimentally in a moment.
Light all eight LEDs using the "LO CURRENT" terminal. You should see most of
the LEDs emit barely visible light.
Measure the voltage across each LED and write it in the table below.
Use the voltage to calculate the energy lost by each electron when it passes through
the LED and enter it in the ―Energy lost‖ column.
Convert the energy values in Joules to units of eV (1eV = 1.6 x 10⁻¹⁹
J).
LED Frequency (Hz) LED voltage (V) Energy lost (J) Energy lost (eV)
infrared
red
orange
yellow
green
blue
violet
ultraviolet

Page 13
Student Section – The Phantastic Photon and LEDs
20. Compare the voltages of the different LEDs with the frequency of the light emitted by
the LEDs. What trend to do you observe? Explain.
Plot the energy lost by an electron versus the frequency of the light emitted for all the
LEDs on a separate piece of graph paper or on a computer.
21. What does the slope of this graph represent?
22. Find the slope of the graph and record it here with units included.
23. Why does this experimental value differ from the established value of 6.626 x 10⁻³⁴
J.s?
Max Planck deduced that the relationship between the energy and the frequency of
electromagnetic radiation is E = hf. He announced his derivation of the relationship in a
paper published in 1900, and received the Nobel Prize for this work in 1918.
Albert Einstein commented on Max Planck‘s discovery in ―On Quantum Physics‖ in
1954 as follows:
―In the year nineteen hundred, in the course of purely theoretical (mathematical)
investigation, Max Planck made a very remarkable discovery: the law of radiation of
bodies as a function of temperature could not be derived solely from the Laws of
Maxwellian electrodynamics. To arrive at results consistent with the relevant
experiments, radiation of a given frequency f had to be treated as though it consisted of
energy atoms (photons) of the individual energy hf, where h is Planck's universal
constant. This discovery became the basis of all twentieth-century research in physics and
has almost entirely conditioned its development ever since. Without this discovery it
would not have been possible to establish a workable theory of molecules and atoms and
the energy processes that govern their transformations. Moreover, it has shattered the
whole framework of classical mechanics and electrodynamics and set science a fresh
task: that of finding a new conceptual basis for all physics. Despite remarkable partial
gains, the problem is still far from a satisfactory solution.‖

Page 14
Student Section – The Phantastic Photon and LEDs
Expressed in the SI units of joule seconds (J•s), Planck’s constant, 6.626 x 10⁻³⁴
J.s, is
one of the smallest constants used in physics. This is significant because it reflects the
extremely small scale at which quantum mechanical effects are observed, and the reason
we don‘t notice quantum physics in our everyday lives the way we notice classical
physics all around us. Indeed, classical physics can essentially be defined as the limit
of quantum mechanics as the Planck constant tends to zero.
Max Planck (1858-1947)