thruport systems proplege peripheral retrograde …...–final probe placement is mid-esophageal...
TRANSCRIPT

ThruPort systemsProPlege peripheral retrograde cardioplegia device

Training Module Lessons
Lesson 1: ProPlege device
Lesson 2: Preparing for the case
Lesson 3: Utilizing the device
Lesson 4: Troubleshooting

Lesson 1: ProPlege device

ProPlege device
Lesson 1 topics:Global myocardial protection strategy Indications and procedural applicationsComponentsAdditional package contents

Global myocardial protection
Global myocardial protection–The combined use of antegrade and retrograde cardioplegia–Aims to achieve homogenous protection of the myocardium
Antegradecardioplegia
Retrograde cardioplegia

Indications and procedural applications
Indication–Used during cardiopulmonary bypass to:Deliver retrograde cardioplegiaProvide occlusion of the coronary sinusAllow monitoring of coronary sinus pressure
Potential minimal incision procedural applications–Aortic valve replacement–Mitral valve repair or replacement–Myxoma resection–Maze procedure–Reoperation–Totally endoscopic coronary artery bypass

Global myocardial protection
Used for patients with the following:–Concomitant procedure–Coronary artery disease–Re-operation–Greater than mild aortic
insufficiency–Mitral valve surgery where the
atrial retractor distorts the aortic valve Both antegrade and
retrograde cardioplegia

Components
Triple-lumen, 9 Fr shaft which is 59 cm in lengthElastomeric balloon near distal tip to occlude a range of coronary sinus diametersDistal connector with locking mechanismClear contamination guard protects shaft of devicePositioning dial which articulates the curvature of the distal tip

Components – stopcocks and lumens
Color coded stopcocks and labeled lumens–Blue stopcock Balloon inflation and deflation access
–Green stopcock Retrograde cardioplegia delivery accessContrast injection accessGuidewire access via the rotating hemostasis
valve adapter, if needed–White stopcock Coronary sinus pressure access
Coronary sinus pressure
Retrograde cardioplegia, contrast, guidewireaccess
Balloon inflation / deflation

Components – device markers
Printed longitudinal orientation line –Serves as reference for device orientation during insertion and placementDepth markers
–In 5 cm increments beginning at 15 cm from the tip to 45 cm
45 cmdepth marker
15 cmdepth marker
Longitudinal orientation line

Components – positioning dial tip articulation
Introduction position–Dial is all the way forward–Used when advancing through
introducer to right atriumOptimal engagement position
–Dial is in the center–Curve of shaft designed to
match most patient anatomiesArticulation position
–Dial is pulled back and held in place–For patients with a sharp coronary sinus angle

Components – how to manipulate the device
Do not rapidly move the positioning dialDo not manually reshape or bend the shaftTorquing the device
–Ensure shaft is not curled or bent–Use 2-handed method to torqueHand on shaft near introducerHand on trifurcation hub

Additional package contents
11 Fr introducer sheath kitHemostasis valve
–For guidewire placement 2 mL volume syringe
–For balloon inflation and deflation 30 mL syringe
–For flushing / priming device and for contrast injection

Lesson 2: Preparing for the case

Preparing for the case
Lesson 2 topics:AnatomyEquipment for monitoring device locationTransesophageal echo imagingFluoroscopic imagingPerfusion preparation

Anatomy
Coronary sinus–Diameter ranges from 3 - 15 mm in size (8
mm on average)–Length is 4.5 - 5.5 cm –Shapes are tubular, funnel or windsock
shaped and can be visualized using fluoroscopy with contrast
–The opening of the coronary sinus (ostium) is located in the right atrium
–ProPlege device is placed in the coronary sinus with the tip of the device proximal to posterior ventricular branch

Anatomy
Eustachian valve or ridge–Lies between the openings of the inferior vena
cava and the coronary sinusTricuspid valve septal leaflet (posterior)
–The coronary sinus lies between the insertion of this leaflet and the Eustachian valve
Thebesian valve–Located at the ostium of the coronary sinus–Present in approximately 90% of patients

Equipment for monitoring device location
Position all monitors for simultaneous viewing–Transesophageal echo (4 views)Modified bicavalDeep 4-chamber 2-chamber Left tangential
–Fluoroscopy–Hemodynamic monitor

Transesophageal echo imaging
Modified bicaval view–Displays the superior vena cava
and the coronary sinus–Used to engage the device in the
coronary sinus ostium–Acquired from The standard bicaval view The long axis view
–Final probe placement is mid-esophageal depth with an angle of110-130 degrees

Transesophageal echo imaging
Deep 4-chamber view–Displays the coronary sinus ostium, inferior
vena cava, Eustachian valve–Used when there is difficulty acquiring the
modified bicaval view–Acquired from standard 4-chamber view by
slightly advancing the probe followed by anteflex or retroflex
–Final probe placement is mid-esophageal depth with an angle of approximately 0 degrees

Transesophageal echo imaging
2-chamber view–Displays the left ventricle, atrium and atrial
appendage, the mitral valve leaflets, the coronary sinus
–Used to confirm placement of the ProPlege device within the coronary sinus
–Acquired from the 4-chamber view by rotating the multi-plane angle forward to 80-100 degrees and retroflexing probe
–Final probe placement is mid-esophageal depth with an angle of 80-100 degrees

Transesophageal echo imaging
Left tangential view–Used to confirm device depth and
cardioplegia flow using color flow doppler mapping
–Acquired from a 2-chamber view by turning the probe left and adjusting the multiplane angle as needed
–The two arrows point to segments of the great cardiac vein

Transesophageal echo imaging
Validate the four standard echo views discussedEvaluate patient’s anatomy while validating views
–Determine presence of an atrial septal defect or patent foramen ovale as presence may impact decision of device use
–Measure and note diameter of coronary sinus for balloon inflation volume purposes–Identify the angle and shape of the coronary sinus noting any anatomical irregularities

Fluoroscopic imaging
Used with transesophageal echo to provide complete pictureUse transesophageal echo with pressure
monitoring and fluoroscopyBenefit of fluoroscopy is a detailed visual image
–Non-occlusive venogram shows device position, coronary sinus shape and diameter
–Occlusive venogram provides visual confirmation of final position and shows distribution of contrast throughout the coronary vessels to ensure effective delivery of retrograde cardioplegia
Position fluoroscope in straight anteroposterior(AP) view

Perfusion preparation
Pressures–Smaller ProPlege device lumen results in
higher line pressures–Line pressures between 250-300 mmHg (less
than 400 mmHg)–Coronary sinus pressure of 20-40 mmHg
during retrograde cardioplegia

Perfusion preparation (continued)
Control options for cardioplegia lines–Perfusionist controls at heart lung machineRetrograde cardioplegia line to ProPlege device
at anesthesiaAntegrade cardioplegia line to surgical field
–Surgeon manually controls on operative field Line connected from perfusion to alternating
control on operative fieldRetrograde cardioplegia line from ProPlege
device at anesthesia to operative fieldAntegrade cardioplegia line to operative field

Lesson 3: Utilizing the device

Utilizing the device
Lesson 3 topics:Preparation prior to device insertion Inserting and advancing the deviceEngaging the coronary sinus ostiumFluoroscopy, venograms and device advancementConfirming placement and balloon inflationRetrograde cardioplegiaDeflating balloon and removing device

Preparation prior to device insertion
Insert introducer sheath in right internal jugular vein–If not accessible, consider the left subclavian veinAdminister anticoagulants per hospital protocolAttach coronary sinus pressure lineFlush line and zero transducerOpen white stopcock to deviceVerify tight connections to blue stopcockEnsure balloon is fully deflated and vacuum has been maintainedEngage positioning dial and note orientation of curve

Inserting and advancing the device
Set positioning dial to introduction position Insert device tip at 7 o’clock position in introducer Insert device through introducer sheathRetract the contamination guard to expose the
shaft of the device.

Inserting and advancing the device (continued)
Acquire optimal transesophageal echo view–Modified bicaval view–Deep 4-chamber viewVerify positioning dial is in the introduction positionAdvance to superior vena cava / right atrial junction
–Device depth approximately 25 - 30 cmVisualize device tip on transesophageal echo, then
torque device counterclockwise while gently advancing tip near coronary sinus ostium–Device depth approximately 30 - 35 cm

Engaging the coronary sinus ostium
Pull positioning dial to the optimal engagement position
Use small, slow, deliberate movements to engage the ostiumAdvance device tip through the coronary sinus ostium If needed, torque the device and / or use the additional articulation position

Fluoroscopy, venograms & device advancement
Prepare for Venograms–FluoroscopyStandard AP view 30 ml syringe
–Do not dilute contrast beyond 50 - 50 ratioAttach syringeOpen cardioplegia stopcock

Fluoroscopy, venograms & device advancement (continued)
Conduct a non-occlusive venogram–Rapidly inject contrast while the balloon is deflatedFor non-diluted contrast, inject 3 - 5 mLFor diluted contrast, inject 5 - 10 mL
–Venogram shows:ProPlege device positionCoronary sinus diameter
–Used to estimate balloon inflation volumeCoronary sinus shapeDevice depth

Fluoroscopy, venograms & device advancement (continued)
Continue to advance the device within the coronary sinus–Past middle cardiac vein–Place device tip proximal to posterior ventricular branch

Confirming placement and balloon inflation
Acquire 2-chamber transesophageal echo view to verify placement within coronary sinus–However, precise location of device tip cannot be confirmed with transesophageal echo,
therefore fluoroscopy is recommended.

Confirming placement and balloon inflation (continued)
If using fluoroscopy, fill the 2 mL syringe with diluted contrast –6 parts sterile physiologic solution to 1 part contrast mediumAttach 2 mL syringe to blue stopcock and open stopcock to syringeSlowly inflate balloon while watching pressure traceStop inflating balloon at first sign of ventricularization
–Do not exceed maximum inflation volume of 1.4 mLTurn blue stopcock off to device to maintain balloon volume

Confirming placement and balloon inflation (continued)
Conduct an occlusive venogram to verify placement–Tip proximal to posterior ventricular
branch–Contrast throughout coronary
vessels–If not optimal, deflate balloon,
reposition and repeat inflation and confirmation steps

Confirming placement and balloon inflation (continued)
Note balloon volume and device depthAttach and secure distal connector to introducer sheathSecure locking mechanismPlace positioning dial in introduction positionCompletely deflate balloonTurn stopcock off to the device to ensure balloon remains deflated

Retrograde cardioplegia
Flush cardioplegia lumen–Remove 30 mL contrast filled syringe–Attach a syringe filled with heparinized
saline (per hospital protocol) to green stopcock
–Flush cardioplegia lumen with 5 - 10 mLof heparinized solution
–Turn green stopcock off to the cardioplegia lumen
–Remove syringe and cap port
Retrograde cardioplegia
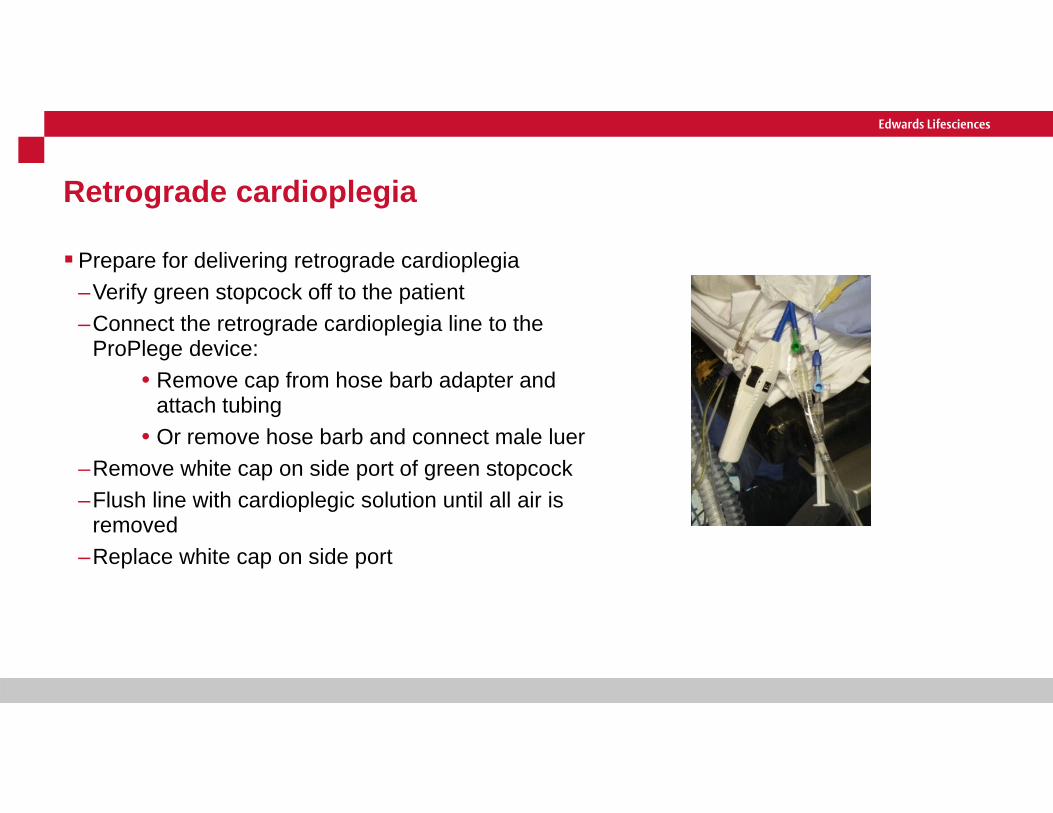
Prepare for delivering retrograde cardioplegia–Verify green stopcock off to the patient –Connect the retrograde cardioplegia line to the
ProPlege device:• Remove cap from hose barb adapter and
attach tubing• Or remove hose barb and connect male luer
–Remove white cap on side port of green stopcock–Flush line with cardioplegic solution until all air is
removed–Replace white cap on side port

Retrograde cardioplegia
Deliver retrograde cardioplegia–Turn green stopcock off to side port (opens cardioplegia line)–Start retrograde perfusion at a low flow rate (<50/mL/min) while
inflating balloon–Stop inflating balloon once an increase in coronary sinus
pressure is visualized–Increase flow while observing coronary sinus pressure (pressure
not to exceed 40 mmHg)–Can visualize retrograde distribution via left tangential view on
transesophageal echo –Ensure effectiveness of cardioplegia–Repeat infusions of cardioplegia as neededDeflate balloon and close infusion line stopcock between
retrograde infusions

Deflating balloon and removing device
Removal of device should occur prior to or at the same time as reversal of anticoagulation therapy to avoid thrombus and thrombo-embolismTurn the blue stopcock off to the side portFully deflate balloon by drawing back on the 2 mL syringe
plunger twiceWhile syringe plunger is retracted, turn blue stopcock off to
deviceDisengage distal connector locking mechanism

Deflating balloon and removing device (continued)
Withdraw device until contamination guard is fully extendedDisconnect device’s distal connector from
introducer sheathRemove device from the introducerDispose of device per hospital protocols for
biohazards Introducer sheath may be left in place for
venous access

Lesson 4: Troubleshooting

Troubleshooting
Lesson 4 topics: Difficulty advancing or torquing the device Challenge locating the tip of the device on transesophageal echo Difficulty advancing device to final position within coronary sinus Use of guidewire to advance device Shaft of device buckles in right atrium Unable to inflate the balloon Ventricularization waveform not observed Difficulty infusing retrograde cardioplegia while observing high
retrograde cardioplegia line pressure and high coronary sinus pressure Low coronary sinus pressure Challenge removing device through introducer

Difficulty advancing or torquing the device
Do not apply excessive force to the device Visualize the device on transesophageal echo and / or fluoroscopy
– Obstruction: Refer to troubleshooting techniques in this lesson
– No obstruction: Ensure distal connector locking mechanism is not engaged Properly handle device to ensure best torque transmission
– Shaft is straight– 2-handed method: one hand on distal shaft near introducer and
one hand on trifurcation hub

Challenge locating the tip of the device on transesophageal echo
Proximal segment of shaft may be mistaken for the tip–Check pressure trace–Consider using fluoroscopy to confirm tip location Inject contrast through cardioplegia channel
Straight AP viewCapture quick image on fluoroEvaluate both fluoroscopy and the hemodynamic monitorPossible locations of the device:
–Right atrial appendage–Inferior vena cava–Right ventricle–Right ventricular outflow tract

Challenge locating the tip of the device on transesophageal echo (continued)
If device tip is in the right atrial appendage–Verify positioning dial is in introduction position–Retract device to 20 cm marker–Tip at 7 o’clock position–Re-attempt advancement If device tip is in the inferior vena cava
–Ensure positioning dial is in introduction position–Simultaneously withdraw and torque clockwise until
tip clears right atrium / inferior vena cava junction–Position tip near coronary sinus ostium–Engage coronary sinus ostium

Challenge locating the tip of the device on transesophageal echo (continued)
If device tip is in the right ventricle–Waveform verifies location–Ensure positioning dial is in introduction position–Simultaneously withdraw and torque counterclockwise
until waveform changes to a venous pattern–Position tip near coronary sinus ostium–Engage coronary sinus ostium If device tip is in the right ventricular outflow tract
–Ensure positioning dial is in introduction position–Simultaneously withdraw and torque counterclockwise
until waveform changes to a venous pattern–Position tip near coronary sinus ostium–Engage coronary sinus ostium

Difficulty advancing device to final position within coronary sinus
Side branch cannulation–If device is in the middle cardiac veinDo not inflate balloonDo not advanceWithdraw deviceSimultaneously torque and reattempt advancementConsider guidewire if needed
–If device is in a shallow posterior ventricular branchWithdraw deviceSimultaneously torque and reattempt advancementConsider guidewire if needed

Difficulty advancing device to final position within coronary sinus (continued)
Presence of a coronary sinus valve– Potential challenges: Obstruct retrograde cardioplegia flow Device can become dislodged
– To bypass the valve: Slightly withdraw Torque shaft while reattempting advancement If efforts are futile, consider guidewire
Kinked coronary sinus– If deep, withdraw device to desired position– To bypass a shallow kink: Slightly withdraw Torque shaft while reattempting advancement If unsuccessful, consider guidewire

Use of guidewire to advance device
Must use fluoroscopyEnsure device tip is engaged in coronary sinus and not forcefully
contacting wall before advancing a guidewire–Withdrawing the catheter slightly and verifying free flow of
blood via green stopcock decreases the likelihood that the device is in forceful contact with the vessel wall
Select a hydrophilic coated, soft tip .035” or .89 mm, minimum 100 cm long guidewireVerify green stopcock is off to deviceAttach contrast filled 30 mL syringe to side portRemove hose barb from green stopcockAttach hemostasis valve adapter to end port on green stopcockOpen the hemostasis valve

Use of guidewire to advance device (continued)
Insert guidewire to device tipTighten hemostasis valveOpen green stopcock to all 3 side portsGently advance guidewire to past tip of the deviceSlightly retract device to straighten shaftRe-advance device into desired positionConfirm device location
–Prior to conducting venograms verify seal on hemostasis valve

Use of guidewire to advance device (continued)
Remove guidewireRemove contrast filled syringeAttach a syringe filled with sterile heparinized
physiologic solution to green stopcockFlush cardioplegia lumen with 5 to 10 mL of
heparinized solutionTurn green stopcock off to the deviceRemove syringe and cap side portRemove hemostasis valve adapter If desired, reconnect hose barb adapter

Shaft of device buckles in right atrium
Device not tracking properlyDevice tip potentially encountered an impedimentTo troubleshoot:
–Verify balloon deflated–Locate tip of device on transesophageal echoTip engaged in coronary sinus
–Review other section in this moduleTip not engaged in coronary sinus
–Position dial in introduction position–Retract device to 20 cm marker–Tip at 7 o'clock position–Reattempt advancement

Unable to inflate the balloon
Verify the following:–Luer connection on blue stopcock is secure–2 mL syringe is secure on blue stopcock–Stopcock turned off to side port–Device is not kinked

Ventricularization waveform not observed
Confirm location of device on transesophageal echo and fluoroscopyVerify scale is adjusted to read 30 mmHgAfter verifying free flow of blood via green stopcock, consider injection of small amount of
contrast to evaluate match of balloon to coronary sinus diameter and leak around balloonConsider possibility of low amplitude ventricularization waveform and evaluate change in
mean pressure before and after balloon inflation

Ventricularization waveform not observed (continued)
If challenges visualizing the waveform are still encountered:–Ensure lumen was properly prepped–Check connections and function of monitoring / transducer system–Check coronary sinus pressure stopcock on device–Re-zero and flush the coronary sinus pressure lumen If efforts are futile, consider repositioning device
–Retract device into right atrium–Reposition device and confirm placement

Difficulty infusing retrograde cardioplegia while observing high line pressure and high coronary sinus pressure
ProPlege device has more resistance to cardioplegia flow and higher line pressures due to smaller lumen size and lengthTroubleshoot infusion challenges combined
with high line pressure–Flush retrograde cardioplegia lumen–Verify stopcocks and connections properly
positioned –Ensure lines are not kinked or twisted

Difficulty infusing retrograde cardioplegia while observing high line pressure and high coronary sinus pressure (continued)
Consider possibility of tip too deep, in a side branch, adjacent to vessel wall or proximal to coronary sinus valve–Temporarily discontinue infusion of cardioplegia–Deflate balloon–Unlock distal connector–Retract device no more than 1 cm–Reinflate balloon–Relock distal connector–Reattempt retrograde cardioplegia infusion–Repeat steps until successful–If repositioning does not resolve inability to give retrograde,
proceed with antegrade-only cardioplegia strategy

Low coronary sinus pressure
Confirm the balloon is inflatedVerify position of device within the coronary sinus
–Temporarily inflate balloon during patient positioning and venous cannula placement to prevent device dislodgement
–Windsock shaped coronary sinus may contribute to dislodgement
Look for persistent left superior vena cava–Diagnose with fluoroscopy–Determine effectiveness of retrograde
cardioplegia

Challenge removing device through introducer
Resistance felt when attempting removal of device through introducer–Do not exert excessive force–Ensure balloon completely deflated–Confirm blue stopcock is off to the device–Gently reattempt removal–While using fluoroscopic guidance, remove
device and sheath as one unit

Thank You
For further information regarding this device and other products, please visit our website at:
thruportmivs.com

Edwards Lifesciences • One Edwards Way, Irvine CA 92614 USA • edwards.com
For professional use. CAUTION: Federal (United States) law restricts this device to sale by or on the order of a physician. See instructions for use for full prescribing information, including indications, contraindications, warnings, precautions and adverse events.
Edwards Lifesciences devices placed on the European market meeting the essential requirements referred to in Article 3 of the Medical Device Directive 93/42/EEC bear the CE marking of conformity.
Proper surgical procedures and techniques are the responsibility of the medical profession. Described procedures are provided for informational purposes only. Each physician must determine the appropriate use of this device for each patient based on medical training, experience, the type of procedure employed, and the benefits and risks associated with device use.
Edwards, Edwards Lifesciences, the stylized E logo, ProPlege and ThruPort are trademarks or service marks of Edwards Lifesciences Corporation. All other trademarks are the property of their respective owners.
© 2017 Edwards Lifesciences Corporation. All rights reserved. PP--US-1708 v1.0
