thea for blender - home - thea render · thea for blender v. 1.5.3 for blender 2.76 render by...
TRANSCRIPT
THEA FOR BLENDER v. 1.5.3 for Blender 2.76
www.thearender.com/blender
Render by Eduardo Câmara
Page 2
GLOSSARY 1.Blender – Blender application Exporter – part of plug-in responsible for exporting Blender data to Thea format IBL – Image Based Lighting LUT – Look Up Table Mesh – geometry data for object Object – Blender and Thea object containing materials assigned to it and mesh OS – Operating system Thea – Thea Render application
INSTALLATION 2.
REQUIREMENTS 2.1
To use this plug-in you will need: Blender in version 2.74 Installed Thea v. 1.5
INSTALLATION 2.2
To make the Thea export plug-in available in Blender: Start Blender, go to menu File/User Preferences/Addons. Select “Install from zip” and choose render_thea_free.zip, then enable Thea Render addon. You can copy TheaConfig.txt file into your Blender scripts/addons/TheaForBlender directory if you wish to set Thea paths manually.
IMPORTANT CHANGES 3.
multiple UV maps are supported
curve objects are exported as meshes
colored hair export
new Interactive Render window
Cycles material converter
dupli group support for particles export
object animation is exported to Thea (no mesh deformation support yet)
FEATURES 4.
OBJECT EXPORT 4.1
Objects are exported with modifiers applied on them. Supported object types are: mesh objects, curve objects.
Page 3
MATERIAL EXPORT 4.2 Material system based on Thea material components. 4.2.1
There is also option in Thea Tools panel in render panel to convert blender internal materials to basic materials or to convert Cycles materials to Thea materials (basic or glossy) Supported components:
Basic
Glossy
SSS
ThinFilm
Coating
Clipping
Displacement
Thea Material LUT System 4.2.2
Blender materials can be automatically translated to already prepared Thea materials by use of the material export name. The LUT (lookup table) file is used to translate and assign a Thea material to a corresponding exported Blender material name. This allows for advanced Thea materials to be called automatically on export. LUT file can be generated using Thea LUT Tool panel located in Render panel. File will be generated based on Thea's materials located under Thea materials path.
CAMERA EXPORT 4.3
All visible cameras are exported with perspective, location and direction. The current Blender camera is set as active camera in Thea. Supported camera options:
Focal length
DOF distance and aperture
Shift
Z Clipping
Sensor size
Orthographic cameras are exported as well.
LIGHTS EXPORT 4.4
Thea's omni, spot, sun, IES and projector lights are supported.
ENVIRONMENT EXPORT 4.5
Dome, IBL and Physical Sky methods are supported.
Page 4
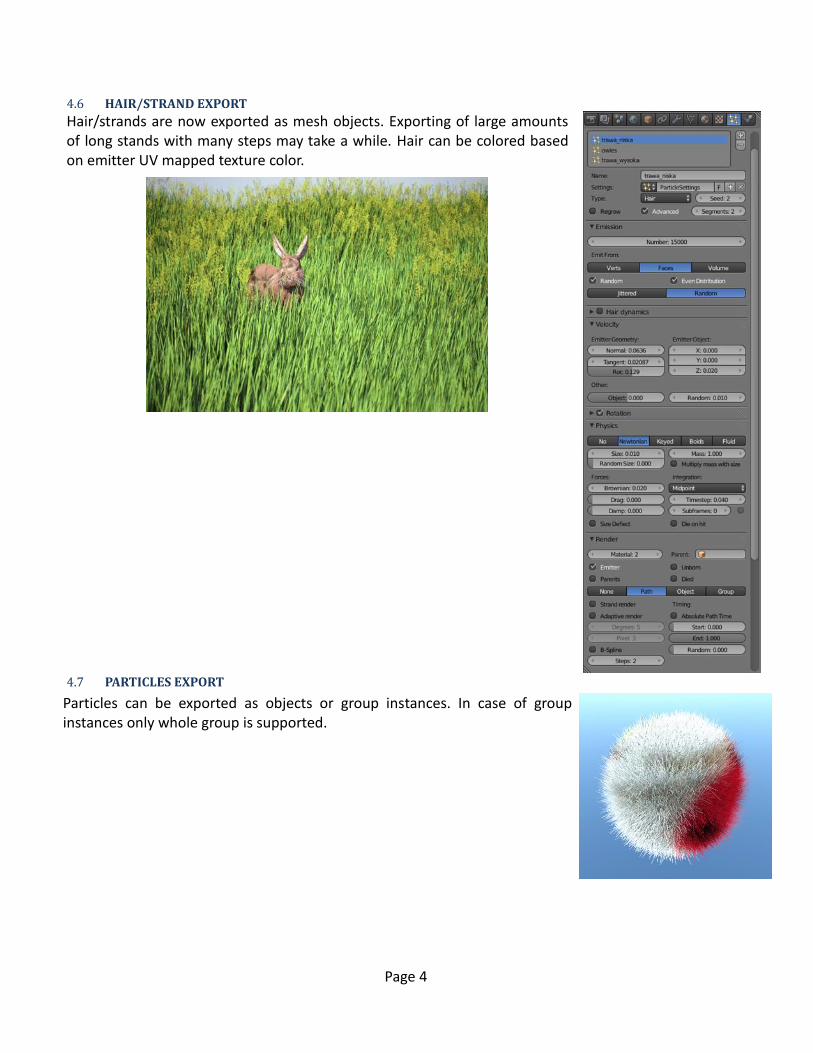
HAIR/STRAND EXPORT 4.6
Hair/strands are now exported as mesh objects. Exporting of large amounts of long stands with many steps may take a while. Hair can be colored based on emitter UV mapped texture color.
PARTICLES EXPORT 4.7
Particles can be exported as objects or group instances. In case of group instances only whole group is supported.
Page 5
GETTING STARTED 5.
HOW TO WORK WITH EXPORTER 5.1
The Thea exporter will try to find Thea’s installation directory, using either the Windows registry or installation files, in case of Unix systems. Scenes are exported in xml format and saved in directory set in Output panel. Blender files have to be saved before exporting.
OBJECTS 5.2
All objects on visible layers are exported unless “Selected only” option in Thea Render panel is enabled. In this case only selected objects will be exported. Objects are exported with modifiers applied on them. Currently only mesh and curve objects are exported so far. Also layers information is exported. Since Thea has only 10 layers and Blender has 20 Thea's if object layer in Blender > 9 then layer = layer - 10. Modifiers are applied at Render level during the export process. In the case of multiple objects using the same mesh, a mesh will be exported only once, but each object will have its own transformation (scale, translation, rotation) parameters, i.e. duplicated objects. In this case objects will be exported as instances of the mesh. If the option to “Reuse meshes” in Thea Render panel is set, then geometry data won't be exported, assuming that it's already exported. Only new transformation will be exported. There is also possibility to set material interface for selected object. Proper panel can be found in object panel. To enable/disable shadow casting/receiving, caustic casting/receiving, visibility or disable object in Thea go to “Thea object settings” panel in Object panel and change desired settings.
Page 6
MATERIALS 5.3
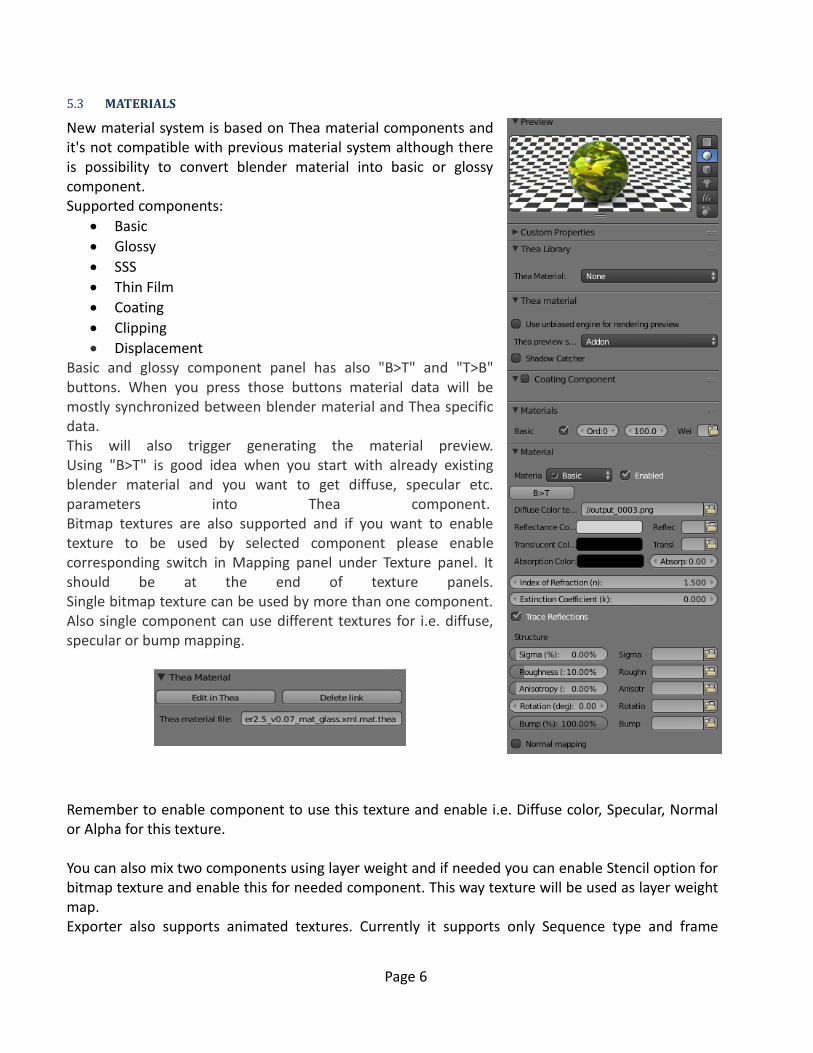
New material system is based on Thea material components and it's not compatible with previous material system although there is possibility to convert blender material into basic or glossy component. Supported components:
Basic
Glossy
SSS
Thin Film
Coating
Clipping
Displacement Basic and glossy component panel has also "B>T" and "T>B" buttons. When you press those buttons material data will be mostly synchronized between blender material and Thea specific data. This will also trigger generating the material preview. Using "B>T" is good idea when you start with already existing blender material and you want to get diffuse, specular etc. parameters into Thea component. Bitmap textures are also supported and if you want to enable texture to be used by selected component please enable corresponding switch in Mapping panel under Texture panel. It should be at the end of texture panels. Single bitmap texture can be used by more than one component. Also single component can use different textures for i.e. diffuse, specular or bump mapping.
Remember to enable component to use this texture and enable i.e. Diffuse color, Specular, Normal or Alpha for this texture. You can also mix two components using layer weight and if needed you can enable Stencil option for bitmap texture and enable this for needed component. This way texture will be used as layer weight map. Exporter also supports animated textures. Currently it supports only Sequence type and frame
Page 7
number must be in last four characters of file name. In cases when it is difficult or impossible to create the desired material in blender, a user can then call Thea’s material editor directly and edit the automatically generated material in Thea’s material editor. On exit, Thea material editor will save the edited material. To get back to automatically generated material press Delete link button.
Thea container 5.3.1
Thea container for selected object can be set in “Thea container” panel in Object panel.
Using LUT (look-up tables) 5.3.2
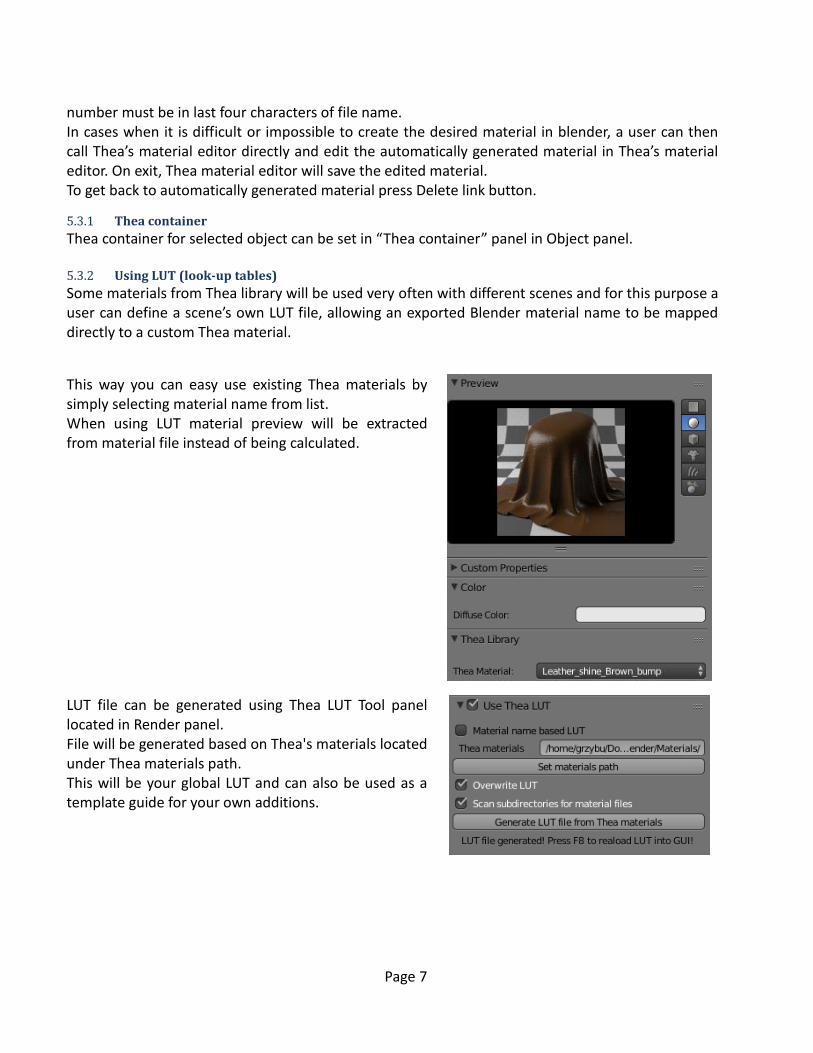
Some materials from Thea library will be used very often with different scenes and for this purpose a user can define a scene’s own LUT file, allowing an exported Blender material name to be mapped directly to a custom Thea material.
This way you can easy use existing Thea materials by simply selecting material name from list. When using LUT material preview will be extracted from material file instead of being calculated.
LUT file can be generated using Thea LUT Tool panel located in Render panel. File will be generated based on Thea's materials located under Thea materials path. This will be your global LUT and can also be used as a template guide for your own additions.
Page 8
CAMERA 5.4
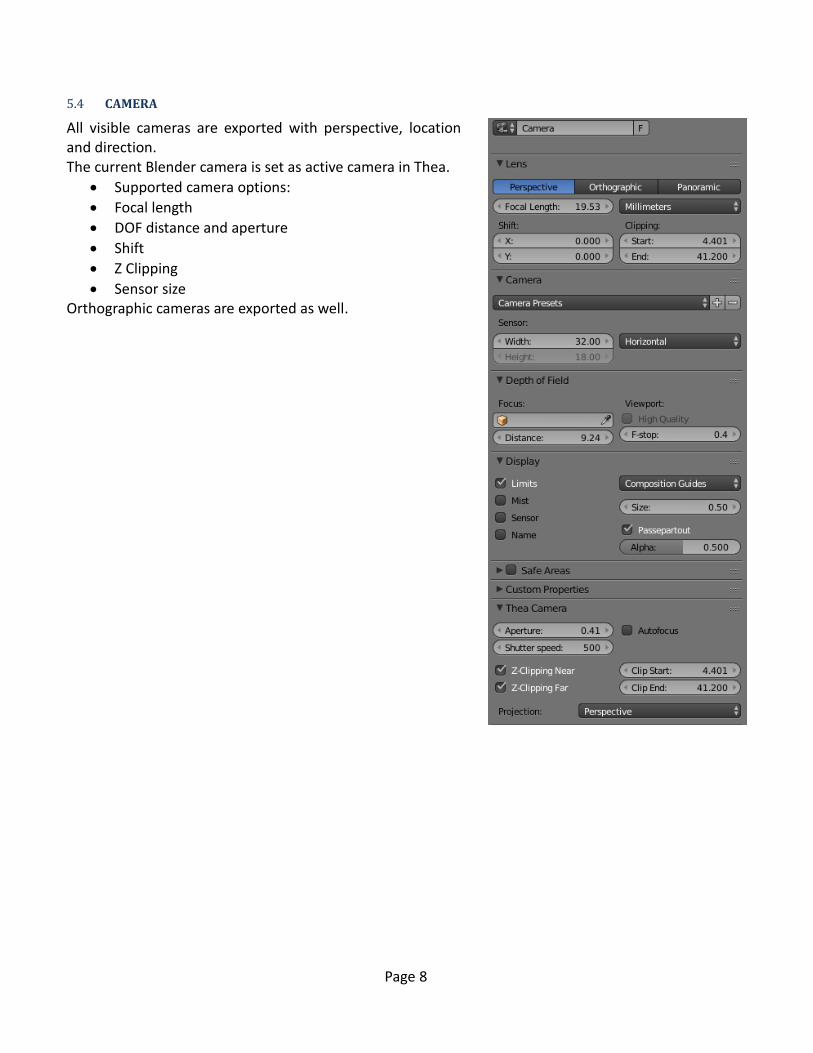
All visible cameras are exported with perspective, location and direction. The current Blender camera is set as active camera in Thea.
Supported camera options:
Focal length
DOF distance and aperture
Shift
Z Clipping
Sensor size Orthographic cameras are exported as well.
Page 9
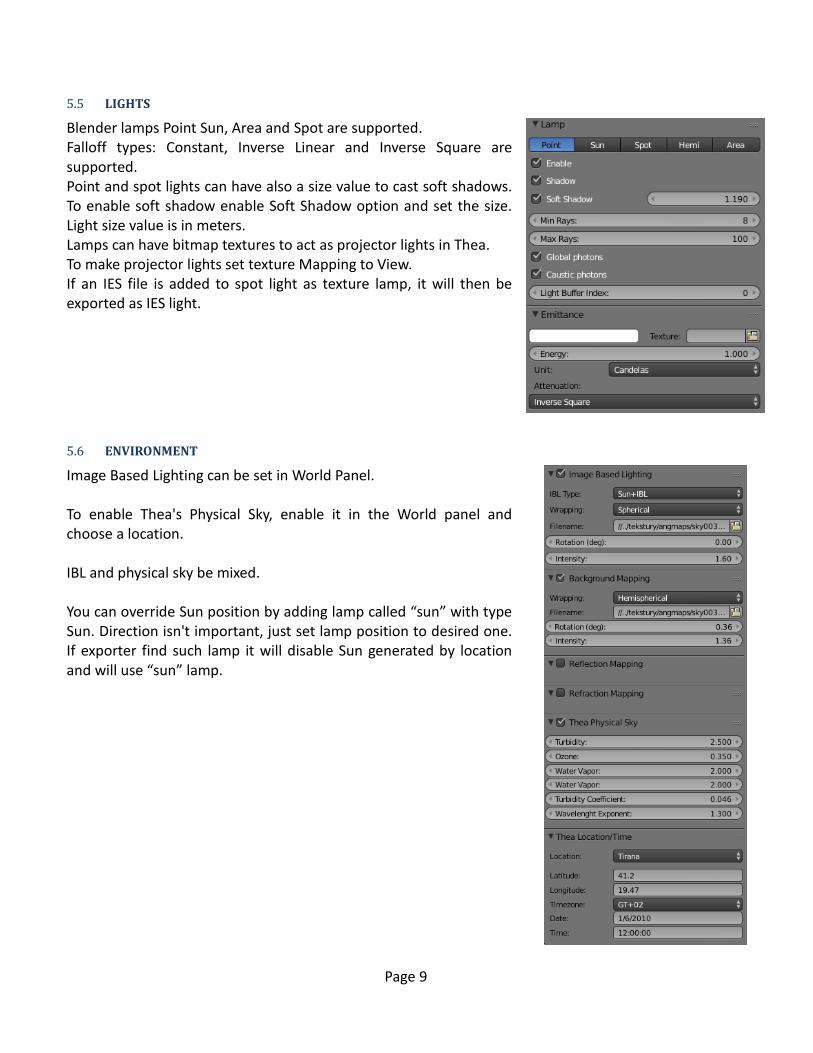
LIGHTS 5.5
Blender lamps Point Sun, Area and Spot are supported. Falloff types: Constant, Inverse Linear and Inverse Square are supported. Point and spot lights can have also a size value to cast soft shadows. To enable soft shadow enable Soft Shadow option and set the size. Light size value is in meters. Lamps can have bitmap textures to act as projector lights in Thea. To make projector lights set texture Mapping to View. If an IES file is added to spot light as texture lamp, it will then be exported as IES light.
ENVIRONMENT 5.6
Image Based Lighting can be set in World Panel. To enable Thea's Physical Sky, enable it in the World panel and choose a location. IBL and physical sky be mixed. You can override Sun position by adding lamp called “sun” with type Sun. Direction isn't important, just set lamp position to desired one. If exporter find such lamp it will disable Sun generated by location and will use “sun” lamp.
Page 10
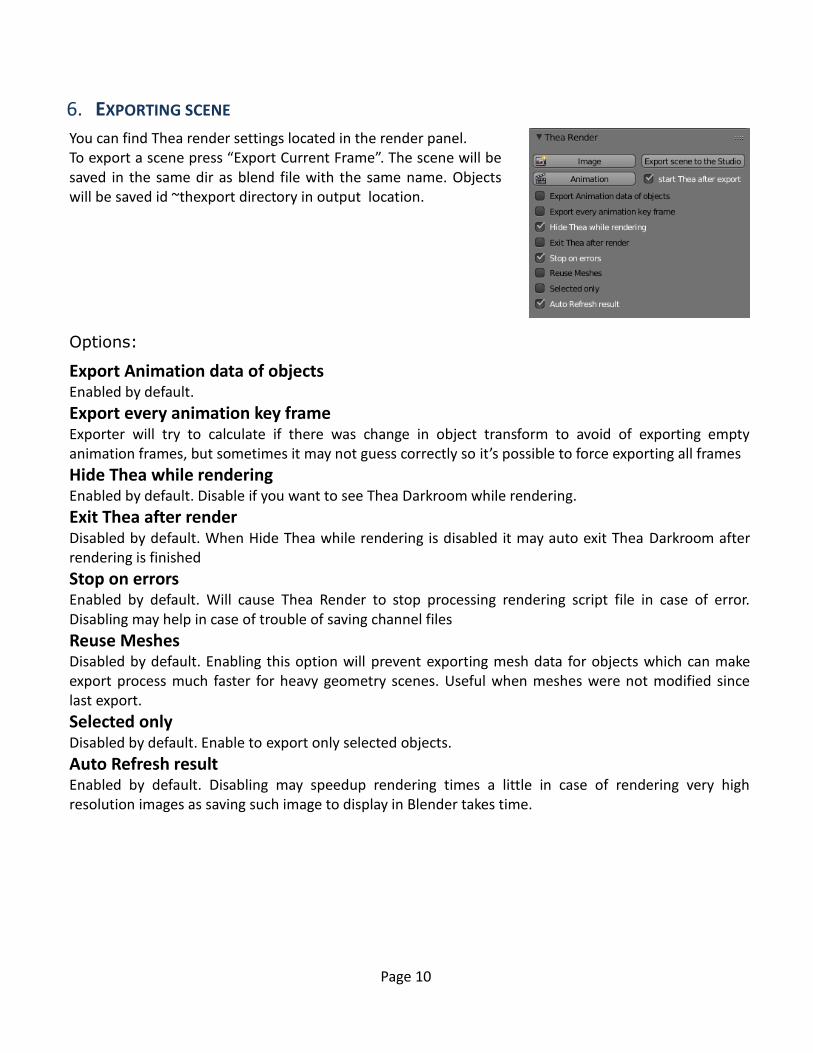
EXPORTING SCENE 6.
You can find Thea render settings located in the render panel. To export a scene press “Export Current Frame”. The scene will be saved in the same dir as blend file with the same name. Objects will be saved id ~thexport directory in output location.
Options:
Export Animation data of objects Enabled by default.
Export every animation key frame Exporter will try to calculate if there was change in object transform to avoid of exporting empty animation frames, but sometimes it may not guess correctly so it’s possible to force exporting all frames
Hide Thea while rendering Enabled by default. Disable if you want to see Thea Darkroom while rendering.
Exit Thea after render Disabled by default. When Hide Thea while rendering is disabled it may auto exit Thea Darkroom after rendering is finished
Stop on errors Enabled by default. Will cause Thea Render to stop processing rendering script file in case of error. Disabling may help in case of trouble of saving channel files
Reuse Meshes Disabled by default. Enabling this option will prevent exporting mesh data for objects which can make export process much faster for heavy geometry scenes. Useful when meshes were not modified since last export.
Selected only Disabled by default. Enable to export only selected objects.
Auto Refresh result Enabled by default. Disabling may speedup rendering times a little in case of rendering very high resolution images as saving such image to display in Blender takes time.
Page 11
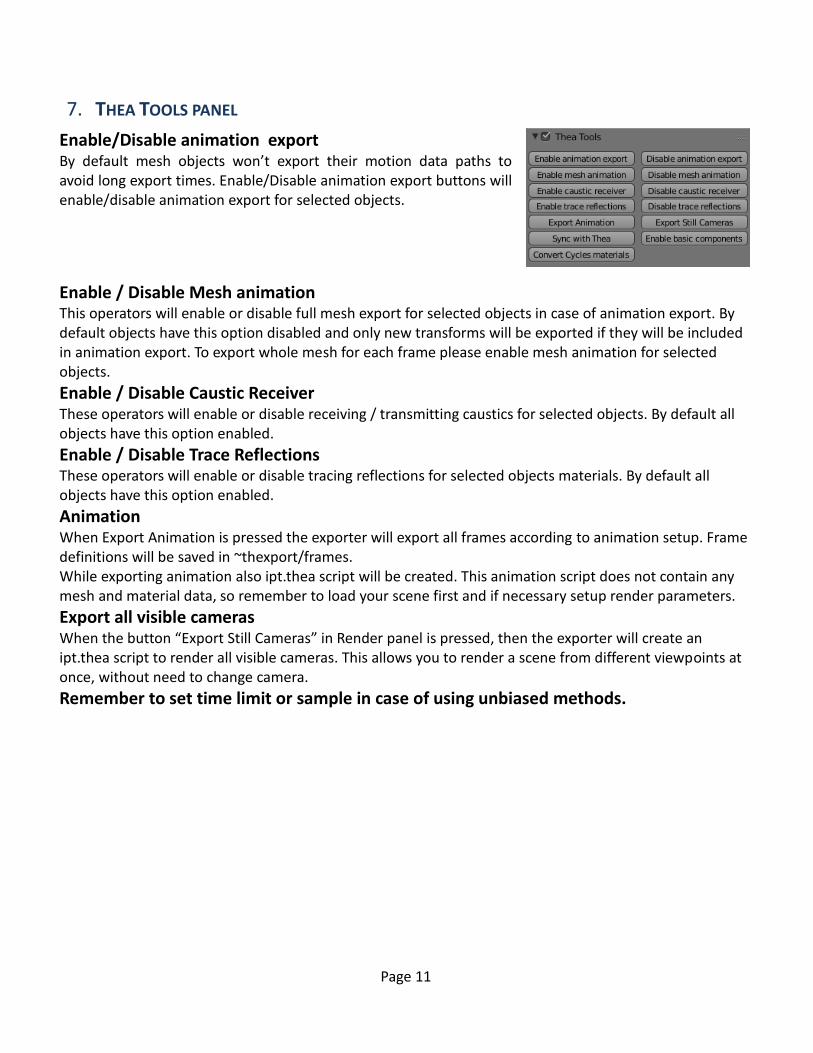
THEA TOOLS PANEL 7.
Enable/Disable animation export By default mesh objects won’t export their motion data paths to avoid long export times. Enable/Disable animation export buttons will enable/disable animation export for selected objects.
Enable / Disable Mesh animation This operators will enable or disable full mesh export for selected objects in case of animation export. By default objects have this option disabled and only new transforms will be exported if they will be included in animation export. To export whole mesh for each frame please enable mesh animation for selected objects.
Enable / Disable Caustic Receiver These operators will enable or disable receiving / transmitting caustics for selected objects. By default all objects have this option enabled.
Enable / Disable Trace Reflections These operators will enable or disable tracing reflections for selected objects materials. By default all objects have this option enabled.
Animation When Export Animation is pressed the exporter will export all frames according to animation setup. Frame definitions will be saved in ~thexport/frames. While exporting animation also ipt.thea script will be created. This animation script does not contain any mesh and material data, so remember to load your scene first and if necessary setup render parameters.
Export all visible cameras When the button “Export Still Cameras” in Render panel is pressed, then the exporter will create an ipt.thea script to render all visible cameras. This allows you to render a scene from different viewpoints at once, without need to change camera.
Remember to set time limit or sample in case of using unbiased methods.
Page 12
THEA RENDER PRESETS 8.You can choose one of Thea's render presets. This will overwrite your custom render settings while export time.
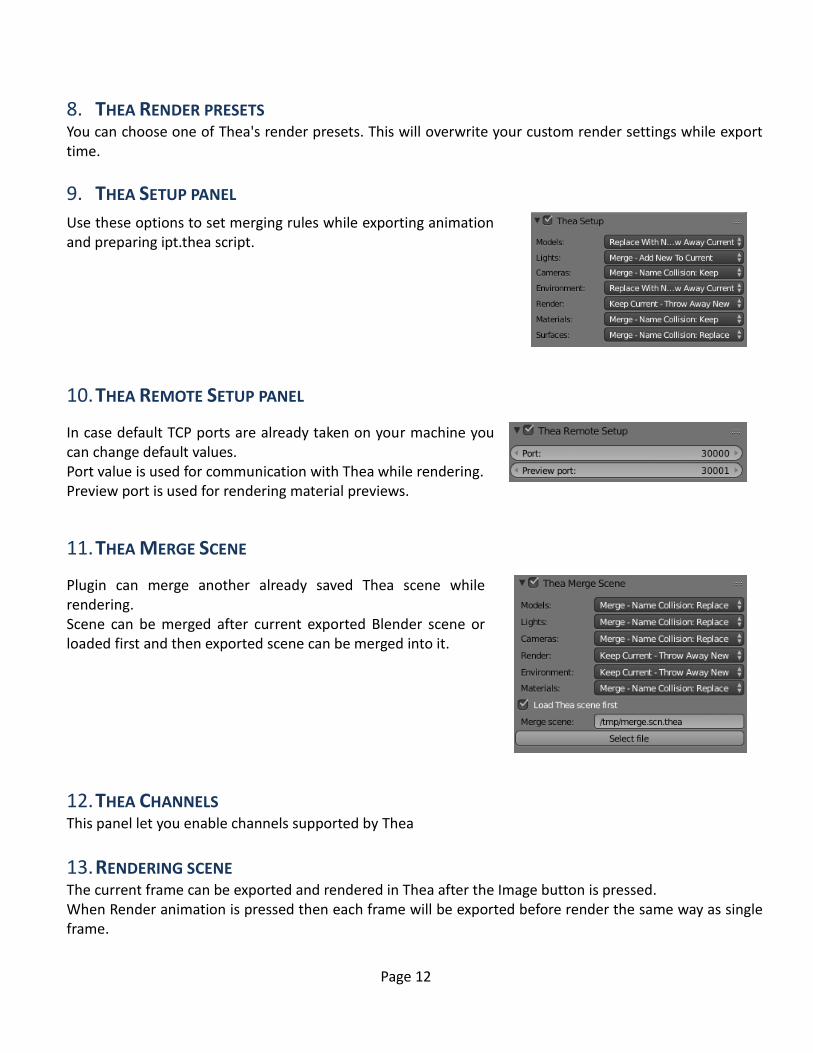
THEA SETUP PANEL 9.
Use these options to set merging rules while exporting animation and preparing ipt.thea script.
THEA REMOTE SETUP PANEL 10.
In case default TCP ports are already taken on your machine you can change default values. Port value is used for communication with Thea while rendering. Preview port is used for rendering material previews.
THEA MERGE SCENE 11.
Plugin can merge another already saved Thea scene while rendering. Scene can be merged after current exported Blender scene or loaded first and then exported scene can be merged into it.
THEA CHANNELS 12.This panel let you enable channels supported by Thea
RENDERING SCENE 13.The current frame can be exported and rendered in Thea after the Image button is pressed. When Render animation is pressed then each frame will be exported before render the same way as single frame.
Page 13
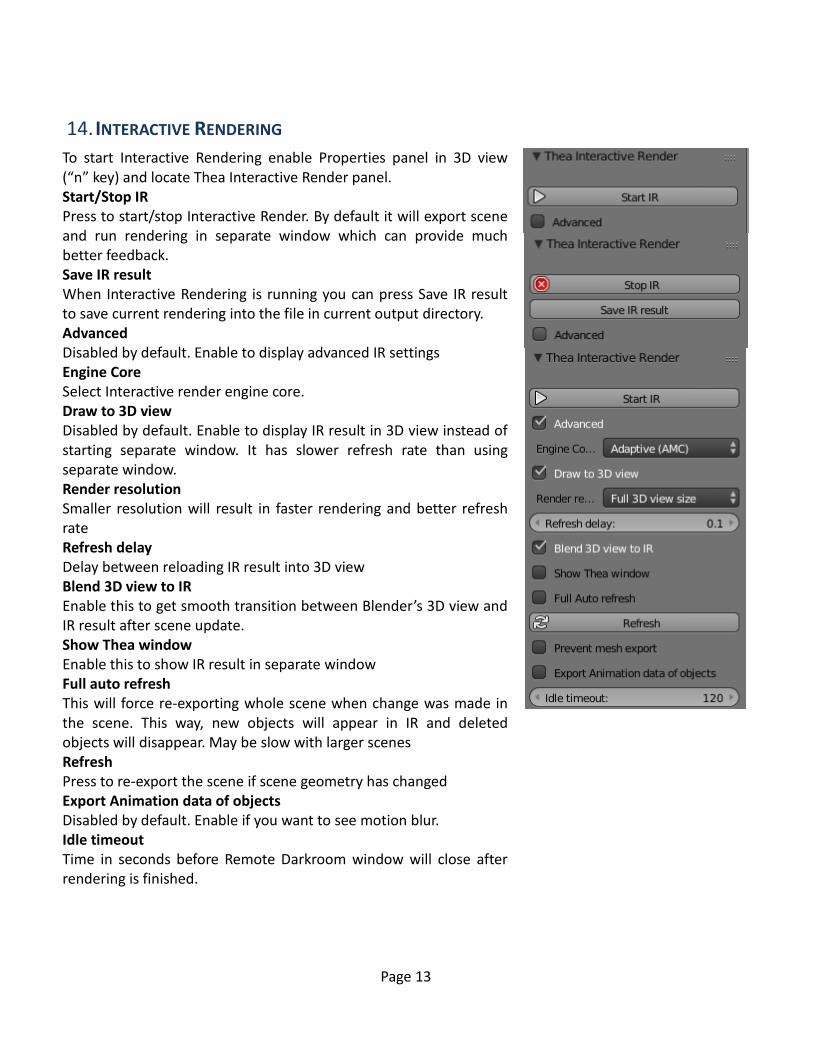
INTERACTIVE RENDERING 14.
To start Interactive Rendering enable Properties panel in 3D view (“n” key) and locate Thea Interactive Render panel. Start/Stop IR Press to start/stop Interactive Render. By default it will export scene and run rendering in separate window which can provide much better feedback. Save IR result When Interactive Rendering is running you can press Save IR result to save current rendering into the file in current output directory. Advanced Disabled by default. Enable to display advanced IR settings Engine Core Select Interactive render engine core. Draw to 3D view Disabled by default. Enable to display IR result in 3D view instead of starting separate window. It has slower refresh rate than using separate window. Render resolution Smaller resolution will result in faster rendering and better refresh rate Refresh delay Delay between reloading IR result into 3D view Blend 3D view to IR Enable this to get smooth transition between Blender’s 3D view and IR result after scene update. Show Thea window Enable this to show IR result in separate window Full auto refresh This will force re-exporting whole scene when change was made in the scene. This way, new objects will appear in IR and deleted objects will disappear. May be slow with larger scenes Refresh Press to re-export the scene if scene geometry has changed Export Animation data of objects Disabled by default. Enable if you want to see motion blur. Idle timeout Time in seconds before Remote Darkroom window will close after rendering is finished.
Page 14
TIPS & TRICKS 15. FASTER EXPORT 15.1
When you exporting your scene first time be sure you have “Reuse meshes” option disabled. But later, if you decide to translate, rotate or scale your objects, then you don't have to export meshes again if “Reuse meshes” option is enabled. When exporting meshes with large poly counts, it's better to enable “Reuse meshes”. This prevents exporting meshes again, which can make the export process much faster. In addition, if you decide to change only one or a few of the meshes, then you could enable “Selected only” and export only the selected objects. Once done, you can disable the “Selected only” parameter and enable “Reuse meshes” to export whole scene without mesh data.. very useful when working with big scenes.
FASTER AND SMALLER ANIMATION EXPORT 15.2
If in your animation only few objects are moving select them and enable “Selected only” parameter. This will export only selected objects to animation frames files. Also use Enable and Disable mesh animation operators in Thea Tools panel. This will set selected objects as animated mesh so Thea will export full mesh in case of animation export. If it's disabled then only a object material and transformation will be exported and base mesh will be linked. Enable animation only in case if your mesh is changing i.e. softbody, cloth, armature or fluids. There is no need to export mesh if you just move, scale or translate object.
SYNC OBJECTS AND LIGHTS POSITION WITH THEA XML FILE. 15.3
Export your scene from Blender with enabled option "Start Thea after export", tune your scene with IR and then save scene to the same xml filename as it was exported. Then press "Sync with Thea" button in Blender and selected objects transforms will be synced with Thea xml file.
TROUBLESHOOTING 16. THEA'S DATA PATH PROBLEMS 16.1
In case when exporter has troubles with automatically discovering Thea's data path where locations and render presets are stored there is possibility to set data path manually. To do this copy TheaConfig.txt file into your Blender scripts/io directory and edit it's content to point to your Thea's data path.
Contact Author 16.2
You can send comments, feature requests or bug information on Thea forum at www.thearender.com/forum or by mail at: [email protected] or [email protected]
© Grzegorz Rakoczy 2015