the guide to fcp by sanjay ganguly shoot/edit delhi bureaudownloads.bbc.co.uk › editingsupport ›...
TRANSCRIPT

THEGUIDE TO FCP
BYSANJAY GANGULY
Shoot/Edit Delhi Bureau


Index
CONTROL Click on the Blue items of the Index to go to the topics
FCP CONNECTIONS BETA SX and ADVC 1000
BETA SX ADVC 110DV CAMERA OR J30
SET UP
CREATING EDITING FOLDERS EASY SETUP
USER PREFERNCESSETTING SCRATCH DISKSYSTEM SETTINGSAUDIO/VIDEO SETTINGS
START FCP & START NEW PROJECT
THE FCP EDIT INTERFACECREATING AND ORGANISING BINSIMPORT CLOCK
LOG & CAPTURECAPTURE SETTINGCLIP SETTINGSLOG CLIPCAPTURING
UNDERSTANDING TIMELINE
EDITING
BASIC EDITING(interview)
EDITING CUT STORYROUGH EDIT

FINETUNINGPutting audio transition (Fade in, Fade out, Cross Fade)
VIDEO DISSOLVES
MULTIPLE SELECTIONS
COPY/CUT/PASTE/ DELETE
MOVING EDITED CLIPS IN THE TIMELINE
RESIZING CLIPS
CREATING SUBCLIPS
MATCH FRAME
SNAPPING
LINKING
STEREO PAIR
FINDING GAPS IN THE TIMELINE
FIXING SYNC ERROR(LIP SYNC etc)
RUBBER BANDING
BLADE TOOL
ARCING
SHORTCUTS
I will update it with more topics

FCP CONNECTIONS BETA SX and ADVC 1000
Select SDI to DV Mic Lead with Male XLR
SDI OUT
BNC
SDI IN
FIREWIRE
9PIN REMOTE CABLE FIREWIRE
SELECT SDI TO DV from THE FRONT PANEL OF ADVC1000 Connection : Cable:
SX SDI OUT to AVDC 1000 SDI IN BNC TO BNCSX REMOTE TO ADVC REMOTE 9 PIN REMOTE CABLE
FCP FIREWIRE TO ADVC FIREWIRE 6PIN TO 6 PIN FIREWIREFCP FIREWIRE TO EXTERNAL HDD F 800 FIREWIREFCP HEADPHONE TO SPEAKER Mic lead Male XLR
I am not writing the obvious like connecting mouse power chord etc
NOTE: It is very important to connect a remote between ADVC 1000 and SX as youcan control the player from FCP and on capturing you will get timecode of the rushestape captured also.
To activate 9 pin remote IN ADVC 1000 Press Menu, then Scroll down till you reachMenu 41 (9P remote), Press right arrow the display will change from OFF to ON
To Switch OFF 9P remote Press the left Arrow after selecting Menu 41
_Go back to INDEX_
BETASX
FCP
SPEAKER
ADVC1000
EXTHDD

FCP CONNECTION USING BETA SX ADVC 110
Select ANALOG IN Mic Lead with Male XLR
VideoOUT
BNC
Video IN
FIREWIRE
CH1 CH2 IN (XLR to RCA) FIREWIRE
SELECT ANALOG IN from THE FRONT PANEL OF ADVC110
Connection : Cable:SX VIDEO OUT to AVDC 1000 VIDEO IN BNC TO BNCSX CH1/CH2 OUT TO ADVC CH1/CH2 IN XLR TO RCA
FCP FIREWIRE TO ADVC FIREWIRE 6PIN TO 6 PIN FIREWIREFCP FIREWIRE TO EXTERNAL HDD F 800 FIREWIREFCP HEADPHONE TO SPEAKER Mic lead Male XLRI am not writing the obvious like connecting mouse power chord etcWe are trying to work out ways to remote ADVC 110
_Go back to INDEX_
BETASX
Ch1Ch2out
FCP
SPEAKER
ADVC1000
EXTHDD

FCP CONNECTION USING DV CAMERA OR J30
Mic Lead with Male XLR
FIRE WIRE
FIREWIRE
FIREWIRE
_Go back to INDEX_
DVCAMERAORJ30
FCP
SPEAKER
EXTHDD


THIS MANUAL IS ASSUMING YOUR FCP IS SET UPPROPERLY AND YOU KNOW NOTHING ABOUT FCPAnd gradually going back to the tough stuff
Terms
HDD = Hard Disk DrivePROJECT = STORY YOU ARE DOING INCLUDING CAPTURED RUSHES ANDTIMELINEMEDIA = captured rushes, graphics plate etcAPPLE Symbol on the Keyboard on the side of the Spacebar is very important, andmany FCP commands are done by pressing apple (APPLE + a number or Alphabet on thekeyboard )
Connect a windows mouse to MAC. This gives you the option to do a right Click .Otherwise you will be constantly CRTL + Clicking , which is a Pain.
CREATING EDITING FOLDERS
To Create a new Folder Right Click and do as you would normally do inWindow.FCP CLOCK in Mac HDDFCP EXPORT in Mac HDD
FCP PROJECT IN EXTERNAL HDDFCP MEDIA IN EXTERNAL HDD
_Go back to INDEX_

Basic Set up for Beginners
FCP SETTINGS
All setting are default except where shown with snapshot
EASY SETUP
CLICK FINAL CUT PRO on the top Task Bar
CLICK EASY SETUP
CLICK select SHOW ALL
CLICK In the Drop Down Menu saying CUSTOM SETUP
SELECT DV-PAL Anamorphic (BBC format for 16:9 video) from the Scroll listFor 4:3 Video Select DV-PAL
CLICK Setup in the Easy SETUP Box
ONCE YOU HAVE DONE THESE SETTINGS YOU ARE READY TO WORKON YOUR PROJECT_Go back to INDEX_

USER PREFERNCES
CLICK FINAL CUT PRO on the top Task BarCLICK User Preference
NOTE :USER PREFERENCE IS A PART OF SETTING UPFCP BETTER DO NOT TOUCH IT UNLESS YOUKNOW WHAT YOU ARE DOING
_Go back to INDEX_

VERY IMPORTANT:SETTING SCRATCH DISK
Assuming your FCP is set properly, the first thing to do on Launching FCP is to set upSCRATCH DISK.
This means telling the program which External HDD or its Partition the PROJECT isgoing to be SAVED. This is very important as if by mistake you save your Media(Rushes) in the Computer’s HDD your will end up a Clogged Hard Disk , and theComputer will Crash
TO SET SCRATCH DISK
CLICK FINAL CUT PRO on the top Task BarCLICK System Settings A box will openCLICK SCRATCH DISK
SYSTEM SETTINGS
You can set as many as 4 Scratch disks to dump stuff into
CLICK SETIn the next Box
CLICK the HDD or the Partition of HDD you want to work onCLICK the Folder called FCP MEDIACLICK CHOOSE (on the bottom right hand of the box)
Set the Waveform Cache, Thumbnail, Autosave Vault by CLICKING SETSET THE AUTO SAVE VAULT IN THE MAC HDD
_Go back to INDEX_

Ideally you should SET the Project in a EXTERNAL HDD Partition and SET theWaveform, Thumbnail, in the same Partition of the external disk
Set THE Autosave Vault in the Mac Hard disk (if your project gets corrupted then youcan Restore it from the autosave vault)
It makes sense to also set the other three scratch disks up to go to the same hard drive.This means if you run out of space on the first partition of the hard drive you can tell thecomputer to use the next partition, and so on. If you forget to do this it can be done laterwhen you realised you’ve run out of space but for the sake of being organised it makessense to do it at the start.
WHEN SCRATCH DISK IS SET CLICK OK IN THE SYSTEM SETTINGWINDOW
AUDIO/VIDEO SETTINGS
THERE IS NO NEED TO CHANGE AUDIO/VIDEO SETTINGS UNLESS FORSPECIFIC PURPOSE
_Go back to INDEX_

START FCP & START NEW PROJECT (i.e begin editing your story)
Click FCP Icon at bottom of screen to open application
NAME & SAVE PROJECT
CLICK FILECLICK SAVE PROJECT AS
IN THE BOX THAT APPEARS
Name Project in the SAVE AS SectionSELECT the external HDD or the Partition you selected in your Scratch DiskSELECT the Folder named FCP PROJECTS (assuming you FCP is set up properly ,if notrefer to setting FCP part of the Manual)
CLICK SAVE
Your FCP is set to Autosave every 10 minutes , but it is a GOOD Practise to SAVE afterevery Section you EDIT in the TIMELINE. (APPLE + S)
THE FCP EDIT INTERFACE (Opens by Default on launching FCP)
If you look at the interface there are 4 large windows and two sidebar.These are:
BROWSER window = Where all the RUSHES BINS, PROJECT BINS, GRAPHICS etcexist. It is your Project window from where you control the Project
VIEWER OR SLUG window = equivalent to Player Monitor of SX
CANVAS window = Equivalent to Recorder Monitor of SX
TIMELINE window = Where you EDIT SHOTS
On the right side of the timeline there are 2 long vertical boxes
The top one is TOOL PALLETTE and the bottom one is AUDIO MONITOR
_Go back to INDEX_

IMP: What we usually call the cut story is unfortunately called the sequence in FCP.So you’ll have to get used to calling the final product on the Timeline after you’vecompleted the Voice over, pictures and natural sound etc the Sequence not the cutstory.What we used to know as sequence is called a section in FCP.
So that’s the language we will use in this guide from now on.
CREATING AND ORGANISING BINSBINS
Bins are the folders you will be putting your material into.You need to make ‘BINS’ that name every section (sequence!) of the story. i.e a bin forsection one; a bin for the first interviewee, a bin for the next section; a bin for the PTCDumping stuff into the computer (digitising) is the most time consuming aspect ofnonlinear editing. So don’t just dump in every thing you’ve filmed. Choose the best PTCor best interview clip etc before you digitise. And then create a bin
Note: In FCP if you CLICK icon it opens it and and if youCLICKtext it gives you theoption to rename it.
CREATING AND NAMING BINS.
Note: When you create a new project the Browser Box opens with a file already in itcalled ‘Sequence 1’. This will become the first version of your cut story.
In the BROWSER BOX
RIGHT CLICKThen In the Drop down BoxCLICK New BinName it
You need to create and organise a clock and an edit bin. Then you’ll create as manyrushes bins as you think you’ll need.
So,Create CLOCK BIN and IMPORT a CLOCK
_Go back to INDEX_

IMPORT CLOCK
Double Click the CLOCK BIN to open itCLICK FILECLICK IMPORT and Select FilesCLICK Macintosh HDCLICK FCP CLOCK
SELECT the Clock you want
CLICK CHOOSEThen create
EDIT BIN and drag the folder SEQUENCE1 in there.
This becomes the folder where all the Sequences (different versions if you are doing it) aresaved.
Rename the sequence e.g.- CUT STORY
Create BINS FOR EVERY SECTION OF YOUR STORY and name it
e.g. Project name is Nepal uprising
Sections : 1. VICTIMS FAMILY 2. Mother’s sync 3. Violence on Street 4. PTC 5. Rally
6. Sync Leader 7. Kathmandu GVs
RENAME SEQUENCE 1 i.e naming you cut story/timelinedouble click on ‘sequence 1’ in browser windowType in new name when highlighted blue
AUDIOThe biggest enemy in non linear domain is AUDIO. Digital audio is less tolerant to Level peaks than Analog Audio. It meansthat Audio in Non Linear editing is prone to distortion.
The best way to tackle this is take care while inputting. Ideally yourcameraman should record Audio peaking below -18dB._Go back to INDEX_

You should ideally Log&Capture using a Deck (Player) which had Audiocontrol (Feeders) so that you can control the INPUT level.
This is possible in Beta SX but not in J30 or DV cameras.
Another caution to be kept in mind is Timecode BreaksFCP doesn’t like TC breaks particularily during Batch Capture and ClipCapture.If you checked your PTC etc in field it is useful to Press the Review Buttonin the Camera and queue the Tape to the last frame of the recordedfootage
LOG & CAPTURE
To go to LOG&CAPTURE window
CLICK FILECLICK Log&Captureor PRESS APPLE + 8
_Go back to INDEX_

Setting to be checked
CAPTURE SETTING:
Device Control – FireWire PALCapture/Input -- DV PAL 48 KHz Anamorphic
CLICK The SCRATCH DISK tab and you can select the HDD where youwant your rushes to be stored.
NOTE: That’s why Setting the other partitions of your external HDD is important sothat you can easily go to other partition when your main Partition of External HDD isnearly full(Always allow headroom in your HDD)
_Go back to INDEX_

CLIP SETTINGS
Tick Video and Audio
Select the number of Audio Channels you want to digitise
FCP allows 2 Audio at 48KHz and 4 Audio at 32 KHzFor now stick to 2 Audio
CLICK Preview (this helps you to hear the sound while digitising)Informations for logging
Log Bin : The BIN in Browser window where the rushes are savedIn the Browser where you have created the Bins for different sections of the story
Right Click on the relevant BINIn the Drop down box Click SET LOGGING BIN
Reel : Tape number the reel number changes automatically when youeject Tape from player and put a new one. It’s a good practise tomark the reel number on the Tape to avoid confusion specially bigprojects.
_Go back to INDEX_

The fields name description are important Fill them thoroughly on bigger projects and fillthem so that you understand on short packages edited in deadline
IMP: Never have Timecode breaks on the shoot tape this will mean you can BatchCapture and your life will be a lot more easier.
THERE ARE THREE WAYS OF CAPTURING
1.CLIP In this mode you log an individual Clip(Shot or and collection of Shots) , fill all the description fields and Capture it.you don’t need it unless you want to make the editing processPainfully slow
OR you have forgotten to Capture a CLIP which is a badPractise
2. NOW In this Mode you Crash Capture your queued rushes on Player. Itis similar to Crash edit in tape2tape editing
3. BATCH In this Mode you Log all the rushes in Different BINS youCreated and Capture them all at once.
Before we Proceed to Log and digitise in different ways let us learn some TapeTransport using Keyboard Commands. These are not only relevant duringLOG&CAPTURE but also during editing in the Timeline
J -- Rewind (Speed increases on every Push, upto 4 pushed allowed)K -- PauseL -- Forward (Speed increases on every Push, upto 4 pushed allowed)Spacebar -- Play/ Stop on alternate pushI -- Mark In PointO -- Mark Out Point
_Go back to INDEX_

LOG CLIP
In The Browser Window
RIGHT CLICK ON THE RELEVANT BIN WHERE CAPUTED MEDIA IS TOGO
CLICK SET LOGGING BIN
The Selected BIN will be displayed in the LOG BIN section of LOG&CAPTUREWindow
Play your rushes using the Keyboard Commands(J/K/L/Spacebar) mentioned above
Mark IN Point (Press I)Mark Outpoint (PressO)
CLICK Log Clip
Fill in a Name for the CLIP (e.g.—Mob on Street, Kathmandu GVs etc)
You can fill in description and other details specially for Large Projects (10 minute Film)
IMP : YOU SHOULD LOG A SECTION OF THE STORY as a single CLIP, ThisWAY YOU WILL HAVE SAY 10 SHOTS OF A PARTICULAR SECTION TO EDITIN A SINGLE CLIP, Rather than LOGGING INDIVIDUAL SHOTS
You should be really careful in identifying relevant BINS for each Section Otherwiseyou will create a mess of rushes digitised all over the BINS in the Browser Window andit will make life very difficult during editing.You should Assign a Reel no to every tape and Physically Mark it on the tape,otherwise when the computer asks for a particular Reel during Batch Digitise and youput a different tape, you will end up digitising rushes you dont want.
_Go back to INDEX_

CAPTURING
CLIP:Put In and Out to individual CLIPS and CLICK CLIP to CAPTURE it
Now :You don’t need to LOG tape, Just queue your rushes and CLICK NOW. It Will digitise until you stopTO STOP DIGITISING PRESS ESC key on the Keyboard
BATCH :After you have logged all tapes ,in the respective BINS with PROPERREEL No for every Tape .
1. You can Select all the LOGGED rushes and CLICK BATCH to Capture all theCLIPS in the Present Logging BIN
2. You Can Go to the Other Logged BINS , Select all Logged Rushes andCLICK FILECLICK BATCH
OR Right Click anywhere on the selected logged clipsAnd from the drop down box select Batch Capture
Note: For multiple selection
Build a BOX around the items to be selected, everything inside it will be selectedORClick the first ItemPress and Hold Down APPLE and CLICK the individual itemsORClick the first ItemPress and Hold Down SHIFT and CLICK the Last ItemEvery Item between First And Last Item will be selected
IN THIS CASE THE ITEMS ARE TH LOGGED CLIPS
Confirm in the Box that opens upA monitor will Open up and FCP will rewingd and Fast Forward the Tape and STARTCapturingAT ANY STAGE TO STOP BATCH CAPTURE PRESS ESC ON THE KEYBOARD
Once You have captured all the pictures the editing processbegins_Go back to INDEX_

_Go back to INDEX_

UNDERSTANDING TIMELINE
Timeline is the place where all VIDEO/ AUDIO(voice over , naturalsound)/EFFECTS edited. A series of edits cobine to become your CUT STORY
On the left compartments there are Green colour icons Speaker sign for Audio and Reelsign for video.
THESE ARE Audio and Video monitors Clicking it deactivate them and you cannot seeor hear the specific track. Clicking it again turns it ON
The Timeline in your FCP is set to have one Video and two audio tracksYou can add VIDEO AND AUDIO TRACKS if needed
To add VIDEO track:
RIGHT CLICK On the top most VIDEO TRACK where the REEL SIGN EXISTS
On the Drop down Menu CLICK ADD TRACKTo DELETE VIDEO track
Right CLICK on the same Space mentioned above andCLICK DELETE TRACK
You can ADD or DELETE AUDIO TRACKS by RIGHT CLICKING on the Lower mostAUDIO TRACKFollowing same procedure as explained for Video Tracks_Go back to INDEX_

To move FORWARD or move BACKWARD in TimelinePRESS ALT + or ALT –
To ZOOM + or ZOOM – in TimelinePRESS OPTION + or OPTION –
Click shift ZTo fit the entire Timeline to the Window (Very Important for big
stories) Player/RecorderTO Lock and Unlock Audio and Video Tracks
Lock / Unlock
Audio PRESS F5 followed by the track numberVideo PRESS F4 followed by the track number
In the timeline the two rows with V1s and A1s written are very usefulImagine the Left V1,A1,A2 represent player audios and videoImagine the Right V1,A1,A2 represent recorder audios and video
So while editing if you want, say, to put CH1 audio of Player to CH2 of Recorder Dragand drop A1 on player side to A2 on recorder side as shown in the diagramOn the top left of Timeline there is a small timecode box that shows thetime code of the Timeline where the Cursor is queued._Go back to INDEX_
click tolock andunlockchannels

The Keyboard Shortcut beside
Is Previous Edit
Is Next Edit
This is useful to jump through boundaries of every edit and queue cursor whileediting without balck frames
Snapping (two lights green Icon)This icon is on the top left side of the TimelineKEYBOARD SHORTCUT N (ON/OFF on alternate CLICKS)This tool when switched on keeps lipsync between Audio and Video always keepit on except when you are doing specific job like clearing an audio track etc
• Linked Selection (Dumb bell shaped green Icon)This is responsible for keeping sync between audio and videoThis icon is also found beside Snapping . It is called Linked Selection
KEYBOARD SHORTCUT SHIFT L (ON/OFF on alternate Clicks)
This Tool highlights all linked audio / videoKeep it ON TILL you know a bit more about Timeline
_Go back to INDEX_

BASIC EDITING
THE BEST WAY TO KNOW TIMELINE OPERATION IS TO LEARN TO EDITINTERVIEWS
In any Interview you will have the following rushes BIN
QS BINANS BIN2SHOT BIN with guest’s face2SHOT BIN with Corrospondent’s face
EDITING
Snapping and Linked Selection to be Switched ON
Snapping NLinked Selection Shift L
STEP1 PUT a CLOCK on Timeline
Double Click the CLOCK BIN to Open itDouble Click the 16:9 Clock It will Load on the SLUG:Viewer
thenClick the TIMELINE
Go to the top by Pressing or
Depending on the position of the Cursor on the Timeline
Put In Point PRESS I
Press F10 (Overwrite Edit)The CLOCK will be put on timeline with TONES on A1 and A2 with the Cursorat the end of the CLOCK
Press I To put an In point ON THE TIMELINE
_Go back to INDEX_

Use J/K/L/ SpaceBar Reminder: J RewindTo navigate through K PauseSlug:Viewer L Forward
Spacebar Paly/Pause I Mark in
O Mark OUTAltI Delete InAltO Delete OUTShiftI Go to INShift O Go to OUTSHIFT Z Fits entire timeline
into timeline window 1 Frame forward 1 Frame backward
Page Go to TOP of ClipOr Timeline
Page Go to END of Clip Or Timeline
As BBC interviews always starts with Answers so now is the time to put ANS1 onTimelineOpen Answer BIN by double clicking it.
It Should LookANS1ANS2ANS3ANS4ANS5
SAY: The Cameraman has recorded the questions on CH2 or A2(ofCaptured rushes)
and the Answers on CH1 or A1 (of captured rushes)
Double Click ANS 1 to Load it on the Slug:Viewer
Mark your IN Point And OUT Point for ANS1
Since the ANS 1’s main voice is on CH1
LOCK A2 by Clicking on the Lock ICON on A2 in TimelinePress F10
_Go back to INDEX_

ANS1 will be edited on Timeline with Cursor on the last Frame(Since you Locked A2 there will be no Audio on A2 Timeline)
Mark In Point on Timeline PRESS I
To Put Q2
Open by double Clicking Qs BIN
It will look likeQ1Q2Q3Q4Q5
Double Click Q2 to load on the Slug Viewer
Mark In &Out points
Lock A1 (since good Audio for corrospondent is on Ch2/ A2)
PRESS F10
The Answer with V1 and A2 will be placed on Timeline(Since A1 is locked)The Cursor as usual will be on the last frame of the Q2 on the Timeline
Mark in on TIMELINE PRESS I
Put all the Qand A
If you want to view your interview in the middle of your editOn the TIMELINE Click on the Clock and Press Play (Spacebar)
Say you do not want watch any more and carry on editing
Use Previous and Next edit keys
Till you go to the end shot of the Timeline and Mark IN and then carry onediting.
_Go back to INDEX_

After you edited all Questions and Answers
Overlaying (Audio/video SPLIT)
Switch OFF Snapping PRESS NSwitch OFF Linked Selection PRESS Shift L
Lock A1 and A2
Click to bring the Cursor near the edge of the Clip you want toOverlay.
e.g.- At the end of an answer you want to carry on with the Videoof the Guest and have the Audio of the Corrospondentunderneath.
LOCK A1 and A2 make sure V1 is unlocked
Click near the end of the guest’s answer
Press R --- this activates the Ripple Edit
With your mouse drag the edge of the guest video over the editedCorrospondents video
A Small meter comes up telling you the Duration of theOverlay.(1:15 maens 1sec 15 frames)
To Undo PRESS APPLE + ZAfter you are happy PRESS Ato return to Normal editing Mode
_Go back to INDEX_

EDITING (Cut Story)
To edit shots on the Timeline
Ther are two steps1. ROUGH EDIT2. FINE TUNING
ROUGH EDIT
In Rough edit you edit the shots in the Timeline and cut a section (sequence).
LOAD the Section you want to edit in the Slug:Viewer
Play the Clip (using JKL Spacebar)
Put MARKERS on the shots you plan to use PRESS M
After you have marked all the good shots
Assuming you have put a CLOCK and put an IN Point in the Timeline.
Click on the Marker you want to use as the first shot.
Set IN and OUT Point
LOCK A1 if you want edit Video and Natural Sound
Edit V1 and A2 in the Timeline by PRESSING F10
Set In point in the Timeline and Carry on editing the rest of the shots.
_Go back to INDEX_

Another way to edit is after putting IN Point in the Timeline and IN & OUT in theSlug:ViewerDrag the Shot from the Slug:Viewer to the CanvasThe options shown below will be activated.Drop your shot to the relevant box to perform desired task.
The Edit Overlay
The Edit Overlayappears when youdrag a clip from theBrowser or Viewer tothe Canvas. Positionyour clip over thedesired type of editto edit it into yoursequence.
Types of Edits
1. Insert-inserts the clip, moves time forward in the sequence2. Overwrite-overwrites other media, doesn't change total time of the sequence3. Replace- form of overwrite edit which replaces the current frame in Canvas with the
frame in Viewer, with additional frames of video on each side to fit available space4. Superimpose- lays on top of media, used to overlay titles and other text onto video5. Fit-to-Fill- inserts clip & speeds or slows the material to fill the available space.6. With transition-places the default transition at beginning of clip when inserted
_Go back to INDEX_

FINETUNING
PUTTING AUDIO TRANSITION (FADE IN, FADE OUT, CROSSFADE)
After cutting the sequence in the Timeline
Smoothening transition between different Natural Sounds
LOCK V1, A1
In A2 andA3 (If you used a third Audio Track to put the Natural Sound)
Click every boundary
PRESS OPTION +APPLE + T
This puts a 1 second dissolve between the two Audio clips edited in the TIMELINE.
This is useful as it smoothens the transition between the different Natural Sounds youhave put in. This is a good practice, unless you have particular reason when you want toCut in the Natural Sound (e.g.- BELL SOUND)
To DELETE AUDIO TRANSITION/ VIDEO DISSOLVE
For Deleting both Audio and Video dissolves CLICK to highlight the transition
PRESS DELETE
TO CHANGE TRANSITION PARAMETERS
RIGHT CLICK the transition
From the Drop down box
CLICK DURATION
In the Box type number
_Go back to INDEX_

PRESS ENTER
And again PRESS ENTER
For e.g. – If you type 215 then you have put in a dissolve of 2seconds and 15 frames
To put dissolve in frames e.g. – 5 frames
Type 5 and then Press ENTER twice
There are three types of dissolves
START AT CUT
CENTERED
END AT CUT
They can be selected by right CLICKING the transition and Selecting form the dropdown box
If you have two Natural Sounds on two different Audio tracks e.g.- A1 and A3 thendissolve them to Blank individually
The VIDEO DISSOLVE works on same principal and commands as audio
Just Lock the Audio tracks otherwise you will end up with dissolved Audio tracks alongwith the dissolve in Video.
COMMANDS FOR DISSOLVE
OPTION + APPLE + T
Or
CLICK EFFECTS
CLICK Video Transitions
You can also put dissolve while editing the clip in the Timeline
PRESS SHIFT + F10 for Overwrite editing with dissolve
_Go back to INDEX_

And
SHIFT + F9 for Insert editing with dissolve
MULTIPLE SELECTIONS
You can select multiple clips by
PRESS APPLE + CLICK ALL THE CLIPS you want to Select
Or
LASSO - Build a Box outside the Clips you want to select and all the Clips insidethe box will be Selected.
OR
Click the first Clip – PRESS and HOLD DOWN SHIFT and click the last clip
Everything between the first and the last CLIP will be selected
COPY/CUT/PASTE/ DELETE
You can COPY/CUT/PASTE/ DELETE Clips as you do it normally in worddocumentsHIGHLIGHT SINGLE OF MULTIPLE CLIP/S
COPY APPLE + CCUT APPLE + X
CLICK WHERE YOU WANT THE CLIP TO BE PASTE
PASTE APPLE + V
Note : you can also CUT, COPY, PASTE BY RIGHT CLICKING ANDCHOOSING FROM DROP DOWN BOX_Go back to INDEX_

DELETEHIGHLIGHT SINGLE OF MULTIPLE CLIP/S
DELETE IF YOU DELETE A CLIP IN THE TIMELINE BETWEEN TWO CLIPSTHEN THERE IS HOLE LEFT BEHIND (You can also cut by pressing X
SHIFT + DELETEIf YOU DO SHIFT+DELETE THE THE CLIP IS DELETED AND THEGAP IS CLOSED.(Or you can also SHIFT+X)
MOVING EDITED CLIPS IN THE TIMELINE
Edited clips in the timeline can be moved forward or backward simply bydragging (this performs overwrite edit)ORSelect a clip or a series if clips
Type a value e.g. 50 or -50Press enterWhen you type the number a box appears in the timeline called MOVE the clip will be moved forward or backward by 50 frames
You can also type a TC to move the selected clip/clips to the TC on theTimeline
NOTE: In FCP you don’t need to put the colons in the TimecodeSay you want to type 10:20:15:10, you can simply type 10201510FCP will figure out the rest
RESIZING CLIPSTake your cursor to the edge of the clip the black arrow changes to ResizePointer tool <II>Drag the clip the duration of the clip is increased right in the Timeline. Boxappears on the Timeline saying the Changed Length of the clip and the newduration of the Clip
_Go back to INDEX_

CREATING SUBCLIPS
Sub clip is a function to break large clip into smaller clips for convenience of editing
SUB Clip has a master/slave relationship with the MASTER CLIP from where it iscreated.If you delete the sub clip nothing happens to the Master Clip
To create sub clip load the original clip in the viewer and put In and Out
CLICK MODIFY MAKE SUBCLIP
ORPRESS APPLE +U
MATCH FRAME
Queue your Play head to the position in the timeline which you want Match Frame to theMaster clip in the BINPut an IN point in the position of Play head in the Timeline
CLICK ViewMatch FrameSource File
OrPRESS OPT+APPLE+FFCP match the frame of the clip in the Timeline with the Frame of theMaster CLIP in the BINLoads the Master Clip in the Viewer and Places the Play head therePut an In Point in the position of the Play head in the viewer
SNAPPINGPress N TO ACTIVATE / DEACTIVATE SNAPPINGLocated at the top right hand corner of the Timeline
• Green when ON and Grey when OFFTHE SNAPPING IS TRIGGERED BYIn & out PointsPlay headClip boundariesMarkersKey frames_Go back to INDEX_

Very Improtant tool you have to keep on switching it ON and OFF whileEditing . Useful during moving Clip/s in the Timeline
LINKING
FCP automatically detects and keeps a tab on the Sync relationships betweenAudio and Video
The relationship is called LINKINGWhen the Video and Audio/s of a Clip in the TIMELINE goes out of sync(e.g.—Lip Sync error) FCP indicates the duration of out of Sync in small dialog box both of Videoand Audio of the particular Clip in the Timeline
FCP does not indicate Out of Sync Duration if the Video and the Audio/ s donot overlap each other in the TimelineThere is a LINK SELECTION Button on the Top Right hand Side of theTimelineGreen when ONGrey when OFFSHIFT + L (ON/ OFF Alternately)
Keep the Linking ON when you put the shots in the Timeline, but need toTurn OFF during finer edits e.g.—Audio Overlap
To Switch OFF
Press SHIFT + L
Rather than pressing Shift + L continuouslyWhen doing selection or using tools like trim tools, Blade, etcPress OPTION and hold down then use the tool, this disables the LINKSelection temporarilyHold down OPTION while you select a clip the link selection is temporarilyswitched on/off depending on the selection in the timeline
_Go back to INDEX_
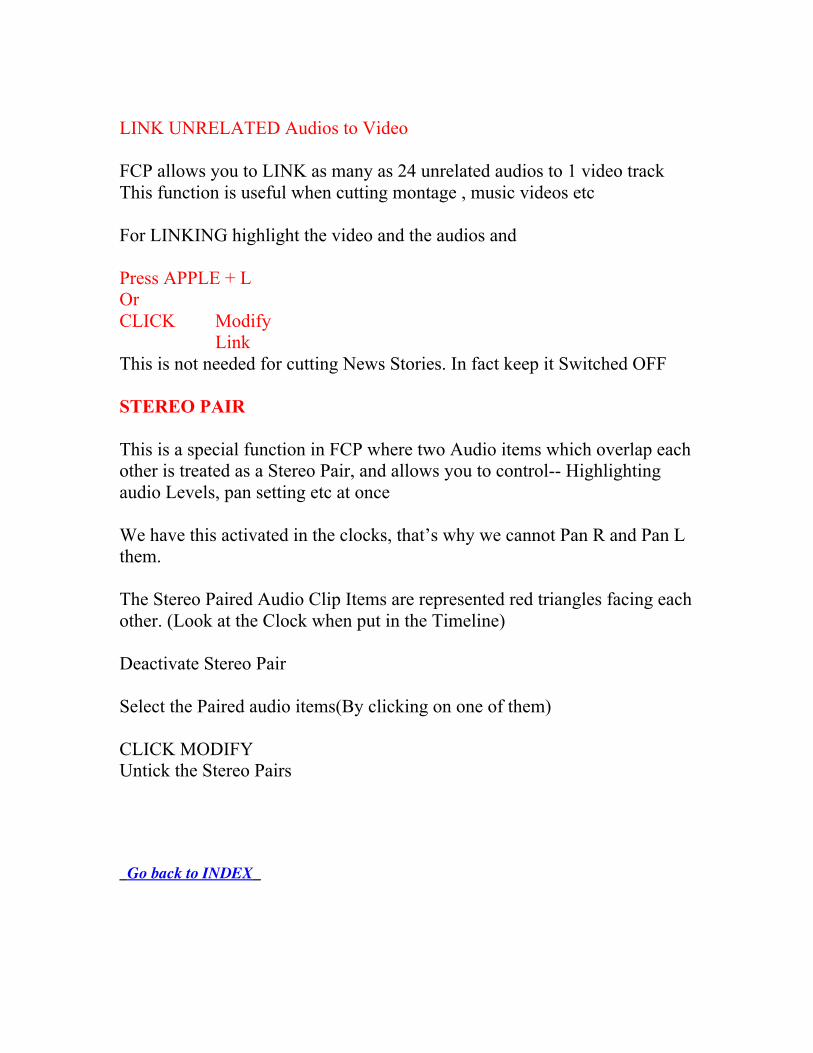
LINK UNRELATED Audios to Video
FCP allows you to LINK as many as 24 unrelated audios to 1 video trackThis function is useful when cutting montage , music videos etc
For LINKING highlight the video and the audios and
Press APPLE + LOrCLICK Modify
LinkThis is not needed for cutting News Stories. In fact keep it Switched OFF
STEREO PAIR
This is a special function in FCP where two Audio items which overlap eachother is treated as a Stereo Pair, and allows you to control-- Highlightingaudio Levels, pan setting etc at once
We have this activated in the clocks, that’s why we cannot Pan R and Pan Lthem.
The Stereo Paired Audio Clip Items are represented red triangles facing eachother. (Look at the Clock when put in the Timeline)
Deactivate Stereo Pair
Select the Paired audio items(By clicking on one of them)
CLICK MODIFYUntick the Stereo Pairs
_Go back to INDEX_

FINDING GAPS IN THE TIMELINE
GAPS are of two kinds 1. TRACK GAP (Where there is hole in one track) 2. GAP (Where there is hole in all the tracks in the
same place)Next GAP SHIFT + GPrevious GAP OPTION + GCLOSE GAP CRTL + G
FIXING SYNC ERROR (e.g.- LIP SYNC)
If by any chance you lose Sync there are two ways to sync up the Audiosand the video
1. MOVE CLIP ITEM INTO SYNC
Right click the out of sync indicator on the clipFrom the drop down box select MOVE INTO SYNCORChange the mathematical sign to oppositee.g.—if your clip says 4.12 change it to (- 4.12) and vice versa
Choose MOVE OTHERS INTO SYNC to sync up all the clip items in thetimeline at once.
NOTE: You can only move a clip item into sync if there is room in thetrack. If there is a clip in the way then FCP will move till as much as itcan and then there will be warning message – “Unable to put item in sync.Another item is the way”.
_Go back to INDEX_

2. SLIP A CLIP ITEM INTO SYNC
Right click the out of sync indicator on the clipFrom the drop down box select SLIP INTO SYNC
Choose SLIP OTHERS INTO SYNC to sync up all the clip items in thetimeline at once.
The difference between MOVE and SLIP is
In Move the Clip item is physically moved to correct the out of syncandin SLIP the clip item is does not move in the timeline just the IN and OUTare changed to correct the out of sync
MARK IN SYNC
ModifyMark in sync
Option is used to deliberately create sync error and registering it as newsync. Not necessary for us , used special effects. Not needed on NewsStories
_Go back to INDEX_

RUBBER BANDING
Your FCP is set to show waveform view Audio Tracks
Dissolving takes care of most of the Audio transitions
But to Raise or Lower the Levels of Audio or do specific Audio edits we use
Rubber banding(SAME AS COOL EDIT PRO)
To activate Rubber band CLICK on the icon on theLeft hand side ofLower task bar of FCP
The rubber band will be activated (PINK LINE) on the Audio Tracks
To ADD key frames
PRESS OPTION + Click on the place of the Audio track where you want do toAudio Edit
TO DELETE key frame Drag the Keyframe outside the boundary of the AudioTrack
_Go back to INDEX_

BLADE TOOL
This tool is used to CUT individual Audio and Video Clips from Timeline.
This is useful during editing specially in cut down versions.
TO Activated BLADE TOOL
QUEUE the cursor to the place in theTimeline where you want to cut the Video
DON’T NEED TO BOTHER ABOUT LOCKING OR UNLOCKING TRACKS WHILEBLADING
PRESS B Activates the Blade Tool and you can see a blade instead of the pointer inthe Timeline.
CLICK on the place and the video /audio s will be snapped from the rest of the Clip.
Once you have Bladed the Clip
PRESS A on the keyboard to go back to the arrow tool(normal Black arrow
Note: If you don’t then the Blade will remain active and snap wherever you click onthe timeline
Click to highlight the part of the snapped clip you want to delete
And then
Press DELETE.
or
PRESS Shift + DELETE as required
Press BB
This function Blades everything vertically in the timeline together
_Go back to INDEX_

ARCING
Converting 4:3 to 16:9
When you put a 4:3 clip in a 16:9 Timeline FCP automatically recognises the changein the aspect ratio of the picture and compensates for it.
Edit your 4:3 clip in your 16:9 timeline
Click on the timeline over the 4:3 clip you put in
DOUBLE Click on the Canvas window to load the clip in the Viewer window
Click on the Motion tab on the top of the Viewer
The motion window will open
Click Distort (the arrow on the left hand side of DISTORT )_Go back to INDEX_

You will see that FCP has automatically changed the aspect ratio to 33.33 (if for somereason it has not done it, then type 33.33 in the aspect ratio box)
And change the scale to 133.33
The picture will blow up and become full screen
But there will be issues with head room( e.g.- the head of a man getting chopped afterarcing)_Go back to INDEX_

TO compensate for thatClick the Image + Wireframe option in the Canvas
Click on the middle of the wireframe and drag the picture up and downTo adjust it(Reframe)
_Go back to INDEX_

To converted 16:9 to 4:3 follow the procedure mentioned above
Load the 16:9 clip in the timeline
FCP automatically changes to -33.33Change the Scale to 133.33And reframe the clip
Parameters to keep in mind during aspect ratio conversion
4:3 to 16:9
IN Motion tab aspect ratio = 33.33 (FCP automatically changes it. If it doesn’t type 33.33)
Scale = change to 133.33
16:9 to 4:3
IN Motion tab aspect ratio = -33.33 (FCP automatically changes it. If it doesn’ttype -33.33)
Scale = change to 133.33
_Go back to INDEX_

TRIMMINGADDING TRANSITION
SPLIT EDITMULTI CLIP EDITINGAUDIO SEPARATE MANUAL
SEQUENCE TO SEQUENCE EDITING
Methods for edit clip from one sequence to another
COPY/PASTE3POINT EDITING
NOTE: Editing clips between sequence of different image dimensions,aspect ratio, frame rates creates the issue of Adjusting MOTIONPARAMETERS (e.g.—ARCING ETC)
COPY/ PASTE
neSTING


SHORTCUTSUse J/K/L/ SpaceBar Reminder: J RewindTo navigate through K PauseSlug:Viewer L Forward
Spacebar Paly/Pause I Mark in
O Mark OUTAltI Delete InAltO Delete OUTShiftI Go to INShift O Go to OUTSHIFT Z Fits entire timeline
into timeline window
X MARK CLIPWHEREPLAYHEAD ISLOCATED
AltX Dlelte In &Out
1 Frame forward 1 Frame backward
Page Go to TOP of ClipOr Timeline
Page Go to END of Clip Or Timeline
PAGE VIEW SHORTCUTS
Apple 1 VIEWER SCREEN
Apple 2 CANVAS SCREEN
Apple 3 TIMELINE
Apple 4 BROWSER
Apple 5 EFFECTS TAB
Apple 6 FAVOURITES BIN

Apple H (Hide Final Cut Pro)
Apple Q (Quits a program)
Apple I (information – ie. Space available on media drives ) – opens filefor importingApple W (Closes a window)
Apple Z Undo action
Shift Apple Z Redo action
Apple O Open file
Apple Shift N New Project
Apple N New Sequence
Control B New Bin
Apple S Save
Apple A Select All
Option Q User Preferences
Control Q Easy Setup
Ctrl U (return to standard fcp layout)
ALT + EXPANDS THE TIMELINE
ALT - REDUCES THE TIMELINE
Apple = Zoom In
Apple - Zoom Out
Alt D (duplicate i.e. sequence)
Right click on project window - increase project text If no pc mouse then Control click – opens hidden menu within Projectwindow – text size (increase or decrease) is one ofthe options available within the menu

click instead of right click - select text size – see above
SHIFT Z brings entire timeline into the timeline window
Home go to beginning of timeline
End go to end of timeline
EDITING SHORTCUTS
Apple 8 (capture window)
I to mark in points
O to mark out points
Control I video in
Control O video out
Option Apple I audio in
Option Apple O audio out
Shift I go to in point
Shift O go to out point
Option I clear in
Option O clear out
X mark clip
Option X clear in and out
Option A select in to out
Shift Delete ripple delete deletes selection and closes the gap
Shift X ripple cut cut and close gap so you can paste
Shift \ play in to out plays from the in point to the out point

\ play around current frame
Option R render all
Control V add edit
V nearest edit takes you to the nearest edit
E extend edit click on the edge of tracks you want toshorten or lengthen and position the playhead where you want them to go to thenpress E
; or ‘up arrow’ go to previous edit
‘ or ‘down arrow’ go to next edit
F Match frame
J reverse play J repeatedly – reverse play faster
K stop
L play K repeatedly – play faster speeds
J + K reverse play low motion
L + K play slow motion
Forward arrow forward one frame
Reverse arrow go back one frame
Shift + forward arrow go forward 1 second
Shift + reverse arrow go back 1 second
Apple J speed changes allows to slow/speed up material
Control (or) audio +/- 3 db quickly trims audio levels up/down
N snapping button turns snapping on or off
SHIFT L linked selection highlights all unlocked tracks

Apple 9 item properties displays all the properties for the materialfrom pixel size to aspect ect.
Apple T add default video transition
Option Apple T add default audio transition
Drag + Option insert for dragging clips into the timeline
Drag (only) overwrite
Shift G go to next gap
Option G go to previous gap
Control G close gap or right click on a gap
Shift down arrow go to next marker
Control S solo selected item
Option V paste attributes
A Selector Tool
R ROLL adds material from one shot while removing an equalamount from the adjacent shot. Using ROLL does NOT affect theduration or sync of the timeline
RR RIPPLE - adds or subtracts material from one shot but the adjacent shot remains the same, forcing it along the timeline. It will affect
the duration and CAN move things out of sync!
S SLIP - both the in and out points of the selected clip change but the shots either side remain the same. Using SLIP does NOT affectthe duration or sync of the timeline as long as you keep the audioand video linked. With linking turn off this is the best way to re-sync rushes that are out of sync!!
SS SLIDE - the selected clip stays the same but SLIDES up and downthe timeline. It will uncover more of the shot to one side and covermore of the shot to the other as it moves. Things stay in sync.
Option (+Selected Tool) Linked Tracks off/on
U Toggle type of edit

. trim forward one frame
, trim backwards one frame
B BLADE cuts a clip with a left click of the mouse. Its good fortidying up voice track.
P PEN (MARKER)
M Add Marker
APPLE R RENDER ALL
Shift F11 Fit to Fill
Shift C Capture now (use on Capture page)
Esc Stop Capture (use on Capture page)
F10 overwrite editShift F10 OVERWRITE WITH TRANSITION
F9 INSERT editShift F9 INSERT WITH TRANSITION
F11 REPLACESHIFT F11 FIT TO FILL
F12 SUPERIMPOSE
A arrow
T TRACK SELECTION
Click timeline Select/deselect all clips in the timelineAP 3
To move FORWARD or move BACKWARD in TimelinePRESS ALT + or ALT –
_Go back to INDEX _

To ZOOM + or ZOOM – in TimelinePRESS OPTION + or OPTION –
Click shift ZTo fit the entire Timeline to the Window (Very Important for big
stories)
COPY APPLE + CCUT APPLE + XPASTE APPLE + V
_Go back to INDEX _