the albumen salted paper bookalbumen.conservation-us.org/library/monographs/reilly/albumen... ·...
TRANSCRIPT

TheAlbumen &
Salted PaperBook


TheAlbumen &
Salted PaperBook
THE HISTORY AND PRACTICEOF PHOTOGRAPHIC PRINTING
1840 - 1895
James M. Reilly
LIGHTIMPRESSIONS

For Linda, Jennifer and Daniel
Published byLIGHT IMPRESSIONS CORPORATION
Box 3012Rochester, New York 14614
Book and cover design by Connie Shermer
First Printing 19801/2/3/4/5/6/7/8/9/
Copyright ©1980 by James M. Reilly
All rights reserved
Library of Congress Catalog Card Number 80-14340Cloth Binding ISBN 0-87992-020-3Paperbound ISBN 0-87992-014-9
Library of Congress Cataloging in Publication Data
Reilly, James M 1946-The albumen & salted paper book.
(Extended photo media series ; 2)On cover: The history and practice of photographic
printing, 1840-1895.Bibliography: p.1. Photography--Printing processes. 2. Albumen
paper. I. Title. II. Series.TR400. R44 772'.l 80-14340ISBN 0-87992-014-9 (pbk.)

Preface
Silverprinting has been often doomed,but it still survives.
— Henry Peach Robinson &William Abney, Preface to
The Art & Practice ofSilver Printing, 1881
The Albumen and Salted Paper Book is a book about the major photographicprinting processes in use during the years 1840 - 1895, approximately the first half-century of photographic history. These first 50 years of photography established atradition of individual experimentation and craftsmanship in which each photographer(of necessity) participated in the manufacture of the printing materials he or she used.Hardly naive and primitive, the best prints from this era stand as examples of the beautyand subtle tonal perfection that silver photographic prints are capable of, but seldomattain. Yet few people today have any idea of the rich possibilities for contemporarywork offered by the fruits of this long tradition of hand-made photographic papers.One important goal of this book is to convey to contemporary photographers an in-troduction to these traditional methods of silver photographic printing, methods whichrepresent the best that the materials and chemical processes themselves can attain, notwhat is best for manufacturing economy or darkroom convenience.
The albumen print and the salted paper print were not exotic or eccentric processesin their own time, but were the ordinary, all-purpose materials of photographicprinting. The salted paper print dominated photographic practice from 1840 to 1855,and the albumen print did likewise from 1855 to 1895. The albumen print is the secondmost common type of photograph ever made (though perhaps it has already lost thisdistinction to the chromogenic color print); it accounts for approximately 85 % of thetotal number of surviving 19th-century photographic prints.
The form of the book is somewhat unusual, in that it combines full workingdirections for the processes (including quite a few variants of the salted paper print) withextensive historical information about their fabrication and use in the 19th century. Italso contains recommendations for the identification, storage and preservation ofalbumen and salted paper prints, whether they be of historical or contemporary origin.Structuring the book to include more than the working directions for the processesseemed a natural outgrowth of my own interest in the subject, which had always seemedto move by turns from admiring historical photographs and wondering how they weremade, to wanting to produce my own images in the same manner. Therefore, I haveattempted in the book to preserve the resonances between the historical context and the

working directions that made my own practice of the processes so much more reward-ing. In time, I also came to be concerned with the factors affecting the permanence ofprints made by these processes, and with techniques for their preservation. The centralpurpose of the book, however, is to offer a contemporary technical account of themaking of these 19th-century printing papers, and as a consequence, the treatment ofrelated aspects of the subject (such as identification, etc.) must remain somewhat briefand introductory.
The book is designed to serve the needs of two kinds of readers, those who simplyseek technical information on these historical materials, and those who might wish toactually make prints according to these traditional means. At present both kinds ofreaders have nowhere else to look for this kind of information but the original technicalwritings of the 19th and early 20th centuries. Very good general histories ofphotography such as those by Newhall and Gernsheim do exist, but these do notprovide detailed technical information.
For a modern reader confronting the original 19th-century sources, the difficultiesare legion, beginning with the unexpectedly vast extent of the available material. Thereare also problems arising from variations of terminology and units of measurement, aswell as a fairly sizeable amount of contradictory information. Probably the biggestdifficulty of all lies in determining how representative of general historical practice anygiven formula or procedure really is.
To this end one of the main purposes of The Albumen and Salted Paper Book is tocondense and distill the essence from literally hundreds of original 19th-centurywritings into one modern, readable account. I have also tried to provide a modernscientific explanation of some of the underlying chemical phenomena, whenever thisseemed to help clarify either the history or the practice of albumen and salted paperprinting. At the same time I have attempted to convey these technical explanations in assimple and understandable terms as possible.
My greatest hope in writing this book is that more people will experience the kind ofpleasure and fulfillment that I have derived from exploring some of the possibilities ofthese printing papers from photography ' s past. If they do, they will come, as I have, torespect and understand more fully the achievements of the great masters of 19th-century photography.
I wish to acknowledge here the help and support of some of the people who madethis book possible: my wife Linda, who gave the most valuable kind of support; LionelSuntop and the whole Light Impressions organization; Irving Pobboraysky for hisfriendship, help and encouragement; and also my colleagues and friends of the ChicagoAlbumen Works, Joel Snyder, Doug Munson and Gordon Wagner, whose beautifulwork in reprinting original negatives on albumen and salted papers would be greatlyadmired — I am sure — by the original photographers themselves. Also, I am indebtedto David Kolody for permission to describe some of his working methods, to Reese V.Jenkins for his guidance and help, to Grant Romer for his advice and counsel, toVolkmar Wentzel for making available some of his father's manuscripts, to CarolSullivan for her help in manuscript preparation, to Karen Reixach for her editorialwork, and finally to Connie Shermer for her efforts in the design, layout and productionof this book.
James M. ReillyRochester, New YorkJuly 1979

Contents
Chapter One:BASIC PRINCIPLES........................................................................................................... 1
Printing with Silver Salts 1Printing-Out Papers 1
Classification of Printing-Out Papers 2Characteristics of Printing-Out Papers 3Silver Chloride 3The Role of Organic Binders 4
Relating Theory to Practice 5
Chapter Two:WORKING ENVIRONMENT, EQUIPMENT AND MATERIALS..................................7
Work Areas 7The "Wet" Area 7The "Dry" Area, or Printing Room 8
Equipment 9Laboratory Balance 9Measuring and Mixing Containers 9Trays 9Printing Frames 10
Paper 11Binder Materials Used in Printing Papers 12
Albumen 12Gelatin 13Starches 14Resins 14
Chapter Three:SALTED PAPERS............................................................................................................. 15
Photographic Printing Before 1850 15
Plain Salted Paper 16Floating the Paper on the Salting Solution 17

Contrast Control in Salted Papers 20Arrowroot Papers 21
Preparation of Arrowroot Papers 22Coating of Papers with Arrowroot Salting Solution 22
Resume of Processing Steps for Albumen and Salted Papers 23Step 1 Initial Wash 23Step 2 Toning 23Step 3 Wash Before Fixing 24Step 4 Fixing 24Step 5 Wash Before Hypo Clearing Treatment 24Step 6 Treatment with a Hypo Clearing Agent 25Step 7 Final Wash 25Step 8 Drying 25
Chapter Four:ALBUMEN PAPER...........................................................................................................27
The Early History of Albumen Paper 27Invention of the Albumen Printing Process 28
Preparation of the Albumen Solution 34Coating Paper with Albumen 36
Double Coating of Albumen Paper 39Sensitizing Albumen Paper 40Ammonia Fuming 40Printing and Processing Albumen Paper 42Toning Albumen Paper 43Fixation, Washing and Drying of Albumen Paper 44
Chapter Five:ALTERNATIVE AND HYBRID PAPERS.......................................................................47
Resin Papers 50Resin-Arrowroot Paper 50
Matte Albumen Paper 51Preparation of Matte Albumen Paper 52
Chapter Six:SENSITIZATION.............................................................................................................55
Composition of the Sensitizing Solution 56Techniques of Sensitization 57
The Floatation Method of Sensitization 57Brush Sensitization 58Exhaustion of the Silver Solution 59Decolorizing the Silver Solution 61
Preserving Sensitized Paper 62Techniques for Preserving Sensitized Albumen and Salted Papers 63
Ammonia and Other Additives to the Silver Bath 64Reclamation of Silver Wastes 64
Chapter Seven:TONE REPRODUCTION AND PRINT EXPOSURE .....................................................67
Characteristics Required in Negatives for Albumen and Salted Paper Printing 68Effect of Binder Materials on Tone Reproduction 68Using a Gray Scale to Measure Gradation and Contrast 69

Print Exposure 70Effect of the Light Source on Print Contrast 72Exposure Time 73
Some Precautions in Printing 73A Note on Printing Historical Negatives 74
Chapter Eight:TONING.......................................................................................................................... 75
History of Toning Methods 75Heat Toning 75Sulfur Toning 75
Gold Toning 76Theory of Noble Metal Toning 78The Practice of Gold Toning 79
Gold Chloride 79Strength of the Gold Toning Solution 80Gold Toner Formulae 80
Platinum Toning 81History of Platinum Toning 81The Practice of Platinum Toning 81
Chapter Nine:FIXATION AND WASHING.........................................................................................83
Theory of the Fixation Process 83History of Fixation with Thiosulfates 84Chemical Reactions Involved in Fixation 84
The Practice of Fixation 85Fixer Exhaustion 85Color Changes During Fixation 86
Washing of Prints 86General Considerations 86Washing Aids 87Washing Conditions and Apparatus 87Washing Time 88Method for Washing Albumen and Salted Papers 89
Drying the Prints 89Chapter Ten:FINISHING, MOUNTING AND STORAGE .................................................................91
Preparing Prints for Display or Storage 91History of the Finishing and Mounting of Albumen Prints 92
Mounting Adhesives Used in the 19th Century 93Rolling Machines and Burnishers 94
A Contemporary Approach to Finishing, Display, and Storage 95Matting Prints 96Hinging Prints 96
A Conservator's Mounting Method 97Summary of the Mounting Procedure . 97Step 1 Preparing the Starch Paste 97
Step 2 Preparing the Rigid Plexiglas" Support 98Step 3 Applying the Polyester Cloth Support 98

Step 4 Applying the Mounting Sheet 98Step 5 Applying the Print 99Step 6 Removing the Mounted Prints from the Temporary Supports 99
Print Storage 100Temperature and Humidity Control 100
Chapter Eleven:THE QUESTION OF PERMANENCE...........................................................................101
Historical Review 102The Era of Salted Papers 1840-1855 102Introduction of Albumen Paper 1850-1860 103Albumen Prints After 1860 104Albumen Versus Emulsion-Type Printing-Out Papers 105
Highlight Yellowing in Albumen Prints 107Causes of Highlight Yellowing in Albumen Prints 108Assessing the Rate of Yellowing and Fading 109
Generalized Image Fading 110Deterioration Caused by Defective Mounts and Mounting Adhesives 110The Need for Restoration Research 110
Appendix A:SUGGESTIONS FOR FURTHER READING ................................................................113
Surveys of the Technical History of Printing-Out Papers 113Early Writings About Salted Papers 114The Albumen Print 114Matte Salted Papers 115
Appendix B:TITRATION METHOD FOR DETERMINING STRENGTHOF SILVER NITRATE SOLUTIONS..............................................................................117
Equipment 117Chemicals 117Process 117Helpful Hints for the Titration Procedure 120
Appendix B:SOME GUIDELINES FOR THE IDENTIFICATION OF ALBUMENAND SALTED PAPER PRINTS .....................................................................................121
Introduction 121Guidelines 122
I.II.
Is the Print a Silver Photographic Print? 122Does the Print Display the Characteristic Colors of Albumen and
III.Salted Paper Prints? 122
What Are the Surface Characteristics of the Print? 122IV. Can the Image Be Dated From Internal Evidence? 123V. Publications Which May Assist in Process Identification 124
REFERENCES................................................................................................................. 125REFERENCES FOR ILLUSTRATIONS .......................................................................... 131

CHAPTER ONE
Basic PrinciplesThere can be no doubt that for purely practical reasons the use of silverprinting-out papers has greatly diminished in favor of develop-outpapers. Yet printing-out papers will always be valued by those who seekhigher image quality in the sense of fine execution and tonality, becausein these things some kinds of printing-out papers — and I cite thealbumen print as an example — have never been surpassed
—Fritz Wentzel, 1927'
Printing with Silver SaltsThe processes described in this book are all based on the fact that salts of silver are
light-sensitive — that is, they chemically dissociate and form particles of silver metal inthe presence of light energy. Silver salts have provided the basis for most photographicmaterials over the entire course of photographic history. Many other light-sensitivesubstances are known, and many of them — notably iron, platinum and chromiumsalts, as well as recently discovered photosensitive polymers — serve as the foundationfor useful photographic printing materials, but all these systems lack the versatility ofsilver salts. Used singly or in combination, compounds of silver can produce a greatvariety of negative and positive images.
There are two large families or evolutionary strains of silver printing papers, dif-ferentiated by the way in which the image is formed. Most modern photographic papersbelong to the class of materials known as develop-out papers, which means that theimage is formed by the chemical reduction of silver particles after a brief exposure to
light. Of course, all practical negative materials have been of the develop-out variety,since the chief advantage of this approach is that only a small amount of light energy isneeded to create the image. Less well known is the fact that only since about 1905 havemost printing papers been of the develop-out variety.
Printing-Out PapersFor the first 65 years of photographic history the chief method of producing prints
was by means of the printing-out processes, wherein the image is formed by the actionof light energy alone, without chemical development. Obviously, more light energy isneeded than with develop-out materials, in some cases 100,000 times more.Historically, this meant that for printing-out papers daylight was the only practical lightsource, and even now it remains the cheapest and most satisfactory source in cases wheremass production is not required. Printing-out papers are almost unknown today butthey are still sold for the purpose of obtaining quick proofs of portrait negatives, thougheven this application is dwindling as color continues to grow in importance in the
1

THE ALBUMEN & SALTED PAPER BOOK
photographic industry.Printing-out papers possess the advantage that because the image appears during
exposure, the progress of exposure may be checked visually and stopped at the rightmoment. Another advantage of printing-out papers is that they have a very long tonalrange, and can successfully reproduce detail from negatives of greater density range thandevelop-out papers can. In general, negatives that produce good prints on printing-outpapers are too contrasty for even the "softest" grades of develop-out papers. The biggest
Fig. 1. Checking the progress ofexposure. Half of the hinged back ofthe printing frame is open, while theother half is still closed to maintainregistration of the print and thenegative.
disadvantage of printing-out papers from the modern point of view is their inability toproduce prints by enlargement; the amount of light energy required to enlarge ontoprinting-out papers is enormous and impractical, so all prints must be made by contact.
CLASSIFICATION OF PRINTING-OUT PAPERS
Within the large class of printing-out papers there are two smaller classes or sub-divisions — emulsion papers and salted papers. The differences between them comefrom the way in which the paper is rendered light sensitive, although both kindsdepend on the same light sensitive substance, silver chloride. Salted papers are made ina two-step process whereby the "salt" (usually ammonium or sodium chloride) is firstapplied to the paper and then converted to silver chloride by a treatment with silvernitrate solution. Emulsion papers are made by a one-step process of coating the paperwith silver chloride already formed and dispersed in an emulsion. The making andcoating of emulsions is best done by machine, although it is possible to produceemulsion papers by hand on a small scale. The salted papers are eminently morepractical to produce on a small scale basis, however, and are capable of a widely variedrange of effects, textures, colors, and contrasts.
This book is about papers that belong to the category of salted papers, using the
2

BASIC PRINCIPLES
term in its technical sense defined above. The term "salted paper" can thus be taken tomean any handmade silver chloride printing-out paper made in two steps, a "salting"step and a sensitizing step. The fact that the two operations of salting and sensitizing areseparate allows a much wider choice of materials to be used as a "binder" in which todisperse the silver chloride and keep the image on the surface of the paper. Manymaterials, most notably albumen, are unsuitable for emulsion-making yet are useful forsalted papers. It is necessary here to mention that although albumen paper is a saltedpaper in the technical sense of the term, most people reserve the term "salted paper" todescribe any handmade silver printing-out paper other than albumen paper. Thisambiguity has arisen because albumen paper has such towering historical importancethat it is usually talked about separately from all other salted papers, though it doesactually belong to that class of materials.
CHARACTERISTICS OF PRINTING-OUT PAPERS
The characteristics of printing-out papers of all kinds differ greatly from those ofdevelop-out materials. The most obvious difference is that of image color. Whiledeveloped images generally are black (sometimes with a greenish or bluish cast), thecolor of printing-out papers after fixation is usually yellowish or reddish brown. To mostpeople the color of fixed printing-out papers is not pleasant or agreeable, so a toningprocess is usually carried out prior to fixing, which alters the color to brown, purplishbrown, purple, or black. It is the basic mechanism of image formation in printing-outpapers which is responsible for their color. When silver chloride is acted upon by light,it dissociates into its component parts of silver and chlorine, and a tiny particle ofmetallic silver is formed. These tiny particles form larger aggregate particles that do notexceed a certain size, and which are relatively much smaller than the filaments of silverthat are generated in develop-out papers by the action of the developing agent.
The aggregate silver particles that are formed in printing-out papers are of a size thatchemists call colloidal, which means that they have special properties with respect tolight. The particles are not large enough to absorb all wavelengths of light and thusappear black. Instead they absorb some wavelengths but not others, depending in parton the index of refraction of the material in which the particles are dispersed. Inpractical terms this means two things: first, different binders or vehicles used to carrythe image, such as albumen, gelatin, or starch, will produce prints of different colors.Second, when the print is fixed, the color will change dramatically, since by dissolvingthe unreduced silver chloride present in the light-sensitive coating the index ofrefraction of the whole system will be changed, and the silver particles will be "packed"together more closely. These are the reasons why prints which have a rich purple orbrown color after exposure change to a reddish or yellowish brown in the fixing bath.After drying the prints again change color, becoming darker and colder in tone becausethe index of refraction of the system and the distances between particles have changed,thus affecting which wavelengths of light are absorbed. The fact that the colloidal silverimage changes color depending on the nature of the vehicle or binder material used onthe paper constitutes some means of controlling print color, but the toning process playsa greater role and provides more possibilities for control.
SILVER CHLORIDE
As stated above, it is light energy alone that reduces the silver salts to metallic silverand thus forms the image in printing-out papers. While many compounds of silver
3

THE ALBUMEN & SALTED PAPER BOOK
exhibit the print-out property, the most useful for printing papers is silver chloride.Silver chloride is insoluble in water and in most solvents, so it cannot simply be brushedon to make photographic paper. It must be formed in place by a process of first treatingthe paper with a soluble chloride like sodium chloride — table salt — and then treatingit again with a solution of silver nitrate. The two chemicals react, forming silver chlorideand sodium nitrate, the latter of which takes no role in forming the image and eitherdissolves into the silver solution or is washed away in processing.
Pure silver chloride paper is unsatisfactory for printing purposes because it producesgray and flat images. Successful printing with silver chloride depends on the presence oftwo additional factors: "active" organic substances and excess silver nitrate. Both ofthese are needed to impart adequate sensitivity and a rich appearance to printing-outpapers. It was William Henry Fox Talbot, the inventor of negative-positivephotography, who first realized the critical relationship between the relative amounts ofchloride and silver nitrate. He found that when chloride and silver nitrate were presentin equal amounts his papers were hardly light-sensitive at all, compared to when silvernitrate was present in great excess. Talbot found that about six times more nitrate wasnecessary and established that the " salting" solution should be 2-4 % in strength and thesilver nitrate 12% . The reason why so much silver nitrate is necessary was explained bythe great 19th-century photochemist Hermann Vogel, who reasoned that as light energydissociates each unit of silver chloride, the chlorine that is liberated simply unites withthe silver nitrate present to form new silver chloride. Light breaks down this newlyformed silver chloride, and the cycle begins again, to be repeated over and over. Whenexcess silver nitrate is available, more image silver will be formed and a greatermaximum density attained.
THE ROLE OF ORGANIC BINDERS
Experience has shown that certain organic substances have a very favorable effect onimage formation in printing-out papers, and these may be designated " active " organicsubstances. The most important are albumen, gelatin, and organic acids, such as citric,tartaric, and oxalic acid. These "active" organic materials facilitate the more completereduction of silver chloride and also themselves form light-sensitive substances when incontact with silver* nitrate (silver albumenate, silver citrate, etc.). There are many otherorganic substances used for printing-out papers which are not "active" in the same way,that is, they do not facilitate more complete reduction of silver chloride, but definitelydo make a contribution to the printing paper by keeping the light-sensitive materials onthe surface and preventing a dull "sunken in" appearance. The most useful of thesesubstances is starch, although lactose, agar-agar, carageenan and resins have also beenused for the purpose.
One of the most basic dynamics with any photographic paper is the location of thelight-sensitive layer, that is, whether it is confined to the surface of the sheet or haspenetrated deeply into the paper fibers. In the latter case the maximum density ob-tainable on the material will be lowered and the prints will have a matte surface,because the light reflected from the paper will be scattered and diffused by the paperfibers. If the image is produced in a compact layer resting on top of the paper fibers,this scattering is minimized and the maximum density obtainable is much greater.Also, if the light-sensitive coating is itself composed of some smooth and transparentsubstance like gelatin or albumen, the scattering of light in the white areas of the printwill be minimized as well, and the paper will look more "brilliant" and have more
4

BASIC PRINCIPLES
contrast. All the various binder materials used in salted papers perform the function ofpreventing the penetration of the image layer into the paper fibers, although the resultsalso depend on the nature and amount of binder used.
Another benefit of keeping the image on the paper surface is a gain in sharpness andcapacity to render fine detail. The early history of printing papers shows a steadyevolution of techniques for producing papers capable of greater resolution and contrast,
Fig. 2. The would-be photographer confronts his textbook andchemicals. From a 1903 advertisement.
fueled by a desire to reproduce the fine detail present in negatives on waxed paper andglass. Obviously the basic smoothness of the raw paper stock has a great effect on theresultant print, and so does the amount of organic material coated onto the raw paper.Albumen, for example, may be applied in pure form to produce a glossy paper or maybe diluted to any strength, with a corresponding loss of gloss, detail, and " brilliance" ofimage.
Relating Theory to PracticeThe terminology and basic theoretical considerations described above are, of course,
not enough to carry out the practice of making albumen and salted papers, but they doform a framework in which to begin work. The historical literature abounds with recipesfor all sorts of salted papers, including some with very exotic ingredients andprocedures. With patience and care, most of them will "work." The difficult part at firstis relating theory to practice, and persevering until the true cause of a difficulty becomesevident. Most of the problems that beginning printers encounter are not the result ofdefective formulae, but of difficulties in coating techniques.
With whatever sort of paper is desired --- albumen, arrowroot, etc. — it will benecessary to get a "feel" for the exact method and amount of coating that will producethe best results. Also, coating methods which seem effortless for one person may betotally unworkable for another. For beginners, it is best to trust the formulae as given,and focus on striving for rich, even coatings. Do not be afraid to try out new ideas forcoating methods. Once a "feel" for the basic materials and coating methods isestablished, it is then possible to create variations on formulae and fulfill the promise of
5
THE ALBUMEN & SALTED PAPER BOOK
creative expression with a totally unique photographic material.The key to success in every operation described in this book is clean and careful
work. Because of the presence of excess silver nitrate, the printing-out papers are farmore subject to damage from careless handling and contamination than are modernphotographic papers. Contamination is a very real danger, and only good housekeepingpractices will prevent it. Failure to clean up spills will load the air in work areas withchemical dust, and uncleaned trays will surely cause stains in prints. A thorough andcareful approach to housekeeping in work areas is actually part of a whole attitude thatleads to good results. This attitude is one of patience and care, and a thoughtful at-tention to detail. Success will come through a process of slow refinement of results andnot through discovering the one "right" formula. A system of record keeping isessential, both to obtain repeatable results and to understand the causes of problems.
Any work with the methods described in this book will help to make a direct linkwith a photographic tradition from which "convenience products" in photographicmaterials have made us very distant. Respect and understanding for the achievements ofearly photographers cannot help but grow from acquaintance with their methods.
6

CHAPTER TWO
Working Environment,Equipment and
MaterialsThe printer should be allowed everything of the best quality towork with, and have a comfortable room to work in.
—Edward L. Wilson, 1881 1
Work AreasThe best approach to organizing work areas is to follow the plan adopted by 19th-
century portrait galleries — to have two separate working rooms, a "wet" fabricationarea and a "dry" printing area in which to load printing frames and store equipmentaway from chemical contamination. It is preferable but not absolutely necessary thatthese two areas be separate rooms, but if they must share the same room, rigorouscleanliness is required. Certain requirements are common to both areas. Ideally, theyshould both be well lit, well ventilated, and maintained at 18-20°C and 45 %relativehumidity. The capacity to eliminate white light from all work areas is also necessary.Both areas need safelight illumination; for this purpose yellow "bug-lite " 60-wattincandescent bulbs work perfectly. There is no need to work in the dim light ofsafelights required for modern papers. The level of illumination should be brightenough to see and work comfortably. In the 19th century, windows of printing roomswere simply hung with yellow curtains or painted over with yellow paint.
THE "WET" AREA
The primary purpose of this area is to provide a place for the coating, drying, andprocessing of materials. The operations involved in coating and sensitizing should becarried on in an area that can tolerate the possibility of spills and stains. Drippings frompapers hung up to dry are inevitable, and somehow silver nitrate stains always appear onfloors and tables despite all precautions. A basement room is a very practical choice,providing it can be kept clean and humidity can be controlled. The level of cleanlinesscertainly does not have to be that of industrial paper coating facilities, but ought to beas clean as any well-kept darkroom.
Generous counter space should be available, and also adequate storage forchemicals, trays, glassware, and other equipment. Although a darkroom sink is notnecessary, a sink of some kind is necessary and a darkroom type is helpful. There shouldalso be an area where freshly coated papers may be hung to dry. For safety reasons,sensitized papers should not be hung where people may pass underneath them. The
7

THE ALBUMEN & SALTED PAPER BOOK
floor underneath this section may be covered with plastic or newspaper to catch drip-pings. Ordinary clothesline and plastic clothespins (papers tend to stick to wooden ones)serve well, and the lines should be strung at an angle of 5 to 7 degrees in order toconcentrate runoff at one corner of the sheet. It is sometimes helpful to acceleratedrying of papers with heat; if the room is small, portable electric heaters will serve thepurpose. Always check to make sure that electrical wiring is adequate to handle the loadcreated by portable heaters. Each 1250-watt heater should be placed on a separatecircuit and heaters should never be left unattended.
THE "DRY" AREA, OR PRINTING ROOM
Once the printing papers have been sensitized and dried the actual operations ofprinting may begin, and for this purpose an area is needed that is free from the dangerof splashing chemicals and airborne contamination. Counter space is required, andstorage for printing frames when not in use. Daylight should be excluded from theprinting room altogether, but incandescent white lights and yellow " bug-lite" safelights
Fig. 3. A printing room, ca. 1875. Printing frames are beingexposed in a window shelf. An ammonia fuming box is shown atleft.
are necessary. It is difficult to evaluate the progress of exposure under yellow light;white lights may be turned on long enough to make the inspection. Incandescent whitelight is preferable to fluorescent light for inspection purposes because the chances offogging the paper are lessened. Two drawers, one for unexposed paper and the other forexposed prints, are also helpful. If conditions of temperature and relative humidity areappropriate, then negatives may be conveniently stored in the printing room as well.The printing room may also double as a print finishing area, since this operation, too,must be kept away from chemical contamination.
8

WORKING ENVIRONMENT, EQUIPMENT AND MATERIALS
EquipmentItems of necessary equipment will include the following:
LABORATORY BALANCE
It is necessary to weigh out amounts of chemicals with reasonable accuracy, but asophisticated and expensive laboratory balance is not required. A "student" gradebalance with a capacity of 2000 g and an accuracy to 0.5 g will be satisfactory. A two-pantype of balance is inexpensive and convenient. Note that throughout this book thesymbol g is used to mean the metric gram, a unit of weight equal to 15.432 grains.
Fig. 4. A typical laboratory balanceof the 1880's.
MEASURING AND MIXING CONTAINERS
For most purposes of measuring and mixing, polyethylene graduated beakers withhandles are the most practical. They are unbreakable and easily cleaned. A 1000 ml anda 2500 ml model should be enough for most mixing needs. For measuring smallamounts of liquids a 100 ml cylinder graduate with 1 ml graduations will be helpful. Agenerous supply of glass or plastic stirring rods is also necessary. A three gallon plastic orporcelain pail will come in handy if large amounts of liquids are to be mixed, and thepail may double as a dishpan for cleaning laboratory glassware. Trays and glasswareshould be cleaned with Alconof or SparkleenTM '', detergents specially made for cleaninglaboratory articles.
TRAYS
Trays that have been in use for ordinary photographic procedures are usually un-satisfactory for albumen and salted paper printing because of contamination. A goodapproach is to buy new trays and to label them for each operation, so that there is onetray reserved for sensitizing, toning, and fixing, respectively. Porcelain trays arepreferable, as long as they are not chipped in any way. Very inexpensive porcelain traysmay be purchased from restaurant supply stores. While they may not be in the usualphotographic formats — 8x10, 11x14, etc., — they are still serviceable, and far cheaperthan trays sold for exclusively photographic use. The tray reserved for the silver solution
9

THE ALBUMEN & SALTED PAPER BOOK
is especially susceptible to chemical contamination, and ideally should be made ofglass. If glass is not available, then a new porcelain or plastic tray will do.
WHITE PORCELAINGLASS TRAYS.
For Plates. Price.4 x 5 $0.205 x 8 307 x 9 505 x 10 6o
Fig. 5. Glass trays, although breakable, were easily kept clean andfree of contamination. From a 1901 advertisement.
PRINTING FRAMES
The printing frame is perhaps the single most important piece of equipment used inalbumen and salted paper printing. The purpose of the printing frame is to provide ameans of keeping the negative in direct contact with the paper during exposure, and atthe same time allow the paper to be inspected and returned to contact in exact register
Fig. 6. "Anthony's Improved Printing Frame". A closeup view ofthe counter device is shown at right.
with the negative. The basic design of printing frames has not changed very much sincethe 1840's; it consists of a wooden frame with a pane of glass in front, and a hinged backthat fits inside the frame and is held in place by springs. The reason for the hinged, two-part back is so that one spring may be loosened, half of the back opened, and theprogress of the exposure checked while the still-closed section holds the negative andprint together to maintain registration. A felt or chamois pad is used between the paperand the back of the printing frame to evenly distribute the pressure and insure goodcontact over the entire print area. The use of such pads was very common in the 19th-century, but so little contact printing is done today that most people are unaware oftheir benefits. When printing from 8x10 or larger film negatives, pads are in-dispensable, especially with the poor quality printing frames available at the presenttime.
Printing frames should be at least one "format" larger than the negative in use — a
1 0
WORKING ENVIRONMENT, EQUIPMENT AND MATERIALS
5x7 frame for a 4x5 negative, for example, — and they should be kept clean and dust-free. They should be of sturdy construction, with double-thickness "picture glass, " notordinary window glass, and have a good-quality laminated back for strength. Sadly, theprinting frames available from photographic dealers today fall far short of those made inyears past that were intended for rugged professional use. Many currently-made frameshave backs of aptly-named "chipboard, " which will constantly release wood splintersand spoil prints and negatives unless the utmost care is taken. It is still possible to findolder printing frames made of beautifully finished hardwoods at antique stores or fleamarkets, or even from dealers in antique photographica, but the larger sizes of these arescarce. The older frames are a joy to use and are often less costly than their paintedplywood descendants.
Many older frames have a counter device on the back. This can take the form of anotched wheel with incised numbers or may be a pointer arm that points at embossednumbers; the purpose of these counters was to keep track of the number of prints madefrom a given negative. With many frames and negatives in use at one time it was ahandy accounting system for the quantity of prints made from each negative.
PaperPaper suitable for albumen and salted paper printing must be of the highest
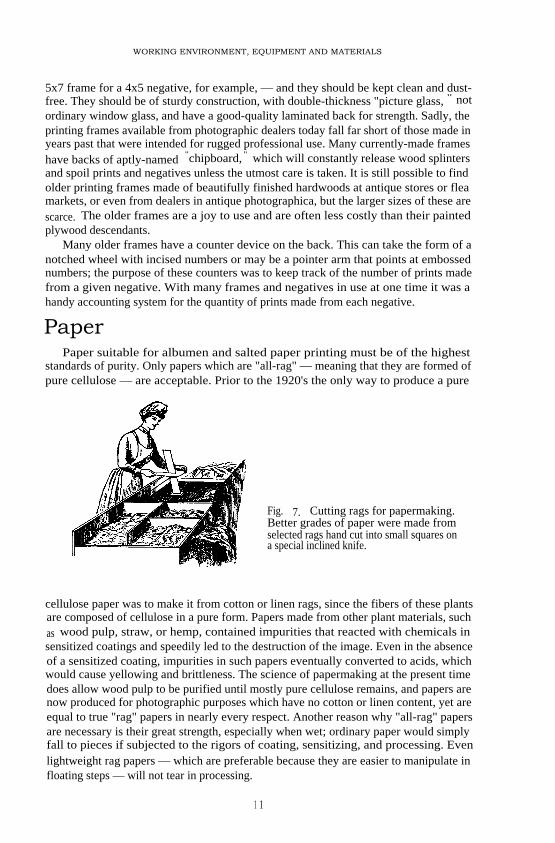
standards of purity. Only papers which are "all-rag" — meaning that they are formed ofpure cellulose — are acceptable. Prior to the 1920's the only way to produce a pure
Fig. 7. Cutting rags for papermaking.Better grades of paper were made fromselected rags hand cut into small squares ona special inclined knife.
cellulose paper was to make it from cotton or linen rags, since the fibers of these plantsare composed of cellulose in a pure form. Papers made from other plant materials, suchas wood pulp, straw, or hemp, contained impurities that reacted with chemicals insensitized coatings and speedily led to the destruction of the image. Even in the absenceof a sensitized coating, impurities in such papers eventually converted to acids, whichwould cause yellowing and brittleness. The science of papermaking at the present timedoes allow wood pulp to be purified until mostly pure cellulose remains, and papers arenow produced for photographic purposes which have no cotton or linen content, yet areequal to true "rag" papers in nearly every respect. Another reason why "all-rag" papersare necessary is their great strength, especially when wet; ordinary paper would simplyfall to pieces if subjected to the rigors of coating, sensitizing, and processing. Evenlightweight rag papers — which are preferable because they are easier to manipulate infloating steps — will not tear in processing.
1 1

THE ALBUMEN & SALTED PAPER BOOK
In addition to the composition of the fibers, other criteria for paper selection are thecolor and texture of the surface. Coarse-textured, porous surfaces will tend to absorb thelight-sensitive coatings, and the resultant prints may be flat and dull. If prints lookbetter by transmitted light than by reflected light, then the solutions have sunk toodeeply into the paper fibers, and either a pre-sizing step or more viscous coating isneeded. If paper is tinted, the color should not be too strong and in any case shouldharmonize with the color of the photographic image. Paper with a smooth surface andwhite color is a good starting point from which to become acquainted with the color andtextural qualities of various light-sensitive coatings and toning techniques.
Smooth-surfaced papers are the result of a combination of heavy sizing (sizing is thematerial added to the paper pulp to bind the fibers together and create a smoothsurface on the sheet) and rolling between rollers to further flatten and polish thesurface. If a very glossy print is desired, the paper should be as smooth as possible tobegin with. Matte paper may be generated either by coating a smooth sheet with amatte coating material like starch, or by coating a porous sheet with a relatively moreviscous and smooth coating.
In the 19th century, obtaining the proper paper for albumen and salted paperprinting was a very difficult problem, especially for the large-scale production ofalbumen paper. Two firms emerged in the 1850's as producers of reliable paper forphotographic use2 and dominated the world market until 1914, when the press ofwartime need forced the development of new production facilities. These two mills, onein Rives, France, near Grenoble and the other in Malmedy, Belgium, supplied nearly allof the photographic rawstock consumed in the 19th century. They possessed the naturaladvantage of being located on mineral-free water supplies, which, together with theirexperience in the specialized needs of photographic paper, insured their continuedsuccess.
Binder Materials Used In Printing PapersMany organic materials — proteins mainly but also some carbohydrates — are
useful as binders or vehicles in which to disperse silver chloride and at the same timeconfine it to the print surface. Albumen, gelatin, starches, and whey were all in use forsalted papers before 1855. Of these, albumen was by far the one most widely used in the19th century. It is also the only one of the binders that an experienced eye may identifywith reasonable certainty with just a cursory examination of a print. The following shortdescriptions of binder materials does not constitute an exhaustive list, and it touchesonly on those properties of the materials which bear on their photographic use.
ALBUMENAlbumen for photographic purposes may be taken to mean the clear white of a hen's
egg. Actually many specific proteins can be identified in egg white, but when usedcollectively they are referred to as albumen. Albumen has a specific gravity of 1.040,and at room temperature it dries to a brittle, transparent mass. Albumen may currentlybe obtained as a powder, of which a 15 % solution in water will approximate native eggwhite, but the powdered albumen is more costly and less convenient for photographicuse than albumen obtained directly from eggs.
Albumen is insoluble in alcohol, and in fact alcohol will coagulate albumen, aproperty that is useful to obtain multiple coatings of albumen on a single sheet.Albumen is also coagulated by temperatures above 65°C and by contact with salts of
1 2

WORKING ENVIRONMENT, EQUIPMENT AND MATERIALS
metals. The reason why albumen does not dissolve off the sheet during processing isbecause contact with silver nitrate in the sensitizing bath coagulates it and forms a newinsoluble silver-albumen complex called silver albumenate. This substance itself is lightsensitive and makes an important contribution to image formation in albumen paper.
Fig. 8. The leghorn chicken,displaying an ideal shape formaximum egg production.
The pH of native egg white is 7.8. Albumen is used in this fresh alkaline conditiononly for matte papers, and for these it is always mixed with starch or other substances.Glossy papers are prepared with partially decomposed acidic albumen, because in thatcondition it creates a glossier surface and more even coating, and has less tendency toyellow after sensitization. Albumen is never used in the strictly native condition; beforeany photographic use may be contemplated, the egg whites must be beaten to a frothand allowed to settle back to a liquid state. This beating process denatures the variousproteins — all of which have different viscosities — and results in a homogeneous liquidwhich will form an even layer on the sheet of paper.
GELATIN
Like albumen, gelatin is not a specific substance but a collection of proteins. Gelatinis obtained by cooking the skins, tendons, and bones of cattle in a pH controlled vat ofwater. If the temperature and pH of the cooking liquor are carefully controlled, verypure forms of gelatin may be obtained. In cold water, dried gelatin swells to a viscousmass, which will melt at temperatures above 32 °C. Gelatin is not precipitated by metalsalts in the same way that albumen is, but additions of alum to solutions of gelatinresult in gels that are harder and less permeable. Adding potassium chrome alum resultsin gels that are completely insoluble. Formaldehyde also exerts a hardening effect ongelatin.
Gelatin lends a characteristic reddish color to salted paper prints. The first saltedpapers made by Fox Talbot showed this reddish color, not because Talbot had includedgelatin in his "salting" solution, but because the gelatin was already present on thepaper, put there as a sizing by the paper manufacturer.
1 3

THE ALBUMEN & SALTED PAPER BOOK
STARCHES
Starch occurs widely in the plant kingdom, and exists as microscopic white grainsthat are insoluble in alcohol, ether, and cold water: When starch is heated in water, thegrains burst and a turbid paste is created. The turbidity and adhesive properties ofstarch pastes vary with the origin of the grains. Although many different kinds of starchmay be used for photographic purposes, certain ones are preferred because the pastesthey produce are pure white, very viscous, odorless, and of low turbidity. Among thesethe most important is arrowroot, which comes from the West Indian plant marantaarundinacea, though tapioca and sago are also useful. When starch pastes are applied topaper and dried, a layer is formed that will not swell in water and will withstand theprocessing solutions without damage. Starches do not react with silver salts and have noeffect on the reduction of silver chloride. Most salted papers that use starch as a binderwill therefore also have an "active" organic substance — usually citric acid — as part ofthe formula.
RESINS
Resins are noncrystallizable, amorphous substances which are obtained from plants,notably the sap of softwoods such as pine and fir. Resins are distinguished from gums bytheir insolubility in water. They are soluble in alcohol, ether, etc., and such solutionsare known as lacquers. When mixed with alkalies such as ammonia or sodiumhydroxide, they form foamy solutions known as resin soaps; if acids are added to resinsoaps, the resin is precipitated in an insoluble form. Resin soaps are also precipitated bycontact with silver nitrate solutions, forming an insoluble white mass that is moderatelylight-sensitive. 3 The presence of resins has no effect on the reduction of silver chloride.
1 4

CHAPTER THREE
Salted PapersA print on plain paper may be dead, foggy, inky, sunk in thepaper, &c. , &c. , but in its most unhappy state it does not lookvulgar; there is always a certain sentiment about it, even in itsworst phase offailure.
—Thomas Sutton, 18561
Photographic Printing Before 1850Although others before him had experimented with the light-sensitive properties of
silver chloride, it was the Englishman William Henry Fox Talbot who prepared the firstsuccessful silver chloride photographic paper. This discovery came in the years 1834-1835, 2 and laid the foundation for all the subsequent printing-out papers that were soextensively used in the 19th and early 20th centuries. The details of Talbot's methodwere not revealed until 1839, 3 after news of Daguerre ' s success had spread around theworld. Talbot ' s " photogenic drawing" paper was prepared in two steps: first, fine qualitywriting paper was immersed in a weak salt solution and dried. The second step involvedmaking the paper light sensitive by brushing on a strong solution of silver nitrate. Thesensitized paper darkened when placed in sunlight, and was "stabilized" against furtherdarkening (at low light levels) by washing the paper in a strong salt solution.
At the suggestion of Herschel, Talbot changed to sodium thiosulfate, or "hypo" asthe fixing material, and this made the prints completely stable to light and left themwith white highlights, instead of the pale lilac highlights characteristic of fixation instrong saline solutions. With the adoption in 1839 of "hypo" as the preferred method offixation, Talbot ' s "photogenic drawing" paper had evolved into what is now known as"plain salted paper" , the positive printing material that was to become almostuniversally used during the decade 1840-1850. During that time plain salted paper wascommonly referred to as "ordinary photographic paper", to distinguish it from varioustypes of develop-out papers.
Talbot had tried to use his "photogenic- drawing " paper in the camera to makenegatives, but exposures were so long that he abandoned print-out negatives as soon as apractical alternative was available. He retained the print-out method for positives,however, because the results were more controllable and in his eyes more aestheticallypleasing. He thus set the pattern for the whole 19th century; development was regardedas a necessary evil for negatives, and as too troublesome and unpredictable for positives.Also, the greenish-black color of developed positives was widely reviled as "inartistic."
Although he himself employed only a plain salt solution as the first step in making
1 5

THE ALBUMEN & SALTED PAPER BOOK
the paper, Talbot's prints were reddish brown in color and reflected the presence ofgelatin, used by the paper manufacturer as a sizing material. French photographersfound that the papers they used did not produce the same results as English papers did,because starch sizing was used by the French paper-makers instead of gelatin. Until the
Fig. 9. A facsimile of a photogenicdrawing that appeared in TheMagazine of Science for April 27,1839.
late 1840's no organic binder materials were used in the salting solutions for saltedpapers, only chlorides — usually table salt or sea salt. Photographers were at first quitepuzzled by the different results from English and French papers, but eventually twoFrench scientists, Alphonse Davanne and Jules Girard, investigated and explained thephenomenon. 4
Plain Salted PaperPlain salted papers are those which have little or no organic binder material, and are
thus matte-surfaced and of relatively lower maximum density. However, for even asimple salted paper, some organic material is necessary; it must either be present in thepaper before the salting solution is applied, or it must be added to the salting solutionitself. In practice, it is usually more convenient and satisfactory to add organic materialto the salting solution. The sizing that already exists in papers is usually insufficient,and without additional organic binder material the resultant prints would appear tooflat.
1 6

SALTED PAPERS
A salted paper which closely approximates the printing materials of the 1840 's canbe made as follows:
Sodium chloride............................................................................... 20 gGelatin ................................................................................................2 gWater..................................................................................... to make 1 liter
Swell the gelatin in 250 ml of cold water, then heat the rest of the water and in itdissolve the sodium chloride. Mix the hot water and gelatin together, and when it hascooled to approximately 80°F, it is ready to use. The paper is salted by floating it on thesalting solution for three minutes. This solution contains far less gelatin than moderngelatin emulsion papers; the amount of gelatin is only enough to slightly inhibit thesinking of the image into the paper fibers. Hence the choice of rawstock for this or anyother plain salted paper that does not contain very much viscous binder is extremelyimportant and has a great influence on the results. Porous rawstocks such as watercolorpaper will yield very flat prints indeed; early photographers generally chose thesmoothest rawstocks available to them, and for plain salted papers that are not madewith viscous binders it is best to imitate their choice of a fairly smooth paper.
A variant on the above formula for plain salted paper is:
Sodium chloride...............................................................................20 g
Sodium citrate.................................................................................. 20 g
Gelatin................................................................................................2 g
Water..................................................................................... to make 1 liter
The addition of a neutral citrate will cause the prints to be more reddish in color andslightly more "brilliant." However, the porosity of the rawstock will still be the largestsingle factor in the resultant prints. Both of these simple salted papers will require thesame sensitizing, toning, and fixing. Detailed descriptions of these operations will befound in later chapters.
With whatever paper stock has been chosen, examine the paper closely beforesalting it to see if there is a difference between sides — usually there is a front side and aback side, meaning that one side is. smoother and has more sizing than the other. Thefront side is the smoother one, and that is the side that should be coated with the saltingsolution. If there is a watermark visible, then the front is facing up when the watermarkis readable. Once the paper has been salted and dried, there will be no way to tell whichside has been treated, so it is necessary to mark the back of each sheet — in pencil — tokeep track of which side has been salted.
FLOATING THE PAPER ON THE SALTING SOLUTION
Floating is the preferred method for coating most salted papers, because iteliminates the possibility of patches of uneven density which might be caused if bothsides are " salted. " These patches of uneven density result when some of the silversolution is drawn to the back of the sheet during sensitization, thus locally sensitizingsome areas on the back and causing a blotchy appearance on the face of the print. Withsome rawstocks, however, the simple gelatin salting solutions given above will providegood results when the paper is immersed and not floated. Only experience willdetermine which rawstocks can be successfully salted with the immersion technique.
The technique of floating is not difficult, and it actually becomes quite efficient androutine if the proper conditions are maintained. If the temperature of the paper itself
1 7

THE ALBUMEN & SALTED PAPER BOOK
and the salting solution is the same, the floating of the paper is made considerablyeasier. If the salting solution is warmer than the room temperature — which is also thepaper temperature — then the sheets of paper will curl ferociously when they are placedupon the surface of the solution. In general, relatively thin papers are preferablebecause they are easier to handle, especially after they have been coated with bindermaterials and must be floated a second time on the sensitizing bath. Paper becomesstiffer when dry, and so a certain amount of moisture in the storage environment of thepaper, especially just prior to floating, makes the sheets easier to handle.
Curling is caused by the swelling of the paper fibers on the bottom of the sheet, so if
Fig. 10. Salting paper by immersion.
curling does occur it can be remedied by dampening the fibers on the top side of thesheet. Old manuals recommend breathing on the sheets to unbend them after they havecurled, but this is impractical for all but the mildest curling.
After a sheet has rested on the surface of the solution for awhile, it will uncurl itselfand gradually lie flat. But if the curling has been too severe, the sheet may be alreadyruined from the solution running on to the back. Sometimes holding the edges of thesheet down on the surface of the solution until the sheet uncurls itself is a workablemethod, but with large sheets this may take two people. With whatever method ischosen, it is always best to try to have conditions of moisture and temperature asfavorable as possible before attempting to float. One way to control curling is bydampening the back of the sheet with a fine mist of water after it is placed on thesolution. The inexpensive plastic atomizers sold for various garden uses will work well,but large droplets of water must not be allowed to collect on the back of the sheet whileit is floating, and only a minimum of dampening should be used. An alternative ap-proach, which works well for some people, is to fold back about 1
/2 inch of paper on allfour sides of the sheet, thus making a kind of "boat" . The creased edges resist thetendency to curl and the folded flaps help prevent the solution from reaching the backof the sheet.
Many old manuals advise that paper be floated by handling it by two diagonalcorners, bending the sheet and placing the center of the bent sheet on the surface of thesolution. It is then gently lowered until the corners touch down and the sheet floats onthe surface. This technique nearly always results in a line of bubbles becoming trappedunder the sheet in a diagonal line from the two corners not held in the hands.
1 8

SALTED PAPERS
A better way is to first fold over about 1/4 inch of paper in two opposite corners ofthe sheet, so that these two bent corners act as little handles to give better control of thesheet. Grasping the paper by these two bent corners, bow the sheet and place one cornerof it on the solution. Gently lower the other hand until the whole sheet rests on thesolution. The advantage of this approach is that the bubbles that may have formedwhen the sheet first touched down on the surface are forced out to the edges by therolling motion from one corner to the other, instead of from the middle to the twocorners at once as the old manuals suggest.
If any bubbles do appear, lift the sheet from one corner and if they do not break of
Fig. 11. Salting paper by floating it on the salting solution.
their own accord, pierce them with a toothpick and replace the sheet on the surface.Bubbles may usually be seen through the paper itself, but if the stock is too thick, thenthe sheets will have to be lifted from the corners to check for bubbles. Time theoperation of floating from the point at which all bubbles have been broken and thesheet rests evenly upon the surface.
When the sheets have floated for the required length of time, carefully lift onecorner and slowly raise the sheet from the solution. The sheets will be coated moreevenly if they are slowly peeled from the surface. By slowly lifting them there will be lessdripping of liquid back into the tray of solution, and fewer bubbles will be formed inthe tray to interfere with the next sheet to be floated. Always check the surface of thesolution for dirt or bubbles before attempting to float a sheet of paper.
The sheets should be hung to dry by the two corners of the long edge, so that thedownward runoff has the least distance to travel. This minimizes the unevenness ofcoating which always occurs because the solution runs downward toward the floor,forming a slightly thicker coating on the lower half of the paper. If the sheets curlduring drying, clothespins may be clipped to the bottom edge of the sheets to weightthem down. Heat may be used to accelerate drying, but with plain salted papers there isno advantage gained except faster drying.
When the sheets are dry, they should be taken down and pressed flat under someweights. This makes them more supple and easier to handle in the sensitizing step.
The paper will keep indefinitely in this salted condition, if stored in a cool and dry
location. Of course all salting operations may be conducted in white light, since thepaper is not light sensitive until it has been sensitized on the silver nitrate solution.
1 9

THE ALBUMEN & SALTED PAPER BOOK
Paper made according to the above two formulae should be sensitized by floating for 3minutes on a 12% silver nitrate solution. After the paper is sensitized, however, it willkeep for only one or two days, depending on the temperature and humidity of thestorage environment.
CONTRAST CONTROL IN SALTED PAPERS
Each type of silver printing paper has a characteristic gradation and contrast. Thismeans that only a certain type of negative will give the optimum results with each kindof salted paper. For example, the plain salted papers given above are very soft-workingpapers and require negatives of far greater density range than any modern develop-outpaper. The reasons for this have to do with the basic nature of printing-out papers andthe smoothness or porosity of the paper stock. A detailed explanation of the tonereproduction characteristics of albumen and salted papers will be given in Chapter 7,but briefly stated, the more matte-surfaced a paper is, the lower the contrast of thatmaterial is likely to be. Albumen paper, therefore, requires a less contrasty negativethan plain salted papers.
Techniques for increasing the contrast of printing-out papers do exist, and they canbe especially useful in printing negatives with a less than optimum density range. In the1840' s the paper negative processes then in use were well suited to salted paper printing,since they often produced "harsh" negatives. For modern negatives that have been madefor printing processes with greater inherent contrast, it is helpful to have a means bywhich such negatives may be printed on salted paper. Controlling the intensity andcolor of the exposing light is one convenient way to control contrast, and this isdiscussed more fully in Chapter 7. The chloride content of the " salting " solution alsohas an effect on contrast Large increases of contrast are possible only with the use ofchromates, and this technique does allow otherwise unprintable negatives to producegood prints. Nevertheless, the judgment of years of experience by many differentwriters on silver printing is that the best salted paper prints are always made in sunlightwith optimum negatives, and without resorting to contrast enhancing additions to thesalting solution.
The addition of chromium salts to the salting solution is the basic method ofcontrast enhancement. This technique is presented here only as an alternative for usewhen a print is desired from a too "thin" negative; it has no place in regular practice,since the finest results may only be obtained by using the "pure" processes with op-timum negatives.
The discovery that chromium salts led to higher contrast was made by FerdinandHrdliczka in the mid-1890's — a time when printing-out papers were gradually losingground to the developing-out papers. 6 For most of the 19th century, photographersdepended mainly on control of the negative density for contrast control in the print;that is why so many intensifier formulae are found in 19th-century photographicmanuals. Chromated papers were introduced to the market in the late 1890 ' s, but theirsales amounted to only a small portion of the total sales of printing-out papers.
Potassium bichromate is the chromium salt most often employed for the purpose ofincreasing contrast. A convenient way to use it is to make a 5% stock solution withdistilled water. CAUTION! Potassium bichromate is a toxic substance and should behandled with care. Some individuals are extremely sensitive to it, and all contact withthe skin should be avoided. Wear eye protection and gloves, and avoid inhalation ofdust by wearing a disposable surgical mask when mixing the bichromate solution.
2 0
SALTED PAPERS
Always work in a well ventilated area.The bichromate stock solution is added to the salting solution in varying amounts
depending on the degree of contrast enhancement desired. The effect of bichromateadditions is mainly on the highlight areas of the image. A sample salting solutioncontaining bichromate is:
Sodium chloride............................................................................... 25 g
5% solution Potassium bichromate ...................................................5 ml
Gelatin................................................................................................2 gWater ..................................................................................... to make 1 liter
Sensitize for 3 minutes on a 10% silver bath which also contains 5 % citric acid.It is best to keep bichromate additions to a minimum. The stability and predic-
tability of papers declines with increasing amounts of bichromate. The practical limitsof contrast control with this technique will have to be established through experience.In no case should the dry weight of bichromate exceed 1 % of the salting solution. Thedisadvantages of bichromate additions include the toxicity of the substance, the factthat papers must be salted and stored in yellow or diffused white light because of thelight sensitivity of potassium bichromate itself, and the necessity of avoiding anycontact of the salting solution with metals, since these react unfavorably withbichromates. Also, the addition of bichromates tends to produce a browner image colorthan would otherwise be obtained. Bichromate additions will serve the same contrast-enhancing function in almost any kind of printing-out paper, and they are employed inapproximately the same quantity with other papers as with the plain salted paperformula given above.
Arrowroot PapersArrowroot paper is a form of salted paper in which the binder material is a paste
made from boiled arrowroot starch. The surface qualities of arrowroot paper range fromvery matte to a dull gloss, depending on the amount of starch applied to the paper andthe smoothness of the underlying rawstock. Arrowroot prints can be considerably morebrilliant and richer-looking than plain salted papers; they have a longer density rangeand preserve more delicate detail.
The first starch papers were prepared by DeBrébisson in 1854 7 using tapioca insteadof arrowroot, but eventually arrowroot emerged as the most suitable and widely usedstarch for the purpose. Starch papers became very popular and almost completelydisplaced plain salted papers for matte-surfaced prints. In 1854, the popularity ofalbumen paper was increasing as well, but a significant number of photographers stillpreferred a matte surface on their prints. At that time, albumen paper was very new andhad its share of problems — it was harder to tone and fix than other kinds of paper, andit was sometimes difficult to coat evenly — and the newly discovered starch papersrepresented a great advance over the older plain salted papers. The middle 1850's saw
the rise of a new kind of business enterprise — offering salted and sized photographicpapers to the public as an article of trade — and many of the new companies sold bothalbumen and starch papers.
However, significant improvements in albumen paper were not long in coming, andduring the last half of the 1850 's albumen paper ascended to the unchallenged
dominance of the photographic paper market that it was to keep for the next 35 years.Although diminished in popularity after 1860, starch papers continued to be used by a
2 1

THE ALBUMEN & SALTED PAPER BOOK
small number of photographers, and arrowroot paper remained an article of commercewell into the 20th century. Unfortunately, starch papers appeared at a time when thepublic taste was very much on the side of glossy papers, which were a novelty at the timeand better suited to the small but immensely popular cartes de visite size portraits. In atypical full-length pose, the head of a person in a carte de visite might be less than 1/2 -inch high, so maximum detail was necessary in the print to make such a tiny imagesuccessful.
After 30 years, public taste began to change again, and glossy papers fell out offavor. In the 1880 ' s the first awakening of a renewed interest in matte papers was felt,led by photographers whose main interest in photography was aesthetic, not com-mercial. By 1900, the public at large had come to regard matte papers as more "artistic,"and although there were a great number of printing methods to satisfy the demand,arrowroot papers enjoyed a modest revival along with plain salted papers. The ap-plication of platinum toning methods allowed a whole range of brown tones to beproduced, and this helped increase public acceptance of arrowroot papers. The pooreconomics of professional portraiture with expensive and time-consuming printing-outpapers eventually drove the last arrowroot and plain salted papers off the market in theyears following World War I.
PREPARATION OF ARROWROOT PAPER
Arrowroot prints can be made on almost any sort of paper surface, but a fairlysmooth surfaced paper is generally preferred. Highly calendered "plate" finish paperspresent a little more difficulty in obtaining an even coating. Arrowroot pastes tend to beabsorbed into the paper fibers — in fact, they must be absorbed to a certain extent toadhere — and so porous papers will require a binder that contains a higher percentageof starch.
The salting solution is prepared as follows: rub 35 g of arrowroot into a creamy pastewith a little cold water. This is best done in a mortar and pestle. Add enough cold waterto make a fairly runny "cream" with no lumps. This "cream" will tend to separate intoits components, so it must be stirred or rubbed up to the moment of use. Separatelydissolve 35 g of sodium chloride and 3 g of citric acid in 950 ml of water. This solutionshould be brought to a boil in a porcelain container, and the arrowroot cream added insmall amounts with constant stirring using a glass rod or wooden spoon. Allow themixture to gently boil for a few minutes and then remove from the heat. When themixture has cooled it is ready to use. Remove the skin that forms on the surface of thecooled liquid; this is the residue of the hulls of the burst grains of starch. Tapioca or ricestarch may also be used in the same manner as arrowroot.
The formula for arrowroot paper is essentially the same as for plain salted paperexcept that it contains citric acid. Starch is not an "active" organic substance and so hasno effect on the reduction of silver chloride. Hence if the citric acid — which is "active"— were not present, the prints would be gray and flat, and hallmarks of a pure chlorideimage. In the presence of both citric acid and starch the prints take on a warm purplecolor after exposure, and, in the absence of toning, change to a yellowish-brown afterfixation.
COATING OF PAPERS WITH ARROWROOT SALTING SOLUTION
There are many approaches to applying the starch salting solution to the paper.Always mark the back of the sheet in pencil before applying the salting solution. Salting
2 2

SALTED PAPERS
solutions that contain 2% arrowroot or less are fluid enough to allow the paper to befloated on the starch solution. This is a little more difficult than floating paper onalbumen or thin gelatin solutions, and will not provide as much binder on the surface ofthe paper as other methods. Heavier coatings of starch may be obtained by immersingthe sheets in the salting solution and drawing them out over a glass rod, or between twoglass rods held tightly together.
The method most recommended in old manuals is first to pin the sheet of paper to aflat board, and use a thin flat brush to apply a 3-4 % starch paste. The salting solution islightly applied by brushing first in one direction, and then distributed with per-pendicular cross-strokes. The paste is allowed to sink in for a minute or two, then around dry brush is used to even out the coating and remove excess paste until a uniformmatte surface is obtained. The difficult part is to keep the coating as even as possible atevery step of the operation. If the paper is textured, care must be taken to insure thatthe paste is uniformly brushed into all the crevices. Still another approach is to applythe paste with a sponge, wait 1 or 2 minutes, and scrape off the excess with a squeegee,first in one direction, then the other. The paper is hung to dry after it has been coatedwith the salting paste. Only experience will determine which is the best approach tocoating the paper for any given paper stock or individual.
Arrowroot paper should be sensitized by floating on a 12% silver nitrate solutionthat also contains 4-5 % citric acid. The length of time for floating starch papers on thesilver bath is generally shorter than with other papers. If the coating of arrowroot is not aheavy one, then ½ minute may be sufficient. For heavily coated papers, 1 1/2 minutes atmost may be required. Too long floating on the silver bath results in gray and flatprints, especially with porous papers. The silver nitrate solution may also be appliedwith a wide brush. Citric acid additions to the silver bath will produce paper that willkeep several weeks after sensitization. The toning of arrowroot papers may be done withany of the toning formulae given in chapter 8.
Resume of Processing Steps forAlbumen and Salted Papers
The individual operations in the processing sequence of salted papers — toning,fixing, washing, and drying — are dealt with in depth in separate chapters. For the sakeof clarity, a brief overview of all the processing steps for a typical albumen or saltedpaper print is as follows:
STEP 1 INITIAL WASH
In order for the papers to have the necessary sensitivity, they must contain an excessof silver nitrate (see chapter 1). The initial wash — usually about 10 minutes in runningwater — is the first step in processing and it serves to remove this excess silver nitrate. Ifit were not removed at this stage, the silver nitrate would retard or completely preventany toning from taking place, and if it were still present when the print is fixed, blackstains would be the result. In large-scale printing operations the first wash water iscarefully saved, and from it the majority of the silver used to sensitize the paper isrecovered.
STEP 2 TONING
The toning process is the largest single factor in determining the final color of the
2 3

THE ALBUMEN & SALTED PAPER BOOK
print. It is performed before the fixing step — although it may be done after fixing withequal success — because the toning process forms silver chloride as a by-product, andthis would therefore resensitize the print if it had already been fixed. The toning step isperformed in weak white light if the prints are to be toned by inspection and not "byrule." Otherwise all the processing steps up to and including the fixing are performed inyellow light.
STEP 3 WASH BEFORE FIXING
A short wash — 3 to 5 minutes in running water — is given before the prints aretransferred to the fixing solution. Interaction between the fixer and toner may causechanges in the fixing solution that would damage the color and permanence of theprints.
Fig. 12. A processing line for albumen prints. Trays B & C are for theinitial wash; D is the toning tray, and E is the fixer tray. F and G are forwashing the prints.
STEP 4 FIXING
The purpose of fixing is to remove the unreduced silver chloride and other light-sensitive substances such as silver citrate, etc., which may be present. A fixer composedof an alkaline 15 % solution of sodium thiosulfate solution is useful for all albumen andsalted papers. The time of fixing should be 8 to 10 minutes. For maximum per-manence, two fixing baths are used. The prints should be fixed for 4 minutes in eachbath, and drained for at least 5 seconds before being placed in the second fixing bath. Afresh batch of fixer should be made for each printing session; the extra silver present insalted papers quickly exhausts fixing baths, and even unused fixer solutions break downvery rapidly.
STEP 5 WASH BEFORE HYPO CLEARING TREATMENT
The prints should b e given a short (2 to 4 minutes) wash in running water beforetreatment with a hypo clearing agent. This wash removes a large portion of the hypoand avoids overloading the mechanism of hypo removal.
2 4

SALTED PAPERS
STEP 6 TREATMENT WITH A HYPO CLEARING AGENT
The use of a hypo clearing agent is recommended to aid in the more completeremoval of silver-thiosulfate complexes which may cause damage to the print. A 3-to 4-minute treatment in 1 % sodium sulfite solution is required.
STEP 7 FINAL WASH
Depending on the thickness of the rawstock, the prints should receive at least a 30-minute wash in an effective print washer. Heavier weight papers may require longerwashing.
STEP 8 DRYING
Prints may be dried in a number of ways. A good approach is to gently blot them onhigh quality photographic blotters and air dry them face up on fiberglass screens.
2 5


CHAPTER FOUR
Albumen Paper
I believe the albumen print will be the print of the future, as it is that ofthe present. It is for the present and coming photographers to make itsfuture better and more enduring than its past.
—W.H. Sherman, 1892'
The Early History of Albumen PaperThe first published notice of the use of albumenized paper in photography occurred
in the following letter, which appeared in The Athenaeum, May 11, 1839:
Photogenic Drawing — Considering that any (however trifling) im-provement will not be unacceptable to those of your readers who feel aninterest in this art, I have been induced to communicate the followingmethod of preparing the paper, which, after many experiments, I find tosucceed best. Wash the paper with a mixture of equal parts of theWHITE OF EGG and water, afterwards with the solution of nitrate ofsilver, fixing the drawing as usual with the iodide of potassium. H .L.2
To the as yet unidentified experimenter " H.L." must go the honor of having producedthe first photographs on albumen paper. It is notable that his or her work with albumenfollowed so closely upon Talbot's revelation on Feb. 21, 1839, of the actual workingdetails of "photogenic drawing " (plain salted paper).
Of course, the method described by "H.L." differs from the usual practice of thealbumen printing process in one vital respect: it does not call for the addition of anychlorides to the albumen, and therefore depends solely on the light sensitivity of "silveralbumenate. " Not until 1850 did Blanquart-Evrard supply the missing chlorides andearn the distinction of having invented the albumen printing process in its mostpractical and useful form (see below).
Although "H.L." was the first person to make albumen paper without chlorides, heor she was not the last. The very first general treatise on photography, Robert Hunt'sPopular Treatise on the Art of Photography (published in Glasgow in 1841), includesthis suggestion:
By soaking the paper in a solution of isinglass or parchment size, orrubbing it over with the white of egg, and drying it prior to the ap-plication of the sensitive wash, it will be found to blacken much morereadily. . . . 3
27

THE ALBUMEN & SALTED PAPER BOOK
Probably very few photographers made albumen prints by this method, since the resultswith plain salted paper were far superior. The idea of using albumen without chlorideswas "rediscovered" in 1865 by Schultner4 and actually proposed as a practical andeconomical printing method in 1866 by Schnauss5 . Albumen prints made withoutchlorides required a weaker than usual silver solution and a fairly contrasty negative, butthe resultant prints have surprising vigor and tone well in gold toners. However, the useof chlorides produces a far more versatile and satisfactory printing paper, and in 19th-century practice chlorides were always used.
INVENTION OF THE ALBUMEN PRINTING PROCESS
The albumen printing process as it was actually used during the 19th century was theinvention of Louis Desire Blanquart-Evrard, a pioneer French photographer who mademany important contributions to photography. He was both a talented photographerand a technical innovator, and his writings on photography were very influential.Without doubt his most useful and far-reaching discovery was the albumen print, thephotographic medium upon which the last half of the 19th century was recorded.
The discovery of albumen paper came in the late 1840' s as Blanquart-Evrardsearched for improvements in Talbot's calotype process. Blanquart-Evrard tried and wassomewhat successful in using albumen as a carrier for the light-sensitive salts on papernegatives, and he went further and adapted it to the usual method of making positiveson plain salted paper. It worked splendidly as a positive material, and provided adeeper, bolder image than could be obtained on the matte salted papers of the day.
Blanquart-Evrard communicated his discovery to the world in a brief account of hisvarious photographic researches which he presented to the French Academy of Scienceson May 27, 1850.6 Photographers were quick to try out the new method for positiveprints, and it became an almost instant success. By 1855 most serious photographershad at least tried — if not adopted — albumen paper.
Blanquart-Evrard's original recipe for the preparation of albumen paper was simple;white of egg was beaten to a froth with 25 % by weight of a saturated salt solution, andthe mixture was allowed to settle overnight. The solution was then placed in a tray andthe paper was floated on the albumen for one minute and hung up to dry. The driedpaper was not light sensitive and would keep indefinitely in the albumenized con-dition.
To print with the material, the paper had to be sensitized by floating on a strongsolution of silver nitrate and dried again. It was then ready to place in the printingframe and expose to daylight. Thus, it may be seen that albumen paper is essentially thesame process as plain salted paper, except that egg white is employed as a bindermaterial to close the pores of the paper and retain the light sensitive substances in acompact layer on the surface. It is precisely because the image is retained on the printsurface that albumen paper represented such a great advance in print boldness andcontrast, and that it possessed increased capacity to reproduce fine detail.
The albumen printing process appeared at almost the same time as the discovery ofthe revolutionary wet collodion negative process by Frederick Scott Archer. These twophotographic materials were seemingly created to meet the needs of each other; tonally,albumen paper made fine prints from the kind of negatives that the wet collodionprocess generated, and the increased capacity for detail in the albumen print exactlyanswered the needs of the new glass negative. By 1860 they had become established asthe dominant — and almost the only — negative and positive materials used in or-
28

THE ALBUMEN & SALTED PAPER BOOK
sistently good paper.It is no wonder that only two paper mills in the world managed to consistently
produce a paper of the necessary quality, and these two mills were able to maintain theirmonopoly from the 1860 ' s until approximately World War I. 10 They were the above-mentioned Blanchet Freres et Klébler Co. in Rives, France (hence their product was
Fig. 13. 1885 advertisement for albumen paper. Note references to"Rives" and "Saxe" rawstock.
known as the " Rives" paper) and Steinbach and Company, located in Malmedy,Belgium (at that time part of Germany). Steinbach paper was known outside Germanyas "Saxe" paper. Both papers were machine-made all-rag papers, sized with a mixture ofstarch and resin soap. One analysis of Rives photographic rawstock conducted in 1904showed it to be comprised of 85 % linen fiber and 15 % cotton fiber."
In the late 1850 's and especially after 1860, two new factors in photographic
Fig. 14. Two types of stereo viewers. Most stereo views produced duringthe 19th century were made on albumen paper.
technology and practice generated a great demand for albumen paper. The first of thesewas the stereograph; its ability to transport the viewer to distant scenes with the illustionof three-dimensional reality depended largely on the smooth surface and fine detail ofalbumen paper. Stereo views were extremely popular, and created a correspondingdemand for albumen paper. Nearly all stereo views before 1890 were made on albumenpaper.
The other factor was the emergence of cheap portraiture for the masses in the small
3 0

ALBUMEN PAPER
dinary photographic practice, and they remained so for the next 20 years. Around 1880the gelatin dry plate began to replace the wet collodion negative, but the albumen printremained the most popular printing material until 1895. At that time emulsion-typegelatin and collodion printing-out papers captured the market and ended the 40-yeardominance of albumen paper.
Albumen paper changed considerably over the years between its introduction in1850 and its ultimate disappearance as a commercial article in 1929.7 The earliestalbumen prints strongly resembled the salted paper prints of the late 1840 's; they werechocolate brown or reddish brown in color, but of course did possess some degree ofadded gloss and depth, depending on the amount of water added to the albumen. Twogreat technical advances in the albumen printing process that solidified its primacy werethe introduction of alkaline gold toning methods and the refinement of coatingtechniques to allow for quite glossy prints. Both of these refinements were made in thedecade 1850-1860.
I mproved toning baths made possible not only a wider range of image colors, butalso significantly increased the durability and resistance to fading of the prints. Theman responsible for this fundamental advance was James Waterhouse, who first appliedalkaline toning sometime around 1855. More detailed information on the history oftoning can be found in Chapter 8.
The other important advance was not the product of any one person but representedan evolutionary process based on experience, as photographers strove to make theprocess of coating albumen simpler and more effective. The great desideratum of theperiod was the attainment of greater gloss and detail, and it was found by many ex-perimenters working independently that partially decomposed — in chemical terms"denatured" — albumen yielded a glossier and more even coating. Decomposedalbumen passes into an acid condition and forms a homogeneous mixture without theuneven viscosity and stringiness of native egg white. Some albumenizers went so far asto actually allow the albumen to naturally ferment at elevated temperatures for severaldays. The origins of the fermentation technique are uncertain, but fermented albumenwas already in use by the mid-1850 's as a substratum on glass plates to improve theadhesion of collodion.8 This technique later became standard procedure in theDresden, Germany, factories, which from the early 1870's on supplied the majority ofthe world's albumen paper. Not surprisingly, Dresden paper could readily be identifiedby the smell.
It also became apparent during the 1850 ' s that albumen paper required a certaintype of raw paper stock in order to obtain the best results. Experience showed that athin, smooth paper of exceptionally high quality was necessary for success. Theproduction of such paper was no easy matter; the main difficulties were the preventionof metal flecks in the paper and the need for an abundant supply of mineral-free water.These kinds of impurities proved extremely troublesome both in the paper manufac-turing process and also when the paper was coated with highly reactive photographicsolutions. The causes of metal flecks in the rawstock were metal buttons left in the ragsused to make the paper, and bits of metal breaking off the paper-making machineryitself. Since water purification techniques were not very advanced at that time, onlynature could provide a supply of mineral-free water, and such places were rare. The millof the Blanchet Freres et Kléber Co. in Rives, France, was located in a valley and usedwater from a nearby mountain lake, fed by "the melting of the alpine snows. "9 Apart
from all this was the enormous amount of capital required to construct a paper mill, andthe fact that the skill and experience of the staff above all else contributed to a con-
2 9

THE ALBUMEN & SALTED PAPER BOOK
Fig. 16. The albumen is beaten to a foam using steam-drivenchurns.
The city of Dresden, Germany, became the center of the burgeoning albumen paperindustry. Close to the sources of rawstock and enjoying an abundant supply of low-costeggs, Dresden also had the advantage of lower labor costs than English or American
Fig. 17. The albumen is then fermented in large casks forseveral days.
competitors. 15 As a result, Dresden soon had enough manufacturing experience to addconsistent high quality to its list of advantages. As mentioned above, the Dresden firmsused naturally occurring bacteria in the albumen to initiate-a fermentation process thatlasted several days. The fermented albumen provided glossier paper that toned more
3 2

ALBUMEN PAPER
format known as carte de visite, or the visiting card photograph, called by the public
simply " card pictures. " These consisted of an albumen print on a cardboard mount thatwas approximately 6 x 10 cm in size. The carte de visite mania originated in Paris andsoon proved to be the greatest stimulus for the photographic gallery trade since thedaguerreotype, and the cheap and easily multiplied portraits were popular in all strataof society. Famous people, great works of art, advertising material, faraway places andpatriotic tableaux all were reproduced on cartes de visite and eagerly collected andtraded by the public. The photograph album soon became a ubiquitous householdarticle, and all this fueled the demand for albumen paper.
To be sure, the possibilities of albumen paper as an article of commerce attractedenterprising photographers, and as early as 1854 albumenized paper appeared for sale
Fig. 15. Manufacture of albumen paper in Dresden, Ca. 1890.The first step is to separate the eggs.
in Germany. 12 Many small companies in Western Europe undertook to producealbumen paper, but for various reasons Germany emerged as the center of worldproduction by the year 1870. In the United States during the 1850 ' s the tendency was to
import rawstock from Europe for individual photographers to albumenize themselves,but during the Civil War a change took place, and from then on most photographersbought the paper already factory-coated with albumen. American photographers couldchoose among four major American brands or from an assortment of Germanproducts. 13 American and English producers were at the immediate disadvantage ofhaving to import the rawstock from France and Germany, where the paper mills whichproduced it were located. In the United States the centers for albumen papermanufacturing were Philadelphia, Rochester and New York. After 1880 the importanceof the German producers grew, and they took control of an even larger share of theAmerican market than they had enjoyed in the 1870 ' s. In 1890 the editors of Anthony 'sPhotographic Bulletin complained loudly about an increase in the tariff on albumenpaper, declaring that American photographers use German paper "in a proportion offour to one of domestic paper, and this in spite of its higher price on the market.""
3 1

ALBUMEN PAPER
Fig. 18. Paper is then floated on the albumen solution andhung on racks to dry.
easily. However, other European and American producers made good quality albumenpaper using aged but not actually fermented albumen.
Some idea of the scale of the Dresden production may be gained by considering that
Fig. 19. The coated paper is "calendered" in rolling presses tomake it more flexible.
one company (there were two major ones and several smaller ones in the city), called theDresdener Albuminfabriken A.G., in 1888 produced 18,674 reams of albumen
paper. 16 Each ream consisted of 480 sheets 46 x 58 cm in size. To coat a ream of paperrequired 9 liters of albumen solution, obtained from 27 dozen eggs. Thus total
3 3

THE ALBUMEN & SALTED PAPER BOOK
production for that one year in this one factory consumed over six million eggs. As maybe seen in the accompanying illustrations, the procedures in the manufacture ofalbumen paper are manual ones, and it is really a handicraft product, quite differentfrom the machine-made photographic articles of the present day. Each sheet ofalbumen paper was floated by hand, and in some cases floated twice on the albumen inorder to obtain a glossier coating. The illustrations show that nearly all the tasks inalbumen paper factories were performed by women, and this was the case in bothEuropean and American factories.
A very large percentage of the albumen paper produced during the period 1870-1900 was tinted various shades of pink, purple and blue by adding aniline dyes to thealbumen before coating it on the rawstock. The first such paper appeared on the market
Fig. 20. Finally the paper is sorted into different quality levelsand packed for shipment.
in 1863 17 and attained great popularity in the 1870 's and 1880 ' s. Tinted paper wasmainly used for portraits, and of all the myriad shades produced, pinks seem to havebeen the most popular. Because the dyes used had poor stability to light — especially insuch diluted form — most of the dyed paper is difficult to recognize today. In somecases although nothing remains of the original tint of the paper, a peculiar buff orchamois cast identifies albumen prints that were originally made on tinted paper. This"dirty" color was noticed in the 1890 ' s and the use of tinted paper advised against forthat reason. 18
Until the mid-1890's albumen paper reigned supreme as the workhorsephotographic printing material, meeting the needs of very diverse users with equalfacility. The state of printing and photomechanical reproduction in the last half of the19th century did not provide for an easy and cheap way to reproduce photographicimages, so actual photographic prints — albumen prints — were used for many ad-vertising, educational and utilitarian purposes. Albumen paper was so pervasive in thelast third of the 19th century that the phrase " silver print " was understood by everyoneto mean "albumen print."
3 4

ALBUMEN PAPER
Preparation of the Albumen SolutionThe first step in the production of albumen paper is to prepare the albumen
solution itself. Only the freshest available eggs should be used, even though thealbumen will be allowed to age before coating it on the paper. Each large egg willprovide about one ounce of albumen. The difference between eggs produced inassembly line fashion in massive henneries and eggs laid by well fed, free-runningchickens is quite considerable. Although the latter sort are preferable, supermarket eggswill suffice for the purpose of preparing albumen paper. The eggs should be separatedcompletely and only the clear white saved — without the slightest contamination ofyolk, blood or the stringy tissue known as the chalazae. Small, inexpensive eggseparators are available at housewares outlets and are a convenient way to separate eggs.A good plan is to separate the eggs over a small bowl and pour the albumen into a largerbowl after each egg is separated. This way, if some contamination occurs, it is notnecessary to attempt to remove a small amount of contaminant from a large amount ofalbumen.
In the 19th century the yolks were preserved with salt and sold to bakeries or totanners, who used them to finish kid leathers. The money realized from the sale of eggyolks was a large factor in the profit and loss statements of the giant Dresden albumenpaper producers. 19 When the number of yolks is not on the industrial scale, the BritishJournal of Photography for Sep. 2, 1861 (p. 313), provided this recipe:
A HINT TO ALBUMENIZERS. - What can you do with the yolks of youreggs? Make them into cheesecakes that will be pronounced unrivalled.Dissolve a quarter of a pound of butter in a basin placed on the hob, stirin a quarter pound of pounded lump sugar, and beat well together; thenadd the yolks of three eggs that have previously been well beaten; beat upall together thoroughly; throw in half of a grated nutmeg and a pinch ofsalt, stir, and lastly add the juice of two fine-flavored lemons and the rindof one lemon that has been peeled very thin; beat up all together,thoroughly, and pour into a dish lined with puff-paste, and bake forabout twenty minutes. This is one of the pleasantest "bye-products " weare acquainted with in the economics of manufacturing photography. Tryit!
When the albumen has been obtained from the eggs, the next step is to beat it to afroth with the appropriate amount of ammonium or sodium chloride. Prints withsimilar color and contrast may be expected with the use of either of these chlorides, orboth used in combination in the correct amount. The amount of chloride used has adefinite relation to the sensitivity, and to a small extent, the contrast of the paper.Papers with a low (1-1.5 0
/0) chloride content are less sensitive and tend to produceslightly more contrasty prints from thin negatives than do papers with the normalchloride content of 1.5-2.5% . This slight gain in contrast is at the expense of a rich,dense image, however, so it is best in ordinary circumstances to keep the chloride at1.5 % or above. On the other hand, the use of more chloride in the formula than isnecessary only results in higher silver consumption without conferring any additionalbenefit. The chloride — ammonium chloride was the most commonly used in the 19thcentury — should be dissolved in a minimum of water and added to the egg whitebefore the beating process. If a blender is used to beat the egg whites it is not necessaryto dissolve the chloride in water.
3 5

THE ALBUMEN & SALTED PAPER BOOK
Beating the albumen is necessary to accomplish the task of chemically breakingdown the different protein substances until a more or less uniform substance is created.While beating to a froth does the major work of evening out the viscosity of albumen'sdifferent components, further "denaturation" by chemical means must take placebefore the albumen is ready to apply to the paper. The chlorides added are vital to the
Fig. 21. H. Hurst's submission to The Photographic Newsfor Nov. 12, 1858, expressing his ideas on the subject offrothing albumen.
formation of the photographic image, but they also help to denature the albumen; oneof the effects of adding chlorides is to reduce the volume of froth produced during thebeating step. The third kind of denaturing treatment usually employed is the ad-justment of pH by the addition of acids or alcohol. The chemical forces which bindtogether the enormous molecules of protein grow weaker as the pH is lowered, and thephysical properties of the substance change as a result. The effect of adding chloridesand acids, such as acetic acid, and finally beating the egg white is to completely andirreversibly change it. After settling for 24 hours and aging in a refrigerator for one weekit is a yellowish homogeneous liquid with a slight "aged" odor that signals its readinessfor use.
A sample preparation of albumen might be as follows:
Ammonium chloride......................15 gGlacial acetic acid............................2 ml combine and add to:Water ........................................... 30 mlAlbumen ......................................... 1 liter
The mixture should be beaten in an electric mixer or blender for 3 minutes, or until theentire mixture has been converted to a froth. Allow the mixture to settle in a covered
1)Dear sir,—I have used the above apparatus to frothalbumen rapidly, and found it answer very well ; at a canbe placed a ferrule, so that the lower part can be take off.The lower stick is cut into four portions, quills are slid incrosswise, and then tied in position. H . HURST .
3 6

ALBUMEN PAPER
container for 24 hours. Strain the mixture through muslin; the liquid may have to besqueezed through the muslin with some pressure. Cover and refrigerate for one week.The albumen solution will remain useful for several weeks after the one-week agingperiod. The smell of the albumen and its color, sedimentation, etc., will reveal when ithas decomposed too badly to use.
Fig. 22. An 1874 advertisement for Dresden paper in an American photographic book,The Practical Printer.
Coating Paper with AlbumenThe basic mechanism of coating consists in filling a tray to a depth of approximately
2/3 to 3/4 inch with the albumen solution and floating the paper on the surface for 11/2
minutes. The choice of paper for albumenizing is somewhat limited, since paper of thetype commonly used for the purpose in the 19th century is not readily available in artsupply stores. A thin, smooth all-rag stock is necessary, and perhaps the closest ap-proximation of the ideal that is available in most areas is Strathmore Series 500 drawingpaper, one-ply, with the plate finish. Although it is somewhat heavier than the usual19th-century rawstocks, this paper will perform satisfactorily.
To coat the paper, first condition both the paper and the albumen solution byallowing them to gradually come to the operating temperature of the work room. Whenready to coat, filter the albumen through muslin and place it in a tray slightly biggerthan the size of sheet to be coated. Immediately before a batch of paper is to be floated,it is helpful to add a surfactant such as Kodak Photo-Flo'"" 1:200 to the albumensolution. Use 4 ml of Kodak Photo-Flo''' for each liter of albumen, and gently stir it intothe solution, avoiding bubbles as much as possible. The purpose of the surfactant istwofold: first, it controls bubbles — one of the most troublesome aspects of the whole
3 7

THE ALBUMEN & SALTED PAPER BOOK
process — and second, it improves the runoff characteristics of the albumen duringdrying and promotes a more even coating. The commonly used jargon for surfactants inphotographic coating plants is to call them "spreaders," which graphically sums up theirbenefits in the coating process.
The actual procedures and precautions of the floating process itself are the same asthose described in Chapter 3 for plain salted papers. Albumen paper must be coated on
Fig. 23. A drying rack for albumen paper.
one side only and cannot be immersed in the solution. With thin papers air bubblestrapped under the sheet will be visible as light circles on a dark background, and if theyappear, the ,sheet must be lifted by one corner and the bubbles broken. With thickerpaper the bubbles will not be visible through the sheet, so each sheet must be lifted offthe surface and the bottom side inspected for bubbles. Floating paper requires a littleskill, but it is not really difficult and experience is the best teacher. It is best to start witha sheet about 10 x 12 inches in size, since this leaves plenty of margin area when one 8 x10 or four 4 x 5 prints are desired. The time of floating should be 1 to 1 1/2 minutes.Time the process from the moment all bubbles are broken and the sheet lies flat on thesurface of the solution. Lift the sheet slowly off the solution and hang it to dry by two
38

ALBUMEN PAPER
corners along the long edge of the sheet.The arrangements necessary for drying the sheets are the same as those for plain
salted papers described in Chapter 3. One additional factor is present with albumenpaper, however, and that is the effect of heat on the drying process. The higher thetemperature of the drying environment, the faster will be the drying, and more im-portantly, the glossier will be the paper. Temperatures of 30 to 50 ° C were maintained indrying rooms in albumen paper factories in the 19th century. High temperature dryingis not necessary, but it does offer a way to improve the gloss and depth of single-coatedalbumen papers. During the process of drying the albumen will collect along thebottom edge of the sheet. If this runoff is allowed to dry, a thick rind of albumen willform and make the sheets very difficult to work with in subsequent operations. Inaddition, the last droplet will take a very long time to dry. The remedy for this is to blotoff the collected runoff with a cloth several times during the drying process. The sheetsshould dry in a relatively short time if this precaution is observed. When dry, the sheetsshould be placed in a pile and flattened under weights. This makes them supple andeasy to handle in the further floating operations to come.
DOUBLE COATING OF ALBUMEN PAPER
There will always be a slight difference in gloss and thickness of coating between thetop half of the sheets and the bottom half because of the action of gravity in hangingthe sheets to dry. The severity of this effect depends on a large number of factors, but itis usually not so pronounced as to render a batch of paper completely unsuitable for use.Obviously many of the characteristics of the finished prints depend on the thickness andglossiness of the coating of albumen; among these are the ultimate color of the prints,their brilliance and "depth," and the ease of toning and fixing. Toning and fixing aremore difficult with thicker coatings because the albumen becomes increasingly lesspermeable as the coating thickness increases. As mentioned above, one of the mostattractive features of albumen paper in the 19th century was its glossy surface and added"depth," so experiments were made to increase the coating thickness by using multiplecoatings of albumen. It was soon learned that some form of hardening or coagulatingstep was necessary between coatings to render the first coating insoluble. Otherwisethere was no gain in thickness or amount of albumen on the sheet, because the secondcoating step dissolved off the albumen remaining from the first coating operation.
There are three possible approaches to hardening the albumen between the first andsecond coating operations. The simplest and most widely used method in the 19thcentury was to store the paper in a warm loft for six months, during which time a slowcuring process sufficiently hardened the albumen. 20 If a speedier result is desired, thereare two " instantaneous" approaches. One is to subject the albumen to a current ofsteam, which in effect cooks the albumen and renders it insoluble. The other is easierand more practical; it involves briefly immersing the sheets in a 70% solution ofisopropyl alcohol. Pure alcohol is too strong and unevenly coagulates the albumen layer,while too dilute alcohol solutions are not strong enough to coagulate the albumenbefore it partially dissolves into the water. Experience has shown that a 70% solution isthe most effective. To prevent leaching out of the chlorides from the albumen,whatever chloride content is present in the albumen itself should also be added to thealcohol solution — if the albumen contains 2 0/o ammonium chloride, so should thealcohol solution.
A satisfactory procedure to accomplish the hardening is simply to place the alcohol
3 9

THE ALBUMEN & SALTED PAPER BOOK
solution in a tray and slowly pull the sheets of albumenized paper through the solutionand hang them up to dry. When they are dry they should be placed in a pile andflattened under some weights to make them easier to manipulate during the secondfloating operation.
Mark the edge of each sheet that was lowest when the sheets were hung to dry thefirst time. This marked edge will be hung as the top after the second floating on thealbumen, in order to even out the coating and thereby compensate for the runoff effect.
Two coatings of albumen produce papers that are quite glossy and may even be soheavily coated that they are brittle and hard to tone. Double-coated paper usuallyproduces better prints from thin negatives than single-coated paper does. For moreinformation on this point, see Chapter 7. A large portion of the albumen paper soldafter 1880 was of the double-coated variety. However, double-coated papers have agreater tendency to curl, and are harder to manipulate in sensitization and printing.
Sensitizing Albumen PaperOnce the sheets have been albumenized, they will keep very well if stored in a cool
and dry place. If the sheets must be rolled for storage, it is better to roll them with thealbumen side out so that the cracking of the albumen is minimized. To sensitize thesheets for printing they must not be excessively dry at the time of sensitization, becauseif too dry, they will not properly absorb the silver nitrate solution. A good plan is toplace the sheets overnight in a damp location such as a basement, etc. This also tends tomake the sheets more supple and easier to handle. Albumen paper should be floated ona 10-12% silver nitrate solution for 2 1/2 to. 3 minutes. No additives to the sensitizingbath are required in the ordinary course of printing. See Chapter 6 for complete in-formation on the sensitization process and the management of the silver bath.
Of course, care must be taken during sensitization to make sure that no air bubblesare trapped under the sheet; bubbles prevent sensitization where they occur, and willcause white circles on the face of the finished print. The sheets must be very slowly andcarefully lifted off the silver solution, since no silver solution should reach the back ofthe sheet, and also because if lifted too quickly, the runoff of sensitizer might causeuneven sensitization. Some old manuals recommend drawing the sheets over a glass rodas they are lifted free of the solution, but this is unnecessary if the sheets are slowlypeeled from the surface. Mild heat may be used to accelerate the drying of the paperafter sensitization, but the paper must not be allowed to become excessively dry at thetime of printing. As is the case during the albumenizing steps, the silver solution whichruns off the sheets when they are hung to dry must be blotted with blotting paper or acloth. Not only does this speed the drying process, but it insures more even sen-sitization.
Ammonia FumingOne of the most confusing things about researching the albumen printing process in
19th-century sources is the question of ammonia fuming. This was a procedure in whichthe sensitized and dried sheets of albumen paper were hung in a closed box and sub-jected to the vapors of ammonia. The ammonia fumes were supplied by placing strongammonia in a dish in the bottom of the box. "Fuming" was usually carried on for 5 to10 minutes. The purpose of fuming was to make the paper more sensitive and to obtainricher, more brilliant prints. While it is true that in some circumstances ammoniafuming will produce more sensitive and contrasty paper than would otherwise be ob-
40

ALBUMEN PAPER
ALBUMEN PAPER.
Why
"THREE CROWN" ALBUMEN PAPER
IS ABSOLUTELY THE BEST.
Because none but the Best of the Rives Paper is
selected for Albumenizing the THREE CROWN
BRAND. It is therefore free from the imperfections
often to be found in other brands, which arise from
imperfections in the plain paper.
Fig. 24. An advertisement for albumen paper, 1894. The tint of the paper and its
quality level is shown on the label.
tained, nevertheless ammonia fuming is not necessary in order to produce good results.
The confusion about the practice of fuming arises because ammonia fuming was a
quite common practice in the United States and yet was hardly practiced at all in
Europe;21 in Germany the practice was used very infrequently. Reading an American
manual, one might find the fuming technique given a prominent place, while in a
German manual it is only briefly mentioned. The resolution of this apparent con-
4 1

THE ALBUMEN & SALTED PAPER BOOK
tradiction lies in the fact that much of the value of fuming may be realized by simplyincreasing the strength of the silver bath or by aiming for negatives of slightly differentdensity range. That is, other factors in the printing process may compensate for the lackof fuming and equally good results obtained.
The value of fuming was most important when a paper of low chloride content wassensitized on a relatively weak sensitizing bath. In this circumstance the extra sensitivityconferred by fuming might make a considerable difference in the results. However,with the use of a stronger silver bath only slightly more silver would be consumed, yetthe paper would probably be as sensitive as the fumed sheet. In those places where theuse of fuming had become customary, other factors in the process adjusted to thatcustom, and gradually fuming came to be perceived as a necessity; in areas where thepractice never became customary, it was reserved for occasional use when extra sen-sitivity was called for. For the modern practice of albumen printing, the troublesomeand unpleasant process of ammonia fuming seems unnecessary .
Printing and Processing Albumen PaperAlbumen paper sensitized as described above will remain in good condition for 24
to 48 hours, depending on environmental conditions. For optimum results it should beboth exposed and processed during that period. Care and patience should be exercisedin every step of the printing operation, beginning with the loading of the printingframes. Make sure that the glass is clean and that the frame is working properly beforerisking a valuable negative. If a glass negative is used, a piece of foreign matter such as asplinter of wood between the glass of the frame and the negative can fracture the
Fig. 25. Chickens and eggs were familiar motifs in albumen paperadvertisements.
negative once pressure is applied. Always use felt pads in the printing frames todistribute the pressure, and make sure that the pads lie flat when re-closing the framesafter checking the progress of exposure.
White light must be excluded from all operations in sensitizing and subsequenthandling of the paper, although it is helpful to evaluate the progress of exposure brieflywith a low wattage white incandescent light. Yellow light does not allow the separationof tones in the middletone and shadow areas to be clearly seen, and under- oroverexposed prints may be the result. The conduct of the printing operation itself isgoverned by the nature of the negative to be printed. A complete discussion of the
4 2

ALBUMEN PAPER
factors involved in print exposure may be found in Chapter 7, but in general thinnegatives are exposed to weaker and more attenuated light, while dense negatives mayrequire the intensity of full sunlight. Only experience can provide the knowledge ofhow far to carry the exposure of any given print, but in all cases the print should appeartoo dark — to a greater or lesser degree — when leaving the printing frame. All printsbleach to a certain extent in the toning and fixing operations, but the exact degree ofoverprinting necessary will vary for different negatives and batches of paper, and alsodepends on taste. However, albumen prints require slightly less overprinting than saltedpaper prints do, and double-coated albumen papers need less overprinting than single-coated sheets.
The color of the prints after exposure will vary from a rich purple to a dark brown.The prints are very beautiful as they come from the frame, and many writers on thealbumen printing process have remarked that they wished the prints could be preservedin that state forever. The exposed prints should be kept in a light-tight drawer or boxuntil all prints are ready to be processed. The general outline of processing is the same asthat given for plain salted papers at the end of Chapter 3. The first step in processing isan initial wash to remove the bulk of the free silver nitrate. Although the washingshould be continued past the point where the wash water is free of the cloudyprecipitate of silver chloride, do not allow the first wash to go on past 10 minutes inrunning water. Excessive washing removes the last small traces of silver nitrate that arenecessary for some toners to work properly. The prints should be agitated or other stepstaken to see that they are uniformly washed; they are now ready for toning.
Toning Albumen PaperThe main difference between the processing of plain salted papers and that of
albumen paper is the strength of the toning bath; albumen prints need a much strongerand more effective toning solution than salted papers do, because albumen is lesspermeable and the silver particles are more protected. This also means that the toningof albumen prints is usually slower — even with a stronger toning solution — than thetoning of salted paper prints. Any variations in the thickness of the albumen coating,especially in the case of double-coated papers, will be immediately apparent in thetoning step, because less heavily coated areas will tone more quickly and deeply.
Any of the gold toning baths given in Chapter 8 may be used with albumen paper.They should be used full strength for ordinary glossy albumen paper. A good way forbeginning printers to get a sense of the toning process is to leave one print completelyuntoned, and fix it and dry it with the rest. In this manner a basis of comparison isestablished for the amount of toning that has taken place.
The historical practice of toning glossy albumen paper involved the used of goldtoners almost exclusively, while salted papers and the later matte-albumen papers weretoned with either gold or platinum toners or both used in combination. For glossyalbumen paper, however, there can be little question of which toning method wasusually applied, for all but a negligible few experimental prints were toned with goldtoners of the kind described in Chapter 8. Black tones (instead of the usual cool brownsand purples) were attainable with gold toners on albumen paper, but never gained greatpopularity.
The toning step is the focal point of the whole processing operation. Every otheraspect of processing may be done "by rule" and is fairly routine, but toning of albumenprints is usually done by inspection. The problem with toning by inspection is that the
4 3

THE ALBUMEN & SALTED PAPER BOOK
prints alter dramatically in fixing and drying, and end up a little darker and colder intone than they appear in the toning bath. Thus is it easy to under- or overestimate theamount of toning that has taken place. The progress of toning, even more so than theprogress of exposure, cannot be accurately gauged in yellow light, so a weak whiteincandescent light is needed at intervals for evaluation of the toning operation. If thelight is not too bright it may be left on during the whole toning process, because afterthe first wash the prints are considerably less sensitive. Another difficulty in toning isthat all prints do not tone at the same rate, so that when one print in a batch is judgedto be toned, the others in the same batch may not necessarily be toned to the samedegree. The necessity of giving the prints individual attention limits the number ofprints that may be toned at any one time.
The prints must be kept uniformly wetted and be constantly agitated during toning,or uneven toning will be the result. The gold toning solution should not be made toostrong (in order to work more quickly), because too rapid a deposition of gold will spoilthe prints. The gold layer will then be merely superficial, and will be largely removed inthe fixing bath, leaving a flat and meager looking print. Also, if toning is carried toextremes in a normal strength bath, too much gold is substituted for silver and theprints turn an unpleasant slate blue color, and lose density. There must be a har-monious distribution of both gold and silver in the print to form an image of good colorand contrast. Ideally the toning operation should last 10 to 15 minutes or even longer;in this way there is less chance of over-toning, and there is time to consider whether theprints are toned to the desired extent.
In large 19th-century galleries and mass-production printing establishments thetoning of prints was a specialized occupation. The " toners" in such places often usedtheir own secret formulas, and each had his or her own special way of determining whena print was correctly toned. One thing to consider that may help in this determination isthe extent to which the prints already have a purplish or cool brown color before thetoning process is begun. Sometimes prints are quite reddish in color by the time theyare ready to tone, and at other times the prints may retain the purplish color at thatpoint. The purple color will completely disappear in the fixing solution, so if the purplecolor has fooled the "toner" into thinking that the toning has advanced farther than itactually has, then under-toned prints are sure to result. Many old manuals advise"redding up" the prints by placing them in a 3 % acetic acid solution for 10 minutes andwashing them in running water before attempting to tone them. In the usual course ofmodern practice, "redding up" will not be necessary, because prints are usually notpurplish at the point of toning unless ammonia fuming has been used.
In most cases the prints should take on a definite lilac or purplish tinge duringtoning, but the process should not be carried so far that the prints look at all bluish. Thedegree of toning to strive for is a matter of taste, but severe under-toning may lower theexpected life-span of a print. The prints may be examined by transmitted light duringtoning to give a more accurate idea of how much toning has been accomplished. Whenby transmitted light the last traces of warm color have disappeared from the print, thetoning process is quite advanced, and the final color of the print is likely to be purple orpurplish-black. Many old manuals advise to tone until the warm color has almostdisappeared by transmitted light. With each of the gold toning baths given in Chapter8 there will be slight differences in rate of toning, and with the thiocyanate toner adifference in the mechanism of toning, but the general instructions given above applyno matter which toner formula is selected. When the toning is completed the printsshould be given a running water wash for at least 5 minutes in accordance with the
44

ALBUMEN PAPER
general outline of processing given at the end of Chapter 3.
Fixation, Washing and Drying ofAlbumen Paper
Fixing of albumen prints is done in an alkaline 15 % solution of sodium thiosulfate(also called "hypo " ). While fixing the prints may appear to be a routine matter that doesnot require careful attention, in reality the permanence of the prints depends to a greatextent on the observance of proper fixing procedure. The object of fixation is to renderthe image stable by removing any light-sensitive substances, leaving behind an image of
Fig. 26. A novel print washer suggested inPhotographic Mosaics for 1878.
metallic silver. As a practical matter, both fixation and washing of albumen prints ismade more difficult by the nature of albumen itself, since coagulated albumen isresistant to penetration by solutions. Therefore attention to the correct procedure is ofthe utmost importance if thorough fixation of albumen prints is to be achieved. Anexplanation of the mechanisms of fixation and of the removal of harmful by-products offixation will be found in Chapters 9 and 11.
The basic approach to fixing albumen prints is to use two fixing baths, both ofwhich must be freshly made up the day on which they will be used. The prints shouldbe uniformly wetted by the fixer and agitated constantly during the fixation process.
4 5

THE ALBUMEN & SALTED PAPER BOOK
After 4 minutes in the first fixer they should be drained for at least 5 seconds and placedin a second tray of fresh fixer for an additional 4 minutes. The reason for the use of two-bath fixation is that some of the reaction products of silver chloride and sodiumthiosulfate are insoluble in water and thus would never wash out of the print. The sulfurcontained in these insoluble reaction products would eventually be released to attackand fade the silver image. However, these compounds — which are not soluble in water— are soluble in fresh sodium thiosulfate, and can be easily removed if there is a suf-ficient excess of fresh "hypo. " This is the reason for the use of two fixing solutions.
It is important to make the fixing solutions slightly alkaline by adding 2 grams ofsodium carbonate to each liter of fixing solution. This promotes more effective fixationand helps to prevent the blistering of the albumen layer on heavily albumenized papers.Another cause of blistering is too rapid changes in the temperature of processingsolutions, so it is best to keep all solutions, including the fixer, at about 70°F (21 ° C). Ifblisters do appear, they do not spoil the prints in every case; if the blisters remain smallthey will sometimes disappear in drying, but if they are large or break, then the printsare usually ruined. Changes of temperature or pH of solutions are the main causes ofblisters, but if they continually appear in spite of remedial measures, then there may bea problem of something in the rawstock reacting with the processing solutions. In thatcase a different rawstock will be needed.
When fixing is complete, the prints should be given a short wash (2 to 4 minutes) inrunning water and transferred to a hypo clearing agent solution at normal workingstrength. Either Kodak Hypo Clearing Agent TM or preferably, a 1 % solution of sodiumsulfite may be used for this purpose. After treatment in the hypo clearing agent theprints should receive a final wash for 30 minutes in an effective print washer. A largetray with a siphon arrangement will effectively wash one or two prints, but cannotsatisfactorily handle more than that unless the prints are hand agitated during the entirewashing period. To dry the prints a good approach is to gently blot them between acid-free blotters and allow them to air dry face up on fiberglass screens. Warm air may beused to accelerate drying.
4 6

CHAPTER FIVE
Alternative andHybrid Papers
The effect is the most artistic yet obtained on any paper of any make.— advertisement for "Albumat " brand
matte albumen paper, 19121 ,
Three basic kinds of salted papers — plain salted, arrowroot and albumen — havealready been described in this book. These materials are of landmark historical im-portance and also are fundamental to any modern practice with handmade silverprinting-out papers. However, they do not represent all of the possibilities of saltedpapers as a group. There are many alternative materials and techniques available whichoffer a very wide range of textures, colors, effects and contrasts. This chapter presentsthese alternative printing papers together with the historical context to which theybelonged.
The handling and processing of these papers is generally the same as for the othersalted papers already covered, but differences in processing will be noted. The maindifferences lie in the materials and techniques of coating the raw paper with organicbinders to carry the silver image. Among the possible alternate materials useful asbinders are whey2 , casein3 , agar-agar 4 , carrageenin (Irish moss)', Iceland moss6 , andvarious resins? . Each of these materials has a characteristic effect on the printing process,and many different printing papers may also be created by combining these variousbinder substances. Even if only one kind of binder is used, a whole range of effects maybe accomplished by simply varying the dilution, i.e. the amount, of binder that isapplied to the raw paper.
The most important historical example of this is albumen paper, which has beenused in many different dilutions over the course of photographic history. Pure albumenproduces the familiar glossy albumen paper, while 1:1 dilutions (with water) result in ahalf-matte paper. A dilution of 1:6 produces a paper that is almost indistinguishablefrom other matte salted papers. Even a 2 % solution of albumen causes a significanti mprovement in depth and contrast over a paper that is simply salted and has no organicbinder at all. Many early photographic prints were made with diluted albumen as aconscious choice over pure albumen. Some photographers preferred the dilutedalbumen because it was easier to tone, though many chose matte papers for aestheticreasons.
As outlined in Chapter 3, the earliest printing papers were salted with only a plainsolution of salt water and depended on organic sizing such as starch or gelatin already
4 7

THE ALBUMEN & SALTED PAPER BOOK
present in the paper to favorably affect the printing process. When the value of organicbinders was realized, the salting step became a "salting-sizing" step, whereby suitableorganic substances were coated onto the paper to give increased density and detail.Among the very first organic materials to be tried for this purpose were gelatin (ca.1850)8 , albumen (1850) and starch (1854). Less important, though also tried and usedin the early 1850 ' s was whey, or "serum of milk, " of which the active sizing ingredientwas lactose (milk sugar). During the period 1850-1855 fewer and fewer prints weremade using only a plain salt solution; after 1855 most of the leading photographerswere employing a salting-sizing solution based on the use of albumen in some dilution,gelatin, starch or whey. The majority of prints from the mid-1850 's are matte, but notthe very deep matte of simple salted paper. Also at this time the paper manufacturerswere becoming aware of the photographic uses of their products, and some even offeredspecially sized and salted papers for photographic printing use. 9
The first 25 years of photographic history were a period of very intense explorationof the possibilities of photographic materials, and printing papers were no exception.When the value of sizing on printing papers became clear, a wide variety of gums,sugars, starches, proteins, resins and other substances were tried. Of course most ofthese experiments yielded little or no improvement on established procedures, but thevariety of published recipes alone is enormous, and sufficient to suggest that ex-perimentation was the order of the day. Unlike later years when photographictechniques were conceived and maintained as proprietary secrets, the discoveries of thisperiod were printed in journals and freely circulated, and this helped to furtherstimulate individual experimentation. Although indispensable to the evolution ofphotography as an art and science, all of this individual experimentation has created avery difficult situation for 20th-century curators and photographic conservators. Thesepeople are now charged with the formidable challenge of identification, and in somecases restoration, of these early prints.
The problem of process identification — not only for these early prints but for manymuch later prints — is very serious for the collector and curator as well as for the con-servator. The attribution of a print to a specific photographer or the dating of a printmay depend on a reliable process identification, but such an identification with saltedpapers is very difficult and in many cases impossible without resorting to destructivetesting. Matte salted papers present this difficulty more often than glossy papers do,because with glossy papers there is usually enough binder material on the print todisplay that material's unique characteristics. For example, glossy albumen paper canusually be distinguished from gelatin printing-out paper fairly easily.
In the case of matte papers, materials are present in smaller quantities and tend toresemble each other, and differences in toning methods often obscure whatever cluesthe color of the image may provide. To make matters worse for the conservator, mattesalted paper prints from this early period are very often the ones needing the mostattention and care. At this point the knowledge and techniques to restore these printsare only beginning to be developed, and much more work and study need to be done.The first step is to understand from the historical context the complexity of theproblem.
By 1865 the often confusing characteristics of printing-out papers had been fairlywell established through experience and study, and some standardization of methodshad been accomplished. Glossy albumen paper had become the most commonly usedprinting paper, and the bulk of it was no longer albumenized by the consumer, but infactories organized for the purpose. Factory-albumenized paper, though still prepared
4 8

ALTERNATIVE AND HYBRID PAPERS
essentially by hand, was reasonably consistent in its appearance and results. It waswelcomed as a time-saving alternative at first, and finally came to be regarded as anecessity. Most photographic manuals published after 1865 warn the novicephotographer to avoid undue frustration and select his paper ready-made. However,many experienced photographers, especially those whose experience pre-dated theappearance of factory-made albumen and arrowroot papers, continued to produce theirown salted papers.
During the last third of the 19th century the public at large and most professionalphotographers preferred glossy paper of various kinds (with albumen paper foremostuntil the early 90' s), and matte salted papers became the province of those selectprofessionals and amateurs who pursued photography as a means of artistic expression.Although most of the papers described in this chapter were pioneered in the 1850's and1860' s, they did not receive much attention until the late 1880 's and 1890 ' s, whensalted papers enjoyed a revival, and a reaction set in against glossy papers among awhole new generation of photographers with a noncommercial, nonscientific orien-tation. As beautiful as glossy albumen paper could be, it became identified with themediocre productions of commercial portrait studios, among which producing theglossiest possible prints seemed to be a matter of professional pride. The hand-coatedmatte salted papers were now seen as an attractive alternative, especially after newmethods of platinum toning opened a whole range of brown and black image colorsthat were never possible before (see Chapter 8).
The salted paper revival began with photographers coating their own paper, but inthe 1880 's a number of matte salted papers appeared on the market and becamemodestly popular. Plain salted and arrowroot papers had never completely disappearedfrom trade lists, but among new types of paper were the so-called "Algeinpapiere "
( made from Iceland moss), several different resin papers (made with mixed resin-gelatinand resin-starch binders) and matte albumen papers (made with mixtures of albumenand starch). These various matte salted papers were mainly produced in Europe byalready established producers of albumen paper, and it appears that few, if any, wereexported to the United States. Most of these papers were available in either sensitized orunsensitized condition.
One element which contributed to the salted paper revival was the popularityduring the 1880 ' s of true platinum prints, which many photographers admired but fewcould afford as the price of platinum soared in the early 1890's. It turned out to becheaper to tone a silver print with a platinum toner than to make an actual platinotypeprint. Several manufacturers saw a marketing opportunity in this and offered mattesalted papers under names like "silver-platinum paper, "1O etc. The finished printssomewhat resembled true platinotypes, but always retained certain characteristics ofsilver salted papers.
Matte albumen papers were the most popular commercial article of all the papersdescribed in this chapter, 11 but at their peak in the years preceding World War I theyaccounted for only a small percentage of the total photographic paper market. Theyfaced competition from the many other "artistic' printing methods available at the time— platinum, gum bichromate, carbon printing, matte collodion emulsion-typepapers, — and all matte salted papers also bore the stigma of alleged impermanence.Whether justified or not, the reputation of silver papers as impermanent was not helpedby the advertising campaigns mounted by the manufacturers of carbon and platinummaterials. By the end of the 1920 ' s all matte salted papers were out of commercialproduction and belonged to the history of photography.12
4 9

THE ALBUMEN & SALTED PAPER BOOK
Resin PapersResins were used as paper sizing (including photographic rawstocks) for most of the
19th century. The use of resins as an internal sizing for paper suggested that they couldbe adapted as an after-sizing for salted papers, and the idea was tried as early as the1860 ' s. One of the drawbacks to this idea was that thick deposits of resins are im-permeable and the print can be toned, fixed and washed only with great difficulty. Alsothe yellow color of some resins together with a tendency of some batches of rosin todiscolor after sensitization kept resin papers from wide use. In the 1880 ' s resin paperswere improved when Henry Cooper of England suggested a mixture of resin and gelatinbe used instead of pure resins. 13 This yielded a matte paper that gave soft results similarto platinum prints, especially when a black color was obtained through the use ofcombined gold and platinum toning.
The basis of resin papers is that a resin soap (made with a resin and an alkali) iscombined with a soluble chloride and mixed with either gelatin or starch. This mixtureis coated on paper and allowed to dry. When the paper is sensitized on a silver nitratesolution, the resin is precipitated and becomes insoluble, analogous to the way albumenis rendered insoluble on contact with silver nitrate. One of the most simple resin papersis this one, made with shellac and arrowroot:
RESIN-ARROWROOT PAPER
This preparation (according to the method described in 1896 by A. von Hübl),14 canbe used with most kinds of rawstocks; for well-sized, smooth rawstocks use therecommended amount of shellac solution, and for porous rawstocks up to double therecommended amount may be used. The first step is to prepare a shellac-ammoniasolution by the following method: In a porcelain or enamel pan pour 100 ml water over10 g powdered white shellac, then add 5 ml strong ammonia (CAUTION! Wear eyeprotection and work in a well ventilated area!) and heat with stirring until the solutionis uniform. This solution will keep. Next make 100 ml of 2.5 % arrowroot solution thatcontains 2.5 g sodium chloride. Make this according to the method of preparing anarrowroot solution given in Chapter 3. With vigorous stirring or shaking add 10 ml ofthe ammonia-shellac solution to the arrowroot solution. Pin the paper to a flat boardand distribute the salting mixture evenly with a wide flat brush or a foam brush. With adry brush smooth out and evenly distribute the coating until a uniform matte ap-pearance is obtained, and hang the paper to dry in a warm place.
Sensitize the paper by floating it for 4 or 5 minutes on a silver solution made asfollows:
Silver nitrate.......................................................................... 120 gCitric acid............................................................................... 80 gDistilled water ............................................................................ 1 liter
Although it is quite possible to tone the prints with gold toning baths, Hübl recom-mends toning them in a platinum toner (see Chapter 8). Combined gold and platinumtoning (with gold first) will produce a neutral black tone, while platinum toner usedalone will produce a succession of tones from reddish brown to black with reddish-violetcast. Prolonged platinum toning will lead to yellowing of the highlights. Otherprocessing steps are done according to the general outline of processing for salted papersgiven at the end of Chapter 3.
5 0

ALTERNATIVE AND HYBRID PAPERS
Matte Albumen Paper
Matte albumen paper refers to a matte salted paper that has been prepared with amixture of albumen and starch. It was the invention of Baron Arthur von Hübl, anAustrian who did a great deal to further the use of matte salted papers. Hübl also wroteextensively on the platinum printing process, and on technical photographic matters.Hübl's book on matte salted papers, Der Silberdruck auf Salzpapier (Silver Printing onSalted Paper) was published in 1896. Although unfortunately it was never translatedinto English, the book remains the most complete and well-written book on matte
Fig. 27. Advertisement for matte albumen paper in Paris Photo Gazette,April 25,1909.
salted papers ever to appear. Many of the formulae he freely published in Der Silber-
druck auf Salzpapier later made a great deal of money for photographic papermanufacturers.
The original formula for matte-albumen paper was first published by Hübl in the
journal Photographische Rundschau for Feb. 1895, and it described a paper made witha mixture of equal volumes of albumen and a 2 % arrowroot solution. In 1898 the firmof E. Just in Vienna brought on the market a ready-sensitized paper based on Hübl 's
formula. 15 In 1902 the long-established albumen paper manufacturer Trapp andMünch followed suit. The new product caught on with portrait photographers andpartially revived a badly sagging market for the albumen paper producers. Many othercompanies started making matte albumen paper, giving their products names likeAlboidin, Albumen , and Albumat. 16 For the first few years the paper was made ac-cording to the original formula — which produced a deep matte surface — but in 1913a half-matte paper appeared17 ; this was apparently accomplished by increasing theproportion of albumen in the salting solution. Following the taste of the day, mostmanufacturers of matte albumen paper offered an extremely wide choice of base stocks.Trapp and Munch offered 18 different choices, including Chinese and Japanese paper,several weights and colors, and a number of different textures.
Matte albumen paper found its chief commercial application among the moresophisticated (and expensive) portrait photographers of the time. Because the toninginfluenced the color of the print so completely — it was brownish red in the absence ofany toning, purplish-black with only gold toning and warm brown to black withcombined gold and platinum toning — there was ample opportunity to suit the color of
TRAPP & MUNCH Soc. en Commardite a FRIEDBERG (Hesse) Allemagne.
PAPIERPAR NOIRCISSEMENT DIRECT
INCOMPARABLE -»«- SANS RIVALREPRESENTANT pour la France : MAX MUTHEL, 69, faubourg St-Martin, PARIS
5 1

THE ALBUMEN & SALTED PAPER BOOK
the image to the overall feel of the portrait. Writers in photographic trade magazinesrhapsodized over the similarities between matte albumen paper and the more "elegant"and "artistic" processes such as gum bichromate and platinum printing. Matte albumenpaper was regarded as a great convenience compared to those processes which itallegedly resembled, but of course by modern business standards in the photographicportrait industry it would be seen as only slightly easier than printing an originalportrait in oils.
Although matte albumen paper was mainly produced and consumed in Germany, itwas exported to the rest of Europe in the years before World War I 18 ; whether it reachedAmerican shores in any quantity during those years is unclear. Matte gelatin printing-out papers (produced by adding resins, starches or clays to the normal emulsion for-mulae) were much used in the United States and were toned by the same techniquesused for matte albumen paper, hence confusion between the two materials is possible.In most cases, however, matte albumen paper will be found to have a slightly rougher,more matte surface than matte gelatin paper. After World War I the market for mattealbumen paper declined sharply, because the austere economic conditions in Germanydid not favor a printing paper that required precious metal toning. The last company toproduce matte albumen paper was Trapp and Münch . They ceased production of it in1929, issuing a brief statement saying that their "gaslight" developing-out paper (withthe somewhat bizarre name of " Tuma-Gas " ) was in every way a worthy substitute. 19 Thisannouncement apparently marks the last time albumen paper of any sort was offered tothe public; the last date of manufacture of the older glossy albumen paper was probablyca. 1926.
PREPARATION OF MATTE ALBUMEN PAPER
The following method of preparing matte albumen paper was described by Hübl inhis book, Der Silderdruck auf Salzpapier. 20 Matte albumen paper is prepared from freshalbumen; the freshest possible eggs are carefully separated, and the whites beaten to afroth just as in the preparation of the usual glossy variety of albumen paper described inChapter 4. However, the albumen is not allowed to age — rather it is used at most 24hours after it has settled back to a liquid state. It should be kept refrigerated duringsettling and filtered through muslin immediately before use. To prepare the saltingsolution combine 100 ml of fresh albumen with 100 ml of arrowroot solution preparedaccording to the instructions given in Chapter 3. The 100 ml of arrowroot solutionshould contain 4 g of sodium chloride.
Very porous rawstocks such as watercolor paper, etc., may require a pre-sizing withplain arrowroot to obtain the best results, but for most papers pre-sizing is notnecessary. Pin the sheet of paper to be coated to a flat surface and distribute thearrowroot-albumen mixture according to the procedures outlined for arrowroot papersin Chapter 3. Hang the coated sheets to dry in a warm room. The coated paper will keepindefinitely if stored flat in a cool and dry place. To sensitize the paper float it for 1 to 2minutes on a solution composed of:
Silver nitrate.......................................................................... 120 gCitric acid................................................................................15 gDistilled water ............................................................... to make 1 liter
Paper thus sensitized will keep in good condition for several weeks, depending on thetemperature and humidity of the storage environment. An alternative method of
5 2

ALTERNATIVE AND HYBRID PAPERS
sensitization is to brush the silver solution on the paper with a wide, flat brush. Twobrushings — allowing the paper to dry in between brushings — may be necessary toobtain sufficient strength of image. Shadow areas will be weak when sensitization hasbeen insufficient.
It is very important to success with matte albumen paper to insure that the paper isnot too dry at the time of printing. Excessive dryness of the paper will result in flat andweak prints. Conditioning the paper in a damp environment such as a basement orclosed box with a dish of water inside will probably be necessary in order to obtain thebest results. A special kind of blotting paper called "Hygro-Papier " was manufacturedand sold by Trapp & Münch for use with matte albumen paper. 21 The "Hygro-Papier"
was dampened and placed behind the matte albumen paper in the printing frame toinsure that a high level of moisture was maintained. Proper pre-conditioning of thesensitized paper should make such measures as "Hygro-Papier " unnecessary, however.
Matte albumen paper requires a negative of about the same density range as glossyalbumen paper. The processing of matte albumen paper is the same as with most otherkinds of salted paper, and the general outline given at the end of Chapter 3 should befollowed. Care should be taken to insure a thorough initial wash that removes as muchof the silver nitrate as possible. Most of the gold or platinum toners given in Chapter 8will work on matte albumen paper. If combined gold and platinum toning is used,deep brown of brown-violet tones may be obtained. Matte albumen paper generallytones faster than glossy albumen paper. Fixing, washing and drying are the same as withmost other salted papers.
5 3


CHAPTER SIX
SensitizationThe change of sensitised paper in the dark is found a serious evil bypractical photographers. I know some persons, who, from this cause,waste as much paper as they use.
—C.A. Seely, 18601
The sensitization step,. in which the previously " salted" papers are rendered lightsensitive by treatment with a silver nitrate solution, is vitally important to successfulprinting with albumen and salted papers. This chapter is devoted to the solutions andprocedures employed for this purpose. The composition of the sensitizing solution mayinclude other substances such as citric acid, but it always has one basic ingredient: silvernitrate. Silver nitrate is formed by the action of nitric acid on silver metal. It is sold inthe form of colorless crystals, normally in quantities of 1 ounce, 4 ounces, and 1 pound.As with nearly all chemicals, a considerable saving is realized by buying in largeamounts, and the one-pound package is economical compared to the one-ounce size.For albumen and salted paper printing a "technical" or "ACS " grade is sufficiently pure,and there is no need to purchase the highly purified grades that are required inphotographic emulsion making.
The primary light-sensitive substance in all the papers described in this book is silverchloride. Silver chloride is always formed in situ by a "double replacement" reactionbetween whatever chloride is used to "salt" the paper — sodium chloride, for example— and silver nitrate. In a "double replacement" reaction the ions of two compoundschange partners, forming two new substances. The reaction between sodium chlorideand silver nitrate yields sodium nitrate and silver chloride. Since silver chloride is nearlyinsoluble in water it is immediately precipitated as a cloudy white mass. A chemistmight symbolically write the reaction this way:
NaCl + AgNO3 --> NaNOa3 +AgogSodium chloride and silver nitrate produce sodium nitrate and silver chloride.
The symbol means that the silver chloride is precipitated; the sodium nitrate which isformed is a soluble substance and remains in solution. Sodium nitrate has no effect onthe printing process and is washed away during processing.
For reasons explained in Chapter 1 there must be sufficient silver nitrate in thesensitizing solution not only to react with all the chloride present on the paper, but also
5 5

THE ALBUMEN & SALTED PAPER BOOK
to leave a considerable excess of silver nitrate present in the light-sensitive layer. Inpractice the silver nitrate solution must be approximately four times as strong as theoriginal salting solution. If a 3% salting solution was used, then the strength of thesensitizing solution must be approximately 12% , depending in part on the type ofbinder material used on the paper (see below). The sensitizing solution itself must bemade with distilled or at least de-ionized water, because if made with tap water, thesilver nitrate will react with chlorine and "hard water ions" such as carbonates, etc., thatexist in many water supplies. The result is a cloudy white precipitate of silver chloride,silver carbonate, etc., which robs the bath of strength and makes sensitizing difficult.During the initial wash step of processing albumen and salted papers, the clouding ofthe water which occurs is this very reaction between the excess silver nitrate left in thepaper and various ions present in tap water.
Composition of the Sensitizing SolutionCAUTION: Always wear eye protection when compounding or handling silver
nitrate solutions!The simplest sensitizing solution may be made as follows:
Silver nitrate.......................................................................... 120 gDistilled water ............................................................... to make 1 liter
The strength of the silver solution for any given paper is governed by several factors;the first is the amount of chloride that has been used to "salt" the paper. In general less" salting " requires a less strong silver bath and vice versa. For most salted papers it is bestto keep the chloride content at about 2-2.5 % and the silver bath at 10-12 % , becauselowering the chloride content tends to produce prints that lack brilliance and density.Albumen paper is a somewhat different case, in that the presence of the glossy albumensurface tends to compensate for a lack of a heavy deposit of image silver. By lowering thechloride content of albumen paper to the range of 1-1.5% thinner negatives may bemore successfully printed, and a weaker silver bath — in the area of 8-9% — is calledfor. Such a low chloride content and weak silver bath were commonly used in the period1880-1900 to try to accommodate the negatives with relatively lower density rangesproduced by gelatin dry plates. On the whole, however, modern practice with albumenpaper is best conducted with a chloride content of 1.5% or above and a silver bathstrength of 10% or above. Of course, this means that some thin negatives will not beprintable. This is a small loss, because better looking and more permanent prints willresult from the increased silver image deposited by stronger salting and silvering (seeChapter 11).
A second consideration in the strength of the silver solution is the nature of thebinder material used. For papers in which starch is the binder material strong silverbaths and short times of floating on the sensitizing solution are required. The reason forthis is that unlike albumen, starch is not coagulated or rendered insoluble by the silversolution. Too long floatation will cause a loss in image brilliance because the starch layeris very permeable to water and absorption of fine silver chloride particles down into thepaper fibers is more likely if floatation is prolonged. Also, the strength of the sensitizingsolution regulates the size of the grains of precipitated silver chloride; stronger solutionsproduce larger grains that are less likely to be absorbed into the paper fibers. Hence forarrowroot and matte albumen papers strong silver baths and short floatation times arerequired.2
5 6

SENSITIZATION
The duration of the floating of albumen paper on the sensitizing solution dependspartly on the strength of that solution. If the silver bath is very strong, the coagulatingeffect of silver nitrate on the albumen layer is correspondingly strong, and the solutionwill not permeate through the albumen very quickly. This means that a longer time offloatation is required for albumen paper on strong sensitizing solutions. On the otherhand if the silver solution is relatively weak, then prolonged floating may bedetrimental because the albumen — which is water soluble unless coagulated — maybegin to dissolve off the sheet before it is completely coagulated. This phenomenon isespecially noticeable with freshly made-up sensitizing baths, because the sodium orammonium nitrate which accumulates in older baths as a result of the "doublereplacement" reaction involved is absent when a bath is fresh. These salts also have acoagulating effect on albumen, and some old manuals advise actually adding someammonium or sodium nitrate to sensitizing baths to insure proper coagulation of thealbumen. However, this advice pertained to relatively silver-poor baths of 5 to 8% , andis not applicable when a bath of 10 % strength is used.
Techniques of SensitizationCAUTION: Always wear approved eye protection and tightly fitting surgeon 's glovesduring the operations of sensitizing paper.
Silver nitrate can cause permanent, irreversible eye damage. Although infrequentcontact with silver nitrate and the resulting staining of the skin does not appear to bedangerous to health, prolonged exposure can lead to permanent staining of the skin.Ultimately silver absorbed through the skin will be deposited in various locationsaround the body causing irreversible staining of the conjunctivae, blood vessel walls,gums, mucous membranes, etc. This condition is known as argyria. Consequences moreserious than staining of the tissues have also been reported, and all necessary precautionsshould be taken to avoid repeated absorption of silver nitrate through the skin. Alwayswash hands immediately after contact with the silver nitrate solution. The most im-portant precaution, however, is to wear eye protection; sheets dripping silver solutionpose a special hazard to eyes.
THE FLOATATION METHOD OF SENSITIZATION
The operation of sensitizing and drying must always be conducted under propersafelight illumination. See Chapter 2 for details on appropriate workroom lighting. Anaverage time of floatation of albumen paper on the sensitizing solution is 2 1/2 to 3minutes. This insures adequate sensitization of even doubly albumenized paper.Albumen paper should not be excessively dry at the time of sensitization. Conditioningthe paper by storing it overnight in a damp basement or placing it for a few hours in aclosed box with a dish of water will confer two benefits in the sensitizing procedure:first, it will allow the albumen layer to evenly take up the sensitizing solution andsecond, the sheets will not be so stiff and hard to manipulate. The most commonapproach to applying the sensitizing solution to the sheet is floating. The actualtechnique of floating is no different from the floatation methods described in Chapter 3for applying the sizing-salting solutions. Care in necessary to prevent the silver solutionfrom reaching the back of the sheets, since patches of uneven density may result. Athree-minute egg timer is a handy accessory when sensitizing paper. Always time theduration of floating from the moment all bubbles have been broken and the sheet liesflat on the surface of the solution. The bubbles that appear usually originate from air
5 7
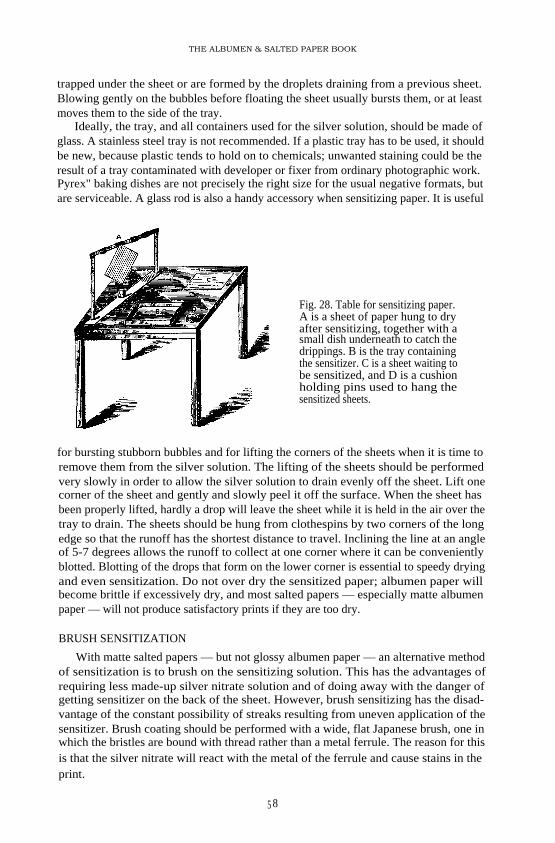
THE ALBUMEN & SALTED PAPER BOOK
trapped under the sheet or are formed by the droplets draining from a previous sheet.Blowing gently on the bubbles before floating the sheet usually bursts them, or at leastmoves them to the side of the tray.
Ideally, the tray, and all containers used for the silver solution, should be made ofglass. A stainless steel tray is not recommended. If a plastic tray has to be used, it shouldbe new, because plastic tends to hold on to chemicals; unwanted staining could be theresult of a tray contaminated with developer or fixer from ordinary photographic work.Pyrex" baking dishes are not precisely the right size for the usual negative formats, butare serviceable. A glass rod is also a handy accessory when sensitizing paper. It is useful
Fig. 28. Table for sensitizing paper.A is a sheet of paper hung to dryafter sensitizing, together with asmall dish underneath to catch thedrippings. B is the tray containingthe sensitizer. C is a sheet waiting tobe sensitized, and D is a cushionholding pins used to hang thesensitized sheets.
for bursting stubborn bubbles and for lifting the corners of the sheets when it is time toremove them from the silver solution. The lifting of the sheets should be performedvery slowly in order to allow the silver solution to drain evenly off the sheet. Lift onecorner of the sheet and gently and slowly peel it off the surface. When the sheet hasbeen properly lifted, hardly a drop will leave the sheet while it is held in the air over thetray to drain. The sheets should be hung from clothespins by two corners of the longedge so that the runoff has the shortest distance to travel. Inclining the line at an angleof 5-7 degrees allows the runoff to collect at one corner where it can be convenientlyblotted. Blotting of the drops that form on the lower corner is essential to speedy dryingand even sensitization. Do not over dry the sensitized paper; albumen paper willbecome brittle if excessively dry, and most salted papers — especially matte albumenpaper — will not produce satisfactory prints if they are too dry.
BRUSH SENSITIZATION
With matte salted papers — but not glossy albumen paper — an alternative methodof sensitization is to brush on the sensitizing solution. This has the advantages ofrequiring less made-up silver nitrate solution and of doing away with the danger ofgetting sensitizer on the back of the sheet. However, brush sensitizing has the disad-vantage of the constant possibility of streaks resulting from uneven application of thesensitizer. Brush coating should be performed with a wide, flat Japanese brush, one inwhich the bristles are bound with thread rather than a metal ferrule. The reason for thisis that the silver nitrate will react with the metal of the ferrule and cause stains in theprint.
5 8

SENSITIZATION
Slightly stronger solutions are employed in brush coating than in sensitization byfloating. The brush should be well washed with distilled water after each use andreserved exclusively for sensitization. The brush will soon be discolored but this will notaffect its performance, if it is kept clean. Another way to apply the sensitizing solutionis with a "Blanchard's brush," which consists of a 4-inch wide, 1/4 -inch thick piece ofwood or Plexiglas", over which are stretched several folds of clean flannel. Sandingsmooth corners on the working edge of the wood or PlexiglasTM strip is helpful. Dip the"Blanchard's brush" into the silver solution and apply it to the paper with smooth, evenstrokes.
Fig. 29. A drying room for sensitizedpaper. A small stove can be seen atright.
B
Two applications may be needed if sufficient density cannot be obtained in shadowareas of the print, especially with papers coated with a relatively heavy layer of bindermaterial. The appearance of blotches or light spots in dense areas of the print is aphenomenon described in old manuals as the " measles, " and is caused by insufficientsensitization. This trouble may appear in either floated or brush-coated papers. Thecause may either be a too-weak silver solution or insufficient residual sensitizingsolution in the paper. Nothing can be done for prints that already have been exposed,but unexposed sheets suspected of having the same difficulty may be re-floated or re-brushed with a stronger sensitizing solution. The appearance of paper-white roundspots with hard, definite edges is the result of air bubbles trapped under the sheetduring floating on the sensitizing solution; these areas have therefore not been sen-sitized at all. Similar white spots also arise when air bubbles prevent the sizing-saltingsolution from covering an area of the print, but instead of being paper-white theytypically have a light brown stain from the action of the silver nitrate.
EXHAUSTION OF THE SILVER SOLUTION
After some sheets have been sensitized by the floating method — which in mostcases is the best and most satisfactory approach — the remaining silver solution will bereduced in both strength and volume. The strength of the silver solution will be loweredby the reaction of the silver nitrate with the chlorides in the paper, and the volume willbe reduced by the simple mechanical absorption of silver solution by the sheets of paper
59

THE ALBUMEN & SALTED PAPER BOOK
as they are floated. Although the amount of silver nitrate removed from the bath byboth causes remains fairly constant and predictable, in practice a relatively weak bathneeds more constant attention and replenishment than a relatively strong one does,since the weaker bath is brought to a dysfunctional point more rapidly. It is bothersometo be constantly monitoring and replenishing a silver solution, so it is better to start witha 12 % bath and attempt to maintain it in a range of 10-12 % , where there need be littleconcern over insufficient sensitization or the "measles. " Of course, 10% baths are lessexpensive than 12 % ones, but the lost time and expense of inadvertently spoiled sheetsand frequent determinations of the strength of the solution make the relatively weakerbaths a false economy. The 12 % solution will remain functional and satisfactory forperhaps two or three batches of prints — say a total of 30 11 x 14 prints — before adetermination of strength need be made, whereas the 10% bath will need replenishingmuch sooner.
Obviously, it is necessary somehow to determine the strength of the solution andreplace its lost strength and volume long before such drastic consequences as insensitive,flat prints or the "measles" make their appearance. The most accurate approach is toperiodically chemically analyze the silver content of the solution by means of a titrationanalysis (see below), but this is not always possible. In the absence of a reliable means oftesting the silver content, a rule of thumb for replenishment may be used instead, andfairly reliable results obtained. This rule of thumb may be summarized as follows:Replenish the lost volume with a silver nitrate solution twice as strong as the originalbath. For example, if the original strength and volume were 1 liter of 12% silversolution and after a printing session only 850 ml remained, replenish with 150 ml of24 % silver solution. This should restore the silver bath to the original strength andvolume. If citric acid is used in the sensitizing solution, it is replenished strictly on thebasis of volume lost from the solution. For example, if the liter of sensitizing solutionhad originally contained 5 % citric acid (i.e., 50 g) and 850 ml was left after a printingsession, then the missing 15 % of the original volume of 1 liter represents a loss of 15 %(i.e., 7.5 g) of citric acid. Thus the 150 ml of replenisher would contain 7.5 g citric acidin addition to the required amount of silver nitrate.
The rule of thumb method of replenishment is not suitable for continuous use, orwhen a large amount of printing is to be done. The errors which are inherent in themethod may accumulate with unpleasant and expensive results. For more critical andserious work the best method is to analyze the silver content of the bath using a titrationprocedure. The following adaptation of a classical procedure in quantitative analysisrequires a modest outlay for equipment but affords accurate, speedy determinations.After the initial calibrations have been performed, a determination of silver-bathstrength can be made in only a few minutes. In practice, a determination is requiredonly about every third printing session, unless a great many sheets are sensitized at onetime. The details of these procedures were worked out by Irving Pobboraysky, a researchtechnologist at the Graphic Arts Research Center at Rochester Institute of Technology,and have been successfully used by the author for several years. They appear herethrough the permission of Mr. Pobboraysky.
The method consists in slowly adding a reagent solution (sodium thiocyanate) to ameasured amount of silver solution mixed with an "indicator" (ferric ammoniumsulfate) until a color change takes place that cannot be made to disappear by stirring oragitation. To make sure that only the desired reactions take place between the silvernitrate, the sodium thiocyanate and the "indicator," the silver solution is acidified witha small quantity of nitric acid. At the point of the irreversible color change, the amount
60

SENSITIZATION
of the thiocyanate consumed indirectly tells the concentration of the silver nitratesolution. The method is known as Volhard's method (after the 19th-century chemistwho discovered it), and it was in use for the purpose of keeping track of albumen papersensitizing baths as early as 1875. The complete working details of the method may befound in Appendix B.
DECOLORIZING THE SILVER SOLUTION
It will become apparent after the first printing session with albumen or salted papersthat although the silver solution begins as a perfectly clear and colorless solution, it soonturns brown and eventually almost black with use. The cause of this is the fact that some
Fig. 30. Siphon apparatus for use indecolorizing silver solutions. Asiphon was used to extract thedecolorized silver solution withoutdisturbing the layer of powderedkaolin on the bottom.
organic matter from the sizing of the paper or whatever organic binder is used —albumen, gelatin, etc. — always partially dissolves into the silver solution. The reactionof this organic matter with some of the silver of the sensitizing solution eventuallycauses a spontaneous reduction of the reacted silver to the metallic state. The metallicsilver is responsible for the coloration of the solution. In much the same way a sensitizedbut unexposed sheet of albumen paper will spontaneously "print-out " over time andbecome dark brown.
The silver solution may be used in a slightly discolored state, but not when it isnearly black. Some way must be found to remove this organic material or the silver bathquickly becomes useless. The best way is to use a finely powdered white clay known askaolin, which if shaken up with the bath, will absorb the organic matter and settle tothe bottom of the bottle, thus clearing the solution. About 15 grams of kaolin is suf-ficient to repeatedly clear one liter of silver solution. The kaolin should be left in thecontainer in which the silver bath is stored, and after each use, the bath and kaolinshould be shaken up together. The kaolin will settle out overnight and the bath will beclear and ready to use the next day.
To avoid the difficulty of trying to decant the clarified solution, a siphonarrangement like the one pictured can be easily constructed. All that is required is atwo-hole rubber stopper and some glass tubing. To cut glass tubing, first score it with afile and snap at the score line, then round the sharp edges on a gas flame. To use the
6 1

THE ALBUMEN & SALTED PAPER BOOK
siphon, blow in the short tube to start the flow, and the bottle will empty itself down tothe level of the bottom of the drain tube without disturbing the kaolin in the bottom ofthe bottle. If for some reason there is not time to allow the kaolin to settle out of thesilver bath, the kaolin may be removed by filtering the solution through medium filterpaper. If a silver bath has acquired a surface scum which shows up either in the tray or asa metallic marbled sheen on exposed prints, filtering the solution is necessary. Alwaysmake sure that the surface of the silver solution is free from scum before floating a sheetof paper.
Preserving Sensitized PaperUnder normal circumstances albumen and salted papers will remain usable only for
one or two days after sensitization. In extremely humid and warm conditions they mayyellow in a matter of 8 to 12 hours, or even less. The yellow color is actually spon-taneously reduced metallic silver in a very finely divided state. As the process ofspontaneous reduction of silver continues, the paper turns a deep reddish brown;ultimately the paper turns black with a shiny greenish " bronzed" surface. It may requireseveral months to reach the "bronzed" stage in dark storage. The spontaneous reductionof silver can be slowed by storing the sensitized paper in a tightly closed container in acool and dry place, since air and moisture accelerate the process of decomposition.Papers that are only slightly yellowed may still be usable, because the fixer will removesome of the finely divided silver from the highlight areas.
Naturally the rapid decomposition of sensitized papers is a real inconvenience inprinting operations. For best results it is necessary to sensitize, print and process all onthe same day. There does exist an alternative procedure, in which organic acids areeither added to the silver nitrate solution or applied to the paper in a separate step (thiscan be done before or after sensitization). The most effective organic acid for thispurpose is citric acid, which is also used in many foodstuffs as a preservative. Citric acidhas a marked effect on those papers such as arrowroot or resin-arrowroot, which do notcontain an " active" organic binder substance. In these papers it produces a redder, morebrilliant print than would otherwise be obtained, and it incidentally preserves them alittle longer after sensitization.
The addition of 5 % citric acid to the silver bath produces the maximum preservativeeffect, although as little as 1 % will extend usable life to a noticeable extent. In the caseof glossy albumen paper the addition of citric acid to either the albumen or the sen-sitizing solution has an effect on the color of the print, causing it to become reddishbrown, even with prolonged gold toning. When the citric acid is present in the silvernitrate solution, the print color seems to be more brownish than when the citric acid ispresent in the albumen. In both cases, however, the pre-processing stability of albumenpaper is improved, and greater sensitivity and maximum density are achieved. Thepreservative effects of citric acid were known as early as 1860 3 , but apparently it was notrealized that by increasing the amount of citric acid in the silver solution, greatly im-proved stability could be obtained.
The idea of using a large amount of citric acid in the sensitizing solution to preservealbumen paper was first published in 1869 by a Viennese photographer named AdolfOst. 4 In 1872 the first "ready sensitized" albumen paper, a product of the SensitizedPaper Co. of Portsmouth, Ohio, was offered to the public.' Hailed as a greatbreakthrough, this invention promised to revolutionize the practice of albumenprinting, and at least as far as amateur photographers were concerned, it did.
62

SENSITIZATION
Professionals, however, continued to sensitize their own paper for two reasons: purpletones were difficult to produce in the presence of the citric acid, and it was considerablycheaper to sensitize the paper "at home." Although the use of organic acids -- citric,tartaric and oxalic — was the basis of most "ready sensitized" papers, there were anumber of ways in which the preservative effects could be obtained (see below). Theexact methods used by manufacturers of "ready sensitized" paper were jealouslyguarded secrets. With the advent of the gelatin dry plate in the 1880's there was a great
Fig. 31. An 1887 advertisement for an albumen paper sensitizing service.
upsurge of amateur photography and "ready sensitized" albumen paper gainedenormously in popularity. Very few amateurs in the 1880 ' s and 1890 's bothered tosensitize their own paper.
TECHNIQUES FOR PRESERVING SENSITIZED ALBUMEN AND SALTED PAPERS
As mentioned above, a serviceable technique that requires the least effort is simplyto add 5% citric acid to the sensitizing bath. The formulae of many salted papersalready stipulate this addition, and where it is not called for it may be used as an optionfor increased keeping qualities after sensitization. Alternative approaches are to brush a2 % citric acid solution on the paper either before applying the salting-sizing solution,or after sensitization. Papers to be "preserved" must be scrupulously kept out of whitelight, because the slightest exposure to actinic light forms some metallic silver that actsas a catalyst for further silver reduction.
Another technique for preserving paper in the 19th century was to wash out aconsiderable part of the residual silver nitrate after sensitization, then restore sensitivityimmediately before printing by fuming with ammonia. For a modern worker toduplicate the 3- or 4-month useful life for albumen paper that commercial "readysensitized" paper achieved in the 19th century would mean a long process of ex-perimentation with silver bath strength, citric acid content, etc. The end result in the19th century (as evidenced by many complaints in the journals) was often paper that wasso silver-poor that it required a revitalizing treatment with ammonia fumes before even
SENSITIZEDALBUMENIZED PAPER.
Prints quickly. Tones easily. Results perfect.MISS +MAY + SCOTT,
PRACTICAL SENSITIZER,32 Upham Park Road, Chiswick, London.
6 3

THE ALBUMEN & SALTED PAPER BOOK
a barely satisfactory print could be obtained. As a general rule, albumen and saltedpapers deliver the best results when used as soon after sensitization as possible.
Ammonia and Other Additivesto the Silver Bath
In 1840 it was first noticed that adding ammonia to a silver bath until the brownprecipitate which forms is finally re-dissolved causes a more brilliant, vigorous image insalted papers. 6 "Ammonia-nitrate" was particularly useful for printing from weaknegatives. The " ammonia-nitrate" process was very widely used for salted papers in theperiod 1840-1860, but it had some disadvantages. The prints sensitized on an am-moniacal silver solution yellowed very quickly, and the solution itself tended to discolorvery rapidly. Brush sensitizing lessened the latter difficulty, but the first one remained.
When albumen paper began to be used in the early 1850's, the disadvantages of theammonia nitrate bath multiplied, since it tended to dissolve the albumen off the paper.Photographers tried to correct this by neutralizing the ammoniated bath with nitricacid, and this approach solved the problem. But in neutralizing the ammonia the realeffect was to form ammonium nitrate, which builds up in use anyway, so the utility ofadding ammonia then acidifying with nitric acid is doubtful, though it does appear tomake a slight contribution to the sensitivity of the paper. Fuming seems to be a betterway to produce the advantages of ammoniacal silver.
Many old manuals do recommend the use of ammonia — and a number of othersubstances — in the silver bath. Most of these are superfluous, if not potentially harm-ful. One clear danger in the use of ammonia in silver baths is the potential for theformation of fulminating silver, a highly explosive substance, if an ammoniacal silverbath is "boiled down," as some old manuals recommend "Boiling down" is supposedto be a way to rejuvenate a bath that has become overloaded with sodium or ammoniumnitrates and organic matter, but the author has had no occasion to employ thisprocedure, and it is not recommended for anyone to undertake this dangerousoperation.
The additives recommended by various 19th-century sources had three purposes:increased sensitivity, coagulation of the albumen layer, and preservation of the sen-sitized paper. For increasing sensitivity ammonia was the main substance recom-mended, but citric acid also has an effect on sensitivity, and this recommendation willbe found in some manuals. The second class of additives — albumen coagulants —includes the largest and most wide-ranging list of substances. At various times sugar,camphor, alum, sodium, and ammonium nitrate and alcohol were all suggested. Thethird group of additives, intended to help preserve sensitized paper, has been dealt withabove. For modern practice, only preservative additions are recommended.
Reclamation of Silver WastesOnly about 6-8 % of the silver initially present in a sheet of sensitized paper is
utilized to form the image; the rest is washed or fixed away in processing. Much of thesilver can be recovered by careful saving and treatment of the processing solutions. Mostof the recoverable silver is found in the first and second changes of wash water. Wherethe volume of printing operations warrant, these should be saved and the silver
precipitated out of them by adding either sodium chloride or sodium carbonate. Thesilver will then be in the form of insoluble silver chloride or silver carbonate, and after
64

SENSITIZATION
settling the excess water can be decanted off. A great deal of silver is present in thefixing solutions, and these should be placed in a large container and allowed toevaporate to a thick sludge, or to dryness when ready to ship to a refiner for processing.Print trimmings and spoiled prints are also a source of recoverable silver. They can beburned and silver (and gold) recovered from their ashes. All of these economy measureswere in common use in the 19th century, especially by larger volume operations. In atypical gallery about 60% of the silver consumed was recovered, though in exceptionalcases 75 % or above was achieved.
All of the residues of wash water, fixer and print trimmings must be sent to aprecious metal refiner for conversion back to pure silver. Sometimes volume users in the19th century did their own smelting and refining, but most often the residues were sentout to be processed. Many of the larger photographic supply houses offered this service,in addition to converting the recovered silver back into silver nitrate. For modernprinters who use only a small amount of silver and gold, silver recovery measures maynot be economically feasible because of the high costs of refining. Many refiners have aminimum charge or specify minimum amounts of residues. Shipping charges must beborne by the consumer, adding to the cost of silver recovery. Smelting and re-nitratingsilver are not operations for the home laboratory. Thus, unless a large amount ofprinting is done, silver recovery is usually not worth the trouble.
6 5


CHAPTER SEVEN
Tone Reproductionand Print Exposure
Now if we had complete control over the finished negative as to beable always to predetermine its character, we should unhesitatinglyproduce all negatives so that they would stand printing in sunshine for allor the principal part of the exposure to light. Somehow it appears thatthose prints are most admired which have had actual sunshine direct onthe negative during all, or nearly all, the process.
— Thomas Bolas, 18891
Those who have had experience in ordinary photographic processes know howimportant the developing step is in determining the density, contrast and even the colorof the photographic image. In all printing-out papers — including albumen and saltedpapers — the "development " step is equally important in determining the color,density and contrast of the image; only instead of varying with the composition of the
Fig. 32. Printing frames in use.
developer or the time, temperature, etc. , the image is affected by the color and intensityof the exposing light and the duration of exposure. In printing-out papers, exposureand development are simultaneous and inseparable. The exposure step is in many waysthe most exciting aspect of printing with albumen and salted papers. It is quite a thrillto place a sheet of hand-coated paper in the printing frame for the first time and watchit darken, and it is a refreshing change to bring photographic processes out of thedarkroom and into the sunshine. This chapter examines the relationship betweennegative characteristics and tone reproduction in albumen and salted papers as well asthe theory and practice of print exposure.
6 7

THE ALBUMEN & SALTED PAPER BOOK
Characteristics Required in Negativesfor Albumen and Salted Paper Printing
Each photographic paper has a fixed set of tone reproduction characteristics; amongthese are the maximum density attainable on that paper, the number of tone steps of agraduated gray scale that it can reproduce (this is referred to as scale length or gradation)and the contrast of the paper, which refers to how rapidly or slowly the transitions fromlight to dark occur. In order to produce a negative with the proper contrast and densityrange to make the best possible print on albumen and salted papers, the tonereproduction characteristics of these papers will have to be taken into consideration.
Fig. 33. A special printing frame for"combination" printing, i.e., usingseveral negatives in succession tomake one print.
Unlike develop-out papers, where graded or variable-contrast materials offer a way tomatch the paper to the negative, consistently good results can only be obtained onalbumen and salted papers by closely matching the negative to the requirements of thepaper. Although there do exist some ways to affect print contrast with printing-outpapers, these certainly do not provide as flexible a response to the negative as moderndevelop-out papers can. Also, many of the contrast-control techniques that are availablefor printing-out papers can only be used at the expense of optimum print quality.
Much experience has shown that even the densest and most contrasty negatives thatwill still print satisfactorily on develop-out papers do not possess sufficient density andcontrast to make good prints on albumen and salted papers. To achieve the finestquality prints on either kind of paper — develop-out or printing-out — will meanexposing and processing negatives for that kind of paper alone, because "compromise "
negatives will print well on neither kind. Even between albumen and the various kindsof salted papers significant differences in negative density range and contrast are calledfor. As a general rule, however, all printing-out papers require negatives with a greaterdensity range — which implies higher maximum densities — than develop-out papersdo.
EFFECT OF BINDER MATERIALS ON TONE REPRODUCTION
Guidance in producing suitable negatives for albumen and salted paper printingfirst comes from the nature of the binder material of the specific paper chosen. If thepaper is glossy, as in the case of albumen paper, then a negative of shorter density rangeis required than would be necessary for a matte surfaced paper. In considering densityrange of a negative, it is the difference in density between the lowest and highestdensities that needs to be determined, not just the highest density. A negative may bevery dense indeed and still be "flat," with only a small relative difference between the
68

TONE REPRODUCTION AND PRINT EXPOSURE
minimum and maximum densities. The reason why glossy papers call for a negativewith a lower density range is that glossy papers have a transparent binder (for example,albumen) which minimizes diffuse reflections and scattering of light by the paperfibers. This effectively produces more " brilliance " and contrast in the image by makingthe whites appear whiter and the shadow areas denser. The same amount of reducedsilver which produces a deep shadow on glossy paper will produce a much paler lookingshadow area on a matte surfaced print. To overcome this difficulty and produce a dense"black" on matte papers requires relatively more reduced silver, and that translatesdirectly into longer exposure times. To permit longer exposure times a negative musthave sufficient density in the highlights to keep the lighter tones in the print frombecoming too dark. Hence a longer density range negative is called for with mattepapers than with glossy papers. Following this rule, plain salted papers will require thegreatest density range in a negative; matte papers like arrowroot and matte albumen,slightly less; and albumen paper still lower. Of course, the negative density range foralbumen paper will still be considerably higher than that called for by develop-outpapers.
USING A GRAY SCALE TO MEASURE GRADATION AND CONTRAST
From the above explanation it will be clear that since there is a great deal of variationin the nature and amount of binder materials used on albumen and salted papers, noexact density ranges can be specified for all negatives intended for these differentpapers. However, there is a handy way to determine the necessary density range once agiven paper has been fabricated. A sample sheet of paper is sensitized, printed from a21-step gray scale and processed in the normal way for that paper. The exposure of thetest sheet must be long enough so that the maximum possible density has been at-tained. This can be verified by making sure that the area of the print under the first stepof the gray scale has reached the same density as the margins of the print which protrudebeyond the gray scale itself. The number of steps of the gray scale which can be countedin the finished print is the "scale length" of that particular paper. Each photographicpaper has its own characteristic number of steps produced in such a test. The ap-propriate negative density range for printing on that paper is approximately the same asthe difference in density between the highest and lowest discernible steps on the grayscale. In practice, detail is always lost at the highest and lowest extremes of density inthe print, so negatives with slightly shorter density ranges than those indicated by thetest are usually employed. As would be expected, plain salted papers have the longestscale length in a test like this, matte papers have a slightly shorter one, and albumenpaper the shortest.
Hübl found that in the tests he performed the scale length of glossy albumen paperwas equal to that of platinum paper, and that the scale length of salted papers exceededthat of platinum paper by a considerable margin. 2 The long scale length of albumenand salted papers means that more of the detail present in negatives can be reproducedin the print than would be possible with shorter-scale materials, such as currentlyavailable develop-out papers. One of the reasons why all printing-out papers tend tohave long scale lengths is because of the so-called "self-masking" property. Thisdescribes the phenomenon by which the density built up in shadow areas of the printduring exposure acts as if it were a "mask" on the lowest density areas of the negative. Asthe silver builds up in the shadow areas of the print, it behaves as if it were additionaldensity in the negative; this delays the attainment of maximum density in the print and
69

THE ALBUMEN & SALTED PAPER BOOK
tends to prevent the loss of all shadow detail before the highlight detail has time to"print in. " The net effect of this "self-masking" action is to yield prints with goodshadow density and detail while retaining a delicate gradation of lighter tones. Withprinting-out papers generally there is far less tendency to produce harsh "soot andchalk" prints than with developing-out papers.
Another important characteristic of every photographic paper that bears on the typeof negative required for best results is its inherent contrast. As explained above, thisrefers to the progression of tones between the darkest and lightest, and whether thisprogression is smooth or abrupt. Two papers with the same scale length may not havethe same contrast. For example, Hübl found in his investigations that althoughalbumen and platinum paper possessed the same total scale length, when they werecompared with the contrast of salted paper as reference, albumen paper had a slowprogression of tones from the shadows to the middletones and a relatively abrupt jumpfrom the middletones to white. With platinum paper the opposite takes place — thetransitions from the highlights to the middletones are relatively soft while there is anabrupt jump down to the deep shadows. 3 These facts were ascertained by comparing thedensities of each step of the gray scales on the three papers. The conclusions to be drawnfrom this are that although the density range of an optimum negative for albumen andplatinum paper is the same, a negative intended for albumen printing should em-phasize highlight detail at the expense of shadow detail, in order to compensate forrelatively high contrast in the highlight end of the scale on albumen paper.
In performing similar tests, modern albumen and salted paper printers can measureprint densities on a reflection densitometer and plot them graphically against thedensities of the steps of the gray scale in order to get an accurate measurement of thegradation and contrast of the particular paper they are working with. Negative contrastcan then be adjusted accordingly; however, the exposure and processing conditions forthe test must be the same as those used in normal practice, or the test results will bemisleading.
Print ExposureWhile print exposure may appear at first glance to be one of the more simple and
straightforward aspects of albumen and salted paper printing, in reality it is one of themost complex. The biggest difficulty arises from the fact that the color and intensity ofthe exposing light affect the color and ultimate contrast of the print. Albumen andsalted paper prints are primarily sensitive to ultraviolet radiation, and only to a muchlesser extent to visible blue light. In choosing a light source to expose albumen andsalted paper prints the main consideration is not how bright the light appears, but howmuch UV radiation it emits. The most convenient source of UV radiation is of course,the sun. Historically, no artificial light sources were available until the advent of theelectric arc lamp in the 1880 ' s, but the arc lamp was so impractical it was almost neverused in the 19th century for printing purposes — it was dangerous and intimidatingenough as a studio lighting device. The most satisfactory modern artificial light source isthe metal halide lamp, developed in the 1960's and now used extensively in the graphicarts industry to expose lithographic plates and stencils for screen printing. Metal halidelamps exceed the sun in their UV output and do not have the drawback of releasingnoxious fumes as did the carbon arc lamps that were previously used for those purposes.The disadvantage of metal halide lamps is their expense — a complete installationconsists of a costly lamp tube, a lamp housing with a mechanical shutter and a separate
7 0

TONE REPRODUCTION AND PRINT EXPOSURE
power supply. Other, less expensive artificial light sources such as sunlamps, quartzhalogen lamps, black-lite fluorescent tubes, or photofloods, are inadequate to the task.
For those without access to metal halide lamps the next best alternative is the sun.
Fig. 34. An indoor printing studio, ca. 1890. A south-facing orientationwas best for printing.
For all its problems and undependability, the use of sunlight (or more properly,daylight) has accounted for all but a tiny fraction of the albumen and salted paper printsever made. The trouble with sunlight is that it is constantly changing in its UV output.The intensity of UV radiation in daylight waxes and wanes in annual and daily cycles,reaching a peak in the month of June in the annual cycle and at the hour of noon in thedaily cycle. There is also the problem of an infinitely varying cloud cover. Still another
7 1

THE ALBUMEN & SALTED PAPER BOOK
difficulty associated with the use of daylight is the fact that the sensitivity of albumenand salted papers is considerably lowered when the temperature dips below 5°C, soprinting outside in winter is practically impossible.
EFFECT OF THE LIGHT SOURCE ON PRINT CONTRAST
A very intense light source lowers contrast in the print, while a weaker light tends toheighten print contrast slightly. Thus the old rule, found in many 19th-centurymanuals, which advises that dense, vigorous negatives be printed in sunlight and thin,weak negatives be printed in the shade. "Printed in shade" means facing open sky butnot directly in sunlight. Also recommended in many old manuals is the technique ofcovering the printing frames with tissue paper or ground glass and printing in direct or
Fig. 35. A rack for holding printingframes outdoors. Such portable rackswere part of every small studio ' sequipment.
filtered sunlight. Whether the majority of printing will be done in the shade or insunlight depends on the character of the negatives to be printed. If the printer is usingnegatives of his or her own that were intended exclusively for albumen and salted paperprinting — and providing the locale offers a fair amount of annual sunshine — then agood plan is to try and make the negatives so that they will stand up to full sunshine.Not only will the prints be more permanent, they will have a more pleasing tone andlook richer and more brilliant.
The color of the exposing light also has an effect on print contrast. The higher theproportion of blue light and the lower the proportion of yellow light the exposuresource contains, the greater will be the tendency toward a softer, flatter print. Thegreater the proportion of yellow and the less blue the exposing source contains, thegreater will be the tendency toward a more contrasty print, but, of course, with anaccompanying lengthening of exposure time. 4
7 2

TONE REPRODUCTION AND PRINT EXPOSURE
EXPOSURE TIME
The "speed" of albumen and salted papers is exceedingly slow. Matte salted paperslike arrowroot paper are the fastest, followed by plain salted papers and the slowest ofthe lot is albumen paper. An average exposure time of albumen paper in direct sunlightis 5 to 10 minutes, in shade, anywhere from ½ hour to several days. Of prime im-portance is the careful monitoring of exposure so that the correct amount of exposure isgiven the print; the necessary exposure required by a given negative will vary greatlywith conditions. The exposure of albumen and salted paper prints must be carried onpast the point where the print " looks right," since the prints lose density in the toningand fixing solutions. The degree of overprinting necessary depends on the nature of thebinder material, the character of the negative and the type of toning bath used. Ex-perience is the only way to know precisely how much overprinting is required, but astarting point for beginners might be to overprint one and a half "stops" for albumenpaper and two "stops" for salted papers.
A good approach in determining the progress of exposure is to watch the margins ofprints as they are exposing and make an initial check a short time after the marginsappear to have reached maximum density. This advice would not apply in the casewhere a very thin negative is being printed because by the time the margins have at-tained maximum density, a print from a very thin negative will have most likely beenspoiled. A guide to the point when maximum density has been attained is when themargins of the print begin to "bronze," that is, take on a greenish luster. At this pointso much metallic silver has been reduced in the light-sensitive layer that a kind ofsaturation point is reached and particles of silver migrate to the surface of the layer andform a coherent, shiny film. If the "bronzing" has not progressed too far it maydisappear during processing; otherwise, it will still be noticeable in the finished print,though not as prominently as before processing. Many old manuals on albumenprinting recommend printing until the shadows are "just bronzed," and this is correctadvice for many negatives, especially ones which can be printed in full sunshine.
Some Precautions in PrintingNeither the paper nor the printing frames should be excessively dry at the time of
printing, because a certain amount of moisture is necessary in order to assure goodsensitivity and contrast, especially with matte salted papers. The paper should containenough moisture to be flexible and not feel dry and brittle. Conditioning the paper in amoist environment may be necessary. However, under no circumstances should thepaper be damp or actually wet, because if some of the silver nitrate from the paperbecomes transferred to the emulsion of the negative, red stains will result. Precautionsagainst this accident should be taken whenever a valuable negative is to be printed. Onemil (.001 inch) MylarTM can be placed between the negative and the paper withoutsacrificing sharpness.
If a relatively cold printing frame is placed out in sunlight the expansion of thepaper and the negative with heat may be unequal, and the result is a "doubled" imageall around the outside edges of the image area while the center of the print remainssharp and crisp. This phenomenon is more likely to occur with large negatives andprints. Likewise, in bringing the frames inside to check the progress of exposure, careshould be taken to avoid leaving half the frame lying open for more than the minimumtime necessary to check exposure. Never open the frame to check exposure in sunlight oropen shade; bring it inside to a safe location, preferably a room lit by a white in-
7 3

THE ALBUMEN & SALTED PAPER BOOK
candescent light of low wattage. In this light the prints can be judged with reasonableleisure and safety.
A Note on Printing Historical NegativesOne of the pleasures of albumen and salted paper printing is to be able to print
historical negatives on the kinds of positive printing materials for which many of thesenegatives were originally intended. A comparison between an albumen print madefrom a 19th-century negative and the " best possible " approximation of an albumen
Fig. 36. A "Scovill" brand printing frame.Usually made of maple, such frames werecheap and durable.
print made from the same negative on modern papers will quickly establish thesuperiority of the " real thing."
In printing from historical negatives the first and most important rule is to protectthe negative; use the 1 mil MylarTM spacer between the negative and the printing paper.Learn to handle glass negatives before attempting to print from a really valuablenegative, because many negatives have been shattered in printing frames from toomuch pressure, or cracked by expansion in sunlight from an overstressed frame. Use aframe that was intended for glass plates, and use a pad.
There is always some risk inherent in printing from a valuable negative, so the riskwill have to be carefully weighed against the benefits of a facsimile print. For extremelyvaluable negatives a duplicate negative can be made at somewhat less risk to the originalnegative and prints then made from the duplicate negative. Whenever possible, this isthe procedure that should be employed. Undoubtedly the making of new albumenprints from historical negatives will find a place in future photographic practice,because ,the appreciation of historical images is greatly enhanced by the use of theappropriate positive printing material. Any and all facsimile prints, however, shouldalways be indelibly marked as such, with an embossed stamp or other method ofidentification.
7 4

CHAPTER EIGHT
ToningHow simple this all is, the novice will exclaim; where are the difficultiesofphotographic printing? But stay, let us look at our print; we were verypleased with its tint when it came from the printing frame, but alas! therich violet has given place [in the fixing bath] to a dull brick-red rustycolour, and our print is for that reason valueless.
—Fitt, 18561
Very early in the history of photographic papers the desire arose to modify the colorand density of the images produced on printing-out papers. The effect of "hypo" onsalted papers — however beneficial it might have been as a fixative — was to produce anunpleasant yellowish-brown image, and one that had suffered a serious loss in overalldensity as a result of the fixing process. Eventually a number of different approachescame to be used to intensify and modify the image color in albumen and salted papers.Many of these treatments had an effect on the permanence of the image as well as itsappearance. The most important and significant to the lifespan of printing-out paperprints is the technique of noble-metal toning, in which the silver image is partiallyreplaced by a deposit of metallic gold or platinum. This chapter presents the history oftoning methods and the theory and practice of noble-metal toning.
History of Toning MethodsHEAT TONING
Probably the oldest toning method was the use of heat to darken the image on saltedpapers. This method was used by Talbot and most other early printers; it no doubtevolved after a hot iron was applied to a finished print to flatten it, whereupon a distinctstrengthening of image occurred. Heat toning with a hot iron must be carefully done inorder to avoid scorching the paper, and the hot iron must never be applied to the face ofthe print. Recently a large number of Talbot's original negatives were printed on saltedpaper at the Kodak Museum in Harrow, England, and heat toning of the prints wasaccomplished by drying the prints in a modern heated print dryer. 2 Heat toning hasmore effect with plain salted papers and arrowroot paper than with other kinds ofpaper.
SULFUR TONING
The other type of toning used extensively in the first two decades of photographywas sulfur toning. Known to photographers as the " old hypo " method, it involved thepurposeful decomposition of the sodium thiosulfate fixing solution to the point where
7 5

THE ALBUMEN & SALTED PAPER BOOK
sulfur was set free to react with the silver image and form brownish silver sulfide, thusaccomplishing a kind of toning. Presumably this effect was first noticed when fixingbaths were allowed to become exhausted through continued use. To the surprise ofphotographers the older the fixing bath got, the more intense was the toning action. Itsoon became apparent, however, that prints fixed in a totally exhausted fixing bathspeedily faded, sometimes within a few weeks. To overcome the difficulties of a com-pletely exhausted fixing bath some photographers actually added old "hypo" to newlymade up fixing solutions, in hopes of a compromise between toning and fixing. Someof the literature of the period 1840-1850 suggests that a fixing solution was ready onlywhen it smelled of sulfur and the sides of the tray were encrusted with brown scum, orwhen the fixing solution itself had been black for several days!
Blanquart-Evrard suggested in 1847 that the "instant aging" of fixing solutionscould be obtained by adding concentrated silver nitrate solutions. 3 An extension of thesame idea was the addition of silver chloride, an ingredient called for in many early" toning-fixing" baths. The same liberation of sulfur from sodium thiosulfate could alsobe accomplished by acid additions to the fixing bath, and Blanquart-Evrard was also thefirst to propose the use of acetic acid additions to promote the toning effect. 4 Althoughthe potentially dangerous effects of "old hypo" to the permanence of the prints(whether the hypo was truly "old" or artificially decomposed) were well known by 1850,the evidence against the practice was not totally conclusive. Even today many sulfurtoned albumen and salted paper prints survive in good condition — for example manyof the prints of Hill and Adamson. Apparently under some circumstances a stableimage of silver sulfide could be produced by the sulfur toning methods used, though ingeneral the odds in favor of permanence in the use of the practice were slim. One factorwhich undoubtedly helped was the recommendation made by many authors that "oldhypo" be followed by a fresh, strong bath of "new hypo."
Gold ToningThe idea of gold toning paper prints was borrowed from daguerreotypists, who used
a mixture of gold chloride and sodium thiosulfate called sel d'or (literally, salt of gold)to intensify and tone their daguerreotypes. This important modification of the originaldaguerreotype process was discovered in 1840 by the famous French physicist HippolyteFizeau, and it soon became standard practice.' Not until 1847 was the same idea ap-plied to paper photographs; in that year P. F. Mathieu suggested the technique in apamphlet entitled Auto-Photographie. 6 Unlike the enthusiastic adoption of "gilding"by daguerreotypists, gold toning of paper prints did not immediately catch on withphotographers. Only when publicized after 1850 in the influential writings onphotographic technique by Gustav LeGray did gold toning gain popularity, and thenonly slowly. LeGray was one of the best known and most successful photographers inFrance, and he did much to popularize all three of the great technical innovations inphotography that appeared in the early 1850's — the wet collodion negative, thealbumen print and gold toning of printing paper.
For a few years after 1850 the sel d'or method of gold toning was the most widelyused for both albumen prints as well as salted papers. The effect of such a treatment wasto change the image color from a yellowish-brown to either a cool brown, purple orbluish-black. The use of sel d'or constitutes what now would be called a toning-fixingbath. Since it is formed by mixing a solution of gold chloride into an excess of sodiumthiosulfate ( "hypo"), it retains its power to dissolve silver chloride and thus act as a
7 6

TONING
fixing agent. It can also decompose and liberate sulfur if it is over-used or if it is madeacidic by the introduction of acidic gold chloride. In fact, the usual practice of sel d'ortoning involved a fairly good chance that sulfur toning and the release of potentiallydestructive invisible sulfur would take place before gold toning was fully accomplished.As in the case of the older sulfur toning approach, some sel d'or toned prints faded veryquickly and others last to this day as vigorous as the day they were made. The difficultywith the method is that control over the outcome is impossible in the routine course ofprinting. In later years, during the era of emulsion-type printing-out papers (1890-1920), toning-fixing baths were reintroduced. Although more was known of the factorsinvolved in assuring permanence, these new toning-fixing baths were also ultimatelyrepudiated as too difficult to keep under control in the ordinary course of photographicprinting.
The approach which came to be used in the late 1850 ' s and which is known to bemore favorable to permanence is called separate toning and fixing, in which the toningstep precedes the fixing step and no thiosulfate is included in the toning formula. By1860 the evidence against sel d'or toning was so conclusive that even its most obstinateadherents had to admit its inferiority. 7 A new and much more effective method, calledalkaline gold toning, had been proposed by James Waterhouse sometime around 1855. 8
This method called for separate toning and fixing, and the main innovation was the use
Fig. 37. "A silvering and toning room," ca. 1875. Note thedouble door entrance arrangement.
of a toning bath composed of gold chloride and one or two mild alkalies. The alkalinesolutions were found to be much more effective in their toning action and made richbrowns and purple-browns easily attainable on albumen paper. The use of differentcombinations of alkaline substances with gold chloride produced different effects intoning, and the number of different formulae for toners quickly multiplied. Many19th-century manuals contain 10 to 15 different formulae, most of them variations onthe alkaline principle.
In 1867 another important class of gold toning baths was-discovered, this time based
7 7

THE ALBUMEN & SALTED PAPER BOOK
on the combination of gold chloride with thiocyanates. 9 This type of toner achieves amore complete substitution of gold for silver and thus produces a colder image tone,generally deep purple tending to black. Thiocyanates are solvents of silver chloride, sowhen a print is introduced into a thiocyanate toner the image at first bleaches, thenintensifies as the gold is deposited. More gold is consumed by thiocyanate toners thanthe alkaline varieties, and although they became fairly popular, they never eclipsed thealkaline toners so beloved by albumen printers. For the later emulsion-type gelatin andcollodion printing-out papers, thiocyanate toners were particularly suitable, andbecame standard practice with these papers. Although thiocyanate (formerly calledsulphocyanide in the old style chemical nomenclature) toners do dissolve silver chloride,they definitely are not a substitute for fixer, and subsequent fixation in sodiumthiosulfate is still necessary.
Theory of Noble Metal ToningToning with noble metals confers two benefits on the albumen and salted paper
printing processes. It improves the color and density of the image and it also provides ameasure of protection against oxidation and sulfiding of the image silver by partiallyreplacing and enclosing it with metallic gold or platinum. The reason why a toning stepis necessary at all has to do with the physical characteristics of the silver image inprinting-out papers. As discussed in Chapter 1, the image is composed of very small,very highly dispersed particles of metallic silver. Although metallic silver is consideredto be fairly unreactive, it will still react with some substances, notably sulfur andoxidizing agents, especially when the silver is in a finely divided condition. The smallparticle size means that the silver has a very large surface area relative to its mass; hence alarge portion of its total mass is on the surface and readily accessible to destructivechemical agents. Gold and platinum react much less readily with sulfur and are muchmore difficult to oxidize. A layer of gold or platinum on a silver particle will tend toshield the silver inside from attack, especially from oxidizing agents.
The factors which affect the ultimate color of a print are the size s10 and shape of theimage particles, the distance between them1
1 and the index of refraction of the mediumin which they are dispersed. 12 In the toning process with noble metals the color of theimage is modified by changing the size and shape of the silver particles throughreplacement of silver atoms by gold or platinum atoms. This enlargement of the metalaggregates which comprise the image causes the print to appear colder in tone, i.e.,more neutral in color.
According to chemical theory it is only necessary to put a print into a solution whichcontains gold or platinum ions in order to have the substitution process take place. Therate of this substitution is greater for gold ions than platinum ions, although the ratemay be modified by the presence of other substances in the toning solution.
3
Depending in part on whether the solution is acidic or alkaline, gold may take one ofseveral ionic forms. In an acid toning bath such as a simple gold chloride solution, oneatom of gold replaces three atoms of silver, a case in which toning action would lag farbehind bleaching of the silver. The result would be a flat, lifeless image with a reddishcolor. In an alkaline toner the gold exists in a different ionic form and there is a morefavorable substitution of one atom of gold for one atom of silver. Platinum toning, onthe other hand, goes on much more effectively in an acid environment. In either gold orplatinum toning, the substitution process creates silver chloride as a by-product. Toningmust always be followed by a fixing step to remove this silver chloride.
7 8

TONING
The Practice of Gold ToningCAUTION: It is recommended that rubber gloves be used during toning
operations.Toning is an inexact process. Standardized, repeatable results come only with ex-
perience and the attainment of repeatability in all other parts of the printing process.Among the factors which influence the outcome of the toning operation are the pH ofthe albumen or other binder materials used, the pH of the silver solution, the amountof silver deposited to form the image, the thoroughness of the initial wash inprocessing, the pH of the toning solution, the presence of other substances in thetoning solution, the strength of the gold solution, its temperature, its age and the timeof immersion of the print. Edward L. Wilson, one of the best known American writerson photography in the late 19th century, understated the case when he wrote, "Theprints are not acted upon just alike." 14 For beginning printers a very helpful exercise inevaluating toning is to leave one or several prints completely untoned to form a basis ofcomparison with toned prints.
GOLD CHLORIDE
The main ingredient in all the gold toning formulae is gold chloride. The goldchloride which can be bought from photographic or chemical suppliers is always anacidic substance (technically called chlorauric acid), made by dissolving gold metal in amixture of nitric and hydrochloric acids. True gold chloride is an unstable substancemade by passing chlorine gas over gold leaf at elevated temperatures, and is not usuallycommercially available. Gold chloride of commerce is usually sold as either an amor-phous orange mass or as a 1 % solution in distilled water. Gold chloride in the dry stateis sold in 15 grain (approx. 1 gram) amounts. Because the dry chemical is verydeliquescent, it is packed in small hermetically sealed glass tubes.
Solutions of gold chloride are fairly stable if kept out of light and out of contact withorganic materials. Stock solutions made up from the dry chemical should always bemade with distilled water. A stock solution of 1 0/0 strength (one gram of the drychemical to each 100 ml of water) is called for by most toner formulae. In the 19thcentury it was quite common for photographers to make their own gold chloride bydissolving gold coins in the mixed acids and then evaporating the solution to dryness orneutralizing the excess acid with chalk. Because of the fumes evolved and the dangers ofthe concentrated acids, this is not a recommended procedure for the home laboratory.
As stated earlier, the pH of the toner solution has a definite effect on the toningprocess. It is not clear whether or not it is simply pH difference of differences caused bythe presence of other ions — or both — which account for the different results obtainedby the numerous alkaline toning formulae found in the literature of albumen andsalted paper printing. A search of that literature reveals two different approaches toalkaline toning practice. In the first approach the gold chloride stock solution isneutralized with calcium carbonate (i.e., chalk) before the toner is compounded.Calcium carbonate will not make the gold chloride alkaline, but will neutralize any freeacid. In the other approach only the various alkaline substances called for in the tonerformula are used to overcome the acidity of the gold stock solution.
For the modern practice of alkaline gold toning it is most convenient to use the goldstock solution in its acid condition, without pre-neutralizing it as much of the older
literature recommends. Care must be taken, however, to see that approximately thesame mildly alkaline condition is maintained in each batch of made-up toner. The stock
79

THE ALBUMEN & SALTED PAPER BOOK
gold solution retains a yellow color while still in the relatively inactive acidic state; whenit has passed into the more active state through contact with alkaline substances, itbecomes colorless. This decolorization is the best guide to the state of the toning bath.Some baths found in the older literature may take hours or even days to decolorize andbecome usable. The most common of these is the sodium acetate toner, which generallyrequires 24 hours to "ripen" before it can be used. The printer who wishes to stan-dardize the toning process as much as possible can monitor the pH of the toningsolution, but for most applications sufficient control is obtainable simply by making upthe toner according to a proven formula and visually observing the progress of toning.
The toning solution should not be made too alkaline because although it tones morequickly in that condition, it also loses its activity much more rapidly. Too active toners,whether from too much gold content or too high pH, do not produce pleasant tonesand are more difficult to control. A leisurely pace in toning allows each print to receiveindividual attention. Making the toner too alkaline will result in baths that still containa great deal of gold but no longer will tone prints. Most alkaline baths are intended for"one-use" toning, and become inactive spontaneously after a few hours. There is no clueother than the cessation of toning action to indicate the point at which a toning bathhas become inactive or exhausted. Baths made with sodium acetate can be usedrepeatedly if strengthened with additions of gold stock solution.
STRENGTH OF GOLD TONING SOLUTIONS
Papers with porous surfaces, such as arrowroot, plain salted paper, etc., requiretoners with much less gold content than those intended for glossy albumen paper.These porous papers tone more quickly, and would rapidly become overtoned in thestrong baths employed for albumen paper. Toning baths for matte salted papers shouldcontain .1 to .2 g gold chloride per liter of toning solution, while glossy albumen papertoners should contain between .4 and .5 g gold chloride per liter of toning solution.Toning of both albumen and salted papers is generally done by inspection, and shouldtake from 3 to 15 minutes depending on conditions and the kind of paper being toned.Toning should generally be carried on well past the point when a visible change takesplace in the image color. The toning solution should be used at temperatures of 17-20 °C, and prints require constant agitation in the toning solution. The toner solution isruined by even a trace of fixer, so cleanliness and care are required. The toningoperation is best carried on in weak incandescent light so that the color of the prints maybe accurately determined. In the case of glossy albumen paper the toning should becontinued until only the shadows of the print retain their original warm color bytransmitted light. Judging toning by looking at prints lying flat in a tray may bedeceptive. After toning is completed the prints should be placed in running water andgiven a 5-minute wash before fixing them.
8 0
GOLD TONER FORMULAE
The following are alkaline gold toning formulae:
Borax Bath
Borax (sodium borate) .............................................................. 10 g
1 % Gold chloride solution....................................................... 40 mlWater ............................................................................to make 1 liter

TONING
Sodium Acetate Bath
fused Sodium acetate............................................................... 20 g1 % Gold chloride solution .................................................. 40-50 mlWater ............................................................................to make 1 liter
The following is a thiocyanate-based toner:
Thiocyanate Toner
Sodium thiocyanate .............................................................15-20 g1 % Gold chloride solution .................................................. 60-80 mlWater............................................................................to make 1 liter
Platinum ToningHISTORY OF PLATINUM TONING
The first published mention of platinum toning occurred in 1856, when aphotographer in Istanbul, M. De Caranza, recommended toning photographs with anacidified platinic chloride solution." Very little notice was taken of De Caranza'ssuggestion because such a toner has only a very slight toning action and possesses astrong tendency to bleach the silver image. In fact all platinic chloride formulae have solittle toning energy that at their best they are restricted to use with matte papers, andare totally ineffective with albumen paper. On the other hand, the platinous chloridesalts, chiefly potassium chloroplatinite, are very active toners when combined withacids, 16 and have a smaller tendency to attack the silver image.
Potassium chloroplatinite was a fairly obscure substance — certainly not onegenerally available to photographers — until 1879, the year in which Willis began tomarket the platinotype process. In this process potassium chloroplatinite is an in-dispensable ingredient. Many workers of the platinotype process also used silver papers,and in 1886 J. Reynolds discovered that potassium chloroplatinite was a very energetictoner of silver prints,
' 7 yielding brown and brownish-black tones instead of the purplishand bluish-black tones obtained with gold toners. In 1889 Alfred Stieglitz alsopublished one of the pioneering platinum toner formulae for silver papers, consistingsimply of nitric acid, potassium chloroplatinite and water. 18
Platinum toning of silver prints became quite a popular practice, especially withmatte-surfaced papers. Its most widespread use occurred during the period 1895-1925when matte collodion and matte gelatin emulsion type printing-out papers were sopopular. Matte gelatin papers were often toned only with platinum and therefore have abrown hue, while matte collodion papers were generally toned with both gold andplatinum. This produced the familiar olive-black color so often seen in the studioportraits of the era 1895-1920. Platinum toning was also preferred for the various saltedpapers in use during this time, such as the many kinds of arrowroot and matte albumenpaper.
THE PRACTICE OF PLATINUM TONING
The effects obtainable with platinum toning do seem to harmonize especially wellwith a matte surface, although platinum toning can be used with albumen and otherkinds of glossy paper. The main technical difference between gold and platinum toningis that gold toning goes on best in an alkaline environment, while platinum toningrequires a neutral or acidic condition. One difficulty in platinum toning is the tendency
8 1
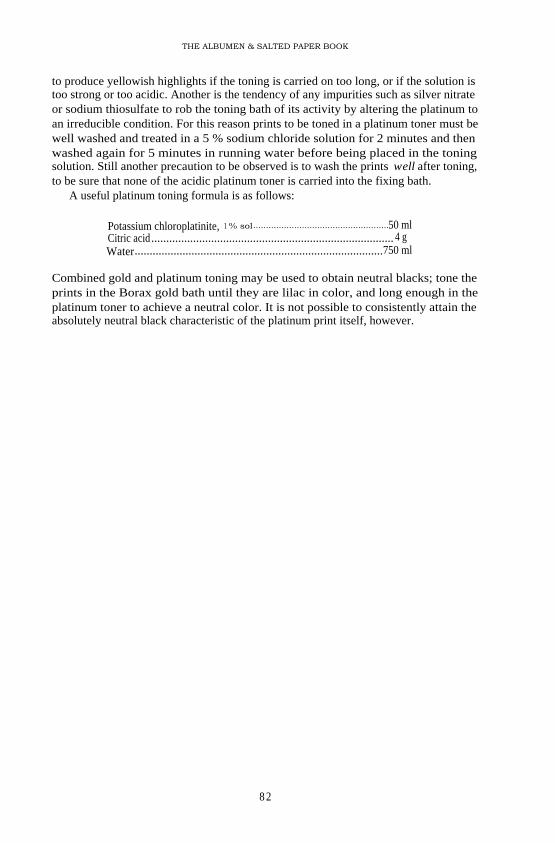
THE ALBUMEN & SALTED PAPER BOOK
to produce yellowish highlights if the toning is carried on too long, or if the solution istoo strong or too acidic. Another is the tendency of any impurities such as silver nitrateor sodium thiosulfate to rob the toning bath of its activity by altering the platinum toan irreducible condition. For this reason prints to be toned in a platinum toner must bewell washed and treated in a 5 % sodium chloride solution for 2 minutes and thenwashed again for 5 minutes in running water before being placed in the toningsolution. Still another precaution to be observed is to wash the prints well after toning,to be sure that none of the acidic platinum toner is carried into the fixing bath.
A useful platinum toning formula is as follows:
Potassium chloroplatinite, 1 % sol.....................................................50 mlCitric acid................................................................................. 4 gWater...................................................................................750 ml
Combined gold and platinum toning may be used to obtain neutral blacks; tone theprints in the Borax gold bath until they are lilac in color, and long enough in theplatinum toner to achieve a neutral color. It is not possible to consistently attain theabsolutely neutral black characteristic of the platinum print itself, however.
8 2

CHAPTER NINE
Fixation and WashingThe permanence ofprints on albumenised paper and their freedom fromyellowness with age undoubtedly depend on the elimination, by thefixing bath, of the insoluble salts ofsilver.
—A. Haddon and F.B. GrundyJuly, 18971
This chapter deals with two important operations in the processing of albumen andsalted papers. The first is the fixing step, in which the unexposed light-sensitive sub-stances are removed from the prints by treatment in a solution of sodium thiosulfate.The second and equally important step is the washing out of the chemical products ofthe fixation process. These must be removed because they are unstable and will causeyellowing and fading of the image if allowed to remain. Washing prints in runningwater and treatment in a "washing aid " such as a 1 % sodium sulfite solution or Kodak
Hypo Clearing AgentTM are the means employed to remove the by-products of fixation.While the broad outlines of the fixing and washing operations with albumen and
salted papers are similar to those of other photographic materials, there are somesignificant differences. Because of the extremely small size of the silver image particlesin these papers, the image is considerably more vulnerable to chemical attack, especiallyfrom the residual products of fixation. Therefore it cannot be over-stressed that strictadherence to correct procedures in fixing and washing is the only way to assure optimumpermanence in albumen and salted paper prints.
Theory of the Fixation ProcessIn an exposed but unprocessed print the image layer consists of the metallic silver
image itself, the binder material used (starch, gelatin, albumen, etc.) and unexposedlight-sensitive silver salts. These are primarily silver chloride, but depending onwhatever additions have been made to the salting or sensitizing solutions, silver citrate,silver chromate or other silver salts may be present. In order to render the image stablethe light-sensitive substances must be removed, ideally leaving behind only the bindermaterial and a silver (and gold or platinum, if the print has been toned) image.
Silver chloride and the other silver salts are not soluble in water; they can only beremoved through a chemical reaction with another substance, in which a new water-soluble "complex" is formed. The choice of fixers — or more properly, "complexing
agents " for silver salts — is somewhat limited. Among the substances which have somefixing or stabilizing action are ammonia, potassium cyanide, strong chloride solutions,
8 3

THE ALBUMEN & SALTED PAPER BOOK
thiocyanates, thiourea, sodium sulfite and sodium and ammonium thiosulfate. Of allthese sodium thiosulfate has the fewest drawbacks for the purpose of fixing silverprinting-out papers, and it has been in almost exclusive use for that task since the veryearliest days of photography.
HISTORY OF FIXATION WITH THIOSULFATES
The discovery of the fixative properties of sodium thiosulfate (or "hyposulfite ofsoda" as it was known then) was made in 1839 by Sir John F. W. Herschel. He had heardthat both Talbot and Daguerre had evolved photographic processes, and decided tomake some investigations himself. He first applied sodium thiosulfate for the purposeof fixing silver chloride papers on January 29, 1839. The idea came to him because ofsome observations he had made in the years 1819 and 1820, when he discovered thesubstance sodium thiosulfate and noticed that it was a solvent for silver chloride. 2 Ashort while later he communicated his epochal discovery to Talbot, who up to this pointhad not been truly fixing but merely "stabilizing " with a strong solution of sodiumchloride. Talbot at first disdained "hypo," but later incorporated it into his own process,as did Daguerre, who had also been "stabilizing" with a strong sodium chloride solution(in a stabilizing treatment the silver chloride is not removed, it is merely changed into aless sensitive form).
Sodium thiosulfate in its pentahydrate form has the chemical formulaNa2S2O3.5H2O . Each thiosulfate ion contains 2 atoms of sulfur, and it is chiefly thepresence of sulfur that necessitates the removal of the silver thiosulfate complexes whichare the products of the fixation process. Also, any thiosulfate which has not "
completed" with silver must be removed as well, because the thiosulfate ion is itself un-stable and can be easily decomposed, thus releasing elemental sulfur to attack the silverimage. However, in dry crystalline form sodium thiosulfate is a stable substance,although it should be kept in a tightly stoppered bottle. When dissolved in water,sodium thiosulfate is not stable, and after a time partially decomposes to sodium sulfiteand elemental sulfur. For this reason fixing solutions intended for use with albumenand salted paper prints should not be made in advance; the fixer solution shouldpreferably be made up just prior to use, so that spontaneous decomposition of thethiosulfate is kept to a minimum.
CHEMICAL REACTIONS INVOLVED IN FIXATION
The actual reactions involved in the fixing process are fairly complicated, and thereare probably at least three different kinds of silver-thiosulfate complexes formed duringfixation. 3 Studies of these reactions have led to the conclusion that certain conditionsmust prevail for the most effective fixation as well as for the most complete removal offree thiosulfate and silver-thiosulfate complexes. The most important of these con-ditions is that thiosulfate ions must be present in excess. There must be more thiosulfateions present than are needed to react with all the silver ions present, or else insolublecomplexes are formed which cannot be washed from the image layer. 4 Another way ofstating this is that one of the complexes formed during fixation is only soluble in freshthiosulfate.
In practice this means that two fixing baths are necessary; the first one does the bulkof the "complexing, " while the second insures that the complexes ultimately formed canbe washed out of the print. It is apparent from this why only fresh fixer solutions arelikely to result in optimum print permanence. As the fixer solution approaches a point
84

FIXATION AND WASHING
of exhaustion, it loses its ability to form soluble silver-thiosulfate complexes. Studieshave also shown that the fixing process is completed fairly rapidly, and prolongedfixation is much more injurious to prints than is generally believed. Fixing too long willallow thiosulfate to penetrate inside the paper fibers, in which case it becomes almostimpossible to remove.
Another potential difficulty arises from the pH of the fixing bath. Althoughmodern gelatin-based photographic materials are generally fixed in an acid hardeningtype of fixing bath, albumen and salted paper prints are best fixed in an alkalinesolution of sodium thiosulfate to which no hardeners have been added. Alkalinethiosulfate solutions are necessary for two reasons: first, the slight alkalinity preventsany acids which might be inadvertently introduced into the fixing bath from decom-posing the sodium thiosulfate and liberating sulfur. Second, an acid fixing bath wouldtend to attack the finely divided metallic silver of the image, causing excessive bleachingof the highlights and middletones in the print. This attack on the image silver itself isminimized when the pH of the fixer is kept on the alkaline side.
The Practice of FixationBased on the theoretical considerations given above, fixation of albumen and salted
papers is best done in a freshly made-up solution composed as follows:
Sodium thiosulfate (pentahydrate) ...........................................150 gSodium carbonate......................................................................2 gWater ............................................................................to make 1 liter
The fixing bath should be made with water slightly warmer than the desired workingtemperature of 18 to 20°C, since some heat is always consumed in the formation of thesolution. It is important that the fixing bath not be too cold, since too great a tem-perature differential between the fixing bath and the other processing solutions mightcause blistering of albumen paper. To insure that fixation is properly carried out, theprints must be washed free of other substances — especially acidic platinum toningbaths — before they are placed in the fixer. Two separate trays of fresh fixer arerequired. The prints are placed in the first fixing bath and agitated constantly for 4minutes, drained for at least 5 seconds, then placed in the second fixing bath andagitated constantly for another 4 minutes. It is important that there be enough fixingsolution in each tray to easily accommodate the number of prints being fixed at onetime, and that care be taken to see that the whole surface of each print is constantlywashed over with fixer solution. As indicated in Chapter 3, this fixing procedure isapplicable to all silver printing-out papers.
FIXER EXHAUSTION
It is difficult to establish the point at which a fixing bath becomes exhausted. Thevalue of maximum solubility of silver chloride in sodium thiosulfate is known, but thatdoes not help to establish the practical limits of use for a fixing bath, since the presenceof excess thiosulfate is required to insure maximum permanence. Estimates in theliterature suggest that no more than 150 8 x 10 inch prints should be fixed in 1 liter of15 % sodium thiosulfate solution,' but it seems that a much more conservative estimateshould be made when optimum permanence is desired. To assure the longest life for aprint, probably no more than 10 to 15 prints (approximately 8 x 10 inches in size)
8 5

THE ALBUMEN & SALTED PAPER BOOK
should be fixed in each liter of fixer solution.The silver content of printing-out papers is very high relative to conventional
develop-out materials, and it can also vary from one kind of albumen or salted paper toanother. The relatively high silver content and the vulnerability of the colloidal silveri mage are the reasons why such a conservative estimate of fixer exhaustion is necessary.Compared to the other costs of albumen and salted paper printing, the price of fixer ischeap, and frequent renewal of the fixing bath is a worthwhile investment which helpsinsure durability of the finished prints.
COLOR CHANGES DURING FIXATION
During fixation the prints undergo a dramatic change in color, in which the originalbrilliant purple or brown color is transformed into a much yellower and duller brownhue, accompanied at the same time by a loss of density. The reasons for this color anddensity change — a characteristic phenomenon in all silver printing-out papers — haveto do with the physical structure of the metallic silver which forms the image. In anexposed but unfixed print the silver image particles exist in a highly dispersed state,forming a kind of "solid solution" of metallic silver in silver chloride. 6 The color anddensity of this system is determined by the size and amount of metallic particles as wellas the combined refractive indices of silver chloride and whatever binder materials havebeen used on the paper.
Upon fixation the silver chloride is removed and the metallic silver particles undergoa "packing" process and accumulate into aggregates of particles.7 . ? At the same time therefractive index of the system is lowered by the removal of the silver chloride. Togetherthese physical and chemical changes cause a loss of particle covering power — i.e., printdensity — and shift the color of the print toward yellow. In fact, any physical change inthe image layer causes a shift of print color. A good example of this is the reddening ofprints that occurs when they are placed in the initial wash water; swelling of the imagelayer is the actual cause of the color shift. When prints dry they undergo anotherchange, becoming more neutral in color and gaining slightly in density as the imagelayer contracts.
Washing of PrintsGENERAL CONSIDERATIONS
The purpose of washing is to remove the sodium thiosulfate and silver thiosulfatecomplexes that remain in the print after fixation. Over the years a great deal of attentionhas been paid to the theory and practice of washing photographic materials, but in-sufficient washing still remains a leading cause of the deterioration of photographs. Thewashing of photographic prints is more difficult than the washing of films, primarilybecause of the absorption of thiosulfate into the paper fibers. With prints the rate ofwashing slows down tremendously at the lower levels of thiosulfate concentration,8 andin practice it is. impossible to remove every trace of thiosulfate simply by washing inwater.
In the case of albumen and salted papers, effective washing is even more importantthan in modern photographic materials. In the older papers, the silver image is in muchmore intimate contact with the paper fibers than is the case with modern papers, wherea substratum of baryta and gelatin (or polyethylene) separates they i mage layer from thepaper base. Therefore, with albumen and salted papers a combination of both properfixation and effective washing is necessary to insure that the base paper does not become
86

FIXATION AND WASHING
a reservoir of image-threatening substances. It is very important in this regard thatimmersion of the prints in the fixing solution is not prolonged beyond the recom-mended time. Experimental evidence on the washing of albumen and salted paperprints is almost nonexistent. However, the factors which affect the rate of washinggelatin prints are probably valid for these papers as well.
WASHING AIDS
The removal of thiosulfate from prints cannot be accomplished simply by washingin water, if a print of optimum stability is desired. In fact, water is such a poor removerof low levels of thiosulfate from prints that an extra step in processing is needed to
Fig. 38. A semi-automatic print washer and agitator, ca. 1890.
assure maximum print permanence. This consists of treating the prints in a so-called"washing aid" or hypo clearing agent in order to facilitate more complete removal of thethiosulfate. These treatments are effective because they displace the absorbedthiosulfate ions and replace them with less harmful and more soluble ions of varioussalts. The best "washing aid" for albumen and salted papers consists of a 1 % solution ofsodium sulfite, although proprietary formulas such as Kodak Hypo Clearing AgentTM
may also be used.
WASHING CONDITIONS AND APPARATUS
The actual apparatus and conditions of washing are very important to the efficiencyof the washing process. In general the desirable factors in the design of washing ap-paratus are assurances that sufficient flow of water covers the entire print surface, andthat the entire volume of water is changed at least every 5 minutes. The temperature ofthe wash water should remain fairly constant at approximately the same temperature asthe other processing solutions. Where the design of the washing system is less than
8 7

THE ALBUMEN & SALTED PAPER BOOK
perfect — for example when more than 2 prints are washing in a tray equipped with atray siphon — hand agitation of the prints is absolutely necessary. Another commonwashing apparatus is merely a round tub with a water inlet that forces the prints to swirlin a circle. This kind of washing apparatus also demands frequent hand agitation toinsure proper washing.
Fig. 39. A print washing tank with acircular water flow and siphon drain,ca. 1870.
Certainly the average conditions for washing prints in the 19th century were lessthan optimum. Often the prints were washed in ice cold water, or without the benefitsof running water of any kind. The basic technique recommended in many manuals ofthe time was to remove the prints from the wash tray, squeegee them, then return themto a fresh tray of water and agitate them. This procedure was to be repeated over aperiod of time that ranged from 12 hours (according to Abney)9 to only 15 minutes(according to Haddon and Grundy).10 Nineteenth-century photographers were verymuch concerned with assuring removal of thiosulfate, and then as now, there were allsorts of washing devices and hypo-elimination preparations on the market.
WASHING TIME
The washing time of prints depends on the thickness of the paper base and thenature of the binder material used. Generally, the thicker the base paper, the longer thewash time required, and also the longer the treatment time required for the "washingaid." The removal of thiosulfate is also affected by the diffusion rate of substancesthrough the image layer, so that albumen paper will probably require substantiallylonger to wash than papers like arrowroot or plain salted paper that possess more porousimage layers. The wash times recommended below are intended to be safe for glossyalbumen paper and all other salted papers as well. Some papers, however, may beinjured by prolonged washing — the image layer may begin to dissolve --- in which casea shorter wash time is indicated.
8 8

FIXATION AND WASHING
METHOD FOR WASHING ALBUMEN AND SALTED PAPERS
After fixing is complete the prints should be given a short (2 to 4 minute) wash inrunning water before treatment in the "washing aid." This water wash removes the vastbulk of the thiosulfate and avoids overloading the mechanism of ion-exchange in thesodium sulfite solution to follow. The prints are then to be treated for 3 to 4 minuteswith constant agitation in the following solution:
Sodium sulfite (anhydrous).......................................................10 gWater............................................................................to make 1 liter
This constitutes a 1 % solution. It should be used only once and discarded. The solutionmay be made in advance. The rate of exhaustion for this solution is the same as that ofthe fixer solution — no more than 20 prints, approximately 8 x 10 inches, should betreated in 1 liter of solution.
Following the sodium sulfite bath the prints should receive 30 minutes of washingin running water in an effective print washer. Extremely heavy base stocks and very thickcoatings of albumen may indicate that a longer wash time — 40 to 50 minutes — isrequired.
Fig. 40. A drying rack for prints. The prints werenot allowed to become truly dry, but weremounted while still damp.
Drying the Prints
After the wash step is completed, the prints should be removed from the printwasher and either gently squeegeed, face-down on clean glass, or blotted withphotographic quality blotters to remove excess water. They should then be air driedface-up on clean fiberglass screens or on suitable blotters. The degree of curling in the
89

THE ALBUMEN & SALTED PAPER BOOK
dried prints depends on the thickness of the paper base and the nature of the bindermaterial used. Thin papers coated with heavy layers of albumen tend to curl the most —hence the almost universal historical practice of mounting albumen prints while stilldamp. Prints may be dried under weights or in a book press to help prevent curling; inthis case the coated side of the print should be against silicone release paper, whileblotters should be placed against the back side of the print.
90

CHAPTER TEN
Finishing, Mountingand Storage
"If we find that a little sour paste is quite sufficient to injure the picture,it is no satisfaction to us to be told that it consists ofmetallic silver, one ofthe most indestructible of metals. "
—T.F. HardwichMay, 18561
Once the prints have been washed and dried, they require further handling beforethey can be displayed or stored in the safest and most advantageous way. The choice offinishing materials and treatments bears directly on both the attractiveness and per-
Fig. 41. Carte de visite albums, ca. 1870. At right isa stereo viewer.
manence of albumen and salted papers. Proper storage is also essential to optimumpermanence in any photographic material. This chapter presents a recommendedcontemporary approach to the finishing and storage of albumen and salted papers,together with some historical notes on 19th-century practice.
Preparing Prints for Display or StorageThe characteristics of the prints themselves will determine the most suitable method
to prepare them for storage or display. Depending on the thickness of the rawstock andthe type of organic binder on the print surface, most prints will need some type offlattening treatment after drying. The most common method is to place them betweenacid-free blotters under weights, or in a book press. This process should be undertakenwhen the prints are slightly damp or at least not when they are bone-dry, and above all
it requires patience. Do not try to hasten the process with excessive pressure, although afair amount of pressure is needed to accomplish the flattening.
9 1

THE ALBUMEN & SALTED PAPER BOOK
The use of heat in the process of drying or flattening may alter the appearance ofsome types of salted papers, especially plain salted papers. Upon heating the prints turncolder in image color and become somewhat darker. This technique was actually a partof the process that Fox Talbot used in the production of his prints. The last step infinishing his prints was to go over them with a hot iron to "intensify" them. Dryingsalted paper prints in a heated drum type of dryer may similarly change them.
Ideally, once the prints are flattened they can be placed in a sleeve or mat without amounting process of any kind. Most salted papers, because they are made on relativelyheavy paper and do not have a great deal of binder material on their surface, can besimply matted and do not require mounting. Mounting is a process that should beemployed only when necessary, and not as a matter of course. Unfortunately, thethinner papers used in albumen printing and the tendency to curl imparted by heavylayers of albumen will often necessitate that prints be flattened by mounting them ontoa suitable material.
History of the Finishing and Mountingof Albumen Prints
A look at the 19th-century approach to the finishing of albumen prints is in-structive, because it relates quite closely to modern practice. It is rare to encounter 19th-century albumen prints that have not been mounted onto some kind of cardboardmount. The main reason for this is the fact that the thin paper stock used for albumen
Fig. 42. Trimming prints using arotary blade trimming knife andbrass templates. A rotary knife madeit easier to follow the outlines ofcurved templates.
printing cannot resist the tendency to curl of the layer of albumen itself. The forceexerted by a thick layer of albumen is quite enough, if a print has been incorrectlymounted, to tear the print in half; the impossibility of getting such a print to lie flat ofits own accord is obvious. Even if a window mat is used to keep an unmounted albumenprint relatively flat, most prints have undesirable ridges, creases and "bumps" in the
print surface that catch the light and detract from the image.The process of mounting an albumen print helps to impart more depth and contrast
92

FINISHING, MOUNTING AND STORAGE
to the image, and creates a smooth, level surface which can be viewed from differentangles without the interference of these uneven surface reflections. In the 19th centurythe prints were mounted when damp, and if they had become dry, they were rewettedand blotted before mounting was attempted. 2 The modern mounting method givenbelow also adopts this precaution.
MOUNTING ADHESIVES USED IN THE 19th CENTURY
The adhesive used for mounting albumen prints was usually starch, althoughgelatins , gum arabic4 , dextrines and albumen itself6 were also used. Sometimes starchand gelatin were mixed together.7 .7 Photographic conservators faced with the problem ofremoving albumen prints from their mounts agree that pure fresh starch has proven
Fig. 43. Advertisement for Higgins' Photo Mounting Paste, 1894, described by themanufacturer as "not a starch or flour paste, but a vegetable glue."
itself as the best choice for a mountant; it is removable with the least difficulty and hasnot attacked the prints. Ordinary "glue" — which is an impure form of gelatin — wasknown to be a cause of trouble even in the 1850's, but it was used as an expedient, alongwith many other destructive substances such as rancid flour paste and India rubbersolution.
The mounting boards used in the 19th century were a constant source of potential
9 3

THE ALBUMEN & SALTED PAPER BOOK
danger for the photographic image. A typical 19th-century mount was composed of athin top and bottom sheet of relatively good quality paper, with a center filler of poorquality pulp board. This pulp center was often loaded with lignin, the noncellulosecomponent of wood, whose presence leads to the acidification of the entire mount andeventually of the photographic print itself. The most common problems seen today thatresult from poor quality mount boards are brittleness and yellowing in the print causedby acidification of the mounting cardboard, and the brownish-red flecks and stains
known as " foxing. " This " foxing" may be the result of mold and fungus growth, or mayalso be caused by the presence of metallic salts in the mount board! ,
Staining from decomposed mounting adhesives is also common, either initiated orcompounded by the acidification of the mount board. Today, many albumen prints arein desperate need of separation from their original mount and re-mounting on a moredurable and less dangerous material. Danger from the mount board is especially acutefor albumen prints because they were made on such thin rawstock — very little barrierexists between the silver image and the potentially destructive substances in the mount.Attempting to forestall further damage to albumen prints from defective mounts andmountants is one of the single largest tasks in photographic conservation, and is amongthe most commonly requested procedures in the conservation of photographic prints.
Fig. 44. "Marion's Self-adjusting Rolling Press & Burnisher," 1884. Note the gas tube inthe upper roller.
Fortunately albumen is a very durable substance, and can usually withstand the rigors ofunmounting and remounting. More trained and experienced photographic conservatorsare needed for this task if our photographic heritage — historical as well as aesthetic —is to be preserved.
ROLLING MACHINES AND BURNISHERS
In addition to curling the paper, sometimes heavy layers of albumen can have ahorny, rough surface that may obscure the finest details. Rolling and smoothing theprints in a press or roller device tends to restore some of the detail and also provides aglossier surface and increased contrast. For this reason, and also to improve adhesion ofthe print to the mount, albumen prints were routinely subjected to a process of rolling
94

FINISHING, MOUNTING AND STORAGE
and smoothing after mounting.There were several styles of rolling machines used in the 19th century, but all of
them accomplished the same purpose of making the prints glossier and smoother. Smallprints — especially "cabinet" size portraits and stereo views — were often given an extraglossy finish in a heated roller device called a "burnisher. " In skilled hands a burnishercould produce a mirror-like gloss on albumen prints. The operators of portrait studios inthe 1880's and 90's sometimes ballyhooed the gloss of their prints by giving themfantastic names like "French Enamel " and "Extra Superior Finish. "
Some types of rolling machines were similar to wringers on old-style washingmachines. One roller was smooth and did the work of polishing the print while the
Fig. 45. A flat-bed type of rolling press, of English manufacture.
other roller sometimes had ribbing to bite into the mount and propel the print throughthe machine. Many small photographic prints of the period 1875-1890 — landscapes,portraits and stereo views — have cross-hatched indentations on the back of the mount.Such prints were rolled in a wringer-type rolling machine with a ribbed drive roller. Inother cases the back side of the print mounts will simply be noticeably shiny with a"squeezed" appearance; this is evidence of having been rolled in a flat-bed or smooth-roller type machine. Flat-bed style machines resembled a copperplate etching press andcould be used with either mounted or unmounted prints. The prints were placed facedown on the steel bed of the press and a large roller applied pressure to the back.
A Contemporary Approach to Finishing,Display, and Storage
The object of finishing (and mounting, if necessary) is to present and store prints inthe safest and most attractive way. A simple, direct approach is to place prints in in-dividual transparent polyester sleeves, together with a piece of two-ply, acid-free ragboard to impart rigidity and prevent creasing of the print during handling. These areavailable in most of the common photographic sizes, and are a satisfactory way to storeand examine prints with a minimum of wear and tear. Any cataloging or identifyinginformation that is to be placed directly on the print should be lightly written on the
9 5

THE ALBUMEN & SALTED PAPER BOOK
back of the print in pencil, and as close to the edge as possible. These polyester (alsocalled Mylar') sleeves will not damage the prints at normal humidities and tem-peratures, and at the present time do appear safe for long-term storage.
MATTING PRINTS
For prints that merit more attractive presentation or more protection in storage, awindow mat is the preferred method. A window mat is two superimposed pieces of veryhigh quality cardboard that are hinged together along one edge. The print lies betweenthe two pieces of board and is visible through a hole — called the "window " — cut inthe top piece of the board. Window mats should be made from what is commonlycalled "museum board, " which means that it is composed of 100% cellulose fiber and isacid-free. Although several other kinds and grades of mat boards are available, it is bestto select only those materials that will lead to optimum permanence. In choosing matboard for use with albumen and salted paper prints, most museums choose a cream orivory-tinted board, in order to harmonize with the warm colors of print-out silverimages. The hinges of the mats should be made of linen treated on one side with aspecial acid-free, water-soluble adhesive.
The " mat,"as it is usually called, fits into a frame as a unit when a print is to beframed. The "window" of the mat is cut with a special beveled cutter so that it does notcast a shadow onto the edge of the print. If a print is to be stored in a window mat, apiece of acid-free paper or polyester sheeting is placed on top of the print (under thewindow) in order to protect the print from dust and mechanical damage. These twomethods — transparent sleeves and window mats — are the most common approachesto presentation and storage used in photographic collections at the present time.
One advantage of both the sleeve and the window mat are that they form a safeenvironment for the print yet are not permanently attached to it. In the case of thewindow mat, there are two approaches to holding the print in position under the"window" of the mat. The first is to use what are called mounting corners, which arehollow folded paper triangles made from acid-free paper. The corners are held in placeby the same kind of linen tape that forms the hinge of the mat. To use mountingcorners, the four corners of the print are inserted into the folded triangles, the print ispositioned under the "window, " and finally the paper triangles are adhered to thebottom piece of the mat.
HINGING PRINTS
If the print has no borders and is all image area, another approach is necessary. Thisalternative method involves the use of " hinges, " which are slips of very thin Japanesepaper that are adhered along one edge of the print and then adhered to the bottomboard of the window mat after the print has been correctly positioned. The adhesive forthis purpose should always be a specially prepared paste of wheat or rice starch. Themethod of preparing this paste will be detailed later on in this chapter. The actualJapanese paper hinges should be about 2 inches long and 1 inch wide; two of them areusually needed. The hinges should be cut from the sheets of Japanese paper by tearingalong a straight edge, and not by cutting with a scissors, because in this way the fiberstaper smoothly off and there is less chance of the hinges showing through a print onthin paper. Just a small portion of the narrow dimension of the hinge need protrudeonto the back of the print itself. The goal in the use of hinges (as in all conservationtreatments) is to make them as reversible — that is, removable without trace or damage
96

FINISHING, MOUNTING AND STORAGE
to the print — as possible and still have them perform the task of holding the print inposition. Longer hinges than necessary are sometimes used so that if the print requiresre-matting, the hinge may be simply cut off with enough of the hinge remaining to re-attach the print in another mat.
A Conservator's Mounting MethodThe following is a very satisfactory method of mounting albumen and other sorts of
photographic prints. It is useful for both modern albumen prints and 19th-centuryprints that have been removed from their original mounts and are in need of re-mounting. This method was worked out by David E. Kolody, a photographic con-servator in Boston, Massachusetts, and it appears here through his courtesy.
Although more complicated than other mounting methods, this method has severaladvantages: first, it adheres the print to the support in such a way that an absolutely flatand smooth surface is created. This is important because it most closely approximatesthe surface quality of the print on its original mount. Albumen prints are generallymost effective when their surface is absolutely flat and smooth. Remarkably, albumenprints mounted by Kolody' s method retain a "rolled" appearance on their new support,even though no high-pressure rolling press is employed in the mounting procedure.Second, this method is equally effective with large or small prints. It allows 18 x 24 inchprints to be mounted almost as easily as 8 x 10 ' s. These large prints, by no means un-common, are notoriously difficult to work with. Third, the method is easily reversiblewithout resorting to strong solvents, and does not permanently attach the print to itsmount. Fourth, no heat is required and there is no danger of altering the color of a printor otherwise damaging it with heat. Dry mounting (in the modern sense) should neverbe used with albumen or salted paper prints, because of color shifts caused by heat, andthe irreversibility of the process.
SUMMARY OF THE MOUNTING PROCEDURE
The basic principle of this mounting method is to provide a rigid temporary supportof Plexiglas
TMon which the print is mounted and dried, so that the print is held flat
until it has become completely dry and its internal forces have equalized out. Of course,if the print and its mount were simply pasted down on the Plexiglas TM they would dryflat, but there would then be no way to remove the print and mount from thePlexiglasTM . The solution to this is to adhere a sheet of polyester cloth to the Plexiglas",then the mount to the polyester cloth and finally the print to the mount. All these stepsare done in immediate succession, and the last step is to protect the face of the printwith waxed paper and roll the print flat with a roller. The whole "sandwich " is allowedto dry, the polyester cloth is then stripped from the Plexiglas TM , and finally the polyestercloth is peeled away from the back of the mounted prints.
STEP 1 PREPARING THE STARCH PASTE
The adhesive used in this method is a paste made from boiled refined wheat starch.Wheat starch paste provides good adhesive properties, is easy to work with and isinexpensive. It is necessary to prepare the starch paste at least one day before it will beused. One brand of wheat starch that has been successfully used is Aytex P TM , apowdered edible wheat starch manufactured by General Mills Chemicals, Inc. Toprepare the paste, place 200 ml of wheat starch (volume measurement is convenient andsufficiently accurate) in a 4-quart enamel or glass saucepan. It is important that no iron
97

THE ALBUMEN & SALTED PAPER BOOK
or steel make contact with the starch solution at any stage in its preparation or use.Slowly and with constant stirring pour in 1400 ml of distilled or deionized water. Stiruntil there are no lumps and allow this mixture to sit overnight. An old wooden spoonthat has been deacidified with magnesium bicarbonate is the best implement withwhich to stir starch pastes, both when cold and during cooking.
The following day, place the pan over a medium-low flame and stir until themixture starts to thicken. The starch must be stirred constantly during its entire cookingphase or it will burn. After the mixture starts to thicken, cook with constant stirring overa low flame for 20 additional minutes. The properties of the gel that will form as well asthe adhesive properties of starch pastes are determined by the length and the method ofcooking, so it is important to follow the directions closely. After the mixture hascooked, add 0.4 ml of a saturated solution of thymol in methyl alcohol. Thymol is afungicide and does not appear to affect the adhesive properties of the paste. Place thepaste in a covered container and refrigerate. The paste may be used when cool andgelled, or may be refrigerated for up to one week before use.
To use the paste, the refrigerated gel must be diluted in a blender. Place the cold geltogether with 2
/3 of its volume of cold distilled water and blend for a few seconds at lowspeed, and then for 30-40 additional seconds at high speed. The paste thus formed isready to use, and it should be kept covered to prevent a "skin" from forming and tokeep out dust. It is most unpleasant to mount a print and discover particles of dirt orhardened starch trapped under the print. The prepared paste should be used on thesame day.
STEP 2 PREPARING THE RIGID PLEXIGLAS" SUPPORT
The rigid support required for the purpose is a piece of 5/16 or 3/8 inch Plexiglas
TM
somewhat larger than the total area of prints to be mounted. The Plexiglas TM is firstprepared by sanding one surface with a waterproof sandpaper (200 grit) used wet, untilit has assumed a matte surface. This roughened surface is necessary to allow thepolyester cloth support to grip the plastic. To mount a print, first clean off thePlexiglas"` sheet with water and thoroughly dry it. Then apply an even coating of starchpaste to the matte surface of the Plexiglas". Do not use a brush that has an iron or steelband to hold the bristles; a flat Japanese brush or a foam brush should be used to applythe paste.
STEP 3 APPLYING THE POLYESTER CLOTH SUPPORT
The temporary cloth support used in this procedure is a single thickness of whitepolyester crepe, available in most fabric stores. This material is tightly woven and has aslight surface texture. It is used in sewing as a liner for garments. It must be larger thanthe piece of Plexiglas"' and it is helpful to make a seam around its perimeter to keep thecloth from unravelling. The polyester cloth must be laundered before each use.
Lay the cloth on the prepared Plexiglas TM by holding it by two opposite corners andbowing it in the center; let the middle touch down first and lower the corners until itlies flat on the PlexiglasTM . Stretch it first in one direction and then the other. Afterworking out the air bubbles as much as possible, apply an even layer of starch paste ontop of the polyester. Take care that the cloth is now smooth, flat and free of bubbles.
STEP 4 APPLYING THE MOUNTING SHEET
The mount for albumen prints should be a sheet of heavy, smooth, all-rag paper of
98

FINISHING, MOUNTING AND STORAGE
very high quality. The mount must first be pre-swelled by dampening it with a spray ofdistilled water, first on the front (watermark right-reading) side and then on the backside. The paper should get fairly wet and then be blotted between acid-free blotters.Pre-swelling helps to distribute the internal forces more evenly during drying. Note thegrain direction of the mounting paper; the idea is to have the grain directions of theprint and the mount crosswise to each other so that the tendency to curl is minimizedand the print lies flatter. The grain direction of the unmounted print is always thedirection of the print's natural curl.
To lay the pre-swelled mounting sheet on the polyester, grasp it by two oppositecorners and place the center of the sheet down first. Lay the corners down with a rollingmotion to try to force out any air bubbles. Smooth out the paper and apply anothercoating of starch paste on top of it. Experience will show what amount of paste isenough, but do not skimp or the print will not adhere satisfactorily. The use of toomuch paste will be apparent when the print is smoothed out.
STEP 5 APPLYING THE PRINT
Prints should be wetted with a spray of distilled water before mounting them. Sprayboth sides and blot them between sheets of acid-free blotting paper so that they are onlydamp when actually placed down on the mount. Remember to place the grain directionof the print perpendicular to that of the mount. The starch paste may need to berenewed by a fresh brushing over just before mounting. Leave room on the mountingpaper between prints for hinges to be cut out later. As many prints as practical may bemounted on each large sheet of mounting paper.
Place waxed paper over the face of the prints and smooth them out with a hardrubber roller. Hold the waxed paper in place and start smoothing from the center ofeach print toward the edges. Large prints may require several sheets of waxed paper;overlap the sheets of waxed paper to prevent starch from reaching the face of the prints.Avoid excessive pressure in rolling or the paste will be forced out and the prints will notadhere to the mount. Peel off the waxed paper and remove any paste from the face ofthe prints using a ball of damp cotton.
Allow the whole "unit" to dry for at least 12 hours, depending on humidity, or untilthere is no "damp" smell from the starch. It is much better to be over-cautious inestimating when the prints are dry than too hasty. The pieces of Plexiglas" may beplaced upright to dry.
STEP 6 REMOVING THE MOUNTED PRINTS FROM THETEMPORARY SUPPORTS
When completely dry, the first step in removing the prints is to pull away thepolyester cloth from all four sides of the Plexiglas TM , up to the point where the mountingsheet begins. The grasp the polyester with two hands and pull it away at a low anglefrom the PlexiglasTM in one smooth motion. It is better to grasp the polyester across theshort dimension of the mounting sheet and pull it the "long way," because this avoidsunnecessary stress for the mounted prints.
When the polyester has been pulled off the Plexiglas TM , turn the cloth over andgently peel the cloth away from the back of the mounting paper. Hold on to the paperto support it while peeling away the polyester. When the mounting sheet has beenremoved from the cloth, trim the mount to within 1
/8 inch of the prints, allowing at thesame time for two hinges 1 inch wide and 2 inches long on each print. The prints are
99

THE ALBUMEN & SALTED PAPER BOOK
now smooth, flat and ready for matting.
A CAUTIONARY NOTE:
Kolody's mounting method exerts considerable stress on the albumen layer of theprint as it dries. While such stress does not usually harm prints, especially newly madeprints, some 19th century prints may have a visibly weakened or severely crackedalbumen layer. In this event mounting by Kolody's method is not recommended,because the stress of mounting may worsen the cracking of the albumen layer.
Print StoragePrints are best stored in boxes and containers made especially for the purpose and
sold by various suppliers to museums and libraries. Metal boxes are a good choicebecause they eliminate the danger of contamination from poor quality cardboard andwood itself. Metal boxes made for print storage are likely to be costly because specialprecautions are necessary in selecting and applying the finish on all metal surfaces.Storage boxes made from acid-free board are considerably less expensive, but may nothave the durability required for use in a working collection. Vinyl covered print "cases"with metal clasps and hinges are more suitable to hard use, but may have to be re-linedwith acid-free paper to insure a safe environment for prints. All prints should be sleevedor matted to protect them in storage.
Always be sure that no gases are emitted from paints or varnishes used on storagecontainers. Do not store prints in wooden cabinets on a long-term basis unless thecabinets are specially treated or metal-lined. Wooden cabinets may be thought of aslarge envelopes of the coarsest kind of paper. Gases that attack the paper support andthe images of prints may also be present in the general environment of the room whereprints are stored, and this must be taken into consideration in selecting the location of aprint collection within a building. High levels of automobile exhaust 9 or ozone emittedfrom an electrostatic copier are both very destructive.
Anything that accompanies the prints in storage, especially inside the sleeves,should be of the highest quality. Do not store prints in the company of acidic or poor-quality papers or board, or together with adhesives, nitrate-base negatives or anythingelse likely to pollute the storage environment.
TEMPERATURE AND HUMIDITY CONTROL
The single most important consideration in print storage is that temperature andhumidity should not undergo sudden drastic changes, and excessive heat and humidityshould definitely be avoided. A satisfactory temperature and humidity range is 18-20°Cat 3 5 -4 5 % R. H. The reason why control of temperature and humidity is so important isthe fact that these factors govern the rate of all possible destructive reactions that printsmight undergo. The higher the temperature and humidity, the faster all the variousmechanisms of deterioration will operate. Active control of temperature and humidityconditions is expensive, but is it the best and most necessary investment that anyphotographic collection can make.
100

CHAPTER ELEVEN
The Question ofPermanence
THE LAST PRINT IN SILVER
'Tis the last print in SilverLeft mould'ring alone,
All her gold-toned companionsAre faded and gone .
No print of her kindred,Albumen, is nigh,
To reflect back her jaundiceSo sad to the eye.
I will leave thee, thou lone one,To vanish away
And to all fellow-workersfrith confidence say
Go, print now in Carbon,Or platinum choose
As long recommendedBy friend Jabez Hughes.
So soon may all followA `Permanent way, '
And from out of our albumsNo prints fade away.
For when Albumen's yellow,and Chloride is flown,
Platino and CarbonShall still hold their own.
—Edgar Clifton, 1887 1
The question of the durability of albumen and salted paper prints is of great interestto collectors, curators, librarians and historians, as well as to modern workers of theseprocesses. This chapter deals with the historical record regarding the permanence ofalbumen and salted papers, and reviews the theoretical and practical considerations inguaranteeing maximum print stability.
Historical ReviewTHE ERA OF SALTED PAPERS 1840-1855
During the late 1840's the initial burst of enthusiasm and interest of the generalpublic for the new marvel — photographic pictures — had hardly worn off before the
10 1

THE ALBUMEN & SALTED PAPER BOOK
fading and staining of paper prints threatened to discredit photography on paperaltogether, and reduce it to the status of a scientific curiosity. While daguerreotypesseemed to be fairly stable, the image on salted paper prints in many cases faded to nearinvisibility, and all sorts of complaints of staining and mottling were heard. It soonbecame apparent that something in the preparation and / or storage of a high percentageof photographic prints was leading to their speedy destruction. For various reasons thedaguerreotype process was the most widely used for portraiture, but some commercialportraiture was attempted using Talbot's calotype process. The high prices paid for thisservice made the rapid fading of the results especially annoying to the patrons, 2 and theensuing public complaints — together with Talbot ' s patent restrictions — effectivelyended the commercial possibilities of calotype portraiture.
The real advantage of Talbot' s negative-positive system of photography over thedaguerreotype was the capability to make multiple copies of the image. Talbot himselftook advantage of this in bringing out the first commercially offered photographicallyillustrated book, The Pencil of Nature, issued serially during the years 1844-1846. Thiswas the first of several publications illustrated with salted paper prints that Talbotproduced at his "Reading Establishment, " where he had hired Nikolaas Henneman andThomas Malone to carry out the actual printing. The prints made at Reading becamesome of the most visible and notorious examples of the instability of salted paper prints.A great many of the problems of the Reading prints may have stemmed from in-sufficient washing; Henneman himself stated in a discussion at a meeting of thePhotographic Society of London in May, 1856, that:
We all know the "Pencil of Nature " alluded to by Mr. Malone; of thoseprints I made twenty-five in one batch; they had only three washings.Some of them remained perfectly good, as if they were printed butyesterday, and others have totally failed. 3
Today of the surviving prints made for The Pencil of Nature, barely a handful arenot very badly faded, and apparently none survive in original condition. Many saltedpaper prints made by amateurs at approximately the same period have survived muchbetter than The Pencil of Nature prints, pointing up the frequent occurrence that mass-produced images get poorer fixing and washing than individual efforts.
Mostly for reasons of ease of operation and public preference, but partly also becauseof the worry over fading, the daguerreotype retained complete dominance of com-mercial portraiture through the early 1850 ' s. Meanwhile, photographers struggled toimprove both the paper negative (which had already proved more adaptable to outdoorphotography than the daguerreotype) and the paper print. Concern over print stabilitygrew to become the single most pressing problem in photography, especially afteradvances in negative technique in the late 1840' s and early 1850 ' s made the wholenegative-positive approach to photography so much more attractive.
Although progress had been made in determining the causes of print fading, it wasstill very uncertain whether any given print would survive for more than a few years.Determination of the exact causes of fading was complicated by the vast number ofdifferent base papers, binder materials and processing chemicals in use at that time.One fact, however, was very clear; photographic paper negatives — in which the imagewas produced by development — had a much better record of durability than thevarious kinds of printing-out papers used for positives. 4 Nevertheless, the image color,familiarity, superior tone reproduction and controllability of printing-out papers in-
10 2

THE QUESTION OF PERMANENCE
sured their continued use while the search for improved print stability went on.In 1855 the Photographic Society of London established a committee to investigate
the causes of print fading. The committee asked for samples of prints made by any andall processes to be forwarded to them for examination and testing. In its report thecommittee stated:
Hence it appears that the most ordinary cause of fading, may be traced tothe presence of sulphur, the source of which may be intrinsic fromhyposulphite left in the print, or extrinsic from the atmosphere, and ineither case the action is much more rapid in the presence of moisture.'
The "Committee Appointed to take into Consideration the Question of the Fading ofPositive Photographic Pictures upon Paper " was first class, both in its eminent per-sonnel and the accuracy of its conclusions. Its report spelled out for the photographiccommunity several of the leading causes of print instability, and its practical recom-mendations laid stress on two important procedures: thorough washing of prints afterfixing, and the employment of gold toning. Although these findings were hardly novelor completely original to the committee members, the authority the committee's workput behind these recommendations was very beneficial to the general practice ofphotography at that time.
During the same year — 1855 — another important key to print stability wasdiscovered and published by two French photographers, Alphonse Davanne and JulesGirard. These two men contributed immeasurably to the advancement of photographicscience by systematically examining all aspects of the printing process with the most up-to-date chemical and empirical methods of their time. They analyzed for sulfur contentprints fixed in fresh sodium thiosulfate and others fixed in "old hypo," and confirmedthe suspicions of many photographers that only fresh, pure thiosulfate solutions —followed by thorough washing — left prints uncontaminated with sulfur afterprocessing. By subjecting test prints to high humidity levels they showed that the sulfurcontaminated prints "rapidly turn yellow and at last vanish. "6
THE INTRODUCTION OF ALBUMEN PAPER 1850-1860
Although the work of the printing committee of The Photographic Society ofLondon and of Davanne and Girard (as well as other independent investigators) wassuccessful in identifying the primary causes of fading, the problem of print instabilitydid not end. In the mid 1850 's a transition from salted papers to the new albumenpaper took place, and albumen prints brought new difficulties in fixing and washing,mostly because of their thicker and less permeable image layer. The adoption ofalbumen paper meant that a new technology had to be learned, and naturally itrequired several years before the peculiarities of albumen paper became familiar to bothphotographers and the newly organized albumen paper manufacturing companies. Theworking methods for plain salted papers did not exactly coincide with those of albumenpaper, especially in the sensitizing and toning steps. No doubt as a result of un-familiarity with the material and the general uncertainty over proper fixing and washingprocedures, a great many early albumen prints now exhibit advanced yellowing andfading.
The point which was most stressed in the journals of that period was the necessity ofthorough washing, and it seems that probably most photographers took pains to washtheir prints as best they could. It appears in retrospect that apart from the use of
103

THE ALBUMEN & SALTED PAPER BOOK
exhausted fixer solutions, the most serious detriments to permanence of prints duringthe decade of the 1850's were additives (mostly for their presumed toning effect) to thefixing bath. A large category of such additives were described as "coloring agents, " butmerely had the effect of decomposing the sodium thiosulfate, so that a process ofsulfiding of the silver image took place.
Gold toning, which had the endorsement of the most respected photographicauthorities and was certainly a good idea in principle, was often the fatal flaw inotherwise good processing because of the manner in which it was applied; whenphotographers mixed gold chloride and "hypo" together, in many cases the acidity ofthe gold solution decomposed the sodium thiosulfate and liberated sulfur, whichultimately caused the prints to fade (see Chapters 8 & 9). This method of toning wasknown as the sel d'or method, and it was the most widely used approach to gold toningin the decade 1850-1860. When the solutions were fresh and the work properly done,the combined toning and fixing of the sel d'or method occasionally produced prints ofexcellent stability, but in ordinary practice the method had too many drawbacks andwas finally replaced at the end of the decade by the vastly superior "separate" toningapproach.
The new technique of separate toning in alkaline gold chloride solutions —followed by fixation in fresh, strong sodium thiosulfate — was a great step forward thatconsolidated the advances in print stability made during the 1850 's and allowedalbumen paper to attain a much better record of resistance to fading than had beenaccomplished with the older plain salted papers. The new alkaline gold toners depositedmore gold than the other toning methods, and this contributed to the resistance ofalbumen prints to oxidative fading. In addition to the protection offered by the gold,the albumen layer itself made a significant difference in protecting the silver imagefrom oxidizing gases.
ALBUMEN PRINTS AFTER 1860
In the 1860 ' s the old idea that the hypo bath was also a kind of "toning" bath finallygave way to the more modern view that its purpose was strictly to remove the light-sensitive substances remaining in the print. As the 1860 ' s progressed the manufacture ofalbumen paper became more and more centralized in factories, and the overall qualityof albumen paper increased as a result. Improvements in albumen coating proceduresalso resulted in glossier papers. Albumen prints from the 1860's were generally "salted"
with 2- 3% chloride, an amount considerably higher than was used later on in the1880's and 1890's. This increased chloride content in the earlier prints on the wholeresulted in slightly higher average print shadow densities, which in turn meant thatrelatively more silver was deposited to form the image. More image silver results inimproved resistance to fading,7 and albumen prints of the 1860 's and 1870 ' s seem tohave accumulated a slightly better average record of durability (in terms of resistance toi mage fading) than their weakly salted and scantily exposed successors in the 1880 ' s and1890's. The reasons for the shift in chloride content of albumen paper have to do withchanges in the character of the negatives used, and are discussed in Chapter 6.
ALBUMEN VERSUS EMULSION-TYPE PRINTING-OUT PAPERS
By the 1890's a feeling of mistrust for albumen paper was growing, since asignificant number of prints from previous years were already yellowed or faded. Theyellowing was particularly objectionable, because while fading could be ascribed to poor
104

THE QUESTION OF PERMANENCE
technique, yellowing seemed almost intrinsic to the material. When the new emulsion-type gelatin and collodion printing-out papers were introduced in the late 1880 's, theirmakers trumpeted the "undoubted permanence" of these papers as loudly as their" convenience." As emulsion papers gained ground in the marketplace, scathingdenunciations of albumen paper appeared in the photographic journals. "Judging fromthe abuse heaped upon the innocent albumen print by many writers for the journals, astranger from the planet Mars would doubtless wonder why it is not immediatelysuppressed," wrote W. H. Sherman in the American Annual of Photography and ThePhotographic Times Almanac for 1892. 8 "According to these writers, " he continued,"the head and front of its offending is its want of permanency ..."
The relative merits of each type of paper were hotly disputed and exaggerated claimswere made on both sides. The debate recalled the furor which accompanied the in-troduction of the gelatin dry plate, and many of the arguments put forth in favor ofalbumen paper were similar to those used to defend the old wet collodion process,namely that photographers were used to albumen paper and could turn out albumenprints easier and cheaper than with the new emulsion papers. The difference in the caseof the printing papers, however,. was the issue of permanency; not only was albumenpaper inconvenient because of the necessity to sensitize it before use, it also had theundeniable tendency to yellow in the highlight areas. For a while the low price ofalbumen paper kept its sales strong, but by 1895 cutthroat competition amongproducers lowered the price of the gelatin and collodion printing-out papers 9 and theoutcome was clear: albumen paper began to be outsold by the emulsion papers and wason the road to obsolescence.
Ironically, at this time when the producers of gelatin and collodion emulsion-typeprinting-out papers were proclaiming the superior permanence of their product overalbumen paper, they were also recommending combined toning-fixing baths, a cir-cumstance that definitely did not maximize print stability. Many gelatin and collodionprints of this era are now in rather poor condition as a result of the "combined bath"(which long before had been repudiated for use with albumen paper), although afterthe mid 1890's many unfavorable reports on this technique discouraged professionalsfrom using it. Apart from this difficulty, however, the gelatin and collodion printing-out papers lived up to their manufacturers' claims and have established an excellentrecord of stability, with collodion papers proving exceptionally stable. Althoughcollodion printing-out papers have a thin emulsion layer composed of essentially thesame material — cellulose nitrate — that has proven so impermanent and dangerouswhen used as a film base for sheet and motion picture films, there is absolutely noevidence to suggest that collodion paper prints are in any way dangerous or unstable.
Some of the defenders of albumen paper preferred it out of habit, while othersargued that its long tonal scale and unique qualities of image color, surface, etc., werevaluable in their own right, apart from considerations of cost and convenience. Themodern reader is most apt to be sympathetic to this position, since today many peopleadmire the "special" character of albumen printing paper in spite of yellowing of thehighlights and the many instances of fading found in surviving prints. Many critics ofalbumen paper in the 1890's put forward the completely erroneous view that since sucha large number of early albumen prints had faded, all albumen prints can expect thesame fate sooner or later. The more well-informed of these speaking on behalf ofalbumen paper reminded the critics that back in the 1850's proper toning, fixing andwashing procedures for albumen paper were not well understood.
10 5

THE ALBUMEN & SALTED PAPER BOOK
THE EMBLEM OF PERMANENCY!
TEN YEARS' RECORDHAS PROVEN IT SO.
TheBest printing-out papers, Aristo Platino, Aristo Jr., and Aristo
Blue Label, All Pure Collodion.Manufacturers: Trade Agents:
American Aristotype Co., E. & H. T. Anthony & Co.,Jamestown, N. Y. New York and Chicago.
106
Fig. 46. An 1899 advertisement for collodio-chloride emulsion type printing-out paper.The reference to "
permanency" was directed at albumen paper users.

THE QUESTION OF PERMANENCE
Highlight Yellowing in Albumen PrintsThe most common form of deterioration of historical albumen prints is the ap-
pearance of a yellow or yellowish-brown stain in the highlights (non-image areas).While the severity of yellowing varies widely from print to print, it is probably safe tosay that not a single albumen print survives from the 19th century without some degreeof staining in non-image areas. Many prints, it is true, do seem to be pristine andunyellowed, but when compared side by side with a freshly albumenized (and neversensitized) sheet of paper, a noticeable difference will be perceived between the "paperwhite " areas in the freshly albumenized sheet and the historical print.
Most albumen prints do not require a comparison with a freshly albumenized sheet,because it is quite obvious that they have yellowed. Approximately 85 % of extantalbumen prints made after 1860 display what might be called "moderate to severe"yellowing, while the remaining 15% or so seem to have white highlights unless com-pared side by side with a white sheet of paper. For those albumen prints made in the1850 ' s the figures probably are closer to 95 % and 5 % . These figures are not based onany formal statistical sampling, merely on the accumulated experience of the author inexamining prints and through discussions with curators and collectors. A statisticalstudy of a large collection of albumen prints with regard to the type and severity of printdeterioration — including highlight yellowing — would be a most welcome addition tothe literature of photographic preservation.
Yellowing of the highlights in albumen prints is sometimes independent ofgeneralized image fading, i.e., the highlights have turned yellow but the middletonesand shadows have remained apparently unchanged. Highlight yellowing is so prevalentin albumen prints that it often serves as an important clue in their identification, sincethe highlight yellowing phenomenon is peculiar to albumen paper and does not occurin quite the same way in otherwise similar gelatin and collodion papers.
Severe highlight yellowing is accompanied in most cases by an apparent color shiftand density loss in the image itself. The original purplish-brown color of many printshas lost density and faded to a sepia brown. Loss of highlight detail is also common insuch cases. The image color may even assume a greenish tinge. Indeed, few albumenprints today at all resemble their original image color.
The time period required for the onset of highlight yellowing in an albumen printappears to vary considerably, and is probably affected primarily by the moisture leveland temperature of the storage environment and the amount of residual thiosulfate andsilver-thiosulfate complexes present. Many prints seem to have yellowed very quickly —within one or two years of processing — while others seem to have taken much longer.There is no guarantee that even today improper storage will not initiate rapid yellowingin the prints that have remained reasonably unyellowed up to this point. Photographicliterature of the period 1860-1895 does contain numerous mentions and complaintsabout the yellowing of highlights in albumen paper, although it seems clear thatnowhere near 85 % of prints had yellowed to a "moderate to severe " extent during theperiod when albumen paper was still in general use.
CAUSES OF HIGHLIGHT YELLOWING IN ALBUMEN PRINTS
The probable origin of the yellowing phenomenon in albumen paper is thechemical bonding of silver to sulfur-containing side groups on the protein molecules ofalbumen, some of which have a very high affinity for silver. The silver bonded during
10 7

THE ALBUMEN & SALTED PAPER BOOK
sensitization to these sites on the protein is so tightly held that treatment in hypo is notsufficient to remove it. Thus a small amount of silver remains in all areas of a fixedalbumen print; the conversion of this silver to silver sulfide is the immediate cause ofthe yellowing phenomenon.
The first published notice of the presence of residual silver in non-image areas ofalbumen prints was made in December 1859 by Davanne and Girard. 10 In a com-munication on the general subject of the fixation of positive prints to the FrenchPhotographic Society, the two scientists noted that a 2% solution of potassium cyanidedid remove all traces of silver from albumen prints, while strong solutions of hypo didnot. They wrote:
These results present a certain importance; . . . they show that it isdifficult to remove every trace of silver salt contained in albumenisedproofs, and consequently, explain the difficulty which photographersoften meet with in their attempts to obtain proofs on albumenised paperin which the whites shall be pure and well preserved."
They also noted that cyanide fixation had two serious drawbacks which virtually ruled itout as a practical technique: it attacked and severely bleached the silver image, and itwas highly poisonous.
In 1866 Matthew Carey Lea, the famous American photographic scientist, alsonoted the presence of residual silver in albumen prints. He conducted a series of ex-periments to find an appropriate solvent for this retained silver, but with no success.
12
The question was explored by the Englishman John Spiller, who wrote in a paper,which he read to the Photographic Society of Great Britain on Jan. 14, 1868:
My experiments went to prove that the metal was retained in the whitesof the albumen print, and indeed in all parts of the coating, in the formof an argentic organic compound, colorless, unalterable by light, andcomparatively insoluble in hyposulphites and other fixing agents. Itcould not be a simple sulphide, for the test by which I discovered itsexistence in the paper was the production of a brown stain uponmoistening the white surface with sulphide of ammonium. 3
Twenty-five years later two Englishmen, A. Haddon and F. B. Grundy, followed upon the inquiries made by Spiller by actually measuring the amount of silver retained inprints that were sensitized and fixed, but never exposed. These prints should havecontained no silver at all, since they had no visible image. The results of their study wereshocking, because they found that an unexposed print (that had been thoroughly fixedand washed) still contained nearly 5 % of the silver left after sensitization and beforeprocessing. 14 To demonstrate the significance of this finding they took an unexposedand fixed sheet of albumen paper and first converted the residual silver to silver chlorideby placing the print in chlorine water; they then applied a solution of potassium nitriteto act as a chlorine acceptor and proceeded to print out an image that was nearly asintense as one printed in the usual way! They reported these disturbing findings in aseries of articles in the British Journal ofPhotography in the mid 1890's.15
If the assumption made by Spiller and confirmed by Haddon and Grundy is true,then the large amounts of "silver albumenate" present in all areas of albumen prints arevery threatening to the long-term stability of these materials, since therefore the
10 8

THE QUESTION OF PERMANENCE
potential for very severe highlight staining exists in every print. The presumedmechanism of the yellowing is the formation of silver sulfide by reaction of thealbumen-bound silver with labile sulfur supplied by residual fixer or atmosphericpollution. If a print was inadequately fixed or washed, then probably it will yellow inthe highlights in addition to fading, and this kind of yellow staining can and does occurin gelatin and collodion as well as albumen prints.
Under such circumstances of high levels of residual fixer, albumen prints can beexpected to display relatively more severe highlight yellowing than gelatin printsbecause of the extra silver available in the highlight areas to react with sulfur from thedecomposing residual fixer. After 75 years (roughly the period of time that has elapsedsince the last widespread use of glossy albumen paper) the highly fixer-contaminatedalbumen prints are no doubt already deteriorated and obviously little can be done of apreventative nature to preserve them. For these prints restoration by chemical means isthe only hope, but this task is beyond our present abilities.
ASSESSING THE RATE OF YELLOWING AND FADING
At present we must concentrate on the prevention of further decay by striving tounderstand more completely the mechanisms of fading, yellowing and staining. As afirst step it is important to assess whether the yellowing process is ongoing for all sur-viving albumen prints (as theoretically it would be, since some sulfur is present in theatmosphere of nearly every locality), and if so, at what rate. This cannot be donevisually, and in fact it is a property of human vision that has probably kept the problemof highlight staining of albumen prints from receiving more attention than it has.
The human visual system has a built-in mechanism that automatically seeks out thelightest area in a photographic print and pegs that as a "reference white;" this adaptivemechanism can lead an observer to believe that the highlights of a print are brighterthan they are unless a side-by-side comparison is made with a "true " white. It is indeedfortunate for our appreciation of albumen paper photographs that we have this built-inability to compensate for stained highlights, since otherwise a majority of albumenphotographs would seem excessively "flat" and lifeless.
On the other hand the imperceptibly slow fading process and staining of thehighlights in historical albumen prints may be proceeding at a rate which will lead tovery severe image deterioration long before the paper and albumen substratadeteriorate. What this means is that possibly in another 75 years, not a single albumenprint will at all resemble its original appearance. Without a monitoring program no onehas any idea how rapidly further deterioration will occur. Such a monitoring programmight consist of checking a statistically significant sample of albumen prints in severalcollections by measuring reflection densities in image and non-image areas. Thedensitometers should be equipped with red, green, blue and visual equivalent filters,and the same prints should be rechecked at two, five, and ten year intervals.
Another benefit from a greater understanding of the causes of highlight yellowingand overall fading would be information about the best way to store albumen prints,i.e., what are the most beneficial types of filing enclosures, framing practices, etc., inorder to minimize further fading and yellowing. The reversal of yellowing that hasalready occurred is an extremely difficult task, principally because the silver sulfidewhich forms the yellow stain is much more chemically stable than the colloidal silver ofthe image itself. No presently known treatment can remove the highlight yellowingwithout completely altering the character of the print.
10 9

THE ALBUMEN & SALTED PAPER BOOK
Generalized Image FadingThe second most prevalent kind of deterioration — and the most serious for the
informational and aesthetic value of the photograph — is generalized image fading.The principal internal causes for this condition in albumen prints are the same as inother photographic materials, namely residual thiosulfate and silver-thiosulfatecomplexes which have been allowed to remain in the material through inadequatefixing and washing. Moreover, albumen prints are also subject to fading induced byexternal causes, either 1) sulfiding of the image from atmospheric sulfur compoundssuch as sulfur dioxide, etc., and 2) oxidation fading caused by oxidizing gases such asozone, organic solvents, etc. Albumen prints do not respond to the so-called " bleachand redevelopment" methods which have been successful in restoring sulfided gelatin-based develop-out photographic materials. The problems with the "bleach andredevelopment" method in regard to albumen prints are that the residual silver in thehighlight areas redevelops along with the image, the "redevelopment" step does notprovide sufficient density overall, and finally, the color of the "restored" image is blackand therefore totally out of character with the original color of the print.
Deterioration Caused by DefectiveMounts and Mounting Adhesives
A third major type of deterioration afflicting albumen prints originates from poorquality mounting boards and improper mounting adhesives. These problems are seriousones because approximately 95 % of all albumen prints were mounted at the time oftheir production. Many mounting boards used in the 19th century were composed ofthin top and bottom layers of relatively good quality paper laminated to a thick core ofpulp containing a high percentage of lignin. The decomposition products of ligninmigrate through the top layer of the board and attack the photograph, causing stainingand brittleness and accelerating and fading and yellowing of the silver image. In manycases the use of putrified starch or gelatin adhesives accomplished the same kinds ofdeterioration.
Other problems associated with mounts are reddish stains known as "foxing" andstains caused by mold or fungus growth. At the moment the repertoire of preservationtreatments available to photographic conservators for use with albumen prints issomewhat limited; the removal of prints from obviously defective mounts and theircareful re-mounting onto appropriate mounts with safe adhesives is the only techniquefor the preservation of albumen prints that has proven itself in practice. Remounting,however, does nothing to reverse the deterioration that has already occurred.
The Need for Restoration ResearchThe reversal of yellowing, fading and staining caused by all of the above internal
and external factors continues to be beyond the present state of knowledge in the fieldof photographic conservation. In spite of the enormous cultural importance of thephotographic record of the 19th century and the advanced state of deterioration inwhich many albumen prints exist today, no research into the nature of the problems orthe potential for new restoration techniques has been done since the days of Haddonand Grundy.
The reasons for this lack of research may be traced to the obsolescence of albumenpaper by 1900 and the attitudes which prevailed for most of the 20th century toward
11 0

THE QUESTION OF PERMANENCE
photographic preservation. Within 10 years of the work done by Haddon and Grundytwo revolutionary changes took place in the technology of photographic printingpapers. Albumen paper was replaced by somewhat similar gelatin and collodionprinting-out papers in the mid 1890 's, and these in turn were supplanted by gelatindeveloping-out papers (of the type still in use) by 1905. Naturally scientific attentionturned to these materials, and the problems of albumen were forgotten. Much researchhas been done concerning the permanence of gelatin-based printing papers, but there isno certainty of the applicability of these results to albumen-based materials. Althoughthe chemical and physical characteristics of albumen prints are similar in some ways togelatin prints, there are a number of significant differences. It is now apparent that atleast the restoration techniques used on gelatin prints are inappropriate for albumenprints.
The lack of organized research into the problems of albumen prints may also beexplained by previously held attitudes toward the importance of 19th-centuryphotographs. For many years the deterioration of these artifacts was ignored, andphotographic copies of important images were considered by many to be a completelysatisfactory substitute for the original photograph. The several new factors which inrecent years have begun to change these attitudes — a new appreciation of the aestheticdimension of 19th-century photography, a new emphasis on preservation of originalphotographic artifacts, and the greatly progressed decay which has beset surviving prints— now make it more imperative that some inquiries into the specific problems ofalbumen prints be conducted. The reward of success in such research would be that thewonderful beauty of albumen prints could be preserved for generations to come, insteadof comprising an unfortunate footnote to the history of photography.
11 1


SUGGESTIONS FOR FURTHER READING
Appendix AIt does one good to think how photographers, even while exercising thenew art for money, have pursued it with a generous ardor for its own sake,and emulate each other in the magnanimity with which they throw theirown discoveries into the common heap, and scorn to check the progress oftheir art for any selfish motive.
—Henry Morley and W.H. Wills, 1853'
Fortunately the processes described in this book belonged to an era of individualexperimentation with photographic materials, and the results of these individual effortswere often reported openly in books and journals of the day. Of course, many in-dividuals and companies did choose to retain secrets about the exact methods they used,but it is quite possible to obtain a good general picture of historical technical practice byreading original books, pamphlets, letters and journals. The following are somesuggestions for further reading, together with some brief notes about the kind of in-formation available from each source.
Surveys of the Technical Historyof Printing-Out PapersFritz Wentzel, Memoirs of a Photochemist, American Museum of Photography,Philadelphia (1960). This wonderful book is perhaps the most complete and satisfactoryintroduction in the English language to the technical history of photographic materials.The chapters on printing-out papers are well written and extensively annotated. Theyare condensed from the author's own experiences as a production supervisor in manydifferent photographic paper factories (beginning in 1914, when albumen paper wasstill being manufactured), and from his research for the work he co-authored with J.M.Eder, Die photographischen Kopirverfahren mit Silbersalzen (Positiv-Prozess), 1928edition (see below).
Josef Maria Eder, The History of Photography, Columbia University Press, N. Y. (1945),trans. by Edward Epstean. Chapter 74 (pp. 534-539) of this monumental work dealswith the history of printing-out processes with silver salts. This is an excellent place tobegin a program of further study because it gives the landmark steps in the develop-ment of these processes and also provides the references where the first notice of theseprocesses was published.
Josef Maria Eder and Fritz Wentzel, Die photographischen Kopirverfahren mit
11 3

THE ALBUMEN & SALTED PAPER BOOK
Silbersalzen (Positiv-Prozess), Wilhelm Knapp, Halle (1928). This book, which is alsoknown as Book IV, Part I of the 3rd edition of J.M. Eder's multivolume AusfuhrlichesHandbuch der Photographie is the most complete technical and historical account ofsilver printing-out processes ever written. Unfortunately, it has never been translatedinto English. It and the references cited in it are the source of a great deal of the materialin The Albumen and Salted Paper Book. Editions previous to the 1928 edition wereauthored by Eder alone, but thanks to the efforts of Dr. Fritz Wentzel, the 1928 editionis the largest and most complete.
Early Writings About Salted PapersRobert Hunt, A Manual of Photography, Richard Griffin & Co., Glasgow (1854), 4thedition. The many editions of Hunt's Manual of Photography offer a comprehensiveglimpse of the state of photographic manipulation at these early dates, and include agreat many recipes for different kinds of printing papers. This is a good work in whichto see the diversity of photographic experimentation at this time.
Thomas Sutton, The Calotype Process, A Hand Book to Photography on Paper, JosephCundall, London (1855). Sutton's calotype manual was another often reprinted andupdated work that — unlike Hunt's far-ranging Manual — concentrates on what appearto be the most tried and true methods of the day for paper negatives and positives. Thisbook kept its popularity through at least 10 editions and seems fairly representative ofgeneral practice. The 1855 edition also contains directions for albumenizing paper.
W.H. Thornthwaite, A Guide to Photography, Home & Thornthwaite, London (1856),10th ed. Thornthwaite 's Guides were also extremely popular and influential during theearly 1850 ' s. Either this work or Sutton's The Calotype Process will provide a goodintroduction to the printing techniques of the period.
The Albumen PrintHenry Peach Robinson and William DeWiveleslie Abney, The Art and Practice of SilverPrinting, E. & H. T. Anthony, N. Y. (1881). This fine book is one of the best generaltexts on albumen and salted paper printing written in the 19th century. It is also veryaccessible to modern readers because it is part of the Arno Press reprint series ofhistorical photographic books.
John Towler, The Silver Sunbeam, Joseph H. Ladd, N. Y. (1864). Towler's SilverSunbeam is available in a reprint edition from Morgan & Morgan (1969) and contains agood general account of albumen and salted paper printing. Although it does not giveas detailed a treatment of printing processes as Robinson and Abney's book does, itconveys a representative technical account of albumen printing in the Civil War era. Itproved to be a very influential book in its own time.
Hermann W. Vogel, Handbook of the Practice and Art of Photography, Benerman &Wilson, Philadelphia (1875), 2nd edition. Vogel's Handbook was an English translationof a German original that was one of the best and most influential books onphotographic technique written in the 19th century. It was as influential all over theworld during the 1870's as Towler's Silver Sunbeam had been in America during the1860 ' s. Like many manuals of the era it does not contain a great deal about the methods
11 4

APPENDIX A
used to prepare albumen paper, but there is much in it on the use of albumen paper.This reflects the shift to factory-coated albumen paper which was virtually complete bythe year 1870.
Matthew Carey Lea, A Manual of Photography, privately printed for the author,Philadelphia (1871), 2nd edition. M. Carey Lea's Manual was the American equivalentto Vogel's Handbook. In fact, the two men were similarly regarded as among the mostbrilliant and learned men on photography in their respective countries. Both hadreputations as eminent scientists and made basic discoveries that advanced the progressof photography. The general manuals that each wrote are also similar in scope andcontent (although in later years Vogel's Handbook expanded into 2 volumes in theGerman editions), and a comparison of the two is instructive regarding the approachesto photography in the United States and Germany in the 1870 ' s.
Charles W. Hearn, The Practical Printer, Benerman & Wilson, Philadelphia (1874).Most of the other books on albumen printing in this list were written for professionalphotographers; this is one written by a professional photographer, who worked his wayup from a studio apprentice to become a national authority on silver printing. The bookis a very comprehensive treatment of the operations of printing with albumen and saltedpapers as it was actually done in American galleries of the 1870 ' s. In addition to theusual recipes, etc., Hearn's own experiences are anecdotally recounted through thebook, and his writing has a unique, down-to-earth style.
Matte Salted PapersArthur Freiherr von Hübl , Der Silberdruck auf Salzpapier, Wilhelm Knapp, Halle(1896). There is probably no more comprehensive and useful book about matte saltedpapers than Hübl's classic, Der Silberdruck auf Salzpapier (Silver Printing with SaltedPapers). This was one of the most influential technical books published in connectionwith the revival of salted papers that took place at the end of the 19th century.Although no English translation was ever published, Hübl 's style is simple and directenough that a determined non-German speaking reader (armed with a German dic-tionary and perhaps a smattering of the German language) can obtain a great deal ofuseful information from the book. The book is divided into two parts, a theoreticalsection and a collection of recipes, and both parts are first rate in their scope and utility.
Lyonel Clark, Platinum Toning, Hazell, Watson & Viney, London (1890). Lyonel Clarkwas a very important figure in the revival of matte salted papers in the 1890 ' s, and hecontributed greatly to their popularity by pioneering the use of platinum toning forsilver printing-out papers. The brown and black tones resulting from the use ofplatinum toners harmonized well with the other qualities of matte salted papers. Muchmore comprehensive than the title indicates, Clark's book was well received and func-tioned as the technical and aesthetic guidebook for the salted paper revival in theEnglish-speaking world. Platinum Toning is sprinkled with the acerbic observations ofthe photographic scene for which Clark was well known. One example:
Photographic amateurs are, I regret to say, an extremely lazy lot, with anincreasing and morbid desire to produce quantity — an appetite largely
encouraged by the pack of traders and process-mongers who live on theirprey 's credulity. (pp. 38-39)
11 5


TITRATION METHOD FOR DETERMININGSTRENGTH OF SILVER NITRATE SOLUTIONS
(Courtesy of Irving Pobboraysky)
Appendix B
EquipmentCentigram balance50 ml buretGlasswareLaboratory magnetic stirrer (optional)
ChemicalsDistilled water
Silver Nitrate, AgNO3, .1 Normal
Sodium thiocyanate, NaCNS, or Potassium thiocyanate, KCNS,.2 Normal
Ferric ammonium sulfate, saturated solutionNitric acid, 6 Molar
ProcessIMPORTANT SAFETY PRECAUTION: Always wear approved laboratoryprotection and work in a well ventilated area.
STEP 1 STANDARDIZATION OF THE THIOCYANATE SOLUTION
1. Mix approximately .2 Normal sodium thiocyanate (16.2g/ liter) or potassium thiocyanate (19.4 g/ liter) using distilledwater. Note: Since both these chemicals are extremelyhygroscopic, do not rely on the dry weight to give solutions ofthe correct normality. An analytical balance is not required toweigh out these amounts; a centigram balance should be suf-ficient.
2. Closely estimate the exact normality of the thiocyanate
eye
11 7

THE ALBUMEN & SALTED PAPER BOOK
solution by titrating it into a silver nitrate solution of knownnormality:
a. Put 35 ml of 0.1 Normal silver nitrate solution into asmall flask. To make a 0.1 Normal silver nitrate solution, add4.25 g silver nitrate to enough distilled water to make a totalvolume of 250 ml.b. Add 1 ml of saturated ferric ammonium sulfate solution.c. Add 5 ml of 6 Molar nitric acid. Note: To Make 6 Molarnitric acid, add 100 ml of concentrated nitric acid (15.78N) to163 ml of water.d. Run in thiocyanate from a buret until a faint brownishcolor appears and will not disappear with vigorous stirring.Note the volume of thiocyanate at this point.
e. Calculate the normality of the thiocyanate using thefollowing equation:
milliequivalents of silver nitrate = milliequivalents of thiocyanate
(ml1 ) (Ni ) = (ml) (N2)
solve for N2, the normality of the thiocyanate, as follows:
N2 = (ml1)(N1)
ml of thiocyanate)
Example:N2=
N2= .2
STEP 2 DETERMINATION OF SILVER NITRATE CONCENTRATION
Determine the silver nitrate concentration by titrating the standardized thiocyanatesolution into a sample of the silver bath as follows:
1. Put 10 ml of the silver nitrate bath into a flask. A pipet or a10 ml cylinder graduate may be used to measure the solution.2. Add 5 ml of 6 Molar nitric acid.3. Add 1 ml of saturated ferric ammonium sulfate solution.4. Run in the standardized thiocyanate solution from a buretinto the silver nitrate sample until the faint brownish color willnot disappear under vigorous stirring. To increase the
detestabilityof the color, view the flask against a white background.Note the volume of thiocyanate titrated when the color firstbecomes permanent, then continue adding thiocyanate drop bydrop to make sure.5. Calculate the normality of the silver bath as follows:
normality of = (ml of thiocyanate) (normality of thiocyanate)silver nitrate
( ml of silver nitrate in sample)
11 8

APPENDIX A
6. To obtain the concentration of silver nitrate in the bath,multiply the normality of the silver nitrate by 170 (the molecularweight of silver nitrate). The result is expressed in grams per liter.Example:
If the normality of the silver nitrate is .65N, then:.65(170) = 110.5 g/liter
110.5 g / liter = 11.05 % silver nitrate solution
7. For greater accuracy the titration procedure may be repeatedand the two readings averaged together.
STEP 3 REPLENISHMENT OF THE SILVER BATH
The amount of silver nitrate required to restore the bath to proper strength will ofcourse depend on the total volume of solution. For example, if after a titration thesolution is found to be 8.5 % in strength instead of 10% and possesses a total volume of2 liters, the first step is to calculate how many grams per liter are lacking. In this caseinstead of 100 g/ liter, there are only 85 g/ liter, so 15 g /liter are missing. Multiply thenumber of missing grams/ liter times the total number of liters of solution to find theamount of silver nitrate needed to replenish the solution:
15 g (2 liters) = 30 g needed for replenishment
Fig. 47. Titration apparatus, froman 1887 manual. P is a pipet formeasuring the correct volume ofsilver solution, S is the buret and F isthe vessel for conducting thetitration.
Helpful Hints for the Titration Procedure1. Because thiocyanate solutions keep well, it is convenient tomake up a large quantity of standardized solution. The ferricammonium sulfate and nitric acid stock solutions will also keepwell. Nitric acid should be stored in a ground-stoppered glassbottle.
11 9

THE ALBUMEN & SALTED PAPER BOOK
2. Do not pour the thiocyanate solution that remains in theburet after a titration back into the container of standardizedstock solution — throw it out.
3. Instead of calculating the normality each time a titration isperformed, it is helpful to make a chart for each batch ofstandardized thiocyanate solution. The chart can be made bycalculating a few points and drawing a line through the points.Label one axis of the graph in ml of standardized thiocyanatesolution and the other in g/liter silver nitrate.
4. For increased economy a 5 ml sample of silver nitrate bathcan be used without sacrificing accuracy, providing the sample iscarefully measured out.
12 0

GUIDELINES FOR THE IDENTIFICATIONOF ALBUMEN AND SALTED PAPER PRINTS
Appendix C
IntroductionIt is a very difficult task to set forth guidelines for the identification of these
materials because they are for the most part hand-crafted products; on the other hand,there do exist a few standard indicators that will yield a fairly reliable judgment. In thefinal analysis, process identification of 19th-century print materials depends almostwholly on experience and judgment, and is a skill that slowly improves with practice.The information presented here is intended solely to assist persons who may be un-familiar with these materials in narrowing the range of possible choices, not in makingpositive identification of individual prints.
In order to develop skills in identifying albumen and salted paper prints, originalprints must be seen and handled. In the case of salted paper prints this may not be easy,but sizeable photographic collections exist in every large city, and they are likely placesto begin a process of familiarization. With regard to albumen prints, it is certainly veryeasy to find prints for study, although one must be sure that example prints are correctlylabeled. Quite a few 19th-century journals contain tipped-in specimens of photographicprints of various kinds, and these prints are usually labeled as to process. Among thejournals whose issues occasionally contained actual photographs are The Photographicand Fine Art Journal, Anthony's Photographic Bulletin, Wilson's PhotographicMagazine, The Philadelphia Photographer, Photographische Korrespondenz,Photographische Archiv, and The American Journal of Photography. Specimen printsin journals are a particularly good way to help differentiate albumen paper from thegelatin and collodion printing-out papers which replaced it in photographic practice.
For those who are so inclined, an excellent way to develop skills in print iden-tification is to actually make albumen and salted paper prints. A little direct experiencewith albumen will make it much more familiar when encountered in historicalmaterials. The most important advice on the whole subject of identification, however, isnot to rely on reproductions or descriptions of anything, but to seek out originalmaterials and get to know them in all their variety.
12 1

THE ALBUMEN & SALTED PAPER BOOK
GuidelinesI. IS THE PRINT A SILVER PHOTOGRAPHIC PRINT?
Silver photographic prints from the albumen and salted paper era (1840-1895)generally show some form of deterioration, or possess spots and blemishes of chemicalorigin that distinguish them as actual photographic prints. Most albumen and saltedpaper prints are faded and yellowed to some degree, either overall or in localized areas.A perfectly intact, unblemished image usually indicates that a print is not an albumenand salted paper print. Such a perfect print may either be of photomechanical origin,such as a woodburytype, carbon print, collotype, etc., or else may be a silverphotographic print on gelatin or collodion printing-out paper. These materials mayresemble albumen prints, but have generally survived in better condition.
II. DOES THE PRINT DISPLAY THE CHARACTERISTIC COLORSOF ALBUMEN AND SALTED PAPERS PRINTS?
I mage color is one of the most important factors in identifying albumen and saltedpaper prints, but it is also an area where experience is vitally necessary. In light of thisfact a list of possible image colors is of very limited value. A discussion of image color iscomplicated by the problem of changes induced in prints by fading and yellowing, andalso by the fact that many photomechanical processes could (and did) successfullymimic the color and appearance of albumen prints. A third complicating factor is thepossibility that a print was hand colored using water colors or aniline dyes.
Albumen and salted paper prints in original condition are usually warm brown,purplish-brown, purple or purplish-black. They are seldom black, but occasionally theywill approach neutral black yet still contain some trace of purple in middletone areas.They are never green, but severely faded and yellowed albumen prints sometimespossess a faint greenish tinge. Approximately 85 % of albumen prints show some readilynoticeable yellow or yellowish-brown stain in the whites and highlight areas. Thepresence of highlight yellowing and the characteristic surface texture of albumen aretwo of the most readily apparent and reliable indicators that a given print is an albumenprint. Albumen prints are certainly not the only types of prints that may exhibithighlight yellowing, however, so one must also watch for contraindications that may bepresent.
III. WHAT ARE THE SURFACE CHARACTERISTICS OF THE PRINT?
Surface characteristics by themselves are little help in differentiating albumen andsalted paper prints from other kinds of photographic prints; corroborating indicatorsmust also be present. Many photographic materials have similar surface qualities andthe appearance of any surface may be altered by smoothing or the application of othersubstances. Nevertheless the basic fact remains that salted paper prints are rough ormatte-surfaced, while albumen prints are smooth and display a greater or lesser degreeof surface gloss. Salted paper prints were made on both smooth and porous rawstocks ofvarious weights, but albumen prints (especially after 1860) were generally made on avery smooth, lightweight stock. Albumen prints of the period 1850-1870 are usuallyless glossy than those of the period 1870-1890, because of two factors: the use ofburnishing and rolling machines to smooth the prints after mounting, and the in-creased use after 1870 of double-coated paper.
Albumen paper was not made with a substratum of barium sulfate (baryta) and
12 2

APPENDIX C
gelatin as were emulsion-type gelatin and collodion printing-out papers, and thereforethese materials exhibit a generally smoother surface than albumen prints. Albumenpaper usually exhibits a characteristic surface texture which (if not obscured by bur-nishing or rolling) sometimes possesses a "crackled" or "crazed" appearance. Ex-perienced individuals usually have little difficulty in detecting albumen paper by itssurface texture.
IV. CAN THE IMAGE BE DATED FROM INTERNAL EVIDENCE?
Information contained in the photographic image itself or on the mount of thephotograph can often help to establish the approximate time at which the negative orprint was made. Only in rare instances will there be a significant lag between themaking of the negative and the making of the print, so it can be assumed in most casesthat the negative and the print have the same approximate date of origin. There aremany internal clues to aid in the dating of a photograph, and assigning an approximatedate is a common practice in historical photographic collections.
Once it has been established that a print is a silver photographic print and an ap-proximate date has been determined for it, reference to the chart below may be helpfulin process identification:
Most Common Types of Photographic Paper, 1840-1905
1840-1855 Salted Papers1855-1895 Albumen Paper1895-1905 Gelatin and Collodion Printing-out Papers
Within the span 1840-1905 there are obviously periods of transition from one type ofprinting paper to another, and in these transition periods the date of origin of an imageis not much help in identifying the specific print process. On the other hand, there arealso spans of time where there can be little doubt as to the printing paper in use by thevast majority of photographers. One such time is of course the 10-year period between1840 and 1850, before the invention of albumen paper. Except for very rare cases wherethe prints were made by development (using the calotype, or paper negative process),prints of this decade are plain salted paper prints.
The years 1850-1860 represent a transition period between salted papers andalbumen paper. For the first few years of the decade plain salted papers predominated,while at mid-decade came a time of unprecedented variety, as albumen paper coexistedwith a number of different kinds of matte salted papers. These matte salted papers weretreated with a salting-sizing solution using an organic binder such as gelatin, whey orstarch, among other substances. It is not possible to differentiate at a glance betweenthese various types of matte salted paper. As the year 1860 drew closer, albumen papergradually replaced most of the varieties of salted papers, and ascended to an almostunchallenged dominance of photographic practice.
Thus the period 1860-1885 is a time of reasonable certainty with regard to processidentity, and there is a great likelihood that any given silver photographic print of thatperiod was made on albumen paper. Studio portraits (except life-size enlargements) andstereo views of this era are especially likely to be albumen prints, and indeedphotographs of any kind from this period not made on albumen paper are unusual.After 1885 an enormous number of photographs were produced on albumen paper, butthere can be little certainty in a process identification based on the date of thephotograph. The mid-1880 's began a 30-year period of great diversity in photographic
12 3

THE ALBUMEN & SALTED PAPER BOOK
printing papers. World War I marked the end of this era of diversity, and consolidatedthe dominance of develop-out bromide and chlorobromide papers, a dominance whichlasted until the early 1960's. At that time chromogenic color papers became the mostwidely used photographic printing material and have remained so until the present day.
V. PUBLICATIONS WHICH MAY ASSIST IN PROCESS IDENTIFICATION
Arthur T. Gill, Photographic Processes, a Glossary and Chart for Recognition,Museums Association Information Sheet IS No. 21, 1978. Published by the MuseumsAssociation, 87 Charlotte St., London W 1 P 2BX, United Kingdom
Siegfried Rempel, The Care of Black and White Photographic Collections: Iden-tification of Processes, Technical Bulletin No. 6, published by The Canadian Con-servation Institute, National Museums Canada. Technical Bulletins may be requestedfree of charge by writing the Canadian Conservation Institute, 1030 Innes Road, Ot-tawa, Ontario, Canada KlA OM8
12 4

References
Chapter One: Basic Principles1. J.M. Eder and Fritz Wentzel, Die photographischen Kopirverfahren mit Silber-
salzen (Positiv-Prozess), Wilhelm Knapp, Halle (1928), pp. v-vi.
Chapter Two: Working Environment, Equipment & Materials1. Edward L. Wilson, Wilson's Photographics, pub. Edw. Wilson, New Yor k (1881),
p. 189.2. J.M. Eder and Fritz Wentzel, Die photographischen Kopirverfahren mit Silber-
salzen (Positiv-Prozess), Wilhelm Knapp, Halle (1928), p. 110.3. A. von Hübl , Der Silberdruck auf Salzpapier, Wilhelm Knapp, Halle (1896), p.
31.
Chapter Three: Salted Papers1. Thomas Sutton, "On Positive Printing, Etc., " Photographic Journal, 2, 311 (1856).2. William Henry Fox Talbot, "Some Account of the Art of Photogenic Drawing, or
the Process by which Natural Objects may be made to delineate themselves withoutthe aid of the Artist's Pencil," The Athenaeum, No. 539 (Feb. 9, 1839), p. 114 -
3. W.H. Fox Talbot, "An Account of the Processes employed in PhotogenicDrawing," The Athenaeum, No. 539 (Feb. 23, 1839), p. 156.
4. Louis Alphonse Davanne and Jules Girard, Recherches Théoretiques et Pratiquessur la Formation des Epreuves Photographiques Positives, Gauthier-Villars, Paris(1864), p. 3.
5. Paul E. Liesegang, Der Silberdruck, E. Liesegang's Verlag, Düsseldorf (1884), pp.12-13.
6. J.M. Eder and Fritz Wentzel, Die photographischen Kopirverfahren mit Silber-salzen (Positiv-Prozess), Wilhelm Knapp, Halle (1928), p. 185.
7. DeBrébisson, Horn's Photographic Journal, 2, 47 (1854).
Chapter Four: Albumen Paper1. W.H. Sherman, "The Past and Future of the Albumen Print," in The American
12 5

THE ALBUMEN & SALTED PAPER BOOK
Annual of Photography and Photographic Times Almanac, Scovill & Adams, NewYork (1892), p. 25.
2. "H.L.," The Athenaeum, No. 602 (May 11, 1839), p. 358.3. Robert Hunt, A Popular Treatise on the Art of Photography, Richard Griffin &
Co. , Glasgow (1841), p. 11.4. J.M. Eder, Die photographischen Kopirverfahren mit Silbersalzen (Positiv-Prozess),
Wilhelm Knapp, Halle (1887), 1st edition, p. 30.5. Julius Schnauss, " Economical Process for Printing Positives," Photographic Mosaics,
Benerman & Wilson, Philadelphia (1867), pp. 65-67. Taken fromPhotographisches Archiv (1886), p. 45.
6. Louis-Désiré Blanquart-Evrard, Compte Rendu Des Séances De L'Academie DesSciences, 30(21), 665 (1850).
7. Die Photographische Industrie, 27, 116 (1929).8. Liverpool Photographic Journal, 3, 25 (1856). See also D. Van Monckhoven, Traite
Genéral de Photographic, A Gaudin & Frere, Paris (1856), 2nd edition, p. 243.9. Anthony's Photographic Bulletin, 21, 225 (1890). See also Edward L. Wilson, " Die
Papierfabrik in Rives," Photographische Mittheilungen, 19, 129 (1883).10. Fritz Wentzel, Memoirs of a Photochemist, American Museum of Photography,
Philadelphia (1960), pp. 51-52.11. J.M. Eder, editor, Jahrbuch für Photographic, Kinematographieund
Reproduktionsverfahren, Wilhelm Knapp, Halle (1905), p. 432.12. J.M. Eder and Fritz Wentzel, Die photographischen Kopirverfahren mit Silber-
salzen (Positiv-Prozess), Wilhelm Knapp, Halle (1928), p. 200.13. Reese V. Jenkins, Images and Enterprise: Technology and the American
Photographic Industry 1839 to 1925, Johns Hopkins University Press, Baltimore(1975), p. 49.
14. Anthony's Photographic Bulletin, 21, 225 (1890).15. British Journal of Photography, 36, 390 (1889).16. Photographisches Archiv, 2, 57 (1889).17. J.M. Eder, Die photographischen Kopirverfahren mit Silbersalzen (Positiv-Prozess),
Wilhelm Knapp, Halle (1887), p. 71.18. F. Wilde, "The Permanency of Photographs — Silver, Carbon and Platinum,"
American Journal of Photography, 12 (134), 51 (1891).19. Photographisches Archiv, 2, 57 (1889).20. Henry C. Stiefel, Sensitized Papers, How Made and Used, The Adams Press, New
York (1894), p. 29.21. Hermann W. Vogel, Handbook of the Practice and Art of Photography, Benerman
& Wilson, Philadelphia (1875), 2nd edition, pp. 179-180.
Chapter Five: Alternative and Hybrid Papers1. The British Journal of Photography Almanac and Photographer's Daily Com-
panion, H. Greenwood & Co., London (1912), p. 1035.2. Marcus Sparling, Theory and Practice of the Photographic Art, Houlston &
Stoneman, London (1856), pp. 155-156.3. J.M. Eder and Fritz Wentzel, Die photographischen Kopirverfahren mit Silber-
salzen (Positiv-Prozess), Wilhelm Knapp, Halle (1928), pp. 192-194.4. H. Snowden Ward, ed., The Figures, Facts and Formulae of Photography, Tennant
& Ward, New York (1904), 3rd edition, pp. 74-75. See also A. von Hübl , DerSilberdruck auf Salzpapier, Wilhelm Knapp, Halle (1896), p. 71.
12 6
REFERENCES
5. W.K. Burton and Andrew Pringle, The Processes of Pure Photography, Scovill &Adams, New York (1889), p. 138.
6. The Photographic Journal, 3, 40 (1856). See also J.M. Eder and Fritz Wentzel, Diephotographischen Kopirverfahren mit Silbersalzen (Positiv-Prozess), WilhelmKnapp, Halle (1928), p. 187.
7. H.P. Robinson and William DeW. Abney, The Art and Practice of Silver Printing,E. & H.T. Anthony, New York (1881), pp. 100-102.
8. J.M. Eder, Die photographischen Kopirverfahren mit Silbersalzen (Positiv-Prozess),Wilhelm Knapp, Halle (1887), 1st edition, pp. 8-9.
9. George Shadbolt, " Some Observations on Positive Printing, " Photographic Journal,2, 256-257 (1855).
10. J.M. Eder, ed., Jahrbuch für Photographic und Reproduktionstechnik, WilhelmKnapp, Halle (1891), p. 519.
11. J.M. Eder, ed., Jahrbuch für Photographic, Kinematographie undReproduktionsverfahren, Wilhelm Knapp, Halle (1911), p. 529.
12. K. Kieser, Photographische Papiere, Urban & Schwarzenberg, Berlin (1931), pp.457-458.
13. H.P. Robinson and William DeW. Abney, The Art and Practice of Silver Printing,E. & H.T. Anthony, New York (1881), p. 101.
14. A. von Hübl, Der Silberdruck auf Salzpapier, Wilhelm Knapp, Halle (1896), pp.78-79.
15. J.M. Eder, ed., Jahrbuch für Photographic und Reproduktionstechnik, Wilhelm
Knapp, Halle (1898), p. 437.16. Fritz Wentzel, Memoirs of a Photochemist, American Museum of Photography,
Philadelphia (1960), p. 69.17. Die Photographische Industrie, 11, 802 (1913).18. The British Journal Almanac and Photographer 's Daily Companion, H. Longwood
& Co., London (1912), p. 1035. See also Photo Gazette (Paris), April 27, 1909.19. Die Photographische Industrie, 27, 116 (1929).20. A. von Hübl, Der Silberdruck auf Salzpapier, Wilhelm Knapp, Halle (1896), pp.
82-83.21. Die Photographische Industrie, 11, 503 (1913).
Chapter Six: Sensitization1. C.A. Seely, "The Use of Acid in Silver Printing Solutions," The Photographic
News, 3, (67), 173 (1860).2. A. von Hübl, Der Silberdruck auf Salzpapier, Wilhelm Knapp, Halle (1896), p.
34.3. "R.," "Printing and Toning on Albumenised Paper, " The Photographic News, 3
(70), 206 (1860).4. J.M. Eder and Fritz Wentzel, Die photographischen Kopriverfahren mit Silber-
salzen (Positiv-Prozess), Wilhelm Knapp, Halle (1928), p. 199.5. The Photographic Times 2, 88 (1872). A sample print made on "ready-sensitized
paper" accompanied this issue of the journal.6. Josef Maria Eder, The History of Photography, trans. Edward Epstean, Columbia
University Press, New York (1945), p. 534.7. Charles W. Hearn, The Practical Printer, Benerman & Wilson, Philadelphia (1874),
p. 24.
12 7
THE ALBUMEN & SALTED PAPER BOOK
Chapter Seven: Tone Reproduction and Print Exposure1. Thomas Bolas, Photographic Review, 1, 219 (1889).2. A. von Hübl , Der Silberdruck auf Salzpapier , Wilhelm Knapp, Halle (1896), p. 4.3. Ibid, p. 5.4. J.M. Eder and Fritz Wentzel, Die photographischen Kopirverfahren mit Silber-
salzen (Positiv-Prozess), Wilhelm Knapp, Halle (1928), pp. 88-89.
Chapter Eight: Toning1. Fitt, "On Positive Printing," Liverpool Photographic Journal, 3, 36 (1856).2. Brian W. Coe, "Sun Pictures: Printing Talbot's Calotype Negatives, " History of
Photography, 1 (3), 180 (1977).3. J.M. Eder and Fritz Wentzel, Die photographischen Kopirverfahren mit Silber-
salzen (Positiv-Prozess), Wilhelm Knapp, Halle (1928), p. 8.4. P. Mercier, Virages et Fixages, Gauthier-Villars, Paris (1892), p. 8.5. Ibid, p. 6.6. P.F. Mathieu, Auto-Photographic ou Méthode De Reproduction Par LaLumière
des Dessins, Lithographies, Gravures, etc., Sans L'Emploi Du Daguerréotype,Imprimerie De Bureau, Paris (1847), p. 14.
7. American Journal of Photography, 2, 270 (1860).8. "R., " "Printing and Toning on Albumenised Paper, " The Photographic News, 3
(70), 205 (1860).9. P. Mercier, Virages et Fixages, Gauthier-Villars, Paris (1892), p. 16.
10. Chapman Jones, "On the Relationship Between the Size of the Particle and theColour of the Image, " Photographic Journal, 51, 162 (1911).
11. E. Weyde, E. Klein and H.J. Metz, "Silver Deposition in the Diffusion Process, "
Journal of Photographic Science, 10, 112 (1962).12. G. Mie, Annalen der Physik, 25, 377 (1908).13. J.M. Eder and Fritz Wentzel, Die photographischen Kopirverfahren mit Silber-
salzen (Positiv-Prozess), Wilhelm Knapp, Halle (1928), pp. 41-43.14. Edward L. Wilson, Wilson 's Photographics, pub. Edward L. Wilson, New York
(1881), p. 202.15. P. Mercier, Virages et Fixages, Gauthier-Villars, Paris (1892), p. 15.16. J.M. Eder and Fritz Wentzel, Die photographischen Kopirverfahren mit Silber-
salzen (Positiv-Prozess), Wilhelm Knapp, Halle (1928), pp. 63-64.17. Ibid, p. 13.18. Alfred Stieglitz, "Toning Aristo Prints with Platinum," American Annual of
Photography and Photographic Times Almanac, Scovill & Adams, New York(1890), p. 120.
Chapter Nine: Fixation and Washing1. A. Haddon and F.B. Grundy, "Strength of Hypo Solution and Times of Immersion
for Fixing Albumenised Paper," British Journal of Photography, 44, 173 (1897).2. Beaumont Newhall, Latent Image, Doubleday, New York (1967), p. 58.3. G.I.P. Levenson, Theory of the Photographic Process, ed. T.H. James, MacMillan,
New York (1977), p. 439.4. Ibid, p. 457.5. J.M. Eder and Fritz Wentzel, Die photographischen Kopirverfahren mit Silber-
salzen (Positiv-Prozess), Wilhelm Knapp, Halle (1928), p. 80.6. L. P. Clerc, Photography, Theory and Practice, Pitman, New York (1939), 2nd
12 8

REFERENCES
edition, p. 346.7. Walter Meidinger, Die Theoretischen Grundlagen der Photographischen Prozesse,
Verlag von Julius Springer, Vienna (1932), p. 431.8. J.I. Crabtree, G.T. Eaton and L.E. Muehler, Photographic Journal, 80, 458 (1940).9. H.P. Robinson and William DeW. Abney, The Art and Practice of Silver Printing,
E. & H.T. Anthony, New York (1881), p. 95.10. F.B. Grundy and A. Haddon, "On the Amounts of Silver and Hypo Left in
Albumenised Paper at Different Stages of Washing, " British Journal ofPhotography, 40, 512 (1893).
Chapter Ten: Finishing, Mounting and Storage1. Thomas F. Hardwich, Photographic Journal, 3, 43 (1856).2. Edward L. Wilson, Wilson's Photographics, pub. Edward L. Wilson, New York
(1881), p. 235.3. Photographic Journal, 2, 252 (1855).4. Paul E. Liesegang, Der Silberdruck, E. Liesegang 's Verlag, Düsseldorf (1884), p.
59.5. John Towler, The Silver Sunbeam, Joseph Ladd, New York (1864), p. 206.6. Robert Howlett, On the Various Methods of Printing Photographic Pictures Upon
Paper, Sampson, Low & Marston, London (1856), p. 32.7. J.G. Tunny, in Wilson's Photographics, pub. Edward L. Wilson, New York (1881),
p. 234.8. Lucia C. Tang, "Determination of Iron and Copper in 18th and 19th Century Books
by Flameless Atomic Absorption Spectroscopy," Journal of the American Institutefor Conservation, 17, 19 (1978).
9. Edith Weyde, "A Simple Test to Identify Gases Which Destroy Silver Images,"Photographic Science and Engineering, 16 (4), 286 (1972).
Chapter Eleven: The Question ofPermanence1. Edgar Clifton, "The Last Print in Silver, " British Journal of Photography Almanac
and Photographer's Daily Companion, H. Greenwood & Co., London (1887), p.137.
2. Helmut and Alison Gernsheim, The History of Photography, McGraw-Hill, NewYork (1969), p. 175.
3. Nikolaas Henneman, Photographic Journal 3, 43 (1856). For a detailed account byThomas Malone of the making of The Pencil of Nature prints, see The Liverpooland Manchester Photographic Journal, 1, 270 (1857).
4. T.F. Hardwich, Photographic Journal, 2, 242 (1855).5. Photographic Journal, 2, 251 (185 5) .6. Alphonse Davanne and Jules Girard, Photographic Journal, 2, 202 (1855), from
Bulletin De La Sociéte De Photographie, June 1855.7. Ralph E. Liesegang, Photographische Physik, E. Liesegang's Verlag, Düsseldorf
(1899), p. 36. See also British Journal of Photography, 26, 2 (1879).8. W.H. Sherman, "The Past and Future of Albumen Print," American Annual of
Photography and The Photographic Times Almanac, Scovill & Adams, New York(1892), p. 23.
9. Reese V. Jenkins, Images and Enterprise: Technology and The AmericanPhotographic Industry 1839-1925, John Hopkins University Press, Baltimore(1975), pp. 90-95.
12 9

THE ALBUMEN & SALTED PAPER BOOK
10. Alphonse Davanne and Jules Girard, Bulletin De La Société Francaise DePhotographic, 5, 347 (1859).
11. Alphonse Davanne and Jules Girard, "General Observations on PhotographicPositives;" The Photographic News, 3, 233 (1860).
12. Matthew Carey Lea, "An Examination Into the Circumstances Under Which Silveris Found in the Whites of Albumen Prints, " The Photographic News, 10, 394-395(1866) and 10, 402-403 (1866).
13.John Spiller, quoted by A. Haddon and F.B. Grundy in British Journal ofPhotography, 40, 511-512 (1893).
14. F.B. Grundy and A. Haddon, "On the Amounts of Silver and Hypo Left inAlbumenised Paper at Different Stages of Washing," British Journal ofPhotography, 40, 512 (1893).
15. British Journal of Photography, 40, 511-512 (1893), 41, 788-789 (1894), and 43,468-469 (1896).
Appendix A: Further Reading1. Henry Morley and W.H. Wills, "Photography," Household Words, New Series 1
(28), 57 (1853). Authorship of this unsigned article was ascribed to Morley andWills by R.D. Wood in the 1975 pamphlet, The Calotype Patent Lawsuit of Talbotvs. Laroche 1854, p. 28.
130

References forIllustrations
ACKNOWLEDGEMENT
The author wishes to thank those people and institutions which assisted him inlocating and reproducing the illustrations for this book. Thanks are due to Robert Bretz,librarian at The Visual Studies Workshop, Rochester, New York, to Gladys Taylor,archivist at Rochester Institute of Technology, to Jeffrey Wolin, director of reproductionservices and Susan Wyngaard, director of the research center at George Eastman House,and also to Prof. Joseph Noga of the School of Printing, Rochester Institute ofTechnology. The permission of the institutions named above to reproduce theillustrations is also gratefully acknowledged.
Fig. 1. J.M. Eder, Die photographischen Copirverfahren mit Silbersalzen (Positiv-Prozess), Wilhelm Knapp, Halle (1893), p. 103.
Fig. 2. Alfred Watkins, The Watkins Manual, Hereford (1903), 2nd ed. , p. 126.Fig. 3. Charles W. Hearn, The Practical Printer, pub. Edward L. Wilson, Philadelphia
(1878), 2nd ed., p. 16.Fig. 4. W. Jerome Harrison, The Chemistry of Photography, Scovill & Adams, New
York (1892), p. 44.Fig. 5. W. I. Scandlin, ed., The International Annual of Anthony's Photographic
Bulletin and American Process Year-Book, 1901, E. & H. T. Anthony, NewYork (1901), adv. p. 1.
Fig. 6. A. H. Elliott and F. P. Smith, eds., The International Annual of Anthony'sPhotographic Bulletin, 1894, E. & H. T. Anthony, New York (1894), adv. p.58.
Fig. 7. Alexander Watt, The Art of Papermaking, Crosby Lockwood & Son, London(1901), 2nd ed., p. 23.
Fig. 8. Harry R. Lewis, Productive Poultry Husbandry, J. P. Lippincott, Philadelphia(1913), p. 78.
Fig. 9. The Magazine of Science and School of Arts, Vol. 4, No. 1 (April 27, 1839).Fig. 10. J.M. Eder, Der Collodion und Daguerreotyp-Process, und "altere Negativ-
Processe, Wilhelm Knapp, Halle (1893), p. 84.
13 1

THE ALBUMEN & SALTED PAPER BOOK
Fig. 11. Ibid, p. 85.Fig. 12. J.M. Eder, Die photographischen Copirverfahren mit Silbersalzen (Positiv-
Prozess), Wilhelm Knapp, Halle (1893), p. 120.Fig. 13. H. Baden Pritchard, ed., The Year Book of Photography and Photographic
News Almanac, 1885, Piper and Carter, London (1885), p. lx.Fig. 14. Giuseppe Pizzighelli, Anleitung Zur Photographic, Wilhelm Knapp, Halle
(1914), 2nd ed., p. 404.Fig. 15. J.M. Eder, Die photographischen Copirverfahren mit Silbersalzen (Positiv-
Prozess), Wilhelm Knapp, Halle (1898), p. 121.Fig. 16. Ibid, p. 121.Fig. 17. Ibid, p. 122.Fig. 18. Ibid, p. 123.Fig. 19. Ibid, p. 123.Fig. 20. Ibid, p. 124.Fig. 21. The Photographic News, 1(12), 119 (1858).Fig. 22. Charles W. Hearn, The Practical Printer, pub. Edward L. Wilson, Philadelphia
(1874), p. 202.Fig. 23. J.M. Eder, Die photographischen Copirverfahren mit Silbersalzen (Positiv-
Prozess), Wilhelm Knapp, Halle (1893), p. 73.Fig. 24. W. I. Lincoln Adams, ed., The American Annual of Photography and
Photographic Times Almanac, 1894, Scovill & Adams, New York (1894), p.13.
Fig. 25. W. B. Bolton, ed., The British Journal Photographic Almanac andPhotographer's Daily Companion for 1882, H. Greenwood, London (1882), p.cxxxvi.
Fig. 26. Photographic Mosaics, Edward L. Wilson, pub., Philadelphia (1878), p. 100.Fig. 27. Paris Photo-Gazette, April 25, 1909, p. xiv.Fig. 28. Edward L. Wilson, Wilson's Quarter Century in Photography, pub. Edward L.
Wilson, New York (1887), p. 449.Fig. 29. Charles W. Hearn, The Practical Printer, pub. Edward L. Wilson, Philadelphia
(1878) 2nd ed., p. 18.Fig. 30. Matthew Carey Lea, A Manual of Photography, privately printed, Philadelphia
(1871), 2nd ed., p. 145.Fig. 31. J. Traill Taylor, ed., The British Journal Almanac and Photographer 's Daily
Companion for 1887, Henry Greenwood & Co., London (1887), adv. p. ccviii.Fig. 32. J.M. Eder, Das Atelier und Laboratorium des Photographen, Wilhelm Knapp,
Halle (1893), p. 47.Fig. 33. Hermann W. Vogel, Handbuch der Photographic, Part III, Section II, Die
Photographischen Copirverfahren mit Silber, Eisen, Chrom und Uransalzen,Gustav Schmidt, Berlin (1889), p. 34.
Fig. 34. J.M. Eder, Das Atelier und Laboratorium des Photographen, Wilhelm Knapp,Halle (1893), p. 48.
Fig. 35. Ibid, p. 47.Fig. 36 Andrew Pringle, Practical Photomicrography, Scovill & Adams, New York
(1890), p. 117.Fig. 37. Charles W. Hearn, The Practical Printer, pub. Edward L. Wilson, Philadelphia
(1878), 2nd ed., p. 17.Fig. 38. J.M. Eder, Die photographischen Copirverfahren mit Silbersalzen (Positiv-
Prozess), Wilhelm Knapp, Halle (1893), p. 126.
13 2

Fig. 39. Elbert Anderson, The Skylight and the Dark-Room, Benerman & Wilson,Philadelphia (1872), p. 165.
Fig. 40. M. Albert, La Photographic Moderne, G. Masson, Paris (1896), p. 442.Fig. 41.H. J. Rodges, Twenty-Three Years Under a Skylight, pub. H. J. Rodgers,
Hartford (1872), errata page.Fig. 42. J.M. Eder, Die photographischen Copirverfahren mit Silbersalzen (Positiv-
Prozess), Wilhelm Knapp, Halle (1893), p. 136.Fig. 43. A. H. Elliott and F. P. Smith, eds., The International Annual of Anthony's
Photographic Bulletin, 1894, E. & H. T. Anthony, New York (1894), adv. p.75.
Fig. 44. H. Baden Pritchard, ed., The Year Book of Photography and PhotographicNews Almanac, 1884, Piper & Carter, London (1884), front advertising pages.
Fig. 45. J.M. Eder, Die photographischen Copirverfahren mit Silbersalzen (Positiv-Prozess), Wilhelm Knapp, Halle (1893), p. 142.
Fig. 46. P. H. Emerson, Naturalistic Photography for Students of the Art, Scovill &Adams, New York (1899), p. 281.
Fig. 47. Edward L. Wilson, Wilson's Quarter Century in Photography, pub. Edward L.Wilson, New York (1887), p. 281.
13 3

Also available from Light Impressions
BREAKING THE RULES: A Photo Media CookbookBea NettlesFLAMINGO IN THE DARKBea NettlesTHE GUM BICHROMATE BOOKDavid ScopickHANDBOOK FOR CONTEMPORARY PHOTOGRAPHYArnold GassanPERCEPTION AND PHOTOGRAPHYRichard D. ZakiaPERCEPTUAL QUOTES FOR PHOTOGRAPHERSRichard D. ZakiaPHOTOGRAPHY BETWEEN COVERS: Interviews with Photo-bookmakersThomas DuganPHOTOGRAPHY: Current PerspectivesJerome Leibling, Ed.
Write for free Book CatalogLight Impressions CorporationBox 3012Rochester, NY 14614