thank you for purchasing this digital drum. the drum has · pdf filethank you for purchasing...
TRANSCRIPT
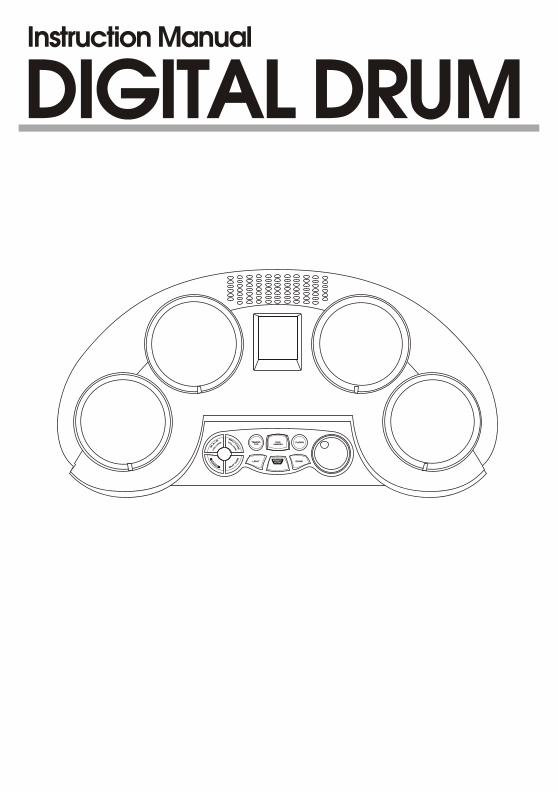

Thank you for purchasing this digital drum. The drum has been developed to act and play like a drum set but with greater ease. Before you use the instrument, we recommend you to read through this manual.
Taking Care of Your Digital DrumYour digital drum will give you years of playing pleasure if you follow the rules shownbelow:
LocationDo not expose the unit to the following
conditions to avoid deformation, discoloration, or more serious damage.! Direct sunlight.! High temperature (near a heat source, or
in a car during the day time).! Excessive humidity.! Excessive dust.! Strong vibration
Power Supply! Turn the power switch OFF when the
instrument is not in use.! If an AC adaptor is used, it should be
unplugged from the AC outlet if the instrument is not to be used for an extended period of time.
! Unplug the AC adaptor during electric storms.
! Avoid plugging the AC adaptor into the same AC outlet as appliance with high power consumption, such as electric heaters or ovens. Also avoid using multi-plug adaptors since these can result in reduced sound quality, operation errors, and possibly damage.
Turn Power OFF When Making Connections! To avoid damage to the instrument and
other devices to which it is connected, turn the power switches of all related device OFF prior to connect ing or disconnecting cables.
Handling and Transport! Never apply excessive force to the
controls, connectors or other parts of the instrument.
! Always unplug cables by gripping the plug firmly, but not pulling on the cable.
! Disconnect all cables before moving the instrument.
! Physical shocks caused by dropping, bumping, or placing heavy objects on the instrument can result in scratches and more serious damage.
Cleaning! Clean the cabinet and panel with a dry soft
cloth.! A slightly damp cloth may be used to
remove stubborn grime and dirt.! Never use cleaners such as alcohol or
thinner.! Avoid placing vinyl object on top of the
unit (vinyl can stick to and discolor the surface).
Electrical Interference! This instrument contains digital circuitry
and may cause interference if placed too close to radio or television receivers. If this occurs, move the instrument further away from the affected equipment.
ContentsSetting Up- Power Supply- Using Headphones
Control Panel- Front Panel- Rear Panel
Playing the Demo Song
Play the Pads- Pad Names- Assign a Voice to Individual Pads
Playing The Game- How to Play?- Starting a New Game
Specifications
Appendix1. Percussion Voice List2. Effect Voice List3. Rhythm List
Playing a Rhythm- Selecting a Rhythm- Adjusting the Tempo- Tap Start- The Drum Pad Indicator- Chord
333
444
5
6-766777
8-988
10-111010
12
13-14131314

Power Supply
Your Digital Drum will run either from batteries or power adaptor. Follow the instructions below according to the power source you intend to use.
Using an AC-AdaptorConnect the power adaptor to the DC
IN jack located on the rear panel of the unit, and plug the AC power adaptor into an AC power outlet.
An optional set of stereo headphones can be connected to the Headphones jack located on the rear panel. When a pair of headphones is connected to the jack, the internal speakers of the unit will switch off automatically, perfect for private practice or late night playing. If you want to use an external sound system, the headphone jack can also be used to connect the digital drum to a stereo system or mixing console.
* Turn the power OFF on a l l equipment before making any connections.
Using Batteries
1 Open the battery compartment cover on the underside of the unit.
2
OPEN
Insert six "C" size, R14, SUM-2 or equivalent batteries. When insertingthe batteries, be care to follow thepolarity markings in the illustration.
3 Close the battery compartment securely.
OPEN
NOTES Power will be automatically drawn from the AC adaptor if an optional AC adaptor is connected while batteries are installed in the instrument.
CAUTION It is recommended that you replace worn batteries as soon as possible. When battery voltage drops, the display will dim and/or the sound will becomedistorted. When this occurs, replace the batterieswith a complete set of six new batteries of the same type.
NEVER mix old and new batteries, different types ofbatteries (alkaline, magnesium, etc.), batteries bydifferent makers, or batteries from the same makerbut of different types.Misuse may cause the instrument to become hot,result in fire, or battery leakage.
Also, to prevent damage due to battery leakage,remove all the batteries from the instrument when it is not to be used for an extended period of time.Batteries left in an unused instrument will also loose their power overtime.
AC power socket
Using Headphones
Do not use adaptors other than the onespecified. The technical specificationof the adaptor is 9V DC output, 800mA,centre positive type.
Setting Up
3
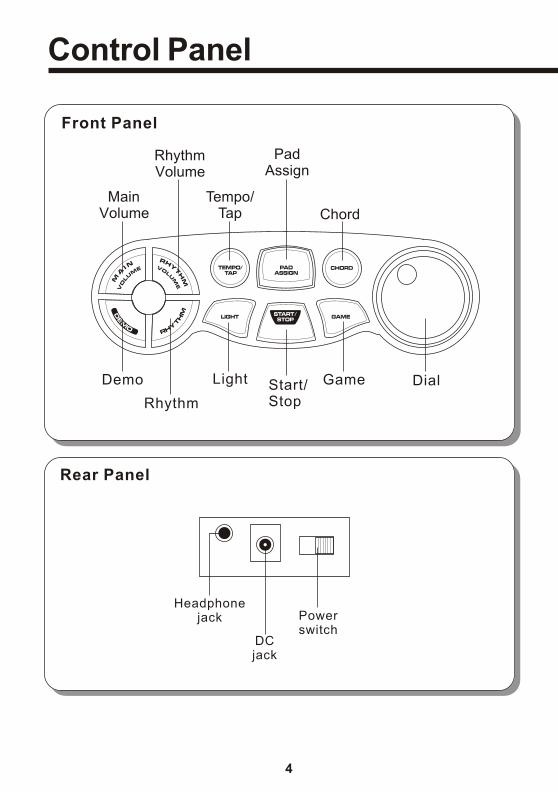
Control Panel
DialDemo
Rhythm
Light Start/Stop
Game
MainVolume
RhythmVolume
Tempo/Tap
PadAssign
Chord
Headphonejack
DCjack
Powerswitch
Front Panel
Rear Panel
4
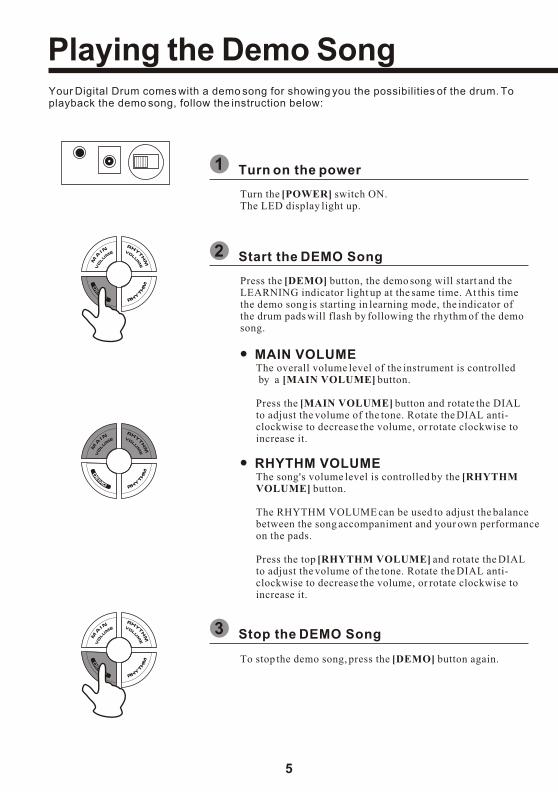
Playing the Demo SongYour Digital Drum comes with a demo song for showing you the possibilities of the drum. Toplayback the demo song, follow the instruction below:
1 Turn on the power
Turn the [POWER] switch ON.The LED display light up.
2 Start the DEMO Song
Press the [DEMO] button, the demo song will start and the LEARNING indicator light up at the same time. At this time the demo song is starting in learning mode, the indicator of the drum pads will flash by following the rhythm of the demo song.
MAIN VOLUMEThe overall volume level of the instrument is controlled by a [MAIN VOLUME] button.
Press the [MAIN VOLUME] button and rotate the DIAL to adjust the volume of the tone. Rotate the DIAL anti-clockwise to decrease the volume, or rotate clockwise to increase it.
RHYTHM VOLUMEThe song's volume level is controlled by the [RHYTHM VOLUME] button.
The RHYTHM VOLUME can be used to adjust the balance between the song accompaniment and your own performance on the pads.
Press the top [RHYTHM VOLUME] and rotate the DIAL to adjust the volume of the tone. Rotate the DIAL anti-clockwise to decrease the volume, or rotate clockwise to increase it.
3 Stop the DEMO Song
To stop the demo song, press the [DEMO] button again.
5

Playing a RhythmYour Digital Drum features 50 different rhythms that can be used to provide accompaniment.Select one of the rhythm and listen to it.
Selecting a Rhythm
1 Press the [RHYTHM] button
Press the [RHYTHM] button, the currently selected song number will appear on the display.
2 Select a rhythm
Use the DIAL to select a rhythm. Rotate the DIAL anti-clockwise to decrease the volume, or rotateclockwise to increase it.
3 Press the [START/STOP] button
Press the [START/STOP] button to start the playback.
Note: You can also use the TAP function to start the songs(see page 7)
Adjusting the Tempo
The tempo of a rhythm can be set anywhere from 40 to 240 beats per minute. As the tempo value increase, the tempo will become faster.
Press the [TEMPO/TAP] button
Press the [TEMPO/TAP] button, the current tempowill appear on the display
1
Rotate the DIAL
Use the DIAL to adjust the tempo. Rotate the DIAL anti-clockwise to decrease, or rotate clockwise to increase it.
2
6

Playing a Rhythm
Tap Start
The TAP START function allows you to set the song's overall tempo as well as start theaccompaniment. The accompaniment will playback at the tempo with which the pads are struck.
Press the [TEMPO/TAP] button
Press the [TEMPO/TAP] button, the current tempowill appear on the display
1
Tap Start
Strike any pad four times, the accompaniment willstart at the desired tempo. The tempo corresponds to the speed of the last 2 times you strike the pads.
2
Stop the Playback
To stop the playback, press the [START/STOP] button.
3
The Drum Pad Indicators
Turn on/off the Drum Pad indicators
You can turn on/off the Drum Pad indicators at anytime while playing. Press the [LIGHT] button once and the status will appear on the display.
Chord
Turn on/off the Chord
You can turn on/off the Chord during the playback or while the accompaniment is stopping.Press the [CHORD] button once and the status willappear on the display.
7

Play the Pads
Assign a Voice to Individual Pads
The Digital Drum has a total of 40 percussion sounds and 10 sound effects that can be assigned to each of the 4 drum pads.
2 Press the [PAD ASSIGN] button
Press the [PAD ASSIGN] button. PAD ASSIGN indicator appear on the display and the indication light below Pad 1light up.
Pad Names
Pad 1
Pad 2 Pad 3
Pad 4
8
1 Select a Rhythm
Rotate the DIAL to select a Rhythm that you want to assign the pads.
Play the Pads
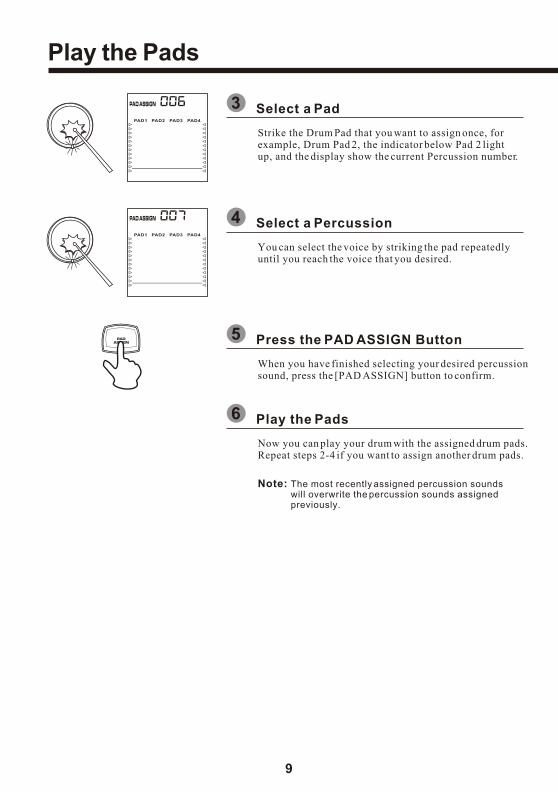
4 Select a Percussion
You can select the voice by striking the pad repeatedlyuntil you reach the voice that you desired.
5 Press the PAD ASSIGN Button
When you have finished selecting your desired percussionsound, press the [PAD ASSIGN] button to confirm.
6 Play the Pads
Now you can play your drum with the assigned drum pads.Repeat steps 2-4 if you want to assign another drum pads.
9
3 Select a Pad
Strike the Drum Pad that you want to assign once, for example, Drum Pad 2, the indicator below Pad 2 lightup, and the display show the current Percussion number.
Note: The most recently assigned percussion soundswill overwrite the percussion sounds assigned previously.

Playing the Game
Starting a New Game
The Digital Drum's Game feature let the player learn and play a rhythm by following thedropping bars on the screen. When the dropping bars of the pad goes beyond the line at the bottom of the display, strike the corresponding pads.
Press the [GAME] button
Press the [GAME] button, the GAME indicatorappear on the display.
1
Select a rhythm to play
Rotate the DIAL to select to select a rhythm to playwith. Each rhythm has its own level shown belowthe GAME indicator:
2
~~~
Easy
Normal
Hard
Start the Game
Press the [START/STOP] button, the bars of the corresponding pads start falling from the top of the screen, as well as the indication lights of each padstart flashing. You can strike the pads with flashingindication lights, or strike the pads until the droppingbars of each pad reaches the line at the bottom of the display.
3
How to Play?
1
The bars of each pads are dropping.
2When the bar drops beyond the line, strike the pad.(In the screen shot on the left, strike PAD3)
10

Score
After playing the whole rhythm for 3 times, it willstop and display your score. You will hear a voice comment according to your performance.
4
Playing the Game
Score0-29
30-5960-79
80-100
CommentOK
GOODVERY GOODEXCELLENT
Stop the Game
The game will automatically restart after displayingthe score for 3 seconds. To stop the game, just press[START/STOP] at anytime. Press [GAME] buttonto exit Game mode.
5
11

Specifications
Pads:Drum Voices:Rhythms:Demo Song:Panel Controls:
Connectors:
Power Source:
Dimensions:Weight:
4 Drum Pads with Indication Lights40 Percussion Voices + 10 Effect Voices501 POWER ON/OFF, MAIN VOLUME, RHYTHM VOLUMEDEMO, RHYTHM, TEMPO/TAP, PAD ASSIGN, CHORD,LIGHT, START/STOP, GAME, DIALHEADPHONESDC 9V (AC Adaptor)Six "C" size, SUM-2, R14, or equivalent batteriesDC 9V adaptor, 800mA 460(W) X 260(D) X 150(H) mm1.5kg (without batteries)
Touch Sensitive
12

Appendix
1. Percussion Voice List
No. Name
BASS DRUM0102030405
Bass Drum HardBass DrumBass Drum RockBass Drum HBass Drum Analog LSNARE DRUM
0607080910111213
Side StickSnare MSnare H HardSnare Drum Rock LSD Rock RimAnalog Rim ShotAnalog Snare 1Analog Snare H
HI-HAT14
151617
Hi-Hat Closed/Hi Hat OpenHi-Hat PedalAnalog HH Closed 1Analog HH-Open
TOM18192021
Floor Tom LLow TomMid Tom LHigh Tom
No. Name
CRASH2223
Crash Cymbal 1Analog Cymbal
RIDE24 Ride Cymbal 1
PERCUSSION25262728293031323334353637383940
Metronome ClickMetronome BellHand ClapTambourineCowbellHi BangoLow BangoConga H OpenConga LTimbale HCabasaMaracasClavesTriangle OpenTriangle MuteAnalog Cowbell
2. Effect Voice List
No. Name41424344454647484950
OneTwo
ThreeFourOK
GoodVery GoodExcellent
FXBLJ Trill
13

Appendix
3. Rhythm List
No. Name
8 Beat010203040506070809
8 Beat8 Beat Ballad8 Beat Pop8 Beat RockRock 1Rock 2Hard Rock Heavy Metal 1Heavy Metal 2
16 Beat10111213
16 Beat 16 Beat Ballad16 Beat Pop16 Beat Funk
Funk141516
FunkFunk PopBlues Funk
Dance1718192021222324
Pop DanceDiscoHourseHip-HopRapShuffleSlow RockSoul
No. Name
Jazz25262728293031
Cool JazzJazz SwingBlues 1Blues 2Fusion 1Fusion 2Bounce
Latin3233343536373839
Reggae 1Reggae 2Bossa NovaSambeLatin RockCha-ChaMamboRhumba
Country4041
CountryCountry RockMarch & Waltz
42434445
MarchPolkaWaltz 1Waltz 2Sound Effect
4647484950
SFX 1SFX 2SFX 3SFX 4SFX 5
14