technology grade 7 - openstax cnx · pdf fileremember to report all accidents, ... then clean...
TRANSCRIPT

Technology Grade 7
By:Siyavula Uploaders


Technology Grade 7
By:Siyavula Uploaders
Online:< http://cnx.org/content/col11032/1.1/ >
C O N N E X I O N S
Rice University, Houston, Texas

This selection and arrangement of content as a collection is copyrighted by Siyavula Uploaders. It is licensed under
the Creative Commons Attribution 3.0 license (http://creativecommons.org/licenses/by/3.0/).
Collection structure revised: September 10, 2009
PDF generated: October 28, 2012
For copyright and attribution information for the modules contained in this collection, see p. 115.

Table of Contents
1 Term 11.1 Safety . . . . . . . . . . . . . . . . . . . . . . . . . . . . . . . . . . . . . . . . . . . . . . . . . . . . . . . . . . . . . . . . . . . . . . . . . . . . . . . . . . . . . . . 11.2 Transport . . . . . . . . . . . . . . . . . . . . . . . . . . . . . . . . . . . . . . . . . . . . . . . . . . . . . . . . . . . . . . . . . . . . . . . . . . . . . . . . . . . 71.3 Making a rocket . . . . . . . . . . . . . . . . . . . . . . . . . . . . . . . . . . . . . . . . . . . . . . . . . . . . . . . . . . . . . . . . . . . . . . . . . . . . . 91.4 Finding arocket's centre of gravity . . . . . . . . . . . . . . . . . . . . . . . . . . . . . . . . . . . . . . . . . . . . . . . . . . . . . . . . . . 171.5 Launching the rocket . . . . . . . . . . . . . . . . . . . . . . . . . . . . . . . . . . . . . . . . . . . . . . . . . . . . . . . . . . . . . . . . . . . . . . . 21
2 Term 22.1 Why people travel into unknown territories . . . . . . . . . . . . . . . . . . . . . . . . . . . . . . . . . . . . . . . . . . . . . . . . . 272.2 Water-wheels . . . . . . . . . . . . . . . . . . . . . . . . . . . . . . . . . . . . . . . . . . . . . . . . . . . . . . . . . . . . . . . . . . . . . . . . . . . . . . . 312.3 Making water-wheels . . . . . . . . . . . . . . . . . . . . . . . . . . . . . . . . . . . . . . . . . . . . . . . . . . . . . . . . . . . . . . . . . . . . . . . 332.4 Designing a water-wheel . . . . . . . . . . . . . . . . . . . . . . . . . . . . . . . . . . . . . . . . . . . . . . . . . . . . . . . . . . . . . . . . . . . . 36
3 Term 33.1 What is electricity? . . . . . . . . . . . . . . . . . . . . . . . . . . . . . . . . . . . . . . . . . . . . . . . . . . . . . . . . . . . . . . . . . . . . . . . . 453.2 Electrical safety . . . . . . . . . . . . . . . . . . . . . . . . . . . . . . . . . . . . . . . . . . . . . . . . . . . . . . . . . . . . . . . . . . . . . . . . . . . . 503.3 An electronic maths game Part 1: the design . . . . . . . . . . . . . . . . . . . . . . . . . . . . . . . . . . . . . . . . . . . . . . . 573.4 An electronic maths game Part 2: Mathematics game . . . . . . . . . . . . . . . . . . . . . . . . . . . . . . . . . . . . . . . 653.5 An electronic maths game Part 3: making the game . . . . . . . . . . . . . . . . . . . . . . . . . . . . . . . . . . . . . . . . 693.6 Designing and making a warning system . . . . . . . . . . . . . . . . . . . . . . . . . . . . . . . . . . . . . . . . . . . . . . . . . . . . 733.7 The need for clothing . . . . . . . . . . . . . . . . . . . . . . . . . . . . . . . . . . . . . . . . . . . . . . . . . . . . . . . . . . . . . . . . . . . . . . . 773.8 The textile industry . . . . . . . . . . . . . . . . . . . . . . . . . . . . . . . . . . . . . . . . . . . . . . . . . . . . . . . . . . . . . . . . . . . . . . . . 783.9 Making a garment . . . . . . . . . . . . . . . . . . . . . . . . . . . . . . . . . . . . . . . . . . . . . . . . . . . . . . . . . . . . . . . . . . . . . . . . . . 82
4 Term 44.1 What is food technology? . . . . . . . . . . . . . . . . . . . . . . . . . . . . . . . . . . . . . . . . . . . . . . . . . . . . . . . . . . . . . . . . . . 894.2 Structures . . . . . . . . . . . . . . . . . . . . . . . . . . . . . . . . . . . . . . . . . . . . . . . . . . . . . . . . . . . . . . . . . . . . . . . . . . . . . . . . . . 964.3 Make your own laminated bracelet . . . . . . . . . . . . . . . . . . . . . . . . . . . . . . . . . . . . . . . . . . . . . . . . . . . . . . . . . . 984.4 Reinforcing doors and windows . . . . . . . . . . . . . . . . . . . . . . . . . . . . . . . . . . . . . . . . . . . . . . . . . . . . . . . . . . . . . 994.5 Project Portfolio . . . . . . . . . . . . . . . . . . . . . . . . . . . . . . . . . . . . . . . . . . . . . . . . . . . . . . . . . . . . . . . . . . . . . . . . . . 108
Attributions . . . . . . . . . . . . . . . . . . . . . . . . . . . . . . . . . . . . . . . . . . . . . . . . . . . . . . . . . . . . . . . . . . . . . . . . . . . . . . . . . . . . . . . .115

iv
Available for free at Connexions <http://cnx.org/content/col11032/1.1>
Chapter 1
Term 1
1.1 Safety1
1.1.1 TECHNOLOGY
1.1.2 Grade 7
1.1.3 TRANSPORT
1.1.4 Module 1
1.1.5 SAFETY
Uses safe working practices and shows awareness of e�cient ways of using materials and tools.Safety procedures are a most important aspect of being in any workshop and you should make sure that
you know and practise them from the start. Make sure that you know where to �nd the emergency buttonand the �rst aid box. Remember to report all accidents, no matter how small, to your teacher.
• Always wear an apron or overcoat to protect your clothes and sensible footwear to protect your feet.• Take o� your blazer or jersey, roll up your sleeves and tuck your tie out of the way.• Long hair should be tied back.• Any jewellery you may be wearing should be removed.• Never fool around with any tools.• Never run or play in a workshop, especially with a sharp tool in your hand.• You are allowed to talk quietly, but you should not shout.• You must never work alone or without permission in any workshop or practical area.• Read all instructions for using tools carefully and make sure that you follow them.• Take great care when carrying tools or materials. Carry sharp tools close to your body and facing
downwards.• Never misuse tools of any sort.• Replace tools after use.• Be sure to keep your bench and �oor area tidy.• Never use a machine without permission or the correct training.• Never use electric tools in damp or wet conditions.• There must never be more than one person operating or near a machine at any time.• Clean machines after you have used them, and report any problems or damage to your teacher. Blunt
or damaged items should be changed.• When you have �nished work, wash and dry your hands properly.
1This content is available online at <http://cnx.org/content/m23101/1.1/>.
Available for free at Connexions <http://cnx.org/content/col11032/1.1>
1

2 CHAPTER 1. TERM 1
• Be especially thorough if you have been using oil, chemicals, paints or resins.• Never hold the wood in your hand while you saw it with the other hand.• Never screw into a piece of wood held in your hand.• Never chisel towards your hand or body.
• Use a bench hook for cutting spars or dowels.• Always keep your tools tidy and out of other people's way.
1.1.6 ELECTRICAL SAFETY
Much of the equipment used in class requires electrical power from either batteries or the mains. Rememberthat moisture and water conduct electricity. Care should be taken when handling electronic components,such as capacitors. Batteries are best kept in separate containers when not in use. Return them at the endof the lesson. Do not put projects away with batteries in place or connected. Do not be tempted to tinkerwith mains electricity. If you come into contact with a live wire an electric shock or fatal accident could bethe result. Electric shocks can cause severe burns and other injuries, so always take care.
1.1.7 Plugging IN
• Check that the appliance is switched o�.• Check that the socket is switched o�.• Make sure that the lead and plug are not damaged.• Plug in.• Switch on the socket.• Switch on the appliance.
1.1.8 Switching OFF
• Switch o� the appliance.• Switch o� the socket.• Remove the plug from the socket.
You must not use an electrical appliance without either a teacher in the room or at least two other pupils inthe room and a teacher close at hand. If you are present when a person receives an electric shock you mustcarry out the following procedure
• Do not touch the person.• Send for adult help.• Press the stop button to cut o� the mains power.• Switch o� the appliance at the socket and pull out the plug.• If this is not possible, try to push them away from the electricity. Use something made of wood which
does not conduct the electricity to you.• If you are certain that the power is o�, then you can attempt to give the person �rst aid if you have
been trained to do it.• If you give yourself a slight electric shock you may feel weak, so relax a bit before carrying on working.
N.B.: Take good care of a person who has been injured. Keep him / her warm, let him / her lie down andcall for help.
Available for free at Connexions <http://cnx.org/content/col11032/1.1>

3
1.1.9 SAFETY MEASURES with regard to
1.1.10 SCISSORS
• A scissors must be good quality, sharp and in good working order.• Never let the tips of the scissors close when cutting a line greater than the length of the blades.• When cutting curves always turn the card and not the scissors.
1.1.11 CRAFT KNIVES
• Only to be used under very close supervision together with a metal safety ruler.• Cut onto a suitable safety surface e.g. Very thick card/ cutting board.• Stand when you cut and retract the blade when you need to put it away.• The blade should not be to far out.• You are allowed with the knife in your hand only when you are going to cut.
1.1.12 DRILLS
• You should know how to change twist drills, how to hold the hand drill and how to keep it at rightangles to their work.
• The material to be drilled must be cramped securely.• Do not remove the chuck completely as it is very di�cult to reassemble.• Select the appropriate twist drill � choosing one too small rather than one too big if in doubt.• When drilling turn the handle in a clockwise direction and continue turning the same way when
removing the drill bit from the hole.• Hand drills are for holes up to 6mm in diameter; use a brace and bit for larger holes.• Never leave a hand drill lying on a work top as it can so easily fall o� and damage the twist drill.
1.1.13 GLUE GUNS
• Must only be used under very close supervision.• It is suitable for wood, metals and certain plastics.• When it is switched on and not in use ensure that it is correctly positioned on its stand.• Switch o� after use.• Be careful of glue that drips and put it away after the gun is cooled o�.
1.1.14 GENERAL
• When sawing plastics and metals, safety spectacles should be worn, because there is a risk of eyedamage.
• Some plastics become pliable when heated but care must be taken to control the temperature becausethe burning of plastics is dangerous as many give o� poisonous fumes.
• Polysterene should be cut with a hot wire cutter set low and used in a well ventilated room.
1.1.15 SOLDERING IRONS
• Soldering irons must be treated with respect. They often use mains electricity and get very hot.
Available for free at Connexions <http://cnx.org/content/col11032/1.1>
4 CHAPTER 1. TERM 1
1.1.16 The rules for correct use are as follows:
1. Do not leave them switched on for possible future use. Always switch them o� when not in use, becausethis will prolong the life of the iron.
2. Never touch the mains lead with the tip of the iron. It will melt and expose bare wires which couldlead to an electric shock.
3. Always use a proper soldering iron stand. Failure to do so will mean that there is a risk of the hot ironsetting �re to things.
4. Avoid breathing in the resin fumes from the �ux.5. Protect the work surface with hardboard.
First aid for other injuries
1.1.17 Small cuts
• Wash the cut in cold water to clean it and stop the bleeding. Dry well with a clean cloth and cover itwith sticky plaster to keep it clean.
1.1.18 SERIOUS CUTS
• Press the wound hard with a clean handkerchief, tissue or your hands to reduce the bleeding.• Put the wound higher than the rest of your body to lessen the �ow of blood.• Find or call someone to help you.
1.1.19 SPLINTERS
• Sterilize tweezers or a needle in the blue part of a �ame.• Make sure you get all the splinter out.• Then clean the wound with antiseptic liquid and cover it with sticky plaster.
1.1.20 BRUISES
• Wash with cold water to reduce bruising and swelling.• A bruised �ngernail may go black. If very painful, see a doctor.• Blood blisters should be left to dry up, not popped.
During investigations, plans a strategy for collecting data and information that includes:
• using search techniques;• extracts relevant data for speci�c purposes;• produces meaningful summaries.
1.1.21 Activity 1:
1.1.22 To draw up a list of safety measures
1.1.23 [LO 1.11]
Write down �ve rules that you must obey with regard to wearing the correct clothing in the Technologyclass.
Available for free at Connexions <http://cnx.org/content/col11032/1.1>

5
1.1.24 Activity 2:
1.1.25 To emphasise safe working practices
1.1.26 [LO 1.11]
Explain the rule that applies to each of the following sketches:
Figure 1.1
Available for free at Connexions <http://cnx.org/content/col11032/1.1>

6 CHAPTER 1. TERM 1
Figure 1.2
Figure 1.3
Available for free at Connexions <http://cnx.org/content/col11032/1.1>

7
1.1.27 Activity 3:
1.1.28 To write a short and clear statement about the safe handling of tools
1.1.29 [LO 1.11]
Produce a short rule with a �tting lettering design for any tool that you use in the Technology class, forexample soldering irons, utility knives, glue guns, drills, saws, ex. The emphasis in the lettering type, shouldbe that it should be easily readable, a warning and informational. The rule/s must focus on a safety aspect.
Bright colours, a bold lettering style and asymmetrical lettering would be regarded as suitable. The bestexamples will be laminated and put up in the class. You must use a computer or stencils for your �nalproduct.
1.1.30 Assessment
Learning outcomes(LOs)
LO 1
Technological processes and skillsThe learner will be able to apply technological processes and skillsethically and responsibly using appropriate information and communication technology.
Assessment standards(ASs)
We know this when the learner:
Investigates:1.3 investigates the background context, the nature of the need, the environmental situation,and the people concerned when given a problem, need or opportunity set in a local context;
Designs:1.7 generates at least two alternative solutions and annotates the ideas;
1.8 chooses possible solutions, gives sensible reasons for choice, and develops a chosen idea using graphicsor modelling techniques;
Makes:1.10 chooses and uses appropriate tools and materials to make products by measuring, marking,cutting or separating, shaping or forming, joining or combining, and �nishing di�erent materials withsome accuracy;
1.11 use safe working practices and shows awareness of e�cient ways of using materials and tools;
Table 1.1
1.2 Transport2
TECHNOLOGYGrade 7TRANSPORTModule 2TransportFor the teacher:This unit can be done in groups.Background
2This content is available online at <http://cnx.org/content/m29611/1.1/>.
Available for free at Connexions <http://cnx.org/content/col11032/1.1>

8 CHAPTER 1. TERM 1
Planes �y at high speeds. They have large engines that let out a powerful source of air that propels theplane through the air. To illustrate quite simply how a plane or a rocket works, you can make a balloon �y.
Activity 1:How to make a balloon �y[LO 1.3]Requirements:A piece of string, about 5 m long.Adhesive tape.A balloon.A drinking straw.A clothes-peg.Method:Thread the piece of string through the drinking straw.Fasten the string in two places, e.g. between two chairs so that it stretches over a distance and is stretched
tightly.Stick two pieces of adhesive tape to the drinking straw.In�ate the balloon and close the opening with a clothes-peg. Stick the balloon to the drinking straw with
the two pieces of adhesive tape.Move the balloon to one end of the string. Let go of the balloon by removing the peg.What are your observations?The balloon with the string �ies at a high speed.The stream of air rushes out at the opening and pushes the balloon forward. It is a reaction to an action,
i.e. the movement in one direction (air that is exhausted at the rear end) causes movement in the oppositedirection (balloon moves forward).
Background: How does the engine of a plane or a rocket work?The large blades of the turbine draw air in at the front and compress it. Fuel is burned in the air and
this causes the air to heat up. Following that, the warm air is exhausted at the rear end of the engine. Itcauses the plane/rocket to move forward at a high speed. This reaction has been known to man for almost2 000 years, but it was only used in an engine for the �rst time in 1930.
The thrust exerted by moving air or water can cause objects to perform work or can even generateelectricity. Air under pressure and a liquid like water can therefore be used to make things work.
The purpose of a rocket is to get a satellite or astronauts into outer space. To achieve that, gravity, i.e.the force that attracts everything to the earth, must be overcome. If the engines of a rocket are not strong,gravity will win and will pull the rocket back to earth. If the force applied by the rocket and the gravitywith which the earth attracts the rocket are equal, the rocket will continue to orbit the earth.
Activity 2:To launch your own rocket[LO 1.3]For the teacher:It is better to do this experiment outside.Requirements:5 ml bicarbonate of soda.One sheet of paper towelling.125 ml water.125 ml vinegar.A 2` plastic cool drink bottle.A cork that �ts tightly in the mouth of the bottle with some trimming at the top.Method:Put 5 ml of bicarbonate of soda exactly in the centre of the sheet of paper towelling. Roll the sheet up
and fold the ends in so that the bicarbonate of soda is tucked safely inside.Take the 2` plastic bottle and put 125 ml water and 125 ml vinegar in the bottle.
Available for free at Connexions <http://cnx.org/content/col11032/1.1>

9
Decorate the cork with a ribbon.Put the paper towel inside the bottle and put the cork on the bottle immediately so that it �ts tightly,
but not too tightly.Stand about 3 m away and see what happens.Observation?The cork is blown into the air like a rocket being launched..Conclusion:A chemical reaction between the vinegar (representing the liquid oxygen) and the bicarbonate of soda
(representing the fuel) produces the gas, carbon dioxide. The air forming in the bottle exerts pressureagainst the cork and causes the cork to shoot up into the air. During the launching of a real rocket, the gasis exhausted from the rocket, causing it to move forward/upward.
NB: It is dangerous to play with chemicals, and irresponsible handling of these substances could lead toserious injuries as a result of explosions or burning. Therefore, be very careful. Wear goggles to protect youreyes and only work under supervision of your educator.
Assessment
Learning outcomes(LOs)
LO 1
Technological processes and skillsThe learner will be able to apply technological processes and skillsethically and responsibly using appropriate information and communication technology.
Assessment standards(ASs)
We know this when the learner:
Investigates:1.3 investigates the background context, the nature of the need, the environmental situation,and the people concerned when given a problem, need or opportunity set in a local context;
Table 1.2
1.3 Making a rocket3
1.3.1 TECHNOLOGY
1.3.2 Grade 7
1.3.3 TRANSPORT
1.3.4 Module 3
1.3.5 MAKING A ROCKET
Design and realiseBackgroundA rocket relies on jet propulsion in order to �y. When a rocket uses its fuel, a current of warm air is
exhausted at its tail causing the rocket to move forward. Planes that �y at lower than 25 km use the oxygenin the atmosphere to ignite (burn up) their fuel.
3This content is available online at <http://cnx.org/content/m23109/1.1/>.
Available for free at Connexions <http://cnx.org/content/col11032/1.1>

10 CHAPTER 1. TERM 1
Rockets have to carry oxygen with them, because above 25 km from the earth's surface there is notenough oxygen.
Make a RocketBackgroundWe are now going to make a rocket that will use jet propulsion in order to move forward. The speed
with which a rocket moves forward depends on the amount of propellant gas that is exhausted at the rearend. Water is a much better propellant than warm gas, because it is much heavier. We are going to usecompressed water and air and will make observations regarding how high/far your rocket can �y.
1.3.6 ASSIGNMENT 1:
1.3.7 To �nd the requirements needed for the rocket
1.3.8 [LO 1.10]
Requirements:
• Thin cardboard.• A pen.• A ruler.• Coloured cardboard.• A pair of scissors.• Two empty.• 2` plastic bottles.• Strong broad adhesive tape or masking tape.• A funnel.• A jug of water.• A cork.• An air valve (from a bicycle pump).• Plastic tube.• A bicycle pump.• A plastic bank coin pouch.• A protractor.• Glue.• A Stanley knife.• A stiletto or a knitting-needle.• A pair of compasses.• Oil-based paint.
BackgroundA plane or rocket operates according to Newton's third law of movement, namely if one source exerts
a force on another, then the other source exerts the same amount of force on the �rst source, but in theopposite direction from the �rst source; i.e. for each action there is an opposite reaction.
If the force you exert on something is bigger than the resistance exerted by that object, the force thatyou exert can cause movement. The movement in the rocket is brought about by the rocket being pushedupward by the escaping gases that were generated as a result of the chemical reaction between the fuel andthe oxygen that are burnt up in the combustion chambers. The large volume of gases escapes at a high speedthrough the rocket's steel exhaust pipe.
There are �ve types of force that act upon a rocket, namely:Thrust: the force provided by the engine, which is exhausted at the rear end and which pushes the
rocket forwardGravity: the force that pulls the rocket back to earth
Available for free at Connexions <http://cnx.org/content/col11032/1.1>

11
Resistance: This is exerted by the air against the rocket, causing the rocket to reduce its speed. (Outsidethe atmosphere, there is no resistance, because there is no air.)
Lifting force: A rocket cannot be launched e�ectively and rise vertically unless the lifting force of itsengines is greater than the weight of the rocket.
Relative wind: The air �ows rapidly around the nose and down the body. Longer nose-pieces are usedto get better air�ow.
1.3.9 ASSIGNMENT 2:
1.3.10 To do research on the �ns of a rocket
1.3.11 [LO 1.7]
BackgroundA rocket needs �ns in order to �y in a straight line. Do research about what the �ns of a rocket look
like and draw a few examples in the space provided. Also decide how many �ns you would like to use andwhat size the �ns will have to be in relation to the body section of the rocket. Also, decide what type ofmaterial will be the most suitable for making the �ns. The position of the �ns on the body is also extremelyimportant.
Available for free at Connexions <http://cnx.org/content/col11032/1.1>

12 CHAPTER 1. TERM 1
Figure 1.4
Available for free at Connexions <http://cnx.org/content/col11032/1.1>

13
Figure 1.5
1.3.12 ASSIGNMENT 3:
1.3.13 [LO 1.10]
Use the sketch in Appendix 1. It is important to give the rocket tail-�ns so that it will be able to standupright for the launch (See Appendix 1). Stick the page onto cardboard. Cut out the �n. Use the templateof the �n and trace four �ns on thicker, more rigid cardboard. Cut them out carefully. Fold on the dottedline and stick the �ns around the bottle at equal distances. (Look at the sketch to see exactly where.)
1.3.14 ASSIGNMENT 4:
1.3.15 [LO 1.10]
NB:Do you know how to enlarge this sketch of a �n according to scale/proportional to a �n of ± 20 cm?
• Draw squares across the sketch: 4 in the breadth and 8 in the length..• In this case, each square is 5 mm by 5 mm.• Draw squares of 30 mm by 30 mm on an A4 sheet of paper � 4 in the breadth and 8 in the length (8
x 30 mm = 240 mm that will give a �n of ± 20 cm).• Now trace the pattern onto the larger squares.• Now you have a �n of ± 20 cm
Available for free at Connexions <http://cnx.org/content/col11032/1.1>

14 CHAPTER 1. TERM 1
Figure 1.6
1.3.16 ASSIGNMENT 5:
1.3.17 Decide which type of body �n will be the most suitable and draw a clearfreehand sketch of your choice
1.3.18 [LO 1.8]
1.3.19 ASSIGNMENT 6:
1.3.20 To make a �nal drawing (correct size with captions) of the body �n on asheet of paper. Use it as a template to trace onto a thicker sheet of cardboard.(Use the method as explained in Assignment 4).
1.3.21 [LO 1.14]
1.3.22 ASSIGNMENT 7:
1.3.23 To build the body of the rocket according to the following instructions
1.3.24 [LO 1.14]
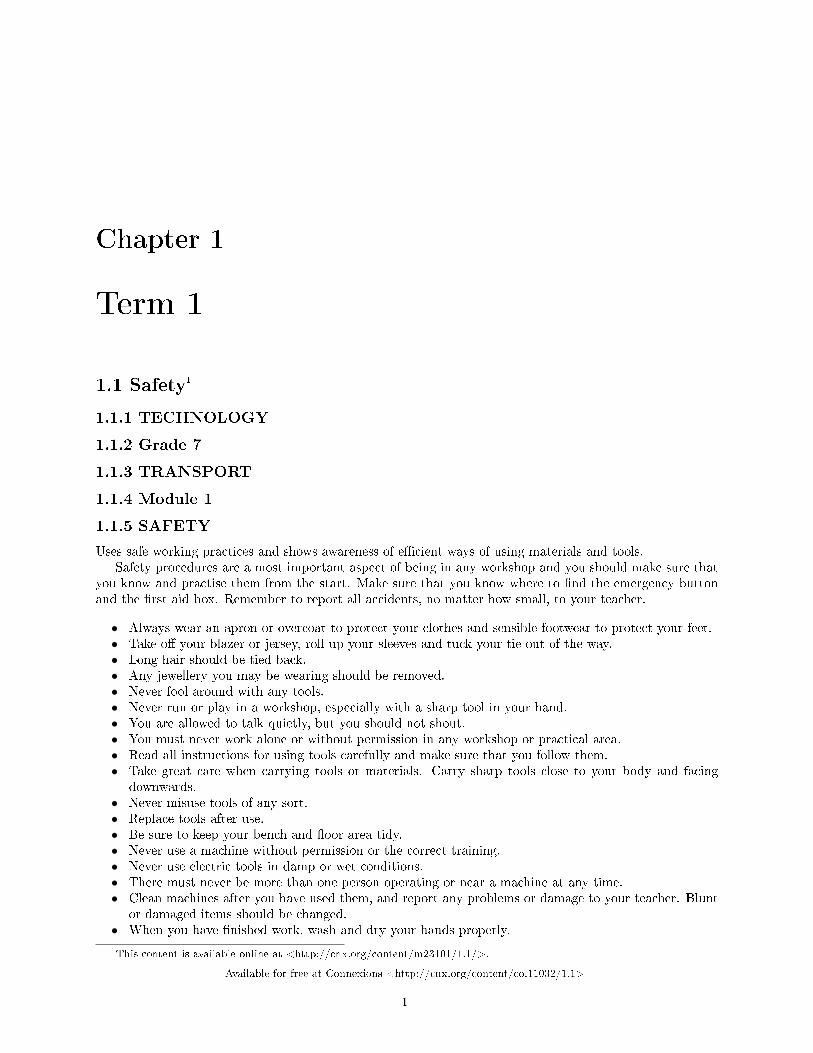
InstructionsMake the body of the rocket by following the instructions below. Cut one 2` bottle right through along
the second line just below the sticker (Sketch 1). The part that has the cork in it will be the top section ofyour rocket. The intact bottle with the opening pointing down forms the lower section of your rocket. Youneed a weight in the top section of your rocket.
Why?
• The rocket is not balanced when the engine is in the lower section. That is the heavier section. Youhave to �nd a centre of gravity, so that the mass can be spread proportionally on both sides.
• It is therefore necessary to put something heavy in the upper section of your rocket so that the rocketcan be more stable.
• When the fuel is added, the lower section of the rocket will be even heavier.• When a rocket is stable, it continues �ying vertically upwards, without overturning and losing direction.• So put a few fairly big pebbles in a plastic bank coin pouch and stick it �rmly to the bottom on the
outside of the intact bottle that is being held upside-down (Sketch 2).• Now put the top section of the bottle that has been cut through on top and stick it �rmly to the intact
bottle with masking tape/strong wide adhesive tape (Sketch 3).
Available for free at Connexions <http://cnx.org/content/col11032/1.1>
15
Figure 1.7
Figure 1.8
Available for free at Connexions <http://cnx.org/content/col11032/1.1>

16 CHAPTER 1. TERM 1
Figure 1.9
1.3.25 ASSIGNMENT 8:
1.3.26 In the space below, draw a top view of the position of the �ns. Use aprotractor and pocket calculator for correct spacing
1.3.27 [LO 1.14]
Now a�x the �ns as planned. Once the rocket has been tentatively completed, it is now necessary to �ndyour rocket's centre of gravity and its centre of pressure.
1.3.28 Assessment
Learning outcomes(LOs)
LO 1
Technological processes and skillsThe learner will be able to apply technological processes and skillsethically and responsibly using appropriate information and communication technology.
continued on next page
Available for free at Connexions <http://cnx.org/content/col11032/1.1>

17
Assessment standards(ASs)
We know this when the learner:
Investigates:1.3 investigates the background context, the nature of the need, the environmental situation,and the people concerned when given a problem, need or opportunity set in a local context;
Designs:1.7 generates at least two alternative solutions and annotates the ideas;
1.8 chooses possible solutions, gives sensible reasons for choice, and develops a chosen idea using graphicsor modelling techniques;
Makes:1.10 chooses and uses appropriate tools and materials to make products by measuring, marking,cutting or separating, shaping or forming, joining or combining, and �nishing di�erent materials withsome accuracy;
1.11 use safe working practices and shows awareness of e�cient ways of using materials and tools;
Evaluates:1.12 evaluates the product or system based on criteria linked directly to the design brief andsome of the speci�cations and constraints, and suggests improvements or modi�cations;
1.13 evaluates the e�ciency of the plan of action followed and suggests improving future plans;
Communicates:1.14 presents ideas (in a project portfolio) using two-dimensional or three-dimensionalsketches, circuit diagrams or system diagrams.
Table 1.3
1.3.29
1.4 Finding arocket's centre of gravity4
1.4.1 TECHNOLOGY
1.4.2 Grade 7
1.4.3 TRANSPORT
1.4.4 Module 4
1.4.5 Finding the rocket's centre of gravity
1.4.6 ASSIGNMENT 1:
1.4.7 How to �nd your rocket's centre of gravity
1.4.8 [LO 1.14]
Make a loop at the end of a 1 m piece of string.
• Tie the loop around the body section of your rocket.• Let the rocket hang free in your hand and shift the loop until the rocket hangslevel/parallel to the
ground.• Indicate the centre of gravity on the rocket by drawing a line right around the body with a marking-pen.
Indicate the symbol for centre of gravity.
4This content is available online at <http://cnx.org/content/m23110/1.1/>.
Available for free at Connexions <http://cnx.org/content/col11032/1.1>

18 CHAPTER 1. TERM 1
Figure 1.10
BackgroundThe aerodynamic forces at a rocket's centre of pressure are centred. The centre of pressure is usually
also close to the tail end of the rocket. The large surface of the �ns and the smooth surface of the rest of therocket cause it to be the position where the pressure is the same on both sides. To get the centre of pressurecloser to the tail of the rocket, the front section (nose) of the rocket has a more pointed shape or the bodysection of the rocket could be made longer, because in that way it becomes more aerodynamic. By puttingsmaller �ns on the front section of the rocket, the centre of pressure is moved closer to the front end.
Figure 1.11
Rules:The centre of gravity should be closer to the front end of the rocket than the centre of pressure.The centre of pressure should be the same distance or longer than the diameter of the rocket from the centreof gravity to the tail end. This will make the rocket stable and will help it to �y in a straight line.
Available for free at Connexions <http://cnx.org/content/col11032/1.1>

19
1.4.9 ASSIGNMENT 2:
1.4.10 How to �nd a rocket's centre of pressure
1.4.11 [LO 1.14]
Make a sketch of the side elevation of your rocket. Sketch the �ns as well and draw as accurately as possible.
• The centre of pressure is determined by drawing a line that spreads the surface of the rocket equallyon both sides of the line.
• Indicate the centre of pressure in the sketch by drawing a line through it.• Indicate the centre of pressure on the rocket by drawing a line right around the body with a marking-
pen. Indicate the symbol for the centre of pressure.
Figure 1.12
1.4.12 ASSIGNMENT 3:
1.4.13 Testing whether your rocket is stable during �ight
1.4.14 [LO 1.13]
• Make a loop at the end of a 2 m piece of string.• Tie the loop around your rocket at its centre of gravity. A�x the loop with adhesive tape if necessary.• The rocket should hang parallel to the ground surface (Sketch 1). Swing it around with a circular
movement (Sketch 2).• Change the centre of gravity or the centre of pressure until your rocket swings forward in a straight
line while hanging horizontally.
Available for free at Connexions <http://cnx.org/content/col11032/1.1>

20 CHAPTER 1. TERM 1
Figure 1.13
If you want to make any changes to your rocket to make it more stable, you can do it now. Decorate thebottles and �ns so that it looks more like a rocket, for instance by painting it with an oil-based paint.
Now you are ready to launch your rocket.
1.4.15 Assessment
Learning outcomes(LOs)
continued on next page
Available for free at Connexions <http://cnx.org/content/col11032/1.1>

21
LO 1
Technological processes and skillsThe learner will be able to apply technological processes and skillsethically and responsibly using appropriate information and communication technology.
Assessment standards(ASs)
We know this when the learner:
Evaluates:1.12 evaluates the product or system based on criteria linked directly to the design brief andsome of the speci�cations and constraints, and suggests improvements or modi�cations;
1.13 evaluates the e�ciency of the plan of action followed and suggests improving future plans;
Communicates:1.14 presents ideas (in a project portfolio) using two-dimensional or three-dimensionalsketches, circuit diagrams or system diagrams.
Table 1.4
1.4.16 Memorandum
Assignment 1 - 3Learners can help each other to �nd the centre of pressure and centre of gravity of every rocket. They
will di�er seeing that the appearance of each rocket should di�er.
1.5 Launching the rocket5
1.5.1 TECHNOLOGY
1.5.2 Grade 7
1.5.3 TRANSPORT
1.5.4 Module 5
1.5.5 LAUNCHING THE ROCKET
1.5.6 ASSIGNMENT 1:
1.5.7 Options for launching the rocket
1.5.8 [LO 1.11]
Option 1
• Use a stiletto or a sharp object, like a pair of compasses, to pierce a small hole through the length ofa cork. Push the wide end of the air valve into the plastic tube. Push the other end of the air valvethrough the opening in the cork. You can try in a similar way to a�x the air valve to the bottle-top.Half-�ll the bottle with water .The water is the �propellant�. The compressed air above the water willprovide the energy to force the rocket forward. Hold the intact bottle and push the cork with the airvalve into the opening of the bottle. Push it in properly so that the cork cannot slip out of the opening.(You could rub some petroleum jelly [Vaseline] onto the cork, so that it will slip out easily during thelaunching.)
5This content is available online at <http://cnx.org/content/m23112/1.1/>.
Available for free at Connexions <http://cnx.org/content/col11032/1.1>

22 CHAPTER 1. TERM 1
Option 1Attach the other section of the plastic tube to a bicycle pump. Turn the rocket so that the right side
points upwards. Make it stand upright on the base. You are now ready to launch your rocket. Find a �atlaunching platform away from trees and buildings. Make the rocket stand �rmly on its tail �ns and haveeverybody stand at a distance (± 5 m). Start pumping. Air bubbles will rise through the water. When thepressure inside the bottle is high, the cork and the water will be forced out at the opening and the rocketwill shoot into the air. Be careful not to bend over the rocket. Only the teacher and the learner involvedshould stand next to the rocket.
Option 2For the teacher:The launching device provides a safer option. The rocket can be launched vertically from it and the
device also keeps the rocket from falling over. It is, however, necessary for you to build this launching device.You also have to test the device beforehand. (The launching �ns then do not really serve their purpose.)
Option 2
Figure 1.14
Launching deviceLaunching instructions :
• Find a �at surface outside, away from trees and buildings.• Half-�ll the bottle with water.• Turn the launching device at an angle and move the mouth of the rocket (opening of the bottle with
water) over the wheel valve. Press the Perspex sheet round the neck of the bottle so that it will helpthe rocket to stand upright.
• Pump air into the bottle with a foot pump not exceeding 40 psi.• Stand back ± 5 m and pull the Perspex sheet out.• The rocket should shoot vertically into the air. Do not allow learners to crowd around the rocket while
it is being launched. Keep onlookers at a safe distance.
1.5.9 ASSIGNMENT 2:
1.5.10 To calculate how high a rocket can �y
1.5.11 [LO 1.13]
Do you know that you could use a mathematical formula and scienti�c pocket calculator to calculate howhigh your rocket has travelled? How? Calculate the angle at which the rocket has soared.
Available for free at Connexions <http://cnx.org/content/col11032/1.1>

23
Figure 1.15
Mathematical calculation: tan < A x adjacent distance = heighte.g. tan 75º x 4 m =Try to launch your rocket three times and record your observations in the column line linear graph below:
Figure 1.16
evaluation
Available for free at Connexions <http://cnx.org/content/col11032/1.1>

24 CHAPTER 1. TERM 1
1.5.12 ASSIGNMENT 3:
1.5.13 [LO 1.12]
Evaluate the appearance of your rocket after the �rst �ight/launch with reference to the questionnairebelow by putting a tick in the appropriate column next to the corresponding question. Try to make theimprovements/changes if necessary to ensure more height during the 2nd and 3rd launches.
Yes, de�nitely Yes Uncertain No
1. Is the conicalpoint straight? (Ifit is skew, it willcause unequal air-�ow from the pointto the tail, whichwill result in moreresistance.)
2. Is there asmooth jointbetween the con-ical point andthe body of therocket? (If thediameter of theconical point islarger than thebody, it will causethe air�ow to beirregular, whichwill increase theair resistance.)
continued on next page
Available for free at Connexions <http://cnx.org/content/col11032/1.1>

25
3. Is the bodyof the rocketnice and smooth?(Any surface ofthe rocket, whichis not smooth,will increase airresistance.)
4. Are the �nsmounted straightand �rmly? (Skewlaunching �nscould hamper thelaunching of therocket and couldcause the rocketto be skew during�ight.)
5. Are all thelaunching �nsof the same sizeand are all theother �ns alsoof the same sizeand do they havesmooth edges?(Fins of di�erentshapes and sizescause more airresistance.)
continued on next page
Available for free at Connexions <http://cnx.org/content/col11032/1.1>

26 CHAPTER 1. TERM 1
6. Has the �n-ishing been donevery well and is therocket sturdy? (Arocket that is notsturdy and prop-erly �nished o�,also increases theair resistance.)
Table 1.5
1.5.14 Assessment
Learning outcomes(LOs)
LO 1
Technological processes and skillsThe learner will be able to apply technological processes and skillsethically and responsibly using appropriate information and communication technology.
Assessment standards(ASs)
We know this when the learner:
Evaluates:1.12 evaluates the product or system based on criteria linked directly to the design brief andsome of the speci�cations and constraints, and suggests improvements or modi�cations;
1.13 evaluates the e�ciency of the plan of action followed and suggests improving future plans;
Communicates:1.14 presents ideas (in a project portfolio) using two-dimensional or three-dimensionalsketches, circuit diagrams or system diagrams.
Table 1.6
1.5.15 Memorandum
Assignment 1Learners can help each other to carry out option 1. A maximum altitude is the main objective at each
launching. The learners and the teacher can observe which rockets achieve a maximum altitude, e.g. ± 70m,and which as less e�ective.
Assignment 2The teacher can deduce from the learners' mathematical computations whether the learners are able to
calculate the altitude reached by their rockets. Each learner's line graph and �ight trajectory will di�er.
Available for free at Connexions <http://cnx.org/content/col11032/1.1>

Chapter 2
Term 2
2.1 Why people travel into unknown territories1
2.1.1 TECHNOLOGY
2.1.2 Grade 7
2.1.3 WORKING WITH WIND AND WATER
2.1.4 Module 6
2.1.5 WATER
BackgroundToday, di�erent types of machines are used to cause motion. In the past, people and animals generated
the power that was needed to move their vehicles or implements. They had to draw wagons, ploughs andsleds, thus moving the implements by sheer muscle power. Later people learned to harness natural forcessuch as wind and running water. Nowadays most machines are driven by electricity. A machine has anelectrical motor that creates the power for an object to move.
Let us take a look at the source of energy that is to be found in running water. This energy is used inhydro-electric power stations to generate electricity.
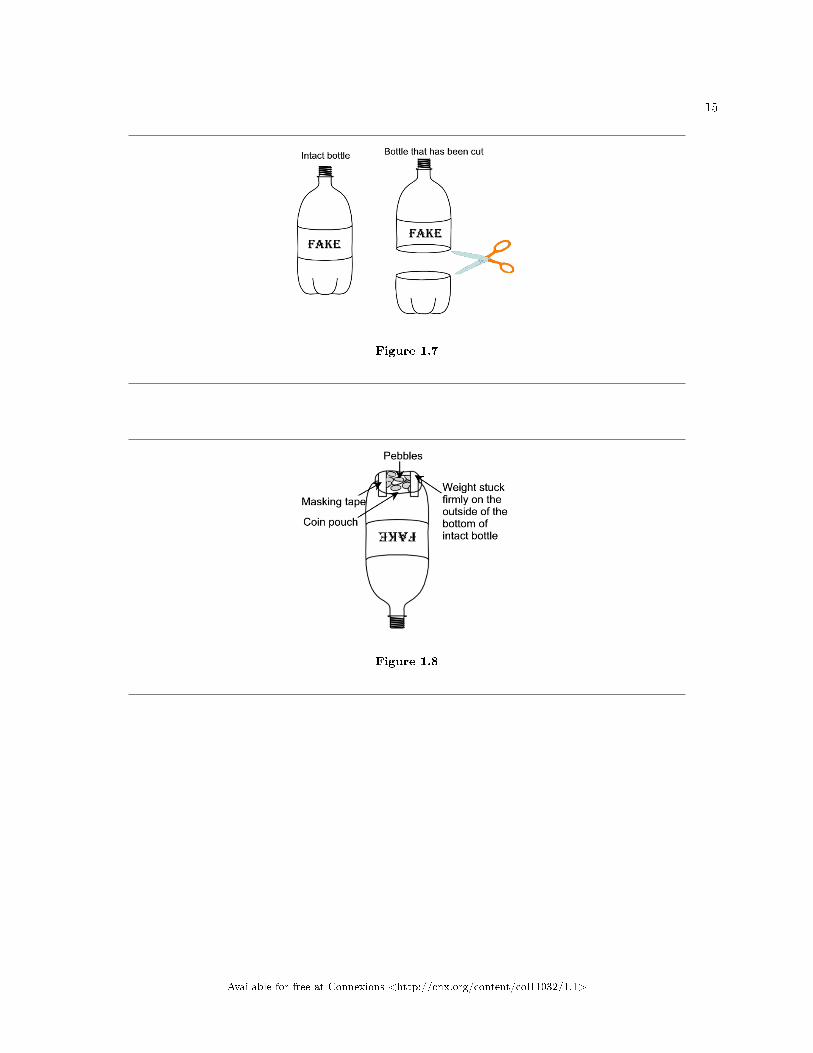
INVESTIGATION 1You will need:
• a pair of scissors• a knitting needle• a deep tray• two drinking straws• adhesive tape• string• water• a plastic cool drink bottle
1This content is available online at <http://cnx.org/content/m23113/1.1/>.
Available for free at Connexions <http://cnx.org/content/col11032/1.1>
27

28 CHAPTER 2. TERM 2
2.1.6 Assignment 1:
2.1.7 To make a drawing
2.1.8 [LO 1.3]
Make a top view drawing with clear labels indicating all the requirements. Use the correct proportion, colourand quantities.
Method:
1. Cut o� the top part of the cool drink bottle.2. Use the knitting needle to make small holes all around the sides along the bottom of the bottle. The
holes must be evenly spaced.3. Cut the straws into 3 cm lengths and stick them through the holes.4. Use adhesive tape to keep the straws in position.5. Make three small evenly-spaced holes along the upper part of the bottle.6. Fasten three equally long lengths of string through the holes and then fasten them to one long piece
of string.7. Fill the bottle with water while holding it over the tray.
What do you observe?The water squirts out through the straws and causes the bottle to spin. This kind of device is called a
turbine.
Available for free at Connexions <http://cnx.org/content/col11032/1.1>
29
Figure 2.1
INVESTIGATION 2Let us try to discover where the pressure is the greatest in a plastic cool drink bottle that has been �lled
with water.
Available for free at Connexions <http://cnx.org/content/col11032/1.1>

30 CHAPTER 2. TERM 2
Figure 2.2
You will need:
• a 2 ` plastic cool drink bottle• a pencil• a deep tray• a pair of scissors• adhesive tape• water
Method:
1. Unscrew and remove the cap of the bottle. Make three little holes, slightly apart, directly below eachother near the bottom of the bottle. Use a pencil or any other sharp object to make the holes.
2. Cover the holes with adhesive tape.3. Fill the bottle with water.4. Now remove the adhesive tape quickly, making sure that all the tape is removed at the same time.
What do you observe?The water squirts out of the holes. The water that comes from the holes at the bottom of the bottle
squirts the furthest.
Available for free at Connexions <http://cnx.org/content/col11032/1.1>

31
2.1.9 Assignment 2:
2.1.10 To make a drawing
2.1.11 [LO 1.3]
Make a labelled drawing to demonstrate your observations. Use suitable colours and shading.Why?Air exerts pressure on the surface of the water in the bottle. The top layer of water exerts pressure on
the rest of the water below. Therefore the water at the bottom of the bottle is driven out with greater force.
2.1.12 Assessment
Learning outcomes(LOs)
LO1
Technological processes and skillsThe learner will be able to apply technological processes and skillsethically and responsibly using appropriate information and communication technology.
Assessment standards(ASs)
We know this when the learner:
investigates:
1.2 examines existing products relevant to a problem, situation or need based on the following key aspectsof design.
1.3 investigates by performing simple practical tests relating to aspects of the technological knowledgeareas (Structures, Processing, and Systems and Control);
Table 2.1
2.1.13
2.2 Water-wheels2
2.2.1 TECHNOLOGY
2.2.2 Grade 7
2.2.3 WORKING WITH WIND AND WATER
2.2.4 Module 7
2.2.5 WATER-WHEELS
BackgroundThe WATER-WHEEL was one of the �rst examples of a motor or a machine that could be operated by
making use of running water. A water-wheel is made of a large wooden wheel with blades or paddles thatturn on an axle. It utilises the force of running or falling water to make a machine work. The axle of thewheel is connected to the machine, and the power that is generated by the wheel is conveyed to the machine.A water-wheel is therefore an example of a wheel and an axle, because the force of the water on the bladescauses a powerful propelling or driving force on the central axle.
2This content is available online at <http://cnx.org/content/m23114/1.1/>.
Available for free at Connexions <http://cnx.org/content/col11032/1.1>
32 CHAPTER 2. TERM 2
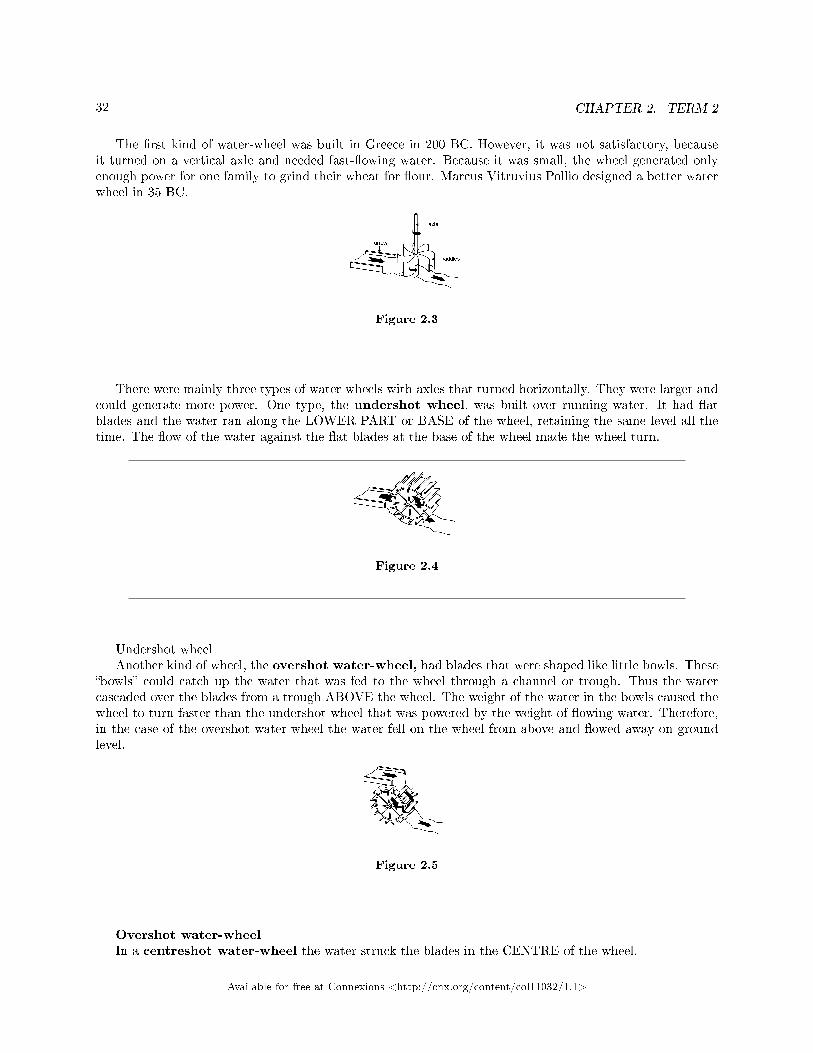
The �rst kind of water-wheel was built in Greece in 200 BC. However, it was not satisfactory, becauseit turned on a vertical axle and needed fast-�owing water. Because it was small, the wheel generated onlyenough power for one family to grind their wheat for �our. Marcus Vitruvius Pollio designed a better waterwheel in 35 BC.
Figure 2.3
There were mainly three types of water wheels with axles that turned horizontally. They were larger andcould generate more power. One type, the undershot wheel, was built over running water. It had �atblades and the water ran along the LOWER PART or BASE of the wheel, retaining the same level all thetime. The �ow of the water against the �at blades at the base of the wheel made the wheel turn.
Figure 2.4
Undershot wheelAnother kind of wheel, the overshot water-wheel, had blades that were shaped like little bowls. These
�bowls� could catch up the water that was fed to the wheel through a channel or trough. Thus the watercascaded over the blades from a trough ABOVE the wheel. The weight of the water in the bowls caused thewheel to turn faster than the undershot wheel that was powered by the weight of �owing water. Therefore,in the case of the overshot water-wheel the water fell on the wheel from above and �owed away on groundlevel.
Figure 2.5
Overshot water-wheelIn a centreshot water-wheel the water struck the blades in the CENTRE of the wheel.
Available for free at Connexions <http://cnx.org/content/col11032/1.1>

33
Figure 2.6
Centreshot water wheelIn a hydroelectric power station the water cascades through a pipe into a dam, and the blades of the
turbines are made to rotate. The pressure caused by the cascading water rotates the wheel so that it rotatesin the same way as the water wheel. The turbine supplies
the power for a generator that generates electricity.
Figure 2.7
2.3 Making water-wheels3
2.3.1 TECHNOLOGY
2.3.2 Grade 7
2.3.3 WORKING WITH WIND AND WATER
2.3.4 Module 8
2.3.5 MAKING A WATER-WHEEL
INVESTIGATIONProblem situationYou are required to lift a certain number of drawing pins over a distance of 60 cm. Your power source is
4 ` of water that is supplied 1,5 m above the rotor in a 3 mm plastic pipe.Design limitationsYou may use any one of the following:For the rotor:
• a cork stopper or• two cardboard circles, each with a diameter of 20 cm or
3This content is available online at <http://cnx.org/content/m23115/1.1/>.
Available for free at Connexions <http://cnx.org/content/col11032/1.1>
34 CHAPTER 2. TERM 2
• an empty cotton reel
For the axle:
• two toothpicks or• a knitting needle or• a 15 cm nail or• a long rounded pencil or• a kebab skewer
For the blades:
• two egg boxes from which the �cups� have been cut out or• thick cardboard or• an empty 2 ` plastic cool drink bottle from which the blades can be cut or• a plastic margarine punnet from which the blades can be cut or• plastic teaspoons or• plastic ice-cream scoops (the �at kind)
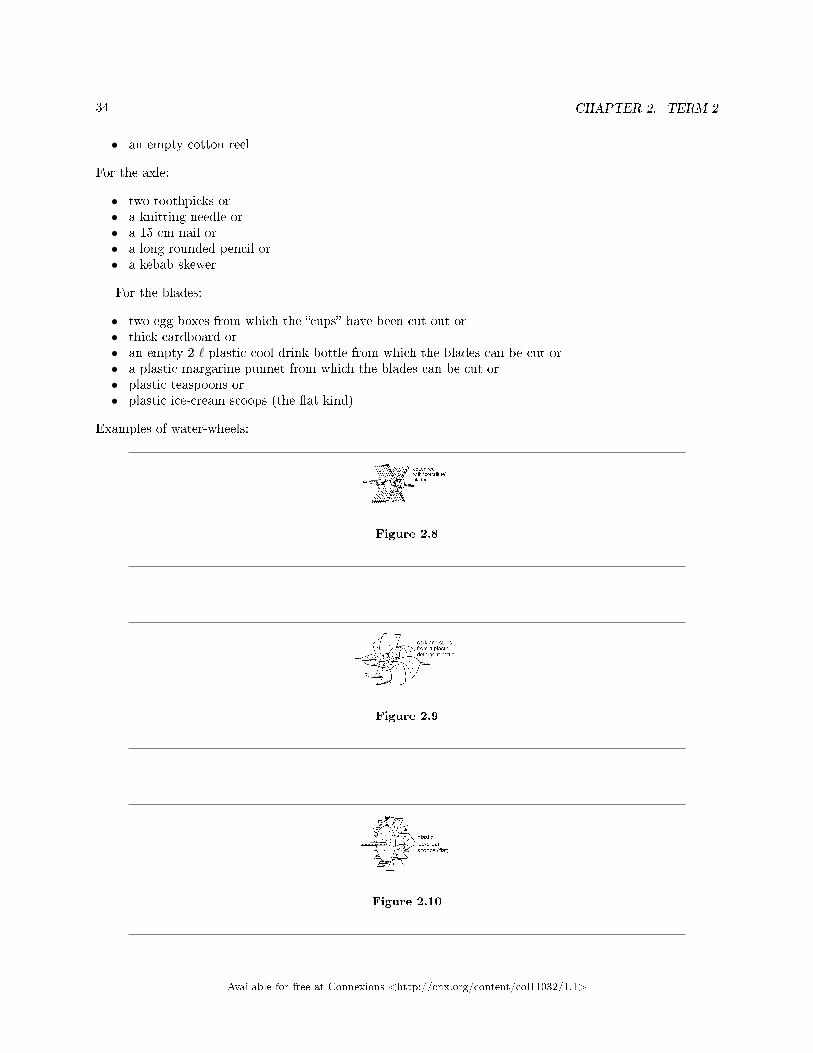
Examples of water-wheels:
Figure 2.8
Figure 2.9
Figure 2.10
Available for free at Connexions <http://cnx.org/content/col11032/1.1>

35
Figure 2.11
For the stand:
• a ruler with wire that is fastened to the axle at both ends or• a piece of wood with string that is fastened to the axle or• an empty 2 ` plastic bottle with the bottom cut out or• a large plastic juice bottle or• a 2 ` plastic milk bottle
To supply the water source:
• a jug that is marked in litres• a length of plastic tubing (1,5 m long, 3 mm in diameter) fastened to a funnel
To catch up the water: a large, �at plastic bowlTo lift the drawing pins (the hoisting apparatus):
• string or• wool• a bowl with a �at bottom for the drawing pins• an eyelet
You will also need:
• a pair of scissors• Prestik• plasticine• adhesive tape• a knife• glue• waterproof paint and varnish• a paint brush• a stapler• a pencil• a ruler• a stylus• a protractor (for positioning the blades)
2.3.6 Assignment 1:
2.3.7 To analyse a situation
2.3.8 [LO 1.5]
Let us analyse the situation and write a design proposal. (A design proposal is a short statement that coulddescribe a probable solution.)
Available for free at Connexions <http://cnx.org/content/col11032/1.1>

36 CHAPTER 2. TERM 2
Complete the following:I am going to design and make a ________that will be capable of lifting anumber of __________over a distance of _________cm verticallyby using some of the suitable material and tools that have been mentioned.Design
2.3.9 Assignment 2:
2.3.10 To do research on hoisting apparatus and turbines
2.3.11 [LO 1.4]
Do research on hoisting apparatus (pulleys) and turbines (water-wheels) and draw or paste pictures ofexisting or antique machines. Brie�y explain how they worked. (Find out more about the Egyptian shadoofor the water-wheels of Archimedes.)
Name the reference sources you made use of________________
2.3.12 Memorandum
Assignment 1
• water wheel/crane (hoisting apparatus)• drawing pins• 60cm
2.4 Designing a water-wheel4
TECHNOLOGYGrade 7WORKING WITH WIND AND WATERModule 9DESIGNING A WATER-WHEELAssignment 1:[LO 1.7]Seeing that there are certain principles of design that you will have to take into consideration since you
may only use certain materials and tools, you will have to write speci�cations because there are speci�cdetails about your design that must be adhered to.
You must contemplate various possible solutions to the problem by drawing all your ideas on paper.Consider various designs. By combining your ideas with the research that you have done, you should begetting closer to a good solution.
Number your ideas and provide labels.Assignment 2:[LO 1.3]Answer the following questions after a thorough investigation in class. It is necessary to investigate all
the factors that in�uence the functioning of the rotor, namely:a) How many blades are you going to use?b) How far apart will the blades be mounted?c) How big (length, breadth) will the blades be?d) At what angle will you mount the blades on the rotor?e) Which material is the most suitable for the blades?
4This content is available online at <http://cnx.org/content/m29612/1.1/>.
Available for free at Connexions <http://cnx.org/content/col11032/1.1>

37
f) What is the diameter of the rotor in comparison with the axle?g) What lubricant can you use to allow the axle to rotate more e�ectively in the stand?h) How fast or slowly must the water be poured onto the machine through the 3 mm tubes in order to
ensure maximum e�ectiveness?i) Where on the machine must the water strike the machine in order to ensure maximum functioning?j) How does the size of the machine in�uence the e�ectiveness of the challenge?k) How can you reduce the resistance on the axle or rotor so that the hoisting apparatus will function
more e�ectively?l) How can you balance the machine so that the drawing pins do not cause the machine to topple over?m) How can you bring about resistance around the axle in order to make the hoisting apparatus work?
Figure 2.12
Figure 2.13
Assignment 3:[LO 1.8]At this stage you have to decide which solution needs to be further developed. The chosen solution
should be the one that most conforms to the speci�cations. You now have to develop the �nal drawing ofthe chosen design by adding all the information that is necessary for making the design. Thorough planningis important in order to ensure that your work will be completed in time.
Draw exploded views in 3D of your best solution. Use colour and supply the correct measurements.Assignment 4:[LO 1.1o]You are ready to make your product now. This stage is called realisation. In a real-life situation a
prototype of the design is built �rst, and the �nal product develops from this prototype. Your time islimited, so you have only enough time to build this model which will have to comply with the speci�cationsas closely as possible after it has been tested and adapted.
Available for free at Connexions <http://cnx.org/content/col11032/1.1>
38 CHAPTER 2. TERM 2
Before you demonstrate your model to the rest of the class, you must complete the following assignmentsin writing:
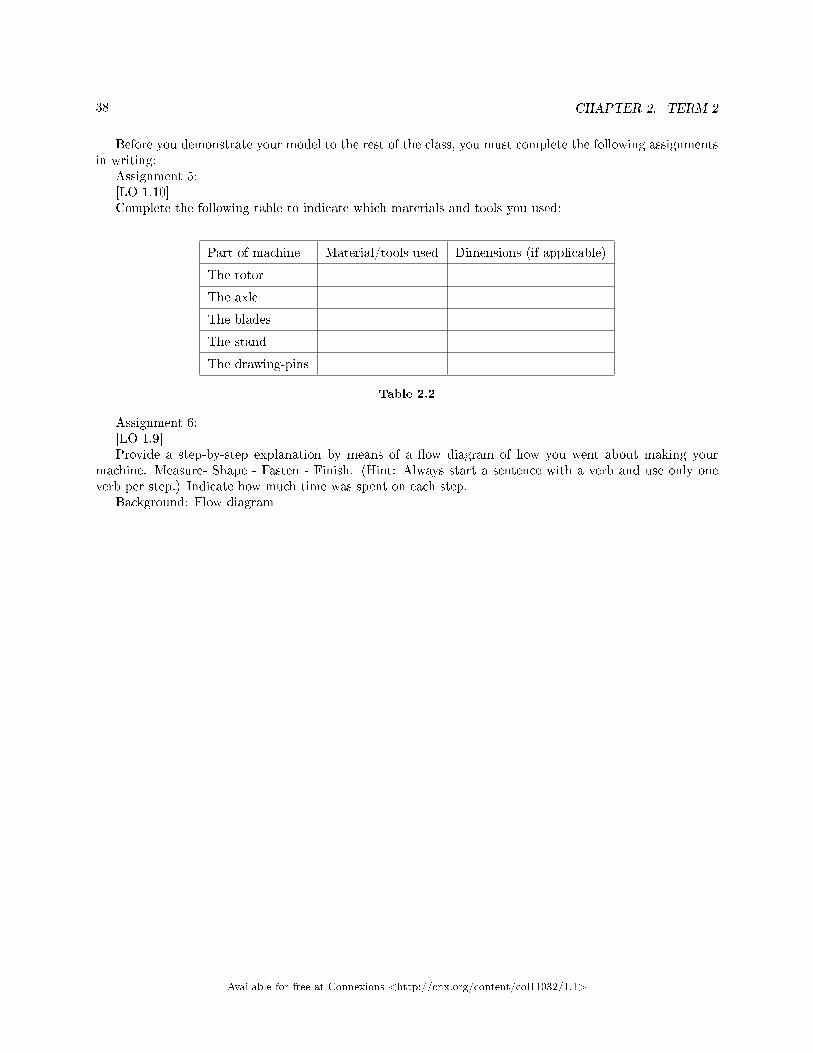
Assignment 5:[LO 1.10]Complete the following table to indicate which materials and tools you used:
Part of machine Material/tools used Dimensions (if applicable)
The rotor
The axle
The blades
The stand
The drawing-pins
Table 2.2
Assignment 6:[LO 1.9]Provide a step-by-step explanation by means of a �ow diagram of how you went about making your
machine. Measure- Shape - Fasten - Finish. (Hint: Always start a sentence with a verb and use only oneverb per step.) Indicate how much time was spent on each step.
Background: Flow diagram
Available for free at Connexions <http://cnx.org/content/col11032/1.1>

39
Figure 2.14
Possible solutions
Available for free at Connexions <http://cnx.org/content/col11032/1.1>

40 CHAPTER 2. TERM 2
Figure 2.15
Making the blades
Figure 2.16
Figure 2.17
Fixing blades to rotor and mounting on axle
Available for free at Connexions <http://cnx.org/content/col11032/1.1>

41
Figure 2.18
Preparing the stand
Figure 2.19
Placing water-wheel in stand
Figure 2.20
Fixing hoisting apparatus (pulley with weight) to axle
Available for free at Connexions <http://cnx.org/content/col11032/1.1>

42 CHAPTER 2. TERM 2
Figure 2.21
Placing water-wheel in standAssessment
Learning outcomes(LOs)
LO1
continued on next page
Available for free at Connexions <http://cnx.org/content/col11032/1.1>
43
Technological processes and skillsThe learner will be able to apply technological processes and skillsethically and responsibly using appropriate information and communication technology.
Assessment standards(ASs)
We know this when the learner:
investigates:
1.2 examines existing products relevant to a problem, situation or need based on the following key aspectsof design.
1.3 investigates by performing simple practical tests relating to aspects of the technological knowledgeareas (Structures, Processing, and Systems and Control);
1.4 during investigations, plans a strategy for collecting data and information.
designs:
1.5 writes or communicates a short and clear statement or a design brief for development of a product orsystem related to a given problem, need or opportunity;
1.7 generates at least two alternative solutions and annotates the ideas;
1.8 chooses possible solutions, gives sensible reasons for choice, and develops a chosen idea using graphicsor modelling techniques;
makes:
1.9 develops a plan for making details.
1.10 chooses and uses appropriate tools and materials to make products by measuring, marking, cutting orseparating, shaping or forming, joining or combining, and �nishing di�erent materials with some accuracy;
Table 2.3
MemorandumAssignment 1The teacher can observe whether the learners' designs are practicable.Assignment 2Learners must discover through their own practical experimentation which type of apparatus appliance
works best for them. Various answers are acceptable, as long as the answers are appropriate and developmeaningfully.
Assignment 3Learners' drawings must be consistent with their �nal model.Assignment 4Learners can now be given su�cient time (± 2 hours) to compile their models.Assignment 5 and 6These two assignments can be completed while the learners make the models or after they have �nished
them.Assignment 10The basic steps that should have been followed in making the model are explained here. The teacher can
use them as a guideline in assessing steps 8 and 9. Learners must be encouraged to respond honestly whenthey complete the questionnaire.
Available for free at Connexions <http://cnx.org/content/col11032/1.1>

44 CHAPTER 2. TERM 2
Available for free at Connexions <http://cnx.org/content/col11032/1.1>

Chapter 3
Term 3
3.1 What is electricity?1
3.1.1 TECHNOLOGY
3.1.2 Grade 7
3.1.3 ELECTRICITY
3.1.4 Module 10
3.1.5 WHAT IS ELECTRICITY?
BackgroundElectricity is a type of energy. An object has electrical energy when it has the ability to conduct electricity.
Electricity is measured in Volts.Electrical energy can be easily converted to other forms of electricity.There are two main types of electricity:
• main stream electricity• battery electricity
Battery-electricityElectrical energy are stored in batteries. The energy in batteries are called chemical energy. When
electrical energy moves, the electrons �ows in an electrical circuit.The basic elements of an electrical circuit is:a source of energy e.g. a battery
1This content is available online at <http://cnx.org/content/m23116/1.1/>.
Available for free at Connexions <http://cnx.org/content/col11032/1.1>
45

46 CHAPTER 3. TERM 3
Sketch Symbol
Table 3.1
a conductor e.g. a sort of metal in the shape of a wire
Sketch Symbol
Table 3.2
a switch to form an open or closed circuit
Sketch Symbol
Table 3.3
a load e.g. a source of light, sound, motion or heat
Available for free at Connexions <http://cnx.org/content/col11032/1.1>

47
Sketch Symbol
a light
a buzzer
an electrical motor
Table 3.4
Two or more of the same component in an electric circuit can be connected in two di�erent ways in thecircuit;
• in series where a positive pole of one cell is linked to the negative pole of another cell;• in parallel where all the positive poles of the cells are connected with one another and all the negative
poles are also connected like this.
Advantage of cells in series � current supply becomes more powerfulAdvantage of cells in parallel � the cells can produce the same current for longer.To the teacher:These worksheets should be done in groups. Each group can construct a di�erent circuit and then explain
it to the rest of the class before completing a worksheet. A class should be divided into 7 groups, becausethere are 7 worksheets. This would save a huge amount of time. Each group should construct a test circuitwith a switch, 1,5 V lamp, lamp holder and a 1,5 V cell in a cell holder. First screw the holders and switchon the board, add the wire between them and then add the cell and lightbulb.
Equipment and tools needed:
• 1,5 V batteries• 1.5 V light bulbs• light bulb holders• wire/�ex• 7 strip connectors• battery holders• 7 switches• small screws• �at nose and star screwdrivers• 7 pieces of insulation board 150 mm by 150 mm• connectors• buzzers with a low voltage• diodes and resistors
Available for free at Connexions <http://cnx.org/content/col11032/1.1>

48 CHAPTER 3. TERM 3
3.1.6 Assignment 1:
3.1.7 To investigate by means of a simple practical test[LO 1.3]
3.1.8 To extract relevant data [LO 1.4.4]
3.1.9 To evaluate the system [LO 1.12]
3.1.10 To show knowledge and understanding of electric circuits [LO 2.2]
WORKSHEET 1:
• Connect one 1,5 V cell in a battery holder to a 1,5 V lamp in a lamp holder with wire and a switch ona piece of insulation board.
• Make a simple drawing of the circuit.
1.3 Draw a circuit diagram of the circuit, using the correct symbols.1.4 Underline:The light bulb shines (very brightly/bright/dimly/ not at all).WORKSHEET 2:2.1 Connect one 1,5 V cell in a cell holder to two 1,5 V lamps in two lamp holders in parallel using wire
and adding a switch on a piece of insulation board.
• Draw a circuit diagram of the circuit.• Unscrew one of the lamps from its holder. What happens to the other lamp? Explain why this happens.• Underline:
The light bulbs shine (very brightly/ brightly/ dimly/ not at all).WORKSHEET 3:3.1 Connect one 1,5 V cell in a cell holder to two 1,5 V lamps in lamp holders �tted in series with wire
and a switch to an insulation board.3.2 Draw a circuit diagram of the circuit.
• Unscrew one of the lamps from its holder. What happens to the other lamp? Explain why this happens.
3.4 Underline:The light bulb shines (very brightly/ brightly/ dimly/ not at all).WORKSHEET 4:4.1 Connect two 1,5 V cells in parallel to two 1,5 V lamps connected in parallel.4.2 Draw a circuit diagram of the circuit.
• Underline:
The bulbs shine (very brightly/ brightly/ dimly/ not at all).4.4 Underline:The in�uence of the two cells connected in parallel on the magnitude of electric current are (big/ small).WORKSHEET 5:5.1 Connect two 1,5 V cells in series to two 1,5 V lamps connected in parallel.5.2 Draw a circuit diagram of the circuit.5.3 Underline:The light bulbs shine (very brightly/ brightly/ dimly/ not at all).5.4 Underline:The in�uence of the two cells connected in series on the magnitude of the electric current are (big/ small).WORKSHEET 6:6.1 Connect two 1,5 V cells in series to a buzzer and one 1,5 V lamp in series.
Available for free at Connexions <http://cnx.org/content/col11032/1.1>

49
6.2 Draw a circuit diagram of the circuit.6.3 Does it work? Why or why not? Give an explanation for your answer.WORKSHEET 7:7.1 Connect two 1,5 V cells in series with a buzzer and one 1,5 V bulb in parallel.7.2 Draw a circuit diagram of the circuit.7.3 Does it work? Why or why not? Give an explanation for your answer.WORKSHEET 8:
• What does it mean if two lamps are connected in parallel?• What does it mean if two lamps are connected in series?• What are the advantages of connecting lamps in parallel?• What are the advantages of connecting cells or batteries in parallel?• What are the advantages of connecting cells or batteries in series?
• What is the function of a resistor in a circuit?• Underline:A resistor in a circuit is connected in (series/ parallel) with a lamp or buzzer.
• What is the function of a diode in a circuit?• Underline:
A Diode is connected in (series/ parallel) with the loads in a circuit.
3.1.11 Assessment
Learning Outcomes(LOs)
LO 1
TECHNOLOGICAL PROCESSES AND SKILLSThe learner will be able to apply technological processesand skills ethically and responsibly using appropriate information and communication technologies.
Assessment Standards(ASs)
We know this when the learner:
investigates:
1.1 investigates the background context, the nature of the need, the environmental situation, and thepeople concerned when given a problem, need or opportunity set in a local context;
1.2 examines existing products relevant to a problem, situation or need.
1.3 investigates by performing simple practical tests relating to aspects of the technological knowledgeareas (Structures, Processing, and Systems and Control);
1.4 during investigations, plans a strategy for collecting data and information.
continued on next page
Available for free at Connexions <http://cnx.org/content/col11032/1.1>

50 CHAPTER 3. TERM 3
evaluates:
1.12 evaluates the product or system based on criteria linked directly to the design brief and some of thespeci�cations and constraints, and suggests improvements or modi�cations;
LO 2
TECHNOLOGICAL KNOWLEDGE AND UNDERSTANDING The learner will be able tounderstand and apply relevant technological knowledge ethically and responsibly.
Assessment Standards(ASs)
We know this when the learner:
processing:2.2 demonstrates knowledge and understanding of how materials can be processed to changeor improve properties (e.g. strength, �re resistance, waterproo�ng, taste, volume, texture).
Table 3.5
3.2 Electrical safety2
3.2.1 TECHNOLOGY
3.2.2 Grade 7
3.2.3 ELECTRICITY
3.2.4 Module 11
3.2.5 ELECTRICAL SAFETY
Use safe working practices and show awareness of e�cient ways of using materials and tools.Safety procedures are a most important aspect of being in any workshop and you should make sure that
you know and practise them from the start. Make sure that you know where to �nd the emergency buttonand the �rst aid box. Remember to report all accidents, no matter how small, to your teacher.
• Always wear an apron or overcoat to protect your clothes and sensible footwear to protect your feet.• Take o� your blazer or jersey, roll up your sleeves and tuck your tie out of the way.• Long hair should be tied back.• Any jewellery you may be wearing should be removed.• Never fool around with any tools.• Never run or play in a workshop, especially with a sharp tool in your hand.• You are allowed to talk quietly, but you should not shout.• You must never work alone or without permission in any workshop or practical area.• Read all instructions for using tools carefully and make sure that you follow them.• Take great care when carrying tools or materials. Carry sharp tools close to your body and facing
downwards.• Never misuse tools of any sort.• Replace tools after use.• Be sure to keep your bench and �oor area tidy.• Never use a machine without permission or the correct training.• Never use electric tools in damp or wet conditions.• There must never be more than one person operating or near a machine at any time.
2This content is available online at <http://cnx.org/content/m23118/1.1/>.
Available for free at Connexions <http://cnx.org/content/col11032/1.1>

51
• Clean machines after you have used them, and report any problems or damage to your teacher. Bluntor damaged items should be changed.
• When you have �nished work, wash and dry your hands properly.• Be especially thorough if you have been using oil, chemicals, paints or resins.• Never hold the wood in your hand while you saw it with the other hand.• Never screw into a piece of wood held in your hand.• Never chisel towards your hand or body.
• Use a bench hook for cutting spars or dowels.• Always keep your tools tidy and out of other people's way.
Figure 3.1
3.2.6 ELECTRICAL SAFETY
Much of the equipment used in class requires electrical power from either batteries or the mains. Rememberthat moisture and water conduct electricity. Care should be taken when handling electronic components,such as capacitors. Batteries are best kept in separate containers when not in use. Return them at the endof the lesson. Do not put projects away with batteries in place or connected. Do not be tempted to tinkerwith mains electricity. If you come into contact with a live wire an electric shock or fatal accident could bethe result. Electric shocks can cause severe burns and other injuries, so always take care.
3.2.7 Plugging IN
• Check that the appliance is switched o�.• Check that the socket is switched o�.• Make sure that the lead and plug are not damaged.• Plug in.• Switch on the socket.• Switch on the appliance.
3.2.8 Switching OFF
• Switch o� the appliance.• Switch o� the socket.
Available for free at Connexions <http://cnx.org/content/col11032/1.1>

52 CHAPTER 3. TERM 3
• Remove the plug from the socket.
You must not use an electrical appliance without either a teacher in the room or at least two other pupils inthe room and a teacher close at hand. If you are present when a person receives an electric shock you mustcarry out the following procedure
• Do not touch the person.• Send for adult help.• Press the stop button to cut o� the mains power.• Switch o� the appliance at the socket and pull out the plug.• If this is not possible, try to push them away from the electricity. Use something made of wood which
does not conduct the electricity to you.• If you are certain that the power is o�, then you can attempt to give the person �rst aid if you have
been trained to do it.• If you give yourself a slight electric shock you may feel weak, so relax a bit before carrying on working.
N.B.: Take good care of a person who has been injured. Keep him / her warm, let him / her lie down andcall for help.
3.2.9
3.2.10 SAFETY MEASURES with regard to
3.2.11 SCISSORS
• A scissors must be good quality, sharp and in good working order.• Never let the tips of the scissors close when cutting a line greater than the length of the blades.• When cutting curves always turn the card and not the scissors.
3.2.12 CRAFT KNIVES
• Only to be used under very close supervision together with a metal safety ruler.• Cut onto a suitable safety surface e.g. Very thick card/ cutting board.• Stand when you cut and retract the blade when you need to put it away.• The blade should not be to far out.• You are allowed with the knife in your hand only when you are going to cut.
3.2.13 DRILLS
• You should know how to change twist drills, how to hold the hand drill and how to keep it at rightangles to their work.
• The material to be drilled must be cramped securely.• Do not remove the chuck completely as it is very di�cult to reassemble.• Select the appropriate twist drill � choosing one too small rather than one too big if in doubt.• When drilling turn the handle in a clockwise direction and continue turning the same way when
removing the drill bit from the hole.• Hand drills are for holes up to 6mm in diameter; use a brace and bit for larger holes.• Never leave a hand drill lying on a work top as it can so easily fall o� and damage the twist drill.
Available for free at Connexions <http://cnx.org/content/col11032/1.1>

53
3.2.14
3.2.15 GLUE GUNS
• Must only be used under very close supervision.• It is suitable for wood, metals and certain plastics.• When it is switched on and not in use ensure that it is correctly positioned on its stand.• Switch o� after use.• Be careful of glue that drips and put it away after the gun is cooled o�.
3.2.16 GENERAL
• When sawing plastics and metals , safety spectacles should be worn, because there is a risk of eyedamage.
• Some plastics become pliable when heated but care must be taken to control the temperature becausethe burning of plastics is dangerous as many give o� poisonous fumes.
• Polystyrene should be cut with a hot wire cutter set low and used in a well ventilated room.
3.2.17 SOLDERING IRONS
• Soldering irons must be treated with respect. They often use mains electricity and get very hot.
3.2.18 The rules for correct use are as follows:
1. Do not leave them switched on for possible future use. Always switch them o� when not in use, becausethis will prolong the life of the iron.
2. Never touch the mains lead with the tip of the iron. It will melt and expose bare wires which couldlead to an electric shock.
3. Always use a proper soldering iron stand. Failure to do so will mean that there is a risk of the hot ironsetting �re to things.
4. Avoid breathing in the resin fumes from the �ux.5. Protect the work surface with hardboard.
First aid for other injuries
3.2.19 SMALL CUTS
• Wash the cut in cold water to clean it and stop the bleeding. Dry well with a clean cloth and cover itwith sticky plaster to keep it clean.
3.2.20 SERIOUS CUTS
• Press the wound hard with a clean handkerchief, tissue or your hands to reduce the bleeding.• Put the wound higher than the rest of your body to lessen the �ow of blood.• Find or call someone to help you.
3.2.21 SPLINTERS
• Sterilize tweezers or a needle in the blue part of a �ame.• Make sure you get all the splinter out.• Then clean the wound with antiseptic liquid and cover it with sticky plaster.
Available for free at Connexions <http://cnx.org/content/col11032/1.1>

54 CHAPTER 3. TERM 3
3.2.22 BRUISES
• Wash with cold water to reduce bruising and swelling.• A bruised �ngernail may go black. If very painful, see a doctor.• Blood blisters should be left to dry up, not popped.
3.2.23 ASSIGNMENT 1:
3.2.24 To draw up a list of safety measures
3.2.25 [LO 1.6]
Write down �ve rules that you must obey with regard to wearing the correct clothing in the Technologyclass.
3.2.26 ASSIGNMENT 2:
3.2.27 To emphasise safe working practices
3.2.28 [LO 1.11]
Explain the rule that applies to each of the following sketches:
Figure 3.2
Available for free at Connexions <http://cnx.org/content/col11032/1.1>

55
Figure 3.3
Figure 3.4
Available for free at Connexions <http://cnx.org/content/col11032/1.1>

56 CHAPTER 3. TERM 3
3.2.29 ASSIGNMENT 3:
3.2.30 To write a short and clear statement about the safe handling of tools
3.2.31 [LO 1.5]
Produce a short rule with a �tting lettering design for any tool that you use in the Technology class, forexample soldering irons, utility knives, glueguns, drills, saws, ex. The emphasis in the lettering type, shouldbe that it should be easily readable, a warning and informational. The rule/s must focus on a safety aspect.
Bright colours, a bold lettering style and asymmetrical lettering would be regarded as suitable. The bestexamples will be laminated and put up in the class. You must use a computer or stencils for your �nalproduct.
3.2.32 Assessment
Learning Outcomes(LOs)
LO 1
TECHNOLOGICAL PROCESSES AND SKILLSThe learner will be able to apply technological processesand skills ethically and responsibly using appropriate information and communication technologies.
Assessment Standards(ASs)
We know this when the learner:
investigates:
1.1 investigates the background context, the nature of the need, the environmental situation, and thepeople concerned when given a problem, need or opportunity set in a local context;
1.2 examines existing products relevant to a problem, situation or need.
1.3 investigates by performing simple practical tests relating to aspects of the technological knowledgeareas (Structures, Processing, and Systems and Control);
1.4 during investigations, plans a strategy for collecting data and information.
design:
1.5 writes or communicates a short and clear statement or a design brief for the development of a productor system related to a given problem, need or opportunity;
1.6 lists product and design speci�cations and constraints for a solution to a given problem, need oropportunity.
1.7 generates at least two alternative solutions and annotates the ideas;
1.8 chooses possible solutions, gives sensible reasons for choice, and develops a chosen idea using graphicsor modelling techniques;
continued on next page
Available for free at Connexions <http://cnx.org/content/col11032/1.1>

57
make:
1.9 develops a plan.
1.10 chooses and uses appropriate tools and materials to make products by measuring, marking, cutting orseparating, shaping or forming, joining or combining, and �nishing di�erent materials with some accuracy;
evaluates:
1.12 evaluates the product or system based on criteria linked directly to the design brief and some of thespeci�cations and constraints, and suggests improvements or modi�cations;
1.13 evaluates the e�ciency of the plan of action followed and suggests improving future plans.
Table 3.6
3.3 An electronic maths game Part 1: the design3
3.3.1 TECHNOLOGY
3.3.2 Grade 7
3.3.3 ELECTRICITY
3.3.4 Module 12
3.3.5 AN ELECTRONIC MATHS GAME
3.3.6 Part 1: The design
3.3.7 ASSIGNMENT 1:
3.3.8 To make an electronic mathematics game
3.3.9 [LO 1.2, 1.7, 1.12, 1.13]
Systems and ControlProblem:The learners in Gr.4 at _______ Primary School experience problems in learning their tables in
Mathematics.Design brief:Design or make a solution for this problem.Market researchAsk each of the following questions to at least ten Grade 4's.A.
3This content is available online at <http://cnx.org/content/m23119/1.1/>.
Available for free at Connexions <http://cnx.org/content/col11032/1.1>

58 CHAPTER 3. TERM 3
Names of learners who participated in the survey Gr.4 Do youYes Know your? Tables?No
1.
2.
3.
4.
5.
6.
7.
8.
9.
10.
Table 3.7
B.
Is it important to know your tables well? Yes Don't know No
1.
2.
3.
4.
5.
6.
7.
8.
9.
10.
Table 3.8
C.
Available for free at Connexions <http://cnx.org/content/col11032/1.1>

59
Howdo youlearnyourta-bles?Whichmethodsuitsyoubest?Makea tickin theappro-priatecol-umnindi-catedby thelearner'snum-ber
1 2 3 4 5 6 7 8 9 10
Parentsor rel-ativesasktables
Writea ta-blestest inclasseveryday
continued on next page
Available for free at Connexions <http://cnx.org/content/col11032/1.1>

60 CHAPTER 3. TERM 3
Regularlyplaytablesgames(non-electronic,e.g.cards)
Errorsarewrit-tenout
Regularlyplayelec-troniccom-putergames
Other
Table 3.9
D. Write down a few reasons why a solution to this problem will have a positive e�ect on the lives ofGrade 4 learners.
Possible solutions to the problem.
• Parents or older relatives should do better consolidation at home.• Learners should write a tables test daily.• Design games to ensure consolidation in a playful manner.• Learners write out mistakes made in tests 50 times.• Other:
Design speci�cations and limitationsPeople (age/market):____________Purpose: ______________Appearance: Colour:Form:Function:Impact on environment � made where?- used where?Safety measures during making:During use:Design proposalI am going to design and make a ______________ (what) for
_____________________(whom) so that they will know their ___________ better (objective) and apply the knowledge in
____________where).Cost of material used for electric circuit:Isolation board
Available for free at Connexions <http://cnx.org/content/col11032/1.1>

61
BulbBulb socketBattery (9V)Battery connectorScrewsResistorBuzzerConnectorsIsolation wireWashersSplit pinsCost of material used for container:CardboardIsolation wireSplit pinsCost of manufacturingSelling pricePro�tTime allocation for design and making of game
Date
Problem and market research
INVESTIGATION:
Limitations, speci�cations and design proposal
DESIGN: Initial ideas
Design
MAKING: Selection of materials and tools
Making of component
Description of process
EVALUATION: Sketch of product
Evaluation of product
Composition of project portfolio
Table 3.10
Investigate at least 3 di�erent electronic games and complete each column of at least 5 di�erent factorsof design.
Game1 Game2 Game3
continued on next page
Available for free at Connexions <http://cnx.org/content/col11032/1.1>

62 CHAPTER 3. TERM 3
Nr. Name of game
1 Sketch ofappearance Shape-Colour
2 Size
3 Control
4 Cost and is it af-fordable for all thegroups in the com-munity?
5 Durability
6 Amount of games
7 Purpose
8 Materials used anddo they bene�t orare they to a disad-vantage to the en-vironment.
Table 3.11
9 For what age group and what in�uence does it have on them?
10 Power source
Table 3.12
SOURCES:Game 1:Game 2:Game 3:
3.3.9.1 Assessment rubric
Investigation
4Gather relevant infor-mation accurately andthoroughly
3Gather su�cient infor-mation
2Gather limited infor-mation
1Gather little informa-tion
continued on next page
Available for free at Connexions <http://cnx.org/content/col11032/1.1>

63
Table 3.13
Teacher: _______________Date: ___________________Comment: ________________Parent or Guardian: _______________Comment: ____________________
3.3.10 Assessment
Learning Outcomes(LOs)
LO 1
TECHNOLOGICAL PROCESSES AND SKILLSThe learner will be able to apply technological processesand skills ethically and responsibly using appropriate information and communication technologies.
Assessment Standards(ASs)
We know this when the learner:
investigates:
1.1 investigates the background context, the nature of the need, the environmental situation, and thepeople concerned when given a problem, need or opportunity set in a local context;
1.2 examines existing products relevant to a problem, situation or need.
1.3 investigates by performing simple practical tests relating to aspects of the technological knowledgeareas (Structures, Processing, and Systems and Control);
1.4 during investigations, plans a strategy for collecting data and information.
design:
1.5 writes or communicates a short and clear statement or a design brief for the development of a productor system related to a given problem, need or opportunity;
1.6 lists product and design speci�cations and constraints for a solution to a given problem, need oropportunity.
1.7 generates at least two alternative solutions and annotates the ideas;
1.8 chooses possible solutions, gives sensible reasons for choice, and develops a chosen idea using graphicsor modelling techniques;
make:
1.9 develops a plan.
continued on next page
Available for free at Connexions <http://cnx.org/content/col11032/1.1>

64 CHAPTER 3. TERM 3
1.10 chooses and uses appropriate tools and materials to make products by measuring, marking, cutting orseparating, shaping or forming, joining or combining, and �nishing di�erent materials with some accuracy;
evaluates:
1.12 evaluates the product or system based on criteria linked directly to the design brief and some of thespeci�cations and constraints, and suggests improvements or modi�cations;
1.13 evaluates the e�ciency of the plan of action followed and suggests improving future plans.
Table 3.14
Available for free at Connexions <http://cnx.org/content/col11032/1.1>

65
3.4 An electronic maths game Part 2: Mathematics game4
3.4.1 TECHNOLOGY
3.4.2 Grade 7
3.4.3 ELECTRICITY
3.4.4 Module 13
3.4.5 AN ELECTRONIC MATHS GAME
3.4.6 Part 2: Mathematics game
Figure 3.5
4This content is available online at <http://cnx.org/content/m23120/1.1/>.
Available for free at Connexions <http://cnx.org/content/col11032/1.1>

66 CHAPTER 3. TERM 3
3.4.6.1 Needs:
• name• screen with positions for buzzer and light• 10 questions and 10 answers• 20 split pins
3.4.6.2 Design: Final working drawing
Suggestion for the teacher: Learners can approach the project in groups of three. One learner designs andmakes the front view (lid), one learner designs and makes the electric circuit of the game, and the thirdlearner designs and makes the container in which the electric circuit is placed.
Learner 1:Sketch the front view (2D-drawing) of the electronic game.(Use sketches of parts, cut out and paste).Learner 2:Sketch the layout of the electric circuit. Also apply the necessary captions/comments.
Figure 3.6
Sketch a circuit diagram. Use the correct symbols and supply a key to explain each symbol.
Available for free at Connexions <http://cnx.org/content/col11032/1.1>

67
Figure 3.7
Available for free at Connexions <http://cnx.org/content/col11032/1.1>

68 CHAPTER 3. TERM 3
3.4.6.3 Assessment of design for electric circuit
Yes No
1. Resistor is in serie with light.
2. Two wires run from buzzer directly to connector/s.
3. Two wires run from light bulb directly to connectors.
4. A wire from the buzzer and light each go through one hole of the connector.
5. The other two wires from the buzzer and light go through one opening of the connector.
6. One wire from the connector goes to the battery and then to the front.
7. The other piece of wire goes directly to the outside.
8. Both of the outside wires have poles �tted to it.
9. Length and width of insulation board are given.
10. Five other dimensions are shown.
11. Red wire runs from battery to buzzer and light.
12. Black wire runs from buzzer and light to battery.
13. Key is complete and correct.
14. Circuit diagram is complete and correct.
Table 3.15
Learner 3:Design:Sketch and planning of container for electric circuit in isometric. Indicate the tessellation pattern and
use an isometric grid.Design the net of the container/box on A3 graph paper.
3.4.7 Assessment
Learning Outcomes(LOs)
LO 1
TECHNOLOGICAL PROCESSES AND SKILLSThe learner will be able to apply technological processesand skills ethically and responsibly using appropriate information and communication technologies.
Assessment Standards(ASs)
We know this when the learner:
investigates:
continued on next page
Available for free at Connexions <http://cnx.org/content/col11032/1.1>

69
1.1 investigates the background context, the nature of the need, the environmental situation, and thepeople concerned when given a problem, need or opportunity set in a local context;
1.2 examines existing products relevant to a problem, situation or need.
1.3 investigates by performing simple practical tests relating to aspects of the technological knowledgeareas (Structures, Processing, and Systems and Control);
1.4 during investigations, plans a strategy for collecting data and information.
design:
1.5 writes or communicates a short and clear statement or a design brief for the development of a productor system related to a given problem, need or opportunity;
1.6 lists product and design speci�cations and constraints for a solution to a given problem, need oropportunity.
1.7 generates at least two alternative solutions and annotates the ideas;
1.8 chooses possible solutions, gives sensible reasons for choice, and develops a chosen idea using graphicsor modelling techniques;
make:
1.9 develops a plan.
1.10 chooses and uses appropriate tools and materials to make products by measuring, marking, cutting orseparating, shaping or forming, joining or combining, and �nishing di�erent materials with some accuracy;
evaluates:
1.12 evaluates the product or system based on criteria linked directly to the design brief and some of thespeci�cations and constraints, and suggests improvements or modi�cations;
1.13 evaluates the e�ciency of the plan of action followed and suggests improving future plans.
Table 3.16
3.5 An electronic maths game Part 3: making the game5
3.5.1 TECHNOLOGY
3.5.2 Grade 7
3.5.3 ELECTRICITY
3.5.4 Module 14
3.5.5 AN ELECTRONIC MATHS GAME:
3.5.6 Part 3: Making the game
3.5.6.1 Making
Steps for making the product _______________through a simple process �ow chart.The functions of a process �ow chart are:
• to separate actions in a process;• to arrange the di�erent actions in a logical order.
5This content is available online at <http://cnx.org/content/m23121/1.1/>.
Available for free at Connexions <http://cnx.org/content/col11032/1.1>

70 CHAPTER 3. TERM 3
Every type of activity is described by a frame or block with a speci�c shape.Write the di�erent stages by making sentences with each action, material and tool that you've used. Use
only one action in a frame.
Figure 3.8
Start/End block
Figure 3.9
Process block
Figure 3.10
Decision block (yes/no)
Available for free at Connexions <http://cnx.org/content/col11032/1.1>

71
3.5.6.2
Figure 3.11
3.5.6.3 Learner 3: Instructions for making the container
1. Place the template (on graph paper) , the carbon copy-paper and the A4-cardboard on top of eachother in the same order. Staple them together with a stapler so that the pages do not shift when youstart copying.
Available for free at Connexions <http://cnx.org/content/col11032/1.1>

72 CHAPTER 3. TERM 3
2. Answer the following questions about your container:
• How many sides does it have?• How many pairs does it have of equal size?• How many edges does it have?• How many corners does it have?• How many �aps does it have?• How many pairs of �aps of equal size does it have?• Using a HB-pencil and a ruler, copy the 2D-form on the cardboard. First draw the straight lines and
then the dotted lines. Check if all of them have been drawn.• Remove the staples and cut out the 2 D-shape along the uninterrupted lines.• Notch the dotted lines on the side with the carbon copy markings, using scissors and a ruler. Work on
a suitable surface; practise �rst so that you do not make the notches too deep.
Figure 3.12
1. Fold on the dotted lines, using a ruler.
Available for free at Connexions <http://cnx.org/content/col11032/1.1>

73
2. Apply the tessellation design with a pencil and your favourite template on the back and sides of theright side of your container. Colour the pattern in and draw the lines with a black pen/ �ne-liner.
3. Complete the lid of the container (name, soldering, light source, questions) according to your �naldesign.
4. Apply wood glue to the �aps and model the 3D-container. Hold �rmly in position so that the containercan dry properly. (Do not use too much wood glue. The surface must just be slightly sticky.)
Put the electric circuit in the container. Make two holes in one side where the connections should comethrough.
3.6 Designing and making a warning system6
3.6.1 TECHNOLOGY
3.6.2 Grade 7
3.6.3 ELECTRICITY
3.6.4 Module 15
3.6.5 DESIGNING AND MAKING A WARNING SYSTEM
3.6.6 Assignment 1:
3.6.7 To design and make a warning system
3.6.8 [LO 1.1, 1.2, 1.5 to 1.13]
Design and make a warning system with two output devices (light and buzzer) that can be installed at thedoor and inside the room. This system should be able to tell the occupants of the room when somebody elsewants to enter at the door by giving o� a light and sound signal in the classroom.
SituationThe door of the Technology class is connected to the classroom by means of a long passage. It is sometimes
impossible for the occupants of the room to hear when somebody is knocking at the door. Therefore is itnecessary for someone to shout or hammer on the door. The teacher prefers that the door should be keptclosed because pupils sometimes tamper with other learners' products or with tools that are stored in thepassage.
• Investigation:
Analyse and write the problem down in your own words.Research:Make a list of existing products and solutions. Paste pictures of their appearance and cost.Modelling:Investigate di�erent types of switches and make models of types that would suit to resolve the problem.Design:Design brief (Who? What? Where? When? Be able to?)Speci�cations and constraints:
• Who is it for (age, access)?
• What is its purpose?
6This content is available online at <http://cnx.org/content/m23125/1.1/>.
Available for free at Connexions <http://cnx.org/content/col11032/1.1>

74 CHAPTER 3. TERM 3
• What will it look like?
• What in�uence will it have on the environment?
• What will the cost of the materials used be?
• Distance between input and output?
Initial designs / solutions:Choice with reasons:Final design (develop design and solution further):Make:Make a list of all the resources (tools and materials) needed. Also add the quantities or dimensions.
Materials Quantity/Measurements
Table 3.17
Draw a simple �ow diagram to show the steps for making the product.(LO 7.1.3.1)
Available for free at Connexions <http://cnx.org/content/col11032/1.1>

75
Figure 3.13Available for free at Connexions <http://cnx.org/content/col11032/1.1>

76 CHAPTER 3. TERM 3
Draw a simple working drawing of your �nal product. Use colour, shade, thick and thin lines and shadow.EvaluationProductDoes the product satisfy the design brief? Explain.Does the product satisfy the speci�cations and constraints? Explain.Suggests any improvements to your �nal product.ProcessHow well did your making compare to your planned steps?Suggests any improvements to your plan of action.
3.6.9 Assessment
Learning Outcomes(LOs)
LO 1
TECHNOLOGICAL PROCESSES AND SKILLSThe learner will be able to apply technological processesand skills ethically and responsibly using appropriate information and communication technologies.
Assessment Standards(ASs)
We know this when the learner:
investigates:
1.1 investigates the background context, the nature of the need, the environmental situation, and thepeople concerned when given a problem, need or opportunity set in a local context;
1.2 examines existing products relevant to a problem, situation or need.
1.3 investigates by performing simple practical tests relating to aspects of the technological knowledgeareas (Structures, Processing, and Systems and Control);
1.4 during investigations, plans a strategy for collecting data and information.
design:
1.5 writes or communicates a short and clear statement or a design brief for the development of a productor system related to a given problem, need or opportunity;
1.6 lists product and design speci�cations and constraints for a solution to a given problem, need oropportunity.
1.7 generates at least two alternative solutions and annotates the ideas;
1.8 chooses possible solutions, gives sensible reasons for choice, and develops a chosen idea using graphicsor modelling techniques;
make:
continued on next page
Available for free at Connexions <http://cnx.org/content/col11032/1.1>

77
1.9 develops a plan.
1.10 chooses and uses appropriate tools and materials to make products by measuring, marking, cutting orseparating, shaping or forming, joining or combining, and �nishing di�erent materials with some accuracy;
evaluates:
1.12 evaluates the product or system based on criteria linked directly to the design brief and some of thespeci�cations and constraints, and suggests improvements or modi�cations;
1.13 evaluates the e�ciency of the plan of action followed and suggests improving future plans.
Table 3.18
3.7 The need for clothing7
3.7.1 TECHNOLOGY
3.7.2 Grade 7
3.7.3 PROCESSING: TEXTILES
3.7.4 Module 16
3.7.5 THE NEED FOR CLOTHING
3.7.6 INTRODUCTION
The need for clothing, like the need for food, is one of the most important human needs. In this module weare going to examine the textile industry and follow the process of manufacturing clothing, from the simple�bres used in producing fabrics to the �nal garment in which you will dress yourself.
3.7.7 WHY DO PEOPLE WEAR DIFFERENT GARMENTS?
Di�erent garments have di�erent functions. Let us look at the typical out�t worn by Venus and SerenaWilliams when they play tennis.
Figure 3.14
7This content is available online at <http://cnx.org/content/m23126/1.1/>.
Available for free at Connexions <http://cnx.org/content/col11032/1.1>

78 CHAPTER 3. TERM 3
3.7.8 ASSIGNMENT 1:
3.7.9 [lo 1.1]
Make a list of their garments:
1. Is each garment suited to its function?
1. What makes it suited to its function?
1. What problems would they experience if their tennis dresses were made of the same fabric as theirtracksuits?
Di�erent occasions and di�erent climatic conditions require that we wear di�erent types of garments. Allgarments are made from di�erent types of textiles. What are textiles?
3.7.10 Assessment
Learning Outcomes(LOs)
LO 1
TECHNOLOGICAL PROCESSES AND SKILLSThe learner will be able to apply technological processesand skills ethically and responsibly using appropriate information and communication technologies.
Assessment Standards(ASs)
We know this when the learner:
Investigates:1.1 investigates the background context, the nature of the need, the environmental situation,and the people concerned when given a problem, need or opportunity set in a local context;
Table 3.19
3.7.11 Memorandum
1. tennis frock (tight-�tting)pants suit2. Yes3. �exible � easy to move in / will not perspire4. hot / perspire / di�cult to move
3.8 The textile industry8
3.8.1 TECHNOLOGY
3.8.2 Grade 7
3.8.3 PROCESSING: TEXTILES
3.8.4 Module 17
3.8.5 THE TEXTILE INDUSTRY
(a) The history of the textile industry
8This content is available online at <http://cnx.org/content/m23127/1.1/>.
Available for free at Connexions <http://cnx.org/content/col11032/1.1>

79
The textile industry came into existence when people discovered that the cover of hair from some animals(e.g. the sheep) could be used without slaughtering the animal. A method for using these �bres was thendeveloped, through spinning them together to make yarn. The �brous nature of some plants, like the �axplant, also made it possible to spin threads which could be woven into fabric.
Today, most fabrics are knitted or woven. Fibres that are used may be natural and may be obtainedfrom plants or animals.
Fibres may also be synthetic (produced arti�cially). Such textiles are produced from minerals like coaland petroleum. Examples of arti�cial �bres are nylon, acrylic and polyester �bres. Sometimes arti�cial �bresare combined with natural �bres. In this way we, for example, obtain polyester cotton.
Figure 3.15
See how many garment labels that indicate that polyester-cotton was used for the manufacture of thefabric you can �nd.
(a) Qualities of �bres
The length, density, strength, �neness and elasticity, as well as resistance to chemicals and moisture, deter-mine the quality of the textile that is manufactured from a �bre. In this way, the qualities of the di�erenttypes of �bres will determine the qualities of the fabrics that are made from them. The way in which �bresare knitted or woven also plays a role.
That is why a garment should have a label to describe the textile from which it is made, as well as giveguidelines about how the garment should be taken care of or washed.
Study the following examples of such labels and talk about them in your groups:
Available for free at Connexions <http://cnx.org/content/col11032/1.1>

80 CHAPTER 3. TERM 3
Figure 3.16
(a) Doing research on the di�erent clothing fabrics
3.8.6 ASSIGNMENT 1:
3.8.7 [LO 1.1]
• Study the labels from 3 garments and complete the table that follows:
Garment Description oftextile
Washing in-structions
Texture of fab-ric
Fabric mass Elasticity offabric
E.g.: T-shirt 100% cotton Cold washhand wash
Soft Light Not much
Table 3.20
Because di�erent types of fabric have di�erent qualities, people choose di�erent types of textiles forspeci�c purposes. Soft fabrics are usually selected for garments that will be worn against the body, whileother fabrics are needed for warm jerseys and jackets.
• The following table presents a summary of the qualities of di�erent types of �bres and also indicateshow articles made from these �bres should be taken care of.
Fibre Qualities Care
Cotton CoolCan absorb moistureLit-tle elasticityCreases easilyVery�ammableSoft/coarse, depend-ing on weave
Machine or hand wash / Luke-warmRinse thoroughlyHang upto dry or spin dry. Colouredcotton is faded by the sunIronwith warm ironWhites may bebleached
continued on next page
Available for free at Connexions <http://cnx.org/content/col11032/1.1>
81
Wool Keeps in warmthElasticWeakwhen wetCan shrink Does notcrease easily
Dry clean / Hand washDry inshade / Lay down �atAvoid iron-ing, or cool iron
Arti�cial �bres StrongDo not absorb mois-tureDry easilyCrease resistantDonor shrink or stretch (Lycrais an exception)Melts at hightemperatures
Warm wash- machine or hand-Hang up or spin dryDoes notneed ironing
Table 3.21
• Make use of the information you have gathered to select a suitable fabric for:
• a school shirt• a winter jacket• long trousers for a boy• Fabric qualities:
Follow the instructions and draw up a table to record your observations.
a) Durability:
Choose three di�erent types of fabric. You need to be reasonably sure that you know what �bres were usedduring the manufacturing process.
• Stretch the fabric over the open end of a tin and secure it in position with an elastic band.• Rub a stone against the fabric, using even movements until a hole is formed.• Compare the strength of the di�erent �bres.• Flammability:
Take the same pieces of fabric and hold them close to a �ame. What do you observe?
a) Absorption of moisture:
Place the fabrics in water to see which one absorbs water most easily.Place the wet fabric outside to see which one dries the fastest.
Fabric 1. 2. 3.
Fibres
Durability
Flammability
Absorption of moisture
Table 3.22
3.8.8 Assessment
Available for free at Connexions <http://cnx.org/content/col11032/1.1>

82 CHAPTER 3. TERM 3
LO 2
TECHNOLOGICAL KNOWLEDGE AND UNDERSTANDINGThe learner will be able to understandand apply relevant technological knowledge ethically and responsibly.
Assessment Standards(ASs)
We know this when the learner:
Structures:2.1 demonstrates knowledge and understanding of structures.
Table 3.23
3.9 Making a garment9
3.9.1 TECHNOLOGY
3.9.2 Grade 7
3.9.3 PROCESSING: TEXTILES
3.9.4 Module 18
3.9.5 MAKING A GARMENT
3.9.6 MAKING A GARMENT
Before you can make a garment, you need to have a pattern. Patterns simply are sheets of paper or cardboard.Each pattern piece is shaped precisely and serves as a master copy according to which you cut the di�erentparts of the garment out of fabric. It is possible to buy a di�erent pattern for each garment or to use a basicpattern, like dressmakers, and adjust it according to need. But before you can cut out a pattern, you needto know what your measurements are.
(a) Taking your measurements
Use a tape measure and write down the necessary measurements in the table. You will need a helper totake some of the measurements. Study the sketch on the following page to ensure that the measurementsare taken correctly.
These are some important guidelines:
1. Be relaxed while your measurements are taken.2. If you pull in your tummy, the garment may be too tight when it is �nished.3. Use the tape measure loosely rather that tightly. It is easy to cut away excess fabric if the pieces are
too large, but you cannot add on fabric when they are too small.4. If a measurement is not measurable to the centimetre, round it o� to the following centimetre.5. Your body is still growing and you must make allowances for such growth.
9This content is available online at <http://cnx.org/content/m23128/1.1/>.
Available for free at Connexions <http://cnx.org/content/col11032/1.1>

83
Measurements My measurements in cm
Shoulder length
Shoulder to waist
Shoulder to hip
Shoulder to chest line
Chest
Arm (length)
Waist
Hip
Inner leg
Outer leg
Table 3.24
DISCUSS THIS WITH YOUR FRIEND:
• How would you adjust the above measurements when you want to make a loose-�tting T-shirt?• Must pattern pieces be made to the exact size of the garment?• How would you indicate where di�erent pattern pieces have to be stitched to one another?• What fabric / kind of paper should be used to make pattern pieces?• The pattern
The following shows a typical pattern for a garment. Can you suggest what kind of garment will be madefrom this pattern?
Figure 3.17
• The solid line indicates the edge of the pattern along which you have to cut.
Available for free at Connexions <http://cnx.org/content/col11032/1.1>

84 CHAPTER 3. TERM 3
• The dotted line that is 15 mm inside the solid line indicates the line along which the pattern piecesmust be sewn to one another.
• This 15 mm-wide area is the seam allowance.• You have to allow at least 30 mm at the lower edges of pattern pieces for hems when you are cutting
out the pattern.• The single and double notches show you where pattern pieces have to be aligned (placed together).
The arrow shows how the pattern piece must be laid on the fabric when you want to cut it out.
3.9.7 THE PRODUCT
Designing my own pattern
• You are going to design a pattern for a T-shirt for yourself.
• How long should the T-shirt be?• Should the neckline be rounded or V-shaped?• The neck opening should slip over your head. How are you going to achieve this?
• Should the shirt �t or be loose?• What type of fabric will suit the purpose of the shirt?
• What type of fabric will you use?
• Must it be soft / elastic / absorbent?• Must it be expensive? For what purpose will you use it?
• Must the fabric be colourful or plain?• Will you decorate it with some painting or appliqué?• Must the fabric be crease resistant? Do you like ironing?
• Must the fabric have speci�c instructions for washing?• The design stage
You will need:
• newspaper• pencil• tape measure• pins / sellotape• old shirts• brown paper / unprinted paper
Available for free at Connexions <http://cnx.org/content/col11032/1.1>

85
3.9.8 ASSIGNMENT 1:
3.9.9 [lo 1.12]
Step 1:Try on the old shirt to see whether it still �ts you properly. If the �t is slightly tight or loose, you must
bear this in mind so that you can make adjustments to the width at the seams.Step 2:Carefully unpick the seams of the old shirt. Place the di�erent parts on a large sheet of newspaper and
trace the outlines carefully, using a pencil. At this stage you must ensure that the shirt will �t properly.If necessary, you must use a tape measure and adjust the measurements of di�erent parts to do so. If youshould like to change the style, it must also be done at this point. You might decide to change the roundneckline to a V-neckline, to have long sleeves instead of short sleeves, or to cut the shirt shorter, and so on.
Step 3:Cut out the di�erent pattern pieces and pin them together, using straight pins. Fit the pattern loosely
around you to see how you are managing. Check whether you have made proper allowance for all the seamsand hems. Is the length correct? Are the sleeves long enough? Check all aspects of the pattern. Thenindicate the notches that will ensure that you �t the di�erent pattern pieces together correctly.
Step 4:You may now remove the pins and lay out the pattern pieces neatly on unprinted paper before tracing
the �nal pattern. Cut out these pattern pieces.Step 5:Study the di�erent pieces of a bought pattern to �nd out as much as you can about the information that
is given on the di�erent pattern pieces. Try to transfer the most important information to your own patternpieces, e.g.:
• How many of each pattern piece you need to cut out (you will have one pattern piece for a sleeve,because the sleeves will be the same).
• How many cm are allowed for seams.• he direction in which the pattern pieces should be laid on the fabric.• The name of the pattern piece: this probably is the most important information.• Whether the pattern piece should be laid against a fold?
Step 6:Fabric is usually sold in 3 approximate widths: 900 mm; 1 150 mm or 1 500 mm. Join newspapers
together to obtain these widths and lay your pattern pieces out on these to try to work out approximatelyhow much fabric you will need for your garment.
Step 7:Get suitable cloth for your garment. (You need not use expensive fabric).Lay out the pattern pieces on the fabric according to the necessary speci�cations and pin them to the
fabric. (It is important to work on a clean, smooth surface that is large enough).Cut out the pattern, using a sharp pair of scissors. Work with care to ensure that you indicate all the
notches clearly. Try to keep your cutting line straight, with long even cuts. Do not unpin the pattern fromthe fabric, or you might have di�culty in recognising the di�erent parts afterwards.
(a) Making the shirt
(i) Hand sewing or sewing machine?
Do not become discouraged if you do not know how to use a sewing machine, or do not have one available.You can manage equally well with a needle and tread.
Study the sketches below to learn more about the basic stitches that you will need for seams and hems.Practise sewing them on a piece of fabric.
Available for free at Connexions <http://cnx.org/content/col11032/1.1>

86 CHAPTER 3. TERM 3
A: Tacking stitch: If the stitches are long, they are meant to hold the pieces of the pattern togethertemporarily. If the stitches are �ne and close together, they can be regarded as permanent stitches.You usually start your sewing with a knot in the thread.
Figure 3.18
A: Backstitch: These very small stitches form a sturdy seam. At the beginning and the end of a seam,the thread should be worked in �rmly.
Figure 3.19
A: Hem stitch: Small, slanted stitches that are used to sew hems. They should preferably not show onthe right side of the fabric. Sew the thread in securely at the beginning and at the end of a hem.
Figure 3.20
(i) We'll �nish the shirt step by step.
What do you need?
• Cut out pattern pieces.• Thread to match the fabric.• Tacking thread in a di�erent colour.• Pins.• needle.
Available for free at Connexions <http://cnx.org/content/col11032/1.1>
87
• A sharp pair of scissors.
Do the work as follows:
• Sew the facings for the front and back to the neckline edges. Remember to pin it in place �rst, thento tack and then to stitch. Iron the seams �at.
• Sew front and back sections together at the shoulders (right sides of fabric must be placed together).Iron the seams neatly.
• Sew both sleeves to the arm openings.• Sew the side and sleeve seams (underarm seams) all the way to the sleeve edge.• Decide how long the sleeves and the shirt body should be, pin the hems, tack and sew neatly. Iron, if
necessary.
Neatly sew down the facing around the neckline, using hemstitch. Iron the whole garment, if necessary.
(i) Fitting:
You may now try on the shirt to see what it looks like. If it is a loose-�tting T-shirt, seams that aren'tperfectly straight will not be too noticeable.
Next, you can organise a competition to design a suitable emblem for grade seven and paint it on yourshirts, using fabric paint. By doing this, you will be creating a garment that will always remain unique andremind you of your grade seven year.
3.9.10 How successful is my product?
Next, you as a class must, under leadership of you educator, establish a set of criteria that you could applyto evaluate your �nal product, which, in this case, is the T-shirt. Make use of factors such as the following:
a) how well does the shirt �t?b) is it comfortable?c) how good is the �nish?d) is the emblem striking?e) is the fabric that was selected suitable?f) and so on . . .
Set up a standard table according to which each item (shirt) that was made can be evaluated and choose awinning T-shirt.
3.9.11 Assessment
Learning Outcomes(LOs)
LO 1
TECHNOLOGICAL PROCESSES AND SKILLSThe learner will be able to apply technological processesand skills ethically and responsibly using appropriate information and communication technologies.
continued on next page
Available for free at Connexions <http://cnx.org/content/col11032/1.1>

88 CHAPTER 3. TERM 3
Assessment Standards(ASs)
We know this when the learner:
Investigates:1.1 investigates the background context, the nature of the need, the environmental situation,and the people concerned when given a problem, need or opportunity set in a local context;
Evaluates:1.12 evaluates the product or system based on criteria linked directly to the design brief andsome of the speci�cations and constraints, and suggests improvements or modi�cations.
Table 3.25
Available for free at Connexions <http://cnx.org/content/col11032/1.1>

Chapter 4
Term 4
4.1 What is food technology?1
4.1.1 TECHNOLOGY
4.1.2 Grade 7
4.1.3 PROCESSING: FOOD TECHNOLOGY
4.1.4 Module 19
4.1.5 WHAT IS FOOD TECHNOLOGY?
1. What is food technology?
Food technology incorporates a broad �eld of study, but de�nitely deals with altering raw materials to foodproducts. Raw materials include items such as bananas, �sh, grains of wheat and potatoes. Some of theseraw materials can be eaten as they are; bananas, for example. Other raw materials need to be processedbefore they can be presented as tasty. We need to distinguish between two core ideas: primary processingand secondary processing. Primary processing involves a process in which a raw material is made intoa usable product (grains of wheat, for instance, are made into �our). When the �our is used to bake bread,we have to do with secondary processing.
4.1.6 ASSIGNMENT 1:
4.1.7 [lo 2.2]
Illustrate examples of your own of primary and secondary processingWhen we apply the process of food technology, it is necessary to have acquired particular knowledge
and skills. We shall learn about di�erent ingredients and their nutritive values. We shall have to be ableto use particular tools and equipment e�ectively to be able to produce food products and we also haveto understand why it is important to know about safety precautions and hygiene. To produce a productthat will be popular, we shall have to do the necessary research, which will require knowledge related to theutilisation of computers and appropriate software. Sometimes the food technology process involves developingparticular recipes and it might often be necessary to follow instructions precisely. Every successful enterprise,including food technology, also requires quality control. Are the ingredients that I use in my product safe in
all instances? is only one of the questions that a food technologist has to ask.
1This content is available online at <http://cnx.org/content/m23129/1.1/>.
Available for free at Connexions <http://cnx.org/content/col11032/1.1>
89

90 CHAPTER 4. TERM 4
4.1.8 ASSIGNMENT 2:
4.1.9 [LO 2.2]
Answer the following questions:
a) Make a list of a number of foods that can be eaten raw, without any processing. Explain how twofoods can be processed to become other products, for example: Meat (raw material) is dried to providebiltong (processed material).
a) Design a memory chart to provide a clear illustration of the knowledge and skills that are required inthe world of food technology.
b) HYGIENE AND SAFETY
a) Food hygiene and personal hygiene
Before designing a food product, you need to increase your knowledge of food hygiene, or you might designa food product that is unsafe for consumption by people!
Food hygiene consists of a set of rules that are directed towards keeping food clean. The main methodsfor keeping food clean are:
• protecting food against bacteria;• preventing bacteria from multiplying in food, and• destroying bacteria by means of cooking.
Poor food hygiene in the food industry often leads to food poisoning. This can lead to legal steps beingtaken by clients against an enterprise, which may result in heavy �nes. To sell food that is unsafe to eat is acontravention of the Food Safety Act of 1990 and this law states that the food industry must do everythingin its power to ensure that food in whatever processed form must be safe to eat. There are certain basicprinciples that can be applied by the individual to ensure that food is protected from bacteria. The coreconcept to be emphasised here is personal hygiene. Try to respect he following recommendations whenyou work with food:
• Clean hands
We use our hands to handle food in most instances and it is therefore important that our hands must beexceptionally clean. Be sure to wash your hands after using the toilet. In any case, wash your hands beforeworking with raw materials or such-like food products. People who are employed in the food industry usuallywash their hands with an anti-bacterial detergent before handling food.
• Injuries
It is unwise to handle food after you have sustained a cut, especially if the wound is on your hand. Thefoodstu� then comes into direct contact with body �uids and bacteria are able to enter the food.
• Clothing
Your clothing can also contribute to the transfer of bacteria. Hair, especially, contribute to transferringbacteria, so people who work in food factories wear nets to cover their hair as a method of protection.
• Condition of health
If you are unwell and su�er from a condition like diarrhoea, you should preferably not work with food.Dangerous bacteria that can cause food poisoning could be transferred to the food.
Available for free at Connexions <http://cnx.org/content/col11032/1.1>

91
• Smoking
People may not smoke while they are involved in working with food. The danger comes from the fact thata person who is smoking might touch the lips when a cigarette is removed from the mouth. In this way,bacteria from the lips can be transferred to the food.
• Work environment
It is obvious that the area where the work takes place must be kept very clean. Although there is muchthat can be done to keep your immediate environment clean, it is a prerequisite to �rst clean the surface onwhich you plan to work with an antibacterial spray.
4.1.10 ASSIGNMENT 3:
4.1.11 [LO 1.2]
Execute the following instructions:
1. Di�erentiate between the core concepts food hygiene and personal hygiene with the help of a classdiscussion.
2. Design a memory chart to indicate what one should do to ensure personal hygiene.
a. FOOD SAFETY
Food safety comprises the process according to which you ensure that food is safe to eat, in order to avoidfood poisoning.
• What causes food poisoning?
A variety of factors can lead to food poisoning, but the presence of bacteria probably is the main cause.Although most kinds of bacteria are harmless, some types can result in food poisoning. The symptomsnormally include nausea, diarrhoea, stomach cramps and fever. In some instances food poisoning can leadto death. Bacteria are microorganisms that can only be seen with the help of a microscope. There arebacteria that can be utilised very advantageously, for example those that are used to make cheese. Bacteriaincrease extremely rapidly under the right circumstances. They develop at temperatures between 5 degreesCelsius and 63 degrees Celsius. They, however, �ourish at temperatures that are more or less the same asbody temperature, i.e. 37 degrees Celsius. It is interesting to note that their numbers double within 10 to20 minutes when conditions are ideal. One bacterium can therefore increase to several thousands within �vehours.
It is important to take note of the conditions that stimulate the growth of bacteria. When these factorsare known, it is easier to take steps to prevent their growth.
Available for free at Connexions <http://cnx.org/content/col11032/1.1>

92 CHAPTER 4. TERM 4
Warmth The temperature range between 5 and 63 degreesCelsius is rated as the danger zone because bacte-ria are able to grow at these temperatures. If weare able to keep the temperature either above 63degrees Celsius or below 5 degrees Celsius, it be-comes impossible for bacteria to multiply further.Boiling food at 70 degrees Celsius for at least twominutes is recommended - in this way all bacteriaare destroyed.
Moisture Bacteria need moisture for their development. Haveyou ever wondered why biltong has such an ex-tended shelf life? It is because there is not enoughmoisture in the dried meat for bacteria to �ourish.
Foods rich in protein Bacteria prefer foods that have high levels of proteinsuch as meat, eggs and �sh. We can regard thesefoods as high-risk foods.
Time We have already stated that bacteria are able tomultiply very quickly when circumstances are ideal.Food must therefore not be kept for too long underwarm conditions.
Table 4.1
People who handle food should try to avoid the following dangerous practices:
• not cooking food for long enough;• preparing food and then leaving it to stand for a long time before eating it;• transferring bacteria from raw materials to cooked food;• not storing food in a freezer;• not thawing foods such as frozen chicken properly.
Develop the habit of studying the label on a food item properly before buying it. The label indicates theexpiry date of the item for the information of the consumer. The expiry date is determined by scientists andfood technologists. Later in the module you will be given an opportunity to design your own food productand then you will also have to make your own label.
It would seem that knowledge of the relationship between temperature and bacteria is important, espe-cially with producing your own food products in view. We therefore recommend that you �ll in the followingtable as precisely as possible:
4.1.12 ASSIGNMENT 4:
Degrees Celsius 100; 72; 63; 37; 25; 5; 0; 18
Table 4.2
Choose the temperature from the above table that best suits the description in the following table:
Available for free at Connexions <http://cnx.org/content/col11032/1.1>

93
FOOD TEMPERATURE CHART
Room temperature
Freezer temperature
Freezing point of water
Boiling point of water
Pasteurization temperature
Fridge temperature
Body temperature
Very hot - bacteria are destroyed
Table 4.3
4.1.13 ASSIGNMENT 5:
4.1.14 [LO 1.2]
Form a panel of "food technologists" for a discussion on the subject Food Safety.
Suggestions for setting up the panel:
• A panel usually comprises three to �ve members and has a leader who stimulates the responses of therest of the panel by means of questions.
• Each member is given a subdivision of the subject, which he or she has to prepare thoroughly. Thegroup leader knows which subdivision is allocated to each of the members and prepares the questionsaccordingly.
• The group leader introduces the panel to the rest of the class and begins to put the questions to thedi�erent members of the panel.
• After the questions have been dealt with, the class has an opportunity to put further questions to thepanel.
Designing your own food product
• Steps to take during the planning and production of your food product.
The following steps may give you good guidance while you are planning and producing your product. Thevarious steps are presented diagrammatically and then the meaning of each is explained brie�y.
ANALYSE THE SUGGESTED DESIGN
COLLECT RESEARCH RESULTS
EXAMINE IDEAS
WRITE OUT A SPECIFICATION
PLAN AND PRODUCE THE FOOD PRODUCT
QUALITY CONTROL
EVALUATE THE SUCCESS OF THE FOOD PRODUCT
Table 4.4
Available for free at Connexions <http://cnx.org/content/col11032/1.1>

94 CHAPTER 4. TERM 4
i) Analyse the suggested design
Planning and making of the food product begins with the analysis of the suggested design. Here is thesuggested design for this module:
Plan and produce an energy bar to be eaten by sports people to improve their energy levels before animportant sports meeting.
Analysing the suggested design carefully makes it clear that the successful food product has to:
• be in the shape of a bar;• release energy after being eaten; and• be attractive to sportsmen and women.• Collect research results
It is wise to take a look at similar products and ideas. Do consult recipe books, magazines and newspapers.Visit several cafes and shops and do not hesitate to talk to people about their preferences and dislikes. Try toarrange an interview with a dietician to discuss the suggested design and study the labels of similar existingproducts thoroughly.
i) Write out a speci�cation
The speci�cation actually is a summary of the prerequisites that are listed in the suggested design. In thisinstance the speci�cation will be as follows:
• The shape of the sweet must be that of a bar.• The ingredients must be tasty and the bar must therefore taste good.• The ingredients must be of such a nature that energy is released quickly.• The ingredients must not run the risk of being regarded as a stimulant.• It must be a�ordable.• Name and description of the product.• Size, shape and appearance.• Ingredients and amounts.• Recipe (how it is made).• Shelf life and storage requirements.• Planning and production of your food product
Some people think that there is only one way of planning and production. When you are busy planning andproducing your energy bar, you really must allow your ability to think creatively and work out solutionsand suggestions to come to the fore. Accept that the way you think will be di�erent to your friend's wayof thinking and that you will do things di�erently. You could ask your friend's opinion for evaluating yourproduct, but never expect your product to be similar to your friend's.
Here is some useful information that you could apply while planning and producing your energy bar:
WHY ARE ENERGY BARS SO POPULAR?They are healthy. Eating them supplies the body withcarbohydrates, vitamins and minerals, as well as �bre and proteins. This usually sustains any sportsmanor sportswoman. Energy bars are easily digested and supply glucose to the muscles. Energy bars areconvenient. Because most energy bars weigh between 30 and 80g sports people can accommodate themeasily. Think about runners and cyclists, for instance, who do not have much space for packing snackswhen they compete.RECIPE FOR AN ENERGY BAR FOR CYCLISTSIngredients
continued on next page
Available for free at Connexions <http://cnx.org/content/col11032/1.1>

95
• 24 dried �gs• 1/3 cup honey• 4 teaspoons orange juice• 2 teaspoons lemon juice• ½ teaspoon bicarbonate of soda
• ¼ teaspoon baking powder• 1 teaspoon cooking oil• ¼ cup syrup• whites of 2 eggs• 1 cup Jungle Oats
InstructionsBlend �gs, honey, orange juice and lemon juice in a blender. Mix other ingredients (exceptJungle Oats) separately. Combine the mixtures and roll into balls of golf ball size (the mixture is enoughfor approximately 20 such balls). Cover the balls with the Jungle Oats and bake them @ 350 ◦ Fahrenheitfor 10 - 15 minutes (try to work out the equivalent degrees in Celsius). Store the product in the refrigerator.
Table 4.5
i) Evaluation of the product
It is important to accept that your �rst attempt may not produce the best product. Make use of your friendsto evaluate the acceptability of your energy bar. Also do not be oversensitive about criticism. Apply therecommendations of your friends and remember that those who might buy your product will be looking atit as critically as your friends. Do make use of a tasting panel. Tasting panels are used to give a number ofpeople the opportunity to judge a product. It is advisable to ask more than one person to give an opinionon the success of your product. The larger the group, the more varied the opinions that you will get. Try toadjust your product to suit the requirements of most of the people in the tasting panel.
4.1.15
4.1.16 Assessment
Learning outcomes(LOs)
LO 1
Technological Processes and SkillsThe learner will be able to apply technological processes and skillsethically and responsibly using appropriate information and communication technologies.
Assessment standards(ASs)
We know this when the learner:
Investigate:1.2 examines existing products relevant to a problem, situation or need.
Design:1.5 writes or communicates a short and clear statement or a design brief for the development ofa product or system related to a given problem, need or opportunity;
Evaluates:1.12 evaluates the product or system based on criteria linked directly to the design brief andsome of the speci�cations and constraints, and suggests improvements or modi�cations
continued on next page
Available for free at Connexions <http://cnx.org/content/col11032/1.1>

96 CHAPTER 4. TERM 4
LO 2
Technological Knowlede and UnderstandingThe learner will be able to understand and apply relevanttechnological knowledge ethically and responsibly.
Assessment standards(ASs)
We know this when the learner:
Processing:2.2 demonstrates knowledge and understanding of how materials can be processed to changeor improve properties (e.g. strength, �re resistance, waterproo�ng, taste, volume, texture).
Table 4.6
4.2 Structures2
4.2.1 TECHNOLOGY
4.2.2 Grade 7
4.2.3 STRUCTURES AND COMMUNICATION
4.2.4 Module 20
4.2.5 STRUCTURES
Demonstrates knowledge and understanding of structures in terms of:
• speci�c properties and use of material (e.g. water resistance, thermal insulation, �re resistance);• stability (e.g. base size, centre of gravity);• strengthening (e.g. corrugation, laminating, reinforcing);• joining techniques.
SPECIFIC PROPERTIES AND USE OF MATERIALBackgroundStructures are designed and built to stand up to certain loads or forces. The strength of a structure are
determined by
• the strength of the materials making up the structure;• the quality of the joints between the parts;• the shape of the parts;• the way the parts are arranged together.
THERMAL INSULATION is when materials like plastic is made strong so that they will be resistant toheat. Once formed into a shape they cannot be reshaped, because they show resistance to heat. Althoughthey are quite hard, they can be chipped or cracked by being dropped or banged. Examples of such plasticsare the bodies of some cars, some glues, work surfaces in some kitchens, the handles of saucepans, goodquality electrical �ttings like the �ttings on light switches and some bowls, jars and glasses.
2This content is available online at <http://cnx.org/content/m23130/1.1/>.
Available for free at Connexions <http://cnx.org/content/col11032/1.1>
97
4.2.6 ASSIGNMENT 1:
4.2.7 To �nd examples of structures
4.2.8 [LO 2.1]
Look for pictures of examples of structures that were formed by using thermal insulation and paste them ona sheet of paper.
Structures that have FIRE RESISTANCE, shows some resistance against heat. Structures that areWATER RESISTANT, show some resistance against water and can be easily submerged into water withoutgetting wet or damaged.
StrengtheningWays of strengthening structures are through:
• CORRUGATION, like some cans and asbestos roofs;• LAMINATING, e.g. to cover placemats or pieces of wood with plastic.
LAMINATING; like the strengthening of placemats with plastic or to make permanently bent pieces of wood.Wood is often thought as a rigid material, because it will bend and usually springs back into shape whenreleased. Because wood is `springy� it is not easy to make bent or curved shapes from straight pieces ofwood, but by laminating wood you can bend it. Thin layers of wood are glued together. A thin layer ofwood is easy to bend. Each layer has glue put on it and is bent into shape around a former. The wholeshape is held in the former until the glue sets. Laminating can be used for small things like tennis racketsand chairs, or for large things like roof beams. Have you heard about laminated �oors? How is it made?
4.2.9 Assessment
LO 2
TECHNOLOGICAL KNOWLEDGE AND UNDERSTANDING The learner will be able toundertsand and apply relevant technological knowledge ethically and responsibly.
Assessment standards (ASs)
We know this when the learner:
structures:
2.1 demonstrates knowledge and understanding of structures.
processing:2.2 demonstrates knowledge and understanding of how materials can be processed to changeor improve properties (e.g. strength, �re resistance, waterproo�ng, taste, volume, texture).
We know this when the learner:
impact of Technology:
3.2 expresses some reasons why products of technology a�ect the quality of people's lives positively andnegatively.
Table 4.7
Available for free at Connexions <http://cnx.org/content/col11032/1.1>

98 CHAPTER 4. TERM 4
4.3 Make your own laminated bracelet3
4.3.1 TECHNOLOGY
4.3.2 Grade 7
4.3.3 STRUCTURES AND COMMUNICATION
4.3.4 Module 21
4.3.5 MAKE YOUR OWN LAMINATED BRACELET
4.3.6 Make your own wooden bracelet by laminating wood
4.3.7 [LO 2.1]
Requirements :
• a tongue depressor• a bowl of warm water• a clean empty frozen-juice container• rubber bands• poster paint and a paint brush• sequins• clear varnish
Method :
1. Soak the wooden tongue depressor in warm water for about an hour, until you can gently bend itaround a frozen-juice container. Place rubber bands on top of the tongue depressor to hold it in place.Let dry for one day.
2. Remove the tongue depressor, cover it with poster paint, and let dry.3. Glue on sequins or other trims. Let dry.4. Cover with clear varnish.
4.3.8 Assessment
LO 2
TECHNOLOGICAL KNOWLEDGE AND UNDERSTANDING The learner will be able toundertsand and apply relevant technological knowledge ethically and responsibly.
Assessment standards (ASs)
We know this when the learner:
structures:
continued on next page
3This content is available online at <http://cnx.org/content/m23131/1.1/>.
Available for free at Connexions <http://cnx.org/content/col11032/1.1>

99
2.1 demonstrates knowledge and understanding of structures.
processing:2.2 demonstrates knowledge and understanding of how materials can be processed to changeor improve properties (e.g. strength, �re resistance, waterproo�ng, taste, volume, texture).
We know this when the learner:
impact of Technology:
3.2 expresses some reasons why products of technology a�ect the quality of people's lives positively andnegatively.
Table 4.8
4.4 Reinforcing doors and windows4
4.4.1 TECHNOLOGY
4.4.2 Grade 7
4.4.3 STRUCTURES AND COMMUNICATION
4.4.4 Module 22
4.4.5 REINFORCING DOORS AND WINDOWS
REINFORCING, by using concrete and lintels over doors and window openings.StabilityStructures are stabilized to prevent them from collapsing when forces or loads are put on them. To
prevent a structure from falling down or collapsing we must try to make the internal forces bigger than theexternal forces under all conditions. How can you prevent a chair from collapsing when you sit on it? Thereare rails acting as ties at the bottom holding the legs together and preventing the legs from being pushedoutwards.
A �agpole doesn't need any supports under normal conditions. When the wind blows it can be supportedby using guy ropes or ties that are �exible, but stop the poles from bending too far.
Di�erent forces can act on di�erent parts of a structure. Forces that structures have to stand up to are:
• Compression � when we try to squash a structure ( a squashing force).
Figure 4.1
• Tension � when we try to pull a structure apart from either end (a pulling force).
4This content is available online at <http://cnx.org/content/m23134/1.1/>.
Available for free at Connexions <http://cnx.org/content/col11032/1.1>

100 CHAPTER 4. TERM 4
Figure 4.2
• Bending � a force which is trying to bend a structure and it is in compression and tension simultaneously.
Figure 4.3
• Torsion � a turning or twisting force like when you twist the top o� a bottle.
Figure 4.4
• Shear � a force created when two opposite forces try to cut a material; like when you use a pair ofscissors to cut a piece of paper.
Figure 4.5
Available for free at Connexions <http://cnx.org/content/col11032/1.1>

101
When one force is balanced by another they are said to be in EQUILIBRIUM.When you build a structure, you do not always have to use solid material like wood or metal. Flexible
material, such as wire, can be used for parts of the structure which will only be stretched or in tension. Wirecan be used in tension (being stretched), but not in compression (be squashed).
Figure 4.6
Load from the top of the structure keeps the wire in tension and the structure remains rigid.
Figure 4.7
When the structure is loaded from the sides the wire is compressed (squashed) and it collapses. It isunstable.
Figure 4.8
Triangles are very useful when building structures. They can help to make a very strong and rigidstructure. To make a rectangle more stable is to put in two more members from corner to corner. Fourtriangles are formed. This way of making structures more stable is called TRIANGULATION. It is oftenused when building bridges or cranes. It is not always necessary to put in two members, one would beenough. The second extra member is called the redundant member. When designing structures it is easy
Available for free at Connexions <http://cnx.org/content/col11032/1.1>
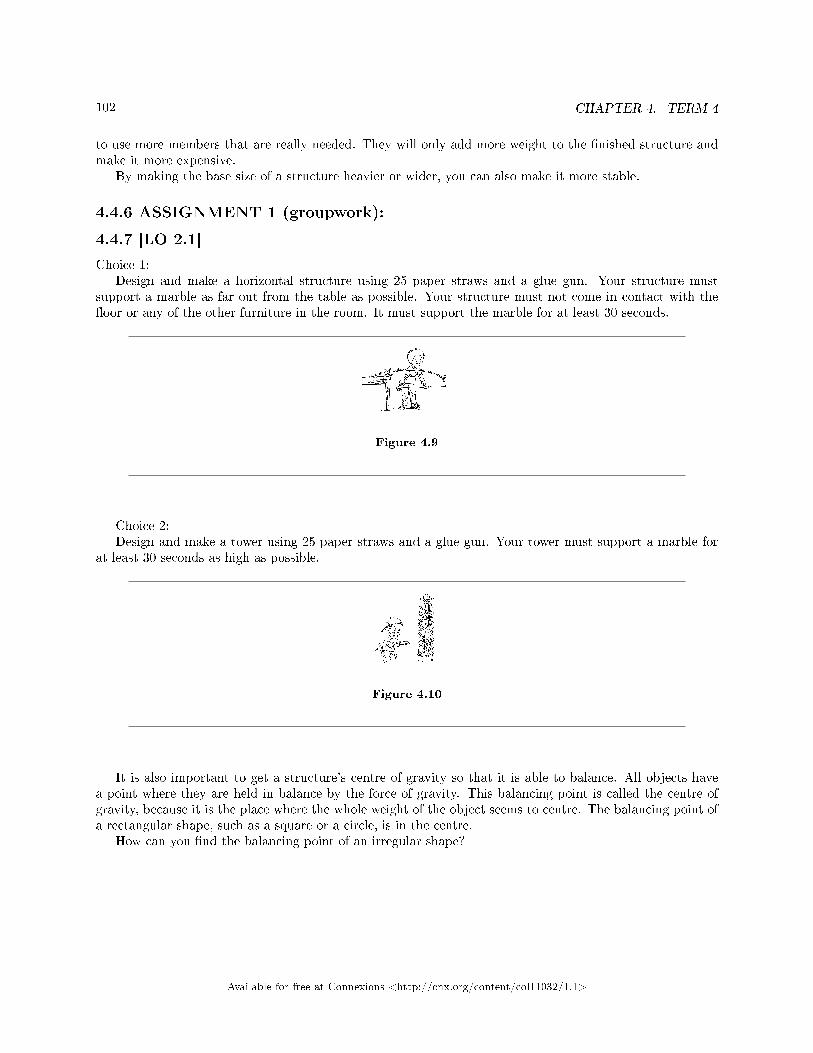
102 CHAPTER 4. TERM 4
to use more members that are really needed. They will only add more weight to the �nished structure andmake it more expensive.
By making the base size of a structure heavier or wider, you can also make it more stable.
4.4.6 ASSIGNMENT 1 (groupwork):
4.4.7 [LO 2.1]
Choice 1:Design and make a horizontal structure using 25 paper straws and a glue gun. Your structure must
support a marble as far out from the table as possible. Your structure must not come in contact with the�oor or any of the other furniture in the room. It must support the marble for at least 30 seconds.
Figure 4.9
Choice 2:Design and make a tower using 25 paper straws and a glue gun. Your tower must support a marble for
at least 30 seconds as high as possible.
Figure 4.10
It is also important to get a structure's centre of gravity so that it is able to balance. All objects havea point where they are held in balance by the force of gravity. This balancing point is called the centre ofgravity, because it is the place where the whole weight of the object seems to centre. The balancing point ofa rectangular shape, such as a square or a circle, is in the centre.
How can you �nd the balancing point of an irregular shape?
Available for free at Connexions <http://cnx.org/content/col11032/1.1>

103
Figure 4.11
Figure 4.12
Available for free at Connexions <http://cnx.org/content/col11032/1.1>

104 CHAPTER 4. TERM 4
Figure 4.13
Where do you think is the best place for the heavy cargo to be stowed on a ship?
Figure 4.14
Gravity is the pull that objects have on other objects around them. Because the Earth itself is the largestobject in our world, the pull of its gravity is the strongest we can feel. Gravity keeps everything resting onthe ground. An object centre of gravity is found when it just balances on the edge of a table before it fallso�.
Any object will balance on a pivot when its centre of gravity is low.How can you change an object's centre of gravity?
Figure 4.15
Available for free at Connexions <http://cnx.org/content/col11032/1.1>

105
4.4.8 ASSIGNMENT 2:
4.4.9 To make your own trapeze artist
4.4.10 [LO 2.1]
Requirements :
• Thick white card• a drawing pin• a scissors• felt tip pens• strong glue• wire• 2 plasticine balls• a heavy bottle• a glue gun• pliers
Method:
1. Draw the man shape onto some thick white card. Carefully cut out the shape with scissors.
Figure 4.16
1. Colour in the man to make him more human in the front and back using felt tip pens. Carefully gluea drawing pin to the bottom of the card.
Figure 4.17
1. Cut of a length of wire using pliers. Glue it into place with the glue gun.
Available for free at Connexions <http://cnx.org/content/col11032/1.1>

106 CHAPTER 4. TERM 4
Figure 4.18
1. Glue two plasticine balls to each end of the wire.
Figure 4.19
4. Carefully stand the balancing man on top of a bottle. He wobbles slightly, but should keep his balance.
Available for free at Connexions <http://cnx.org/content/col11032/1.1>
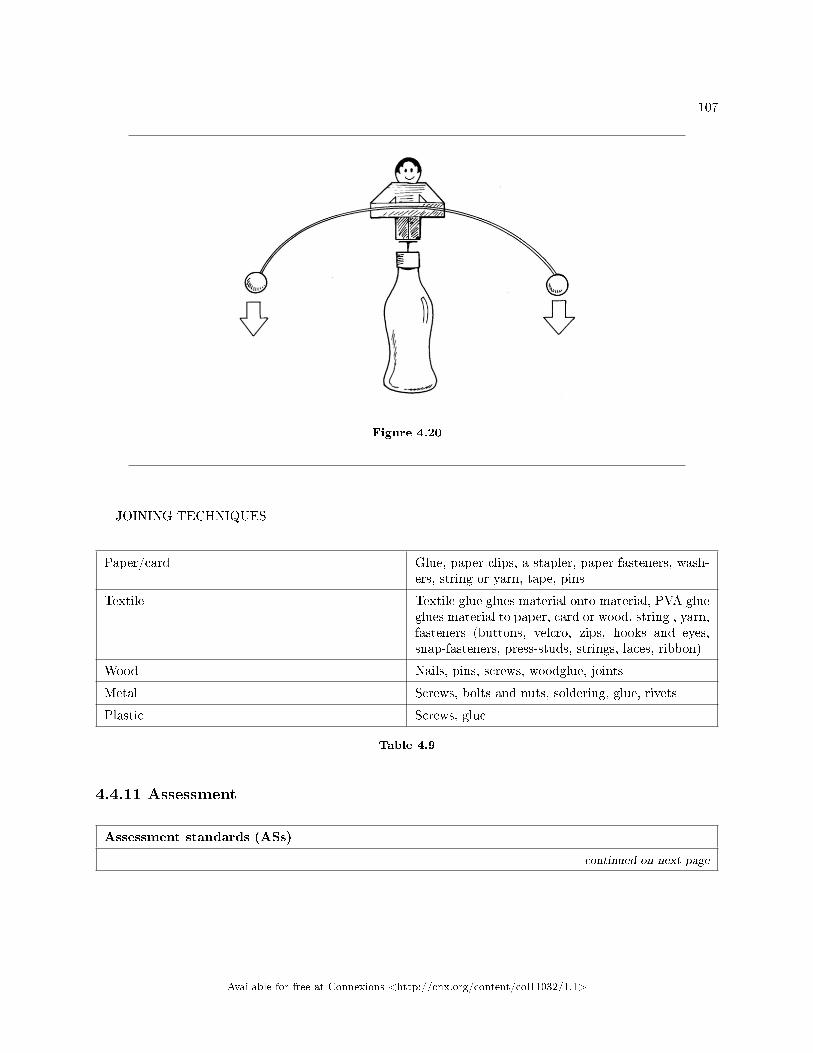
107
Figure 4.20
JOINING TECHNIQUES
Paper/card Glue, paper clips, a stapler, paper fasteners, wash-ers, string or yarn, tape, pins
Textile Textile glue glues material onto material, PVA glueglues material to paper, card or wood, string , yarn,fasteners (buttons, velcro, zips, hooks and eyes,snap-fasteners, press-studs, strings, laces, ribbon)
Wood Nails, pins, screws, woodglue, joints
Metal Screws, bolts and nuts, soldering, glue, rivets
Plastic Screws, glue
Table 4.9
4.4.11 Assessment
Assessment standards (ASs)
continued on next page
Available for free at Connexions <http://cnx.org/content/col11032/1.1>

108 CHAPTER 4. TERM 4
We know this when the learner:
structures:
2.1 demonstrates knowledge and understanding of structures.
processing:2.2 demonstrates knowledge and understanding of how materials can be processed to changeor improve properties (e.g. strength, �re resistance, waterproo�ng, taste, volume, texture).
Table 4.10
4.5 Project Portfolio5
4.5.1 TECHNOLOGY
4.5.2 Grade 7
4.5.3 STRUCTURES AND COMMUNICATION
4.5.4 Module 23
4.5.5 Project Portfolio
4.5.5.1 ASSIGNMENT 1:
4.5.5.2 [LO 2.2]
Look for examples of various containers in magazines and cut them out. Some of the examples will becontainers for A SPECIAL PURPOSE such as an egg box, a milk carton and a toolbox. Other will becontainers with GENERAL USES such as a basket and a briefcase. Paste at least �ve examples of each typeon a sheet of paper and complete the questions about each example:
Questions:1. Who/ What is it for?2. What is it made of?3. Is it relatively expensive or cheap?4. Can it be used many times of only once?5. Is it environment friendly/biodegradable or will it pollute the environment?6. Is it durable or will it easily break?
• SPECIAL PURPOSE CONTAINERS
Figure 4.21
5This content is available online at <http://cnx.org/content/m23135/1.1/>.
Available for free at Connexions <http://cnx.org/content/col11032/1.1>

109
• CONTAINERS FOR GENERAL USAGE
4.5.5.3 ASSIGNMENT 2:
4.5.5.4 [LO 3.2]
4.5.5.5 To complete a list of di�erent types of containers that are advantageous to people
4.5.5.6 ASSIGNMENT 3:
4.5.5.7 [LO 3.2]
4.5.5.8 To compile a list of di�erent types of containers that are harmful to the environment
Design briefDesign and make a luxury container that you will like to keep.
4.5.5.9 ASSIGNMENT 4:
4.5.5.10 [LO 1.6]
4.5.5.11 To write down the speci�cations of your job
Write the speci�cations for your product by answering the following questions:1. What will it hold/ What will it be for?2. What type of shape should it be?3. What must it look like?4. How must the lid be �xed to the box?5. Will it be for everyday use or for special occasions only?6. How will the lid open and close (locking mechanism)?7. What form do you want the container to take? (exciting, simple, beautiful, elegant, functional)8. What are the most suitable materials for a luxury package?
• type of card: smooth, shiny, thick, thin, coloured
• What type of cardboard do you want to use for the reinforcement inside?• What type of wood do you want to use for the reinforcement and decoration on the outside?• What type of material do you want to use on the inside to give it a nice interior? (velvet, satin, silk,
felt).
MAKE/ MANUFACTORING
4.5.5.12 ASSIGNMENT 5:
4.5.5.13 [LO 1.9]
4.5.5.14 To make a treasure chest
Instructions for making the treasure chest.
1. Place the net, the carbon copy paper and the A4 cardboard on top of one another in that order.2. Using a pencil and a ruler, copy the 2D-form on the cardboard. First draw the solid lines and then
the interrupted lines. Check if all of them have been drawn. Make sure that it doesn't shift.
• What are the use of the solid lines?
Available for free at Connexions <http://cnx.org/content/col11032/1.1>

110 CHAPTER 4. TERM 4
• What are the use of the interrupted lines?• Cut out the 2Dshape along the uninterrupted / solid lines with a scissors.• Notch the dotted lines on the side where the carbon copy markings are, using an awl and a safety ruler.
Work on a suitable surface. Practice �rst so that you don't make the notches too deep.• Fold the card on the dotted lines, using a ruler.• Apply glue to the �aps and model the chest (�aps to the outside). Hold �rmly in position so that the
chest can dry properly. (Do not use too much glue. The surface must just be slightly sticky.)
4.5.5.15 ASSIGNMENT 6:
4.5.5.16 [LO 1.9]
4.5.5.17 To plan the manufacturing of a product
Complete the following table by choosing all the materials and tools used, as well as the actions performedand write it underneath the appropriate heading.
Materials Tools Action
Table 4.11
4.5.5.18 ASSIGNMENT 7:
4.5.5.19 [LO 1.11]
4.5.5.20 To compile a list of safety measures
List a few safety rules that you should have obeyed when you've used a speci�c tool while making yourtrinket box.
Example: scissors � carry with the sharp side facing downwards.DESIGN
4.5.5.21 ASSIGNMENT 8:
4.5.5.22 [LO 1.7, 1.8]
To make a lid for your treasure chestDesign and draw di�erent types for lids for your treasure chest in isometric. Use the 30 ◦ graph paper.
Make a �nal choice by making a correct sign with that drawing. Also give valid reasons for your choice.Draw the lid in an open and closed position in isometric.
First designs:Reasons:Final choice:Closed positionMANUFACTURING
Available for free at Connexions <http://cnx.org/content/col11032/1.1>

111
4.5.5.23 ASSIGNMENT 9:
4.5.5.24 [LO 1.10]
4.5.5.25 To reinforce the inside of your box with cardboard
Take cardboard and measure out the �ve sides of the box. Cut it out and glue them to the insides of thebox to reinforce it. Are all the insides of even sizes? Explain.
REASEARCH
4.5.5.26 ASSIGNMENT 10:
4.5.5.27 [LO 1.4]
4.5.5.28 To use a explanatory dictionary
Look up the word HINGE in the explanatory dictionary and write down its meaning.
4.5.5.29 ASSIGNMENT 11:
4.5.5.30 [LO 1.4]
Look around you and make drawings of di�erent hinges in the space below. Write where you saw each hingeon the dotted line below each drawing.
DESIGNDi�erent ways of attaching the lid by using a hinge.
4.5.5.31 ASSIGNMENT 12:
4.5.5.32 [LO 1.5]
4.5.5.33 To attach a lid
Draw sketches or paste pictures with labels of di�erent ways of attaching the lid by using a hinge. Mark o�your �nal choice.
DESIGNReinforce the outside of your box.
4.5.5.34 ASSIGNMENT 13:
4.5.5.35 To reinforce your box
Take the 40 wooden sucker sticks and plan how you are going to glue them to the outside of your box. Thewhole outside, except the bottom of the box, should be covered with sticks. You are allowed to use less than40 sticks and you are allowed to saw some of the sticks to cover the whole outside (also the lid).
MAKING
4.5.5.36 ASSIGNMENT 14:
4.5.5.37 [LO 1.10]
Attach the lid as well as the wooden sticks to the outside of the box. Work neatly and sparingly with theglue. Cut the sticks shorter with a craft knife and safety ruler on a suitable surface. Be careful not tohurt yourself. Snap the sticks by cutting one side, folding them over, cut the other side and snapping themindividually. Sand the edges with sandpaper before you glue them onto the box. Position the sticks andpaste them together with masking tape if you need to cut a lot of sticks the same length.
RESEARCH
Available for free at Connexions <http://cnx.org/content/col11032/1.1>

112 CHAPTER 4. TERM 4
4.5.5.38 ASSIGNMENT 15:
4.5.5.39 [LO 1.8]
Draw or paste pictures of di�erent types of closing meganisms. Add labels.Decorate the outside of your box by spraying.
4.5.5.40 ASSIGNMENT 16:
4.5.5.41 [LO 1.10]
4.5.5.42 To decorate your box
Decorate the outside of your box by spraying/ printing a pattern/ sandblasting/ wire brushing/ painting itand varnishing it. Decorate it any way you wish. Add the closing mechanism and glue some material to theinside of your trinket box.
EVALUATION
4.5.5.43 ASSIGNMENT 17:
4.5.5.44 [LO 1.14]
Sketch the �nished model/product in colour and in isometric. Use the 30 ◦ graph paper.
4.5.5.45 ASSIGNMENT 18:
4.5.5.46 [lo 1.14]
Make an orthographic drawing (3 elevations) of your �nished product. Indicate the exact measurements(height, length, width, radius, diameter of lid).
• Overhead elevation• Front elevation• Side elevation
4.5.6 Assessment
Learning outcomes (LOs)
Lo 1
Technological processes and skillsThe learner will be able to apply technological processes and skillsethically and responsibly using appropriate information and communication technology.
Assessment standards (ASs)
We know this when the learner:
investigate:
continued on next page
Available for free at Connexions <http://cnx.org/content/col11032/1.1>

113
1.4 during investigations, plans a strategy for collecting data and information.
design:
1.5 writes or communicates a short and clear statement or a design brief for development of a product orsystem related to a given problem, need or opportunity;
1.6 lists product and design speci�cations and constraints for a solution to a given problem, need oropportunity based on some of the design key words.
1.7 generates at least two alternative solutions and annotates the ideas;
1.8 chooses possible solutions, gives sensible reasons for choice, and develops a chosen idea using graphicsor modelling techniques;
make:
1.9 develops a plan for making details .
1.10 chooses and uses appropriate tools and materials to make products by measuring, marking, cutting orseparating, shaping or forming, joining or combining, and �nishing di�erent materials with some accuracy;
1.11 use safe working practices and shows awareness of e�cient ways of using materials and tools;
evaluate:
1.12 evaluates the product or system based on criteria linked directly to the design brief and some of thespeci�cations and constraints, and suggests improvements or modi�cations;
communicate:
1.14 presents ideas (in a project portfolio) using two-dimensional or three-dimensional sketches, circuitidagrams or systems diagrams.
LO 2
TECHNOLOGICAL KNOWLEDGE AND UNDERSTANDING The learner will be able toundertsand and apply relevant technological knowledge ethically and responsibly.
Assessment standards (ASs)
We know this when the learner:
structures:
2.1 demonstrates knowledge and understanding of structures.
processing:2.2 demonstrates knowledge and understanding of how materials can be processed to changeor improve properties (e.g. strength, �re resistance, waterproo�ng, taste, volume, texture).
We know this when the learner:
impact of Technology:
continued on next page
Available for free at Connexions <http://cnx.org/content/col11032/1.1>

114 CHAPTER 4. TERM 4
3.2 expresses some reasons why products of technology a�ect the quality of people's lives positively andnegatively.
Table 4.12
Available for free at Connexions <http://cnx.org/content/col11032/1.1>

ATTRIBUTIONS 115
Attributions
Collection: Technology Grade 7
Edited by: Siyavula UploadersURL: http://cnx.org/content/col11032/1.1/License: http://creativecommons.org/licenses/by/3.0/
Module: "Safety"By: Siyavula UploadersURL: http://cnx.org/content/m23101/1.1/Pages: 1-7Copyright: Siyavula UploadersLicense: http://creativecommons.org/licenses/by/3.0/
Module: "Transport"By: Siyavula UploadersURL: http://cnx.org/content/m29611/1.1/Pages: 7-9Copyright: Siyavula UploadersLicense: http://creativecommons.org/licenses/by/3.0/
Module: "Making a rocket"By: Siyavula UploadersURL: http://cnx.org/content/m23109/1.1/Pages: 9-17Copyright: Siyavula UploadersLicense: http://creativecommons.org/licenses/by/3.0/
Module: "Finding arocket's centre of gravity"By: Siyavula UploadersURL: http://cnx.org/content/m23110/1.1/Pages: 17-21Copyright: Siyavula UploadersLicense: http://creativecommons.org/licenses/by/3.0/
Module: "Launching the rocket"By: Siyavula UploadersURL: http://cnx.org/content/m23112/1.1/Pages: 21-26Copyright: Siyavula UploadersLicense: http://creativecommons.org/licenses/by/3.0/
Module: "Why people travel into unknown territories"By: Siyavula UploadersURL: http://cnx.org/content/m23113/1.1/Pages: 27-31Copyright: Siyavula UploadersLicense: http://creativecommons.org/licenses/by/3.0/
Available for free at Connexions <http://cnx.org/content/col11032/1.1>

116 ATTRIBUTIONS
Module: "Water-wheels"By: Siyavula UploadersURL: http://cnx.org/content/m23114/1.1/Pages: 31-33Copyright: Siyavula UploadersLicense: http://creativecommons.org/licenses/by/3.0/
Module: "Making water-wheels"By: Siyavula UploadersURL: http://cnx.org/content/m23115/1.1/Pages: 33-36Copyright: Siyavula UploadersLicense: http://creativecommons.org/licenses/by/3.0/
Module: "Designing a water-wheel"By: Siyavula UploadersURL: http://cnx.org/content/m29612/1.1/Pages: 36-43Copyright: Siyavula UploadersLicense: http://creativecommons.org/licenses/by/3.0/
Module: "What is electricity?"By: Siyavula UploadersURL: http://cnx.org/content/m23116/1.1/Pages: 45-50Copyright: Siyavula UploadersLicense: http://creativecommons.org/licenses/by/3.0/
Module: "Electrical safety"By: Siyavula UploadersURL: http://cnx.org/content/m23118/1.1/Pages: 50-57Copyright: Siyavula UploadersLicense: http://creativecommons.org/licenses/by/3.0/
Module: "An electronic maths game Part 1: the design"By: Siyavula UploadersURL: http://cnx.org/content/m23119/1.1/Pages: 57-64Copyright: Siyavula UploadersLicense: http://creativecommons.org/licenses/by/3.0/
Module: "An electronic maths game Part 2: Mathematics game"By: Siyavula UploadersURL: http://cnx.org/content/m23120/1.1/Pages: 65-69Copyright: Siyavula UploadersLicense: http://creativecommons.org/licenses/by/3.0/
Module: "An electronic maths game Part 3: making the game"By: Siyavula UploadersURL: http://cnx.org/content/m23121/1.1/Pages: 69-73Copyright: Siyavula UploadersLicense: http://creativecommons.org/licenses/by/3.0/
Available for free at Connexions <http://cnx.org/content/col11032/1.1>

ATTRIBUTIONS 117
Module: "Designing and making a warning system"By: Siyavula UploadersURL: http://cnx.org/content/m23125/1.1/Pages: 73-77Copyright: Siyavula UploadersLicense: http://creativecommons.org/licenses/by/3.0/
Module: "The need for clothing"By: Siyavula UploadersURL: http://cnx.org/content/m23126/1.1/Pages: 77-78Copyright: Siyavula UploadersLicense: http://creativecommons.org/licenses/by/3.0/
Module: "The textile industry"By: Siyavula UploadersURL: http://cnx.org/content/m23127/1.1/Pages: 78-82Copyright: Siyavula UploadersLicense: http://creativecommons.org/licenses/by/3.0/
Module: "Making a garment"By: Siyavula UploadersURL: http://cnx.org/content/m23128/1.1/Pages: 82-88Copyright: Siyavula UploadersLicense: http://creativecommons.org/licenses/by/3.0/
Module: "What is food technology?"By: Siyavula UploadersURL: http://cnx.org/content/m23129/1.1/Pages: 89-96Copyright: Siyavula UploadersLicense: http://creativecommons.org/licenses/by/3.0/
Module: "Structures"By: Siyavula UploadersURL: http://cnx.org/content/m23130/1.1/Pages: 96-97Copyright: Siyavula UploadersLicense: http://creativecommons.org/licenses/by/3.0/
Module: "Make your own laminated bracelet"By: Siyavula UploadersURL: http://cnx.org/content/m23131/1.1/Pages: 98-99Copyright: Siyavula UploadersLicense: http://creativecommons.org/licenses/by/3.0/
Module: "Reinforcing doors and windows"By: Siyavula UploadersURL: http://cnx.org/content/m23134/1.1/Pages: 99-108Copyright: Siyavula UploadersLicense: http://creativecommons.org/licenses/by/3.0/
Available for free at Connexions <http://cnx.org/content/col11032/1.1>

118 ATTRIBUTIONS
Module: "Project Portfolio"By: Siyavula UploadersURL: http://cnx.org/content/m23135/1.1/Pages: 108-114Copyright: Siyavula UploadersLicense: http://creativecommons.org/licenses/by/3.0/
Available for free at Connexions <http://cnx.org/content/col11032/1.1>

About ConnexionsSince 1999, Connexions has been pioneering a global system where anyone can create course materials andmake them fully accessible and easily reusable free of charge. We are a Web-based authoring, teaching andlearning environment open to anyone interested in education, including students, teachers, professors andlifelong learners. We connect ideas and facilitate educational communities.
Connexions's modular, interactive courses are in use worldwide by universities, community colleges, K-12schools, distance learners, and lifelong learners. Connexions materials are in many languages, includingEnglish, Spanish, Chinese, Japanese, Italian, Vietnamese, French, Portuguese, and Thai. Connexions is partof an exciting new information distribution system that allows for Print on Demand Books. Connexionshas partnered with innovative on-demand publisher QOOP to accelerate the delivery of printed coursematerials and textbooks into classrooms worldwide at lower prices than traditional academic publishers.