technical information / laying instructions · pdf filechamber element seal and ensures that...
TRANSCRIPT
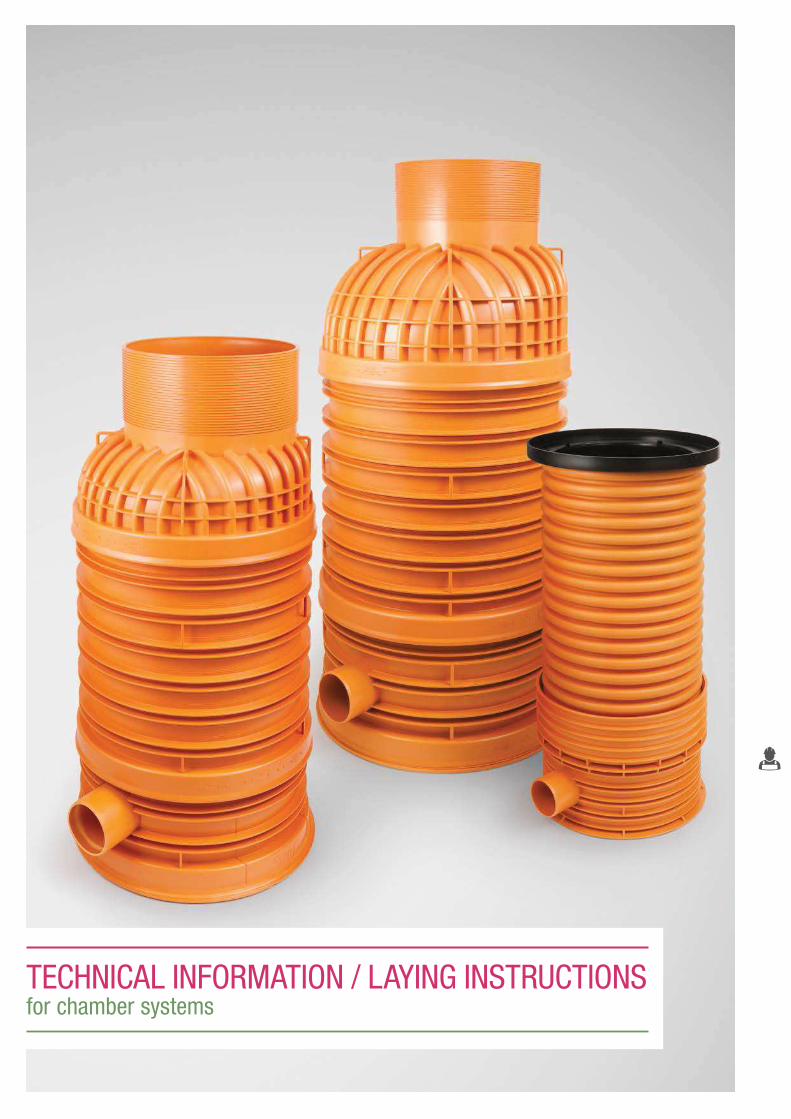
TECHNICAL INFORMATION / LAYING INSTRUCTIONSfor chamber systems


231
CONTENTS
Installation instructions AWASCHACHT PP DN 1000 and 800 232
with concrete bearing ring and standard cover (BEGU)
Installation instructions AWASCHACHT PP DN 1000 and 800 236
with concrete bearing ring and roll-in cover
Installation instructions AWASCHACHT PP DN 1000 and 800 237
with concrete cover plate
Installation instructions AWASCHACHT PP DN 1000 239
with chamber bases DN 1200/1500
Installation instructions AWASCHACHT PP DN 1000 241
Description for constructing the AWASCHACHT PP DN 1000
Installation instructions AWASCHACHT PP DN 1000 and 800 245
Chamber-in-chamber renovation method
Installation instructions AWASCHACHT PP DN 600 251
with concrete bearing ring or telescopic adapter
Installation instructions AWASCHACHT PP DN 400/315 254
with telescopic adapter or separate cover

INSTALLATION INSTRUCTIONS AWASCHACHT PP DN 1000 AND 800with concrete bearing ring and standard cover (BEGU)
The bearing area of the chamber base should be prepared as per
DIN EN 1610. To do this, construct a min. 10 cm thick bedding layer
(e.g. granular subbase).
Set the chamber base at the relevant height according the plans,
align and position in accordance with the connecting pipes. Ensure
that the chamber drainage channel is not laid with a counter slope. Fit
the chamber base outlet onto the pipe using lubricant.
Push-fit connection: Apply lubricant to the spigot, check that the seals
are correctly positioned before fitting and clean oT any dirt. Push pipe
and chamber together up to the stop.
Fit the articulated socket/ball joint (included as standard with the
chamber base if necessary) onto the inlet side of the chamber base.
Follow the instructions given on the sockets for direction-bound
sockets/ball joints. Observe the notes on the push-fit process, see
point 2. When fitting the ball joint DN 160/DN 200, note the flow
direction, marked with embossed arrows. Stabilise the chamber base
on the side as necessary using bedding material.
Push the pipe into the chamber base on the inlet. Observe the
notes on the push-fit process, see point 2. Then align the pipe in
accordance with the pipeline routing. The articulated sockets and ball
joints can be used to realise slope changes as well as changes in
direction up to 7.5° to the left or right. With a simultaneous change in
slope and direction, the deflection values can be reduced.
Note on installing the articulated sockets:
The articulated sockets should be inserted onto the chamber base
with the fully variable side. Also, ensure that the soZt marking is
pointing upwards (see sketch). The assembly notes on the jointed
socket must be observed:
To connect the chamber elements, first coat the top sealing
chamber with lubricant. This makes it easier to stretch out the
chamber element seal and ensures that the fitted position is correct.
α
β φ
α
232

Insert the element seal into the sealing chamber with the lettering
pointing upwards and then check for damage and correct position and
for any dirt.
Clean the socket on the chamber ring being installed and coat it
evenly with lubricant. (Installation tip: do not coat the seal with
lubricant.) Ensure that there is no dirt on the socket after being coated
with lubricant.
Position the chamber elements on top of one another without
tilting. Positioning the chamber rings and chamber cone is made
easier by the 4 external retaining lugs. Align the chamber elements
with one another using the two external longitudinal marks to ensure
the correct positioning of the vertical ladder. Then push the compo-
nents all the way together.
To fill the chamber components, soil of group G1 or G2, max.
particle size 63 mm (stepped soil with fine particles) should be used.
Recommendation: Use recycled material. Add back-fill material at
a width of 40 cm (for installation of the chambers in groundwater min.
60 cm) carefully and in layer thicknesses of 20 to 40 cm and compact
in line with the stipulations of DIN EN 1610, ATV-DVWK-A 139.
Degree of compaction in the area of roads DPr ≥ 97 %.
In the same way as points 5 to 8, fit further chamber rings or
chamber cones, then add backfilling material in layers and compact
in accordance with point 9.
233

The chamber cone is delivered to the site unshortened and must
be shortened on site for the access opening. The dimension for
shortening depends on the installation depth of the chamber structure
and the choice of the chamber cover. Maximum shortening dimension
25 cm. Trimming is carried out in line with the rib bases, which are
spaced at intervals of 1 cm. Deburr the cut edge. To calculate the
shortened dimension, see installation sketch on page 235.
The filling/bedding of the chamber is carried out up to 5 cm below
the upper edge of the trimmed cone (OKgK) (see installation sketch on
page 235). The embedding surface must be level and must not
transmit any point loads to the concrete bearing ring (add fine grit or a
mortar layer if necessary).
Fit the cone seal DN 625 flush to the top edge of the shortened cone.
Coat the inside of the concrete bearing ring with lubricant and then
mount centrically. To ensure that he concrete bearing ring is evenly
mounted, without impairing the prepared fine layer, the use of
screw-in rope loops (accessories) is recommended. The concrete
bearing ring transmits the traZc loads on to the road foundations. The
concrete bearing ring must be seated solidly and evenly. Point loads
should be avoided (see point 12). Direct load contact between the
concrete bearing ring and the chamber cone should also be avoided.
This is ensured by creating approx. 5 cm of overlap between the
chamber cone and the concrete bearing ring (see installation sketch
dimension hU).
A vertical interval of approx. 4 cm must be maintained between
the upper edge of the cone and the concrete bearing ring. This
ensures that after any potential settlement of the road structure, the
traZc load is not transferred directly into the chamber.
Note: During the road building phase, insert steel cover plate or similar
into the concrete bearing ring in order to cover the chamber.
Point loads between the concrete bearing ring and the cover
should be avoided. To do this, set the cover on a 1 cm thick layer of
levelling mortar. See installation sketch below.
234

Installation sketch for AWASCHACHT PP DN 1000 and DN 800 with concrete bearing ring and standard cover (BEGU)
Approx. 4 cmgap betweencone andconcrete bearingring!(settlement joint)
Concrete bearing ring
Levelling mortar
BEGU cover
Conical seal DN 625
Cone (trimmed)
approx. 40 mm
approx. 50 mm
Point-load free bedding e.g.fine aggregate/layer of mortar
ACO Bituplan cover incl. adapter ring
Upper edge ofuntrimmed cone
Bottom edge of concretebearing ring
Bedding:apply sand, sandy gravel or crushed material(largest grain 32 mm) in uniform layers andcompact. Min. compaction 97 % Dpr.
GOK-upper edge of terrain, OKV-upper edge compaction, OKgK-upper edge trimmed cone,h -height levelling mortar, h -cover height incl. levelling, h - levelling mortar height, h -e�ective height concrete bearing ring, h -overlap cone bearing ring
Granular subbase or foundation - this varies dependingon the installation situation.Prepare the contact surface as per DIN EN 16010.
Overlap:50 mm
Trim cone neck in the bases of the rib (spacing of rib bases: 1cm)
Compacting height below GOK:OKV = GOK -hAe -hNB -hU
Heigth of trimmed cone belowOKgK = GOK -hAe -hNB
her: OKgK = GOK -250
Chamber ring(s)
Element seal DN1000
Chamber base
Inst
alla
tion
dep
th: d
ista
nce
GO
K t
o d
rain
ag
e c
han
nel (i
n c
en
tre o
f ch
am
ber)
M NB U
M A
235

INSTALLATION INSTRUCTIONS AWASCHACHT PP DN 1000 AND 800with concrete bearing ring and roll-in cover
– Installation steps 1 – 15 see “Installation instructions for
AWASCHACHT PP DN 1000 and 800 with concrete bearing ring and
standard cover (BEGU)“ on page 232.
To install the roll-in cover, observe the installation instructions from
the relevant cast iron manufacturer. If an adapter ring is required for
the chosen roll-in cover, set this on a 1 cm thick layer of levelling
mortar. See installation sketch below.
Installation of the cast cover using the example of the VIATOP
NIVEAU 200: Insert chamber cover with frame. In the fully installed
condition, there must be min. 2 cm space between the cast frame
and concrete bearing ring or adapter ring. Where necessary, cover the
gap between the adapter ring and frame with a bitumen layer to
prevent mixture falling in. Line the flange with mixture and bring it to
roughly the final level of the first layer.
Mark the position of the cover and apply the first surface course.
Where necessary, scatter fine sand onto the cover to facilitate
subsequent cleaning.
To ensure the same compaction for rolling-in as in the surrounding
area, the frame should be raised with a pickaxe to approx. 20 % of
the layer thickness above the final level. Line with mixture again and
add a second layer.
Press the cover down by rolling over it several times in the centre
and finish rolling-in as part of the total surface compaction.
Installation sketch for AWASCHACHT PP DN 1000 and DN 800 with concrete bearing ring and standard cover (BEGU)
Approx. 4 cmgap betweencone andconcrete bearingring!(settlement joint)
Concrete bearing ring
Conical seal DN 625
Cone (trimmed)
Point-load free bedding e.g.fine aggregate/layer of mortar
Upper edge ofuntrimmed cone
Bottom edge of concretebearing ring
Bedding:apply sand, sandy gravel or crushed material(largest grain 32 mm) in uniform layers andcompact. Min. compaction 97 % Dpr.
GOK-upper edge of terrain, OKV-upper edge compaction, OKgK-upper edge trimmed cone,h -height levelling mortar, h -cover height incl. levelling, h - levelling mortar height, h -e�ective height concrete bearing ring, h -overlap cone bearing ring
Granular subbase or foundation - this varies dependingon the installation situation.Prepare the contact surface as per DIN EN 16010.
Overlap:50 mm
Trim cone neck in the bases of the rib (spacing of rib bases: 1cm)
Compacting height below GOK:OKV = GOK -h -h -h
Heigth of trimmed cone belowOKgK = GOK -h -h
her: OKgK = GOK -250
Chamber ring(s)
Element seal DN1000
Chamber base
Inst
alla
tio
n d
ep
th:
dis
tan
ce G
OK
to
dra
ina
ge
ch
an
ne
l (i
n c
en
tre
of
cha
mb
er)
approx. 50 mm
approx. 40 mm
Cover that can be rolled in, incl.adapter ring (e.g. ACO Bituplan)
M NB U
M A
A NB U
A NB
236

INSTALLATION INSTRUCTIONS AWASCHACHT PP DN 1000 AND 800with concrete cover plate
– Installation steps 1 – 9 see “Installation instructions for
AWASCHACHT PP DN 1000 and 800 with concrete bearing ring and
standard cover (BEGU)“ on page 232.
In the same way as points 5 to 8, fit further chamber rings or
chamber cones and then add backfilling material according to point 9
in layers and compact.
The chamber rings are supplied unshortened to the construction
site. Depending on the installation depth of the chamber, the chamber
ring must be shortened by 125 mm as necessary. The shortening
process is carried out between the two marking lines above the
sealing chamber. See also point 15.
The chamber ring and cover plate must overlap by approx. 70 mm
to max. 90 mm to ensure the seal and correct load distribution. Create
a fine grit layer or concrete foundation accordingly. See installation
sketch on page 238.
Check the chamber element seal for damage and correct fit and
clean away any dirt. Coat the concrete cover plate on the sealing
surface with lubricant.
Raise the concrete cover plate horizontally and centrally over the
chamber ring and place it onto the prepared subsoil. The access
opening should be aligned with the ladder rungs. If mounted correctly,
there should be a gap of 30 – 50 mm inside the chamber between
the top edge of the chamber ring and concrete cover plate.
Depending on the installation height of the existing chamber cover,
concrete compensating rings of diTerent heights should be fitted for
adjustment to the GOK if necessary. With a very high / excessively
low levelling height, it is necessary to shorten the chamber ring in
advance by exactly 125 mm (see point 11). Then fit concrete
compensating ring(s) and chamber cover on the levelling mortar layer.
The number of concrete compensating rings for height equalisation
should be kept to a minimum.
237

Installation sketch for AWASCHACHT DN 1000 and DN 800 with concrete cover plate (incl. BEGU cover and spacer ring
(z. B. H = 80 mm))
Installation instructions AWASCHACHT PP DN 1000 in liquid soil
When installing the AWASCHACHT PP DN 1000 in liquid soil, note
that installed components have a strong buoyant force. This buoyant
force remains until the liquid soil started hardening. To prevent the
location of the chamber bases put into position due to the backfill with
liquid soil, an additional load must be applied that is higher than the
buoyant force. The counterweight depends on the backfill height.
The buoyant force of the AWASCHACHT PP DN 1000 in liquid soil is
around twice as strong as in water.
At least 185 kg of additional load should be applied to the chamber/
chamber base per 10 cm backfill height with liquid soil. Once the soil
started hardening, the next layer of liquid soil can be applied.
BEGU cover
Compensating ring (here:H=80mm)
Concrete cover plate
Concrete foundations
Overlap
Chamber rings
Chamber base
Element seal
DN 1000
Fine chippings on
load bearing subsoil
Installation depth: distance GOK to drainage
channel (in centre of cham
ber)
Settlement joint between
OKgR and BAP: 50 mm
Filling:
Fill sand, gravel, sandy gravel or crushed
material(grain size 32 mm) in uniform layers and
compact. Compacting mind. 97 % Dpr.
Granular subbase or foundation, varies depending
on installation scenario. Preparation of the
contact surface to DIN EN 1610.
* MIN ha: cover height + levelling mortar
if ha is so small that it cannot be implemented without compensating rings,
the chamber ring is to be trimmed by 125 mm (see installation instructions)
Height foundation/fine chippings below GOK:
OKF = GOK –hA – hNB-hU
OKgR = GOK – hA -hNB
Height of trimmed chamber ring below GOK:
238

INSTALLATION INSTRUCTIONS AWASCHACHT PP DN 1000with chamber bases DN 1200/1500
– See “Installation instructions for AWASCHACHT PP DN 1000
and 800 with concrete bearing ring and standard cover (BEGU)“ on
page 232.
To fill the chamber base DN 1200/DN 1500, soil of group G1 or
G2, max. grain size 32 mm (stepped soil with fine particles) should be
used. Recommendation: Use recycled material. Add back-fill material
at a width of 40 cm (for installation of the chambers in groundwater
min. 60 cm) carefully and in layers in chamber thicknesses of 20 to
40 cm and compact in line with the stipulations of DIN EN 1610,
ATV-DVWK-A 139.
Degree of compaction DPr 97 %.
The compaction of the back-fill soil must be implemented up to the
height of the adapter plate (1 to 2 cm below) between the chamber
base and chamber ring. See installation sketch on page 268. See
installation sketch on page 240.
The embedding surface for the reinforced concrete load distributi-
on plate must be level and must not transmit any point loads.
To do this, an approx. 20 cm wide layer of fine grit (sand if necessary)
should be applied where the surface is at the same height as the top
of the adapter plate.
Note: In order to create exactly the right level, the fine grit layer can be
removed with a batten to the height of the polymer adapter plate.
The delivery scope includes a square seal for the external
circumference of the adapter plate as well as a seal along the
circumference of the ascending chamber rings DN 1000. Carefully
clean the adapter plate and then glue on the two square seals. The
seals may already be glued onto the underside of the load distribution
plate.
239

Carefully place the reinforced concrete load distribution plate onto
the fine grit layer using ring bolts.
Caution! Ensure that the load distribution plate is correctly rotated so
that it does not rest on the polymer adapter plate.
Fill the gap between the reinforced concrete load distribution plate
and chamber ring DN 1000 with mortar.
– Implement the remaining installation steps in accordance with
point 5 T. of the “Installation instructions for AWASCHACHT PP DN
1000 and 800 with concrete bearing ring and standard cover (BEGU)”
on page 232.
Installation sketch for chamber bases DN 1200/DN 1500 with transition to DN 1000
chamber ring DN 1000 (welded on)
mortar
reinforced concrete load distribution plate
rectangular, small seal
rectangular, large seal
fine chipplings / levelling course
plastic transition plate
chamber base DN 1200 or DN1500
AttentionBedding surface of the reinforced concrete load distribution plate must be on the same level as the plastic transition plate
Bedding:Use soils of group G1 or G2, max, grain size 32 mm (graded soil with fine grains). Recommendation: recycling material / wet-mix macadam,carefully apply backfilling material in layers(of 20 to 40 cm ) (or at least 60 cm when laying the chambers in groundwater). Compaction min. 97 % Dpr.
Granular subbase or foundation - this varies depending on the installation situation.Prepare the contact surface as per DIN EN 16010.
Reinforced concrete load distribution plate
Plastic transition platefine clippings
Ap
pro
x. 1
0 -
20 m
m
Mortar
240

INSTALLATION INSTRUCTIONS AWASCHACHT PP DN 1000Description for constructing the AWASCHACHT PP DN 1000
General
When calculating the installation depths, the diTering eTective heights of the chamber base, chamber rings, chamber cone, bearing ring,
chamber cover and where appropriate the levelling mortar layer should be taken into account. Observe the installation instructions.
ETective height of chamber base: The eTective height relates to the centre of the chamber base. For each 1 % slope in the drainage channel,
the inlet/outlet are 5 mm higher/lower. Other slopes accordingly.
ETective height of cone: The eTective height of the unshortened cone DN 1000/625 is 820 mm. When fully shortened, it is 570 mm.
The cone can be shortened in increments of 10 mm by up to 250 mm.
Component Effective height
[mm]
Chamber base (e.g. 435 mm) 435
+ Chamber rings (if necessary) 750
+ Cone (between 570 mm and 820 mm) 650
+ Concrete bearing ring with 5 cm overlap (70 mm) 70
+ Chamber cover (e.g. 160 mm) taking into account the levelling mortar (10 mm) 170
= Installation depth (from top ground surface to pipe invert in the centre of the chamber): 2075
Example 1: Standard installation with concrete bearing ring and
BEGU cover
Specifications: Installation depth: 2900 mm
Cover: Standard BEGU class D400, h = 160 mm
Chamber base: Base DN 1000/250 – elbow 240°, N = 435 mm
Reverse calculation to determine the number of chamber rings and the shortening dimension on the cone:
Component Effective height Remaining height *
[mm] [mm]
Installation depth required 2900
- Chamber base 435 2465
- Chamber cover (160 mm) incl. levelling mortar layer (10 mm) 170 2295
- Concrete bearing ring 70 2225
- Cone. not shortened 820 1405
- Ring h = 1000 1000 405
- Ring h = 500 500 – 95
= Remaining height is negative -> cone should be shortened by: 90 mm
* With a remaining height greater than 0 mm, a further chamber ring should be used.
With a remaining height less than 0 mm, the cone should be shortened by this dimension.
Observe the installation instructions for AWASCHACHT PP DN 1000 and DN 800 with concrete bearing and standard cover (BEGU).
Results smaller than -250 mm are not possible as the minimum installation depth is not maintained.
241

Example 2: Installation with concrete bearing ring and roll-in cover
Specifications: Installation depth: 1800 mm
Cover: BITUPLAN from ACO, h = 160 mm
Chamber base: Base DN 1000/400 – customer-specific drainage channel, N = 935 mm
Reverse calculation to determine the number of chamber rings and the shortening dimension on the cone:
Component Effective height Remaining height *
[mm] [mm]
Installation depth gefordert 1800
- Chamber base 935 865
- Chamber cover (160 mm) incl. settlement distance (20 mm) 180 685
- Concrete bearing ring 70 615
- Cone, not shortened 820 – 205
= Remaining height is negative -> cone should be shortened by 200 mm
Note on the result:
No chamber rings are required. The roll-in cover can also be extended telescopically by a further 40 mm.
* With a remaining height greater than 0 mm, a further chamber ring should be used.
With a remaining height less than 0 mm, the cone should be shortened by this dimension.
Observe the installation instructions for AWASCHACHT PP DN 1000 and DN 800 with concrete bearing ring and roll-in cover.
Results smaller than -250 mm are not possible as the minimum installation depth is not maintained.
Example 3: Installation without cone with concrete cover plate and standard cover class B125.
Specifications: Installation depth 970 mm
Cover: Standard BEGU class B125, h = 125 mm
Chamber base: Base DN 1000/200 – customer-specific drainage channel, N = 435 mm
Reverse calculation to determine the number of chamber rings and the shortening dimension on the cone:
Component Effective height Remaining height **
[mm] [mm]
Installation depth required 970
- Chamber base 435 535
- Chamber cover (125 mm) incl. levelling mortar layer (10 mm) 135 400
- Concrete cover plate 180 220
- Ring h = 250 250 –30
= Remaining height is negative -> chamber ring should be shortened by: 125 mm
Note on the result:
The chamber ring is shortened by 125 mm. The diTerence between 125 – 30 = 95 must be realised on-site by the customer using compensa-
ting ring rings and levelling mortar.
** With a remaining height greater than 125 mm, a further chamber ring should be used.
With a remaining height between 0 mm and 125 mm, this should be realised using standard levelling rings.
With a remaining height between -125 mm and 0 mm, the customer should shorten the top chamber ring on site by exactly 125 mm and the height then adjusted using
standard compensating rings. Observe the installation instructions for AWASCHACHT PP DN 1000 and DN 800 with concrete bearing ring and standard cover (BEGU).
If no chamber rings are used, the remaining height must not be smaller than 0 (minimum installation depth reached).
242

Installation matrix for AWASCHACHT PP DN 1000 with cone and concrete bearing ring
Need for chamber rings for every installation depth (distance GOK to the flow surface)
Cone (N = 570-820 mm) + concrete bearing ring (N = 70 mm) + levelling mortar (N = 10 mm) + BEGU cover D 400 (N = 160 mm)
Ring 250 Ring 500 Ring 750 Ring 1000
Installation depth [mm] *
from to
1245 1495 Chamber base effective height 435 mm
1496 1745 Chamber base effective height 935 mm shortened to 685 mm
1746 1995 Chamber base effective height 935 mm -
1996 2245 1 - - -
2246 2495 - 1 - -
2496 2745 - - 1 -
2746 2995 - - - 1
2996 3245 1 - - 1
3246 3495 - 1 - 1
3496 3745 - - 1 1
3746 3995 - - - 2
3996 4245 1 - - 2
4246 4495 - 1 - 2
4496 4745 - - 1 2
4746 4995 - - - 3
4996 5245 1 - - 3
5246 5495 - 1 - 3
Installation matrix for AWASCHACHT PP DN 1000 with concrete cover plate (without cone)
Need for chamber rings for every installation depth (distance GOK to the pipe invert) taking into account the following parameters:
Concrete cover plate (N = 180 mm) + levelling mortar/rings (N = 10 - 130 mm) + BEGU cover D 400 (N = 160 mm)
Ring 250 Ring 500 Ring 750 Ring 1000
Installation depth [mm] *
from to
785 910 Chamber base effective height 435 mm
911 1035 Chamber base effective height 935 mm shortened to 560 mm
1036 1160 Chamber base effective height 935 mm shortened to 685 mm
1161 1285 Chamber base effective height 935 mm shortened to 810 mm
1286 1410 Chamber base effective height 935 mm
1411 1535** 1
1536 1660 1 - - -
1661 1785** - 1 -
1786 1910 - - 1 -
1911 2035** - - 1 -
2036 2160 - - - -
2161 2285** - - - 1
2286 2410 - - - 1
2411 2535** 1 - - 1
2536 2660 1 - - 1
2661 2785** - 1 - 1
2786 2910 - 1 - 1
* measured from top edge of cover to drainage channel base in chamber centre; height adjustment by shortening on the cone; see installation instructions with concrete bearing
ring.
** Chamber ring should be shortened on-site by 125 mm as necessary; see installation instructions with concrete cover plate
243

Installation matrix for AWASCHACHT PP DN 800 with cone and concrete bearing ring
Need for chamber rings for every installation depth (distance GOK to the pipe invert) taking into account the following parameters:
cone (N = 365 – 615 mm) + concrete bearing ring (N = 70 mm) + levelling mortar (N = 10 mm) + BEGU cover D 400 (N = 160 mm))
GD, RML
Slope 0 %
GD, RML
Slope 0 %
GD, RML
Slope 0 %
DN 160 DN 200 DN 250
Effective height [mm] Effective height [mm] Effective height [mm]
455 495 535
Installation depth* Installation depth* Installation depth* Chamber rings [mm]
Min.
[mm]
Max.
[mm]
Min.
[mm]
Max.
[mm]
Min.
[mm]
Max.
[mm]
Ring
125
Ring
250
Ring
375
Ring
500
Ring
625
Ring
750
Ring
875
1060* 1310 1100* 1350 1140* 1390 Chamber base without chamber ring
1311 1435 1351 1475 1391 1515 1
1436 1560 1476 1600 1516 1640 1
1561 1685 1601 1725 1641 1765 1
1686 1810 1726 1850 1766 1890 1
1811 1935 1851 1975 1891 2015 1
1936 2060 1976 2100 2016 2140 1
2061 2185 2101 2225 2141 2265 1
2186 2310 2226 2350 2266 2390 1 1
2311 2435 2351 2475 2391 2515 1 1
2436 2560 2476 2600 2516 2640 1 1
2561 2685 2601 2725 2641 2765 1 1
2686 2810 2726 2850 2766 2890 2
2811 2935 2851 2975 2891 3015 1 1
2936 3060 2976 3100 3016 3140 1 2
*ETective height can be reduced by shortening the chamber base by a further 125 mm
GD, RML
Slope 0 %
Standard
Slope 1-2 %
Standard
Slope 1-2 %
DN 315 DN 160/200 DN 250/315
Effective height [mm] Effective height [mm] Effective height [mm]
590 310 435
Installation depth* Installation depth* Installation depth* Chamber rings [mm]
Min.
[mm]
Max.
[mm]
Min.
[mm]
Max.
[mm]
Min.
[mm]
Max.
[mm]
Ring
125
Ring
250
Ring
375
Ring
500
Ring
625
Ring
750
Ring
875
1195* 1445 915 1165 1040 1290 Chamber base without chamber ring
1446 1570 1166 1290 1291 1415 1
1571 1695 1291 1415 1416 1540 1
1696 1820 1416 1540 1541 1665 1
1821 1945 1541 1665 1666 1790 1
1946 2070 1666 1790 1791 1915 1
2071 2195 1791 1915 1916 2040 1
2196 2320 1916 2040 2041 2165 1
2321 2445 2041 2165 2166 2290 1 1
2446 2570 2166 2290 2291 2415 1 1
2571 2695 2291 2415 2416 2540 1 1
2571 2695 2291 2415 2416 2540 1 1
2821 2945 2541 2665 2666 2790 2
2946 3070 2666 2790 2791 2915 1 1
3071 3195 2791 2915 2916 3040 1 2
*ETective height can be reduced by further 125 mm by shortening the chamber base
244

INSTALLATION INSTRUCTIONS AWASCHACHT PP DN 1000 AND 800Chamber-in-chamber renovation method
Important: During all work steps, the relevant accident
prevention regulations should be observed.
Preparation: Measure the chamber and chamber base (height,
diameter, angle) and order the renovation chamber.
Remove the concrete chamber cone DN 1000/625.
Clean the concrete chamber rings and seal against penetrating,
flowing water as appropriate.
Stop the flow of wastewater. To do this, fit shut-oT bladders into
the outlets (tip: Fit shut-oT bladders in the next chamber (inlet side) to
facilitate work in the renovation chamber.)
Remove the climbing steps or step irons from the existing chamber.
The existing drainage channel and the existing berm are to be
chiselled out until the pipe sockets of the chamber-in-chamber (SiS)
chamber base are flush with the existing pipes. Ensure that the
chamber base plate is not chiselled out too far down to avoid potential
ingress of groundwater.
NOTE: Stop acute water ingress by appropriate means (e.g. plugging
mortar OMBRAN W). This temporary seal must function until the
mortar has set in the ring gap (see step 15).
Fit the chamber element seal onto the chamber base. To fit the
chamber element seal, first coat the top sealing chamber with lubricant.
Then insert the element seal into the sealing chamber with the
lettering pointing upwards and check for damage and correct position,
and for any dirt.
245

Mount the Q-TE-C expandable seals. Install the blue-green round
cord seals supplied onto the pipe sockets on the renovation chamber
base. Position the seals behind the bead to avoid rolling away.
Lower the renovation chamber base into the concrete chamber.
Check the fit of the renovation chamber base with the connection
pipes (flow height and angle). If necessary, line the existing drainage
channel further or raise the SiS chamber base. The drainage channel
base of the chamber base must be at the same height as the existing
pipe bottom.
Position shut-oT bladders on every inlet and outlet. These are
used to centre the connection socket of the new chamber drainage
channel with the existing pipes and as shuttering for the grout.
When inflating the shut-oT bladders, align the renovation chamber
base horizontally using a spirit level.
Note: If the existing chamber is in a skew position, the SiS chamber
base also has to be slanted in order to ensure an even ring gap for
further chamber construction.
Fit at least 3 steel brackets to the wall as buoyancy control for the
filling process. Ensure that these are distributed evenly across the
circumference of the renovation chamber base.
246

Mix a quick-setting, wastewater resistant grouting mortar (e.g.
OMBRAN FG plus) according to the manufacturer’s specifications and
pour it into the gap between the concrete chamber and the renovation
chamber base via a chute. Pour the mortar in from one side and
without interruption until the highest shut-oT bladder is embedded in
mortar at least 5 cm.
CAUTION! In order to ensure that the chamber rings can be inserted
with a socket, the grouting must have a minimum circumferential
distance to the top rib of the spigot end from the installed chamber
base or chamber ring. Otherwise, no further chamber rings can be
inserted.
Wait until the grout has hardened.
Remove the angle irons and shut-oT bladders and clean the
chamber element seal, i.e. remove dirt and mortar residues.
Fit the chamber ring. To do this, pull the chamber element seal
onto the chamber ring in accordance with point 6. Clean the socket of
the fitted chamber ring and coat evenly with lubricant (installation tip:
do not coat the seal with lubricant.). Ensure that there is no dirt on the
socket after being coated with lubricant. Fit the chamber elements
together without tilting and push them together as far as it will go.
Fill the gap between the concrete chamber and chamber ring with
grouting mortar. In case of a larger backfill volume, alternative
flowable filling materials can also be used for filling the cavity.
247

Fit additional chamber rings and the cone in the same way as
steps 14 – 15.
To fill the chamber cone, soil of group G1 or G2, max. grain size 32
mm (stepped soil with fine particles) should be used.
Add back-fill material at a width of 40 cm carefully and in layer
thicknesses of 20 to 40 cm and compact in line with the stipulations
of DIN EN 1610, ATV-DVWK-A 139. Degree of compaction in the area
of roads DPr ≥ 97 %..
The chamber cone is delivered to the site unshortened and must
be shortened on site for the access opening. The dimension for
shortening depends on the installation depth of the chamber structure
and the choice of chamber cover. Maximum shortening dimension 25
cm. Trimming is carried out in line with the rib valleys, which are
spaced at intervals of 1 cm. Deburr the cut edge.
For the calculation of the shortening dimension, see the installation
sketch on page 250.
The backfilling/embedding of the chamber structure is created up
to 5 cm below the top edge of the shortened cone (OKgK) (see
installation sketch on pageSeite 250). The embedding surface must
be level and must not transmit any point loads to the concrete bearing
ring (add fine grit or a mortar layer if necessary).
Fit the cone seal DN 625 flush to the top edge of the shortened cone.
Coat the inside of the concrete bearing ring with suZcient lubricant
and then mount centrically. To ensure that he concrete bearing ring is
evenly mounted, without impairing the prepared fine layer, the use of
screw-in rope loops (accessories) is recommended. The concrete
bearing ring transmits the traZc loads on to the road foundations.
The concrete bearing ring must be seated solidly and evenly- Point
loads should be avoided (see point 20). Direct load contact between
the concrete bearing ring and the chamber cone should also be
avoided. This is ensured by creating approx. 5 cm of overlap between
the chamber cone and the concrete bearing ring (see installation
sketch dimension hU).
248

A vertical interval of approx. 4 cm must be maintained between the
upper edge of the cone and the concrete bearing ring. This ensures
that after any potential settlement of the road structure, the traZc
load is not transmitted directly into the chamber.
Note:
During the road building phase, insert steel cover plate or similar into
the concrete bearing ring in order to cover the chamber.
Point loads between the concrete bearing ring and the cover
should be avoided. To do this, set the cover on a 1 cm thick layer of
levelling mortar. See page 250.
249

Installation sketch for AWASCHACHT PP DN 1000 and DN 800 chamber-in-chamber renovation (concrete bearing ring and BEGU
cover)
BEGU cover
Levelling mortar
Concrete bearing ring
Point load free support, e.g. fine grit / mortar layer
Cone seal DN 625
Cone (shortened)
Chamber ring(s)
Element seal
SiS chamber base
Concrete chamber
Existing pipe
Old drainage channel, chiselled out
Height of compaction below GOK:
OKV = GOK - hA - hM - hNB - hU
Height of trimmed cone below GOK:
OKgK = GOK - hA - hM - hNB
(here: OKgK = GOK - 240)
GOK - top ground surface
OKV - upper edge of compaction
OKgK - upper edge of shortened cone
hM - levelling mortar height
hA - cover height incl. levelling
hM - levelling mortar height
hNB
- eTective height concrete bearing ring
hU - overlap cone / bearing ring
Caution !
approx. 4 cm gap between cone
and concrete bearing ring
(=settlement joint)
Bottom edge of
concrete bearing ring
Upper edge of
shortened cone
50 mm
approx. 40 mm
Overlap:
50 mm
GOK
OKgK
Shorten cone neck in
rib base (spacing
of rib bases: 1 cm)
10
(hM)
60-
160
(hA)
50 (hU)OKV70 (hNB)
240
250

INSTALLATION INSTRUCTIONS AWASCHACHT PP DN 600with concrete bearing ring or telescopic adapter
Prepare the bearing area of the chamber base according to DIN EN
1610. The subsoil must be capable of bearing a load and even. To do
this, construct a min. 10 cm thick bedding layer (e.g. granular
subbase).
Set the chamber base at the relevant height according to the
planning specification, align and position in accordance with the
connecting pipes. Push-fit connection: Apply lubricant to the spigot
end, check that the seals are positioned correctly before fitting and
clean oT any dirt. Push pipe and chamber together up to the stop.
The optional ball joints/articulated sockets can be used to realise
slope changes up to 13 %, alternatively up to 7.5° to left/right. The
values are reduced accordingly with simultaneous slope change and
direction change. With ball joints and jointed sockets, note the flow
direction that is marked by a raised direction arrow.
The alignment of the chamber base should be checked (the slope
of the chamber channel is 0%).
To fit the enclosed seal, first remove any impurities from the
bottom root of the corrugation of the riser pipe and apply lubricant.
Then fit the seal. In the next step, apply lubricant to the plug-in area
of the chamber base and push the riser pipe in as far as it will go.
251

To fill the chamber components, soil of group G1 or G2, max.
particle size 16 mm (graded soil with fine particles) should be used.
Recommendation: Use recycled material.
Add back-fill material at a width of 40 cm (for installation of the
chambers in groundwater min. 60 cm) carefully and in layer thicknes-
ses of 20 to 40 cm and compact in line with the stipulations of DIN EN
1610, ATV-DVWK-A 139. Degree of compaction in the area of roads
DPr ≥ 97 %.
The following chamber structure is dependent on the chamber
cover that has to be used.
Chamber cover cl. D400
The filling of the riser pipe is created up to 37 cm (16 cm for the cover
+ 1 cm mortar joint + 20 cm for concrete bearing ring) below GOK (see
installation sketch page Seite 253). The embedding surface for the BAR
must be level and must not transmit any point loads to the BAR (add
fine grit or a mortar layer if necessary).
If necessary, the riser pipe should be shortened taking into account
the total height of the chamber. Ensure that the cut is made on the
crest of a corrugation whereby the overlap with the BAR must be at
least 7 cm. The riser pipe is permitted to overlap with the BAR by
maximum 13 cm. One complete root of the corrugation must be
available for the seal. The cut surface is to be deburred.
The optional seal for the BAR should be fitted to the outside of the
riser pipe. Fit the concrete bearing ring onto the riser pipe (use
lubricant). This cover transmit traZc loads on to the road foundations.
It is therefore essential to ensure that there is no direct load contact
between the bearing ring and the chamber. The decoupling of the
chamber and concrete bearing ring and their secure position is
ensured via the overlap of both components of at least 7 cm and max.
13 cm. As the riser pipe can only be shortened in 6.5 cm increments,
the usable height of the telescopic BAR 7 – 13 cm and should be
taken into account in the height adjustment of the chamber. Then fit a
standard cover cl. D 400 onto the concrete bearing ring onto a layer
of levelling mortar.
Chamber cover cl. A15 or B125:
The telescope can realise a 30 cm height equalisation. If necessary,
the riser pipe can be shortened taking into account the overall height
of the chamber.
The seal for the telescopic pipe should be mounted on the inside of
the riser pipe between the first and second corrugation. Insert the
telescopic pipe into the chamber pipe (use lubricant). When aligning
the telescope with the top ground level ensure that the telescope
projects min. 14 cm into the riser pipe. The telescope should be put
into place in such a way that the load bearing capacity is adequate for
the particular load situation. Then place cover DN 600 cl. A or B
inside the telescope.
252

Installation sketch for AWASCHACHT PP DN 600 with concrete bearing ring and chamber cover cl. D 400
70 – 130 mm
Installation sketch for AWASCHACHT PP DN 600 with telescope and chamber cover cl. D 125
140 – 380 mm
Levelling mortar
Concrete
bearing ring
Bedding:
Apply sand, sandy gravel or crushed material
(grain size 16 mm) in uniform layers and
compact. Min. compaction 97 % Proctor
Bedding:
Apply sand, sandy gravel or crushed material
(grain size 16 mm) in uniform layers and
compact. Min. compaction 97 % Proctor
Preparation for contact surface
as per DIN EN 1610
Preparation for contact surface
as per DIN EN 1610
Seal optional
Overlap:
Overlap:
Inst
alla
tion
dept
h: d
ista
nce
GO
K to
drai
nage
cha
nnel
(in
cent
re o
f ch
ambe
r)
Inst
alla
tion
dept
h: d
ista
nce
GO
K to
drai
nage
cha
nnel
253

INSTALLATION INSTRUCTIONS AWASCHACHT PP DN 400/315with telescopic adapter or separate cover
Installation of chamber base and riser pipe
Place the chamber base into the pipe trench.
Align the chamber base in the pipe trench and connect the pipeline.
Insert the riser pipe DN 400 into the chamber base.
The remaining assembly steps depend on the chamber cover selected.
1) Installation of telescopic cover DN 315 B125/DN 400
Fitting the telescopic sleeve.
Insert the telescopic cover DN 315 into the riser pipe DN 400.
Then, layer by layer, add and compact the bedding material up to
approx. 20 cm below the top edge of the telescopic cover.
Concrete bearing produced. Fully installed chamber.
254

2) Installation with separate cast cover
Fit the telescopic sleeve and fit the telescopic pipe DN 315 into the
riser pipe DN 400.
Then, layer by layer, add and compact the bedding material up to
approx. 20 cm below the top edge of the chamber extension.
Mount the cast frame.
Fit the positioned cast frame with approx. 60 mm thick spacing blocks.
Concrete bearing produced.
3) Installation with cover accessible by foot
Chamber cover DN 400: Mount.
Fasten the bolts tightly to secure against unauthorised
removal (child safety) of the lightweight cover.
255

256