table of contents - prosoft engineering · if you have downloaded a demo of drive genius and wish...
TRANSCRIPT
Table of Contents1 Introduction
1.1 System Requirements1.2 Latest version of the software1.3 Technical Support1.4 Drive Genius Features1.5 Drive Genius Activation
1.5.1 Demo2 Using Drive Genius
2.1 Monitoring Drive Genius activity2.2 Using drives with multiple volumes2.3 Using Drive Genius with older versions of macOS
3 DrivePulse™4 SPEEDUP
4.1 Defragment4.2 Speed
5 CLEANUP5.1 File Management
5.1.1 Find Duplicates5.1.2 Find Large Files5.1.3 Selecting files to delete
5.2 Clone5.3 Secure Erase5.4 Initialize5.5 Repartition5.6 IconGenius™5.7 Drive Information
6 PROTECT6.1 BootWell™6.2 Malware Scan6.3 Instant DrivePulse™6.4 Physical Check
6.4.1 Revive damaged areas6.4.2 Extended check
6.5 Consistency Check6.6 Repair6.7 Rebuild6.8 Fix Permissions6.9 Active Files
7 Drive Genius Menu7.1 Preferences7.2 Uninstall
8 Questions and Answers9 Acknowledgements

Using Drive Genius Table of Contents
1 IntroductionThank you for purchasing Drive Genius.
Drive Genius is a collection of utilities that help maintain and protect all of the important data on your computer.
Drive Genius is the next advance in Prosoft Engineering’s award winning drive maintenance and management utilities. Drive Geniusimproves on its powerful set of utilities to optimize drive performance, protect data, and provide easy-to-use, yet powerful features foryour storage needs.
DrivePulse™ is a core utility that automatically monitors the performance and health of all your drives. This monitoring system detectsany potential physical issues, data corruption, and excessive fragmentation on your drives. DrivePulse will alert you of possible issuesbefore they become serious problems.
1.1 System Requirements
macOS 10.10.5 or laterAt least 1GB of RAM
Please see the “Using Drive Genius with older versions of macOS” section for information on using Drive Genius with macOSversions older than the required minimum above.
1.2 Latest version of the softwareBy default, Drive Genius automatically checks for updates. You may also manually check for an update by selecting “Check forUpdate” from the Drive Genius menu.
1.3 Technical SupportOur technical support is free and can be accessed by email or phone.
Please note that Prosoft can only provide support in English. If you purchased from a local distributor and would like non-Englishsupport please contact your local distributor directly.
Support: https://www.prosofteng.com/support Support Hours: Monday – Friday, 7AM – 5PM (PST)
Mailing Address: Prosoft Engineering, Inc. 1599 Greenville Road Livermore, CA 94550
1.4 Drive Genius FeaturesDrive Genius optimizes drive performance, protects data, and provides easy-to-use yet powerful features for your storage needs.Drive Genius automatically monitors your drives’ integrity and performance characteristics, and provides utilities to repair or optimizedetected issues. Its capabilities go beyond other drive utilities with advanced physical and data integrity checking, including heuristicfailure prediction.
The utilities included in Drive Genius are:
DrivePulse™
DrivePulse is an always-on utility that automatically monitors drives for potential issues. DrivePulse’s optimized scheduling engine

Using Drive Genius
ensures that system performance is never impacted while your computer is in use. And the DrivePulse historical heuristics engine caneven predict drive failure before it actually occurs.
SPEEDUP
Defragment: Optimize your drive for maximum performance.Speed: Test optimal raw drive speed.
CLEANUP
Find Duplicates: Find and remove duplicate files.Find Large Files: Find and remove unused large files.Clone: Create an exact copy of your drive.Secure Erase: Securely erase drives, files and folders using a pattern of your choice.Initialize: Prepare drives for use with macOS.Repartition: Advanced drive space management.IconGenius™: Set a custom icon for a drive or folder.Information: Detailed information about drive characteristics and structure.
PROTECT
BootWell™: Create a secondary startup drive that can be used to maintain, repair, or recover your primary startup drive.Instant DrivePulse: Run the most common DrivePulse tests manually.Malware Scan: Scan drives for malware.Physical Check: Check for hardware problems that may result from a damaged drive.Consistency Check: Check for drive/data corruption.Repair: Repair a corrupted drive.Rebuild: Rebuild the folder structure of a drive.Fix Permissions: Fix system permission inconsistencies that can cause erratic system behavior.Active Files: Determine what applications have files/folders open on a drive.
1.5 Drive Genius ActivationOn first launch, you will be prompted to enter your serial number (sent to you by email, or provided in your retail box copy).
This serial number will activate all features of Drive Genius. Please keep this number in a safe place for reinstallation, upgrades, andtechnical support.
If you have downloaded a demo of Drive Genius and wish to purchase a serial number, click on the Purchase button to purchase andautomatically activate Drive Genius.
1.5.1 Demo
A 30-day demo serial number is included in the email you received when downloading the free trial. During the demo period, DriveGenius will be fully functional. When the demo period expires, a licensed serial number will be required to continue using DriveGenius.
Table of Contents

Introduction DrivePulse™ Table of Contents
2 Using Drive GeniusMost Drive Genius utilities require a three-step process to complete a task:
1. Select a drive (or file/folder).2. Select a utility.3. Set utility options (if any) and run the utility.
Prosoft recommends backing-up your data before using most Drive Genius utilities. Backing up on a regular basis isyour best defense against data loss. The Clone utility can be used to make an exact copy of any drive.
Drive Genius’s main window displays a list of currently attached drives in addition to any files and folders that have been added in thecurrent session.
When launched Drive Genius displays an overview of your system. This includes time since last restart, various hardwarecharacteristics, memory statistics and the total used space of all attached drives.
Drive Genius ignores the following drives: read-only disk images from local drives, all disk images from network drives, opticaldrives, RAM disks and iPods.
Files and folders can be added to Drive Genius by dragging them to the Drive Genius Dock icon, the Drive Genius mainwindow or through the standard Open and Open Recent items in the File menu.
To display the applicable utilities for a drive, file, or folder, simply click on it in the list.
To select a utility, click on the utility icon and from there you can run the utility.
Drive Genius will disable utility icons that are not applicable to the currently selected drive, file or folder. If you hover yourmouse cursor over a disabled icon, a tooltip will appear to explain why the utility is disabled.
Once a utility is running, you can use other drives, files, folders or even other utilities on the same drive without having to wait for thecurrent utility to finish. Drive Genius will properly schedule multiple utilities on multiple drives so you can continue using Drive Geniuswhile work is being done.
You can use the “Show All” button in the Drive Genius toolbar to go back to an item’s utility list when a utility is active.
Drive Genius keeps a session history of selected items and utilities in its History menu. You can go back to a specific item and/or utilityusing this menu or the back/forward buttons in the toolbar.
Drive Genius will prevent automatic computer sleep while a utility is running.
2.1 Monitoring Drive Genius activity

Drive Genius allows multiple utilities to be run on multiple drives in parallel and allows multiple utilities to be queued on a single drive.To monitor the activity of drives and their utilities, either select “Activity” from the “Window” menu or click on the activity icon in thetoolbar.
Respectively, these will open a standalone window or a transient pop-up window.
Either window provides a full list of all drives and their running / pending utilities. If you click on a utility item, it will open thecorresponding full utility in the main window.
Some activity items are transient items that are not associated with any utility; clicking on these items will not doanything.
The standalone window and the popup window cannot be open at the same time.
2.2 Using drives with multiple volumesDrive Genius presents a simplified interface that hides the distinction between volumes and drives when there is a 1:1 mappingbetween the two.
However when a drive contains multiple volumes then a distinction has to be made so you can operate on individual volumes. In thiscase, Drive Genius will present a menu allowing selection of the drive or individual volumes.
When a utility is working on a drive with multiple volumes, then the volume selection menu will be disabled.
Utilities will enable and disable themselves as different volumes are selected or when “All Volumes” (the whole drive) is selected.
2.3 Using Drive Genius with older versions of macOSDrive Genius can be used for offline maintenance and repair of drives that have older, unsupported versions of macOS installed.
Options that don’t require a second computer
If your older computer supports the Drive Genius required minimum macOS version then you can use an existing secondarystartup drive (or create one) with the minimum required macOS version to install Drive Genius and then startup from that driveto work with the older macOS drive.
Options that require a second computer
If your older computer supports the Drive Genius required minimum macOS version then you can create a BootWell drive onanother computer running Drive Genius and then startup the older computer from the BootWell drive to work with the oldermacOS drive.
Start the older computer in Target Disk mode (by holding down the “T” key while restarting) and then connect it to a newcomputer with a supported macOS version to work with the older macOS drive. See http://support.apple.com/kb/PH10725 formore information on Target Disk mode.
Target Disk mode requires both computers have a Thunderbot™ connection or a Firewire™ connection. In additionboth computers must have the latest Apple firmware installed on them as old firmware versions may contain Target

Introduction DrivePulse™
Disk mode bugs.
Table of Contents
Using Drive Genius SPEEDUP Table of Contents
3 DrivePulse™DrivePulse uses the advanced tests provided by Drive Genius to fully automate drive integrity testing. DrivePulse’s optimizedscheduling engine ensures that tests never impact the computer while it’s in use. And the DrivePulse historical heuristics engine caneven predict drive failure before it actually occurs.
In addition to integrity testing, DrivePulse also includes a feature to enhance system and application usage. Automatic Drive ActivityManagement ensures that drives are always immediately available for use by without delays associated to inactive drives needing tobe reactivated by the system.
Minimal System ImpactDrivePulse’s raison d’être is to protect your computer from drive failures before they happen while ensuring that you never notice thatDrivePulse is protecting your system.
To meet this goal, DrivePulse uses an advanced scheduling engine to automatically start and stop tests as the computer movesbetween idle and active states respectively.
Idle state is determined by computer activity, CPU use, and system activity (such as Time Machine backups).
In addition DrivePulse will stop all tests when the computer switches to battery power and resume tests when mains power is restored.
Finally, when DrivePulse does determine the computer is in an idle state and schedules tests to run, those tests are run at a reducedpriority so other applications have precedence over DrivePulse.
TestsIn addition to the scheduled drive tests that monitor for corruption and performance issues, DrivePulse also monitors for the followingissues:
Corrupted preference files
Corrupt preference files are a common source of misbehaving or crashing applications. DrivePulse automatically verifies both userand system preferences and alerts you of corrupted files so they can be moved to the trash.
Drives low on free space
macOS requires a minimal amount of free space for all drives, but the startup drive in particular is sensitive to free space. If drive freespace is too low, it can lead to lost data, application crashes, or even system crashes.
DrivePulse’s low free-space detection enhances the system built-in detection by automatically adjusting for system use (includingvirtual memory, sleep images, etc) and warning you of low free-space before it becomes a true problem.
Changes to system login items
DrivePulse monitors all login item launch methods in macOS, including legacy methods. While changes to login items are normalwhen installing applications, login items are also popular avenues for malware infestation.
DrivePulse will automatically alert you to additions, removals and changes in any macOS login item database.
StatusThe DrivePulse icon will appear in the top right corner of the menu bar to quickly view the status of currently connected drives.
Move the cursor over any drive menu item to view the status of a drive. This status menu shows the tests that are scheduled for theselected drive and the next time those tests will be attempted.
DrivePulse will notify you with an alert if there are any issues found by the tests that require action on your part.
Using Drive Genius SPEEDUP
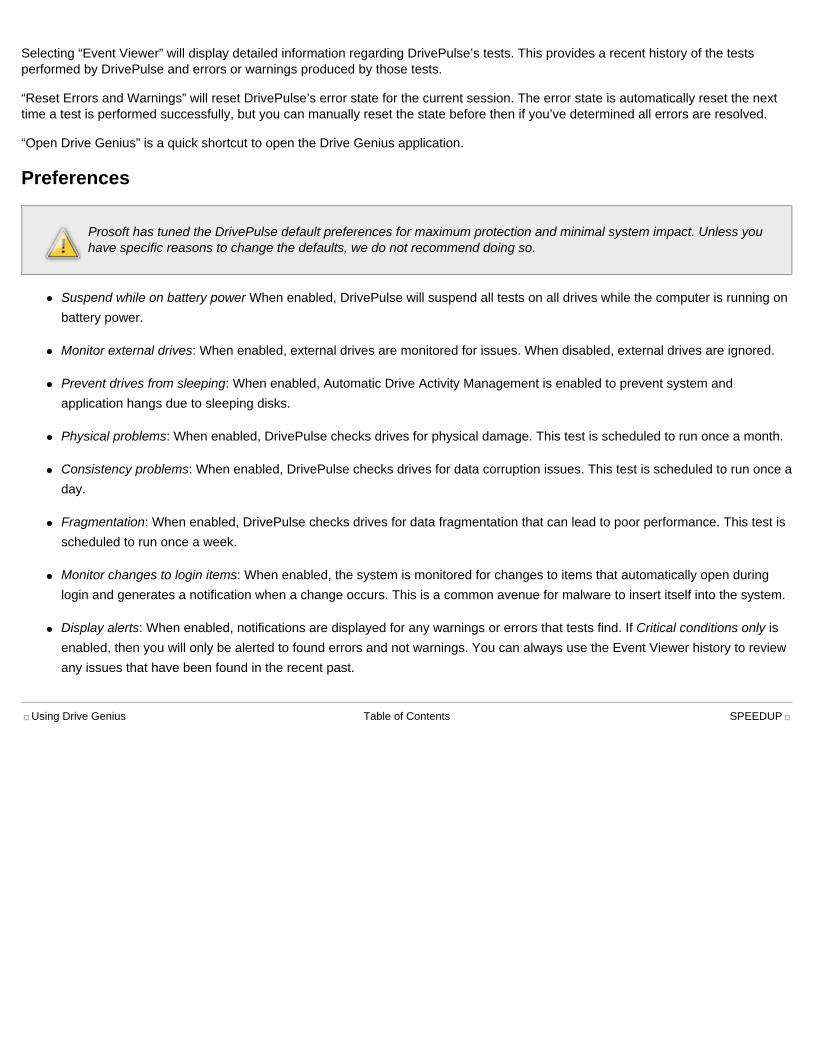
Selecting “Event Viewer” will display detailed information regarding DrivePulse’s tests. This provides a recent history of the testsperformed by DrivePulse and errors or warnings produced by those tests.
“Reset Errors and Warnings” will reset DrivePulse’s error state for the current session. The error state is automatically reset the nexttime a test is performed successfully, but you can manually reset the state before then if you’ve determined all errors are resolved.
“Open Drive Genius” is a quick shortcut to open the Drive Genius application.
Preferences
Prosoft has tuned the DrivePulse default preferences for maximum protection and minimal system impact. Unless youhave specific reasons to change the defaults, we do not recommend doing so.
Suspend while on battery power When enabled, DrivePulse will suspend all tests on all drives while the computer is running onbattery power.
Monitor external drives: When enabled, external drives are monitored for issues. When disabled, external drives are ignored.
Prevent drives from sleeping: When enabled, Automatic Drive Activity Management is enabled to prevent system andapplication hangs due to sleeping disks.
Physical problems: When enabled, DrivePulse checks drives for physical damage. This test is scheduled to run once a month.
Consistency problems: When enabled, DrivePulse checks drives for data corruption issues. This test is scheduled to run once aday.
Fragmentation: When enabled, DrivePulse checks drives for data fragmentation that can lead to poor performance. This test isscheduled to run once a week.
Monitor changes to login items: When enabled, the system is monitored for changes to items that automatically open duringlogin and generates a notification when a change occurs. This is a common avenue for malware to insert itself into the system.
Display alerts: When enabled, notifications are displayed for any warnings or errors that tests find. If Critical conditions only isenabled, then you will only be alerted to found errors and not warnings. You can always use the Event Viewer history to reviewany issues that have been found in the recent past.
Table of Contents

DrivePulse™ CLEANUP Table of Contents
4 SPEEDUP4.1 Defragment
Defragment is not available for SSD / Fusion drives as they do not benefit from the defragmentation process.
Adding and deleting files to and from your drive will cause the drive to become fragmented. When files are written to the drive, thesystem will search for empty space on the drive to write data to. If the found space is too small to fit all of the file’s data, it will writepart of the data to one area and the remaining data to other areas of the hard drive. This way no disk space is wasted. However, thiswill cause the drive to slow down as multiple areas of the hard drive will need to be scanned to locate and read the file’s data the nexttime you want to use it.
The more writing and deleting that is done to the drive, the more fragmented the drive will become. This process will gradually have animpact on the drive’s performance. This is why using Drive Genius to defragment your hard drive is an excellent way to boost theoverall performance of your drives and thus your computer. Drive Genius reorders all of the non-contiguous data areas into a onecontiguous area and all of the empty areas into another contiguous area. (The same reordering process is also performed for everysingle file on the drive.)
Defragment displays fragmentation information in two separate tabs: Drive Fragmentation and File Fragmentation.
Drive Fragmentation will display a graphical representation for a quick overview of how data is ordered on the drive and howfragmented the drive is. Four different colors are displayed to indicate the data usage:
The red portion represents fragmented dataThe white portion represents free spaceThe green portion represents data that is not fragmented.The yellow portion represents reserved data required by macOS that cannot be defragmented.
In the screenshot above you can see there is a large free space area followed by a large data area, which is then followed by anotherlarger free space area. The data area itself is slightly fragmented with most of the fragmentation centered at the end of the data area(where new data is likely to be written).
Drive Genius has not recommended a defragment for the drive since its fragmentation percentage is within the normal range; howeveryou may still wish to defragment a drive like this to merge the two separate free space areas.
File Fragmentation will display a list of the files that are fragmented. For each fragmented file, the number of fragments the file is splitinto, and total size of the file is shown. The more fragments the file is split into, the longer it will take to access the file’s data. If a fileyou regularly access is fragmented, you should defragment the drive to improve the file’s performance and accessibility; this isespecially true for large media files (music, photos, movies, etc) and database files.
Defragmenting a startup drive and then starting up from the drive will immediately re-fragment the drive as log files,virtual memory files, and OS cache files are created. This is completely normal for a startup drive and these types offragmented files can be ignored.
The Defragment Process
Prosoft recommends backing-up your data before defragmenting a drive. Backing up on a regular basis is your bestdefense against data loss. The Clone utility can be used to make an exact copy of your drive.

DrivePulse™ CLEANUP
Defragment will do a basic health check for both logical and physical problems before starting the actual defragment process. If anyproblems are found the defragment process will not run.
Click the “Start” button to begin.
It can take from half an hour to a day to defragment large drive (depending on how fragmented it is). DrivePulse willautomatically notify you when your drives cross a certain fragmentation threshold. You can then schedule a block oftime to defragment the fragmented drive.
Defragment requires that you restart from a BootWell drive to run it on your primary startup drive.
4.2 SpeedThe Speed utility measures the optimal raw performance of your drives.
The test measures raw drive speed, not actual use speed when reading and writing files.
Tests are saved automatically and can be used to compare the raw performance of different drives.
The Defragment utility will increase performance for file access; however that performance change will not be reflectedin the Speed utility as it tests the raw drive speed without file access overhead.
Table of Contents

SPEEDUP PROTECT Table of Contents
5 CLEANUP5.1 File ManagementFile management utilities can help recover drive space by deleting duplicate, or unused files. The utilities will find and recommend filesthat provide the best opportunity to recover free space.
The utilities ignore system files. This is done to prevent accidental system corruption.
5.1.1 Find Duplicates
Finds all duplicate files larger than 1KB.
Duplicate files are found by content only and the most recently used file is selected as the master. When removing aduplicate file, it is replaced with an alias so the file is still accessible by all of its various names.
5.1.2 Find Large Files
Finds files that are larger than a set minimum size and have not been accessed in a period of time you specify.
The minimum size can be from 5MB to 100MB. The last accessed period can be from 0 to 365 days.
File List Tips
Hover your mouse over a file for a few seconds to display a tooltip containing extended file information and the master file forduplicates.
Click the magnifying glass icon next to any file to reveal that file in the Finder.
The list of files can be organized in alphabetical order by clicking on the “File” column heading, or by size by clicking on the“Size” column heading.
5.1.3 Selecting files to delete
Please make sure you have a current backup before slimming a drive or folder. If a file is removed by mistake the onlyway to recover it will be via a backup.
Once the search is complete, a list of files will be provided that meet the search criteria you have chosen. Although the files may meetthe criteria, it is your choice to remove any of the listed files. Be sure to thoroughly review the list of files to prevent removing anyimportant files you may be using.
Mark any files you want to delete and click on the Start button to delete the files. To cancel a utility, unmark all files and click on theCancel button.
5.2 CloneThe Clone utility copies all data from a source drive to a destination drive. All data and metadata (dates, file permissions, etc) are
copied when cloning a drive.
Drive Genius uses one of two methods when cloning a drive. If possible it will obtain exclusive access to the drive and perform a rawdisk copy. If exclusive access cannot be obtained (e.g. the startup drive) then Clone will perform a file-based copy. With eithermethod, your data is duplicated to the new drive.
A raw drive clone is preferred as data can be changed by other applications while a file-based clone is running. Inaddition a raw drive clone performs an extra data verification step while cloning a drive to ensure the cloned data is anexact duplicate of the source data. This extra verification step is not performed with a file-based clone.
To perform a clone, select a destination drive from the list and click the “Start” button. Clone will perform a basic health check of boththe source drive and the destination drive. If either has problems Drive Genius will warn you before attempting to clone the drive.
When performing a raw copy, it is possible for an attached drive to be missing as a destination option even though it islarge enough. This is due to fundamental hardware differences. In this case, you can select an individual volume toclone, or try attaching a new drive.
Drive Genius will automatically erase and format the destination drive if necessary. If the destination drive containsdata you wish to keep, you should choose a different drive.
Cloning to a Disk Image
For some drives, it is possible to clone them to a disk image file. Cloning to a disk image requires exclusive access to the drive;therefore the current startup drive cannot be cloned to a disk image file.
The disk image option is not shown for drives that do not support cloning to a disk image.
5.3 Secure Erase
Please make sure you have a current backup of important data before securely erasing a drive or folder. Once data issecurely erased, the only way to recover it will be via a backup.
Drive Genius’s Secure Erase utility is used for securely erasing drives, files or folders (and all of their data). There are many reasonsto perform a secure erase instead of simply dragging files and folders to the Finder’s Trash. A few common uses are:
Destroy sensitive information, such as financial documents.
Destroy all personal information before reselling or repurposing a computer.
Job requirements that require protection of work related information.
The only secure way to erase your data is by overwriting it with new (preferably random) patterns. Drive Genius has many standardpatterns to choose from and several conform to the United States Department of Defense standards for drive sanitation.
Secure Erase offers the following patterns: 1 Pass (Zeros), 1 Pass (Random), 3 Pass (Random), or 7 Pass (DoD) to ensure originaldata cannot be recovered. Drive Genius also features a 35 Pass (Gutmann) option, which overwrites every block of data 35 times witha complex array of patterns. Drive Genius’s Secure Erase function conforms to the U.S. Department of Defense standard for drivesanitization (DoD 5220.22 M), and it works with all drives.

US Department of Defense in the clearing and sanitizing standard DoD 5220.22-M recommends the approach “Overwrite alladdressable locations with a character, its complement, then a random character, verify for clearing and sanitizing informationon the writable media”.
The more passes a pattern performs the less chance there is of recovery; however, the time required to securely erasean item increases with each additional pass. Drive Genius defaults to 3 random passes as that offers the best securitywhile keeping the erase time reasonable.
Secure Erase Free Space
Secure Erase can also permanently erase the free space on your drives so temporary file data and old file data that was not securelyerased cannot be retrieved.
This option does not require exclusive access to a drive, and is therefore an effective sanitation procedure for drives that are used ona regular basis, including your primary startup drive.
If you erase a drive’s free space, recovery of deleted files on that drive will be impossible.
Secure Erase process
To begin a Secure Erase, choose the strength – the default “3 Pass (Random)” is sufficient for most cases – and then then click the“Start” button. Drive Genius will obtain exclusive access to the drive if necessary and begin erasing the drive.
If the Free Space option is not enabled, erasing a drive will permanently remove all data. After the drive is completely erased, DriveGenius will initialize it for macOS use.
For a whole drive (non-Free Space) erase, Secure Erase requires that you restart from a Recovery drive to run it onyour primary startup drive.
Erasing files or folders stored on an SSD drive will not actually erase the data. This is due to the way SSDs write andstore data. Therefore the only way to securely destroy files and folders is to perform a Free Space erase of the driveafter erasing all files you want to destroy.
Securely Erasing a File or Folder from the Finder
DrivePulse adds the ability to easily securely erase a file or folder from the Finder. Simply select the files/folders you want to erase inthe Finder and then select “Drive Genius Secure Erase” from the Finder’s services menu.
5.4 InitializeThe Initialize utility prepares new drives, or erases old drives, for use with macOS.
Drives can optionally be initialized for use with Windows / Camera cards or for use with legacy PowerPC macs.
When initializing a volume on a multi-volume drive, the format option is restricted to the existing volume type and cannot be changed.
5.5 Repartition

The Repartition utility allows you to manage drive space by creating, deleting and resizing volumes on the drive.
Unless you have a specific need for multiple volumes on a drive, Prosoft recommends against partitioning a drive intomultiple volumes.
Repartition provides multiple sub-utilities that can be combined to perform complex drive management functions such as mergingdisparate free space partitions, or creating new free space from an existing volume.
Partitions are presented in both a pie chart and a table; selecting a partition enables or disables the various operations that can beperformed on that partition.
Some partitions are reserved by the operating system and thus cannot be edited.
To run a sub-utility, click on the utility title to activate it, change the available configuration options to suit your needs, and then click onthe Start button.
Add / Delete
Selecting a free space partition will allow you too add a new volume. You can specify the volume type, the volume name and thevolume size. By default Drive Genius will suggest a new size that uses all available free space.
Alternatively, selecting an existing volume will allow you to remove that volume and create new free space.
Move
Selecting a non-free space partition allows that partition to be moved into neighboring free space. Drive Genius will automaticallyselect the new location.
The pie chart is updated to show the proposed new location of the volume.
Resize
Selecting an HFS+ volume allows you to resize the volume, either shrinking it or growing it. By default, Drive Genius will suggest anew size that minimizes the free space on the volume. The new size can be set to any value within the constraints of the used data asa minimum and the neighboring free space as a maximum.
The pie chart is updated to show the proposed new size of the volume.
Only HFS+ volumes can be resized. Other volume types cannot be resized.
Rename
To rename a volume, simply type the new name in the Name field and click the Start button.
Secondary Utilities
Secondary utilities can be accessed from the gear menu. They have no configuration options and when selected run automaticallywithout clicking the Start button.
Hide / Reveal
Selecting an HFS+ volume allows you to hide that volume from the Finder and other user applications. If the volume is already hidden,
SPEEDUP PROTECT
it can be made visible again.
This will not hide the volume from a drive editor such as Drive Genius, Disk Utility, etc. Do not rely on this to obscuresensitive information, please use proper encryption when necessary.
Reset
Reset is a special-case utility. It simply rewrites the existing partition table and in the process reveals free space on the drive that mayhave been hidden. This should only be necessary if the drive was manually edited or edited with another application, as Drive Geniusautomatically handles free-space whenever it operates on a drive.
5.6 IconGenius™IconGenius provides a multitude of custom designed icons for you to customize your drive and folder icons.
Icons are arranged in various collections. Click a collection name in the list to load a collection.
Setting a custom icon
To set a custom icon, select the icon you want, and then click the “Set Icon” button.
Tip: You can view a high-quality preview of an icon by selecting an icon and clicking the space-bar key once. You can thenmove to other icons in the collection using the left or right arrow keys.
Removing a custom icon
When no icon is selected and the drive/folder has an existing custom icon, IconGenius will offer the ability to remove the existingcustom icon.
5.7 Drive InformationInformation provides technical drive details such as: block counts, macOS kernel information and other low-level information thatexpert users may find useful. The information can be saved to a text file by selecting “Save” from the “File” menu.
Table of Contents

CLEANUP Drive Genius Menu Table of Contents
6 PROTECT6.1 BootWell™A BootWell drive can be used to maintain, repair, or recover your primary startup drive in the event of a primary drive error.
For maintenance purposes, most Drive Genius utilities work on the primary startup drive “live” with no need for a secondary startupdrive. However all repair and recovery utilities require starting your computer from a secondary drive so they can have exclusiveaccess to your primary drive.
The utilities that require a secondary startup drive are:
The advanced Physical Check options.RepairRebuildDefragmentThe whole-drive Secure Erase option.
These utilities will automatically prompt you to restart using a BootWell drive as needed.
When prompted by a utility you can create a BootWell drive using any 32GB or larger drive and then restart; or attach an existing BootWell drive.
If you would like to pre-create a BootWell drive for emergency use, then simply select your current startup drive, select the “BootWell” utility and finally choose a secondary drive that can be erased and formatted for use as a Drive Genius BootWell drive.
Secondary drives selected for BootWell use, will be erased and reformatted.
6.2 Malware ScanMalware Scan scans for known malware. The malware database is updated multiple times a day. In addition to running scansmanually, DrivePulse will automatically scan downloaded files in near real-time (there is a slight delay).
Automatic download scans are only performed for certain well-known locations. Downloads saved outside of theselocations will not be scanned automatically.
6.3 Instant DrivePulse™Instant DrivePulse will run the most common DrivePulse tests on a drive and provide a pass/fail status for each test. Since DrivePulsewill not run its tests until the computer is idle, this utility can be used to immediately test a drive.
6.4 Physical CheckPhysical Check is designed to detect hardware issues with drives. It goes through extensive tests to determine if there are possiblehardware issues.
Data on a hard drive is stored in a series of small, atomic data areas (technical terms for these are blocks and/or sectors). Duringnormal operation every data area should be able to be written to and read from again without stalling or worse a change in datacontents between a write and a read.

However, since drives are mechanical devices, a drive can develop hardware problems where one or more data areas may losestorage capacity and become unreadable. Physical Check reads every data area on a drive in sequence and determines whether thedrive reports an error for any of these reads. It can also do much more advanced tests at the expense of greatly increased testingtime.
The time required for a Physical Check test to complete is dependent on the drive’s size, speed, and its physical health.
6.4.1 Revive damaged areas
Most modern drives will automatically reallocate any bad data areas they encounter to another area on the drive. Each drive has areserved amount of space to handle these reallocations.
If Drive Genius or DrivePulse informs you it has found bad areas, or you suspect there are bad areas on a drive you can enableRevive damaged areas to allow Drive Genius to instruct the hard drive to reallocate any bad data areas that are found.
When Drive Genius finds a bad area, it will attempt to read the information from the bad area and write it back to the same area. Thiswill kick-in the drive’s reallocation mechanism and move the data area contents to a new area.
Please note that bad data area reallocation will likely result in data loss as the contents of bad areas may not beretrievable. Therefore, Drive Genius defaults to erasing and formatting the drive if data areas are reallocated. If youwant to attempt to recover data from the drive - even though it may be corrupt - you can disable the erase option.
6.4.2 Extended check
The extended check option will verify the read and write ability of every data area on the drive. Unlike the Revive option, which onlyattempts writes for bad areas, the Extended check option will read and write the contents of every single data area on the drive;possibly multiple times.
This process goes through great pains to bypass all operating system layers and directly interact with the drive’s data; thereforeenabling Extended scan will greatly increase the time needed to complete the scan.
If you have the time to let the Extended check complete, it will find faults with the drive even when other tests, other utilities or vendorsthemselves declare the drive to be in good condition.
Due to the stress placed on a drive with the Extended check option enabled, it is not recommended for SSD drives.
6.5 Consistency CheckConsistency Check verifies the file and folder structures of macOS formatted drives.
If an issue is found during the check, Drive Genius will offer to Repair the drive.
A check of the current startup drive may cause Drive Genius or the system itself to pause and become unresponsive.This is normal during a check of the startup drive and the system will return to normal operation when the check iscomplete.
6.6 RepairRepair is a utility for repairing most kinds of logical file and folder errors on a drive.
Repair should be run whenever Drive Genius or DrivePulse notifies you of a Consistency Check failure. It is not necessary to run
CLEANUP Drive Genius Menu
Repair in other circumstances.
Repair requires that you restart from a BootWell drive to run it on your primary startup drive.
Repair does not handle physical defects. The Physical Check utility will do so. Please note that DrivePulse willautomatically check your drives for both logical and physical problems and notify you if an issue is found.
6.7 Rebuild
Rebuild is a specialized utility and Prosoft does not recommend its use in normal drive maintenance procedures.
Rebuild is a utility for reconstructing the catalog of files and folders on macOS formatted drives. This will rebuild the directory of thedrive (known as the Catalog B-Tree) that contains information pertaining to the location of all files on the drive.
Rebuild addresses a very specific set of problems; namely “lost” files that are still on the drive but are no longer accessible becausethe location pointers to the data have been lost or corrupted.
Rebuild requires that you restart from a BootWell drive to run it on your primary startup drive.
6.8 Fix Permissions
Fix Permissions is only available on macOS 10.10 or earlier, as Apple no longer recommends (nor supports) modifyingsystem permissions in macOS 10.11 and later.
Fix Permissions repairs incorrect file and folder ownership and permissions on startup drives according to Apple specifications.Permission issues can result from bad application installers and lead to applications failing to open or randomly crashing. If you areexperiencing these symptoms, Fix Permissions may be able to resolve them.
6.9 Active FilesThe Active Files utility shows files and folders that are in use on the selected drive. In addition to the item (file/folder) name it showsthe application that is using the item and the item’s parent folder.
This is very useful when a drive cannot be ejected, as you can find the application that is using the drive and quit it.
Tip: You can double-click on an item to reveal it in the Finder.
Table of Contents

PROTECT Questions and Answers
PROTECT Questions and Answers
Table of Contents
7 Drive Genius MenuThe Drive Genius menu provides access to preferences, uninstall and other Prosoft resources.
7.1 Preferences
Check for updates automatically: Enabling this option will have Drive Genius inform you of any updates and allow you todownload and install the latest version.
If automatic update checks are enabled, Drive Genius will send anonymous information about your system (CPU, Memory, etc) toProsoft. This information helps us improve Drive Genius.
Email Notifications: Enter an email address to have Drive Genius email you when a utility you have started completes. Morethan one email address can be included by using a comma “,” to separate addresses.
Drive Genius sends emails using the default email application. Apple’s Mail, Microsoft Entourage, and Stickshift Software’s Mailsmithare supported; if one of these is not the default email application, Drive Genius will attempt to use Apple’s Mail application. Your emailapplication must be configured correctly for emails to be sent. Email notifications are only sent if your computer is not being used.
Disable DrivePulse Disables DrivePulse.
DrivePulse is a critical component of Drive Genius and certain features will not work if it is disabled (such as VerifyPreferences). Prosoft strongly recommends that DrivePulse is always enabled.
Refer a friendRefer Drive Genius to family and friends via Prosoft’s web site.
Check for UpdateManually check for Drive Genius updates.
7.2 UninstallTo completely remove Drive Genius and its components from your system, select “Uninstall” from the Drive Genius menu. A promptwill appear to confirm you want to uninstall the application and will require administrator authentication to complete the process:
Uninstall: Drive Genius will remove only its installed components, but will leave the application and its preferences in place.Uninstall All: Drive Genius will perform an uninstall as outlined above and then move the application and its preferences to theTrash.
Table of Contents
Drive Genius Menu Acknowledgements Table of Contents
8 Questions and AnswersCan Drive Genius be used with macOS 10.9.5 and earlier.Yes. There are several options that will allow Drive Genius to operate on older macOS startup drives. Please see the “Using DriveGenius with older versions of macOS” section for more information.
A File Management utility is showing me a lot of files to delete. Which files should Iselect?You should only delete files you are familiar with and are not using (files you know can be safely deleted). If you see unfamiliar files,the best course of action is to assume those files are related to macOS or applications and leave those files alone. The utilities willshow all files on your drive according to the options you have selected; they make a best effort to filter files that should not be deleted.However, it is ultimately your responsibility to determine which files to delete.
Do I need to restart from a BootWell drive to use the File Management utilities?No. Since the utilities do not need exclusive access to drives, you may run the utilities on the startup drive without restarting.
Will Drive Genius work with RAID drives?Yes. Hardware based RAID, Apple software RAID and SoftRAID are supported.
Does Drive Genius support Drobo drives?No. Drobos are proprietary devices and due to the way they store and manipulate data on multiple physical drives, Drive Geniuscannot safely manipulate that same data. It is the decision of Data Robotics, Inc to not share the technical information necessary tosafely support Drobo devices.
Does Drive Genius work with Boot Camp?Yes. However support for Windows formatted drives is limited. See the next question.
Does Drive Genius work with ExFAT/FAT32/NTFS formatted drives?Drive Genius provides limited support for FAT32, ExFAT and NTFS formats.
Should sleep mode be disabled prior to running a utility?No. Drive Genius prevents the system from automatically sleeping while a utility is running. Although the display may turn off during along process, the system will not sleep while a utility is running. If the display goes to sleep, simply move the mouse or tap thekeyboard to wake up the display.
Can Drive Genius clone the startup drive to another hard drive?Yes.
Does a Clone destination drive have to be larger than the source drive?No.
Will Drive Genius report a problem during a Clone if the source drive is corrupted?

Drive Genius Menu Acknowledgements
No. Since Drive Genius uses a bit-by-bit copy, every problem will be copied over without regard for the corruption on the drive. Thiswill result in a direct copy of the source drive. If the source drive is failing to attach or startup, the destination drive will also have thesame issues. This is ideal for creating a copy of a bad drive for the purpose of troubleshooting, such as using Prosoft’s Data Rescueto scan for data from the duplicated device.
Table of Contents

Questions and Answers Table of Contents
9 AcknowledgementsDrive Genius is copyright 2004-2017 Prosoft Engineering, Inc.
BootWell™, DrivePulse™, and IconGenius™ are trademarks of Prosoft Engineering, Inc. All other trademarks are the property of their respectiveowners.
Drive Genius uses the following third-party software libraries:
Boost
http://www.boost.org/
Boost Software License - Version 1.0 - August 17th, 2003
Permission is hereby granted, free of charge, to any person or organization obtaining a copy of the software and accompanying documentationcovered by this license (the “Software”) to use, reproduce, display, distribute, execute, and transmit the Software, and to prepare derivative works ofthe Software, and to permit third-parties to whom the Software is furnished to do so, all subject to the following:
The copyright notices in the Software and this entire statement, including the above license grant, this restriction and the following disclaimer, mustbe included in all copies of the Software, in whole or in part, and all derivative works of the Software, unless such copies or derivative works aresolely in the form of machine-executable object code generated by a source language processor.
THE SOFTWARE IS PROVIDED “AS IS”, WITHOUT WARRANTY OF ANY KIND, EXPRESS OR IMPLIED, INCLUDING BUT NOTLIMITED TO THE WARRANTIES OF MERCHANTABILITY, FITNESS FOR A PARTICULAR PURPOSE, TITLE AND NON-INFRINGEMENT. IN NO EVENT SHALL THE COPYRIGHT HOLDERS OR ANYONE DISTRIBUTING THE SOFTWARE BE LIABLEFOR ANY DAMAGES OR OTHER LIABILITY, WHETHER IN CONTRACT, TORT OR OTHERWISE, ARISING FROM, OUT OF OR INCONNECTION WITH THE SOFTWARE OR THE USE OR OTHER DEALINGS IN THE SOFTWARE.
The Lean Mean C++ Option Parser
http://optionparser.sourceforge.net
Copyright (C) 2012 Matthias S. Benkmann
The “Software” in the following 2 paragraphs refers to this file containing the code to The Lean Mean C++ Option Parser. The “Software” doesNOT refer to any other files which you may have received alongside this file (e.g. as part of a larger project that incorporates The Lean Mean C++Option Parser).
Permission is hereby granted, free of charge, to any person obtaining a copy of this software, to deal in the Software without restriction, includingwithout limitation the rights to use, copy, modify, merge, publish, distribute, sublicense, and/or sell copies of the Software, and to permit persons towhom the Software is furnished to do so, subject to the following conditions: The above copyright notice and this permission notice shall beincluded in all copies or substantial portions of the Software.
THE SOFTWARE IS PROVIDED “AS IS”, WITHOUT WARRANTY OF ANY KIND, EXPRESS OR IMPLIED, INCLUDING BUT NOTLIMITED TO THE WARRANTIES OF MERCHANTABILITY, FITNESS FOR A PARTICULAR PURPOSE AND NONINFRINGEMENT. INNO EVENT SHALL THE AUTHORS OR COPYRIGHT HOLDERS BE LIABLE FOR ANY CLAIM, DAMAGES OR OTHER LIABILITY,WHETHER IN AN ACTION OF CONTRACT, TORT OR OTHERWISE, ARISING FROM, OUT OF OR IN CONNECTION WITH THESOFTWARE OR THE USE OR OTHER DEALINGS IN THE SOFTWARE.
MABGTimer
https://github.com/mikeash/MABGTimer
Copyright (c) 2010, Michael Ash All rights reserved.
Redistribution and use in source and binary forms, with or without modification, are permitted provided that the following conditions are met:
Redistributions of source code must retain the above copyright notice, this list of conditions and the following disclaimer.

Redistributions in binary form must reproduce the above copyright notice, this list of conditions and the following disclaimer in the documentationand/or other materials provided with the distribution.
Neither the name of Michael Ash nor the names of its contributors may be used to endorse or promote products derived from this software withoutspecific prior written permission.
THIS SOFTWARE IS PROVIDED BY THE COPYRIGHT HOLDERS AND CONTRIBUTORS “AS IS” AND ANY EXPRESS OR IMPLIEDWARRANTIES, INCLUDING, BUT NOT LIMITED TO, THE IMPLIED WARRANTIES OF MERCHANTABILITY AND FITNESS FOR APARTICULAR PURPOSE ARE DISCLAIMED. IN NO EVENT SHALL THE COPYRIGHT HOLDER OR CONTRIBUTORS BE LIABLE FORANY DIRECT, INDIRECT, INCIDENTAL, SPECIAL, EXEMPLARY, OR CONSEQUENTIAL DAMAGES (INCLUDING, BUT NOTLIMITED TO, PROCUREMENT OF SUBSTITUTE GOODS OR SERVICES; LOSS OF USE, DATA, OR PROFITS; OR BUSINESSINTERRUPTION) HOWEVER CAUSED AND ON ANY THEORY OF LIABILITY, WHETHER IN CONTRACT, STRICT LIABILITY, ORTORT (INCLUDING NEGLIGENCE OR OTHERWISE) ARISING IN ANY WAY OUT OF THE USE OF THIS SOFTWARE, EVEN IFADVISED OF THE POSSIBILITY OF SUCH DAMAGE.
Oniguruma
http://www.geocities.jp/kosako3/oniguruma/
Copyright (c) 2002-2009 K.Kosako All rights reserved.
Redistribution and use in source and binary forms, with or without modification, are permitted provided that the following conditions are met: 1.Redistributions of source code must retain the above copyright notice, this list of conditions and the following disclaimer. 2. Redistributions inbinary form must reproduce the above copyright notice, this list of conditions and the following disclaimer in the documentation and/or othermaterials provided with the distribution.
THIS SOFTWARE IS PROVIDED BY THE AUTHOR AND CONTRIBUTORS “AS IS” AND ANY EXPRESS OR IMPLIED WARRANTIES,INCLUDING, BUT NOT LIMITED TO, THE IMPLIED WARRANTIES OF MERCHANTABILITY AND FITNESS FOR A PARTICULARPURPOSE ARE DISCLAIMED. IN NO EVENT SHALL THE AUTHOR OR CONTRIBUTORS BE LIABLE FOR ANY DIRECT, INDIRECT,INCIDENTAL, SPECIAL, EXEMPLARY, OR CONSEQUENTIAL DAMAGES (INCLUDING, BUT NOT LIMITED TO, PROCUREMENT OFSUBSTITUTE GOODS OR SERVICES; LOSS OF USE, DATA, OR PROFITS; OR BUSINESS INTERRUPTION) HOWEVER CAUSED ANDON ANY THEORY OF LIABILITY, WHETHER IN CONTRACT, STRICT LIABILITY, OR TORT (INCLUDING NEGLIGENCE OROTHERWISE) ARISING IN ANY WAY OUT OF THE USE OF THIS SOFTWARE, EVEN IF ADVISED OF THE POSSIBILITY OF SUCHDAMAGE.
Sparkle
https://github.com/sparkle-project/Sparkle
Copyright (c) 2006-2013 Andy Matuschak.
Copyright (c) 2009-2013 Elgato Systems GmbH.
Copyright (c) 2011-2014 Kornel Lesiński.
Copyright (c) 2014 C.W. Betts.
Copyright (c) 2014 Petroules Corporation.
Copyright (c) 2014 Big Nerd Ranch.
All rights reserved.
Permission is hereby granted, free of charge, to any person obtaining a copy of this software and associated documentation files (the “Software”), todeal in the Soft ware without restriction, including without limitation the rights to use, copy, modify, merge, publish, distribute, sublicense, and/orsell copies of the Software, and to permit persons to whom the Software is furnished to do so, subject to the following conditions:
The above copyright notice and this permission notice shall be included in all copies or substantial portions of the Software.
THE SOFTWARE IS PROVIDED “AS IS”, WITHOUT WARRANTY OF ANY KIND, EXPRESS OR IMPLIED, INCLUDING BUT NOTLIMITED TO THE WARRANTIES OF MERCHANTABILITY, FITNESS FOR A PARTICULAR PURPOSE AND NONINFRINGEMENT. INNO EVENT SHALL THE AUTHORS OR COPYRIGHT HOLDERS BE LIABLE FOR ANY CLAIM, DAMAGES OR OTHER LIABILITY,

WHETHER IN AN ACTION OF CONTRACT, TORT OR OTHERWISE, ARISING FROM, OUT OF OR IN CONNECTION WITH THESOFTWARE OR THE USE OR OTHER DEALINGS IN THE SOFTWARE.
EXTERNAL LICENSES
bspatch.c and bsdiff.c, from bsdiff 4.3 http://www.daemonology.net/bsdiff/ : Copyright (c) 2003-2005 Colin Percival.
SUDSAVerifier.m: Copyright (c) 2011 Mark Hamlin.
All rights reserved.
Redistribution and use in source and binary forms, with or without modification, are permitted providing that the following conditions are met:
1. Redistributions of source code must retain the above copyright notice, this list of conditions and the following disclaimer.
2. Redistributions in binary form must reproduce the above copyright notice, this list of conditions and the following disclaimer in thedocumentation and/or other materials provided with the distribution.
THIS SOFTWARE IS PROVIDED BY THE AUTHOR “AS IS” AND ANY EXPRESS OR IMPLIED WARRANTIES, INCLUDING, BUT NOTLIMITED TO, THE IMPLIED WARRANTIES OF MERCHANTABILITY AND FITNESS FOR A PARTICULAR PURPOSE AREDISCLAIMED. IN NO EVENT SHALL THE AUTHOR BE LIABLE FOR ANY DIRECT, INDIRECT, INCIDENTAL, SPECIAL,EXEMPLARY, OR CONSEQUENTIAL DAMAGES (INCLUDING, BUT NOT LIMITED TO, PROCUREMENT OF SUBSTITUTE GOODSOR SERVICES; LOSS OF USE, DATA, OR PROFITS; OR BUSINESS INTERRUPTION) HOWEVER CAUSED AND ON ANY THEORY OFLIABILITY, WHETHER IN CONTRACT, STRICT LIABILITY, OR TORT (INCLUDING NEGLIGENCE OR OTHERWISE) ARISING INANY WAY OUT OF THE USE OF THIS SOFTWARE, EVEN IF ADVISED OF THE POSSIBILITY OF SUCH DAMAGE.
utf8proc licenseutf8proc is a software package originally developed by Jan Behrens and the rest of the Public Software Group, who deserve nearly all of the creditfor this library, that is now maintained by the Julia-language developers. Like the original utf8proc, whose copyright and license statements arereproduced below, all new work on the utf8proc library is licensed under the MIT “expat” license :
Copyright © 2014-2015 by Steven G. Johnson, Jiahao Chen, Tony Kelman, Jonas Fonseca, and other contributors listed in the githistory.
Permission is hereby granted, free of charge, to any person obtaining a copy of this software and associated documentation files (the “Software”), todeal in the Software without restriction, including without limitation the rights to use, copy, modify, merge, publish, distribute, sublicense, and/orsell copies of the Software, and to permit persons to whom the Software is furnished to do so, subject to the following conditions:
The above copyright notice and this permission notice shall be included in all copies or substantial portions of the Software.
THE SOFTWARE IS PROVIDED “AS IS”, WITHOUT WARRANTY OF ANY KIND, EXPRESS OR IMPLIED, INCLUDING BUT NOTLIMITED TO THE WARRANTIES OF MERCHANTABILITY, FITNESS FOR A PARTICULAR PURPOSE AND NONINFRINGEMENT. INNO EVENT SHALL THE AUTHORS OR COPYRIGHT HOLDERS BE LIABLE FOR ANY CLAIM, DAMAGES OR OTHER LIABILITY,WHETHER IN AN ACTION OF CONTRACT, TORT OR OTHERWISE, ARISING FROM, OUT OF OR IN CONNECTION WITH THESOFTWARE OR THE USE OR OTHER DEALINGS IN THE SOFTWARE.
Original utf8proc licenseCopyright (c) 2009, 2013 Public Software Group e. V., Berlin, Germany
Permission is hereby granted, free of charge, to any person obtaining a copy of this software and associated documentation files (the “Software”), todeal in the Software without restriction, including without limitation the rights to use, copy, modify, merge, publish, distribute, sublicense, and/orsell copies of the Software, and to permit persons to whom the Software is furnished to do so, subject to the following conditions:
The above copyright notice and this permission notice shall be included in all copies or substantial portions of the Software.
THE SOFTWARE IS PROVIDED “AS IS”, WITHOUT WARRANTY OF ANY KIND, EXPRESS OR IMPLIED, INCLUDING BUT NOTLIMITED TO THE WARRANTIES OF MERCHANTABILITY, FITNESS FOR A PARTICULAR PURPOSE AND NONINFRINGEMENT. INNO EVENT SHALL THE AUTHORS OR COPYRIGHT HOLDERS BE LIABLE FOR ANY CLAIM, DAMAGES OR OTHER LIABILITY,WHETHER IN AN ACTION OF CONTRACT, TORT OR OTHERWISE, ARISING FROM, OUT OF OR IN CONNECTION WITH THESOFTWARE OR THE USE OR OTHER DEALINGS IN THE SOFTWARE.

Questions and Answers
Unicode data licenseThis software distribution contains derived data from a modified version of the Unicode data files. The following license applies to that data:
COPYRIGHT AND PERMISSION NOTICE
Copyright (c) 1991-2007 Unicode, Inc. All rights reserved. Distributed under the Terms of Use inhttp://www.unicode.org/copyright.html.
Permission is hereby granted, free of charge, to any person obtaining a copy of the Unicode data files and any associated documentation (the “DataFiles”) or Unicode software and any associated documentation (the “Software”) to deal in the Data Files or Software without restriction, includingwithout limitation the rights to use, copy, modify, merge, publish, distribute, and/or sell copies of the Data Files or Software, and to permit personsto whom the Data Files or Software are furnished to do so, provided that (a) the above copyright notice(s) and this permission notice appear with allcopies of the Data Files or Software, (b) both the above copyright notice(s) and this permission notice appear in associated documentation, and (c)there is clear notice in each modified Data File or in the Software as well as in the documentation associated with the Data File(s) or Software thatthe data or software has been modified.
THE DATA FILES AND SOFTWARE ARE PROVIDED “AS IS”, WITHOUT WARRANTY OF ANY KIND, EXPRESS OR IMPLIED,INCLUDING BUT NOT LIMITED TO THE WARRANTIES OF MERCHANTABILITY, FITNESS FOR A PARTICULAR PURPOSE ANDNONINFRINGEMENT OF THIRD PARTY RIGHTS. IN NO EVENT SHALL THE COPYRIGHT HOLDER OR HOLDERS INCLUDED INTHIS NOTICE BE LIABLE FOR ANY CLAIM, OR ANY SPECIAL INDIRECT OR CONSEQUENTIAL DAMAGES, OR ANY DAMAGESWHATSOEVER RESULTING FROM LOSS OF USE, DATA OR PROFITS, WHETHER IN AN ACTION OF CONTRACT, NEGLIGENCE OROTHER TORTIOUS ACTION, ARISING OUT OF OR IN CONNECTION WITH THE USE OR PERFORMANCE OF THE DATA FILES ORSOFTWARE.
Except as contained in this notice, the name of a copyright holder shall not be used in advertising or otherwise to promote the sale, use or otherdealings in these Data Files or Software without prior written authorization of the copyright holder.
Unicode and the Unicode logo are trademarks of Unicode, Inc., and may be registered in some jurisdictions. All other trademarks and registeredtrademarks mentioned herein are the property of their respective owners.
ClamAv
https://raw.githubusercontent.com/vrtadmin/clamav-devel/master/COPYING
Table of Contents