system setup handbook - intouchpos · intouchpos by assal 04/25/11 page 1 system setup handbook...
TRANSCRIPT
INTOUCHPOS® SYSTEM SETUP INSTRUCTIONS
InTouchPOS by ASSAL 04/25/11 Page 1
SYSTEM SETUP HANDBOOK
IMPORTANT: The Following is a list of key items that must be completed before we will install your InTouchPOS® System. Some items may not apply to your restaurant. ******************************************************************
WIRING – NEW CAT5e or CAT6 (do not constrict, twist or bend the CAT6 wire), home run from Main Manager Station (Office) to workstations and prep printers with RJ45 jack termination with gold plated ends. Details on page 5. PLEASE NOTE: No wiring is necessary for receipt printers at the cash stations.
CALLER ID WIRING FOR INCOMING CALLS. Details on page 31.
ELECTRICAL - Dedicated circuit/isolated ground for each plug (Orange Outlets) for each station. If not dedicated/isolated, line conditioners will need to be purchased. Details on page 7.
“BUSINESS CLASS” HIGH SPEED CONNECTION (DSL, CABLE, ETC.) INFORMATION – A dedicated Static IP address for the POS System (AT&T, Verizon, Comcast, Cox, Viacom). Other Static IP addresses will need to be ordered for Camera Systems or Wifi. If it takes more than 30 minutes to setup InTouchPOS with the High Speed Connection, there will be a configuration charge. Details on page 9.
CREDIT CARD PROCESSING INFORMATION. Approved vendor merchant specification sheet & dedicated phone line for backup credit cards over a dial up modem in case High Speed DSL is down. Details on page 10.
MENUS, COUPONS & DISCOUNTS (email or snail mail, NO FAX'S). Details on page 21.
DELIVERY MAP – Real Map (NO FAX'S). Details on page 28.
COUNTERS INSTALLED – All POS counters need to installed and openings drilled for station cables
All information contained in this package must be completed and returned to InTouchPOS by ASSAL no later than three weeks before your scheduled installation date. If not, your installation date may be changed due to time constraints. All of the above boxes need to be checked off and you need to sign on the line below certifying that all the above mentioned items have been completed in order for the installation date to be confirmed. Upon completion and sign off, this page needs to be faxed to 925.939.3444 before we can come onsite to perform the installation & training. If an Assal Employee arrives onsite and these items were signed off and not fully completed, you will need to sign a waiver releasing Assal from liability, we will have to reschedule the installation & training and there will be a rescheduling fee. Print Name _______________________ Date ______________________ Signature ______________________________________________________

INTOUCHPOS® SYSTEM SETUP INSTRUCTIONS
InTouchPOS by ASSAL 4/25/2011 Page 2
Thank you for choosing the InTouchPOS® the advanced Point of sale and Management System. InTouchPOS by ASSAL would like to welcome you to our growing family of InTouchPOS® users. We are confident that you will have a good working relationship with ASSAL, and you will be pleased with the many features that the InTouchPOS® system offers. In order to make your system meet your management needs and correspond with your store operations, we must first gather some information about your restaurant. This package contains a questionnaire that will help us to set up your InTouchPOS® system to meet your stores’ unique needs before intallation.. As you progress through this questionnaire, you will notice that some questions do not apply to your restaurant. In those instances, please write N/A. It is required that you return the whole package to us at least four (4) weeks prior to installation, including the pages that you did not fill out so that we can use that information to set up your System. We have provided detailed instructions in each section for your convenience, but if you have any questions and need additional assistance, please do not hesitate to call us at (800) 777-8202 x633. In some sections you may also need to make extra copies of the forms in order to accommodate all of the information that you will be providing us (i.e. employee information). Please be sure that the forms are filled out as accurately and thoroughly as possible and return them to:
1601 N. California Blvd. Walnut Creek, CA 94596 Attn: System Setup Dept.

INTOUCHPOS® SYSTEM SETUP INSTRUCTIONS
InTouchPOS by ASSAL 4/25/2011 Page 3
THE INTOUCHPOS® TRAINING PROGRAM ASSAL’s Training Program is designed to enable all levels of employees, from line employees to the Corporate Staff, to be self-sufficient when using the InTouchPOS® System to its fullest potential. On-site training is provided to the Managers & Owners. To make the transition smoother for your operation to the InTouchPOS® System, we require that each person in your Management Team be present for training. You may have to revise your Management Team’s schedule so that they can attend this necessary training. InTouchPOS by ASSAL will provide you and your Management Team with the essential training materials; a System Manual and Quick Reference Guide. ASSAL provides four standard training programs to satisfy all of our customer’s requirements. Courses range from training on the day-to-day operations, to more elaborate instruction on installing and configuring the InTouchPOS® System. Customized training programs can be tailored to your specific needs.
INTOUCHPOS® SYSTEM SETUP INSTRUCTIONS
InTouchPOS by ASSAL 4/25/2011 Page 4
TABLE OF CONTENTS 1.0 Cabling & Electrical Specifications InTouchPOS by ASSAL Data Communication Cable Specs..........................................................................................5 Cabling Diagram...........................................................................................................................................................6 ASSALCorporation Electrical Specifications ................................................................................................................7 2.0 Store Information Store Information...........................................................................................................................................................8 Data Backup ..................................................................................................................................................................8 Accounting Period .........................................................................................................................................................8 Modem/DSL information ...............................................................................................................................................9 Credit Card Card Setup...............................................................................................................................................10 Multi-Store Gift Card Setup.........................................................................................................................................11 Floorplan .....................................................................................................................................................................12 Dining Area .................................................................................................................................................................13 Departments.................................................................................................................................................................14 Party Rooms ................................................................................................................................................................14 3.0 Employee Information Instructions ............................................................................................................................................................ 15-16 Employee Information Form........................................................................................................................................17 4.0 Payroll Setup Payroll Setup ...............................................................................................................................................................18 5.0 Break Setup Break Setup..................................................................................................................................................................19 6.0 Coupons & Discounts Instructions ..................................................................................................................................................................20 Coupons & Discounts ..................................................................................................................................................21 7.0 Menu Setup Your Menu ...................................................................................................................................................................22 Lunch Specials .............................................................................................................................................................23 Salad Dressings List ....................................................................................................................................................24 Soda List ......................................................................................................................................................................25 Beer List.......................................................................................................................................................................26 Wine List ......................................................................................................................................................................27 8.0 Delivery Operations Delivery Territory (Mapping your Territory) ..............................................................................................................28 Delivery Setup........................................................................................................................................................ 28-29 Delivery Cities and Zip Code List................................................................................................................................29 Delivery Vehicles .........................................................................................................................................................30 9.0 Caller I.D.
Wiring Diagram & Requirements................................................................................................................................31 10.0 Wireless Setup
Wireless Access Points & Setup...................................................................................................................................32 11.0 Online Ordering Information for Online Ordering.................................................................................................................................33 12.0 Payout Categories Payout Categories .......................................................................................................................................................34 13.0 Receivable Categories Receivable Categories .................................................................................................................................................34 14.0 Supplier Information SupplierInformation.....................................................................................................................................................35 15.0 Inventory Setup Transferring Inventory.................................................................................................................................................36 Inventory List ......................................................................................................................................................... 36-37 Detail Report ......................................................................................................................................................... 38-39 16.0 Hardware Specifications Cut Sheet................................................................................................................................................................ 40-42
INTOUCHPOS® SYSTEM SETUP INSTRUCTIONS
InTouchPOS by ASSAL 4/25/2011 Page 5
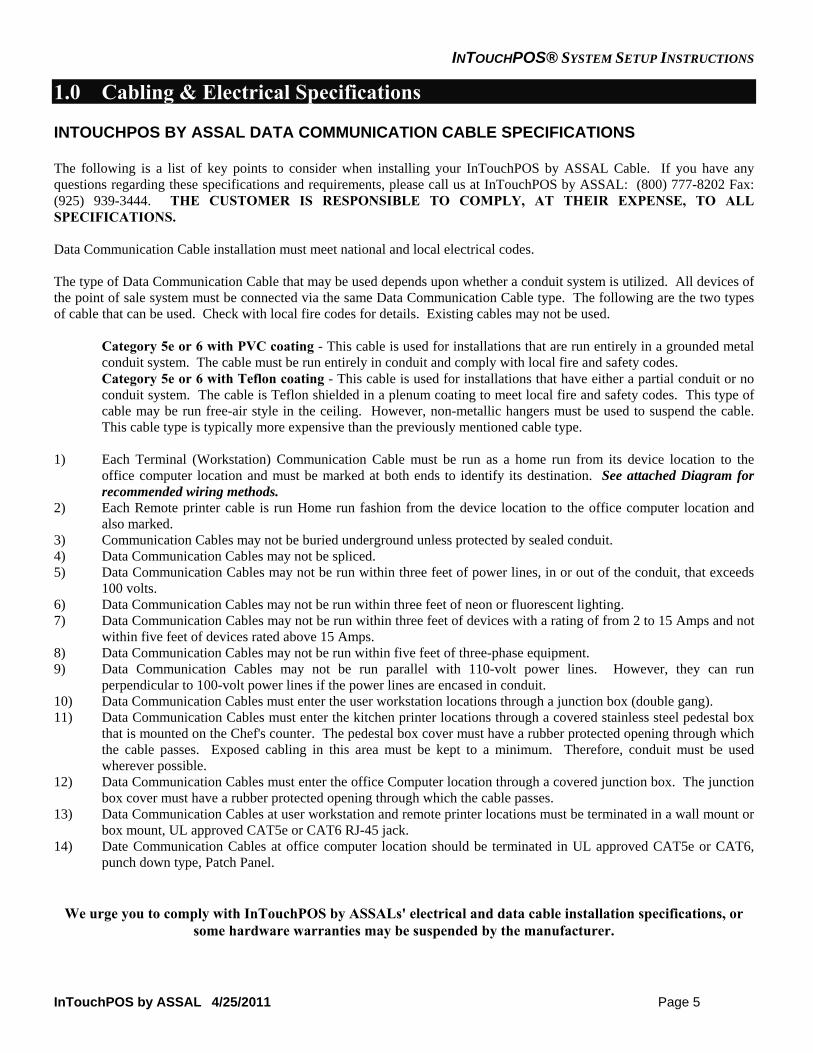
1.0 Cabling & Electrical Specifications INTOUCHPOS BY ASSAL DATA COMMUNICATION CABLE SPECIFICATIONS The following is a list of key points to consider when installing your InTouchPOS by ASSAL Cable. If you have any questions regarding these specifications and requirements, please call us at InTouchPOS by ASSAL: (800) 777-8202 Fax: (925) 939-3444. THE CUSTOMER IS RESPONSIBLE TO COMPLY, AT THEIR EXPENSE, TO ALL SPECIFICATIONS. Data Communication Cable installation must meet national and local electrical codes. The type of Data Communication Cable that may be used depends upon whether a conduit system is utilized. All devices of the point of sale system must be connected via the same Data Communication Cable type. The following are the two types of cable that can be used. Check with local fire codes for details. Existing cables may not be used.
Category 5e or 6 with PVC coating - This cable is used for installations that are run entirely in a grounded metal conduit system. The cable must be run entirely in conduit and comply with local fire and safety codes. Category 5e or 6 with Teflon coating - This cable is used for installations that have either a partial conduit or no conduit system. The cable is Teflon shielded in a plenum coating to meet local fire and safety codes. This type of cable may be run free-air style in the ceiling. However, non-metallic hangers must be used to suspend the cable. This cable type is typically more expensive than the previously mentioned cable type.
1) Each Terminal (Workstation) Communication Cable must be run as a home run from its device location to the
office computer location and must be marked at both ends to identify its destination. See attached Diagram for recommended wiring methods.
2) Each Remote printer cable is run Home run fashion from the device location to the office computer location and also marked.
3) Communication Cables may not be buried underground unless protected by sealed conduit. 4) Data Communication Cables may not be spliced. 5) Data Communication Cables may not be run within three feet of power lines, in or out of the conduit, that exceeds
100 volts. 6) Data Communication Cables may not be run within three feet of neon or fluorescent lighting. 7) Data Communication Cables may not be run within three feet of devices with a rating of from 2 to 15 Amps and not
within five feet of devices rated above 15 Amps. 8) Data Communication Cables may not be run within five feet of three-phase equipment. 9) Data Communication Cables may not be run parallel with 110-volt power lines. However, they can run
perpendicular to 100-volt power lines if the power lines are encased in conduit. 10) Data Communication Cables must enter the user workstation locations through a junction box (double gang). 11) Data Communication Cables must enter the kitchen printer locations through a covered stainless steel pedestal box
that is mounted on the Chef's counter. The pedestal box cover must have a rubber protected opening through which the cable passes. Exposed cabling in this area must be kept to a minimum. Therefore, conduit must be used wherever possible.
12) Data Communication Cables must enter the office Computer location through a covered junction box. The junction box cover must have a rubber protected opening through which the cable passes.
13) Data Communication Cables at user workstation and remote printer locations must be terminated in a wall mount or box mount, UL approved CAT5e or CAT6 RJ-45 jack.
14) Date Communication Cables at office computer location should be terminated in UL approved CAT5e or CAT6, punch down type, Patch Panel.
We urge you to comply with InTouchPOS by ASSALs' electrical and data cable installation specifications, or some hardware warranties may be suspended by the manufacturer.

INTOUCHPOS® SYSTEM SETUP INSTRUCTIONS
InTouchPOS by ASSAL 04/25/11 Page 6
INTOUCHPOS® SYSTEM SETUP INSTRUCTIONS
InTouchPOS by ASSAL 4/25/2011 Page 7
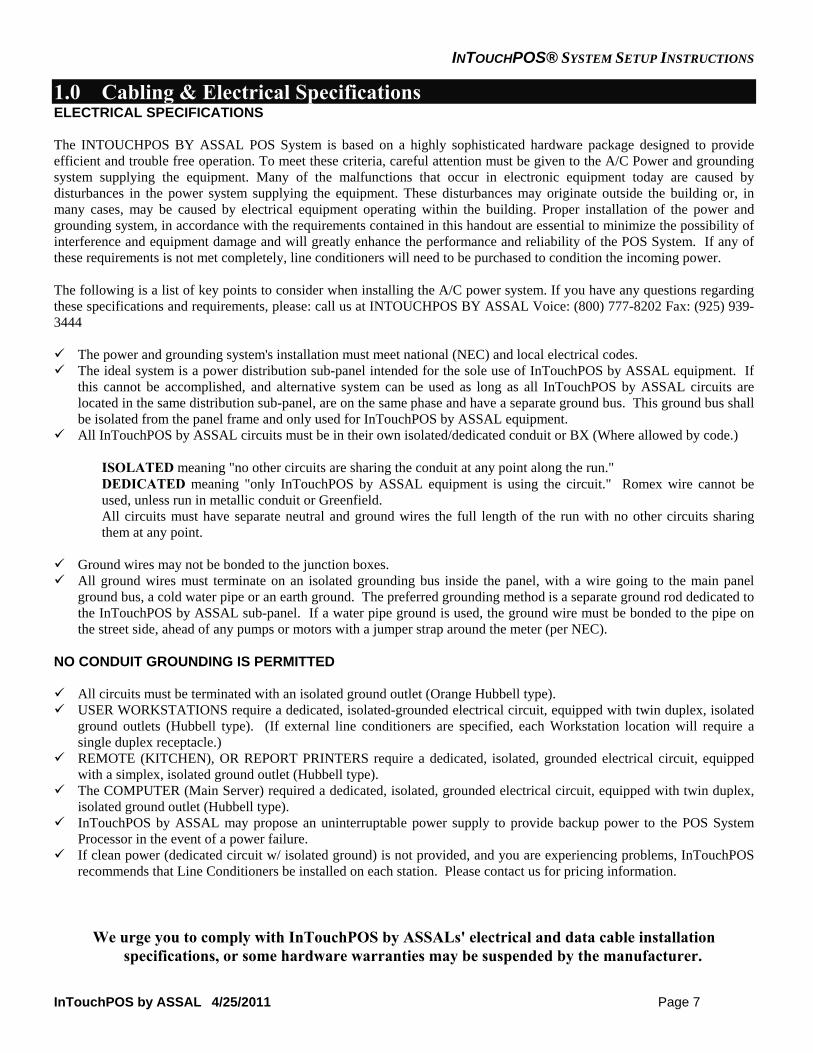
1.0 Cabling & Electrical Specifications ELECTRICAL SPECIFICATIONS The INTOUCHPOS BY ASSAL POS System is based on a highly sophisticated hardware package designed to provide efficient and trouble free operation. To meet these criteria, careful attention must be given to the A/C Power and grounding system supplying the equipment. Many of the malfunctions that occur in electronic equipment today are caused by disturbances in the power system supplying the equipment. These disturbances may originate outside the building or, in many cases, may be caused by electrical equipment operating within the building. Proper installation of the power and grounding system, in accordance with the requirements contained in this handout are essential to minimize the possibility of interference and equipment damage and will greatly enhance the performance and reliability of the POS System. If any of these requirements is not met completely, line conditioners will need to be purchased to condition the incoming power. The following is a list of key points to consider when installing the A/C power system. If you have any questions regarding these specifications and requirements, please: call us at INTOUCHPOS BY ASSAL Voice: (800) 777-8202 Fax: (925) 939-3444 The power and grounding system's installation must meet national (NEC) and local electrical codes. The ideal system is a power distribution sub-panel intended for the sole use of InTouchPOS by ASSAL equipment. If
this cannot be accomplished, and alternative system can be used as long as all InTouchPOS by ASSAL circuits are located in the same distribution sub-panel, are on the same phase and have a separate ground bus. This ground bus shall be isolated from the panel frame and only used for InTouchPOS by ASSAL equipment.
All InTouchPOS by ASSAL circuits must be in their own isolated/dedicated conduit or BX (Where allowed by code.)
ISOLATED meaning "no other circuits are sharing the conduit at any point along the run." DEDICATED meaning "only InTouchPOS by ASSAL equipment is using the circuit." Romex wire cannot be used, unless run in metallic conduit or Greenfield. All circuits must have separate neutral and ground wires the full length of the run with no other circuits sharing them at any point.
Ground wires may not be bonded to the junction boxes. All ground wires must terminate on an isolated grounding bus inside the panel, with a wire going to the main panel
ground bus, a cold water pipe or an earth ground. The preferred grounding method is a separate ground rod dedicated to the InTouchPOS by ASSAL sub-panel. If a water pipe ground is used, the ground wire must be bonded to the pipe on the street side, ahead of any pumps or motors with a jumper strap around the meter (per NEC).
NO CONDUIT GROUNDING IS PERMITTED
All circuits must be terminated with an isolated ground outlet (Orange Hubbell type). USER WORKSTATIONS require a dedicated, isolated-grounded electrical circuit, equipped with twin duplex, isolated
ground outlets (Hubbell type). (If external line conditioners are specified, each Workstation location will require a single duplex receptacle.)
REMOTE (KITCHEN), OR REPORT PRINTERS require a dedicated, isolated, grounded electrical circuit, equipped with a simplex, isolated ground outlet (Hubbell type).
The COMPUTER (Main Server) required a dedicated, isolated, grounded electrical circuit, equipped with twin duplex, isolated ground outlet (Hubbell type).
InTouchPOS by ASSAL may propose an uninterruptable power supply to provide backup power to the POS System Processor in the event of a power failure.
If clean power (dedicated circuit w/ isolated ground) is not provided, and you are experiencing problems, InTouchPOS recommends that Line Conditioners be installed on each station. Please contact us for pricing information.
We urge you to comply with InTouchPOS by ASSALs' electrical and data cable installation specifications, or some hardware warranties may be suspended by the manufacturer.

INTOUCHPOS® SYSTEM SETUP INSTRUCTIONS
InTouchPOS by ASSAL 4/25/2011 Page 8
2.0 Store Information
Store Name: Up to 25 Characters
Address: Please specify store address City: State: Zip:
County: Phone:( ) Please specify store phone number
Delivery Phone:( ) Please specify store delivery phone number (if applicable)
Reference Number: Please specify store reference number (if applicable)
Store Franchise Number: Please specify store franchise number (if applicable)
Start Cash: $ Tax Rate: % Provide the amount of start cash at the beginning ( ) Round Up of each business day for each register. ( ) Round Off
Time Zone: Daylight Savings? ( )Yes ( )No DATA BACKUP
InTouchPOS® is setup to backup your data automatically on a nightly basis when you close your shift. The amount of data that is backed up nightly depends on your choice below.
Please choose one of the following three timelines. We recommend that you choose Quarterly
(every three months), for Accounting purposes. ( ) QUARTERLY (every three months) ( ) SEMI-ANNUALLY (every six months) ( ) ANNUALLY (every twelve months) Please choose only one of the above. ACCOUNTING PERIOD ( ) Calendar / Fiscal Year Accounting Period ( ) Thirteen – 4 Weeks Accounting Period
INTOUCHPOS® SYSTEM SETUP INSTRUCTIONS
InTouchPOS by ASSAL 4/25/2011 Page 9
2.0 HIGH SPEED INTERNET / DIAL UP
Dial Up Connection Required for Backup Credit Card & Support
Store Modem Line Phone Number: One dedicated phone line is needed in the store office next to the main computer (Server) for back up credit card & support services in case your DSL service is interupted. This line cannot be shared with your existing telephone system, credit card or fax machine.
DSL or Broadband Setup & Configuration
InTouchPOS by ASSAL offers DSL integration with your InTouchPOS® System. However, there are steps to follow by InTouchPOS by ASSAL, the Customer, and your DSL Provider before DSL can be successfully integrated into your system.
CUSTOMER/DSL PROVIDER RESPONSIBILITY At least 4 weeks prior to installation of the INTOUCHPOS® System, the customer must; 1. Call your local DSL or Broadband High Speed Internet Provider and open a BUSINESS CLASS - DSL or Broadband
High Speed Internet Account. 2. Request STATIC IP’s (NOT STICKY OR DYNAMIC!!!) for DSL with five IP Addresses, installed by the main server
(office). A Static IP Address is an IP Address that never changes. Similar to a telephone number, we require that the IP Address never change so that we can send updates to you, and our Software Support Department will have no problems when you call us for Support. This static IP address should be dedicated solely for Assal’s use. You will need to purchase additional Static IP Addresses if you wish to use a camera system or WIFI.
3. Make sure they provide a DSL Filter with two (2) splitters with your service. 4. The DSL Provider will activate the DSL Line and install a DSL Modem (We prefer a Netopia Modem, not a Gateway
Router). 5. DSL Modem should have NAT turned off, and should be in Bridge Mode. 6. Your DSL Provider must come into your location to physically test the line at the location (using one of the static IP
addresses) to make sure DSL is installed properly before ASSAL can integrate the DSL with your InTouchPOS® system. 7. Please notify your DSL provider that your POS Company will be using their own Firewall (SonicWall) to protect your
POS network, therefore request them to disable NAT on their DSL modem. Tell them that you want just static IP addresses without any protection. This is a very important step. If they fail to accommodate your request it may result in delay of your POS installation. Please keep in mind that if you are going to use other IP addresses for your work office or for your camera equipment you will have to take care of their security on your own. ASSAL’s Firewall will protect only the POS equipment. DSL modems made by 2Wire cannot handle true static IP’s. If your DSL provider gives you a 2Wire modem, please ask them to switch that modem with something else (i.e., Cayman/Netopia)
8. After DSL installation, customer will fax following DSL Specifications to (925) 939-3444 or email to [email protected]
a. Static IP Address c. Gateway e. DNS 2
b. Subnet Mask d. DNS 1 PLEASE NOTE: Your DSL provider must go to your restaurant to setup and test the DSL modem. If this isn’t done by the time of installation, you may incur additional charges from InTouchPOS by ASSAL for setup and testing. ASSAL’s RESPONSIBILITY
PLEASE NOTE: When ASSAL receives all of the information referenced above, only then can we configure and integrate the DSL into your INTOUCHPOS® System. 1. ASSAL will provide and program Firewall/Router (SonicWall) with the above DSL specifications. 2. ASSAL will install Norton Antivirus Corporate Version onto Manager Station and all work stations.

INTOUCHPOS® SYSTEM SETUP INSTRUCTIONS
InTouchPOS by ASSAL 4/25/2011 Page 10
2.0 Credit Card Processing - High Speed or Dial-up Have your processor send us their own Data Sheet or complete this form and fax it back to us at 925.939.3444. You can also email it to us at [email protected]. Please provide your processor with the following information before they setup your Credit Card Account:
1. Notify them if it will be a high speed connection or dial up. 2. Platform must be Visanet, Vital, Paymentech or Nabanco. 3. Processing software is PC Charge Payment Server.
If you have not chosen a processor, we recommend 1. Ali Tousi of Banctek-(877) 828-0777
2. Bob Payne of Heartland Payment Systems-(408) 293-7001 3. Jay Singh of Paymentech - (214) 684-1891
Processor: Merchant Name: Merchant #: Street: City: State:
Terminal ID:__________________________________________ Bin #: Store #: Terminal #: Chain #: Agent #: Currency Code: Country Code: City Code: Language Code: Category Code: Time Zone Difference: Security Code:
Location #:____________________________________________
Cust. Svc. # (Primary Authorization): Cust. Svc. # (Secondary Authorization): Cust. Svc. # (Primary Settlement): Cust. Svc. # (Secondary Settlement): Visa: Yes No Master Card: Yes No American Express: Yes No Discover: Yes No Diners Club: Yes No JCB: Yes No Processor 16-digit Merchant Number: Voice Authorization Phone #:
INTOUCHPOS® SYSTEM SETUP INSTRUCTIONS
InTouchPOS by ASSAL 4/25/2011 Page 11
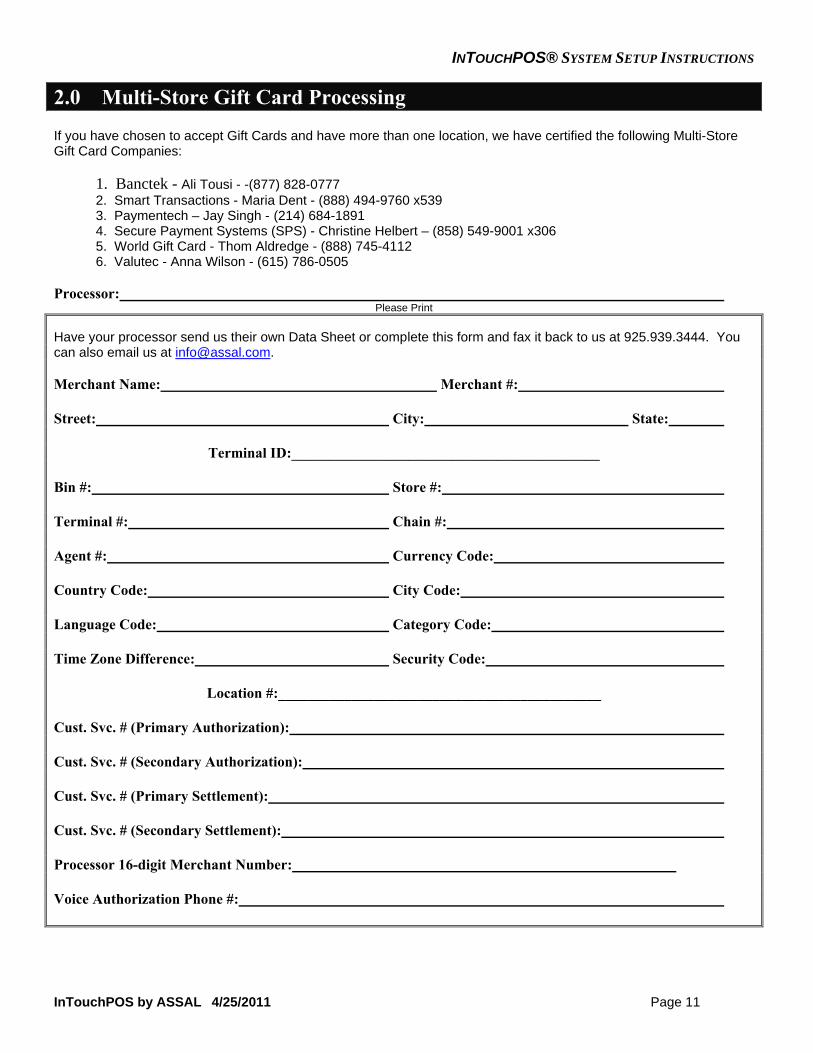
2.0 Multi-Store Gift Card Processing If you have chosen to accept Gift Cards and have more than one location, we have certified the following Multi-Store Gift Card Companies:
1. Banctek - Ali Tousi - -(877) 828-0777 2. Smart Transactions - Maria Dent - (888) 494-9760 x539 3. Paymentech – Jay Singh - (214) 684-1891 4. Secure Payment Systems (SPS) - Christine Helbert – (858) 549-9001 x306 5. World Gift Card - Thom Aldredge - (888) 745-4112 6. Valutec - Anna Wilson - (615) 786-0505
Processor: Please Print
Have your processor send us their own Data Sheet or complete this form and fax it back to us at 925.939.3444. You can also email us at [email protected]. Merchant Name: Merchant #: Street: City: State:
Terminal ID:__________________________________________ Bin #: Store #: Terminal #: Chain #: Agent #: Currency Code: Country Code: City Code: Language Code: Category Code: Time Zone Difference: Security Code:
Location #:____________________________________________
Cust. Svc. # (Primary Authorization): Cust. Svc. # (Secondary Authorization): Cust. Svc. # (Primary Settlement): Cust. Svc. # (Secondary Settlement): Processor 16-digit Merchant Number: Voice Authorization Phone #:
INTOUCHPOS® SYSTEM SETUP INSTRUCTIONS
InTouchPOS by ASSAL 4/25/2011 Page 12
2.0 Floorplan Please attach your floor plan below or draw one up indicating where you would like your stations installed, so that InTouchPOS by ASSAL Technicians can install your InTouchPOS® stations according to the layout that you provide.

INTOUCHPOS® SYSTEM SETUP INSTRUCTIONS
InTouchPOS by ASSAL 4/25/2011 Page 13
2.0 Dining Area Please attach or draw your floor plan below for your dining area indicating the table numbers and Number of covers, so that InTouchPOS by ASSAL can setup your InTouchPOS® system according to the layout that you provide.
etc.....
INTOUCHPOS® SYSTEM SETUP INSTRUCTIONS
InTouchPOS by ASSAL 4/25/2011 Page 14
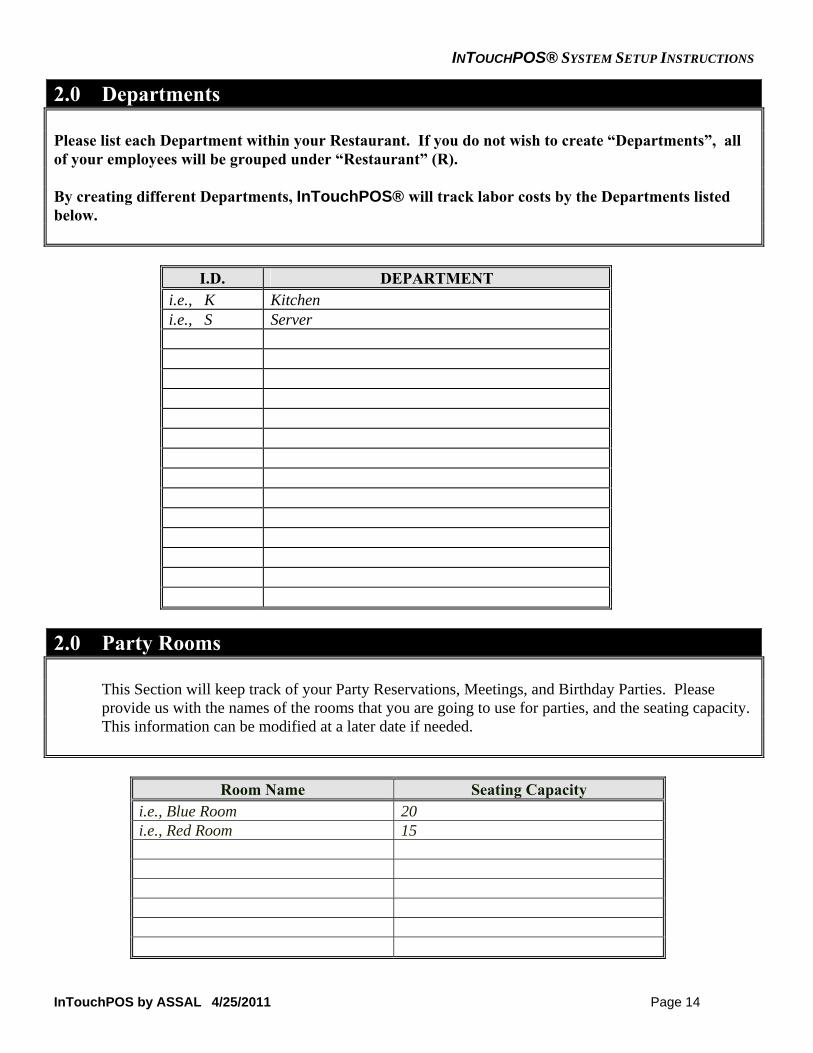
2.0 Departments Please list each Department within your Restaurant. If you do not wish to create “Departments”, all of your employees will be grouped under “Restaurant” (R). By creating different Departments, InTouchPOS® will track labor costs by the Departments listed below.
I.D. DEPARTMENT
i.e., K Kitchen i.e., S Server
2.0 Party Rooms This Section will keep track of your Party Reservations, Meetings, and Birthday Parties. Please
provide us with the names of the rooms that you are going to use for parties, and the seating capacity. This information can be modified at a later date if needed.
Room Name Seating Capacity
i.e., Blue Room 20 i.e., Red Room 15
INTOUCHPOS® SYSTEM SETUP INSTRUCTIONS
InTouchPOS by ASSAL 4/25/2011 Page 15
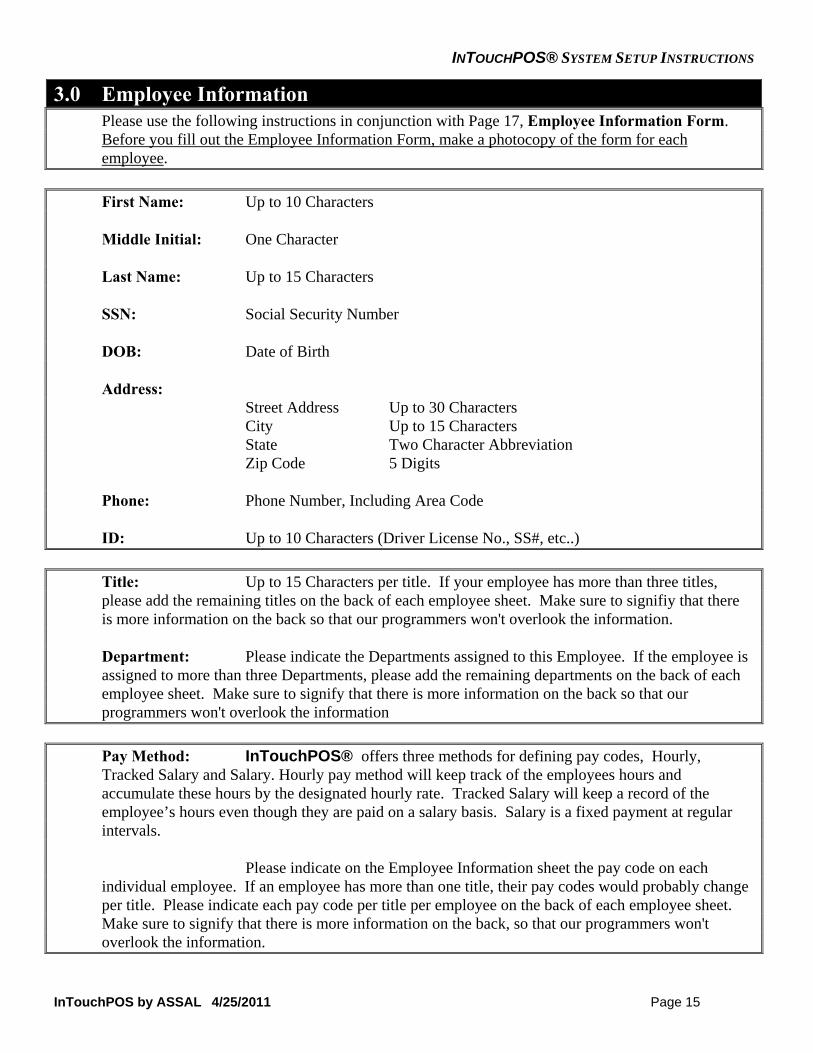
3.0 Employee Information Please use the following instructions in conjunction with Page 17, Employee Information Form.
Before you fill out the Employee Information Form, make a photocopy of the form for each employee.
First Name: Up to 10 Characters Middle Initial: One Character Last Name: Up to 15 Characters SSN: Social Security Number DOB: Date of Birth Address: Street Address Up to 30 Characters City Up to 15 Characters State Two Character Abbreviation Zip Code 5 Digits Phone: Phone Number, Including Area Code ID: Up to 10 Characters (Driver License No., SS#, etc..) Title: Up to 15 Characters per title. If your employee has more than three titles,
please add the remaining titles on the back of each employee sheet. Make sure to signifiy that there is more information on the back so that our programmers won't overlook the information.
Department: Please indicate the Departments assigned to this Employee. If the employee is
assigned to more than three Departments, please add the remaining departments on the back of each employee sheet. Make sure to signify that there is more information on the back so that our programmers won't overlook the information
Pay Method: InTouchPOS® offers three methods for defining pay codes, Hourly, Tracked Salary and Salary. Hourly pay method will keep track of the employees hours and accumulate these hours by the designated hourly rate. Tracked Salary will keep a record of the employee’s hours even though they are paid on a salary basis. Salary is a fixed payment at regular intervals.
Please indicate on the Employee Information sheet the pay code on each
individual employee. If an employee has more than one title, their pay codes would probably change per title. Please indicate each pay code per title per employee on the back of each employee sheet. Make sure to signify that there is more information on the back, so that our programmers won't overlook the information.

INTOUCHPOS® SYSTEM SETUP INSTRUCTIONS
InTouchPOS by ASSAL 4/25/2011 Page 16
Access Codes R Runners (Room Service Operations) W Waiters (Table Service Operations) E Permits access to Employee Management and Delivery Dispatch functions I Permits access to Inventory Management functions M Permits access to Management, Accounting and Marketing functions O Permits access to Order Management functions (Cancellation & Waste Orders) C Permits Managers to approve coupons at the time of the actual transaction P Permits access to perform Pay Outs S Permits access to send mail to others Security Level: This option enables you to set employee security levels. After you add a new
employee to the system, you need to set the employee security to the appropriate level otherwise the system does not allow you to work with the appropriate management options. Please refer to the list below recommended by ASSAL to set the security levels or define your own. You may circle only on per employee.
Level 1: Regular Employee Level 2: Person In charge Level 3: Assistant Manager Level 4: Store Manager Level 5: Area Supervisor Level 6: Corporate Staff Level 7: Owner
System Password: 5 Characters. This can be either numbers or letters. This enables your
employees to access the InTouchPOS® System.

INTOUCHPOS® SYSTEM SETUP INSTRUCTIONS
InTouchPOS by ASSAL 4/25/2011 Page 17
3.0 EMPLOYEE INFORMATION MAKE ONE COPY PER EMPLOYEE First Name: MI:_____ Last Name: Required Required
SSN (Truncated): DOB: Required Required
Address: Required
City: State: Zip: Required Required Required
Phone: ( ) ID: Required
Titles:1. 2. 3. i.e., Cook
Depts: i.e., Kitchen
Pay Method Title. 1: Hourly Pay Rate: $__________________/Hour Clocks In/Out
Salary $ /Month Does not clock In/Out
Salary, Track Hours $ /Month Clocks In/Out
Pay Method Title. 2: Hourly Pay Rate: $ /Hour
Salary $ /Month
Salary, Track Hours $ /Month
Pay Method Title. 3: Hourly Pay Rate: $ /Hour
Salary $ /Month
Salary, Track Hours $ /Month
Access Codes: (Circle as many as apply)
W Server (Waiter/Waitress) E Employee Mgmt. I Inventory Mgmt. M Management O Ordering Mgmt. C Coupon Approval P Pay Out S Send Mail R Runner
Security Level: (Circle only one per employee)
1 Regular Employee 2 Person In Charge 3 Assistant Manager 4 Store Manager 5 Area Supervisor 6 Corporate Staff 7 Owner
System Password: (Must be 5 digits – letters or numbers or both)
INTOUCHPOS® SYSTEM SETUP INSTRUCTIONS
InTouchPOS by ASSAL 4/25/2011 Page 18
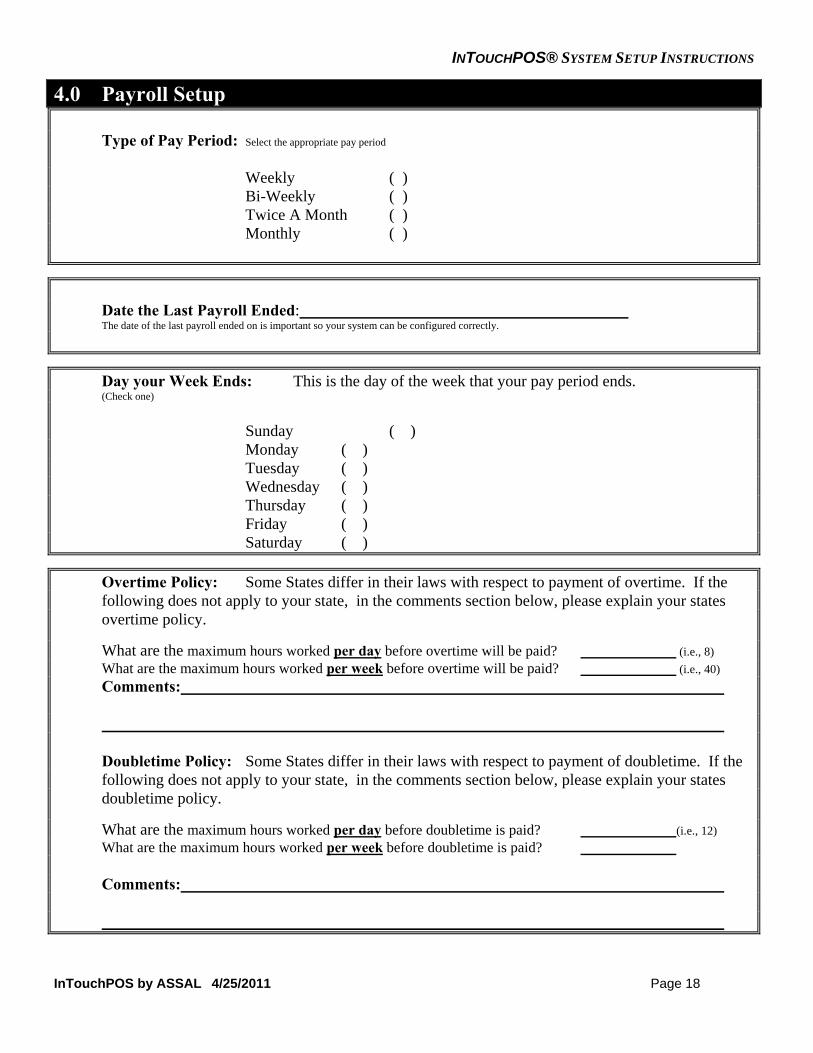
4.0 Payroll Setup Type of Pay Period: Select the appropriate pay period Weekly ( ) Bi-Weekly ( ) Twice A Month ( ) Monthly ( )
Date the Last Payroll Ended: The date of the last payroll ended on is important so your system can be configured correctly.
Day your Week Ends: This is the day of the week that your pay period ends. (Check one) Sunday ( ) Monday ( ) Tuesday ( ) Wednesday ( ) Thursday ( ) Friday ( ) Saturday ( )
Overtime Policy: Some States differ in their laws with respect to payment of overtime. If the following does not apply to your state, in the comments section below, please explain your states overtime policy.
What are the maximum hours worked per day before overtime will be paid? (i.e., 8) What are the maximum hours worked per week before overtime will be paid? (i.e., 40) Comments: Doubletime Policy: Some States differ in their laws with respect to payment of doubletime. If the
following does not apply to your state, in the comments section below, please explain your states doubletime policy.
What are the maximum hours worked per day before doubletime is paid? (i.e., 12) What are the maximum hours worked per week before doubletime is paid? Comments:

INTOUCHPOS® SYSTEM SETUP INSTRUCTIONS
InTouchPOS by ASSAL 4/25/2011 Page 19
5.0 Break Setup Instructions
In order for your employees breaks to be tracked, you must define the types of breaks you will offer
your employees. Define the type of breaks you offer your employees. Type of Breaks: P = Paid U = Unpaid Minutes: The number of minutes the break is. Grace Period: The number of minutes an employee may exceed their break before being
automatically clocked out. Employee Types: The type of employee (as designated by their pay code) that the break applies
to: T = Tracked S = Salary or H = Hourly.
Name Type Minutes Grace Employee
i.e.: 30 minute Unpaid 30 2 T,H,S or All
i.e.: 10 minute Paid 10 2 T,H,S or All

INTOUCHPOS® SYSTEM SETUP INSTRUCTIONS
InTouchPOS by ASSAL 4/25/2011 Page 20
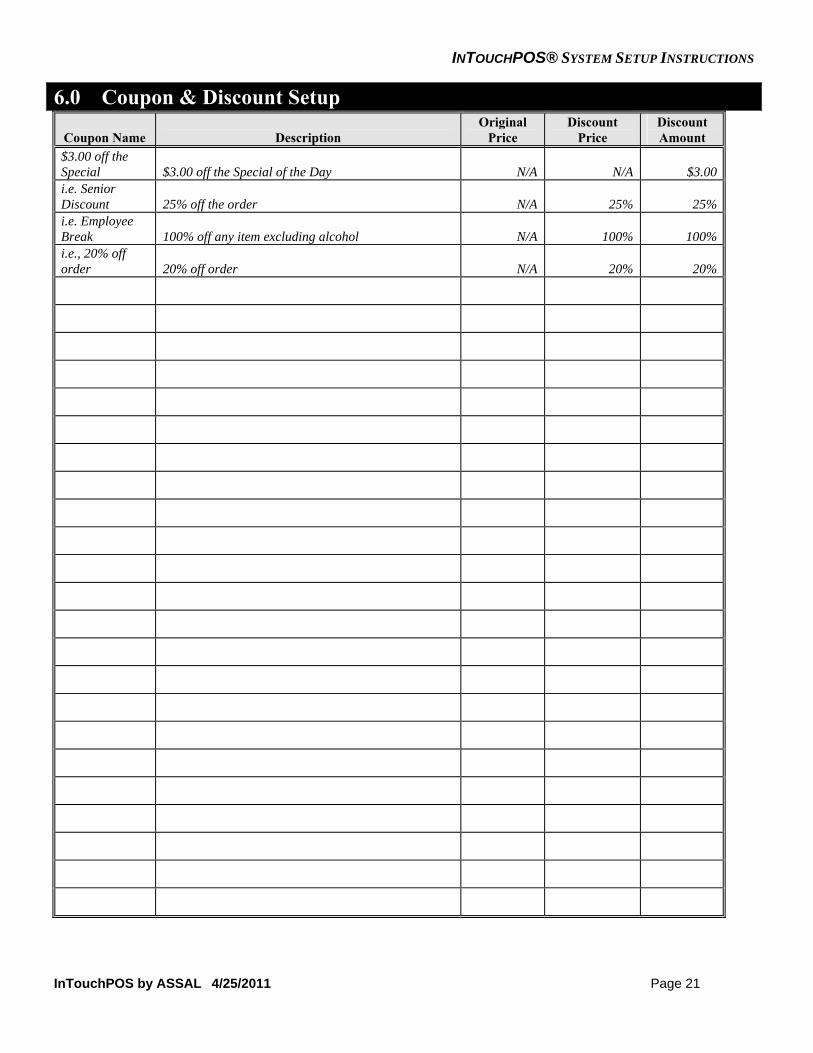
6.0 Coupon & Discount Setup
On page 20, (Coupon Information form), please list all of the coupons that are accepted by your store including any discounts the employees receive while off duty and any discount they receive off of their employee meal during their break. Please list all of the prices and discount amounts without tax. See the list below for instructions for each of the columns. Coupon Name Up to 15 Characters Description A brief description of the coupon and what it applies to. The coupon is applied only when the
items in the order matches with the definition of the coupon. Original Price The original price of the Item(s) before tax. Discount Price The discounted price of the Item(s) before tax is applied. Discount Amount The dollar value of the coupon.
INTOUCHPOS® SYSTEM SETUP INSTRUCTIONS
InTouchPOS by ASSAL 4/25/2011 Page 21
6.0 Coupon & Discount Setup
Coupon Name
Description
Original Price
Discount Price
Discount Amount
$3.00 off the Special
$3.00 off the Special of the Day N/A
N/A $3.00
i.e. Senior Discount
25% off the order N/A
25% 25%
i.e. Employee Break
100% off any item excluding alcohol N/A
100% 100%
i.e., 20% off order
20% off order N/A
20% 20%

INTOUCHPOS® SYSTEM SETUP INSTRUCTIONS
InTouchPOS by ASSAL 4/25/2011 Page 22
7.0 Menu Items
Please provide us with your COMPLETE MENUS. Attach your complete menus below. Also,
list any other menu items that are not printed on your menu, such as a side of ranch or a side of sauce for $.50 + tax.
ATTACH YOUR COMPLETE MENU HERE
(We will not accept copies or faxes) It is VERY important that you provide us with your complete menus.
You will be charged an additional setup fee if an additional menu is presented at the time of Training and InTouchPOS by ASSAL’s Trainer is asked to add this menu.
LIST MENU ITEMS THAT ARE NOT PRINTED ON YOUR MENU. IF YOU NEED MORE SPACE, CONTINUE ON THE BACK OF THIS SHEET.
OTHER MENU ITEMS OTHER MENU ITEMS 1. 8. 2. 9. 3. 10. 4. 11. 5. 12. 6. 13. 7. 14.

INTOUCHPOS® SYSTEM SETUP INSTRUCTIONS
InTouchPOS by ASSAL 4/25/2011 Page 23
7.0 Lunch Specials / COMBO Menus
Below, please provide us with a list of your lunch specials, if they are not printed on your menu.
Prices should be without tax.
Lunch Special Name
Description
Crust
Original
Price
Discount
Price
Discount Amount
Lunch Special #1
Soup & Salad Same Price $6.00 $5.00 $1.00
Lunch Special #2
Sandwich, Drink and a Salad
N/A $8.05 $5.99 $2.06
Lunch Special #3
Pasta, drink and a Salad N/A $8.50 $5.99 $2.51
THE ABOVE PRICES ARE WITHOUT TAX

INTOUCHPOS® SYSTEM SETUP INSTRUCTIONS
InTouchPOS by ASSAL 4/25/2011 Page 24
7.0 Salad Dressings List
Please list the types of Salad Dressings below that you offer to your customers. distinguish if this
will be offered as a packet or a side (include ounces).
Salad Dressing Name
Packet
Side
Oz.
i.e., Creamy Italian
X
i.e., Ranch
X
2 oz.

INTOUCHPOS® SYSTEM SETUP INSTRUCTIONS
InTouchPOS by ASSAL 04/25/11 Page 25
7.0 Soda List This form will provide information about the sodas that you offer.
Name
Size
Price
Size
Price
Size
Price
Size
Price
Size
Price
Size
Price
Size
Price
i.e. Coke S $.80 M $.90 L $1.00 P $3.00 C $1.00 X $4.00 X
Please check which of the following applies to you: �sodas are self serve �sodas are pay per drink �Tax added to price �Tax Included in price

INTOUCHPOS® SYSTEM SETUP INSTRUCTIONS
InTouchPOS by ASSAL 04/25/11 Page 26
7.0 Beer List
This form will provide information about the beer that you offer.
Name
Size
Price
Size
Price
Size
Price
Size
Price
Size
Price
Size
Price
i.e. Bud M $1.25 H $2.50 P $5.00
�Tax added to price �Tax Included in price
INTOUCHPOS® SYSTEM SETUP INSTRUCTIONS
InTouchPOS by ASSAL 04/25/11 Page 27
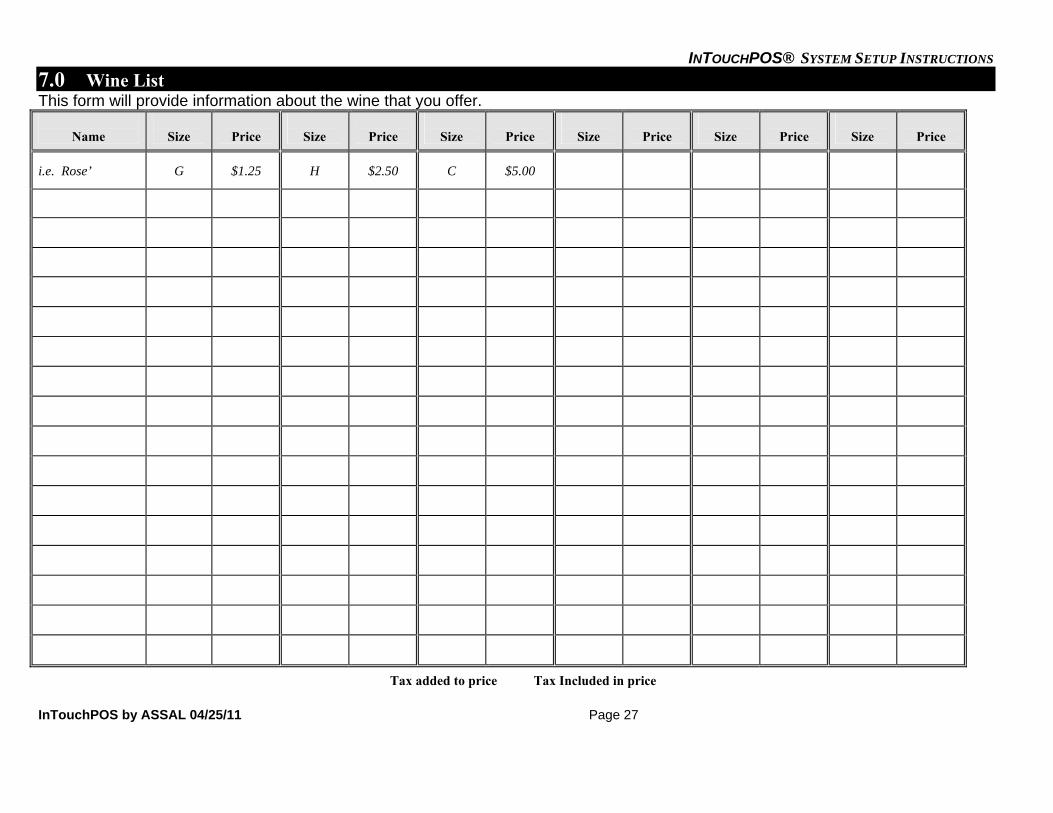
7.0 Wine List
This form will provide information about the wine that you offer.
Name
Size
Price
Size
Price
Size
Price
Size
Price
Size
Price
Size
Price
i.e. Rose’ G $1.25 H $2.50 C $5.00
�Tax added to price �Tax Included in price

INTOUCHPOS® SYSTEM SETUP INSTRUCTIONS
InTouchPOS by ASSAL 04/25/11 Page 28
8.0 Delivery Territory InTouchPOS by ASSAL will setup your delivery territory in your InTouchPOS® System. We
are requesting the following information so that your system will be as complete as possible. Please keep in mind that the more up to date and complete the information that you send us is, the more up to date and complete your Delivery Territory will be in your System. There are two ways you can send the information to us:
A. Street Database (Preferred by InTouchPOS by ASSAL): Please email your Street Database to us at info @intouchpos.com. The document must be setup
in MS Excel format as follows:
Main Zone
Alt Zone Street Name
Map Reference City State Zip Fom To
YELL YELL N. California Blvd 14W-18N Walnut Creek CA 94596 100 2000 YELL BLUE N. Main Street 8S-12E Walnut Creek CA 94596 All All RED GREEN Locust Street 5W-22N Walnut Creek CA 94596 All All
Or B. Delivery Map clearly marked: Include two originals of your Delivery Territory Map. One copy will be used by ASSAL to
setup your System, and the other will be returned to you as a reference to mount on the wall of your restaurant. The maps that you send us must be originals (copies or faxes will not be accepted), and they must be legible and include "map references". You must have the borders, zones and store location clearly marked.
To define your delivery territory: 1) Clearly mark the borders of your delivery territory on the map. 2) Identify your store location and label it. 3) Divide the map into zones by determining ease of access from your store to each zone or
grid. An easy way to determine your zones is to divide your territory by areas that may be obstacles to the driver (i.e., railroad tracks, rivers, bridges, etc.).
4) Each zone can be divided by color coding, numbers or names.
8.0 Delivery Setup Zones: Up to 4 Characters Delivery Charge: This amount will be added to the order total. It (i.e., red) could be a flat charge, different charges for different zones, or no charge (i.e., yellow) None (i.e., blue) Flat Charge of $ (i.e., green) Per Zone (i.e., orange) Variable Charge

INTOUCHPOS® SYSTEM SETUP INSTRUCTIONS
InTouchPOS by ASSAL 4/25/2011 Page 29
8.0 Delivery Setup (continued)
Driver Reimbursement: If the drivers use their own cars, they will be Please specify if you want the driver reimbursed according to the options you select. reimbursements to be paid at the end The four choices are reimbursement per order, of the day or at the end of the pay period. percentage of sales, per mile, or none. None Pay at the end of the day $ Per Order Pay with Payroll % of Sales $ per Mile
Routing: Maximum number of orders per trip that can be assigned to a driver __________Orders per Driver per Trip (i.e., four orders maximum) Timing: Wait time for Drivers to take the next delivery order. (i.e., 1 min, 2 min, 7 min):
Minimum Delivery Amount (Select an option): Option 1: Minimum dollar amount for the delivery orders before the delivery order can be accepted. Option 2: Delivery orders below the minimum amount, will automatically be increased to the minimum delivery
amount: �YES �NO Delivery Tax Rate: %
8.0 Delivery Cities & Zip Code List
Please provide the cities and zip codes which are included in your delivery area.
City Name Zip Code
Up to 19 characters Up to 5 characters
i.e., Walnut Creek 94595
i.e., Martinez 94553
INTOUCHPOS® SYSTEM SETUP INSTRUCTIONS
InTouchPOS by ASSAL 4/25/2011 Page 30
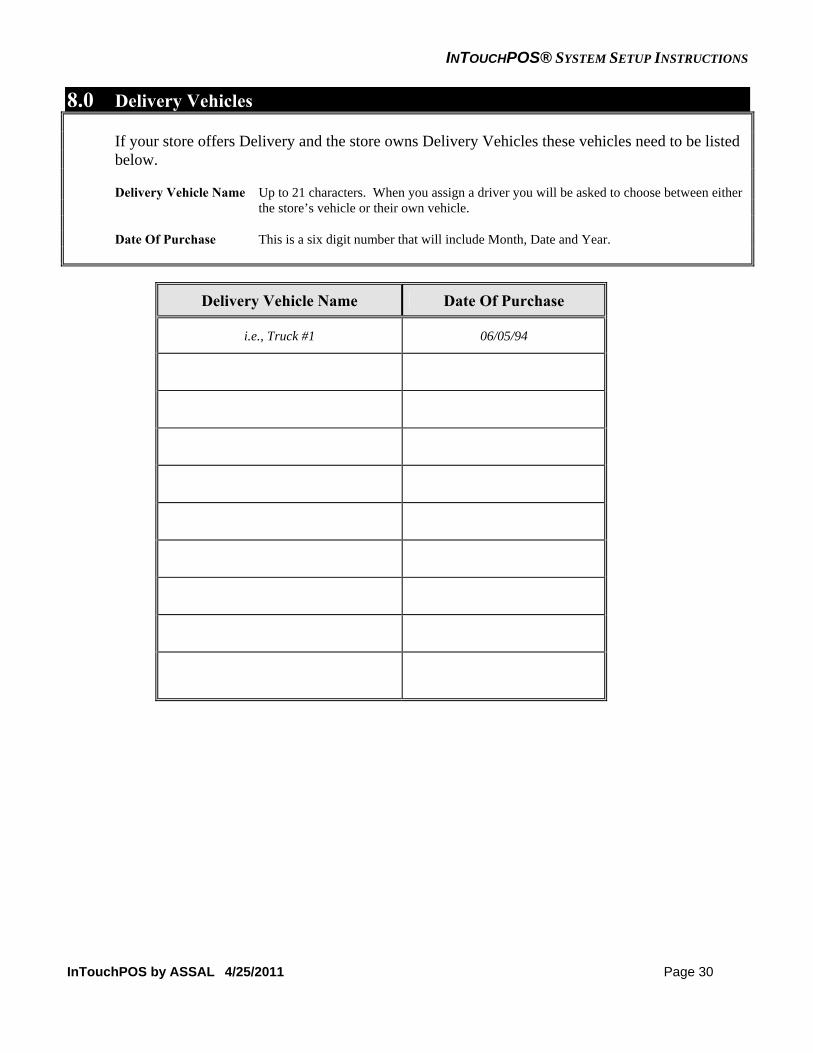
8.0 Delivery Vehicles If your store offers Delivery and the store owns Delivery Vehicles these vehicles need to be listed
below. Delivery Vehicle Name Up to 21 characters. When you assign a driver you will be asked to choose between either
the store’s vehicle or their own vehicle. Date Of Purchase This is a six digit number that will include Month, Date and Year.
Delivery Vehicle Name Date Of Purchase
i.e., Truck #1 06/05/94

INTOUCHPOS® SYSTEM SETUP INSTRUCTIONS
InTouchPOS by ASSAL 4/25/2011 Page 31
9.0 Caller I.D. This applies only if you have purchased the Caller ID Module

INTOUCHPOS® SYSTEM SETUP INSTRUCTIONS
InTouchPOS by ASSAL 4/25/2011 Page 32
10.0 Wireless Capability This applies only if you have purchased the Wireless Handheld Module

INTOUCHPOS® SYSTEM SETUP INSTRUCTIONS
InTouchPOS by ASSAL 4/25/2011 Page 33
11.0 Online Ordering This applies only if you have purchased the Online Ordering Module
INTOUCHPOS® SYSTEM SETUP INSTRUCTIONS
InTouchPOS by ASSAL 4/25/2011 Page 34
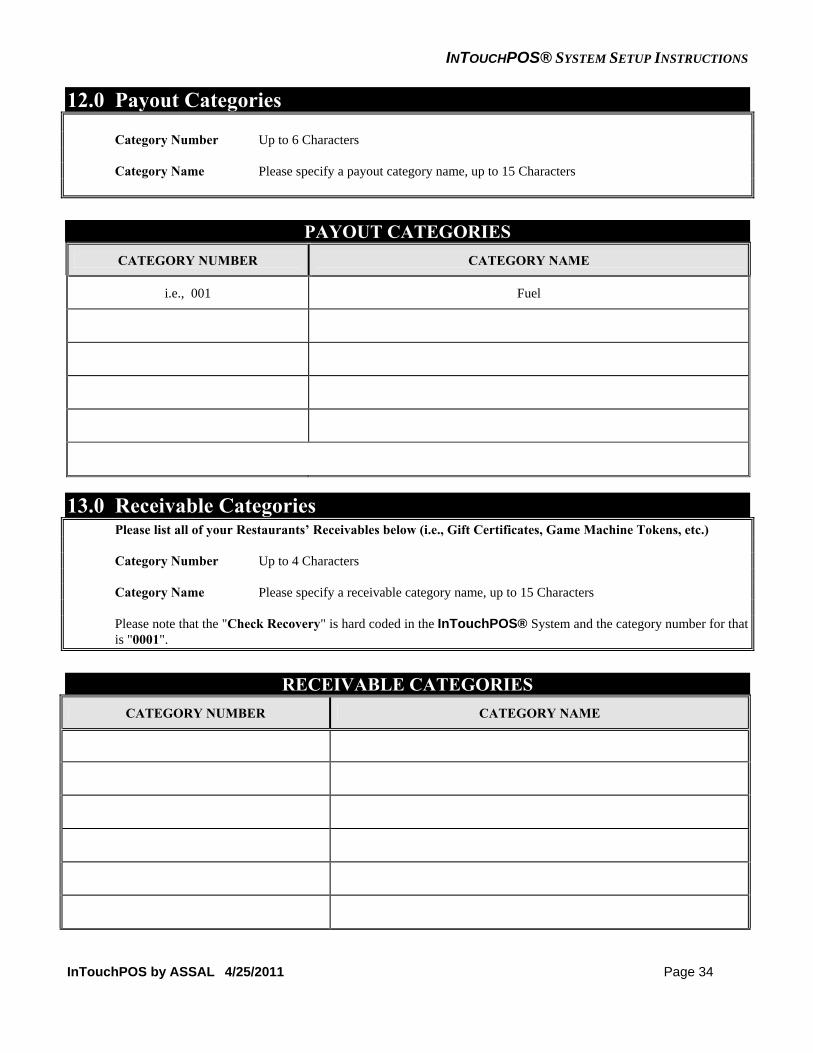
12.0 Payout Categories
Category Number Up to 6 Characters Category Name Please specify a payout category name, up to 15 Characters
PAYOUT CATEGORIES
CATEGORY NUMBER CATEGORY NAME
i.e., 001 Fuel
13.0 Receivable Categories Please list all of your Restaurants’ Receivables below (i.e., Gift Certificates, Game Machine Tokens, etc.) Category Number Up to 4 Characters Category Name Please specify a receivable category name, up to 15 Characters Please note that the "Check Recovery" is hard coded in the InTouchPOS® System and the category number for that
is "0001".
RECEIVABLE CATEGORIES
CATEGORY NUMBER CATEGORY NAME

INTOUCHPOS® SYSTEM SETUP INSTRUCTIONS
InTouchPOS by ASSAL 4/25/2011 Page 35
14.0 Supplier Information Company Name` Up to 30 Characters Contact Name Up to 20 Characters Phone Phone Number, Including Area Code
SUPPLIER INFORMATION
COMPANY NAME CONTACT NAME PHONE NUMBER
INTOUCHPOS® SYSTEM SETUP INSTRUCTIONS
InTouchPOS by ASSAL 4/25/2011 Page 36
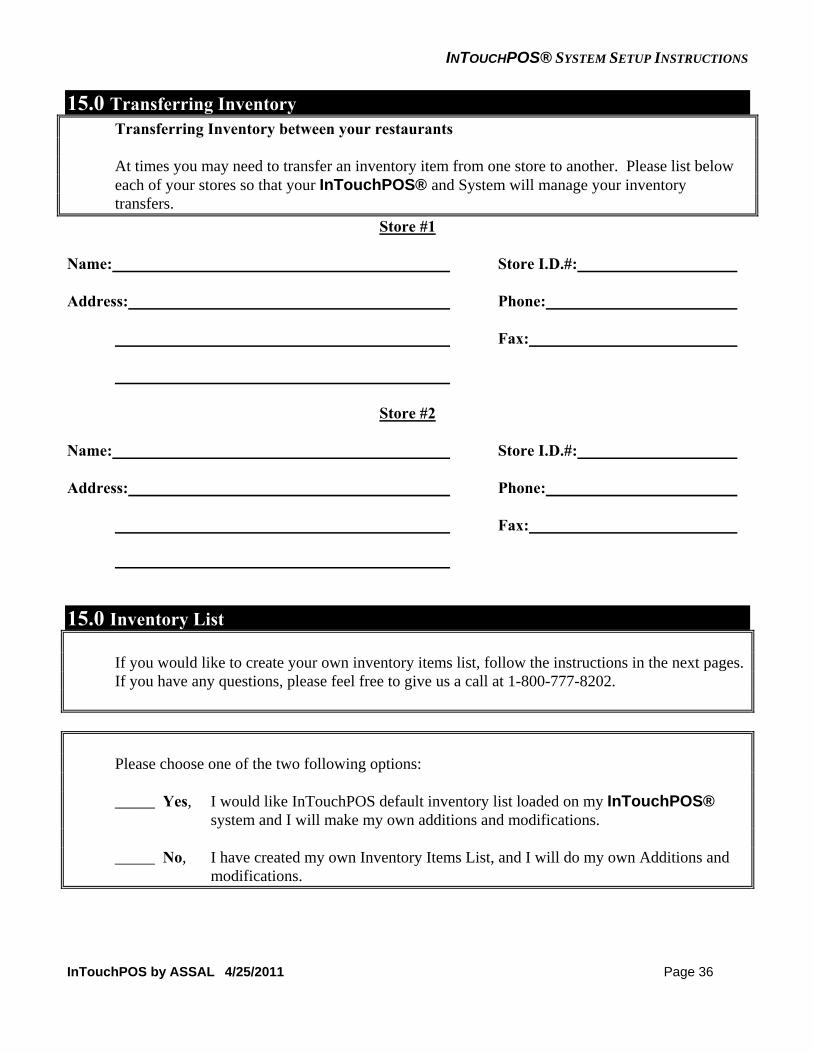
15.0 Transferring Inventory Transferring Inventory between your restaurants At times you may need to transfer an inventory item from one store to another. Please list below
each of your stores so that your InTouchPOS® and System will manage your inventory transfers.
Store #1 Name: Store I.D.#: Address: Phone: Fax:
Store #2 Name: Store I.D.#: Address: Phone: Fax:
15.0 Inventory List If you would like to create your own inventory items list, follow the instructions in the next pages.
If you have any questions, please feel free to give us a call at 1-800-777-8202.
Please choose one of the two following options: _____ Yes, I would like InTouchPOS default inventory list loaded on my InTouchPOS®
system and I will make my own additions and modifications. _____ No, I have created my own Inventory Items List, and I will do my own Additions and
modifications.

INTOUCHPOS® SYSTEM SETUP INSTRUCTIONS
InTouchPOS by ASSAL 04/25/11 Page 37
15.0 Inventory List (continued)
Item Name Rotelle
Item ID 1001
Draw ID -------
Supplier Saladino’s
Supplier ID 12345
Menu Category Food
Menu Sub-Category Pasta
Receive/Mix/Track as Mix Receive
Physical Period D/W/M/Q Monthly
Auto Tracking Yes
Sales Tax 0.00%
Tracking Unit Lbs.
Menu Unit Oz.
Receiving Unit Lbs.
Yield 100%
Menu/Tracking Conversions 16
Track./Rec. Conversions 25
Threshold Amount 50 lbs.
Build To Amount/$1000 InTouchPOS will
calculate

INTOUCHPOS® SYSTEM SETUP INSTRUCTIONS
InTouchPOS by ASSAL 04/25/11 Page 38
15.0 Detail Report
EXPLANATION OF THE INVENTORY ITEM DETAIL REPORT
The Inventory Item Detail Report is a listing of the inventory items that may exist in your Inventory. Each Inventory Item is set up according to the specific information for that item. How these items are set up in your inventory files will affect everything else related to inventory such as your menu, etc. When going through the Item Detail Report, it is very important to understand the difference between the Receiving, Tracking, Menu Units, their conversions, and how they relate to one another. The following explanations of the Inventory Item Detail Report should help you understand how to set up your inventory files. 1. Inventory Item Name 2. Inventory Item ID Number, the numbers listed on the report are standard inventory item numbers.
When defining the Item ID number, we advise that you do not use the product code number from your supplier to prevent confusion in the future if you switch to a different supplier.
3. Supplier Inventory Item ID Number, if you have multiple Suppliers, please provide an Inventory ID
number for each Supplier 4. There are five Inventory Categories to choose from. The Inventory Categories are as follows:
INVENTORY CATEGORIES
Food Non-Alcoholic Alcoholic Salad Supplies
INVENTORY SUB-CATEGORIES “CREATE YOUR OWN”
EXAMPLE:
FOOD NON-ALCHOHOLIC ALCOHOLIC SALAD SUPPLIES
Meat Soda Beer Salad Food & Bar
Vegetable Hot Drink Wine Dressing Restaurant Supplies
Cheese Other Mixed Drink Soup Janitoria
INTOUCHPOS® SYSTEM SETUP INSTRUCTIONS
InTouchPOS by ASSAL 4/25/2011 Page 39
15.0 Detail Report (continued)
EXPLANATION OF THE INVENTORY ITEM DETAIL REPORT (cont’d)
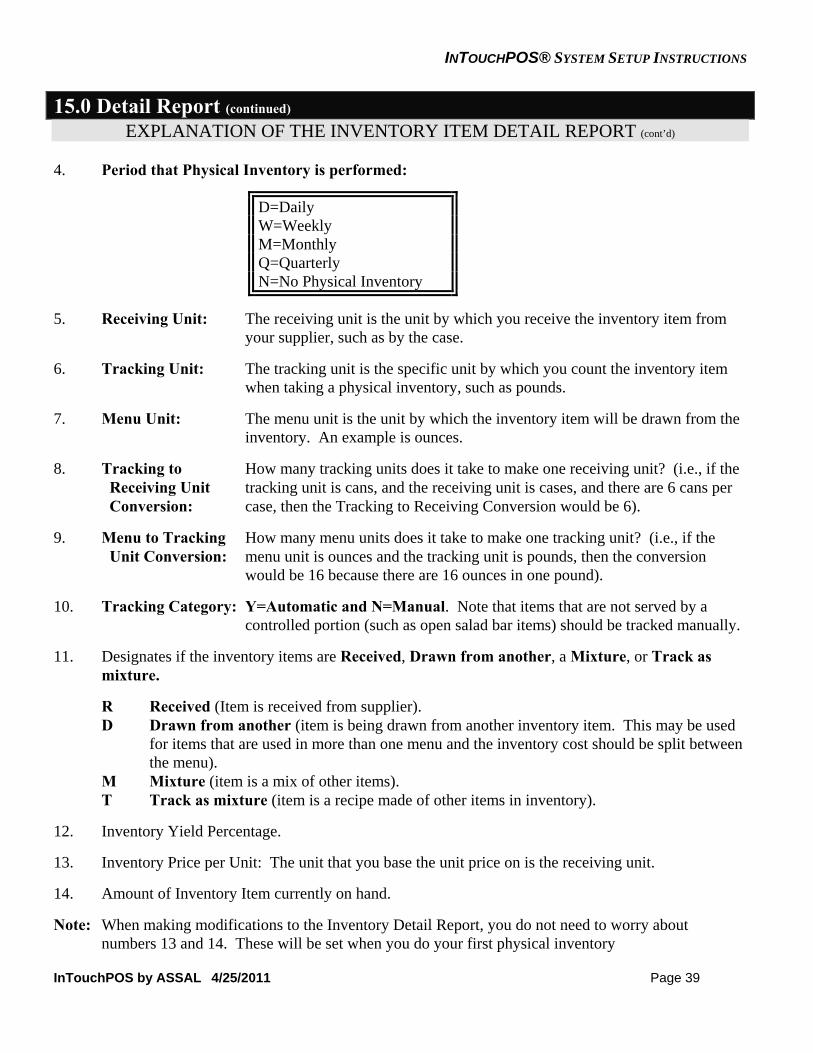
4. Period that Physical Inventory is performed:
D=Daily W=Weekly M=Monthly Q=Quarterly N=No Physical Inventory
5. Receiving Unit: The receiving unit is the unit by which you receive the inventory item from your supplier, such as by the case.
6. Tracking Unit: The tracking unit is the specific unit by which you count the inventory item when taking a physical inventory, such as pounds.
7. Menu Unit: The menu unit is the unit by which the inventory item will be drawn from the inventory. An example is ounces.
8. Tracking to How many tracking units does it take to make one receiving unit? (i.e., if the Receiving Unit tracking unit is cans, and the receiving unit is cases, and there are 6 cans per Conversion: case, then the Tracking to Receiving Conversion would be 6).
9. Menu to Tracking How many menu units does it take to make one tracking unit? (i.e., if the Unit Conversion: menu unit is ounces and the tracking unit is pounds, then the conversion
would be 16 because there are 16 ounces in one pound).
10. Tracking Category: Y=Automatic and N=Manual. Note that items that are not served by a controlled portion (such as open salad bar items) should be tracked manually.
11. Designates if the inventory items are Received, Drawn from another, a Mixture, or Track as mixture.
R Received (Item is received from supplier). D Drawn from another (item is being drawn from another inventory item. This may be used
for items that are used in more than one menu and the inventory cost should be split between the menu).
M Mixture (item is a mix of other items). T Track as mixture (item is a recipe made of other items in inventory).
12. Inventory Yield Percentage.
13. Inventory Price per Unit: The unit that you base the unit price on is the receiving unit.
14. Amount of Inventory Item currently on hand.
Note: When making modifications to the Inventory Detail Report, you do not need to worry about numbers 13 and 14. These will be set when you do your first physical inventory

INTOUCHPOS® SYSTEM SETUP INSTRUCTIONS
InTouchPOS by ASSAL 4/25/2011 Page 40
16.0 InTouchPOS® Equipment Specifications – Cut Sheet
SERVER/MANAGER STATION
Chassis Height: 42.7 cm (16.8 in), Width: 19.0 cm (7.5 in), Depth: 44.9 cm (17.7 in)
Ports 6 x USB 2.0 1 x parallel 2 x serial 2 x PS/2
Power - Wattage Single power supply (250W)
Input Devices PS/2 keyboard, PS/2 mouse
DELL WORKSTATIONS / BOOKSIZE COMPUTER
Power DC power supply
Wattage 160 W
Heat dissipation 455 BTU/hr (average)
Voltage 90 to 135 volts (V) at 50/60 Hz; 180 to 265 V at 50/60 Hz
Backup battery 3-V CR2032 lithium coin cell
Physical Height: 9.0 cm (3.57 inches), Width: 31.9 cm (12.54 inches), Depth: 35.4 cm (13.93 inches)
IBM SUREPOS
Ports Customer display, video (SVGA), RS-232 (3), USB (4), parallel, external diskette, MSR, PS/2 keyboard/PC mouse, cash drawer (2), Ethernet
Tilt adjustment Counter: 30° to 90° Wall-mount: -10° to 15° on wall from vertical surface
Dimension (HxWxD) Countertop: 13.4" to 15" x 12.8" to 13.9" x 12.6" (340mm to 381mm x 325mm to 353mm x 321mm) Wall-mount: 18" to 18.3" x 12.8" to 13.9" x 8.9" to 10.4" (457mm to 464mm x 325mm to 353mm x 227mm to 265mm)
Weight System unit: 21 lb (9.5kg) Speaker (562 and 552): 1.1 lb (0.5kg) MSR: 0.35 LB (0.16kg)
Power consumption 45 W typical, 23 W standby, ENERGYSTAR® compliant
DELL/ELO ALL IN ONE WORKSTATIONS
Display Size: 15" diagonal Type: Active matrix TFT LCD Aspect ratio: 4 x 3
Monitor dimensions Width: 13.99" (355 mm), Height: 11.27" (286 mm), Depth: 10.44" (265 mm) Dimensions vary with stand position and options selected
Power supply Type: External brick Input (line) voltage: 100–240 VAC, 50–60 Hz Output voltage/current: 12 V at 5.0 amps max.
Weight Actual: 17.38 lb (7.88 kg) Shipping: 22.66 lb (10.26 kg)
INTOUCHPOS® SYSTEM SETUP INSTRUCTIONS
InTouchPOS by ASSAL 4/25/2011 Page 41
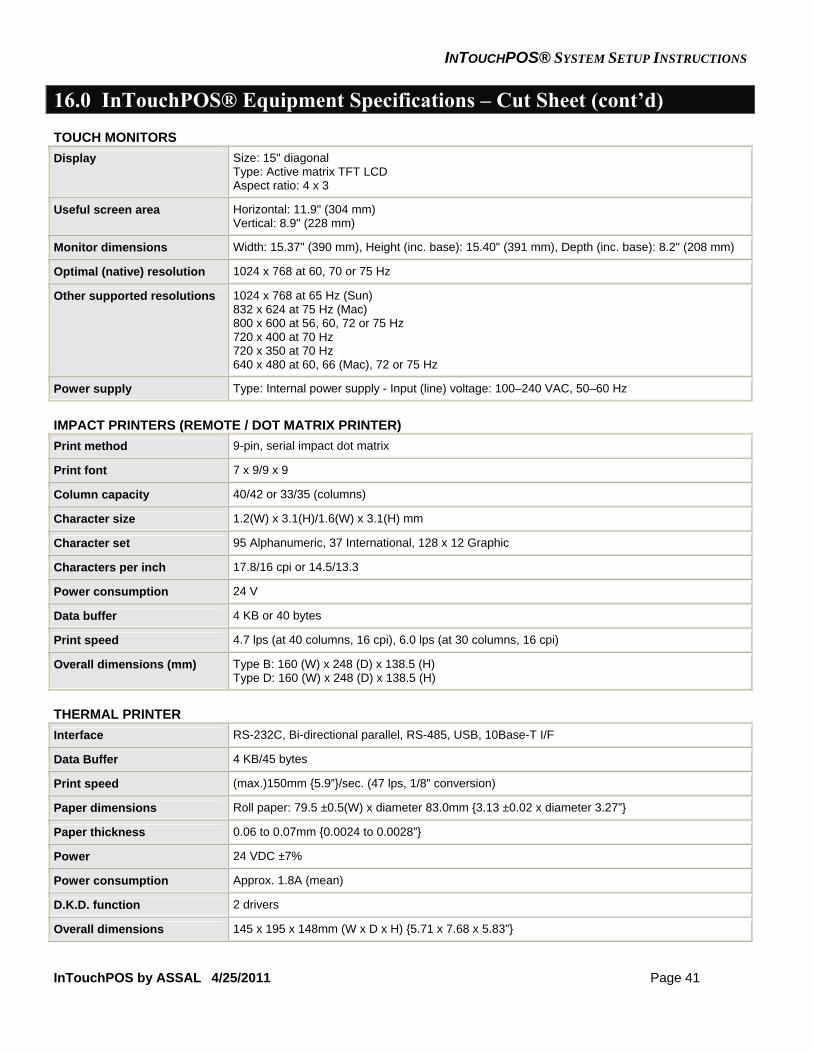
16.0 InTouchPOS® Equipment Specifications – Cut Sheet (cont’d)
TOUCH MONITORS
Display Size: 15" diagonal Type: Active matrix TFT LCD Aspect ratio: 4 x 3
Useful screen area Horizontal: 11.9" (304 mm) Vertical: 8.9" (228 mm)
Monitor dimensions Width: 15.37" (390 mm), Height (inc. base): 15.40" (391 mm), Depth (inc. base): 8.2" (208 mm)
Optimal (native) resolution 1024 x 768 at 60, 70 or 75 Hz
Other supported resolutions 1024 x 768 at 65 Hz (Sun) 832 x 624 at 75 Hz (Mac) 800 x 600 at 56, 60, 72 or 75 Hz 720 x 400 at 70 Hz 720 x 350 at 70 Hz 640 x 480 at 60, 66 (Mac), 72 or 75 Hz
Power supply Type: Internal power supply - Input (line) voltage: 100–240 VAC, 50–60 Hz
IMPACT PRINTERS (REMOTE / DOT MATRIX PRINTER)
Print method 9-pin, serial impact dot matrix
Print font 7 x 9/9 x 9
Column capacity 40/42 or 33/35 (columns)
Character size 1.2(W) x 3.1(H)/1.6(W) x 3.1(H) mm
Character set 95 Alphanumeric, 37 International, 128 x 12 Graphic
Characters per inch 17.8/16 cpi or 14.5/13.3
Power consumption 24 V
Data buffer 4 KB or 40 bytes
Print speed 4.7 lps (at 40 columns, 16 cpi), 6.0 lps (at 30 columns, 16 cpi)
Overall dimensions (mm) Type B: 160 (W) x 248 (D) x 138.5 (H) Type D: 160 (W) x 248 (D) x 138.5 (H)
THERMAL PRINTER
Interface RS-232C, Bi-directional parallel, RS-485, USB, 10Base-T I/F
Data Buffer 4 KB/45 bytes
Print speed (max.)150mm {5.9”}/sec. (47 lps, 1/8” conversion)
Paper dimensions Roll paper: 79.5 ±0.5(W) x diameter 83.0mm {3.13 ±0.02 x diameter 3.27”}
Paper thickness 0.06 to 0.07mm {0.0024 to 0.0028”}
Power 24 VDC ±7%
Power consumption Approx. 1.8A (mean)
D.K.D. function 2 drivers
Overall dimensions 145 x 195 x 148mm (W x D x H) {5.71 x 7.68 x 5.83”}

INTOUCHPOS® SYSTEM SETUP INSTRUCTIONS
InTouchPOS by ASSAL 4/25/2011 Page 42
16.0 InTouchPOS® Equipment Specifications – Cut Sheet (cont’d)
Cash Drawer
Dimensions 18.8" W x 15.2" L x 3.94" H
Interface Epson printer interface
Battery Backup
Unit Dimensions (HWD/in): 10.75 x 5.25 x 7.25
Voltage compatibility: 120V AC
Frequency compatibility: 60Hz
Output volt amp capacity (VA):
600
Output watt capacity (watts): 345
Output nominal voltage: 120V AC
Output voltage regulation: BATTERY MODE: PWM sine wave output 120V +/-5%
Output frequency regulation: LINE MODE: Passes line frequency of 60Hz +/-10% BATTERY MODE: Inverter output regulated to 60Hz +/-0.5Hz
Outlet quantity / type: 6 NEMA 5-15R output receptacles (3 with UPS and surge suppression / 3 with surge suppression only)
Maximum input amps: 12A / 1440 watts
Input connection type: NEMA 5-15P
Input cord length: 6 ft., 14 gauge
Recommended electrical service:
15A 120V