student educational planner
TRANSCRIPT
Student Educational Planner
The Student Education Planner feature in the Degree Works degree audit system allows students and advisors
to build 4-year plans for completion of a bachelor’s degree while incorporating any other requirements into the
plan for minors and cohort designations (i.e. GLI, Honors, etc.). This feature also allows advisors and students to
view a degree plan at the same time as a degree audit to compare the two and verify that every degree
requirement is reflected in a student’s plan.
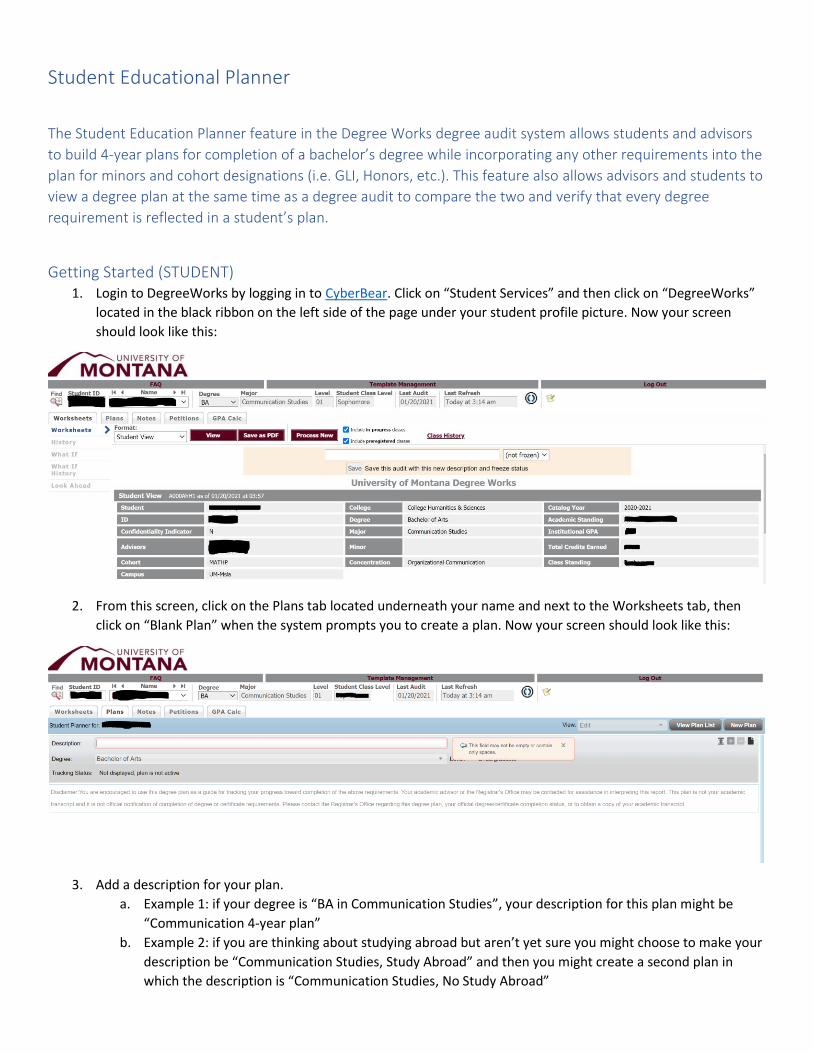
Getting Started (STUDENT) 1. Login to DegreeWorks by logging in to CyberBear. Click on “Student Services” and then click on “DegreeWorks”
located in the black ribbon on the left side of the page under your student profile picture. Now your screen
should look like this:
2. From this screen, click on the Plans tab located underneath your name and next to the Worksheets tab, then
click on “Blank Plan” when the system prompts you to create a plan. Now your screen should look like this:
3. Add a description for your plan.
a. Example 1: if your degree is “BA in Communication Studies”, your description for this plan might be
“Communication 4-year plan”
b. Example 2: if you are thinking about studying abroad but aren’t yet sure you might choose to make your
description be “Communication Studies, Study Abroad” and then you might create a second plan in
which the description is “Communication Studies, No Study Abroad”
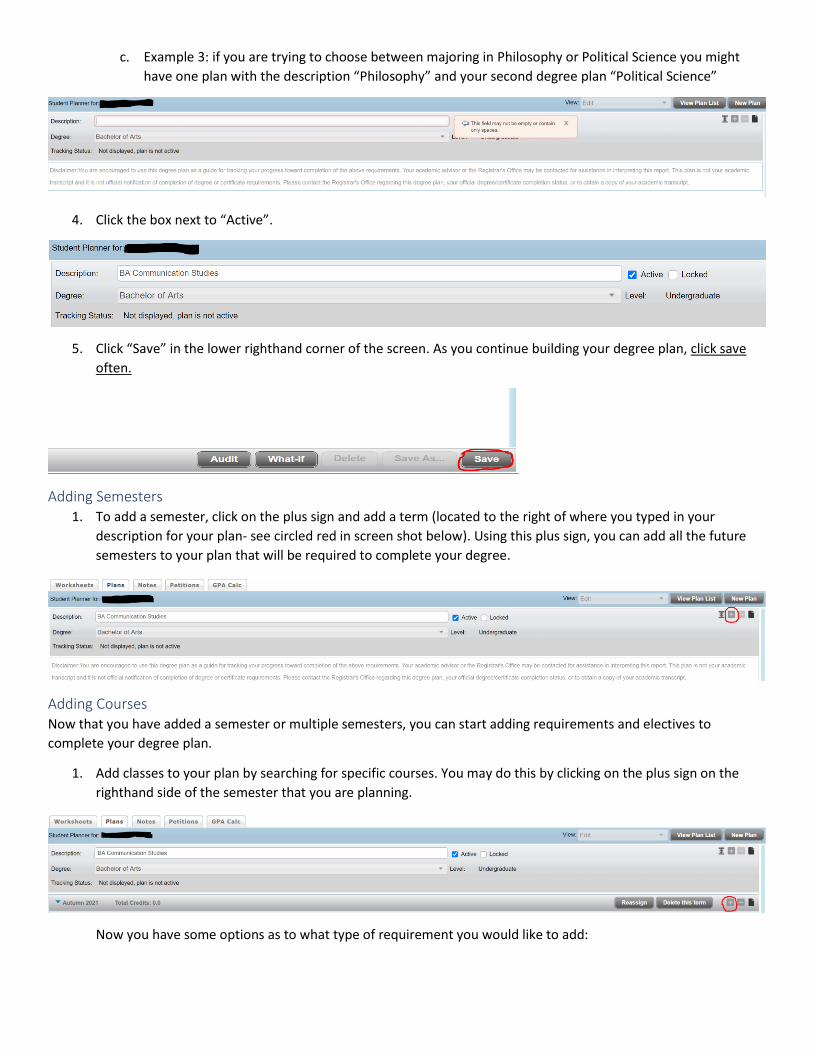
c. Example 3: if you are trying to choose between majoring in Philosophy or Political Science you might
have one plan with the description “Philosophy” and your second degree plan “Political Science”
4. Click the box next to “Active”.
5. Click “Save” in the lower righthand corner of the screen. As you continue building your degree plan, click save
often.
Adding Semesters 1. To add a semester, click on the plus sign and add a term (located to the right of where you typed in your
description for your plan- see circled red in screen shot below). Using this plus sign, you can add all the future
semesters to your plan that will be required to complete your degree.
Adding Courses Now that you have added a semester or multiple semesters, you can start adding requirements and electives to
complete your degree plan.
1. Add classes to your plan by searching for specific courses. You may do this by clicking on the plus sign on the
righthand side of the semester that you are planning.
Now you have some options as to what type of requirement you would like to add:

A. Choice Requirement- choose this option if you are trying to choose between two or more different courses to
take. If you choose this, click on the blank box that appears under the semester after you click on “choice”. Now
your screen should look like this:
Search for the two courses (or more) that you will choose between by clicking on the ellipsis tab, which will open
a course search box. Select the magnifying glass tab to the right of the “Course” fields to search your course
options. To add more courses select “Add another option” at the bottom left of the course box. After you have
made your choice course selections, select “Done” to close your search.
B. Course Requirement- Used for selecting one course you plan on taking whether it is a requirement or an
elective. This is the most commonly used feature for degree planning and is the requirement option you want to
utilize in order to be able to run a review of your plan against your Degree Works degree audit. Click on the
magnifying glass under Course Requirement to search for a course.
I searched for ANTY 101H and added it to my plan (see screenshots below):
C. GPA Requirement- Add this to your plan if you need a specific GPA for the semester.
D. Place Holder Requirement- this is used if you know you will take a course to fulfill a certain requirement but
are unsure which course you will take to fulfill that requirement. For example, you might know that you would
like to take a course that satisfies the Ethical and Human Values perspective during Autumn ‘21 but you’re
unsure of which course you will take to fulfill the requirement. You can add a Placeholder for this (see example
below):
Deleting Courses To delete a planned course, click on the space between the course information boxes so that the whole bar is
highlighted in blue and then click the minus symbol.
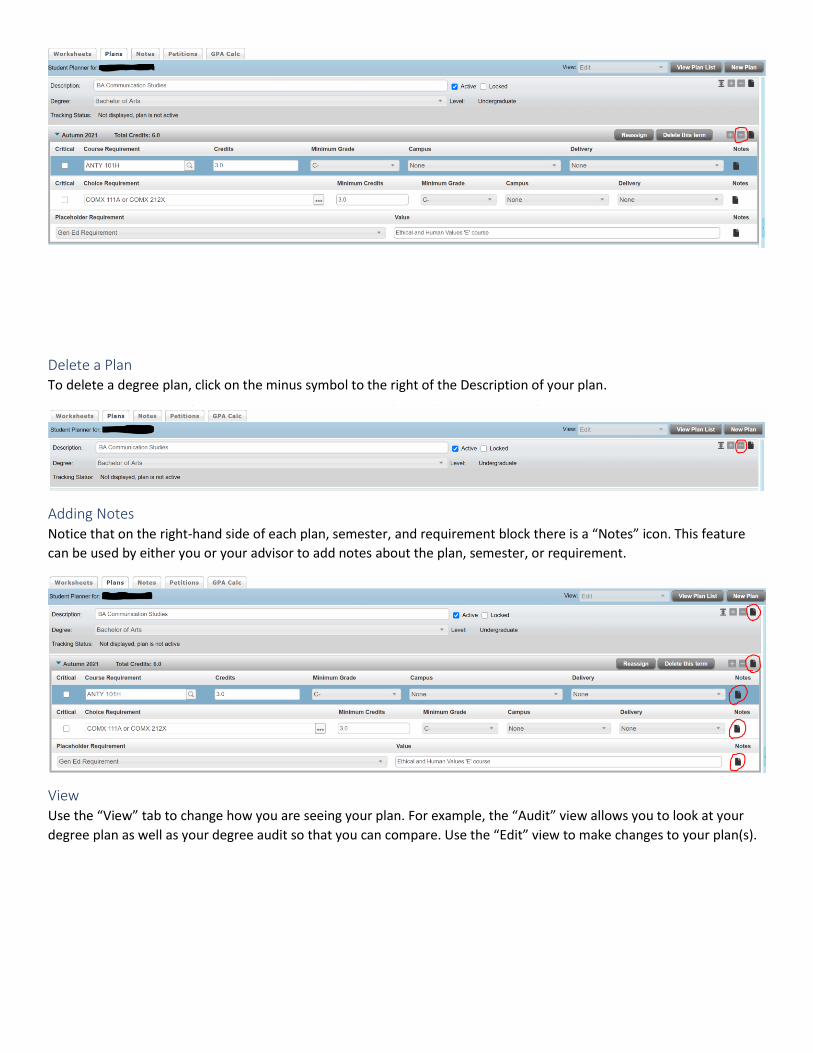
Delete a Plan To delete a degree plan, click on the minus symbol to the right of the Description of your plan.
Adding Notes Notice that on the right-hand side of each plan, semester, and requirement block there is a “Notes” icon. This feature
can be used by either you or your advisor to add notes about the plan, semester, or requirement.
View Use the “View” tab to change how you are seeing your plan. For example, the “Audit” view allows you to look at your
degree plan as well as your degree audit so that you can compare. Use the “Edit” view to make changes to your plan(s).
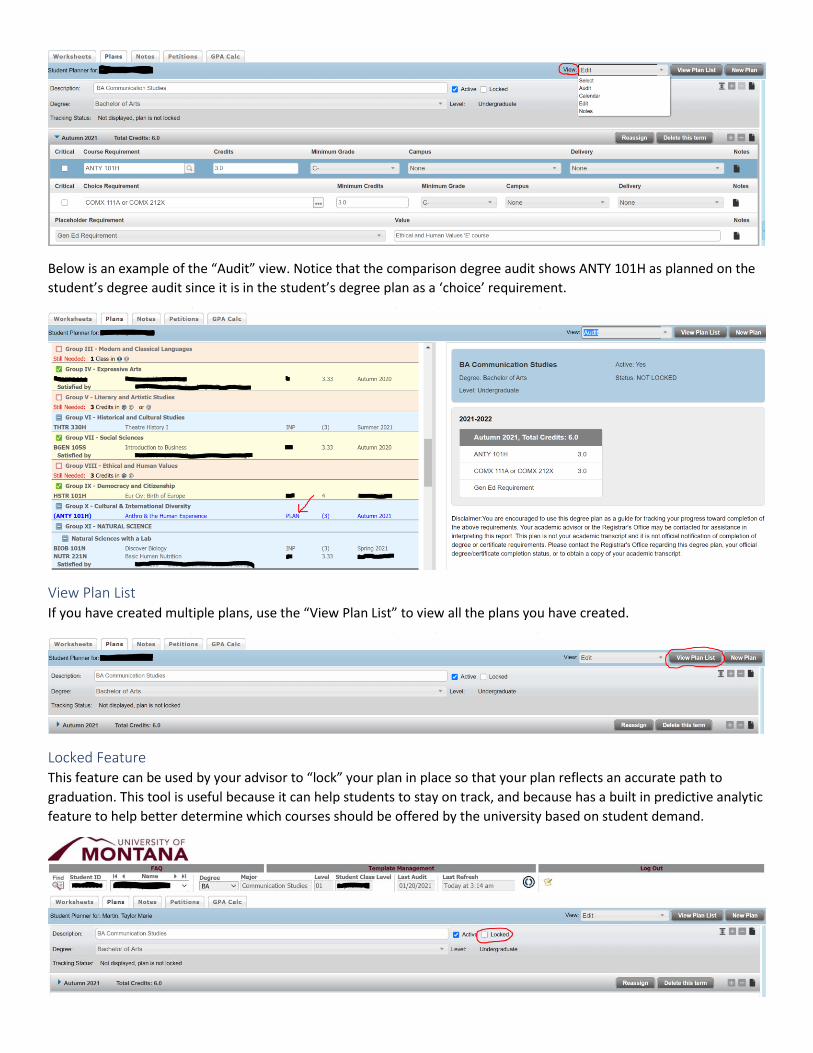
Below is an example of the “Audit” view. Notice that the comparison degree audit shows ANTY 101H as planned on the
student’s degree audit since it is in the student’s degree plan as a ‘choice’ requirement.
View Plan List If you have created multiple plans, use the “View Plan List” to view all the plans you have created.
Locked Feature This feature can be used by your advisor to “lock” your plan in place so that your plan reflects an accurate path to
graduation. This tool is useful because it can help students to stay on track, and because has a built in predictive analytic
feature to help better determine which courses should be offered by the university based on student demand.
Getting Started (ADVISOR)
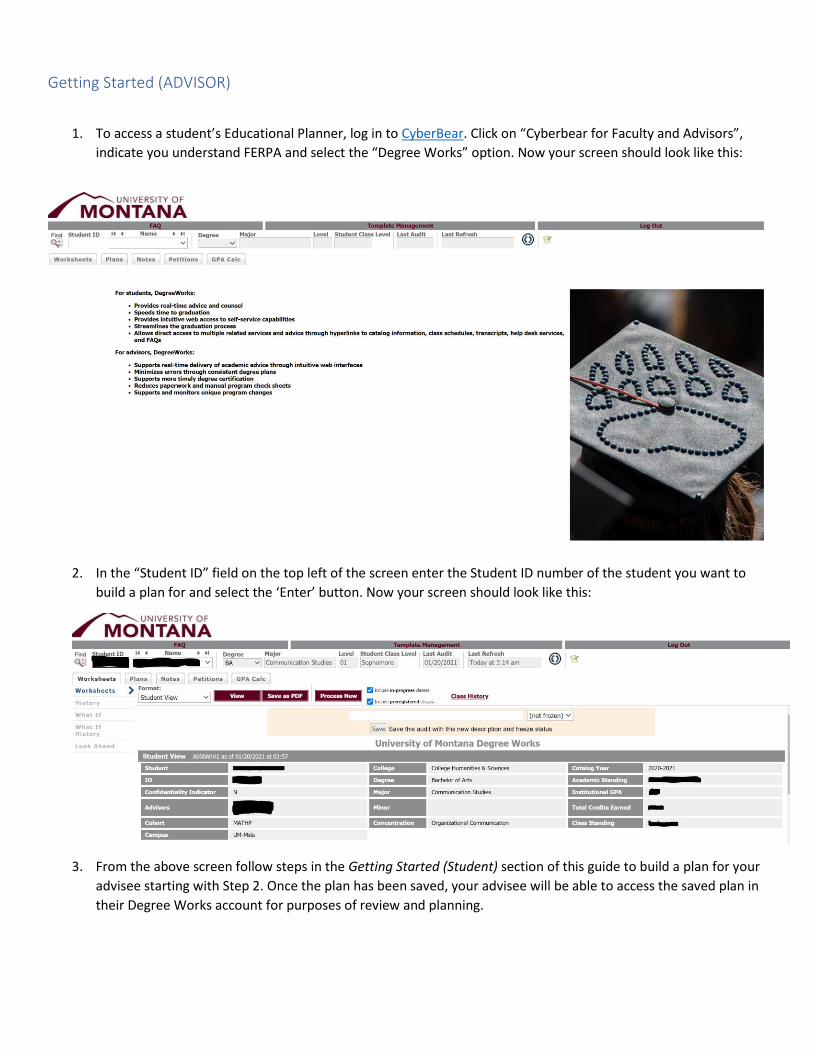
1. To access a student’s Educational Planner, log in to CyberBear. Click on “Cyberbear for Faculty and Advisors”,
indicate you understand FERPA and select the “Degree Works” option. Now your screen should look like this:
2. In the “Student ID” field on the top left of the screen enter the Student ID number of the student you want to
build a plan for and select the ‘Enter’ button. Now your screen should look like this:
3. From the above screen follow steps in the Getting Started (Student) section of this guide to build a plan for your
advisee starting with Step 2. Once the plan has been saved, your advisee will be able to access the saved plan in
their Degree Works account for purposes of review and planning.