student book what are posture and eye contact? page 9 student book the physical message the physical...
TRANSCRIPT
Speaking of Speech New Edition —Teacher’s Book4
Student BookThe Ph
ysical M
essag
e
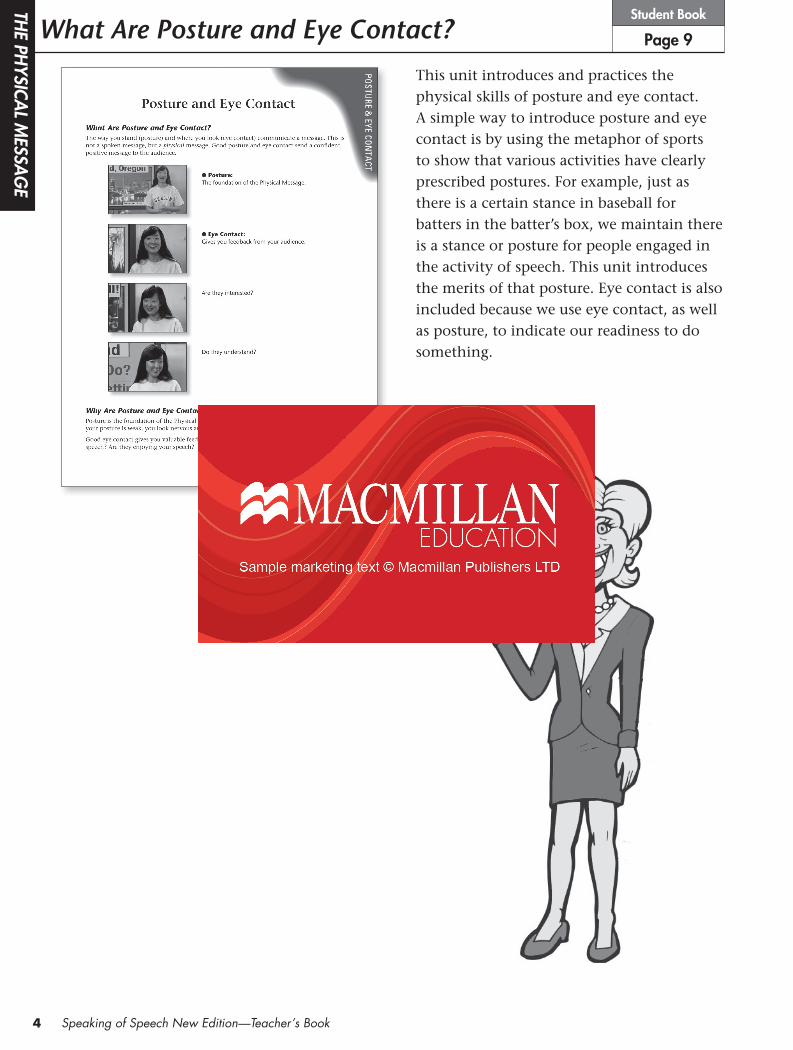
This unit introduces and practices the physical skills of posture and eye contact. A simple way to introduce posture and eye contact is by using the metaphor of sports to show that various activities have clearly prescribed postures. For example, just as there is a certain stance in baseball for batters in the batter’s box, we maintain there is a stance or posture for people engaged in the activity of speech. This unit introduces the merits of that posture. Eye contact is also included because we use eye contact, as well as posture, to indicate our readiness to do something.
What Are Posture and Eye Contact? Page 9
SOS_TB2(1-11).indd 4 08.11.20 2:03:51 PM

5
Student BookThe Ph
ysical M
essag
e
The Physical Message
Posture: How Not to Do It Pages 10–11
These two pages give a catalog or “glossary” of the negative messages sent by poor posture or eye contact. We all have little nervous habits that we should be aware of and that we should control to become better public speakers. The scratch of the head, the shrug of the shoulders, the shifting of the feet that go unnoticed in daily conversation, are magnified in public speaking. These movements at best distract the audience, and at worst might be read as uncertainty, lack of knowledge, or just plain fear. In any case, they will damage the credibility of the speaker’s message.
Feel free to add to this list. For example, standing with all the weight on one foot could be called a “crane.” Or, standing and shaking one leg with excess nervous energy could be called “Elvis.”
Teaching Tip For the best results, go over the vocabulary in the “Word Box” before playing the CD. For low-level students, have them match the words with the descriptions before listening to the CD.
One Step Beyond! t 1. Have students close their books. 2. Test students’ understanding by acting out the different common eye contact and posture
problems and have them identify which error you are representing.
One Step Beyond! ttAsk students to reflect on their posture and eye contact habits, and then circle one problem they want to work on correcting.
the Leaning Tower of Pisa
the stargazer
the surfer
the hula dancer
washing your hands
the birdwatcher
the soldier
SOS_TB2(1-11).indd 5 08.11.20 2:03:52 PM

Speaking of Speech New Edition —Teacher’s Book6
Student BookThe Ph
ysical M
essag
e
These are the “How to Do It” and “Practice” pages for posture. Page 12 outlines what is good posture, and how to achieve it. Over the years, we have found this “checklist” the easiest and most effective way of controlling and eliminating many of the common posture problems. Page 13 actually walks each student through the checklist. Although at first students may find this posture a bit uncomfortable or unnatural, with practice it should become second nature.
Suggested Procedure: Follow the steps on page 13 of the Student Book.
Posture: How to Do It & Practice: Posture Workshop Pages 12–13
Teaching Tip #1 The first 30 seconds of the presentation can determine success or failure. It only takes a moment to make a good impression;
it may take the rest of the presentation to overcome a bad impression. The speaker’s initial Physical Message needs to say to the audience “I’m in control, I’m confident, I’m ready to speak, and I’m sure you’ll like what I have to say!” This Posture & Eye Contact Checklist is the foundation that a presentation is built upon. As more and more elements such as gestures, voice inflection, transitions, persuasive evidence, and visual aids are added, it is easy to forget this basic foundation of good posture, direct eye contact and a powerful presentation voice. The teacher’s goal should be to make following this checklist automatic for the students as soon as they stand up to speak.
Teaching Tip #2 In our experience, it is best to be strict early in the course
about following the checklist. Give immediate, individual feedback to each student. Stop the student if necessary and give “hands-on” feedback if the student’s upper body is not stable, if the student doesn’t use a presentation voice, etc. If the student needs more practice, send him/her to the end of the line to try again.
SOS_TB2(1-11).indd 6 08.11.20 2:03:53 PM
7
Student BookThe Ph
ysical M
essag
e
The Physical Message
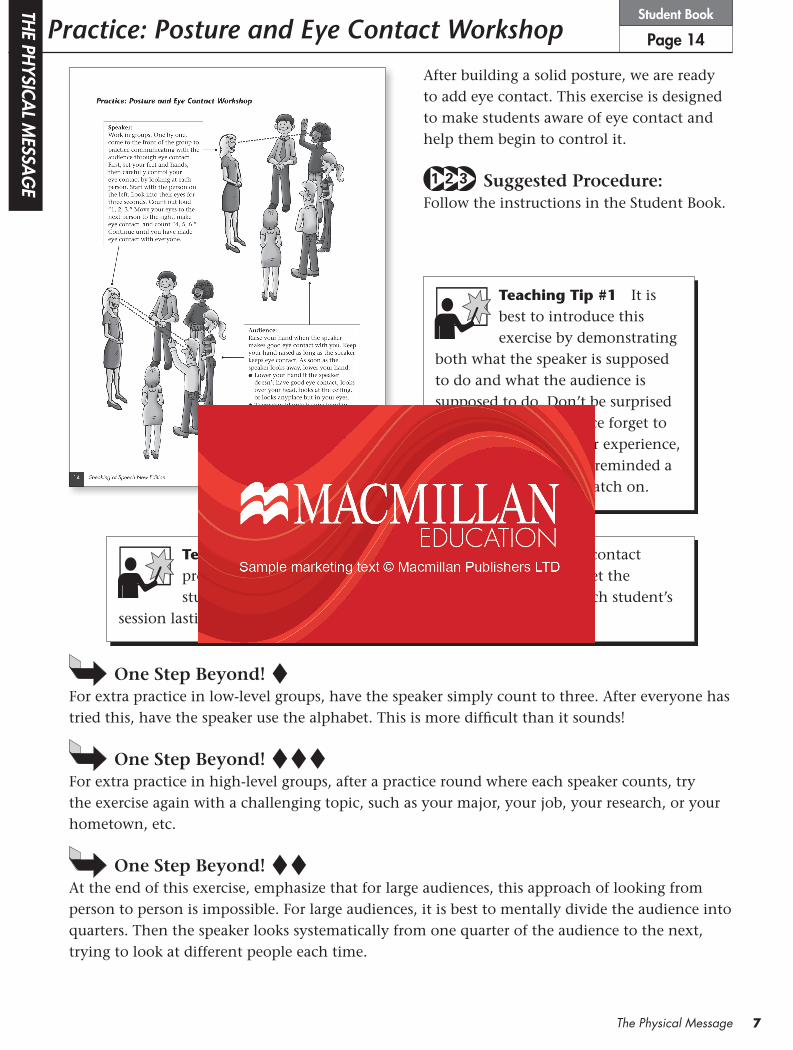
Practice: Posture and Eye Contact Workshop Page 14
After building a solid posture, we are ready to add eye contact. This exercise is designed to make students aware of eye contact and help them begin to control it.
Suggested Procedure: Follow the instructions in the Student Book.
Teaching Tip #1 It is best to introduce this exercise by demonstrating
both what the speaker is supposed to do and what the audience is supposed to do. Don’t be surprised if people in the audience forget to raise their hands. In our experience, they always need to be reminded a few times before they catch on.
Teaching Tip #2 Watch for the common posture and eye contact problems. Stop the student to give your feedback and then let the student resume. This should be a fast-paced activity, with each student’s
session lasting fewer than 30 seconds.
One Step Beyond! tFor extra practice in low-level groups, have the speaker simply count to three. After everyone has tried this, have the speaker use the alphabet. This is more difficult than it sounds!
One Step Beyond! tttFor extra practice in high-level groups, after a practice round where each speaker counts, try the exercise again with a challenging topic, such as your major, your job, your research, or your hometown, etc.
One Step Beyond! ttAt the end of this exercise, emphasize that for large audiences, this approach of looking from person to person is impossible. For large audiences, it is best to mentally divide the audience into quarters. Then the speaker looks systematically from one quarter of the audience to the next, trying to look at different people each time.
SOS_TB2(1-11).indd 7 08.11.20 2:03:54 PM
Speaking of Speech New Edition —Teacher’s Book8
Student BookThe Ph
ysical M
essag
e
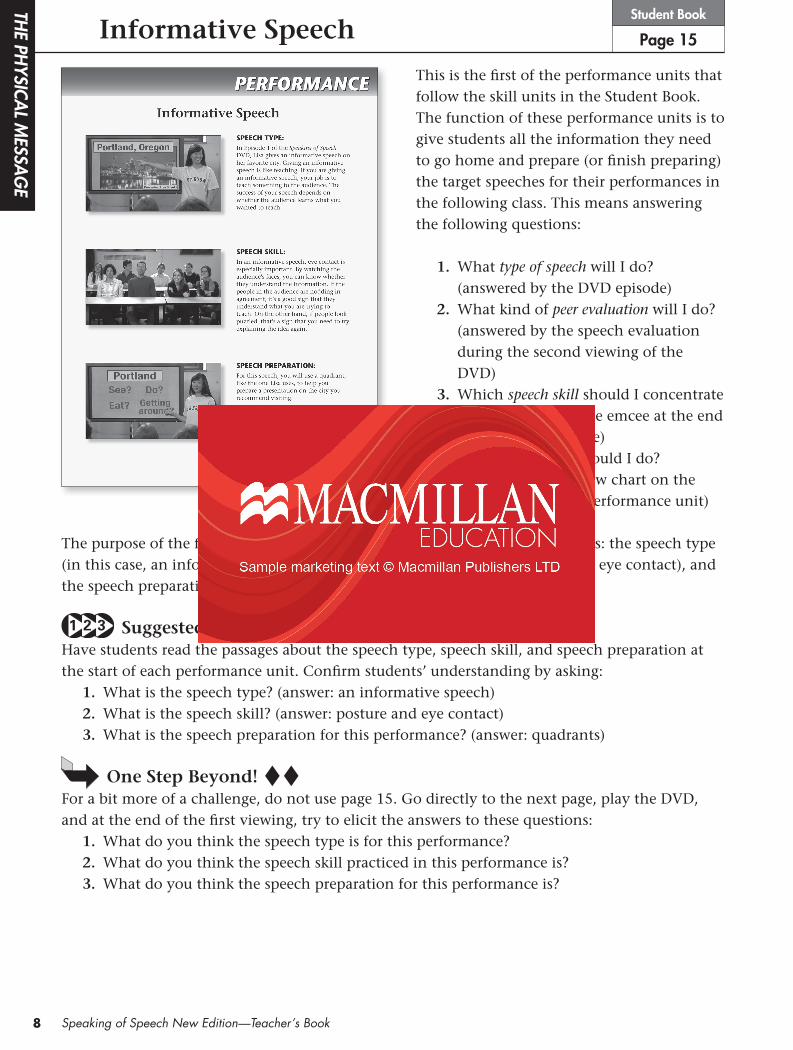
This is the first of the performance units that follow the skill units in the Student Book. The function of these performance units is to give students all the information they need to go home and prepare (or finish preparing) the target speeches for their performances in the following class. This means answering the following questions:
1. What type of speech will I do? (answered by the DVD episode)
2. What kind of peer evaluation will I do? (answered by the speech evaluation during the second viewing of the DVD)
3. Which speech skill should I concentrate on? (answered by the emcee at the end of each DVD episode)
4. What preparation should I do? (answered by the flow chart on the third page of each performance unit)
Informative Speech Page 15
The purpose of the first page of the performance unit is to preview three points: the speech type (in this case, an informative speech), the speech skill (in this case, posture and eye contact), and the speech preparation (in this case, a poster of quadrants).
Suggested Procedure:Have students read the passages about the speech type, speech skill, and speech preparation at the start of each performance unit. Confirm students’ understanding by asking: 1. What is the speech type? (answer: an informative speech) 2. What is the speech skill? (answer: posture and eye contact) 3. What is the speech preparation for this performance? (answer: quadrants)
One Step Beyond! ttFor a bit more of a challenge, do not use page 15. Go directly to the next page, play the DVD, and at the end of the first viewing, try to elicit the answers to these questions: 1. What do you think the speech type is for this performance? 2. What do you think the speech skill practiced in this performance is? 3. What do you think the speech preparation for this performance is?
SOS_TB2(1-11).indd 8 08.11.20 2:03:54 PM
9
Student BookThe Ph
ysical M
essag
e
The Physical Message
Model: Informative Speech Page 16
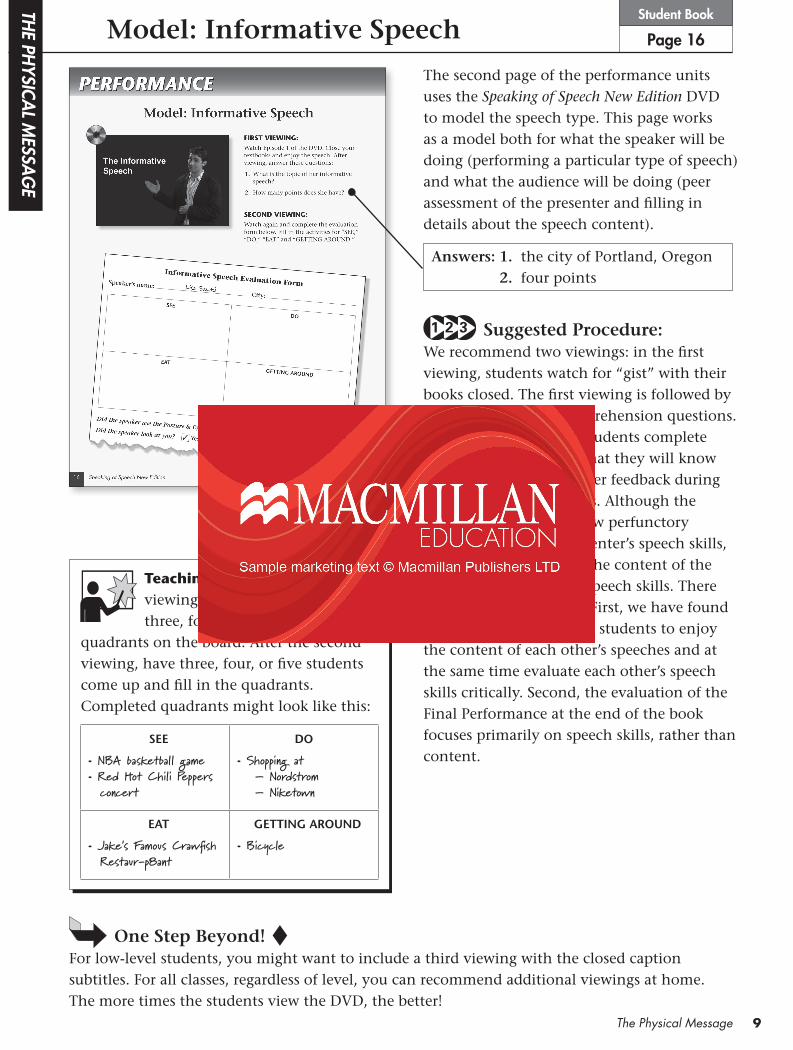
The second page of the performance units uses the Speaking of Speech New Edition DVD to model the speech type. This page works as a model both for what the speaker will be doing (performing a particular type of speech) and what the audience will be doing (peer assessment of the presenter and filling in details about the speech content).
Suggested Procedure:We recommend two viewings: in the first viewing, students watch for “gist” with their books closed. The first viewing is followed by a couple of general comprehension questions. In the second viewing, students complete the evaluation form so that they will know exactly what to do for peer feedback during the in-class performances. Although the evaluation forms ask a few perfunctory questions about the presenter’s speech skills, they focus primarily on the content of the speech, rather than the speech skills. There are two reasons for this. First, we have found that it is very difficult for students to enjoy the content of each other’s speeches and at the same time evaluate each other’s speech skills critically. Second, the evaluation of the Final Performance at the end of the book focuses primarily on speech skills, rather than content.
Teaching Tip After the first viewing of this episode, draw three, four, or even five blank
quadrants on the board. After the second viewing, have three, four, or five students come up and fill in the quadrants. Completed quadrants might look like this:
SEE
• NBA basketball game• Red Hot Chili Peppers concert
DO
• Shopping at – Nordstrom – Niketown
EAT
• Jake’s Famous Crawfish Restaur-p8ant
GETTING AROUND
• Bicycle
One Step Beyond! tFor low-level students, you might want to include a third viewing with the closed caption subtitles. For all classes, regardless of level, you can recommend additional viewings at home. The more times the students view the DVD, the better!
Answers: 1. the city of Portland, Oregon2. four points
SOS_TB2(1-11).indd 9 08.11.20 2:03:55 PM
Speaking of Speech New Edition —Teacher’s Book10
Student BookThe Ph
ysical M
essag
e
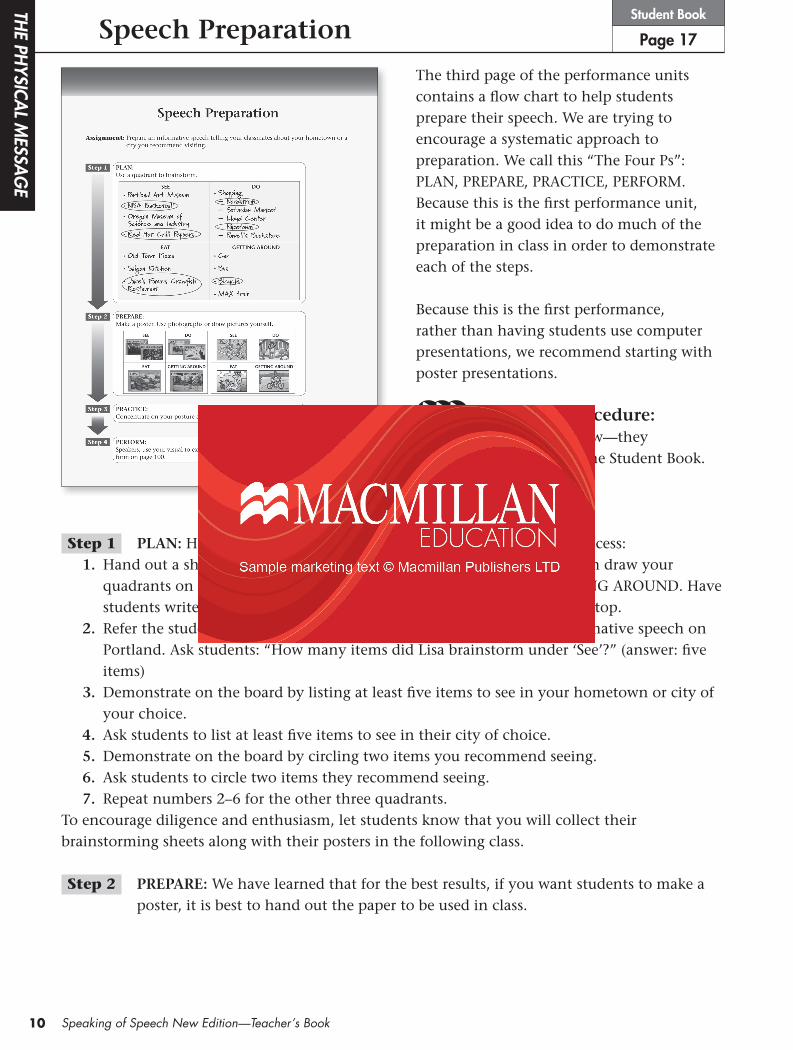
The third page of the performance units contains a flow chart to help students prepare their speech. We are trying to encourage a systematic approach to preparation. We call this “The Four Ps”: PLAN, PREPARE, PRACTICE, PERFORM. Because this is the first performance unit, it might be a good idea to do much of the preparation in class in order to demonstrate each of the steps.
Because this is the first performance, rather than having students use computer presentations, we recommend starting with poster presentations.
Suggested Procedure:Follow the four steps below—they supplement the steps in the Student Book.
Speech Preparation Page 17
Step 1 PLAN: Help students brainstorm by walking them through this process: 1. Hand out a sheet of blank paper. Together draw four quadrants—you can draw your
quadrants on the board. Label each quadrant SEE, DO, EAT, and GETTING AROUND. Have students write their names and the cities they recommend seeing at the top.
2. Refer the students to the brainstorming example Lisa used for her informative speech on Portland. Ask students: “How many items did Lisa brainstorm under ‘See’?” (answer: five items)
3. Demonstrate on the board by listing at least five items to see in your hometown or city of your choice.
4. Ask students to list at least five items to see in their city of choice. 5. Demonstrate on the board by circling two items you recommend seeing. 6. Ask students to circle two items they recommend seeing. 7. Repeat numbers 2–6 for the other three quadrants.To encourage diligence and enthusiasm, let students know that you will collect their brainstorming sheets along with their posters in the following class.
Step 2 PREPARE: We have learned that for the best results, if you want students to make a poster, it is best to hand out the paper to be used in class.
SOS_TB2(1-11).indd 10 08.11.20 2:03:55 PM

11
Student BookThe Ph
ysical M
essag
e
The Physical Message
Page 17
It is our experience that students can interpret “poster” in a variety of perplexing and surprising ways. We have had students bring in postcard-sized “posters.” Pass out to the students (or show) exactly what you have in mind as a “poster”!
Step 3 PRACTICE: This step can be done either at home or in class prior to the performances—or both! For this performance, tell students—better yet, show students—how to practice:
1. Remind them to practice the “checklist” from page 12 of the Student Book. 2. When using visuals, tell them to emulate Lisa. She is a good model. She stands parallel
to the visual and faces the audience. She points to information and then looks at the audience.
3. Encourage them to time their speeches. Are their speeches too short? Are their speeches too long? We recommend about three minutes for this speech.
Always give students a time limit for their presentations. It helps them know what to aim for. It helps you with classroom logistics during the performance class—if some students have one-minute presentations and some have three-minute presentations, it will be difficult for students to rotate to new pairs/groups smoothly.
Step 4 PERFORM: 1. For this performance, we recommend Appendix 1: Classroom Logistics for Performances.
There are several tips on grading etc. useful for not only this performance but for all the performances to come. Alternatively, you can try Appendix 2: Super Presentation Poster Party, Appendix 3: Round Robin Presentations, and Appendix 4: Peer Feedback Presentations. But we highly recommend at least reading Appendix 1!
2. If you want students to do more than two peer evaluations, make copies of the evaluation forms on page 100 of the Student Book. Before class, make a photocopy of the evaluation form for each student. At the end of class, the completed forms can be given to the teacher to be duly noted, checked, and recorded. Collecting the evaluation forms keeps the audience honest. They will pay closer attention and mark their sheets more diligently if they know the sheets are going to be collected.
SOS_TB2(1-11).indd 11 08.11.20 2:03:55 PM