stokes basket sog 2005-2007/08 pierce tractor drawn aerials
TRANSCRIPT
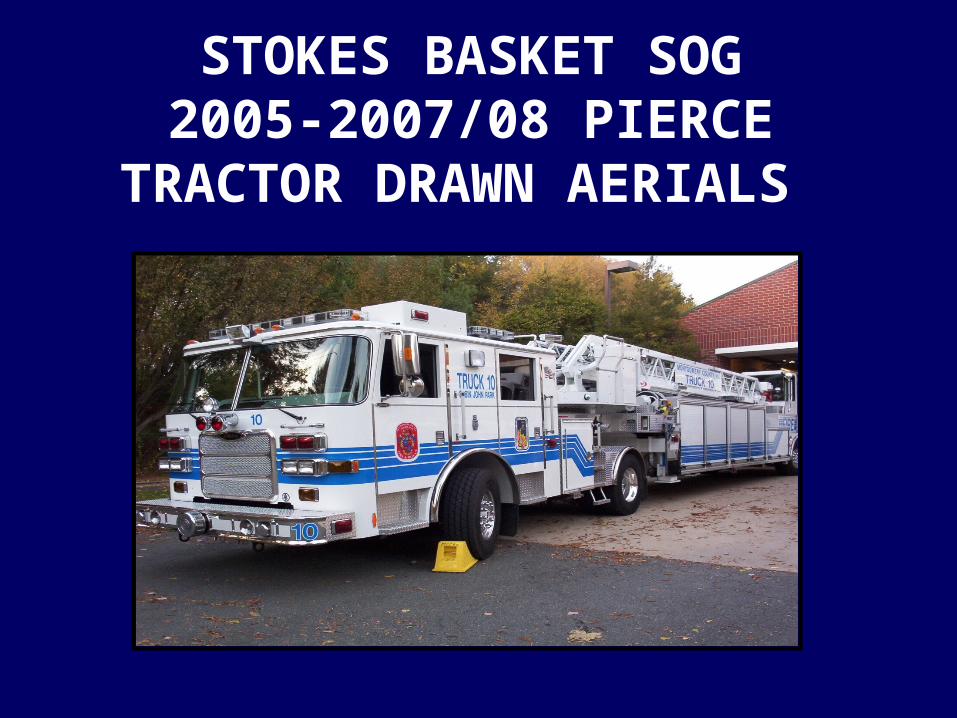
STOKES BASKET SOG2005-2007/08 PIERCE
TRACTOR DRAWN AERIALS
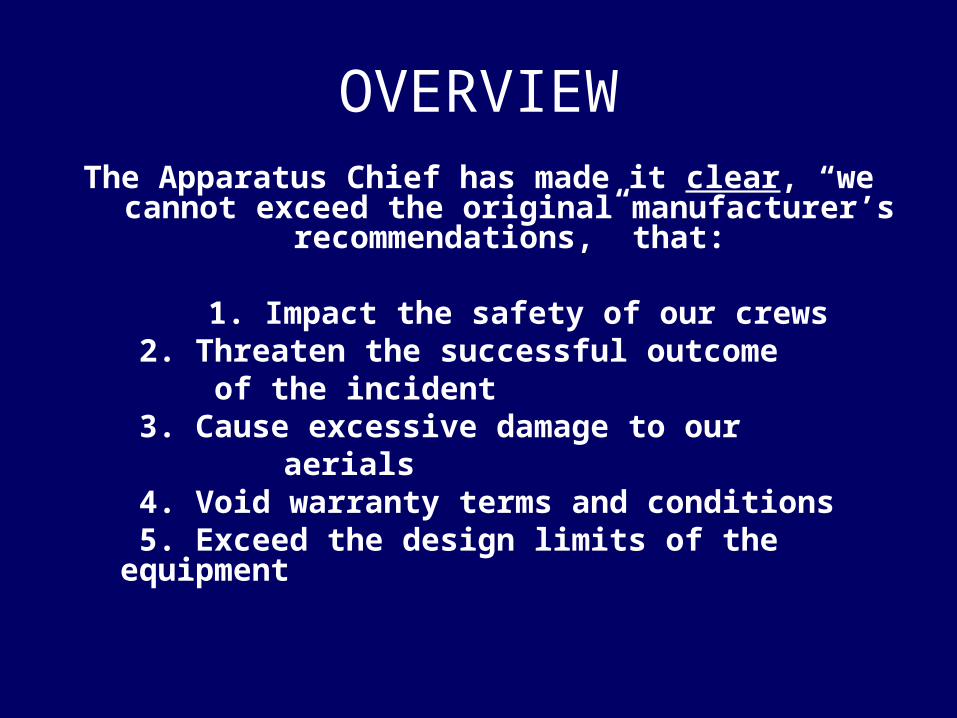
OVERVIEWThe Apparatus Chief has made it clear, “we cannot
exceed the original manufacturer’s recommendations,” that:
1. Impact the safety of our crews 2. Threaten the successful outcome of the incident 3. Cause excessive damage to our
aerials 4. Void warranty terms and conditions 5. Exceed the design limits of the equipment
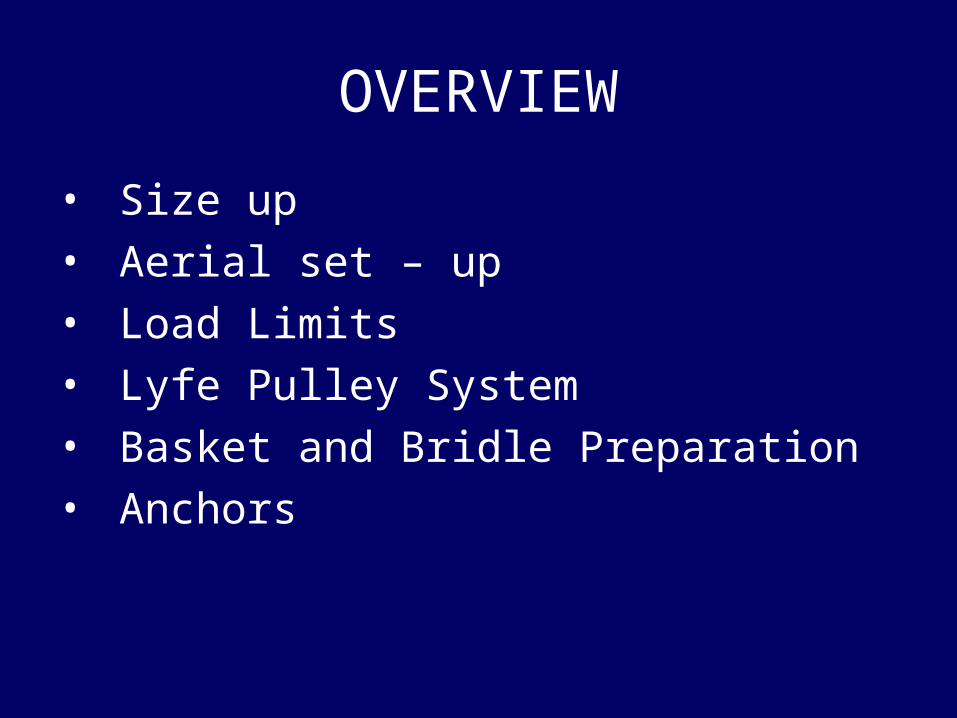
OVERVIEW
• Size up
• Aerial set – up
• Load Limits
• Lyfe Pulley System
• Basket and Bridle Preparation
• Anchors

SIZE - UP
SAFETY CONCERNS FOR ALL TOREMEMBER
• Consider Risk Benefit
• Is your task feasible? Do you have all the resources necessary? If not,
• Consider alternative resources, (Aerial Tower, Manpower,
Crane, USAR )
• A 500lb distributed load is the maximum load permissible IF you follow the manufactures recommendations on set up procedures
• No shock loads
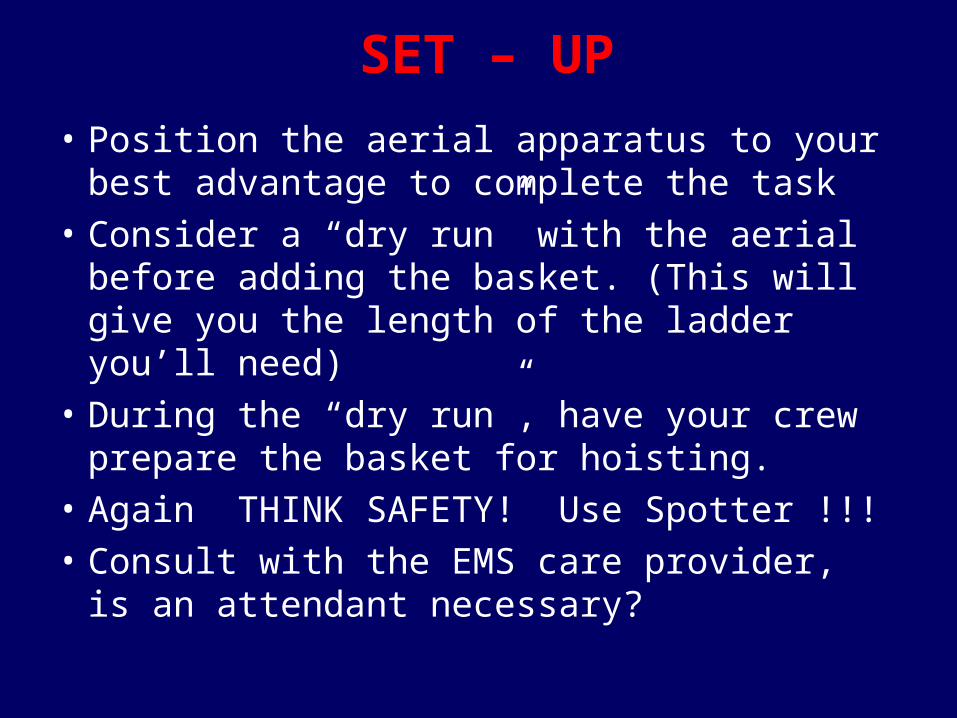
SET – UP
• Position the aerial apparatus to your best advantage to complete the task
• Consider a “dry run” with the aerial before adding the basket. (This will give you the length of the ladder you’ll need)
• During the “dry run”, have your crew prepare the basket for hoisting.
• Again THINK SAFETY! Use Spotter !!!
• Consult with the EMS care provider, is an attendant necessary?
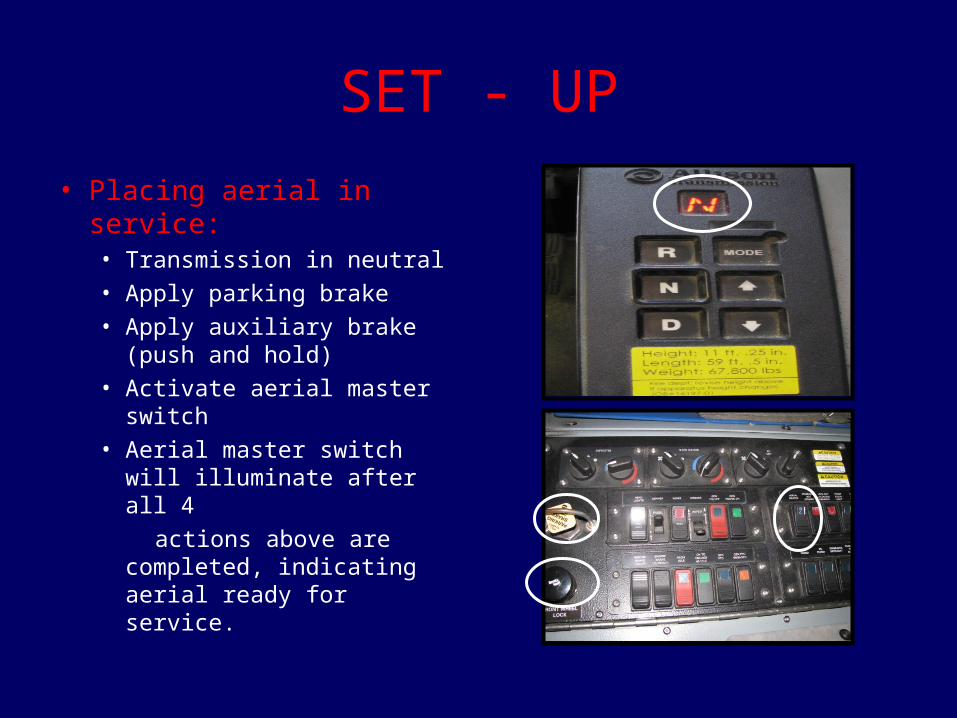
SET - UP
• Placing aerial in service:• Transmission in neutral• Apply parking brake• Apply auxiliary brake (push
and hold)• Activate aerial master
switch• Aerial master switch will
illuminate after all 4
actions above are completed, indicating aerial ready for service.
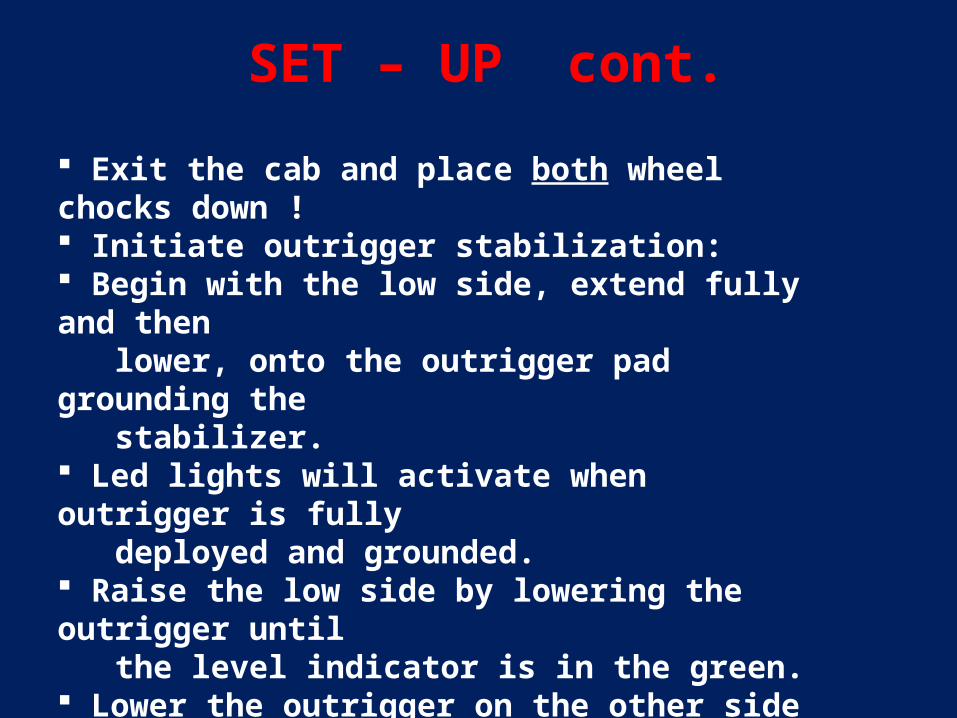
SET – UP cont.
Exit the cab and place both wheel chocks down ! Initiate outrigger stabilization: Begin with the low side, extend fully and then lower, onto the outrigger pad grounding the stabilizer. Led lights will activate when outrigger is fully deployed and grounded. Raise the low side by lowering the outrigger until the level indicator is in the green. Lower the outrigger on the other side until grounded. Then lower both outriggers together to get the bulge out of the tire. The desired result is to keep the drive axle tires on the ground.
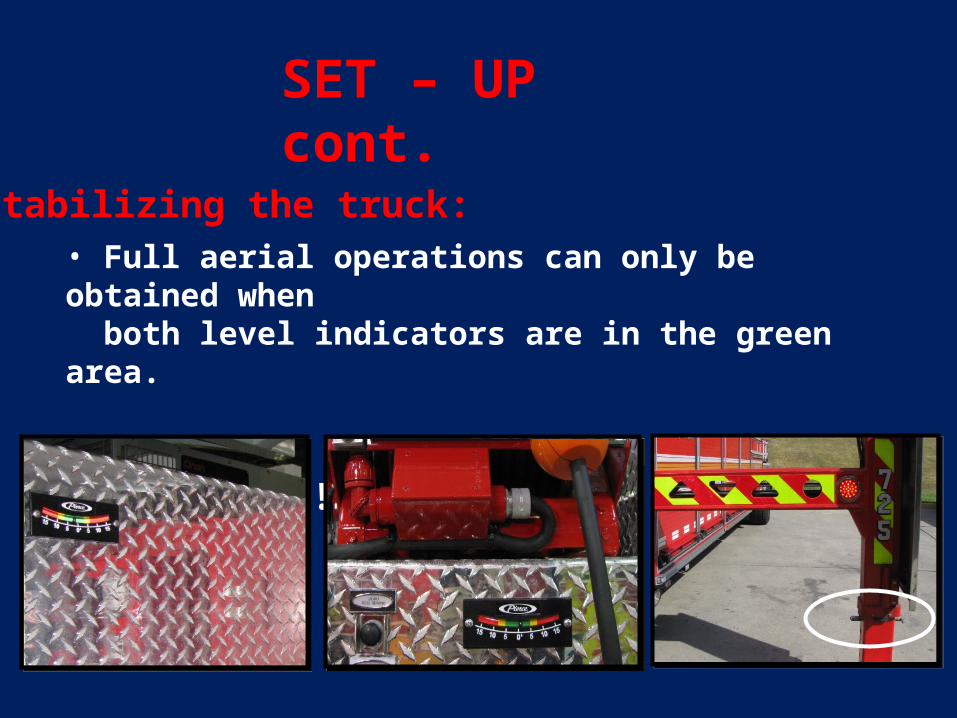
SET – UP cont.
Stabilizing the truck:• Full aerial operations can only be obtained when both level indicators are in the green area. PIN BOTH STABILIZERS!!

SET – UP cont.
WITH STABILIZERS DEPLOYED FULLY:
• Transfer power to aerial
• Pull 5th wheel lockout lever towards you until locked
• The turntable pistons are now locked and the handles on the pedestal are active.
* Remember * Foot pedal depressed is required for valves to work. (2007/2008 Models)
2007 / 2008
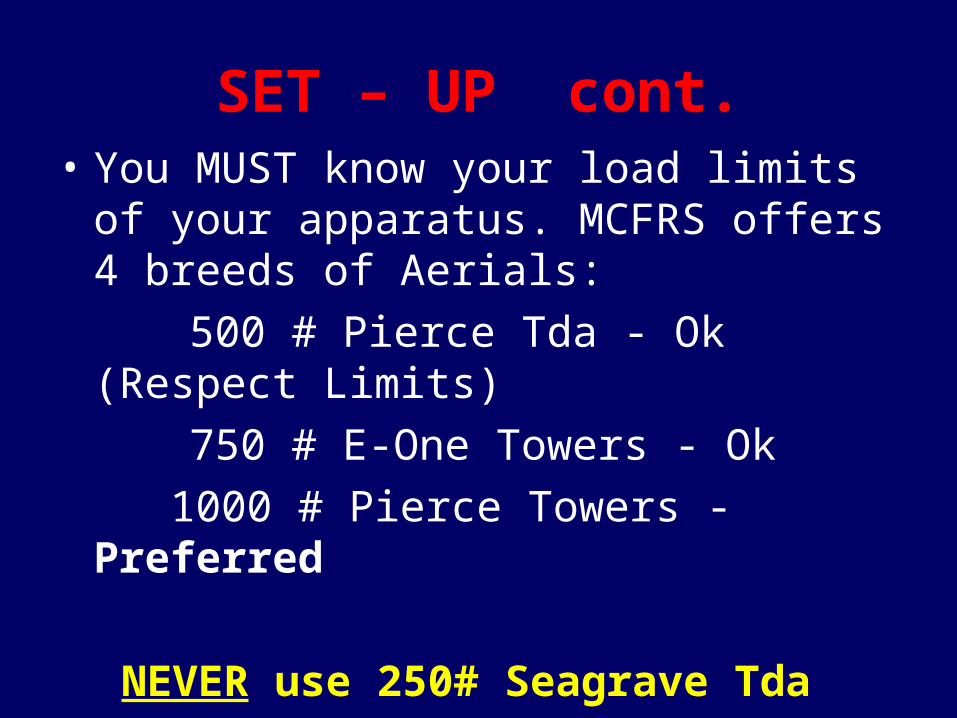
SET – UP cont.• You MUST know your load limits of your
apparatus. MCFRS offers 4 breeds of Aerials:
500 # Pierce Tda - Ok (Respect Limits)
750 # E-One Towers - Ok
1000 # Pierce Towers - Preferred
NEVER use 250# Seagrave Tda
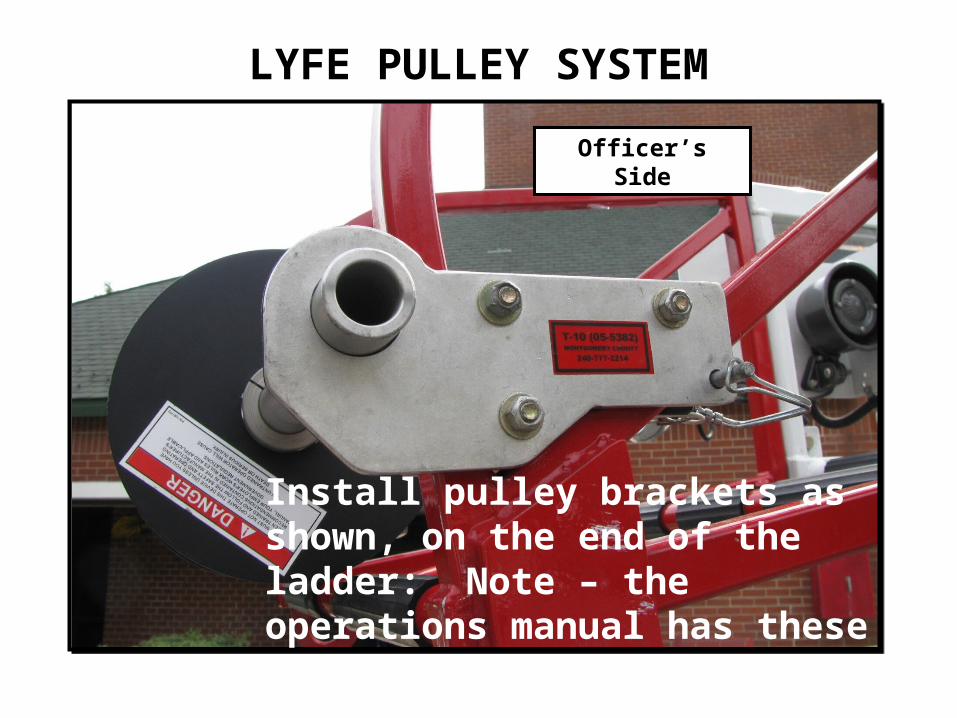
Install pulley brackets as shown, on the end of the ladder: Note – the operations manual has these illustrations pg 3-13
Safety Pin
LYFE PULLEY SYSTEM
Install pulley brackets as shown, on the end of the ladder: Note – the operations manual has these illustrations pg 3-15
Officer’s Side

Safety Pins
LYFE PULLEY SYSTEM
Driver’s Side
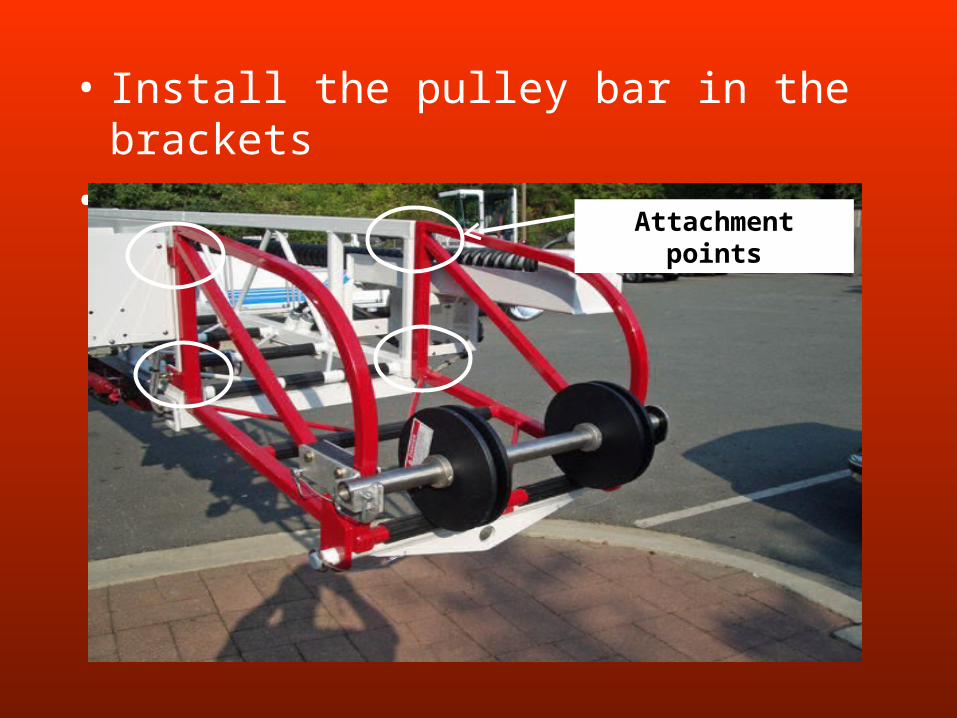
• Install the pulley bar in the brackets
• Inspect the integrity of the detachable tip
Attachment points
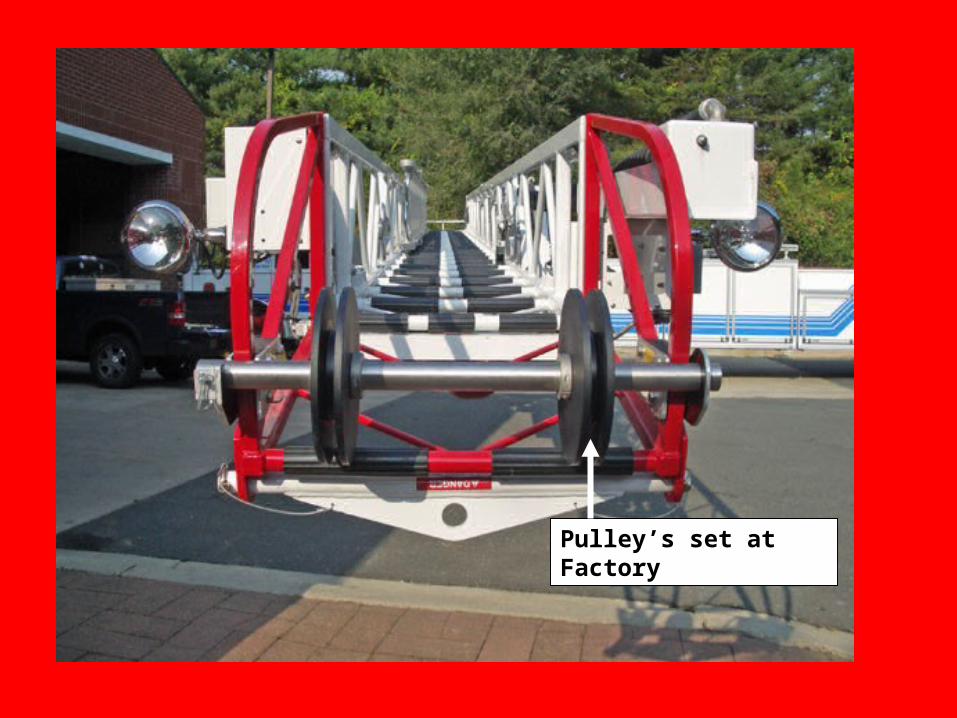
Pulley’s set at Factory

Pulley’s adjusted eliminating
obstructions in ladder bed.
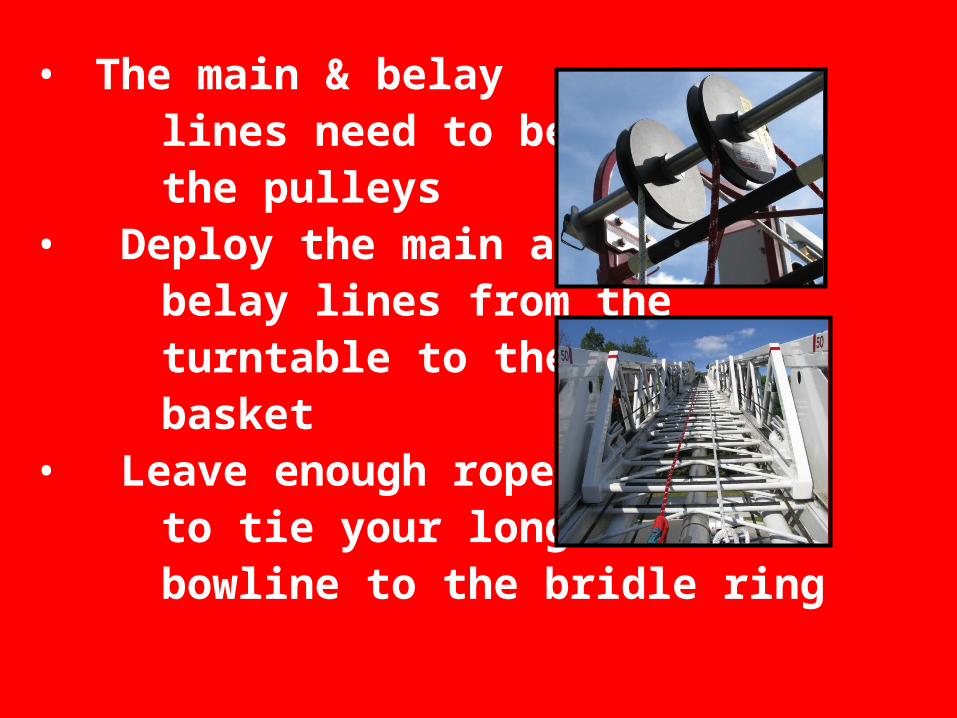
• The main & belay lines need to be in the pulleys• Deploy the main and belay lines from the turntable to the basket • Leave enough rope to tie your long tail bowline to the bridle ring
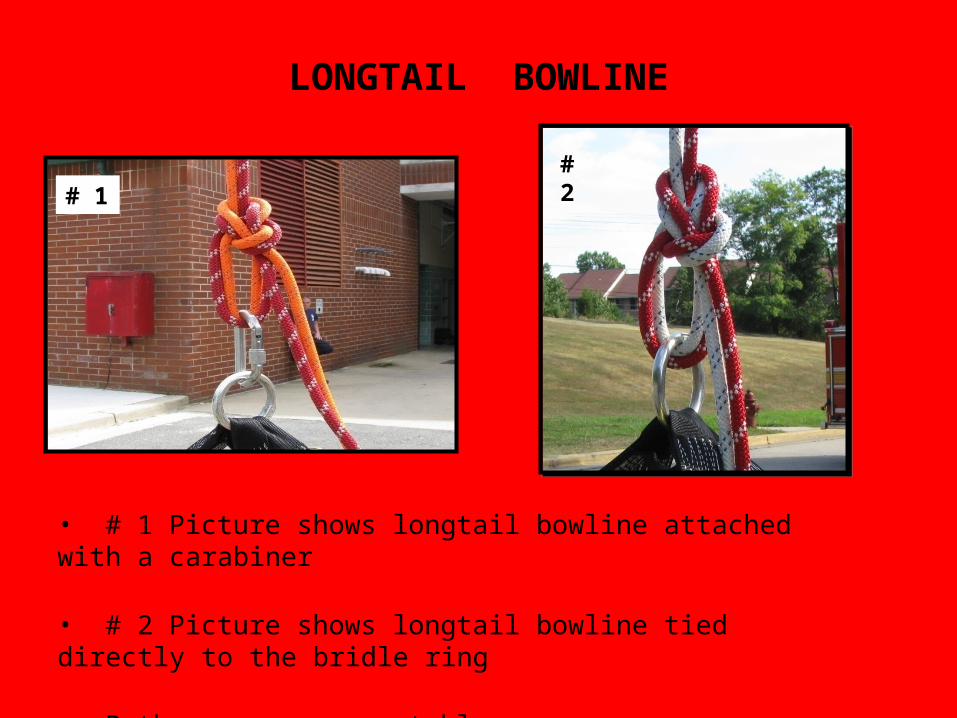
LONGTAIL BOWLINE
• # 1 Picture shows longtail bowline attached with a carabiner
• # 2 Picture shows longtail bowline tied directly to the bridle ring
• Both ways are acceptable
# 1# 2
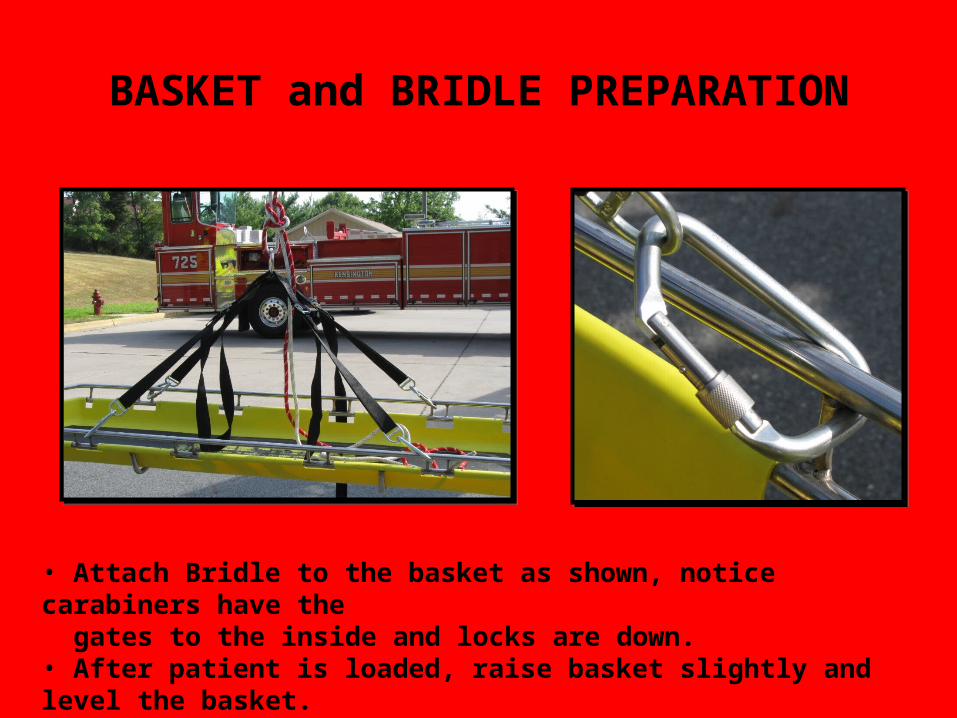
BASKET and BRIDLE PREPARATION
• Attach Bridle to the basket as shown, notice carabiners have the gates to the inside and locks are down.• After patient is loaded, raise basket slightly and level the basket. with adjustable straps.

• Your lines need to be dead ended or tied off at the base of the ladder or turntable to get your load rating
Main LineBelay Line
with Rescue 540
Rap 3 pull 2 webbing anchors
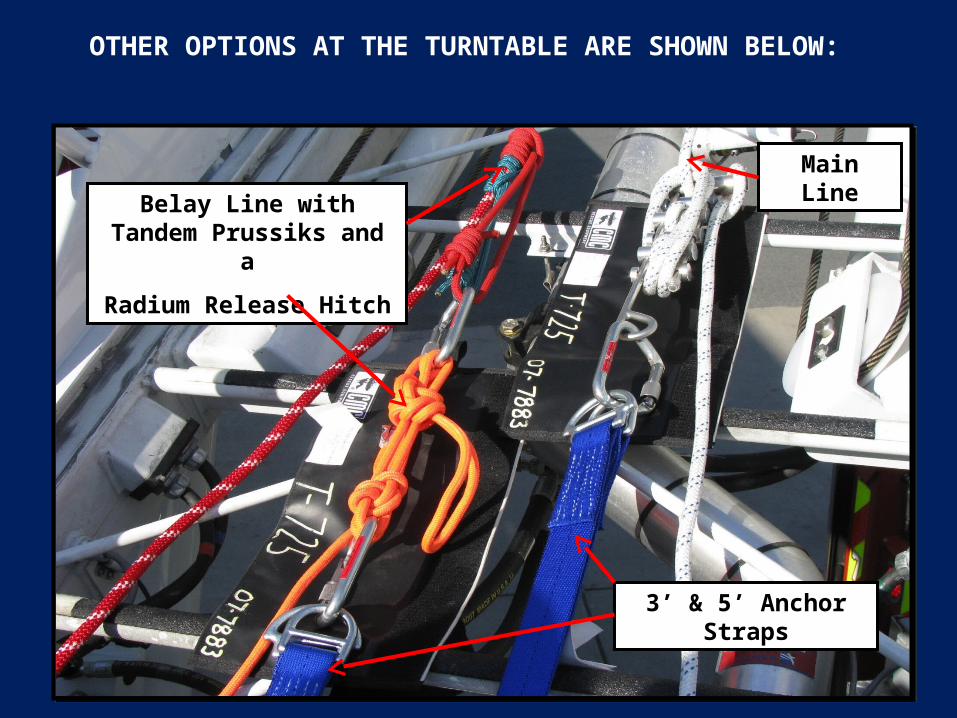
Main Line
Belay Line with Tandem Prussiks and a
Radium Release Hitch
3’ & 5’ Anchor Straps
OTHER OPTIONS AT THE TURNTABLE ARE SHOWN BELOW:
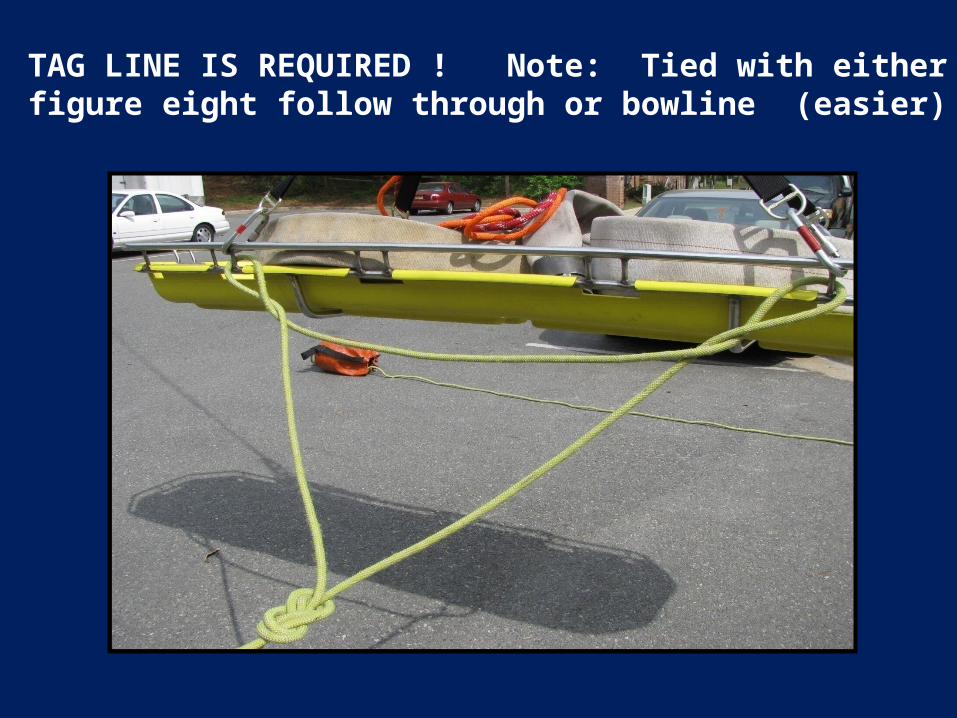
TAG LINE IS REQUIRED ! Note: Tied with eitherfigure eight follow through or bowline (easier)
REMINDERS
• The TDA’s have a good inventory for hardware. Edge pads are a good accessory to use to protect your rope and hardware.
• At steeper angles the rope will rub on the rung covers. PROTECT YOUR ROPE
• PRACTICE, PRACTICE, PRACTICE
• The better we are at our job the SAFER
everyone is!!!