step-by-step final cut pro: basic editing - york...
TRANSCRIPT
Final Cut Pro: Basic Editing n Step-by-Step Card 1
Step-by-Step
Final Cut Pro: BasicEditing
Once you have set your preferences in Final Cut Pro, you are ready to begin editing. The editing
discussed in this Step-by-Step Card uses QuickTime video clips located on The Archives of
History CD. To learn how to import video, refer to the “Final Cut Pro: Importing and Editing Audio
Files” Step-by-Step Card. For more information, refer to the Final Cut Pro user’s manual or the
program’s electronic help system. To use the help system, choose Final Cut Pro Help from the
Help menu.
Final Cut Pro workspace
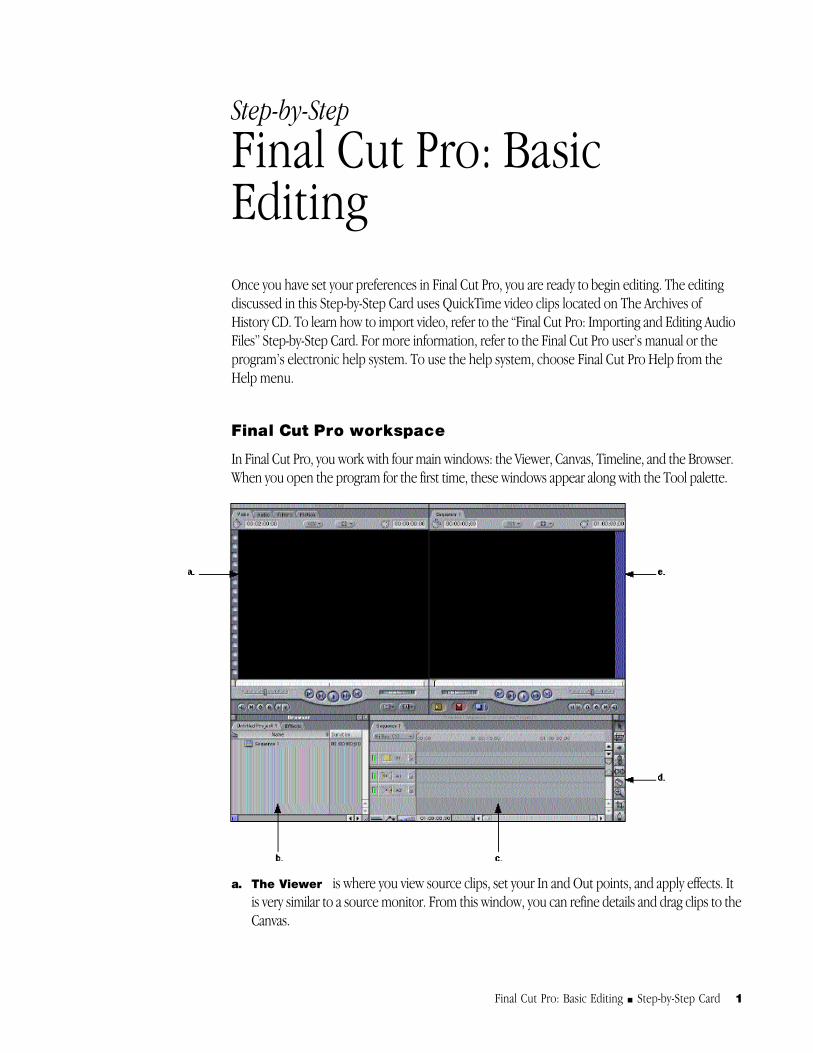
In Final Cut Pro, you work with four main windows: the Viewer, Canvas, Timeline, and the Browser.
When you open the program for the first time, these windows appear along with the Tool palette.
a. The Viewer is where you view source clips, set your In and Out points, and apply effects. It
is very similar to a source monitor. From this window, you can refine details and drag clips to the
Canvas.
2 Final Cut Pro: Basic Editing n Step-by-Step Card
b. The Browser is where you organize and locate the source material for your project. Here
you can create folders or bins to organize and story your video, audio, pictures, and so forth.
c. The Timeline is the area that shows you the chronological events of your sequence. In this
window you can see multiple video and audio tracks.
d. The Tool palette contains all of the necessary tools you will need to edit your items in the
Timeline or Canvas.
e. The Canvas looks much like the Viewer but is equivalent to an output or record monitor.
This window displays the output of all of your edits, transitions, and any other items added to the
Timeline.
Importing QuickTime movies
1 Create a folder on your hard disk that will contain all of your QuickTime movies. If you are using
The Archives of History CD or other QuickTime movies not located on your hard disk, drag these
QuickTime movies into this new folder.
2 Open the Final Cut Pro application.
3 Choose Import from the File menu, then choose Folder from the submenu. This allows you to
import all QuickTime files located in a specified folder. Navigate to the folder you created for your
QuickTime video clips. Click Select to import your folder.
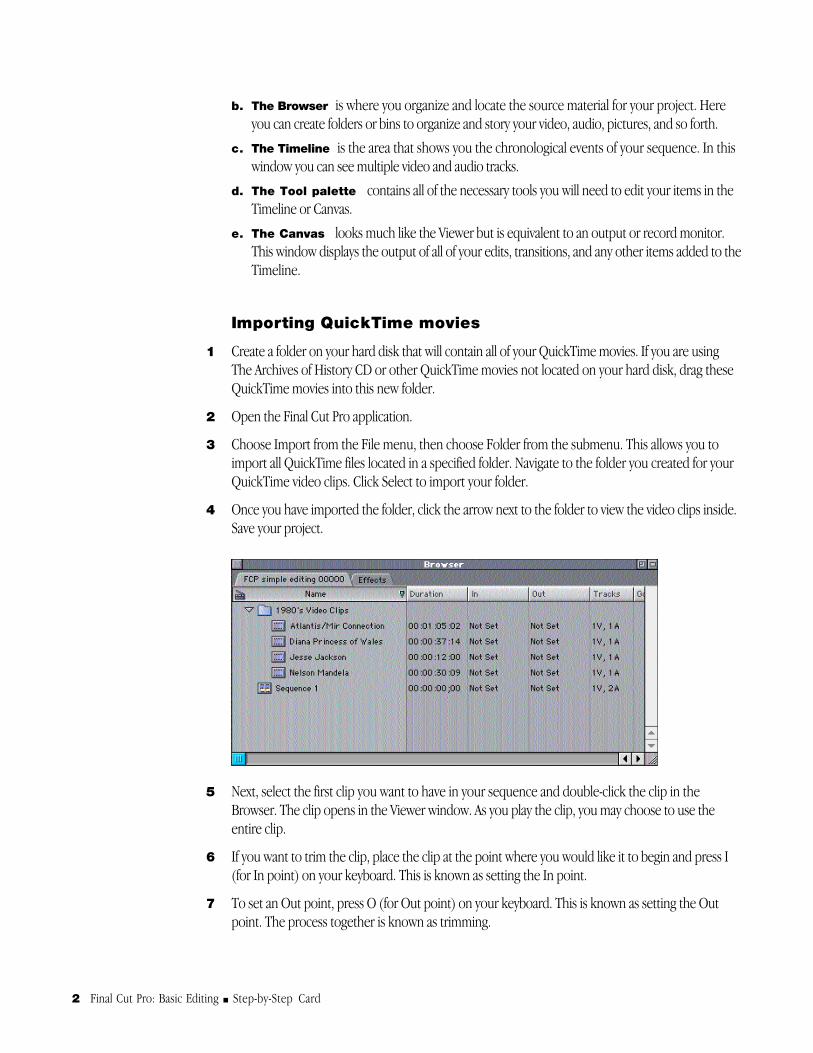
4 Once you have imported the folder, click the arrow next to the folder to view the video clips inside.
Save your project.
5 Next, select the first clip you want to have in your sequence and double-click the clip in the
Browser. The clip opens in the Viewer window. As you play the clip, you may choose to use the
entire clip.
6 If you want to trim the clip, place the clip at the point where you would like it to begin and press I
(for In point) on your keyboard. This is known as setting the In point.
7 To set an Out point, press O (for Out point) on your keyboard. This is known as setting the Out
point. The process together is known as trimming.
Final Cut Pro: Basic Editing n Step-by-Step Card 3
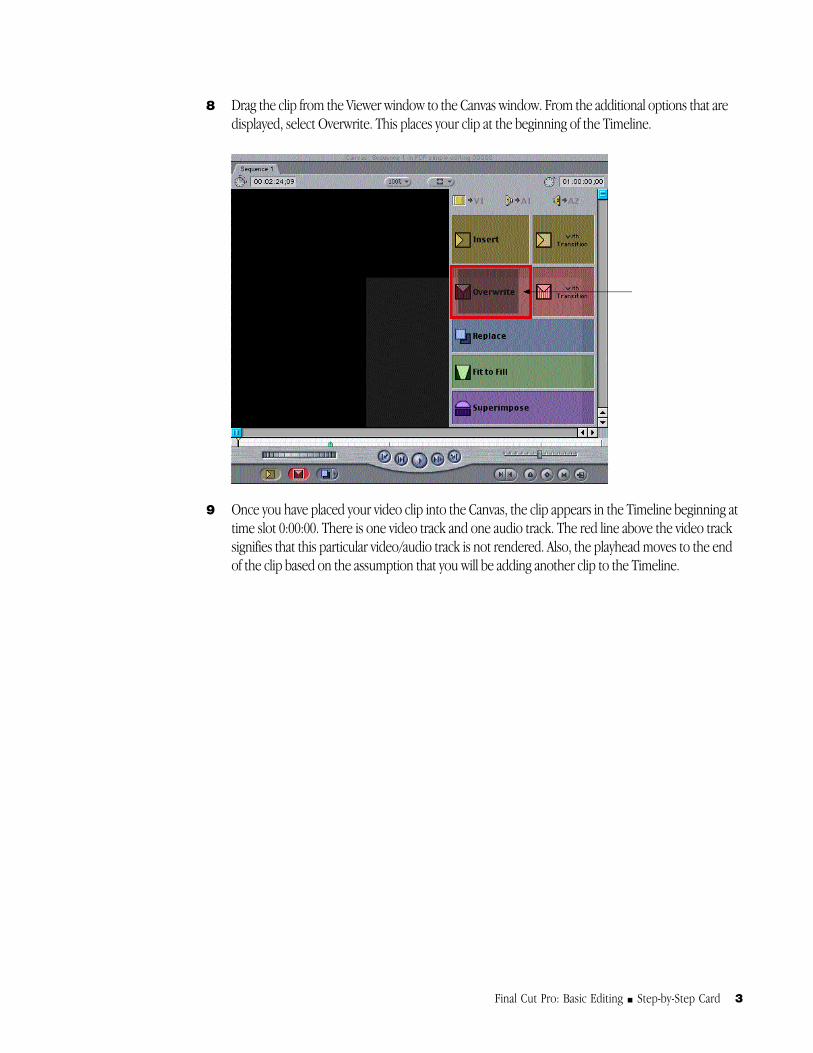
8 Drag the clip from the Viewer window to the Canvas window. From the additional options that are
displayed, select Overwrite. This places your clip at the beginning of the Timeline.
9 Once you have placed your video clip into the Canvas, the clip appears in the Timeline beginning at
time slot 0:00:00. There is one video track and one audio track. The red line above the video track
signifies that this particular video/audio track is not rendered. Also, the playhead moves to the end
of the clip based on the assumption that you will be adding another clip to the Timeline.
4 Final Cut Pro: Basic Editing n Step-by-Step Card
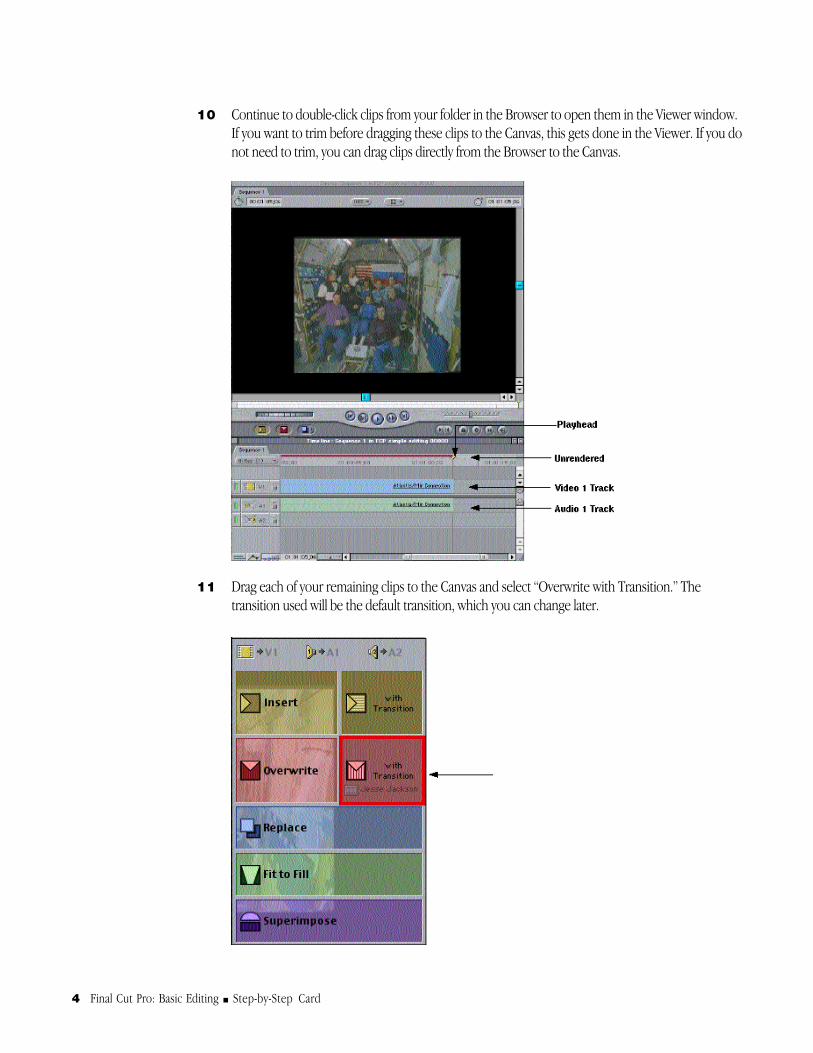
10 Continue to double-click clips from your folder in the Browser to open them in the Viewer window.
If you want to trim before dragging these clips to the Canvas, this gets done in the Viewer. If you do
not need to trim, you can drag clips directly from the Browser to the Canvas.
11 Drag each of your remaining clips to the Canvas and select “Overwrite with Transition.” The
transition used will be the default transition, which you can change later.
Final Cut Pro: Basic Editing n Step-by-Step Card 5
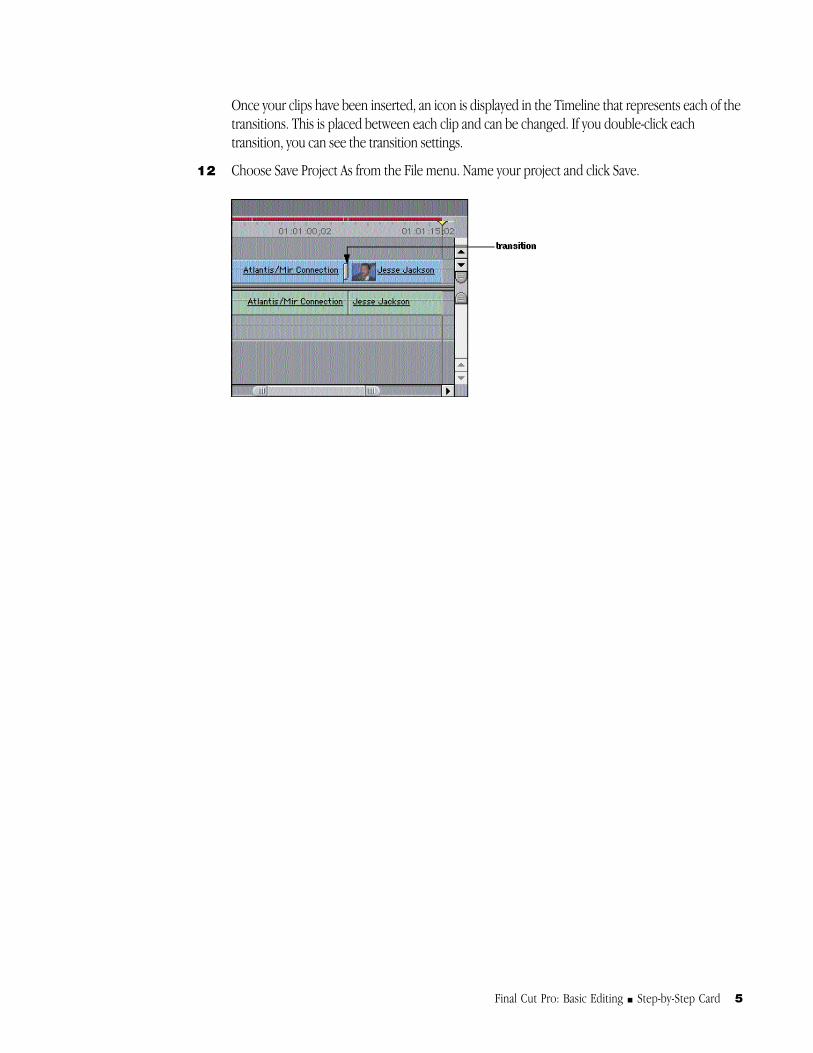
Once your clips have been inserted, an icon is displayed in the Timeline that represents each of the
transitions. This is placed between each clip and can be changed. If you double-click each
transition, you can see the transition settings.
12 Choose Save Project As from the File menu. Name your project and click Save.
6 Final Cut Pro: Basic Editing n Step-by-Step Card
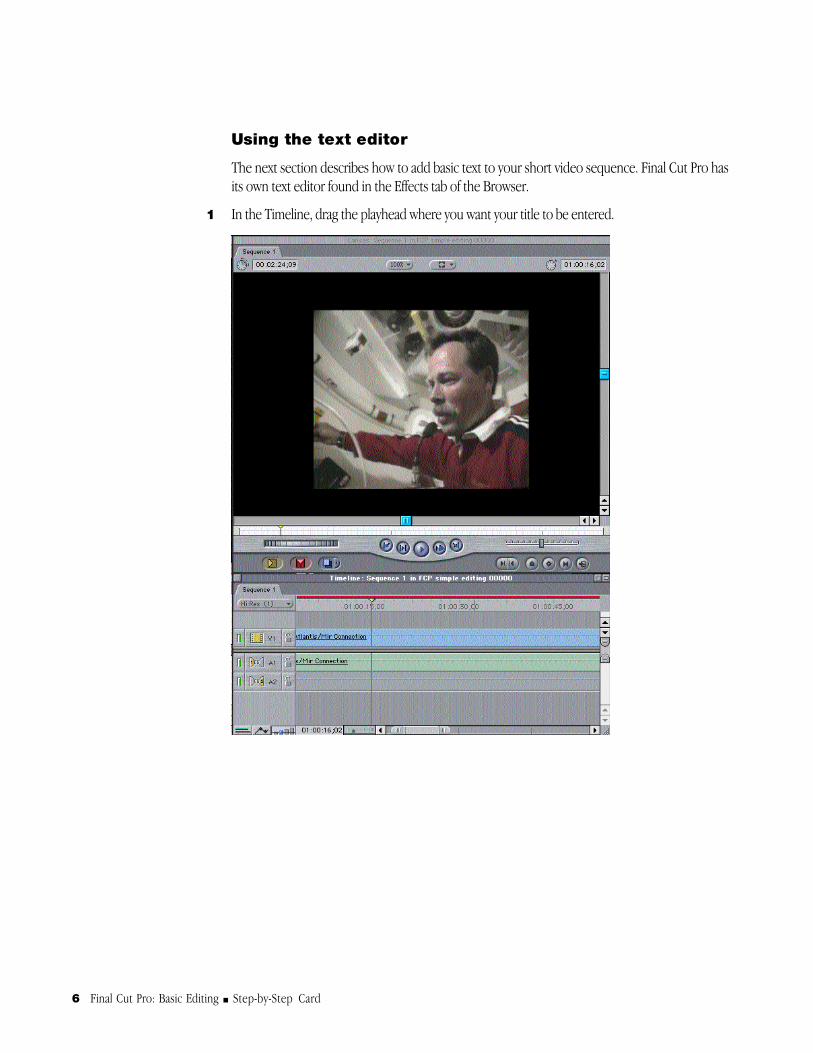
Using the text editor
The next section describes how to add basic text to your short video sequence. Final Cut Pro has
its own text editor found in the Effects tab of the Browser.
1 In the Timeline, drag the playhead where you want your title to be entered.
Final Cut Pro: Basic Editing n Step-by-Step Card 7
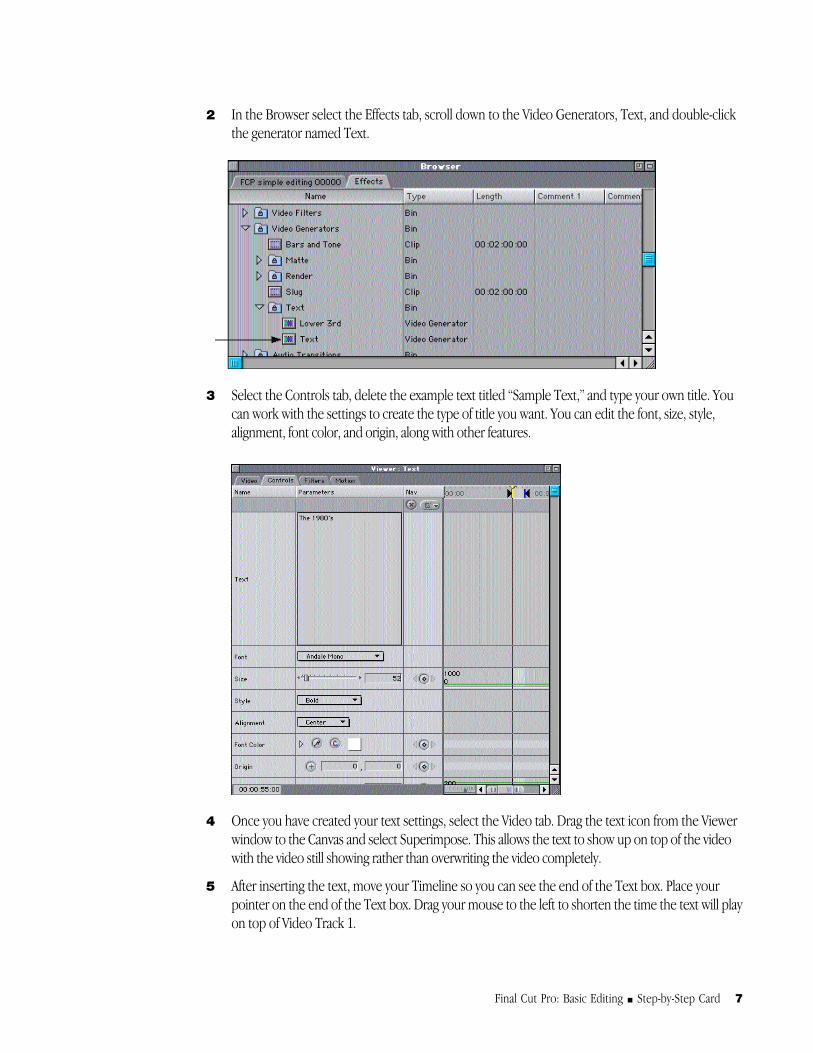
2 In the Browser select the Effects tab, scroll down to the Video Generators, Text, and double-click
the generator named Text.
3 Select the Controls tab, delete the example text titled “Sample Text,” and type your own title. You
can work with the settings to create the type of title you want. You can edit the font, size, style,
alignment, font color, and origin, along with other features.
4 Once you have created your text settings, select the Video tab. Drag the text icon from the Viewer
window to the Canvas and select Superimpose. This allows the text to show up on top of the video
with the video still showing rather than overwriting the video completely.
5 After inserting the text, move your Timeline so you can see the end of the Text box. Place your
pointer on the end of the Text box. Drag your mouse to the left to shorten the time the text will play
on top of Video Track 1.
8 Final Cut Pro: Basic Editing n Step-by-Step Card
Render quality
You are now ready to render your final movie and save it as a QuickTime file. During this part of the
process, you must decide what quality you would like your output to be. If it is your finished
product, you may want to choose Hi-Res, which gives you the best quality output but takes longer
to render. If you want average quality but a faster rendering process, you may want to choose Draft.
1 Choose Render Quality from the Sequence menu; then choose the quality you want from the
submenu.
2 Choose Export from the File menu; then choose QuickTime Movie from the submenu. Name your
file; then click Save.
3 Choose Quit from the File menu.