step 1: flattening the artwork step 2: tron control panel … · 2017-03-15 · step 1: flattening...
TRANSCRIPT

Darin Pitts Phoenix Arcade: How To - Tron Control Panel Overlay October 31, 2011
Page 1
Step 1: Flattening the Artwork • Tron artwork purchased from Phoenix Arcade will be shipped rolled. At least one week
prior to application the artwork should be laid out on a flat surface in order for the artwork to return to its natural flat form. I typically lay the artwork on a carpeted floor in an unused room with magazines laying on the corners and sides in order to keep the artwork flat.
Step 2: Tron Control Panel Disassembly • Before the control panel overlay can be applied the control panel must be disassembled,
cleaned, and painted. In order to disassemble the control panel the joystick and spinner must be removed. There are 5 security screws that mount the joystick plastics to the joystick shaft as show in figures 1 &2. These can be removed with a T3 security bit. Some individuals have difficulty removing the 5 security screws because they have previously been stripped. If this is the case one can carve a horizontal slot in the screw with a Dremel tool so that the screw can be removed with a flat head screw driver. In doing this the joystick plastic will be damaged however a replacement may be purchased at Groovy Game Gear.
Figure 1 Figure 2
• Next the trigger limit switch must be removed. There are two Phillips head screw that hold this in place as shown in figure 3 below.
Figure 3

Darin Pitts Phoenix Arcade: How To - Tron Control Panel Overlay October 31, 2011
Page 2
• Next the spinner knob must be removed. The spinner knob is held in place by two set screws on the bottom of the spinner shaft as shown in figure 4 below. These can be loosened with an allen wrench and the spinner knob will slide out from the top.
Figure 4
• With the spinner knob and joystick plastics removed the remaining control panel hardware can be unbolted from the bottom of the panel as shown in figure 5 below.
Figure 5

Darin Pitts Phoenix Arcade: How To - Tron Control Panel Overlay October 31, 2011
Page 3
• With the control panel hardware removed the control panel should look like figure 6 below.
Figure 6

Darin Pitts Phoenix Arcade: How To - Tron Control Panel Overlay October 31, 2011
Page 4
Step 3: Control Panel Overlay Art Removal
• Once the control panel hardware has been removed, the control panel overlay artwork can be removed. I’ve found that the use of a heat gun greatly aids in removal of any artwork. Remove the old overlay with the help of a heat gun and then remove the adhesive residue left behind by the old control panel overlay with paper towels and acetone. The acetone will soften the adhesive residue allowing it to easily be cleaned off the panel.
• Next the control panel should be painted prior to installing the new control panel overlay. You will notice that control panels were originally not painted from the factory however painting the panel will allow the new overlay to adhere better and to protect the panel from rust. The cleaned and painted control panel can be seen in figure 7 below.
Figure 7

Darin Pitts Phoenix Arcade: How To - Tron Control Panel Overlay October 31, 2011
Page 5
Step 4: Control Panel Overlay Art Installation
• Once the control panel has been prepped one can begin the control panel overlay art installation. First the holes must be removed from the overlay. Phoenix Arcade overlays are die cut for easy removal of the holes for the buttons, joystick, and spinner. Simply remove the die cut holes by carefully pushing them out as shown in figure 8 below.
Figure 8
• Next the control panel should be wiped down with denatured alcohol to remove any oils or dirt prior to art application.
Figure 9

Darin Pitts Phoenix Arcade: How To - Tron Control Panel Overlay October 31, 2011
Page 6
• After the control panel has been wiped down with denatured alcohol the control panel overall can be overlaid on the panel for correct positioning. I use painter’s tape to hold the overlay in place after it has been correctly positioned as shown below in figure 10. Others also recommend reinstalling any buttons to hold the overlay in place.
Figure 10
• In order to apply the art one can use a credit card wrapped in a soft towel or a side art application tool to apply the artwork. With the artwork still taped in place carefully peal back and remove about a 1” strip of the control panel overlay backing from one end of the overlay and apply to the panel using your application tool and a slow, incremental back and forth motion to remove any air bubbles. This is shown in figure 11 below.
Figure 11
Darin Pitts Phoenix Arcade: How To - Tron Control Panel Overlay October 31, 2011
Page 7
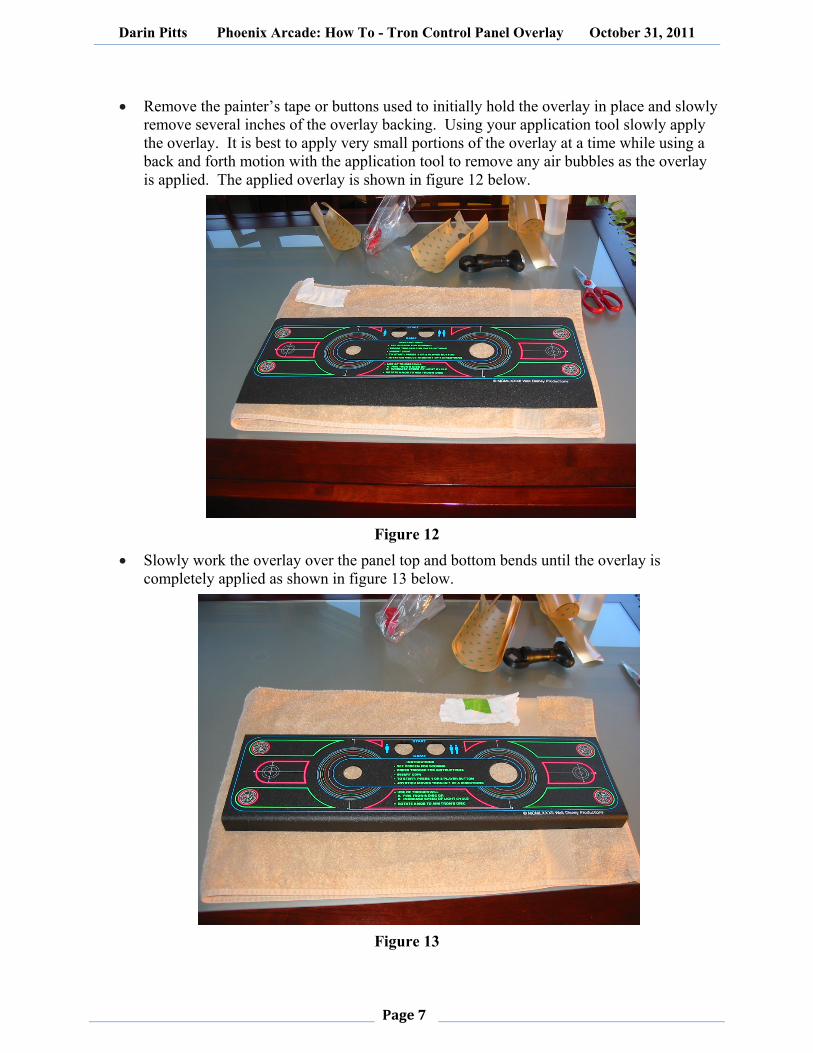
• Remove the painter’s tape or buttons used to initially hold the overlay in place and slowly remove several inches of the overlay backing. Using your application tool slowly apply the overlay. It is best to apply very small portions of the overlay at a time while using a back and forth motion with the application tool to remove any air bubbles as the overlay is applied. The applied overlay is shown in figure 12 below.
Figure 12
• Slowly work the overlay over the panel top and bottom bends until the overlay is completely applied as shown in figure 13 below.
Figure 13

Darin Pitts Phoenix Arcade: How To - Tron Control Panel Overlay October 31, 2011
Page 8
• The spinner decal can be applied in the same manner. Wipe the top of the spinner down with denatured alcohol and align the decal so that it is centered on the spinner. Tape the decal in place on one side to create a hinge as shown in figure 14 below. Peel off the backing and apply to the spinner as shown in figure 15 below. If using the spinner decal supplied with the control panel overlay it will need to be trimmed to size prior to application. If the spinner decal is purchased separately from Phoenix Arcade, it will be cut to fit.
Figure 14 Figure 15

Darin Pitts Phoenix Arcade: How To - Tron Control Panel Overlay October 31, 2011
Page 9
Step 5: Tron Control Panel Reassembly
• Once the control panel overlay has been applied all control panel hardware can be reassembled in the reverse order it was removed. While the panel is disassembled it is recommended that all components are cleaned, polished, and/or painted before reassembly as shown in figure 16-20 below.
Figure 16 Figure 17
Figure 18

Darin Pitts Phoenix Arcade: How To - Tron Control Panel Overlay October 31, 2011
Page 10
Figure 19 Figure 20 Step 6: Enjoy Your Newly Installed Phoenix Arcade Artwork
• Now that your Phoenix Arcade Tron Control Panel Overlay is installed you can reassemble the rest of your cabinet and enjoy your handy work.
Figure 21