stem-tivity class kit - push and pull piggies · pull piggies—a hands-on kit utilizing the...
TRANSCRIPT

© 2017 Really Good Stuff® 1-800-366-1920 www.reallygoodstuff.com Made in China #164298Helping Teachers Make A Difference® © 2017 Really Good Stuff® 1-800-366-1920 www.reallygoodstuff.com Made in China #164298
All instructional guides can be found online.
Helping Teachers Make A Difference®
This Really Good Stuff ® product includes:• 12 Rubber Piggies• 100 Colored Pipe Cleaners • 80 “Wooden” Sticks • 4 Work Mats • 12 Task Cards (4 each of three different tasks)• Storage Box • This Really Good Stuff® Instructional Guide
Congratulations on your purchase of this Really Good Stuff® STEM-tivity™ Class Kit - Push and Pull Piggies—a hands-on kit utilizing the inquiry method to heighten your students’ imaginations and engineering skills with engaging activities about push and pull concepts.
Meeting the StandardsThe Really Good Stuff® STEM-tivity™ Class Kit - Push and Pull Piggies aligns with the Next Generation Science Standards below. For alignment with other state standards, please refer to our website’s Standards Match.
K-PS2 Motion and Stability: Forces and interactionsStudents who demonstrate understanding can:K-PS2-1 Plan and conduct an investigation to compare the effects of different strengths or different directions of pushes and pulls on the motion of an object.
K-2-ETS1 Engineering DesignStudents who demonstrate understanding can:K-2-ETS1-1 Ask questions, make observations, and gather information about a situation people want to change to define a simple problem that can be solved through the development of a new or improved object or tool.K-2-ETS1-2 Develop a simple sketch, drawing, or physical model to illustrate how the shape of an object helps it function as needed to solve a given problem.K-2-ETS1-3 Analyze data from tests of two objects designed to solve the same problem to compare the strengths and weaknesses of how each performs.
Displaying and Preparing the STEM-tivity™ Class Kit - Push and Pull PiggiesBefore displaying the STEM-tivity™ Class Kit - Push and Pull Piggies, make copies of this Really Good Stuff® Instructional Guide, and file the pages for future use. Or, download another copy of it from our website at www.reallygoodstuff.com.
This kit includes enough materials to divide your class into four working groups of up to four students each. The groups can work on the same Task Card at the same time, allowing them to compare and contrast their designs and models. Or, the groups can work on different Task Cards and then present their designs to the class. Divide the materials accordingly.
Each Task Card features a main activity on the front and extended activities on the back for each STEM component. Depending on your students’ level, you may need to lead the activities due to text complexity and task difficulty. In addition to the text on the back of each Task Card, the text on the front of the Card is color-coded to identify steps in the task as Science-based (blue), Math-based (red), or Engineering-based (green). Store all of the materials in the Storage Box once activities are completed.
Introducing the STEM-tivity™ Class Kit - Push and Pull PiggiesGather students together and review the basics of push and pull: push means “to move something away from you,” and pull means “to move something toward you.” Present the following scenario as background for why students will be working with the STEM-tivity™ Class Kit - Push and Pull Piggies.
Farmer Jones lives on a farm with lots of animals. Lately, his pet piggies are getting into all kinds of trouble, so he needs your help. Use what you know about pushing and pulling to solve Farmer Jones’s piggy problems.
STEM-tivity™ Class Kit - Push and Pull Piggies
Push
and
Pul
l Pig
gies
Rep
rodu
cibl
e
164298_STEMtivity_ClassKit_PshPullPiggies_RGIG.indd 1-2 4/18/17 1:28 PM
STEM-tivity™ Class Kit - Push and Pull Piggies
© 2017 Really Good Stuff® 1-800-366-1920 www.reallygoodstuff.com Made in China #164298Helping Teachers Make A Difference®
Used section on their reproducibles. If desired, distribute additional materials, such as tape, string, and clay.
• Make a Plan: Tell each group to discuss a plan for making the best tools to push and pull the hay that they can. Ask them to draw or write their plan on the Push and Pull Piggies Reproducible. Circulate and check the plans as students begin the task.
• Conduct the Task: Instruct students to use the materials and work on the aerial view of the farm side of the Work Mats to display their pigpens. Urge them to try out their push and pull tools to move the “paper hay” into the pigpen.
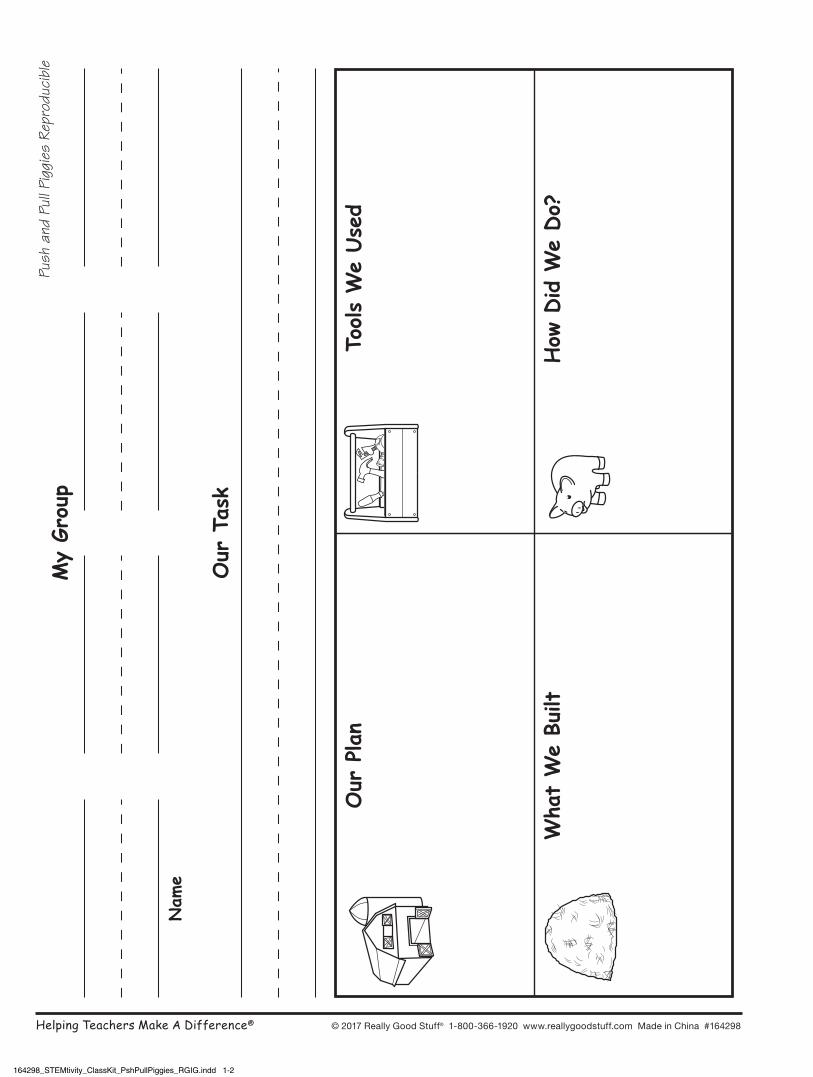
• Evaluate: Direct each group to fill in the What We Built section on the Push and Pull Piggies Reproducible with a drawing or photograph of their hay-moving tool. Ask them to evaluate their task by writing or telling what worked and what didn’t work in the How Did We Do? section. For young students, have them draw a simple smiley or frowny face to evaluate. Have each group compare and contrast their hay-moving tool with other groups.
• Share Ideas: Have students present their finished task to the class and talk about what worked and what they could do better. Ask students to break down their creations, straighten out any useable Pipe Cleaners, and return them to the Storage Box for use with other Task Cards or extension activities.
Choose other Science, Technology, Engineering, and Math activities from the back of the Task Card to enhance your students’ learning.
Piggie Sled Task Card Copy and distribute the Push and Pull Piggies Reproducible as well as the Task Card with the orange header, 3 Piggies, 25 Pipe Cleaners, and 20 “Wooden” Sticks to each group.
• Essential Question: Read the header at the top of the Task Card to create a setting before asking the essential question of How can you help the piggies find their dinner? Read the instructions on the Task Card aloud to students. Answer any questions students may have about their task.
• Available Tools: Introduce the groups to the Pipe Cleaners and “Wooden” Sticks, explaining that they are to use these tools to complete the task. Have them fill in the Tools We Used section on their reproducibles. If desired, distribute additional materials, such as tape, string, clay, and tagboard.
• Make a Plan: Tell each group to discuss a plan for making the best sled to pull the piggies out of the barn and over to the hay. Ask them to draw or write their plan on the Push and Pull Piggies Reproducible. Circulate and check the plans as students begin the task.
• Conduct the Task: Instruct students to use the materials to create a sled that can be pulled. Tell them to prop up the barn side of the Work Mat to create a setting and to set the Piggies near the door. Urge each group to find rough and smooth surfaces in the classroom and to practice pulling their sled over each surface. Note: If necessary, bring in appropriate surfaces, such as acetate, sandpaper, and cloth ahead of class.
• Evaluate: Direct each group to fill in the What We Built section on the Push and Pull Piggies Reproducible with a drawing or photograph of their sled. Ask them to evaluate their task by writing or telling what worked and what didn’t work in the How Did We Do? section. For young students, have them draw a simple smiley or frowny face to evaluate. Have each group compare and contrast their sled with other groups.
• Share Ideas: Have students present their finished task to the class and talk about what worked and what they could do better. Ask students to break down their creations if possible, straighten out the Pipe Cleaners, and return them to the Storage Box for use with other Task Cards or extension activities.
Choose other Science, Technology, Engineering, and Math activities from the back of the Task Card to enhance your students’ learning.
STEM-tivity™ Class Kit - Push and Pull Piggies
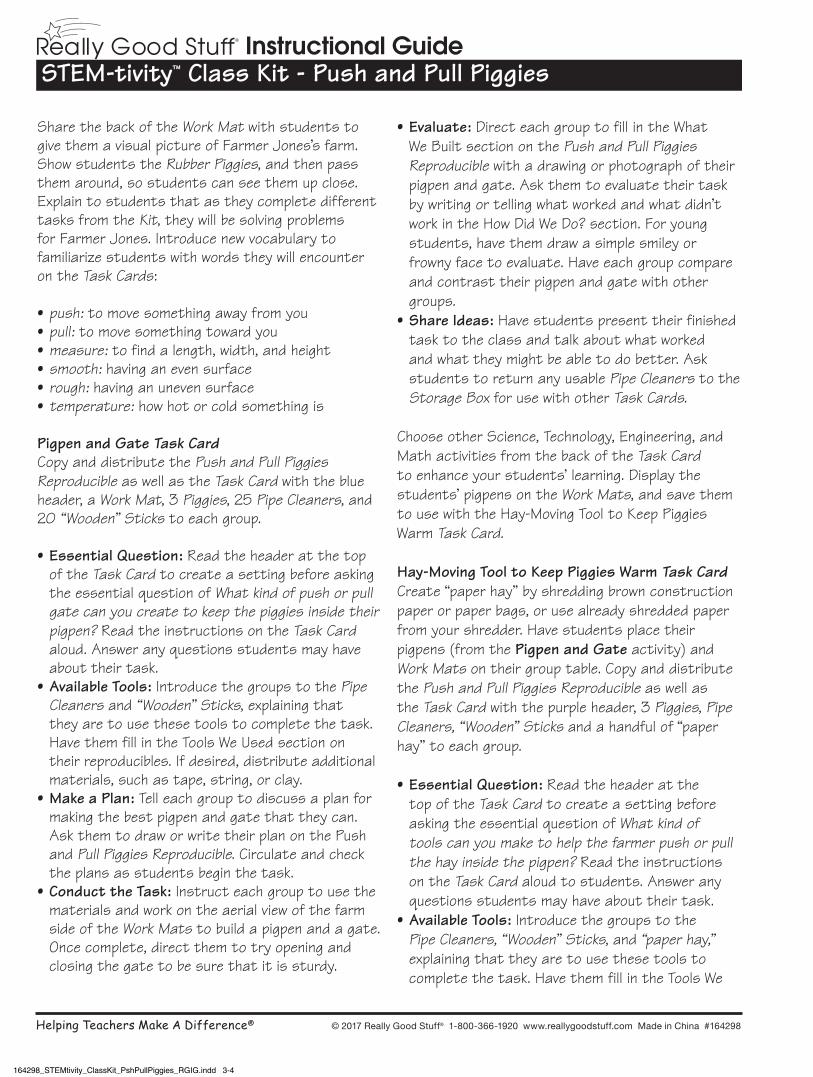
Share the back of the Work Mat with students to give them a visual picture of Farmer Jones’s farm. Show students the Rubber Piggies, and then pass them around, so students can see them up close. Explain to students that as they complete different tasks from the Kit, they will be solving problems for Farmer Jones. Introduce new vocabulary to familiarize students with words they will encounter on the Task Cards:
• push: to move something away from you• pull: to move something toward you• measure: to find a length, width, and height• smooth: having an even surface• rough: having an uneven surface• temperature: how hot or cold something is
Pigpen and Gate Task Card Copy and distribute the Push and Pull Piggies Reproducible as well as the Task Card with the blue header, a Work Mat, 3 Piggies, 25 Pipe Cleaners, and 20 “Wooden” Sticks to each group.
• Essential Question: Read the header at the top of the Task Card to create a setting before asking the essential question of What kind of push or pull gate can you create to keep the piggies inside their pigpen? Read the instructions on the Task Card aloud. Answer any questions students may have about their task.
• Available Tools: Introduce the groups to the Pipe Cleaners and “Wooden” Sticks, explaining that they are to use these tools to complete the task. Have them fill in the Tools We Used section on their reproducibles. If desired, distribute additional materials, such as tape, string, or clay.
• Make a Plan: Tell each group to discuss a plan for making the best pigpen and gate that they can. Ask them to draw or write their plan on the Push and Pull Piggies Reproducible. Circulate and check the plans as students begin the task.
• Conduct the Task: Instruct each group to use the materials and work on the aerial view of the farm side of the Work Mats to build a pigpen and a gate. Once complete, direct them to try opening and closing the gate to be sure that it is sturdy.
• Evaluate: Direct each group to fill in the What We Built section on the Push and Pull Piggies Reproducible with a drawing or photograph of their pigpen and gate. Ask them to evaluate their task by writing or telling what worked and what didn’t work in the How Did We Do? section. For young students, have them draw a simple smiley or frowny face to evaluate. Have each group compare and contrast their pigpen and gate with other groups.
• Share Ideas: Have students present their finished task to the class and talk about what worked and what they might be able to do better. Ask students to return any usable Pipe Cleaners to the Storage Box for use with other Task Cards.
Choose other Science, Technology, Engineering, and Math activities from the back of the Task Card to enhance your students’ learning. Display the students’ pigpens on the Work Mats, and save them to use with the Hay-Moving Tool to Keep Piggies Warm Task Card. Hay-Moving Tool to Keep Piggies Warm Task Card Create “paper hay” by shredding brown construction paper or paper bags, or use already shredded paper from your shredder. Have students place their pigpens (from the Pigpen and Gate activity) and Work Mats on their group table. Copy and distribute the Push and Pull Piggies Reproducible as well as the Task Card with the purple header, 3 Piggies, Pipe Cleaners, “Wooden” Sticks and a handful of “paper hay” to each group.
• Essential Question: Read the header at the top of the Task Card to create a setting before asking the essential question of What kind of tools can you make to help the farmer push or pull the hay inside the pigpen? Read the instructions on the Task Card aloud to students. Answer any questions students may have about their task.
• Available Tools: Introduce the groups to the Pipe Cleaners, “Wooden” Sticks, and “paper hay,” explaining that they are to use these tools to complete the task. Have them fill in the Tools We
© 2017 Really Good Stuff® 1-800-366-1920 www.reallygoodstuff.com Made in China #164298Helping Teachers Make A Difference®
164298_STEMtivity_ClassKit_PshPullPiggies_RGIG.indd 3-4 4/18/17 1:28 PM

STEM-tivity™ Class Kit - Push and Pull Piggies
© 2017 Really Good Stuff® 1-800-366-1920 www.reallygoodstuff.com Made in China #164298Helping Teachers Make A Difference®
Used section on their reproducibles. If desired, distribute additional materials, such as tape, string, and clay.
• Make a Plan: Tell each group to discuss a plan for making the best tools to push and pull the hay that they can. Ask them to draw or write their plan on the Push and Pull Piggies Reproducible. Circulate and check the plans as students begin the task.
• Conduct the Task: Instruct students to use the materials and work on the aerial view of the farm side of the Work Mats to display their pigpens. Urge them to try out their push and pull tools to move the “paper hay” into the pigpen.
• Evaluate: Direct each group to fill in the What We Built section on the Push and Pull Piggies Reproducible with a drawing or photograph of their hay-moving tool. Ask them to evaluate their task by writing or telling what worked and what didn’t work in the How Did We Do? section. For young students, have them draw a simple smiley or frowny face to evaluate. Have each group compare and contrast their hay-moving tool with other groups.
• Share Ideas: Have students present their finished task to the class and talk about what worked and what they could do better. Ask students to break down their creations, straighten out any useable Pipe Cleaners, and return them to the Storage Box for use with other Task Cards or extension activities.
Choose other Science, Technology, Engineering, and Math activities from the back of the Task Card to enhance your students’ learning.
Piggie Sled Task Card Copy and distribute the Push and Pull Piggies Reproducible as well as the Task Card with the orange header, 3 Piggies, 25 Pipe Cleaners, and 20 “Wooden” Sticks to each group.
• Essential Question: Read the header at the top of the Task Card to create a setting before asking the essential question of How can you help the piggies find their dinner? Read the instructions on the Task Card aloud to students. Answer any questions students may have about their task.
• Available Tools: Introduce the groups to the Pipe Cleaners and “Wooden” Sticks, explaining that they are to use these tools to complete the task. Have them fill in the Tools We Used section on their reproducibles. If desired, distribute additional materials, such as tape, string, clay, and tagboard.
• Make a Plan: Tell each group to discuss a plan for making the best sled to pull the piggies out of the barn and over to the hay. Ask them to draw or write their plan on the Push and Pull Piggies Reproducible. Circulate and check the plans as students begin the task.
• Conduct the Task: Instruct students to use the materials to create a sled that can be pulled. Tell them to prop up the barn side of the Work Mat to create a setting and to set the Piggies near the door. Urge each group to find rough and smooth surfaces in the classroom and to practice pulling their sled over each surface. Note: If necessary, bring in appropriate surfaces, such as acetate, sandpaper, and cloth ahead of class.
• Evaluate: Direct each group to fill in the What We Built section on the Push and Pull Piggies Reproducible with a drawing or photograph of their sled. Ask them to evaluate their task by writing or telling what worked and what didn’t work in the How Did We Do? section. For young students, have them draw a simple smiley or frowny face to evaluate. Have each group compare and contrast their sled with other groups.
• Share Ideas: Have students present their finished task to the class and talk about what worked and what they could do better. Ask students to break down their creations if possible, straighten out the Pipe Cleaners, and return them to the Storage Box for use with other Task Cards or extension activities.
Choose other Science, Technology, Engineering, and Math activities from the back of the Task Card to enhance your students’ learning.
STEM-tivity™ Class Kit - Push and Pull Piggies
Share the back of the Work Mat with students to give them a visual picture of Farmer Jones’s farm. Show students the Rubber Piggies, and then pass them around, so students can see them up close. Explain to students that as they complete different tasks from the Kit, they will be solving problems for Farmer Jones. Introduce new vocabulary to familiarize students with words they will encounter on the Task Cards:
• push: to move something away from you• pull: to move something toward you• measure: to find a length, width, and height• smooth: having an even surface• rough: having an uneven surface• temperature: how hot or cold something is
Pigpen and Gate Task Card Copy and distribute the Push and Pull Piggies Reproducible as well as the Task Card with the blue header, a Work Mat, 3 Piggies, 25 Pipe Cleaners, and 20 “Wooden” Sticks to each group.
• Essential Question: Read the header at the top of the Task Card to create a setting before asking the essential question of What kind of push or pull gate can you create to keep the piggies inside their pigpen? Read the instructions on the Task Card aloud. Answer any questions students may have about their task.
• Available Tools: Introduce the groups to the Pipe Cleaners and “Wooden” Sticks, explaining that they are to use these tools to complete the task. Have them fill in the Tools We Used section on their reproducibles. If desired, distribute additional materials, such as tape, string, or clay.
• Make a Plan: Tell each group to discuss a plan for making the best pigpen and gate that they can. Ask them to draw or write their plan on the Push and Pull Piggies Reproducible. Circulate and check the plans as students begin the task.
• Conduct the Task: Instruct each group to use the materials and work on the aerial view of the farm side of the Work Mats to build a pigpen and a gate. Once complete, direct them to try opening and closing the gate to be sure that it is sturdy.
• Evaluate: Direct each group to fill in the What We Built section on the Push and Pull Piggies Reproducible with a drawing or photograph of their pigpen and gate. Ask them to evaluate their task by writing or telling what worked and what didn’t work in the How Did We Do? section. For young students, have them draw a simple smiley or frowny face to evaluate. Have each group compare and contrast their pigpen and gate with other groups.
• Share Ideas: Have students present their finished task to the class and talk about what worked and what they might be able to do better. Ask students to return any usable Pipe Cleaners to the Storage Box for use with other Task Cards.
Choose other Science, Technology, Engineering, and Math activities from the back of the Task Card to enhance your students’ learning. Display the students’ pigpens on the Work Mats, and save them to use with the Hay-Moving Tool to Keep Piggies Warm Task Card. Hay-Moving Tool to Keep Piggies Warm Task Card Create “paper hay” by shredding brown construction paper or paper bags, or use already shredded paper from your shredder. Have students place their pigpens (from the Pigpen and Gate activity) and Work Mats on their group table. Copy and distribute the Push and Pull Piggies Reproducible as well as the Task Card with the purple header, 3 Piggies, Pipe Cleaners, “Wooden” Sticks and a handful of “paper hay” to each group.
• Essential Question: Read the header at the top of the Task Card to create a setting before asking the essential question of What kind of tools can you make to help the farmer push or pull the hay inside the pigpen? Read the instructions on the Task Card aloud to students. Answer any questions students may have about their task.
• Available Tools: Introduce the groups to the Pipe Cleaners, “Wooden” Sticks, and “paper hay,” explaining that they are to use these tools to complete the task. Have them fill in the Tools We
© 2017 Really Good Stuff® 1-800-366-1920 www.reallygoodstuff.com Made in China #164298Helping Teachers Make A Difference®
164298_STEMtivity_ClassKit_PshPullPiggies_RGIG.indd 3-4 4/18/17 1:28 PM
© 2017 Really Good Stuff® 1-800-366-1920 www.reallygoodstuff.com Made in China #164298Helping Teachers Make A Difference® © 2017 Really Good Stuff® 1-800-366-1920 www.reallygoodstuff.com Made in China #164298
All instructional guides can be found online.
Helping Teachers Make A Difference®
This Really Good Stuff ® product includes:• 12 Rubber Piggies• 100 Colored Pipe Cleaners • 80 “Wooden” Sticks • 4 Work Mats • 12 Task Cards (4 each of three different tasks)• Storage Box • This Really Good Stuff® Instructional Guide
Congratulations on your purchase of this Really Good Stuff® STEM-tivity™ Class Kit - Push and Pull Piggies—a hands-on kit utilizing the inquiry method to heighten your students’ imaginations and engineering skills with engaging activities about push and pull concepts.
Meeting the StandardsThe Really Good Stuff® STEM-tivity™ Class Kit - Push and Pull Piggies aligns with the Next Generation Science Standards below. For alignment with other state standards, please refer to our website’s Standards Match.
K-PS2 Motion and Stability: Forces and interactionsStudents who demonstrate understanding can:K-PS2-1 Plan and conduct an investigation to compare the effects of different strengths or different directions of pushes and pulls on the motion of an object.
K-2-ETS1 Engineering DesignStudents who demonstrate understanding can:K-2-ETS1-1 Ask questions, make observations, and gather information about a situation people want to change to define a simple problem that can be solved through the development of a new or improved object or tool.K-2-ETS1-2 Develop a simple sketch, drawing, or physical model to illustrate how the shape of an object helps it function as needed to solve a given problem.K-2-ETS1-3 Analyze data from tests of two objects designed to solve the same problem to compare the strengths and weaknesses of how each performs.
Displaying and Preparing the STEM-tivity™ Class Kit - Push and Pull PiggiesBefore displaying the STEM-tivity™ Class Kit - Push and Pull Piggies, make copies of this Really Good Stuff® Instructional Guide, and file the pages for future use. Or, download another copy of it from our website at www.reallygoodstuff.com.
This kit includes enough materials to divide your class into four working groups of up to four students each. The groups can work on the same Task Card at the same time, allowing them to compare and contrast their designs and models. Or, the groups can work on different Task Cards and then present their designs to the class. Divide the materials accordingly.
Each Task Card features a main activity on the front and extended activities on the back for each STEM component. Depending on your students’ level, you may need to lead the activities due to text complexity and task difficulty. In addition to the text on the back of each Task Card, the text on the front of the Card is color-coded to identify steps in the task as Science-based (blue), Math-based (red), or Engineering-based (green). Store all of the materials in the Storage Box once activities are completed.
Introducing the STEM-tivity™ Class Kit - Push and Pull PiggiesGather students together and review the basics of push and pull: push means “to move something away from you,” and pull means “to move something toward you.” Present the following scenario as background for why students will be working with the STEM-tivity™ Class Kit - Push and Pull Piggies.
Farmer Jones lives on a farm with lots of animals. Lately, his pet piggies are getting into all kinds of trouble, so he needs your help. Use what you know about pushing and pulling to solve Farmer Jones’s piggy problems.
STEM-tivity™ Class Kit - Push and Pull PiggiesPu
sh a
nd P
ull P
iggi
es R
epro
duci
ble
164298_STEMtivity_ClassKit_PshPullPiggies_RGIG.indd 1-2 4/18/17 1:28 PM

© 2017 Really Good Stuff® 1-800-366-1920 www.reallygoodstuff.com Made in China #164327Helping Teachers Make A Difference® © 2017 Really Good Stuff® 1-800-366-1920 www.reallygoodstuff.com Made in China #164327
All instructional guides can be found online.
Helping Teachers Make A Difference®
This Really Good Stuff® product includes:• 12 Rubber Penguins• 100 Colored Pipe Cleaners • 15 Foil-Paper Sheets • 4 Work Mats • 12 Task Cards (4 each of 3 different tasks) • Storage Box • This Really Good Stuff® Instructional Guide
Congratulations on your purchase of this Really Good Stuff® STEM-tivity™ Class Kit - Penguin Cool-Down—a hands-on activity kit utilizing the inquiry method to heighten your students’ imaginations and engineering skills with engaging activities about the warming effect of sunlight on Earth’s surface.
Meeting the StandardsThe Really Good Stuff® STEM-tivity™ Class Kit - Penguin Cool-Down aligns with the Next Generation Science Standards below. For alignment with other state standards, please refer to our website’s Standards Match.
K-PS3 EnergyStudents who demonstrate understanding can:K-PS3-1 Make observations to determine the effect of sunlight on Earth’s surface. K-PS3-2 Use tools and materials to design and build a structure that will reduce the warming effect of sunlight on an area.
K-2-ETS1 Engineering DesignStudents who demonstrate understanding can:K-2-ETS1-1 Ask questions, make observations, and gather information about a situation people want to change to define a simple problem that can be solved through the development of a new or improved object or tool.K-2-ETS1-2 Develop a simple sketch, drawing, or physical model to illustrate how the shape of an object helps it function as needed to solve a given problem.K-2-ETS1-3 Analyze data from tests of two objects designed to solve the same problem to compare the strengths and weaknesses of how each performs.
Displaying and Preparing the STEM-tivity™ Class Kit - Penguin Cool-DownBefore displaying the STEM-tivity™ Class Kit - Penguin Cool-Down, make copies of this Really Good Stuff® Instructional Guide, and file the pages for future use. Or, download another copy of it from our website at www.reallygoodstuff.com.
This kit includes enough materials to divide your class into four working groups of up to four students each. The groups can work on the same Task Card at the same time, allowing them to compare and contrast their designs and models. Or, the groups can work on different Task Cards and then present their designs to the class. Divide the materials accordingly.
Each Task Card features a main activity on the front and extended activities on the back for each STEM component. Depending on your students’ level, you may need to lead the activities due to text complexity and task difficulty. In addition to the text on the back of each Task Card, the text on the front of the Card is color-coded to identify steps in the task as Science-based (blue), Math-based (red), or Engineering-based (green). Store all of the materials in the Storage Box when activities are completed.
Introducing the STEM-tivity™ Class Kit - Penguin Cool-DownGather students together and review the basics of the warming effect of sunlight on Earth. Present the following scenario as background for why students will be working with the STEM-tivity™ Class Kit - Penguin Cool-Down.
Scientists have discovered that temperatures on Earth are rising. They call it global warming. The penguins at the South Pole are very sensitive to temperature change. We need to help them stay cool.
Show students the Penguins, and then pass them around, so students can see them up close. Explain to students that as they complete different tasks from the Kit, they will be solving problems for the Penguins. Introduce new vocabulary to familiarize students with words they will encounter on the Task Cards:
STEM-tivity™ Class Kit - Penguin Cool-Down
Peng
uin
Cool
-Dow
n Re
prod
ucib
le
164327_STEMtivity_ClassKit_PengCoolDwn_RGIG.indd 1-2 4/18/17 10:53 AM
STEM-tivity™ Class Kit - Penguin Cool-Down
© 2017 Really Good Stuff® 1-800-366-1920 www.reallygoodstuff.com Made in China #164327Helping Teachers Make A Difference®
We Designed section on the Penguin Cool-Down Reproducible with a drawing or photograph of the Penguins under the umbrella. Ask them to evaluate their task by writing or telling what worked and what didn’t work in the How Did We Do? section. For young students, have them draw a simple smiley or frowny face to evaluate. Have each group compare and contrast their umbrella with other groups.
• Share Ideas: Have students present their finished task to the class and talk about what worked and what they might be able to do better. Ask students to return any usable Pipe Cleaners to the Storage Box for use with other Task Cards.
Choose other Science, Technology, Engineering, and Math activities from the back of the Task Card to enhance your students’ learning.
Individual Umbrellas Task Card Copy and distribute the Penguins Cool-Down Reproducible as well as the Task Card with the blue header, 1 Penguin, 5 Pipe Cleaners, a Work Mat, 1 Foil-Paper Sheet, and scissors to each group.
• Essential Question: Read the header at the top of the Task Card to create a setting before asking the essential question of What kind of umbrella can you make for a penguin that might have trouble holding one? Read the instructions on the Task Card aloud to students. Answer any questions students may have about their task.
• Available Tools: Introduce the groups to the Pipe Cleaners, the Foil-Paper Sheet, and the scissors, explaining that they are to use these tools to complete the task. Have them fill in the Tools We Used section on their reproducibles. If desired, distribute additional materials, such as tape, poster putty, and glue sticks.
• Make a Plan: Tell each group to discuss a plan for making the best umbrella for a single penguin to “hold.” Ask them to draw or write their plan on the Penguin Cool-Down Reproducible. Circulate and check the plans as students begin the task.
• Conduct the Task: Instruct students to use the materials to create an umbrella for a single penguin. Have them use the aerial view of the penguin habitat side of the Work Mat to place their penguin
with its umbrella. Shine a light source on the completed activity to show the protected area.
• Evaluate: Direct each group to fill in the What We Designed section on the Penguin Cool-Down Reproducible with a drawing or photograph of their penguin with an umbrella. Ask them to evaluate their task by writing or telling what worked and what didn’t work in the How Did We Do? section. For young students, have them draw a simple smiley or frowny face to evaluate. Have each group compare and contrast their umbrella with other groups.
• Share Ideas: Have students present their finished task to the class and talk about what worked and what they might be able to do better. Ask students to break down their creations if possible, straighten out the Pipe Cleaners, and return them to the Storage Box for use with other Task Cards or extension activities.
Choose other Science, Technology, Engineering, and Math activities from the back of the Task Card to enhance your students’ learning.
STEM-tivity™ Class Kit - Penguin Cool-Down
• measure: to find a length, width, and height• protect: to keep safe• rays: light and energy from the sun• shelter: something that covers to keep people,
animals, or things safe• temperature: how hot or cold something is• thermometer: a tool to measure how hot or cold
something is
Penguin Shelter Task Card Copy and distribute the Penguins Cool-Down Reproducible as well as the Task Card with the purple header, a Work Mat, 3 Penguins, several Pipe Cleaners, 1 or 2 Foil-Paper Sheets, and scissors to each group.
• Essential Question: Read the header at the top of the Task Card to create a setting before asking the essential question of What kind of shelter can you create to keep the penguins out of the warming rays of the sun? Read the instructions on the Task Card aloud to students. Answer any questions students may have about their task.
• Available Tools: Introduce the groups to the Pipe Cleaners, Foil-Paper Sheets, and scissors, explaining that they are to use these tools to complete the task. Have them fill in the Tools We Used section on their reproducibles. If desired, distribute additional materials, such as tape, poster putty, and glue sticks.
• Make a Plan: Tell each group to discuss a plan for making the best shelter that they can. Ask them to draw or write their plan on the Penguin Cool-Down Reproducible. Circulate and check the plans as students begin the task.
• Conduct the Task: Instruct each group to use the materials and work on the aerial view of the penguin habitat side of the Work Mats to build a shelter.
• Evaluate: Direct each group to fill in the What We Designed section on the Penguin Cool-Down Reproducible with a drawing or photograph of their shelter and Penguins. Ask them to evaluate their task by writing or telling what worked and what didn’t work in the How Did We Do? section. For young students, have them draw a simple smiley or frowny face to evaluate. Have each group compare and contrast their shelter with other groups.
• Share Ideas: Have students present their finished task to the class and talk about what worked and what they might be able to do better.
Extension: Encourage students to design a second shelter that they might see in a zoo. Have students use the zoo side of the Work Mat as a back drop for digital photos or videos.
Choose other Science, Technology, Engineering, and Math activities from the back of the Task Card to enhance your students’ learning. Display the students’ shelters on the Work Mats for everyone to view.
Single-File Penguins Task Card Copy and distribute the Penguins Cool-Down Reproducible as well as the Task Card with the orange header, 3 Penguins, a Work Mat, several Pipe Cleaners, 1 or 2 Foil-Paper Sheets, and scissors to each group. • Essential Question: Read the header at the top
of the Task Card to create a setting before asking the essential question of What kind of umbrella can you make for three penguins walking in single file? Read the instructions on the Task Card aloud to students. Answer any questions students may have about their task.
• Available Tools: Introduce the groups to the Pipe Cleaners, Foil-Paper Sheets, and scissors, explaining that they are to use these tools to complete the task. Have them fill in the Tools We Used section on their reproducibles with drawings or words. If desired, distribute additional materials, such as tape, poster putty, and glue sticks.
• Make a Plan: Tell each group to discuss a plan for making the best umbrella that they can. Ask them to draw or write their plan on the Penguins Cool-Down Reproducible. Circulate and check the plans as students begin the task.
• Conduct the Task: Instruct students to use the materials and work on the aerial view of the penguin habitat side of the Work Mats to display their Penguins under the umbrella. Afterward, shine a light source on their completed Work Mat to show the protected area.
• Evaluate: Direct each group to fill in the What
© 2017 Really Good Stuff® 1-800-366-1920 www.reallygoodstuff.com Made in China #164327Helping Teachers Make A Difference®
164327_STEMtivity_ClassKit_PengCoolDwn_RGIG.indd 3-4 4/18/17 10:53 AM
STEM-tivity™ Class Kit - Penguin Cool-Down
© 2017 Really Good Stuff® 1-800-366-1920 www.reallygoodstuff.com Made in China #164327Helping Teachers Make A Difference®
We Designed section on the Penguin Cool-Down Reproducible with a drawing or photograph of the Penguins under the umbrella. Ask them to evaluate their task by writing or telling what worked and what didn’t work in the How Did We Do? section. For young students, have them draw a simple smiley or frowny face to evaluate. Have each group compare and contrast their umbrella with other groups.
• Share Ideas: Have students present their finished task to the class and talk about what worked and what they might be able to do better. Ask students to return any usable Pipe Cleaners to the Storage Box for use with other Task Cards.
Choose other Science, Technology, Engineering, and Math activities from the back of the Task Card to enhance your students’ learning.
Individual Umbrellas Task Card Copy and distribute the Penguins Cool-Down Reproducible as well as the Task Card with the blue header, 1 Penguin, 5 Pipe Cleaners, a Work Mat, 1 Foil-Paper Sheet, and scissors to each group.
• Essential Question: Read the header at the top of the Task Card to create a setting before asking the essential question of What kind of umbrella can you make for a penguin that might have trouble holding one? Read the instructions on the Task Card aloud to students. Answer any questions students may have about their task.
• Available Tools: Introduce the groups to the Pipe Cleaners, the Foil-Paper Sheet, and the scissors, explaining that they are to use these tools to complete the task. Have them fill in the Tools We Used section on their reproducibles. If desired, distribute additional materials, such as tape, poster putty, and glue sticks.
• Make a Plan: Tell each group to discuss a plan for making the best umbrella for a single penguin to “hold.” Ask them to draw or write their plan on the Penguin Cool-Down Reproducible. Circulate and check the plans as students begin the task.
• Conduct the Task: Instruct students to use the materials to create an umbrella for a single penguin. Have them use the aerial view of the penguin habitat side of the Work Mat to place their penguin
with its umbrella. Shine a light source on the completed activity to show the protected area.
• Evaluate: Direct each group to fill in the What We Designed section on the Penguin Cool-Down Reproducible with a drawing or photograph of their penguin with an umbrella. Ask them to evaluate their task by writing or telling what worked and what didn’t work in the How Did We Do? section. For young students, have them draw a simple smiley or frowny face to evaluate. Have each group compare and contrast their umbrella with other groups.
• Share Ideas: Have students present their finished task to the class and talk about what worked and what they might be able to do better. Ask students to break down their creations if possible, straighten out the Pipe Cleaners, and return them to the Storage Box for use with other Task Cards or extension activities.
Choose other Science, Technology, Engineering, and Math activities from the back of the Task Card to enhance your students’ learning.
STEM-tivity™ Class Kit - Penguin Cool-Down
• measure: to find a length, width, and height• protect: to keep safe• rays: light and energy from the sun• shelter: something that covers to keep people,
animals, or things safe• temperature: how hot or cold something is• thermometer: a tool to measure how hot or cold
something is
Penguin Shelter Task Card Copy and distribute the Penguins Cool-Down Reproducible as well as the Task Card with the purple header, a Work Mat, 3 Penguins, several Pipe Cleaners, 1 or 2 Foil-Paper Sheets, and scissors to each group.
• Essential Question: Read the header at the top of the Task Card to create a setting before asking the essential question of What kind of shelter can you create to keep the penguins out of the warming rays of the sun? Read the instructions on the Task Card aloud to students. Answer any questions students may have about their task.
• Available Tools: Introduce the groups to the Pipe Cleaners, Foil-Paper Sheets, and scissors, explaining that they are to use these tools to complete the task. Have them fill in the Tools We Used section on their reproducibles. If desired, distribute additional materials, such as tape, poster putty, and glue sticks.
• Make a Plan: Tell each group to discuss a plan for making the best shelter that they can. Ask them to draw or write their plan on the Penguin Cool-Down Reproducible. Circulate and check the plans as students begin the task.
• Conduct the Task: Instruct each group to use the materials and work on the aerial view of the penguin habitat side of the Work Mats to build a shelter.
• Evaluate: Direct each group to fill in the What We Designed section on the Penguin Cool-Down Reproducible with a drawing or photograph of their shelter and Penguins. Ask them to evaluate their task by writing or telling what worked and what didn’t work in the How Did We Do? section. For young students, have them draw a simple smiley or frowny face to evaluate. Have each group compare and contrast their shelter with other groups.
• Share Ideas: Have students present their finished task to the class and talk about what worked and what they might be able to do better.
Extension: Encourage students to design a second shelter that they might see in a zoo. Have students use the zoo side of the Work Mat as a back drop for digital photos or videos.
Choose other Science, Technology, Engineering, and Math activities from the back of the Task Card to enhance your students’ learning. Display the students’ shelters on the Work Mats for everyone to view.
Single-File Penguins Task Card Copy and distribute the Penguins Cool-Down Reproducible as well as the Task Card with the orange header, 3 Penguins, a Work Mat, several Pipe Cleaners, 1 or 2 Foil-Paper Sheets, and scissors to each group. • Essential Question: Read the header at the top
of the Task Card to create a setting before asking the essential question of What kind of umbrella can you make for three penguins walking in single file? Read the instructions on the Task Card aloud to students. Answer any questions students may have about their task.
• Available Tools: Introduce the groups to the Pipe Cleaners, Foil-Paper Sheets, and scissors, explaining that they are to use these tools to complete the task. Have them fill in the Tools We Used section on their reproducibles with drawings or words. If desired, distribute additional materials, such as tape, poster putty, and glue sticks.
• Make a Plan: Tell each group to discuss a plan for making the best umbrella that they can. Ask them to draw or write their plan on the Penguins Cool-Down Reproducible. Circulate and check the plans as students begin the task.
• Conduct the Task: Instruct students to use the materials and work on the aerial view of the penguin habitat side of the Work Mats to display their Penguins under the umbrella. Afterward, shine a light source on their completed Work Mat to show the protected area.
• Evaluate: Direct each group to fill in the What
© 2017 Really Good Stuff® 1-800-366-1920 www.reallygoodstuff.com Made in China #164327Helping Teachers Make A Difference®
164327_STEMtivity_ClassKit_PengCoolDwn_RGIG.indd 3-4 4/18/17 10:53 AM

© 2017 Really Good Stuff® 1-800-366-1920 www.reallygoodstuff.com Made in China #164327Helping Teachers Make A Difference® © 2017 Really Good Stuff® 1-800-366-1920 www.reallygoodstuff.com Made in China #164327
All instructional guides can be found online.
Helping Teachers Make A Difference®
This Really Good Stuff® product includes:• 12 Rubber Penguins• 100 Colored Pipe Cleaners • 15 Foil-Paper Sheets • 4 Work Mats • 12 Task Cards (4 each of 3 different tasks) • Storage Box • This Really Good Stuff® Instructional Guide
Congratulations on your purchase of this Really Good Stuff® STEM-tivity™ Class Kit - Penguin Cool-Down—a hands-on activity kit utilizing the inquiry method to heighten your students’ imaginations and engineering skills with engaging activities about the warming effect of sunlight on Earth’s surface.
Meeting the StandardsThe Really Good Stuff® STEM-tivity™ Class Kit - Penguin Cool-Down aligns with the Next Generation Science Standards below. For alignment with other state standards, please refer to our website’s Standards Match.
K-PS3 EnergyStudents who demonstrate understanding can:K-PS3-1 Make observations to determine the effect of sunlight on Earth’s surface. K-PS3-2 Use tools and materials to design and build a structure that will reduce the warming effect of sunlight on an area.
K-2-ETS1 Engineering DesignStudents who demonstrate understanding can:K-2-ETS1-1 Ask questions, make observations, and gather information about a situation people want to change to define a simple problem that can be solved through the development of a new or improved object or tool.K-2-ETS1-2 Develop a simple sketch, drawing, or physical model to illustrate how the shape of an object helps it function as needed to solve a given problem.K-2-ETS1-3 Analyze data from tests of two objects designed to solve the same problem to compare the strengths and weaknesses of how each performs.
Displaying and Preparing the STEM-tivity™ Class Kit - Penguin Cool-DownBefore displaying the STEM-tivity™ Class Kit - Penguin Cool-Down, make copies of this Really Good Stuff® Instructional Guide, and file the pages for future use. Or, download another copy of it from our website at www.reallygoodstuff.com.
This kit includes enough materials to divide your class into four working groups of up to four students each. The groups can work on the same Task Card at the same time, allowing them to compare and contrast their designs and models. Or, the groups can work on different Task Cards and then present their designs to the class. Divide the materials accordingly.
Each Task Card features a main activity on the front and extended activities on the back for each STEM component. Depending on your students’ level, you may need to lead the activities due to text complexity and task difficulty. In addition to the text on the back of each Task Card, the text on the front of the Card is color-coded to identify steps in the task as Science-based (blue), Math-based (red), or Engineering-based (green). Store all of the materials in the Storage Box when activities are completed.
Introducing the STEM-tivity™ Class Kit - Penguin Cool-DownGather students together and review the basics of the warming effect of sunlight on Earth. Present the following scenario as background for why students will be working with the STEM-tivity™ Class Kit - Penguin Cool-Down.
Scientists have discovered that temperatures on Earth are rising. They call it global warming. The penguins at the South Pole are very sensitive to temperature change. We need to help them stay cool.
Show students the Penguins, and then pass them around, so students can see them up close. Explain to students that as they complete different tasks from the Kit, they will be solving problems for the Penguins. Introduce new vocabulary to familiarize students with words they will encounter on the Task Cards:
STEM-tivity™ Class Kit - Penguin Cool-Down
Peng
uin
Cool
-Dow
n Re
prod
ucib
le
164327_STEMtivity_ClassKit_PengCoolDwn_RGIG.indd 1-2 4/18/17 10:53 AM

© 2017 Really Good Stuff® 1-800-366-1920 www.reallygoodstuff.com Made in China #164331Helping Teachers Make A Difference® © 2017 Really Good Stuff® 1-800-366-1920 www.reallygoodstuff.com Made in China #164331
All instructional guides can be found online.
Helping Teachers Make A Difference®
This Really Good Stuff® product includes:• 250+ Rubber Bands, assorted• 100 Milkshake Straws• 4 Harp/Banjo Cards• 4 Work Mats • 12 Task Cards (4 each of 3 different tasks) • Storage Box • This Really Good Stuff® Instructional Guide
Congratulations on your purchase of this Really Good Stuff® STEM-tivity™ Class Kit - Silly Sounds—a hands-on activity kit utilizing the inquiry method to heighten your students’ imaginations and engineering skills with engaging activities about sound.
Meeting the StandardsThe Really Good Stuff® STEM-tivity™ Class Kit - Silly Sounds aligns with the Next Generation Science Standards for Science below. For alignment with other state standards, please refer to our website’s Standards Match.
1-PS4 Waves and their Applications in Technologies for Information TransferStudents who demonstrate understanding can:1-PS4-1 Plan and conduct investigations to provide evidence that vibrating materials can make sound and that sound can make materials vibrate. 1-PS4-4 Use tools and materials to design and build a device that uses light or sound to solve the problem of communicating over a distance.
K-2-ETS1 Engineering DesignStudents who demonstrate understanding can:K-2-ETS1-1 Ask questions, make observations, and gather information about a situation people want to change to define a simple problem that can be solved through the development of a new or improved object or tool.K-2-ETS1-2 Develop a simple sketch, drawing, or physical model to illustrate how the shape of an object helps it function as needed to solve a given problem.K-2-ETS1-3 Analyze data from tests of two objects designed to solve the same problem to compare the strengths and weaknesses of how each performs.
Displaying and Preparing the STEM-tivity™ Class Kit - Silly SoundsBefore displaying the STEM-tivity™ Class Kit - Silly Sounds, make copies of this Really Good Stuff® Instructional Guide, and file the pages for future use. Or, download another copy of it from our website at www.reallygoodstuff.com.
This kit includes enough materials to divide your class into four working groups of up to four students each. The groups can work on the same Task Card at the same time allowing them to compare and contrast their designs and models. Or, the groups can work on different Task Cards and then present their designs to the class. Divide the materials accordingly.
Each Task Card features a main activity on the front and extended activities on the back for each STEM component. Depending on your students’ level, you may need to lead the activities due to text complexity and task difficulty. In addition to the text on the back of each Task Card, the text on the front of the Card is color-coded to identify steps in the task as Science based (blue), Math based (red), or Engineering based (green). Store all of the materials in the Storage Box when activities are completed.
Introducing the STEM-tivity™ Class Kit - Silly SoundsGather students together and review the basics of how vibrations make sound. Present the following scenario as background for why students will be working with the STEM-tivity™ Class Kit - Silly Sounds.
Miss Melody is a music teacher at an elementary school, and she helps with the school band. She wants to make the band the best it can be and add more instruments to make new sounds.
Explain to students that as they complete different tasks from the Kit, they will be working with vibrations to help Miss Melody solve her problems. Introduce new vocabulary to familiarize students with words they will encounter on the Task Cards:
STEM-tivity™ Class Kit - Silly Sounds
Silly
Sou
nds
Repr
oduc
ible
164331_STEMtivity_ClassKit_SillySounds_RGIG.indd 1-2 4/18/17 10:51 AM
STEM-tivity™ Class Kit - Silly Sounds
© 2017 Really Good Stuff® 1-800-366-1920 www.reallygoodstuff.com Made in China #164331Helping Teachers Make A Difference®
• Conduct the Task: Instruct students to use the materials and have each student create his or her own panpipe from the Straws. Have students return the unused Straw pieces to the Storage Box for activities on another Task Card. Instruct each student to use the permanent marker to write his or her name on the panpipe. Encourage them to test their panpipes by blowing into the Straws to create sounds and then discuss what they hear with other group members.
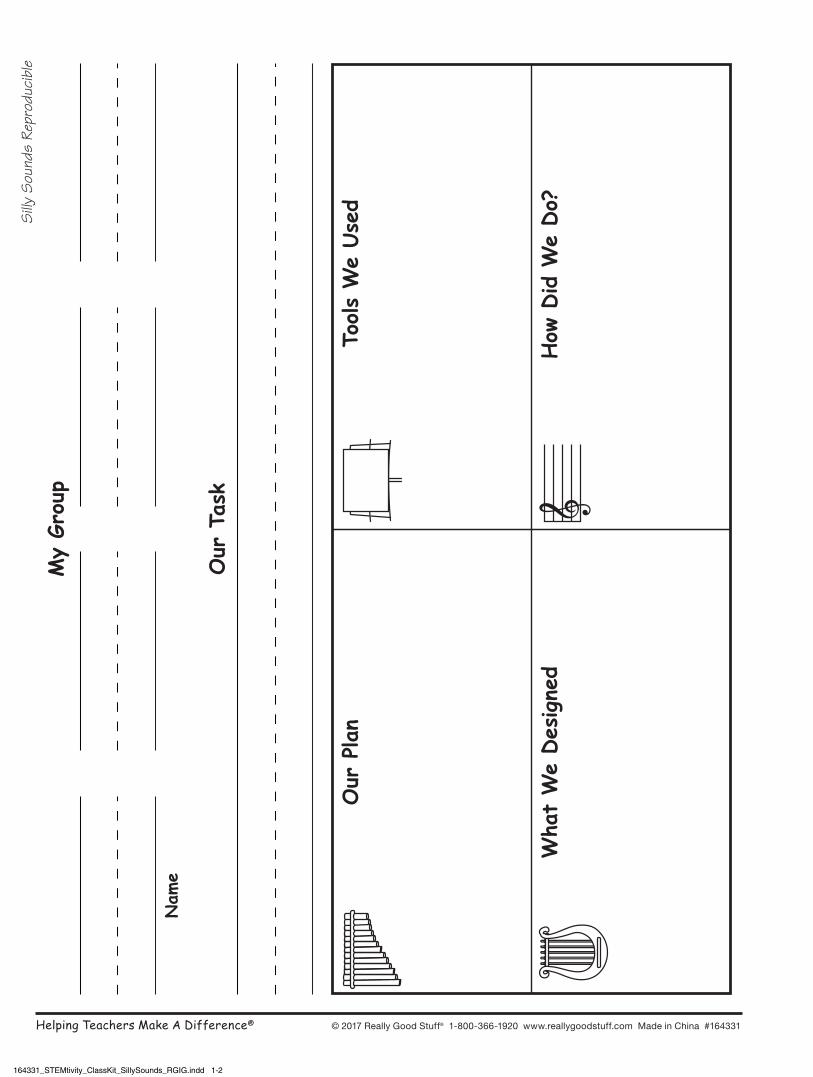
• Evaluate: Direct each student to fill in the What We Designed section on the Silly Sounds Reproducible with a drawing or photograph of his or her panpipe. Ask students to evaluate their task by writing or telling what worked and what didn’t work in the How Did We Do? section. For young students, have them draw a simple smiley or frowny face to evaluate. Have students compare and contrast their panpipes with one another.
• Share Ideas: Have students present their finished panpipe to the class and talk about what worked and what they might be able to do better.
Extension: Encourage students to have a panpipe parade to show off their work and then take their panpipes home to share with their families.
Choose from the extension activities on the back ofthe Task Card to enhance the task with additionalactivities featuring Science, Technology, Engineering,and Math.
Start a Song Task Card Copy and distribute the Silly Sounds Reproducible as well as the Task Card with the blue header, assorted Rubber Bands, assorted-sized Straws, and scissors. Provide additional materials, such as flex straws, small boxes, oatmeal boxes, water bottles, or cardboard for creating sounds with vibration.• Essential Question: Read the header at the top of
the Task Card to create a setting before asking the essential question of What kind of sound-making device can you create to let everyone know it’s time to start a song? Read the instructions on the Task Card aloud to students. Answer any questions students may have about their task.
• Available Tools: Introduce the groups to the Rubber Bands, Straw pieces, and other collected materials, explaining that they are to use these tools to complete the task. Have them fill in the Tools We Used section on their reproducibles. If desired, distribute additional materials, such as tape, poster putty, and glue sticks.
• Make a Plan: Tell each group to discuss a plan for creating a sound-making device for Miss Melody. Ask them to draw or write their plan on the Silly Sounds Reproducible. Circulate and check the plans as students begin the task.
• Conduct the Task: Instruct students to use the materials to create a sound-making device for Miss Melody. Have them take digital photographs of their designs and make two copies.
• Evaluate: Direct each group to fill in the What We Designed section on the Silly Sounds Reproducible with one copy of their digital photograph, and have them provide a caption to identify it. Ask them to evaluate their task by writing or telling what worked and what didn’t work in the How Did We Do? section. For young students, have them draw a simple smiley or frowny face to evaluate. Have each group compare and contrast their sound-making device with other groups.
• Share Ideas: Have students present their finished task to the class and talk about what worked and what they might be able to do better. Make a color copy of the back of the Work Mat to use as a book cover. Have students share their ideas for a title of the booklet, and then write it on the musical staff. Compile the groups’ second digital photograph copies (from the Conduct the Task step above) into a booklet to place in your Science Center.
Choose from the extension activities on the back of the Task Card to enhance the task with additional activities featuring Science, Technology, Engineering, and Math.
STEM-tivity™ Class Kit - Silly Sounds
• vibrate: to move back and forth or from side to side rapidly to produce sound
• sounds: vibrations that travel through the air and can be heard when they reach the ears
• pluck: to create sound by pulling strings of a stringed musical instrument
• device: a piece of equipment to serve a special purpose
• signal: an act, event, or word that starts an action• fret: a ridge that is fixed across the fingerboard of
a stringed musical instrument• fingerboard: the part of a stringed instrument that
the fingers press against to change the pitch
String a Harp Task Card Copy and distribute the Silly Sounds Reproducible as well as the Task Card with the green header, a Work Mat, a Harp/Banjo Card, several Rubber Bands (excluding the small white and tan rubber bands), a Straw, and scissors to each group. • Essential Question: Read the header at the top
of the Task Card to create a setting before asking the essential question of What kind of instrument can you create to make new musical sounds for the band? Read the instructions on the Task Card aloud to students. Answer any questions students may have about their task.
• Available Tools: Introduce the groups to the Rubber Bands, Harp/Banjo Card, Straw, and scissors, explaining that they are to use these tools to complete the task. Have them fill in the Tools We Used section on their reproducibles. If desired, distribute additional materials, such as tape, poster putty, and glue sticks.
• Make a Plan: Tell each group to discuss a plan for making their harp. Ask them to draw or write their plan on the Silly Sounds Reproducible. Circulate and check the plans as students begin the task.
• Conduct the Task: Instruct each group to use the materials to build the most interesting musical harp that they can. Encourage them to test the “strings” and arrange them in the order they find most pleasing.
• Evaluate: Direct each group to fill in the What We Designed section on the Silly Sounds Reproducible
with a drawing or photograph of their harp. Ask them to evaluate their task by writing or telling what worked and what didn’t work in the How Did We Do? section. For young students, have them draw a simple smiley or frowny face to evaluate. Have each group compare and contrast their harp with other groups.
• Share Ideas: Have students present their finished task to the class and talk about what worked and what they might be able to do better.
Extension: Encourage each group to create their own simple tune by placing dry-erase colored notes, the same colors as their harp “strings,” on the music-staff side of the Work Mat. Have the groups share their tunes.
Choose from the Science, Technology, Engineering, and Math activities on the back of the Task Card to enhance your students learning.
Panpipe Parade Task Card Copy and distribute the Silly Sounds Reproducible as well as the Task Card with the pink header, 20 Straws (5 for each student), a permanent marker, scissors (to cut the straws to varying lengths), and tape to each group. • Essential Question: Read the header at the top
of the Task Card to create a setting before asking the essential question of What kind of instrument can you make that vibrates and makes sound when you blow into it? Read the instructions on the Task Card aloud to students. Answer any questions students may have about their task.
• Available Tools: Introduce students within groups to the Straws, scissors, and tape, explaining that they are to use these tools to complete the task. Discuss how they will need to use the Ruler on the Work Mat as well. Have them fill in the Tools We Used section on their reproducibles.
• Make a Plan: Tell each student to discuss a plan for making his or her panpipe. Ask each student to draw or write his or her plan on the Silly Sounds Reproducible. Circulate and check the plans as students begin the task.
© 2017 Really Good Stuff® 1-800-366-1920 www.reallygoodstuff.com Made in China #164331Helping Teachers Make A Difference®
164331_STEMtivity_ClassKit_SillySounds_RGIG.indd 3-4 4/18/17 10:51 AM
STEM-tivity™ Class Kit - Silly Sounds
© 2017 Really Good Stuff® 1-800-366-1920 www.reallygoodstuff.com Made in China #164331Helping Teachers Make A Difference®
• Conduct the Task: Instruct students to use the materials and have each student create his or her own panpipe from the Straws. Have students return the unused Straw pieces to the Storage Box for activities on another Task Card. Instruct each student to use the permanent marker to write his or her name on the panpipe. Encourage them to test their panpipes by blowing into the Straws to create sounds and then discuss what they hear with other group members.
• Evaluate: Direct each student to fill in the What We Designed section on the Silly Sounds Reproducible with a drawing or photograph of his or her panpipe. Ask students to evaluate their task by writing or telling what worked and what didn’t work in the How Did We Do? section. For young students, have them draw a simple smiley or frowny face to evaluate. Have students compare and contrast their panpipes with one another.
• Share Ideas: Have students present their finished panpipe to the class and talk about what worked and what they might be able to do better.
Extension: Encourage students to have a panpipe parade to show off their work and then take their panpipes home to share with their families.
Choose from the extension activities on the back ofthe Task Card to enhance the task with additionalactivities featuring Science, Technology, Engineering,and Math.
Start a Song Task Card Copy and distribute the Silly Sounds Reproducible as well as the Task Card with the blue header, assorted Rubber Bands, assorted-sized Straws, and scissors. Provide additional materials, such as flex straws, small boxes, oatmeal boxes, water bottles, or cardboard for creating sounds with vibration.• Essential Question: Read the header at the top of
the Task Card to create a setting before asking the essential question of What kind of sound-making device can you create to let everyone know it’s time to start a song? Read the instructions on the Task Card aloud to students. Answer any questions students may have about their task.
• Available Tools: Introduce the groups to the Rubber Bands, Straw pieces, and other collected materials, explaining that they are to use these tools to complete the task. Have them fill in the Tools We Used section on their reproducibles. If desired, distribute additional materials, such as tape, poster putty, and glue sticks.
• Make a Plan: Tell each group to discuss a plan for creating a sound-making device for Miss Melody. Ask them to draw or write their plan on the Silly Sounds Reproducible. Circulate and check the plans as students begin the task.
• Conduct the Task: Instruct students to use the materials to create a sound-making device for Miss Melody. Have them take digital photographs of their designs and make two copies.
• Evaluate: Direct each group to fill in the What We Designed section on the Silly Sounds Reproducible with one copy of their digital photograph, and have them provide a caption to identify it. Ask them to evaluate their task by writing or telling what worked and what didn’t work in the How Did We Do? section. For young students, have them draw a simple smiley or frowny face to evaluate. Have each group compare and contrast their sound-making device with other groups.
• Share Ideas: Have students present their finished task to the class and talk about what worked and what they might be able to do better. Make a color copy of the back of the Work Mat to use as a book cover. Have students share their ideas for a title of the booklet, and then write it on the musical staff. Compile the groups’ second digital photograph copies (from the Conduct the Task step above) into a booklet to place in your Science Center.
Choose from the extension activities on the back of the Task Card to enhance the task with additional activities featuring Science, Technology, Engineering, and Math.
STEM-tivity™ Class Kit - Silly Sounds
• vibrate: to move back and forth or from side to side rapidly to produce sound
• sounds: vibrations that travel through the air and can be heard when they reach the ears
• pluck: to create sound by pulling strings of a stringed musical instrument
• device: a piece of equipment to serve a special purpose
• signal: an act, event, or word that starts an action• fret: a ridge that is fixed across the fingerboard of
a stringed musical instrument• fingerboard: the part of a stringed instrument that
the fingers press against to change the pitch
String a Harp Task Card Copy and distribute the Silly Sounds Reproducible as well as the Task Card with the green header, a Work Mat, a Harp/Banjo Card, several Rubber Bands (excluding the small white and tan rubber bands), a Straw, and scissors to each group. • Essential Question: Read the header at the top
of the Task Card to create a setting before asking the essential question of What kind of instrument can you create to make new musical sounds for the band? Read the instructions on the Task Card aloud to students. Answer any questions students may have about their task.
• Available Tools: Introduce the groups to the Rubber Bands, Harp/Banjo Card, Straw, and scissors, explaining that they are to use these tools to complete the task. Have them fill in the Tools We Used section on their reproducibles. If desired, distribute additional materials, such as tape, poster putty, and glue sticks.
• Make a Plan: Tell each group to discuss a plan for making their harp. Ask them to draw or write their plan on the Silly Sounds Reproducible. Circulate and check the plans as students begin the task.
• Conduct the Task: Instruct each group to use the materials to build the most interesting musical harp that they can. Encourage them to test the “strings” and arrange them in the order they find most pleasing.
• Evaluate: Direct each group to fill in the What We Designed section on the Silly Sounds Reproducible
with a drawing or photograph of their harp. Ask them to evaluate their task by writing or telling what worked and what didn’t work in the How Did We Do? section. For young students, have them draw a simple smiley or frowny face to evaluate. Have each group compare and contrast their harp with other groups.
• Share Ideas: Have students present their finished task to the class and talk about what worked and what they might be able to do better.
Extension: Encourage each group to create their own simple tune by placing dry-erase colored notes, the same colors as their harp “strings,” on the music-staff side of the Work Mat. Have the groups share their tunes.
Choose from the Science, Technology, Engineering, and Math activities on the back of the Task Card to enhance your students learning.
Panpipe Parade Task Card Copy and distribute the Silly Sounds Reproducible as well as the Task Card with the pink header, 20 Straws (5 for each student), a permanent marker, scissors (to cut the straws to varying lengths), and tape to each group. • Essential Question: Read the header at the top
of the Task Card to create a setting before asking the essential question of What kind of instrument can you make that vibrates and makes sound when you blow into it? Read the instructions on the Task Card aloud to students. Answer any questions students may have about their task.
• Available Tools: Introduce students within groups to the Straws, scissors, and tape, explaining that they are to use these tools to complete the task. Discuss how they will need to use the Ruler on the Work Mat as well. Have them fill in the Tools We Used section on their reproducibles.
• Make a Plan: Tell each student to discuss a plan for making his or her panpipe. Ask each student to draw or write his or her plan on the Silly Sounds Reproducible. Circulate and check the plans as students begin the task.
© 2017 Really Good Stuff® 1-800-366-1920 www.reallygoodstuff.com Made in China #164331Helping Teachers Make A Difference®
164331_STEMtivity_ClassKit_SillySounds_RGIG.indd 3-4 4/18/17 10:51 AM
© 2017 Really Good Stuff® 1-800-366-1920 www.reallygoodstuff.com Made in China #164331Helping Teachers Make A Difference® © 2017 Really Good Stuff® 1-800-366-1920 www.reallygoodstuff.com Made in China #164331
All instructional guides can be found online.
Helping Teachers Make A Difference®
This Really Good Stuff® product includes:• 250+ Rubber Bands, assorted• 100 Milkshake Straws• 4 Harp/Banjo Cards• 4 Work Mats • 12 Task Cards (4 each of 3 different tasks) • Storage Box • This Really Good Stuff® Instructional Guide
Congratulations on your purchase of this Really Good Stuff® STEM-tivity™ Class Kit - Silly Sounds—a hands-on activity kit utilizing the inquiry method to heighten your students’ imaginations and engineering skills with engaging activities about sound.
Meeting the StandardsThe Really Good Stuff® STEM-tivity™ Class Kit - Silly Sounds aligns with the Next Generation Science Standards for Science below. For alignment with other state standards, please refer to our website’s Standards Match.
1-PS4 Waves and their Applications in Technologies for Information TransferStudents who demonstrate understanding can:1-PS4-1 Plan and conduct investigations to provide evidence that vibrating materials can make sound and that sound can make materials vibrate. 1-PS4-4 Use tools and materials to design and build a device that uses light or sound to solve the problem of communicating over a distance.
K-2-ETS1 Engineering DesignStudents who demonstrate understanding can:K-2-ETS1-1 Ask questions, make observations, and gather information about a situation people want to change to define a simple problem that can be solved through the development of a new or improved object or tool.K-2-ETS1-2 Develop a simple sketch, drawing, or physical model to illustrate how the shape of an object helps it function as needed to solve a given problem.K-2-ETS1-3 Analyze data from tests of two objects designed to solve the same problem to compare the strengths and weaknesses of how each performs.
Displaying and Preparing the STEM-tivity™ Class Kit - Silly SoundsBefore displaying the STEM-tivity™ Class Kit - Silly Sounds, make copies of this Really Good Stuff® Instructional Guide, and file the pages for future use. Or, download another copy of it from our website at www.reallygoodstuff.com.
This kit includes enough materials to divide your class into four working groups of up to four students each. The groups can work on the same Task Card at the same time allowing them to compare and contrast their designs and models. Or, the groups can work on different Task Cards and then present their designs to the class. Divide the materials accordingly.
Each Task Card features a main activity on the front and extended activities on the back for each STEM component. Depending on your students’ level, you may need to lead the activities due to text complexity and task difficulty. In addition to the text on the back of each Task Card, the text on the front of the Card is color-coded to identify steps in the task as Science based (blue), Math based (red), or Engineering based (green). Store all of the materials in the Storage Box when activities are completed.
Introducing the STEM-tivity™ Class Kit - Silly SoundsGather students together and review the basics of how vibrations make sound. Present the following scenario as background for why students will be working with the STEM-tivity™ Class Kit - Silly Sounds.
Miss Melody is a music teacher at an elementary school, and she helps with the school band. She wants to make the band the best it can be and add more instruments to make new sounds.
Explain to students that as they complete different tasks from the Kit, they will be working with vibrations to help Miss Melody solve her problems. Introduce new vocabulary to familiarize students with words they will encounter on the Task Cards:
STEM-tivity™ Class Kit - Silly Sounds
Silly
Sou
nds
Repr
oduc
ible
164331_STEMtivity_ClassKit_SillySounds_RGIG.indd 1-2 4/18/17 10:51 AM

© 2017 Really Good Stuff® 1-800-366-1920 www.reallygoodstuff.com Made in China #164333Helping Teachers Make A Difference® © 2017 Really Good Stuff® 1-800-366-1920 www.reallygoodstuff.com Made in China #164333
All instructional guides can be found online.
Helping Teachers Make A Difference®
This Really Good Stuff® product includes:• 4 Flashlights• 8 Silver Mirror Boards• 4 Rolls of Glow-in-the-Dark Tape• 4 Cutout Sheets• 4 Work Mats • 12 Task Cards (4 each of three different tasks) • Storage Box • This Really Good Stuff® Instructional Guide
Congratulations on your purchase of this Really Good Stuff® STEM-tivity™ Class Kit - Looking at Light—a hands-on kit utilizing the inquiry method to heighten your students’ imaginations and engineering skills with engaging activities about light.
Meeting the StandardsThe Really Good Stuff® STEM-tivity™ Class Kit - Looking at Light aligns with the Next Generation Science Standards below. For alignment with other state standards, please refer to our website’s Standards Match.
1-PS4 Waves and Their Applications in Technologies for Information TransferStudents who demonstrate understanding can:1-PS4-2. Make observations to construct an evidence-based account that objects can be seen only when illuminated.1-PS4-3 Plan and conduct an investigation to determine the effect of placing objects made with different materials in the path of a beam of light.
K-2-ETS1 Engineering DesignStudents who demonstrate understanding can:K-2-ETS1-1 Ask questions, make observations, and gather information about a situation people want to change to define a simple problem that can be solved through the development of a new or improved object or tool.K-2-ETS1-2 Develop a simple sketch, drawing, or physical model to illustrate how the shape of an object helps it function as needed to solve a given problem.K-2-ETS1-3 Analyze data from tests of two objects designed to solve the same problem to compare the strengths and weaknesses of how each performs.
Displaying and Preparing the STEM-tivity™ Class Kit - Looking at LightBefore displaying the STEM-tivity™ Class Kit - Looking at Light, make copies of this Really Good Stuff® Instructional Guide, and file the pages for future use. Or, download another copy of it from our website at www.reallygoodstuff.com.
This kit includes enough materials to divide your class into four working groups of up to four students each. The groups can work on the same Task Card at the same time, allowing them to compare and contrast their designs and models. Or, the groups can work on different Task Cards and then present their designs to the class. Divide the materials accordingly.
Each Task Card features a main activity on the front and extended activities on the back for each STEM component. Depending on your students’ level, you may need to lead the activities due to text complexity and task difficulty. In addition to the text on the back of each Task Card, the text on the front of the Task Card is color-coded to identify steps in the task as Science-based (blue), Math-based (red), or Engineering-based (green). Store all of the materials in the Storage Box once activities are completed.
Introducing the STEM-tivity™ Class Kit - Looking at LightGather students together and review the basics of how light waves travel in a straight line. Present the following scenario background for why students will be working with the STEM-tivity™ Class Kit - Looking at Light. The local scout troop is going on an overnight camping trip in the woods. They plan to take plenty of camping gear to help them in case they need it. As it begins to get dark, they run into some problems, and they need your help.
Explain to students that as they complete different tasks from the Kit, they will be working with light to help the scouts solve their problems. Introduce new vocabulary to familiarize students with words they will encounter on the Task Cards:
STEM-tivity™ Class Kit - Looking at Light
Cam
era
Repr
oduc
ible
Look
ing
at L
ight
Rep
rodu
cibl
e
164333_STEMtivity_ClassKit_LookatLight_RGIG.indd 1-2 4/18/17 12:05 PM

STEM-tivity™ Class Kit - Looking at Light
© 2017 Really Good Stuff® 1-800-366-1920 www.reallygoodstuff.com Made in China #164333Helping Teachers Make A Difference®
plan on the Looking at Light Reproducible. Circulate and check the plans as students begin the task.
• Conduct the Task: Darken the room enough so that the beam from all four groups’ Flashlights are visible. Instruct the groups to investigate the best location to place the Mirror Board in order to direct the light from one tent to the other.
• Evaluate: Direct each group to fill in the What We Designed section on the Looking at Light Reproducible with a drawing or photograph of their completed Work Mat. Ask them to evaluate their task by writing or telling what worked and what didn’t work in the How Did We Do? section. For young students, have them draw a simple smiley or frowny face to evaluate. Have each group compare and contrast its solution with other groups.
• Share Ideas: Have students present their finished task to the class and talk about what worked and what didn’t work. Have students discuss other scenarios in which they could use the light-bending techniques from the Task Card.
Choose other Science, Technology, Engineering, and Math activities on the back of the Task Card to enhance your students’ learning. Photography Fun Task Card Prior to starting this task, collect an assortment of transparent, translucent, opaque, and reflective materials. Suggested materials might be:• transparent: overhead acetate, plastic wrap, clear
plastic • translucent: wax paper, tissue paper, or frosted
paper• opaque: cardboard, black construction paper,
wrapping paper• reflective: Mirror Board, foil, foil paper
Make 8 copies of the Camera Reproducible onto cardstock or heavy white paper and distribute 2 copies as well as the Task Card with the pink header, 1 Mirror Board, glue sticks, crayons or markers, and scissors to each group. Provide each group with an assortment of transparent, translucent, opaque, and reflective materials.
• Essential Question: Read the header at the top of the Task Card to create a setting before asking the essential question of What type of material allows the most light to past through it to clearly see what is on the other side? Read the instructions on the Task Card aloud to students, Answer any questions they may have about their task.
• Available Tools: Introduce the groups to the Camera Reproducible, Mirror Board, the collected materials, glue sticks, crayons or markers, and scissors. Have them fill in the Tools We Used section on their reproducibles.
• Make a Plan: Tell each group to discuss a plan for assembling and “testing” their cameras. Ask them to draw or write their plan on the Looking at Light Reproducible. Circulate and check the plans as students begin the task.
• Conduct the Task: Instruct students to use the materials to make four cameras with each featuring a “lens” from a different material. Have each group write the name of the type of material on each camera. Once the cameras are completed, have students look through the lenses at the raccoon-scene side of the Work Mat and decide which material works best to allow them to see the raccoons clearly.
• Evaluate: Direct each group to fill in the What We Designed section on the Looking at Light Reproducible. Ask them to evaluate their task by writing or telling what worked and what didn’t work in the How Did We Do? section. For young students, have them draw a simple smiley or frowny face to evaluate. Have each group compare and contrast their cameras and findings with other groups.
• Share Ideas: Have students present their finished task to the class and talk about which material worked best.
Choose other Science, Technology, Engineering, and Math activities on the back of the Task Card to enhance your students’ learning.
STEM-tivity™ Class Kit - Looking at Light
• light: radiation of any wavelength that is visible to the human eye
• transparent: transmitting light so that objects lying beyond are entirely visible
• translucent: not transparent but clear enough to allow light to pass through
• opaque: not letting light through so that objects lying beyond are not visible at all
• reflect: to bend or throw back waves of light Overnight Camping Trip Task Card Copy and distribute 4 of the Looking at Light Reproducibles as well as the Task Card with the blue header; 1 Roll of Glow-in-the-Dark Tape; paper, such as cardstock, tagboard, or construction paper, crayons or markers; and scissors to each group. (Note: students can easily tear the tape into pieces instead of cutting it, if preferred.)
• Essential Question: Read the header at the top of the Task Card to create a setting before asking the essential question of What kind of glow-in-the-dark item can you create to help the scouts find each other in the dark? Read the instructions on the Task Card aloud to students. Answer any questions students may have about their task.
• Available Tools: Introduce the groups to the Glow-in-the-Dark Tape, construction paper, crayons or markers, and scissors, explaining that they are to use these tools to complete the task. Have them fill in the Tools We Used section on their reproducibles. Explain to students that this special Tape collects light, and then glows when placed in a dark area. Provide students with pieces of masking or package tape for attaching the items to their clothing if required by the design.
• Make a Plan: Tell each group to discuss a plan for making their glow-in-the-dark items. Ask them to draw or write their plan on the Looking at Light Reproducible. Circulate and check the plans as students begin the task.
• Conduct the Task: Instruct each group to use the materials to create the most interesting and useful glow-in-the-dark item that they can. Once finished, allow 30 minutes for the glow-in-the-dark items to collect light (sunlight works best but any bright light will do.) Choose an area that darkens significantly, and have students test their items there.
• Evaluate: Direct the students to fill in the What We Designed section on the Looking at Light Reproducibles with a drawing or photograph of their glow-in-the-dark items. Ask them to evaluate their task by writing or telling what worked and what didn’t work in the How Did We Do? section. For young students, have them draw a simple smiley or frowny face to evaluate. Have each group compare and contrast their glow-in-the-dark items with other groups.
• Share Ideas: Have students present their finished task to the class and talk about what worked and what they might be able to do better.
Choose other Science, Technology, Engineering, and Math activities on the back of the Task Card to enhance your students’ learning. Around the Tree Task Card Copy and distribute 1 Looking at Light Reproducible as well as the Task Card with the green header, a Flashlight, 1 piece of Mirror Board, 1 Cutout Sheet, a Work Mat, poster putty or clay, and scissors to each group. The Flashlight can be used by pointing the bulb end just like any other flashlight, but it also provides hands-free operation by setting the Flashlight on its bulb end and pushing the switch up. • Essential Question: Read the header at the top
of the Task Card to create a setting before asking the essential question of How can you make the light go around a tree to travel from one tent to another? Read the instructions on the Task Card aloud to students. Answer any questions they may have about their task.
• Available Tools: Introduce the groups to the Flashlight, Mirror Board, and clay (poster putty), explaining that they are to use these tools to complete the task. Discuss how they will use the aerial view of the campground side of the Work Mat as well. Have them fill in the Tools We Used section on their reproducibles.
• Make a Plan: Tell each group to choose a member to cut out the tree and the tents from the Cutout Sheet, as well as a second member to assemble the tree, fold the tents, and attach them to the Work Mat with clay. Direct them to discuss a plan for placing the Mirror Board in a good location to complete the task. Ask them to draw or write their
© 2017 Really Good Stuff® 1-800-366-1920 www.reallygoodstuff.com Made in China #164333Helping Teachers Make A Difference®
164333_STEMtivity_ClassKit_LookatLight_RGIG.indd 3-4 4/18/17 12:05 PM
STEM-tivity™ Class Kit - Looking at Light
© 2017 Really Good Stuff® 1-800-366-1920 www.reallygoodstuff.com Made in China #164333Helping Teachers Make A Difference®
plan on the Looking at Light Reproducible. Circulate and check the plans as students begin the task.
• Conduct the Task: Darken the room enough so that the beam from all four groups’ Flashlights are visible. Instruct the groups to investigate the best location to place the Mirror Board in order to direct the light from one tent to the other.
• Evaluate: Direct each group to fill in the What We Designed section on the Looking at Light Reproducible with a drawing or photograph of their completed Work Mat. Ask them to evaluate their task by writing or telling what worked and what didn’t work in the How Did We Do? section. For young students, have them draw a simple smiley or frowny face to evaluate. Have each group compare and contrast its solution with other groups.
• Share Ideas: Have students present their finished task to the class and talk about what worked and what didn’t work. Have students discuss other scenarios in which they could use the light-bending techniques from the Task Card.
Choose other Science, Technology, Engineering, and Math activities on the back of the Task Card to enhance your students’ learning. Photography Fun Task Card Prior to starting this task, collect an assortment of transparent, translucent, opaque, and reflective materials. Suggested materials might be:• transparent: overhead acetate, plastic wrap, clear
plastic • translucent: wax paper, tissue paper, or frosted
paper• opaque: cardboard, black construction paper,
wrapping paper• reflective: Mirror Board, foil, foil paper
Make 8 copies of the Camera Reproducible onto cardstock or heavy white paper and distribute 2 copies as well as the Task Card with the pink header, 1 Mirror Board, glue sticks, crayons or markers, and scissors to each group. Provide each group with an assortment of transparent, translucent, opaque, and reflective materials.
• Essential Question: Read the header at the top of the Task Card to create a setting before asking the essential question of What type of material allows the most light to past through it to clearly see what is on the other side? Read the instructions on the Task Card aloud to students, Answer any questions they may have about their task.
• Available Tools: Introduce the groups to the Camera Reproducible, Mirror Board, the collected materials, glue sticks, crayons or markers, and scissors. Have them fill in the Tools We Used section on their reproducibles.
• Make a Plan: Tell each group to discuss a plan for assembling and “testing” their cameras. Ask them to draw or write their plan on the Looking at Light Reproducible. Circulate and check the plans as students begin the task.
• Conduct the Task: Instruct students to use the materials to make four cameras with each featuring a “lens” from a different material. Have each group write the name of the type of material on each camera. Once the cameras are completed, have students look through the lenses at the raccoon-scene side of the Work Mat and decide which material works best to allow them to see the raccoons clearly.
• Evaluate: Direct each group to fill in the What We Designed section on the Looking at Light Reproducible. Ask them to evaluate their task by writing or telling what worked and what didn’t work in the How Did We Do? section. For young students, have them draw a simple smiley or frowny face to evaluate. Have each group compare and contrast their cameras and findings with other groups.
• Share Ideas: Have students present their finished task to the class and talk about which material worked best.
Choose other Science, Technology, Engineering, and Math activities on the back of the Task Card to enhance your students’ learning.
STEM-tivity™ Class Kit - Looking at Light
• light: radiation of any wavelength that is visible to the human eye
• transparent: transmitting light so that objects lying beyond are entirely visible
• translucent: not transparent but clear enough to allow light to pass through
• opaque: not letting light through so that objects lying beyond are not visible at all
• reflect: to bend or throw back waves of light Overnight Camping Trip Task Card Copy and distribute 4 of the Looking at Light Reproducibles as well as the Task Card with the blue header; 1 Roll of Glow-in-the-Dark Tape; paper, such as cardstock, tagboard, or construction paper, crayons or markers; and scissors to each group. (Note: students can easily tear the tape into pieces instead of cutting it, if preferred.)
• Essential Question: Read the header at the top of the Task Card to create a setting before asking the essential question of What kind of glow-in-the-dark item can you create to help the scouts find each other in the dark? Read the instructions on the Task Card aloud to students. Answer any questions students may have about their task.
• Available Tools: Introduce the groups to the Glow-in-the-Dark Tape, construction paper, crayons or markers, and scissors, explaining that they are to use these tools to complete the task. Have them fill in the Tools We Used section on their reproducibles. Explain to students that this special Tape collects light, and then glows when placed in a dark area. Provide students with pieces of masking or package tape for attaching the items to their clothing if required by the design.
• Make a Plan: Tell each group to discuss a plan for making their glow-in-the-dark items. Ask them to draw or write their plan on the Looking at Light Reproducible. Circulate and check the plans as students begin the task.
• Conduct the Task: Instruct each group to use the materials to create the most interesting and useful glow-in-the-dark item that they can. Once finished, allow 30 minutes for the glow-in-the-dark items to collect light (sunlight works best but any bright light will do.) Choose an area that darkens significantly, and have students test their items there.
• Evaluate: Direct the students to fill in the What We Designed section on the Looking at Light Reproducibles with a drawing or photograph of their glow-in-the-dark items. Ask them to evaluate their task by writing or telling what worked and what didn’t work in the How Did We Do? section. For young students, have them draw a simple smiley or frowny face to evaluate. Have each group compare and contrast their glow-in-the-dark items with other groups.
• Share Ideas: Have students present their finished task to the class and talk about what worked and what they might be able to do better.
Choose other Science, Technology, Engineering, and Math activities on the back of the Task Card to enhance your students’ learning. Around the Tree Task Card Copy and distribute 1 Looking at Light Reproducible as well as the Task Card with the green header, a Flashlight, 1 piece of Mirror Board, 1 Cutout Sheet, a Work Mat, poster putty or clay, and scissors to each group. The Flashlight can be used by pointing the bulb end just like any other flashlight, but it also provides hands-free operation by setting the Flashlight on its bulb end and pushing the switch up. • Essential Question: Read the header at the top
of the Task Card to create a setting before asking the essential question of How can you make the light go around a tree to travel from one tent to another? Read the instructions on the Task Card aloud to students. Answer any questions they may have about their task.
• Available Tools: Introduce the groups to the Flashlight, Mirror Board, and clay (poster putty), explaining that they are to use these tools to complete the task. Discuss how they will use the aerial view of the campground side of the Work Mat as well. Have them fill in the Tools We Used section on their reproducibles.
• Make a Plan: Tell each group to choose a member to cut out the tree and the tents from the Cutout Sheet, as well as a second member to assemble the tree, fold the tents, and attach them to the Work Mat with clay. Direct them to discuss a plan for placing the Mirror Board in a good location to complete the task. Ask them to draw or write their
© 2017 Really Good Stuff® 1-800-366-1920 www.reallygoodstuff.com Made in China #164333Helping Teachers Make A Difference®
164333_STEMtivity_ClassKit_LookatLight_RGIG.indd 3-4 4/18/17 12:05 PM

© 2017 Really Good Stuff® 1-800-366-1920 www.reallygoodstuff.com Made in China #164333Helping Teachers Make A Difference® © 2017 Really Good Stuff® 1-800-366-1920 www.reallygoodstuff.com Made in China #164333
All instructional guides can be found online.
Helping Teachers Make A Difference®
This Really Good Stuff® product includes:• 4 Flashlights• 8 Silver Mirror Boards• 4 Rolls of Glow-in-the-Dark Tape• 4 Cutout Sheets• 4 Work Mats • 12 Task Cards (4 each of three different tasks) • Storage Box • This Really Good Stuff® Instructional Guide
Congratulations on your purchase of this Really Good Stuff® STEM-tivity™ Class Kit - Looking at Light—a hands-on kit utilizing the inquiry method to heighten your students’ imaginations and engineering skills with engaging activities about light.
Meeting the StandardsThe Really Good Stuff® STEM-tivity™ Class Kit - Looking at Light aligns with the Next Generation Science Standards below. For alignment with other state standards, please refer to our website’s Standards Match.
1-PS4 Waves and Their Applications in Technologies for Information TransferStudents who demonstrate understanding can:1-PS4-2. Make observations to construct an evidence-based account that objects can be seen only when illuminated.1-PS4-3 Plan and conduct an investigation to determine the effect of placing objects made with different materials in the path of a beam of light.
K-2-ETS1 Engineering DesignStudents who demonstrate understanding can:K-2-ETS1-1 Ask questions, make observations, and gather information about a situation people want to change to define a simple problem that can be solved through the development of a new or improved object or tool.K-2-ETS1-2 Develop a simple sketch, drawing, or physical model to illustrate how the shape of an object helps it function as needed to solve a given problem.K-2-ETS1-3 Analyze data from tests of two objects designed to solve the same problem to compare the strengths and weaknesses of how each performs.
Displaying and Preparing the STEM-tivity™ Class Kit - Looking at LightBefore displaying the STEM-tivity™ Class Kit - Looking at Light, make copies of this Really Good Stuff® Instructional Guide, and file the pages for future use. Or, download another copy of it from our website at www.reallygoodstuff.com.
This kit includes enough materials to divide your class into four working groups of up to four students each. The groups can work on the same Task Card at the same time, allowing them to compare and contrast their designs and models. Or, the groups can work on different Task Cards and then present their designs to the class. Divide the materials accordingly.
Each Task Card features a main activity on the front and extended activities on the back for each STEM component. Depending on your students’ level, you may need to lead the activities due to text complexity and task difficulty. In addition to the text on the back of each Task Card, the text on the front of the Task Card is color-coded to identify steps in the task as Science-based (blue), Math-based (red), or Engineering-based (green). Store all of the materials in the Storage Box once activities are completed.
Introducing the STEM-tivity™ Class Kit - Looking at LightGather students together and review the basics of how light waves travel in a straight line. Present the following scenario background for why students will be working with the STEM-tivity™ Class Kit - Looking at Light. The local scout troop is going on an overnight camping trip in the woods. They plan to take plenty of camping gear to help them in case they need it. As it begins to get dark, they run into some problems, and they need your help.
Explain to students that as they complete different tasks from the Kit, they will be working with light to help the scouts solve their problems. Introduce new vocabulary to familiarize students with words they will encounter on the Task Cards:
STEM-tivity™ Class Kit - Looking at LightCa
mer
a Re
prod
ucib
leLo
okin
g at
Lig
ht R
epro
duci
ble
164333_STEMtivity_ClassKit_LookatLight_RGIG.indd 1-2 4/18/17 12:05 PM