start arduino course 02 - fade - tech will save us€¦ · start arduino course 02 - fade page 1...
TRANSCRIPT

Introduction:
You know how to turn an LED on and off with the Arduino, the next skill to
master is how to control the brightness. To do this you are going to start
reading switch values. After you have learnt to fade an LED automatically, you
will use a button to create a random brightness, and then go on to use a
potentiometer to control the brightness.
Goals
• Make an LED fade up and down automatically.• Use a button to turn an LED on and off.• Make an LED have a random brightness at the push of a button.• Control the brightness of an LED with a potentiometer.
Start Arduino course 02 - Fade
Page 1 - Start Arduino Course: 02 Fade

Pulse Width Modulation (PWM)
Look at the Arduino Digital pins closely, you will notice that 6 of the pins have tilda signs (~) next to the pin number.
These are to tell us that this pin can perform Pulse Width Modulation (PWM), a technique in digital computing used to create the perception of changeable voltage. Digital pins can only output 0v or 5v (On or Off). With PWM it creates the illusion that we are outputting different voltages to this. This is managed by switching the state of our Arduino pin from high to low very quickly, much like what happened when we changed the delay of our blink sketch to 10 milliseconds. Another way we can do this is to use the Arduino’s analogWrite() function.
Start Arduino course 02 - Fade
Page 2 - Start Arduino Course: 02 Fade

This code and circuit will fade an LED on and off using the analogWrite function.
For this, we will need:
1x Arduino Uno1x USB cable1x Breadboard1x LED1x 220 Ohm Resistor (Red Red Brown Gold)2x Jumper wires
You will notice there are a lot of similarities between this circuit and the blink circuit, The two main differences are we have moved our jumper from pin 13 to pin 11. This is because pin 13 is not able to use the analogWrite() function (no tilda sign).
Circuit 2.0 - Fade Hardware
Start Arduino course 02 - Fade
Page 3 - Start Arduino Course: 02 Fade

Circuit 2.0 - Fade
Make a new sketch in the Arduino IDE and name this ‘Fade’. Copy the code below.
Code
/* Fade This example shows how to fade an LED on pin 11 using the analogWrite() function. This example code is in the public domain. */
int led = 11; // the pin that the LED is attached toint brightness = 0; // how bright the LED isint fadeAmount = 5; // how many points to fade the LED by
// the setup routine runs once when you press reset:void setup() { // declare pin 11 to be an output: pinMode(led, OUTPUT);}
// the loop routine runs over and overvoid loop() { // set the brightness of pin 11: analogWrite(led, brightness);
// change the brightness for next time through the loop: brightness = brightness + fadeAmount;
// reverse the direction of the fading at the ends of the fade: if (brightness == 0 || brightness == 255) { fadeAmount = -fadeAmount ; } // wait for 30 milliseconds to see the dimming effect delay(30); }
Once you have copied the code, press (compile) and if no errors appear, press (upload) and watch the results!
Start Arduino course 02 - Fade
Page 4 - Start Arduino Course: 02 Fade

Let’s go through the code understand what every part is doing.
My code won’t compile!
- Check your spelling. Is everything spelt correctly?
- Check your punctuation. Are all your lines ending in a semi-colon? Do you have the correct capital letters?
- Did you close the curly brackets? Make sure your void setup and void loop both have everything surrounded by the open and closed curly brackets.
Is your computer asking you to choose the right Serial port?
This can be solved by going to:Tools > Port > dev/tty.usb.... for MacTools > Port > COM... for Windows.
Start Arduino course 02 - Fade
Page 5 - Start Arduino Course: 02 Fade
int led = 11; int brightness = 0; int fadeAmount = 5;
void setup() { // declare pin 11 to be an output: pinMode(led, OUTPUT);}
void loop() {
analogWrite(led, bright-ness);
Global Variables
These are always initialized outside both void setup and void loop functions, so they are accessible in both.
void setup()
This function, which is only used once at the start of the program. This is where we set our Led pin to be an output using pinmode(). Take note of the open curly bracket to start the loop and closing bracket to show when the loop ends.
void loop()
Everything within the curly brackets of the void loop is constantly looped over while the program is running.
analogWrite()
This is how we create our PWM, the first variable is which digital pin this will be, the second is how much it is going to be. This value has to be between 0 and 255. In our case, we are using our variable names, and this is going to change the brightness of the Led (11) using the brightness variable.
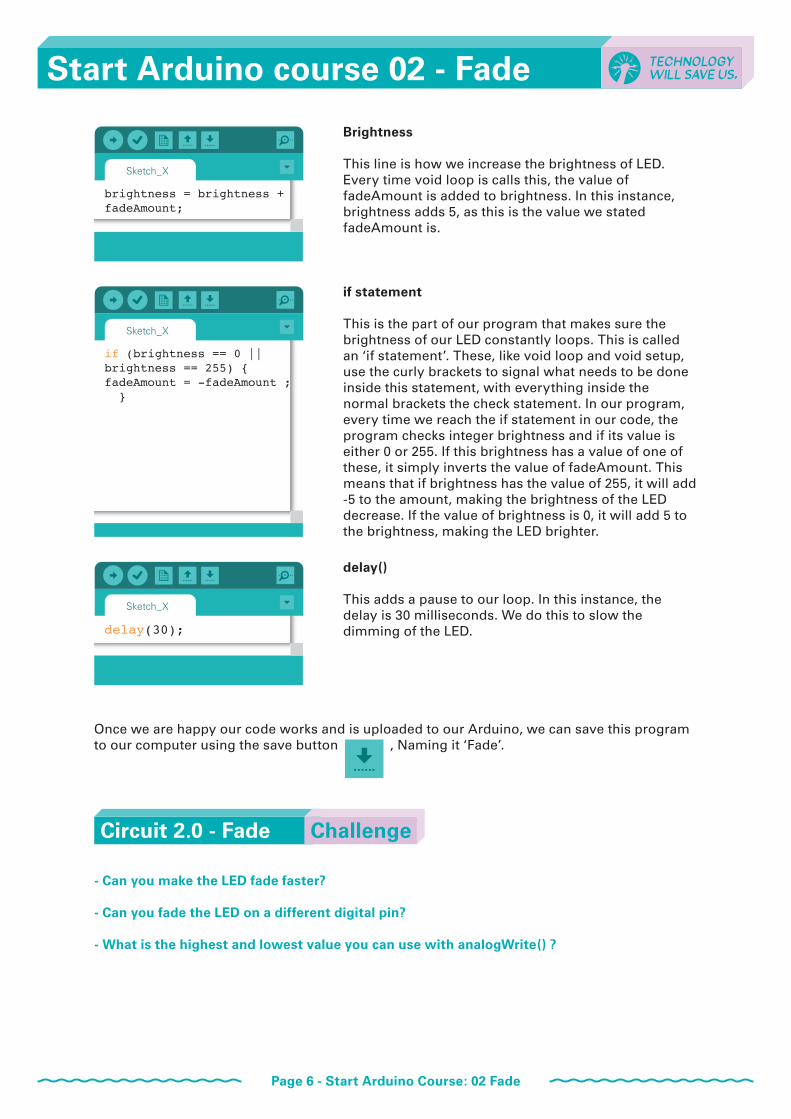
Brightness
This line is how we increase the brightness of LED. Every time void loop is calls this, the value of fadeAmount is added to brightness. In this instance, brightness adds 5, as this is the value we stated fadeAmount is.
delay()
This adds a pause to our loop. In this instance, the delay is 30 milliseconds. We do this to slow the dimming of the LED.
if statement
This is the part of our program that makes sure the brightness of our LED constantly loops. This is called an ‘if statement’. These, like void loop and void setup, use the curly brackets to signal what needs to be done inside this statement, with everything inside the normal brackets the check statement. In our program, every time we reach the if statement in our code, the program checks integer brightness and if its value is either 0 or 255. If this brightness has a value of one of these, it simply inverts the value of fadeAmount. This means that if brightness has the value of 255, it will add -5 to the amount, making the brightness of the LED decrease. If the value of brightness is 0, it will add 5 to the brightness, making the LED brighter.
brightness = brightness + fadeAmount;
delay(30);
if (brightness == 0 || brightness == 255) {fadeAmount = -fadeAmount ; }
Once we are happy our code works and is uploaded to our Arduino, we can save this program to our computer using the save button , Naming it ‘Fade’.
- Can you make the LED fade faster?
- Can you fade the LED on a different digital pin?
- What is the highest and lowest value you can use with analogWrite() ?
Circuit 2.0 - Fade Challenge
Start Arduino course 02 - Fade
Page 6 - Start Arduino Course: 02 Fade

Start Arduino course 02 - Fade
Page 7 - Start Arduino Course: 02 Fade
Buttons
Now we have our fading LED, let’s control this with an input. For this, we’re going to use one of our pushbuttons.
Pushbuttons (also known as tactile switches), are what we use to open and close circuits. Buttons and switches are used in electronics to allow us to interact with our circuits. We’re going to use one with fading LED to change the outcome.
You are now going to try two ways to use the pushbutton to change a circuit:
2.1 - In a simple series circuit to open and close the circuit directly.
2.2 - Isolate the button from the circuit and use the arduino to process the information.

We will use the push button in series with our led to open the circuit. This means the flow of electricity is stopped as there is an incomplete circuit flowing from the positive (digital pin) to negative (ground).
For this, we will need:
1x Arduino Uno1x USB cable1x Breadboard1x LED1x Push button1x 220 Ohm resistor (Red, Red, Brown, Gold)3x Jumper Wires
Circuit 2.1 - Fade (Push Button/series) Hardware
Start Arduino course 02 - Fade
Page 8 - Start Arduino Course: 02 Fade
- What happens when the pushbutton is pressed?
- Why does this happen?
Circuit 2.1 - Fade (Push Button/series) Challenge

The second method is to use the pushbutton isolated with a digital pin and program the arduino to change the outcome.
For this, we will need:
1x Arduino Uno1x USB cable1x Breadboard1x LED1x Push button1x 220 Ohm resistor (Red, Red, Brown, Gold)1x 10k Ohm resistor (Brown Black Orange Gold)8x Jumper Wires
Circuit 2.2 - Fade (Digital Read + LED) Hardware
Start Arduino course 02 - Fade
Page 9 - Start Arduino Course: 02 Fade
The resistor used with the button is known as a pull down resistor. This ensures that when the button is open, the circuit is still completed through the resistor and creates a solid connection to voltage or ground.

Make a new sketch in the Arduino IDE and name this ‘Fade_digital Read+LED’. Copy the code below.
/*Digital Read & LEDThis code is for using a Push Button to change the state of an LED*/
int led = 11;int pushButton = 7;
void setup(){//set pinMode of LED pin (11)pinMode(led, OUTPUT);//set pinMode of pushButton pin (7)pinMode(pushButton, INPUT);}
void loop() { //if statement to check the state of button if (digitalRead(pushButton) == HIGH) { //LED on digitalWrite(led, HIGH); } if(digitalRead(pushButton) == LOW){ //LED off digitalWrite(led, LOW); }}
Once you have copied the code, press (compile) and if no errors appear, press (upload) and watch the results!
Start Arduino course 02 - Fade
Page 10 - Start Arduino Course: 02 Fade
Circuit 2.2 - Fade (Digital Read + LED) Code

Let’s go through the code understand what every part is doing.
Start Arduino course 02 - Fade
Page 11 - Start Arduino Course: 02 Fade
int led = 11;int pushButton = 7;
void setup(){//set pinMode of led pin (11)pinMode(led, OUTPUT);//set pinMode of pushbutton pin (7)pinMode(pushButton, INPUT);}
void loop() {
//if statement to check the state of button if (digitalRead (pushButton) == HIGH) { //led on digitalWrite (led, HIGH);
if(digitalRead(pushBut-ton) == LOW){ //led off digitalWrite(led, LOW); }
Global Variables
These are defined outside both void setup and void loop as they can be used in both. We have set two integers led and pushButton to the values 11 and 7. These are the numbers of the digital pins we are using with them.
void setup()
This is only called once at the start of the program. In here we set the states of the LED and Push Button pins. As we are using the LED pin to light up the LED, this is an OUTPUT pin. As we are sensing the push button pin, this is an INPUT pin.
void loop()
This is the start of our void loop function, we use the curly brackets to signal the start and end of the function. Everything within these curly brackets is looped infinitely while the program is running.
if statements
This is one of two if statements we have used in this program. An if statement is a way of defining an outcome dependent on an input. In this instance, we have used Arduino function digitalRead() to check the push button pin state. As it is a Digital pin, it has two states – High or Low. This if statement checks for the input being HIGH. If this is true, the state of the LED pin is set to HIGH using digitalWrite(). If not, the program moves onto the next line.
This if statement effectively looks for the opposite of the one above, checking to see if the push button hasn’t been pressed. The outcome of that is that the LED pin state is LOW using digitalWrite().

Now we have learnt about LED Fade and Push buttons, let’s bring them together. You are going to write a new sketch to create a random brightness for the LED at the push of the button.
For this, we will need:
1x Arduino Uno1x USB cable1x Breadboard1x LED1x Push button1x 220 Ohm resistor (Red Red Brown Gold)1x 10k Ohm resistor (Brown Black Orange Gold)8x Jumper Wires
Circuit 2.3 - Digital Read (Fade + Button) Hardware
Start Arduino course 02 - Fade
Page 12 - Start Arduino Course: 02 Fade
The circuit is going to stay the same as before. (Circuit 2.2 - Fade (Digital Read + LED))
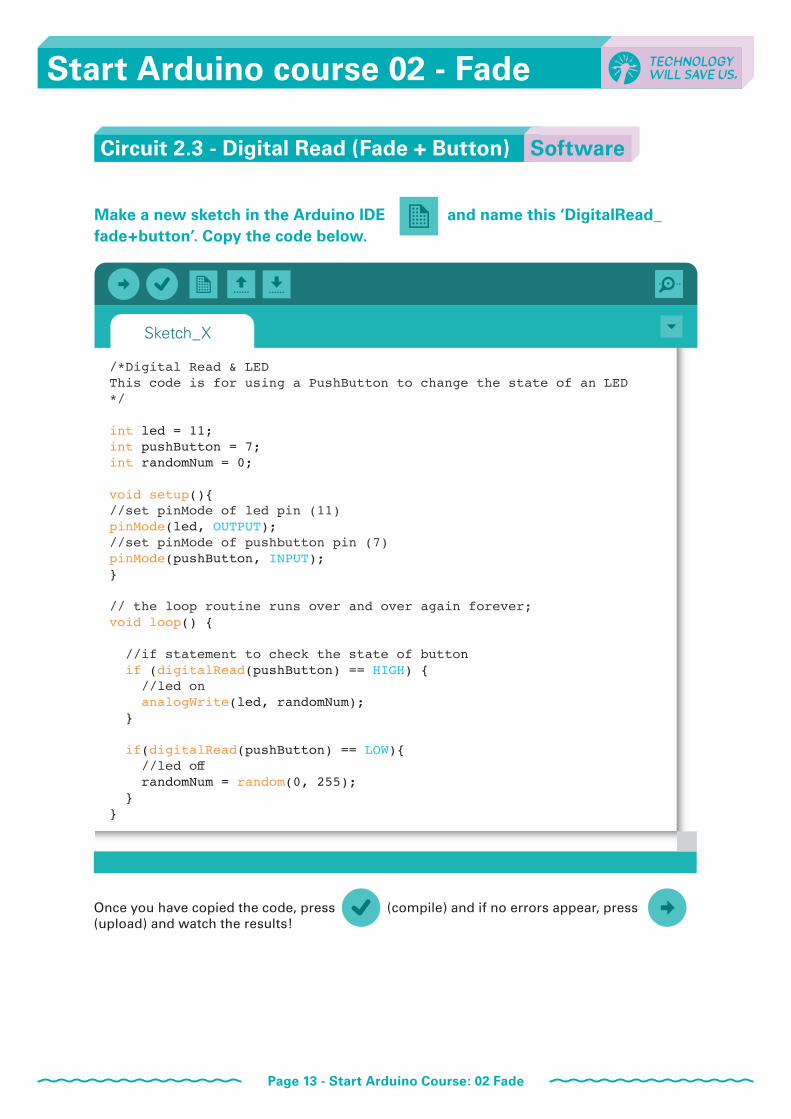
Make a new sketch in the Arduino IDE and name this ‘DigitalRead_fade+button’. Copy the code below.
/*Digital Read & LEDThis code is for using a PushButton to change the state of an LED*/
int led = 11;int pushButton = 7;int randomNum = 0;
void setup(){//set pinMode of led pin (11)pinMode(led, OUTPUT);//set pinMode of pushbutton pin (7)pinMode(pushButton, INPUT);}
// the loop routine runs over and over again forever;void loop() { //if statement to check the state of button if (digitalRead(pushButton) == HIGH) { //led on analogWrite(led, randomNum); } if(digitalRead(pushButton) == LOW){ //led off randomNum = random(0, 255); }}
Once you have copied the code, press (compile) and if no errors appear, press (upload) and watch the results!
Start Arduino course 02 - Fade
Page 13 - Start Arduino Course: 02 Fade
Circuit 2.3 - Digital Read (Fade + Button) Software

Let’s go through the code understand what every part is doing.There are many similarities between this and the previous program. The main difference is the inclusion of random().
My code won’t compile!
- Check your spelling. Is everything spelt correctly?
- Check your punctuation. Are all your lines ending in a semi-colon? Do you have the correct capital letters?
- Did you close the curly brackets? Make sure your void setup and void loop both have everything surrounded by the open and closed curly brackets.
Is your computer asking you to choose the right Serial port?
This can be solved by going to:Tools > Port > dev/tty.usb.... for MacTools > Port > COM... for Windows.
Start Arduino course 02 - Fade
Page 14 - Start Arduino Course: 02 Fade
randomNum = random(0, 255);
Random()
is an Arduino function used to create a random number between two values (0 and 255 in this instance). The outcome of this program is that every time the push button is pressed, the program generates a new random brightness for the LED, displaying it constantly when the push button is not pressed. It does this by using the digitalRead() argument to distinguish if the push button pin is pressed. If the push button is not pressed, a random value is generated. When push button is pressed, this value is used as the brightness for analogWrite().
- Can you make the LED always LOW when the push button is not pressed?
- Could you do this with TWO LEDs?
Circuit 2.3 - Digital Read (Fade + Button) Challenge
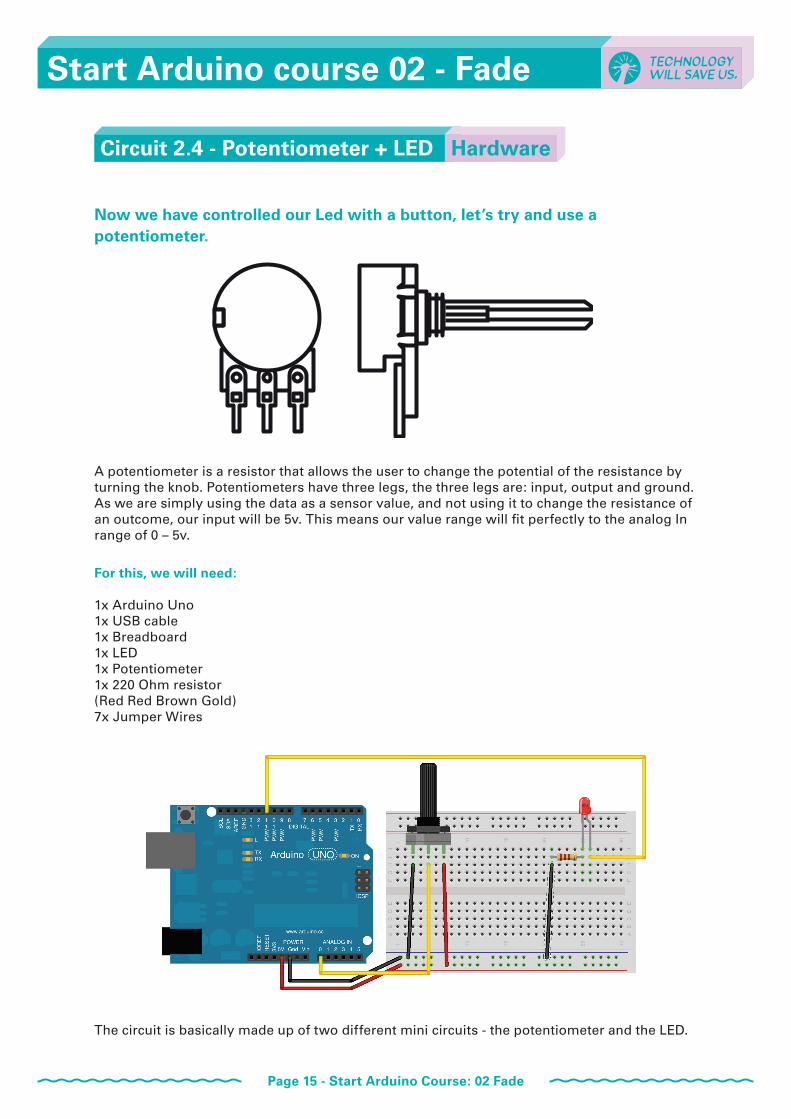
Now we have controlled our Led with a button, let’s try and use a potentiometer.
A potentiometer is a resistor that allows the user to change the potential of the resistance by turning the knob. Potentiometers have three legs, the three legs are: input, output and ground.As we are simply using the data as a sensor value, and not using it to change the resistance of an outcome, our input will be 5v. This means our value range will fit perfectly to the analog In range of 0 – 5v.
For this, we will need:
1x Arduino Uno1x USB cable1x Breadboard1x LED1x Potentiometer1x 220 Ohm resistor (Red Red Brown Gold)7x Jumper Wires
Circuit 2.4 - Potentiometer + LED Hardware
Start Arduino course 02 - Fade
Page 15 - Start Arduino Course: 02 Fade
The circuit is basically made up of two different mini circuits - the potentiometer and the LED.

Make a new sketch in the Arduino IDE and name this ‘Potentiometer_LED’. Copy the code below.
//variables set with pins of potentiometer and LEDint pot_pin = 0;int led_pin = 11;
//variable for storing potentiometer valueint pot_value = 0;
void setup() { //put your setup code here, to run once: //set LED pin to output mode pinMode(led_pin, OUTPUT);}
void loop() { //put your main code here, to run repeatedly: //sample potentiometer pin and store value in pot_value pot_value = analogRead(pot_pin); //use pot value to change brightness of LED analogWrite(led_pin, pot_value / 4); //pause loop for 50 milliseconds so readings happen every 50ms delay(50);}
Once you have copied the code, press (compile) and if no errors appear, press (upload) and watch the results!
Start Arduino course 02 - Fade
Page 16 - Start Arduino Course: 02 Fade
Circuit 2.4 - Potentiometer + LED HardwareSoftware

How does it work?
My code won’t compile!
- Check your spelling. Is everything spelt correctly?
- Check your punctuation. Are all your lines ending in a semi-colon? Do you have the correct capital letters?
- Did you close the curly brackets? Make sure your void setup and void loop both have everything surrounded by the open and closed curly brackets.
Is your computer asking you to choose the right Serial port?
This can be solved by going to:Tools > Port > dev/tty.usb.... for MacTools > Port > COM... for Windows.
Start Arduino course 02 - Fade
Page 17 - Start Arduino Course: 02 Fade
int pot_pin = 0;int led_pin = 11;
int pot_value = 0;
pinMode(led_pin, OUTPUT);
void loop() {
void setup() {
Global Variables
These are the global variables created to store the pin numbers of both our digital LED and analog potentiometer.
Global Variables
This is the variable for storing our analog potentiometer data. The range will be between 0 and 1023.
pinMode
We initialise our digital LED pin to be an output pin in the void setup(), as it only needs to be initialised once.
void loop()
The void loop() function is where the main looping of our program happens. Everything within the curly brackets of void loop will be repeated one line after the other and back to the top continuously while the program is running.
void setup()
The void setup() is where we initialise our program, as everything within the curly brackets is called once.

Start Arduino course 02 - Fade
Page 18 - Start Arduino Course: 02 Fade
pot_value = analogRead(pot_pin);
analogWrite(led_pin, pot_value / 4);
delay(50);
analogRead()
analogRead() is an Arduino function used to sample analog In pins. The desired analog pin number is set within the normal brackets (in our case, pot_pin, which is 0). This value is then stored in the integer pot_value.
analogWrite()
The value stored is then used in another Arduino function analogWrite(). This is how we use the technique PWM to fade our LED. The potentiometers analog value is divided by 4 as this brings it down to fit within scale of analogWrite() (0 – 255).
delay()
We add a delay to pause the program loop, meaning the sampling our data only happens every 50 milliseconds.