sso authentication with adfs saml 2 - ephesoft...
TRANSCRIPT
SSO Authentication with ADFS SAML 2.0
Ephesoft Transact Documentation
Table of Contents
Configure Ephesoft Transact ............................................................................................... 1
Configure ADFS Server ......................................................................................................... 3
Export Certificate from ADFS Server .................................................................................... 7
SSO Authentication with ADFS SAML 2.0
w w w . e p h e s o f t . c o m Page 1
Configure Ephesoft Transact 1) Configure Tomcat server to run on HTTPS
http://tomcat.apache.org/tomcat-7.0-doc/ssl-howto.html
2) Configure SAML SSO in Ephesoft Transact http://wiki.ephesoft.com/home/documentation/security-compliance- support-saml-v2
3) The following changes need to be made in the applicationContext- security.xml file:
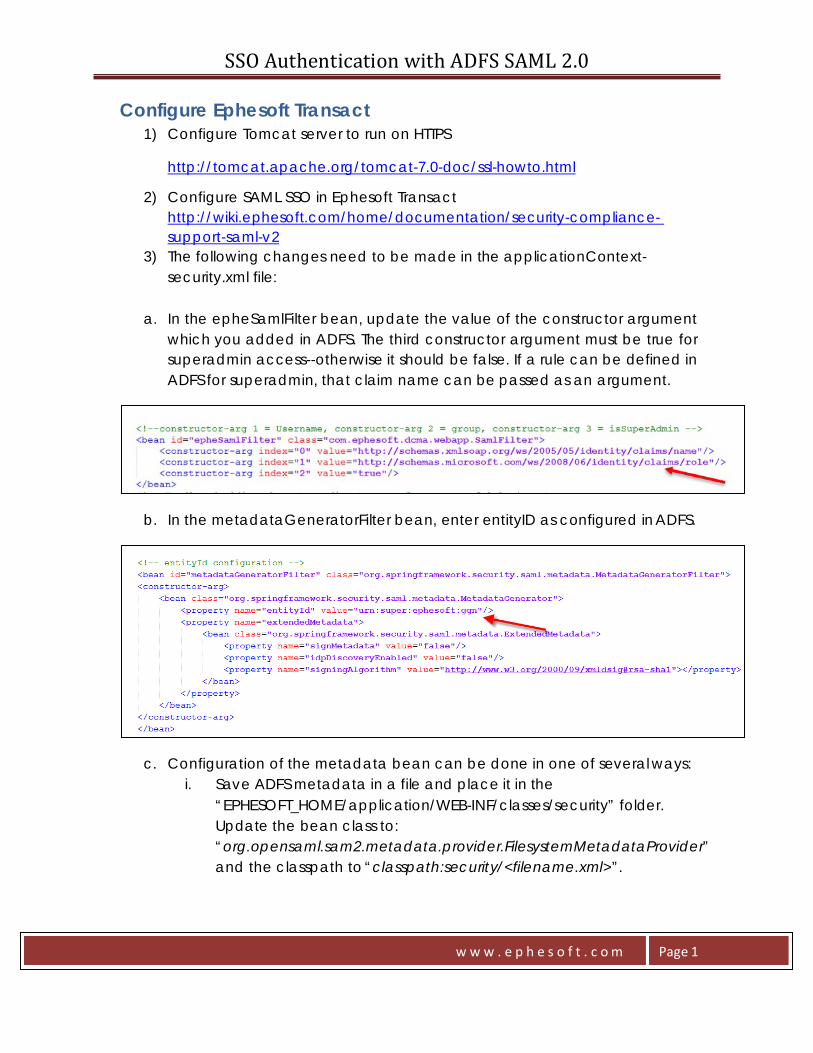
a. In the epheSamlFilter bean, update the value of the constructor argument
which you added in ADFS. The third constructor argument must be true for superadmin access--otherwise it should be false. If a rule can be defined in ADFS for superadmin, that claim name can be passed as an argument.
b. In the metadataGeneratorFilter bean, enter entityID as configured in ADFS.
c. Configuration of the metadata bean can be done in one of several ways:
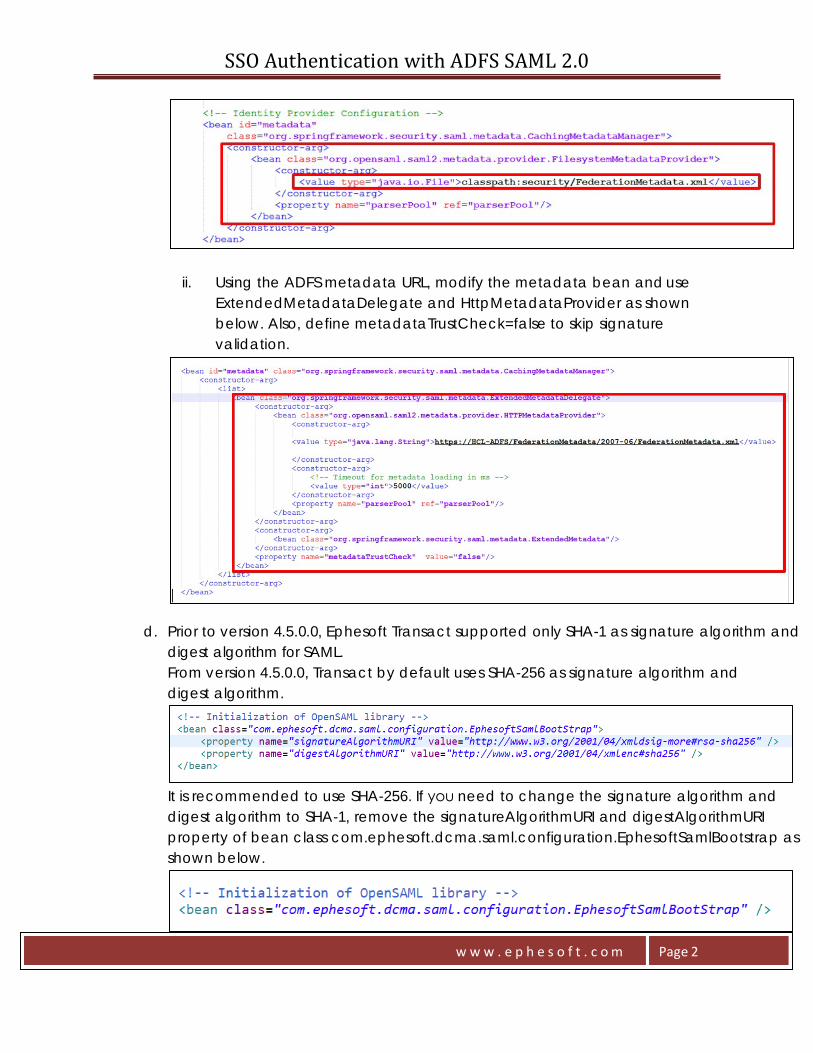
i. Save ADFS metadata in a file and place it in the “EPHESOFT_HOME/application/WEB-INF/classes/security” folder. Update the bean class to: “org.opensaml.sam2.metadata.provider.FilesystemMetadataProvider” and the classpath to “classpath:security/<filename.xml>”.
SSO Authentication with ADFS SAML 2.0
w w w . e p h e s o f t . c o m Page 2
ii. Using the ADFS metadata URL, modify the metadata bean and useExtendedMetadataDelegate and HttpMetadataProvider as shownbelow. Also, define metadataTrustCheck=false to skip signaturevalidation.
d. Prior to version 4.5.0.0, Ephesoft Transact supported only SHA-1 as signature algorithm anddigest algorithm for SAML.From version 4.5.0.0, Transact by default uses SHA-256 as signature algorithm and digest algorithm.
It is recommended to use SHA-256. If you need to change the signature algorithm and digest algorithm to SHA-1, remove the signatureAlgorithmURI and digestAlgorithmURI property of bean class com.ephesoft.dcma.saml.configuration.EphesoftSamlBootstrap as shown below.
SSO Authentication with ADFS SAML 2.0
w w w . e p h e s o f t . c o m Page 3
4) Import ADFS certificates into Ephesoft Transact using the command below. keytool.exe -import cert alias adfssigning -keystore samlKeystore.jks -file adfsCertificate.cer
To export certificates from ADFS, reference the Export Certificate from ADFS Server section in this document.
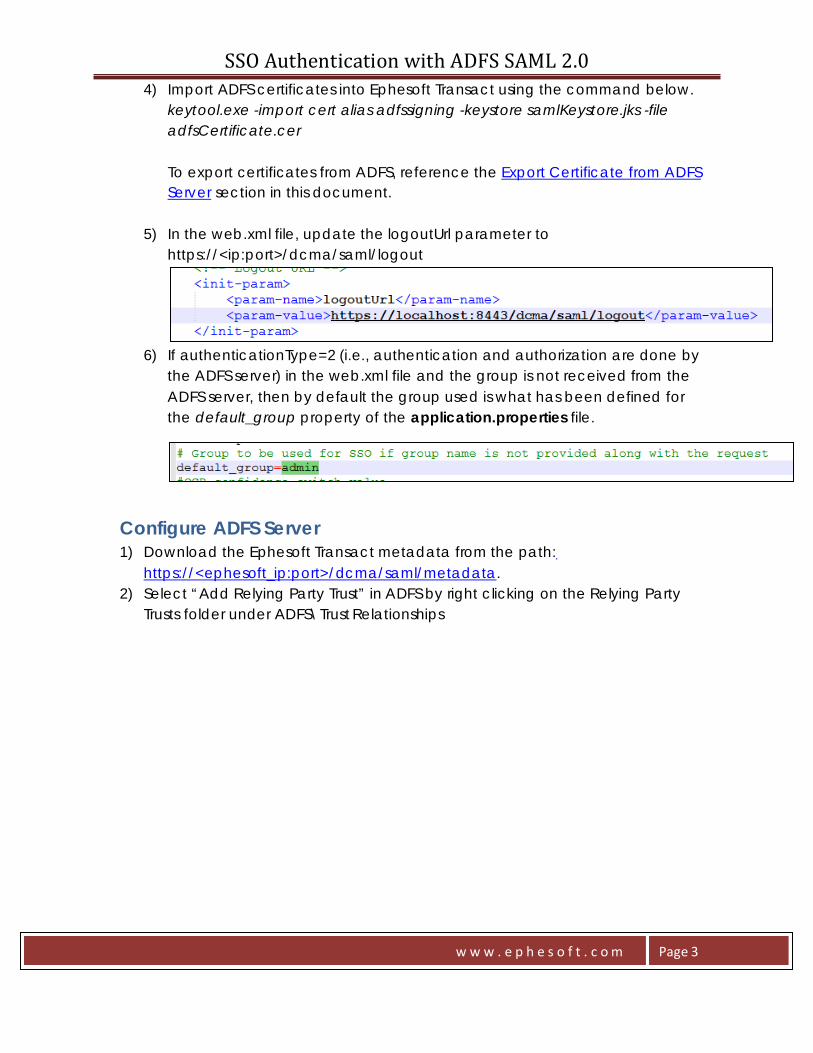
5) In the web.xml file, update the logoutUrl parameter to https://<ip:port>/dcma/saml/logout
6) If authenticationType=2 (i.e., authentication and authorization are done by
the ADFS server) in the web.xml file and the group is not received from the ADFS server, then by default the group used is what has been defined for the default_group property of the application.properties file.
Configure ADFS Server 1) Download the Ephesoft Transact metadata from the path:
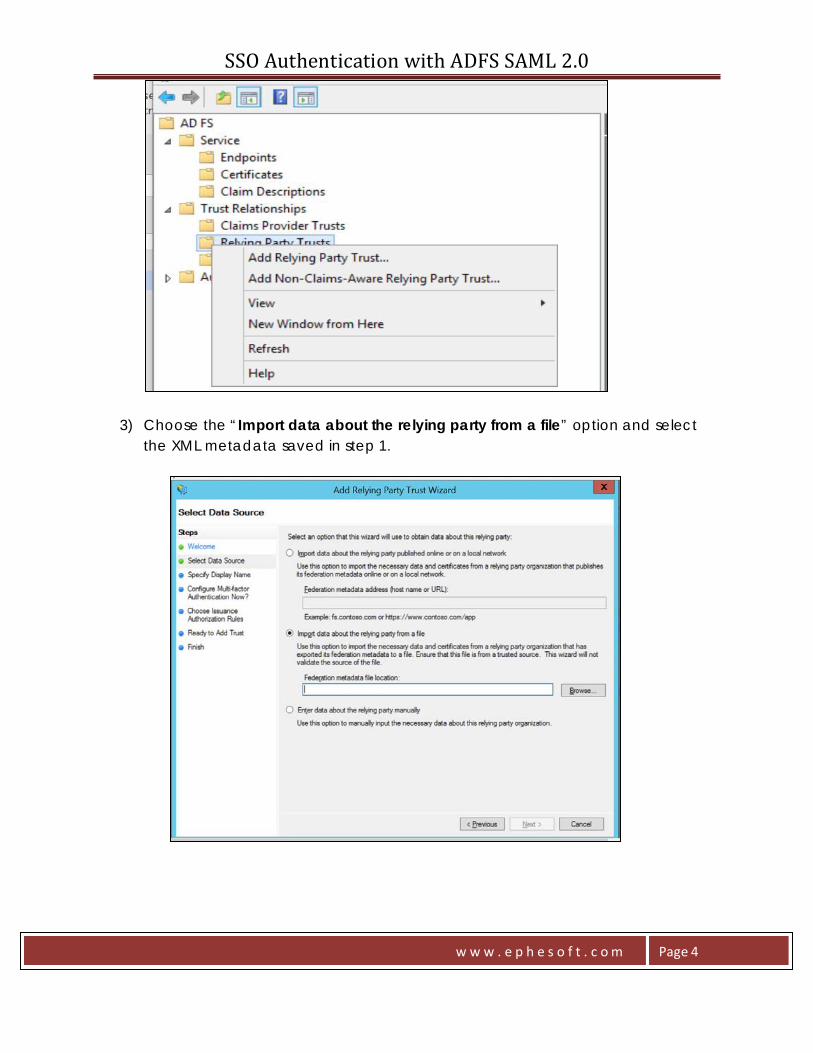
https://<ephesoft_ip:port>/dcma/saml/metadata. 2) Select “Add Relying Party Trust” in ADFS by right clicking on the Relying Party
Trusts folder under ADFS\Trust Relationships
SSO Authentication with ADFS SAML 2.0
w w w . e p h e s o f t . c o m Page 4
3) Choose the “Import data about the relying party from a file” option and select the XML metadata saved in step 1.
SSO Authentication with ADFS SAML 2.0
w w w . e p h e s o f t . c o m Page 5
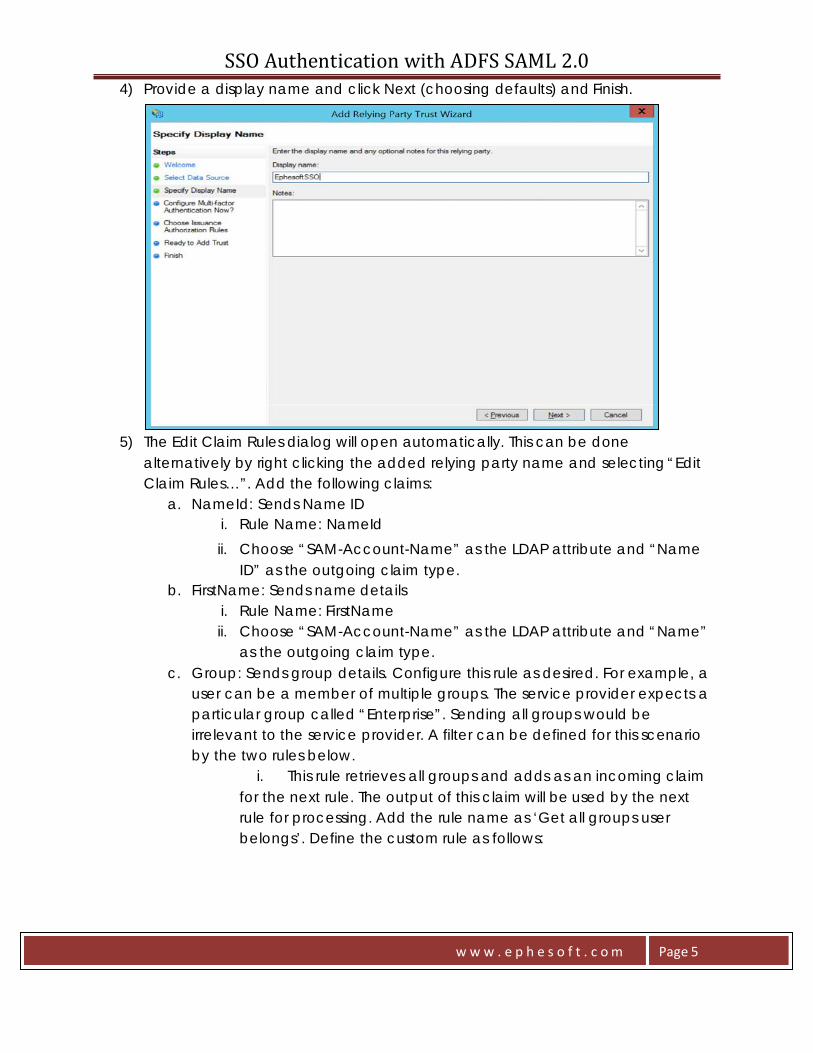
4) Provide a display name and click Next (choosing defaults) and Finish.
5) The Edit Claim Rules dialog will open automatically. This can be done alternatively by right clicking the added relying party name and selecting “Edit Claim Rules…”. Add the following claims:
a. NameId: Sends Name ID i. Rule Name: NameId ii. Choose “SAM-Account-Name” as the LDAP attribute and “Name
ID” as the outgoing claim type. b. FirstName: Sends name details
i. Rule Name: FirstName ii. Choose “SAM-Account-Name” as the LDAP attribute and “Name”
as the outgoing claim type. c. Group: Sends group details. Configure this rule as desired. For example, a
user can be a member of multiple groups. The service provider expects a particular group called “Enterprise”. Sending all groups would be irrelevant to the service provider. A filter can be defined for this scenario by the two rules below.
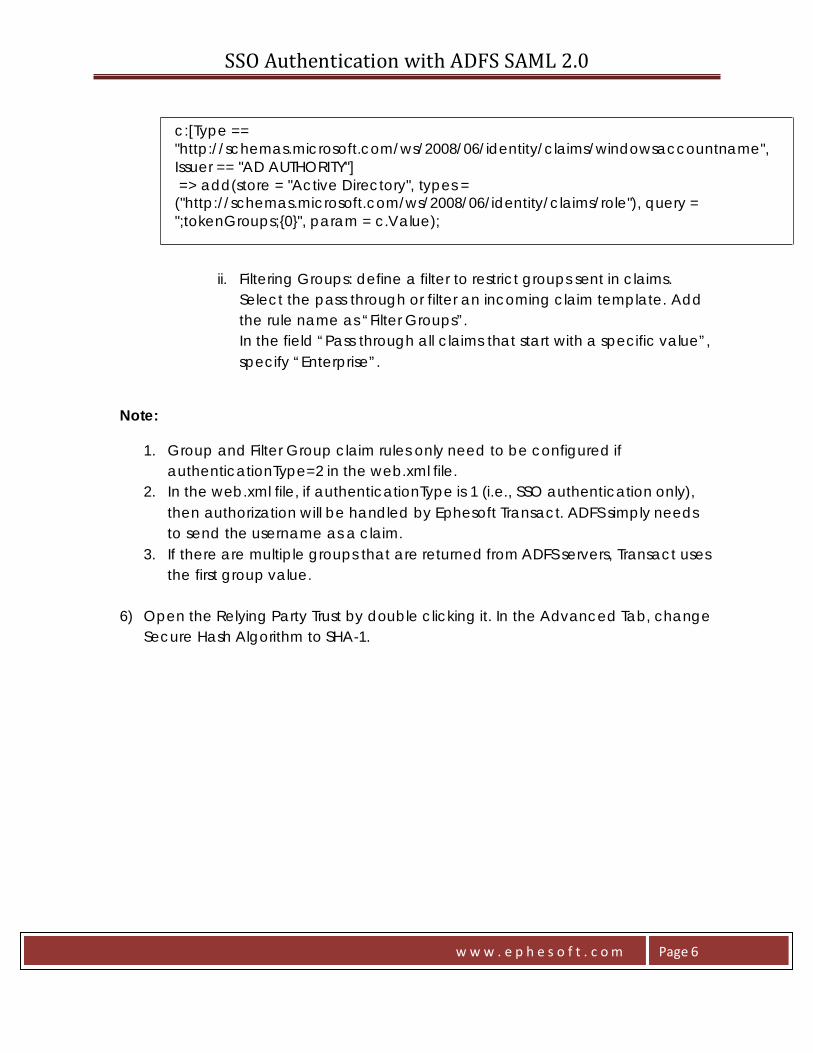
i. This rule retrieves all groups and adds as an incoming claim for the next rule. The output of this claim will be used by the next rule for processing. Add the rule name as ‘Get all groups user belongs’. Define the custom rule as follows:
SSO Authentication with ADFS SAML 2.0
w w w . e p h e s o f t . c o m Page 6
c:[Type == "http://schemas.microsoft.com/ws/2008/06/identity/claims/windowsaccountname", Issuer == "AD AUTHORITY"] => add(store = "Active Directory", types =
("http://schemas.microsoft.com/ws/2008/06/identity/claims/role"), query = ";tokenGroups;{0}", param = c.Value);
ii. Filtering Groups: define a filter to restrict groups sent in claims. Select the pass through or filter an incoming claim template. Add the rule name as “Filter Groups”. In the field “Pass through all claims that start with a specific value”, specify “Enterprise”.
Note:
1. Group and Filter Group claim rules only need to be configured if authenticationType=2 in the web.xml file.
2. In the web.xml file, if authenticationType is 1 (i.e., SSO authentication only), then authorization will be handled by Ephesoft Transact. ADFS simply needs to send the username as a claim.
3. If there are multiple groups that are returned from ADFS servers, Transact uses the first group value.
6) Open the Relying Party Trust by double clicking it. In the Advanced Tab, change
Secure Hash Algorithm to SHA-1.
SSO Authentication with ADFS SAML 2.0
w w w . e p h e s o f t . c o m Page 7
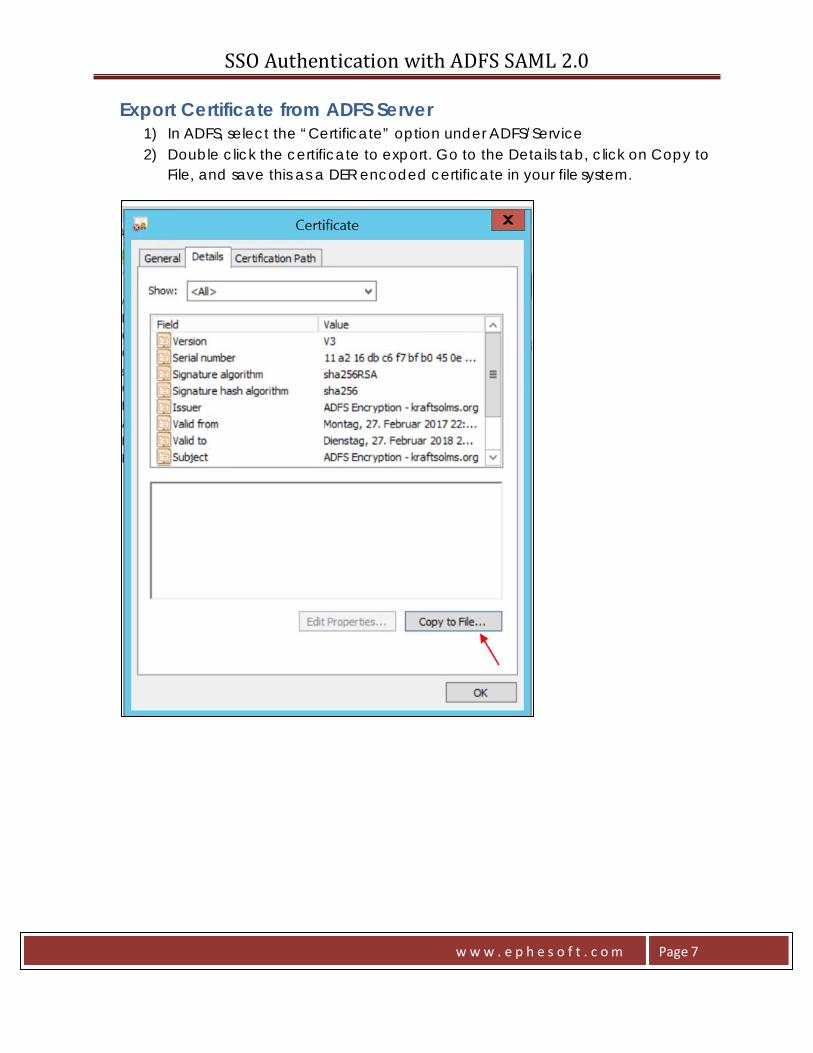
Export Certificate from ADFS Server 1) In ADFS, select the “Certificate” option under ADFS/Service 2) Double click the certificate to export. Go to the Details tab, click on Copy to
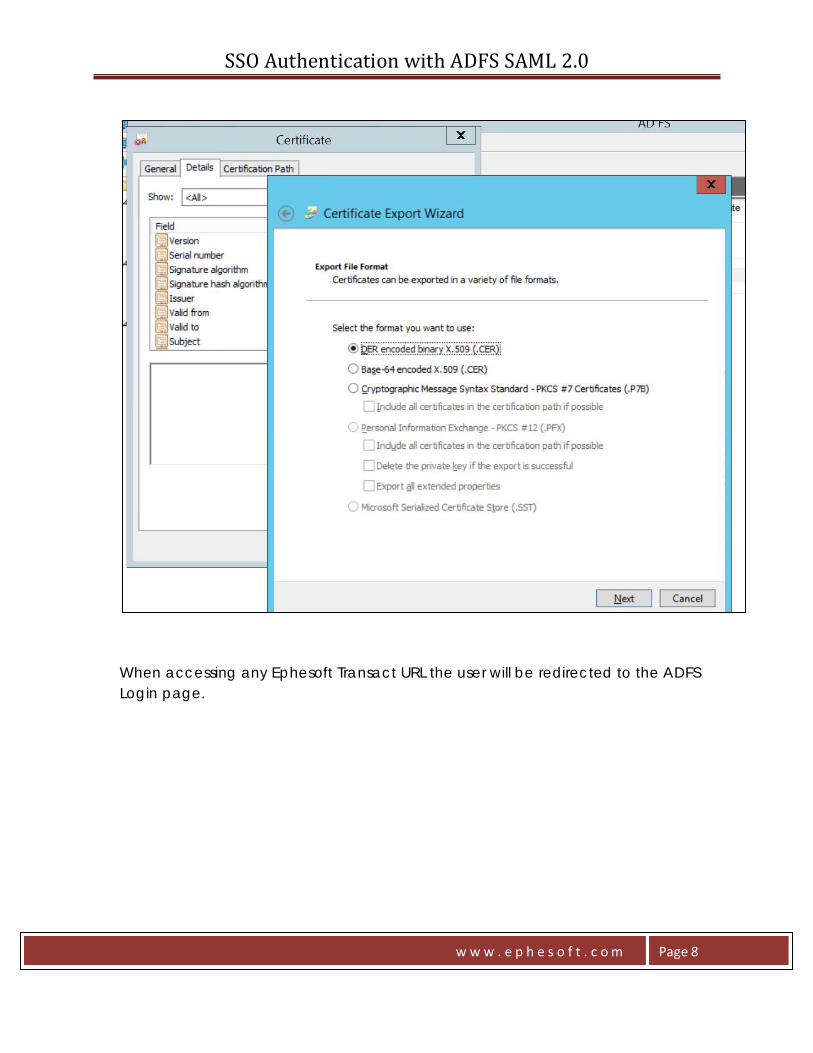
File, and save this as a DER encoded certificate in your file system.
SSO Authentication with ADFS SAML 2.0
w w w . e p h e s o f t . c o m Page 8
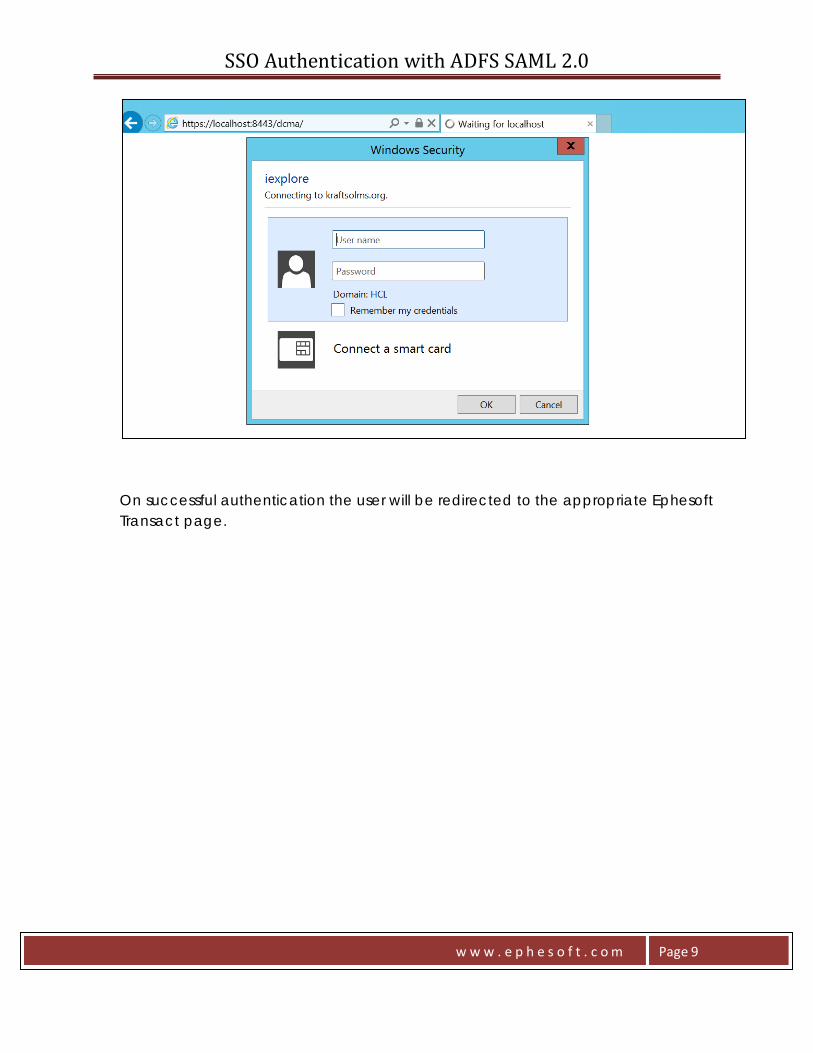
When accessing any Ephesoft Transact URL the user will be redirected to the ADFS Login page.
SSO Authentication with ADFS SAML 2.0
w w w . e p h e s o f t . c o m Page 9
On successful authentication the user will be redirected to the appropriate Ephesoft Transact page.