srv222: dispatch boardftp.sagesoftwareuniversity.com/lms/cre/smb26/srv222-dispatchbrd.pdfdispatch...
TRANSCRIPT

CERTIFIED COURSE CURRICULUMSAGE UNIVERSITY
SRV222: Dispatch Board

IMPORTANT NOTICE
This document and the Sage 100 Contractor software may be used only in accordance with the Sage 100 Contractor End User License Agreement applicable to the Sage 100 Contractor software. You may not use, copy, modify, or transfer the Sage 100 Contractor software or this documentation except as expressly provided in the license agreement.
Visit Sage's training services Web site at www.SageU.com, call 1-877-724-3285, or e-mail us at [email protected] to learn about training classes that Sage adds throughout the year. Contact your business partner to learn about local training options.
Information in this document is intended solely as general information with respect to common business issues and is not to be construed as professional advice. Consult a tax or accounting professional for all tax and account related questions. THE INFORMATION HEREIN IS PROVIDED“AS IS” AND ALL WARRANTIES ARE EXPRESSLY DISCLAIMED, INCLUDING BUT NOT LIMITED TO ANY WARRANTY: OF MERCHANTABILITY; OF FITNESS FOR ANY PARTICULAR PURPOSE; OF NON-INFRINGEMENT OF ANY PROPRIETARY RIGHT OF ANY THIRD PARTY IN ANY COUNTRY; OTHERWISE ARISING OUT OF ANY PRODUCT, PROPOSAL, SPECIFICATION OR SAMPLE; AND ANY WARRANTY THAT THE DOCUMENT IS ERROR FREE. No license, express, implied, by estoppel or otherwise, to any intellectual property right is granted by this document. Sage Software may make changes to the information in this document at any time, without notice. Recipient is solely responsible for assessing the suitability of the information and assumes all risk of use.
© 2013 Sage Software, Inc. All rights reserved. Sage, the Sage logos, and the Sage product and service names mentioned herein are registered trademarks or trademarks of Sage Software, Inc., or its affiliated entities. All other trademarks are the property of their respective owners.
01/2013

Service Contents
© 2013 Sage Software, Inc. Online Training at www.SageU.com 3
Contents
Welcome . . . . . . . . . . . . . . . . . . . . . . . . . . . . . . . . . . . . . . . . . . . . . . . . . . . . . . 5
Course Pre-Requisites . . . . . . . . . . . . . . . . . . . . . . . . . . . . . . . . . . . . . . . . . . . . . . . . 5Training Data for Lecture and Activities . . . . . . . . . . . . . . . . . . . . . . . . . . . . . . . . . . . 5Conventions Used in This Workbook . . . . . . . . . . . . . . . . . . . . . . . . . . . . . . . . . . . . . 7
Dispatch Board . . . . . . . . . . . . . . . . . . . . . . . . . . . . . . . . . . . . . . . . . . . . . . . . . 9
Dispatch Board . . . . . . . . . . . . . . . . . . . . . . . . . . . . . . . . . . . . . . . . . . . . . . . . . . . . . 9Dispatch a Work Order . . . . . . . . . . . . . . . . . . . . . . . . . . . . . . . . . . . . . . . . . . . . . . 11View Dispatch Board . . . . . . . . . . . . . . . . . . . . . . . . . . . . . . . . . . . . . . . . . . . . . . . . 13Dispatch Board Preferences . . . . . . . . . . . . . . . . . . . . . . . . . . . . . . . . . . . . . . . . . . 18Column Setup - Employees and Vendors . . . . . . . . . . . . . . . . . . . . . . . . . . . . . . . . 18Student Exercise 1 . . . . . . . . . . . . . . . . . . . . . . . . . . . . . . . . . . . . . . . . . . . . . . . . . . 19Student Exercise 2 . . . . . . . . . . . . . . . . . . . . . . . . . . . . . . . . . . . . . . . . . . . . . . . . . . 20Dispatch a Work Order . . . . . . . . . . . . . . . . . . . . . . . . . . . . . . . . . . . . . . . . . . . . . . 20Student Exercise 3 . . . . . . . . . . . . . . . . . . . . . . . . . . . . . . . . . . . . . . . . . . . . . . . . . . 23Student Exercise 4 . . . . . . . . . . . . . . . . . . . . . . . . . . . . . . . . . . . . . . . . . . . . . . . . . . 24Student Exercise 5 . . . . . . . . . . . . . . . . . . . . . . . . . . . . . . . . . . . . . . . . . . . . . . . . . . 26Student Exercise 6 . . . . . . . . . . . . . . . . . . . . . . . . . . . . . . . . . . . . . . . . . . . . . . . . . . 27

Contents Sage 100 Contractor
4 Local Training From Business Partners © 2013 Sage Software, Inc.

Service Welcome
© 2013 Sage Software, Inc. Online Training at www.SageU.com 5
Welcome
This handout has been designed for use in an instructor-led class for Sage 100 Contractor. Detailed instructions help you recall the procedures introduced by your instructor. Depending on how your training class is conducted, some sections may not be addressed. Refer to these sections in the future as you continue to work with the software.
Course Pre-Requisites
This course assumes that you have the Sage 100 Contractor software installed with the Sample Company selected. You should also have participated in the NCT102, SRV120, and SRV121 courses.
Training Data for Lecture and Activities
As your instructor demonstrates procedures in the software, he or she will access the training data set that has been used to capture application screens in this workbook. You will also use the training data set to complete the activities.
You can download the training data sets on the Sage University Web site (www.sageu.com) using the procedure explained on the next page.
Transactions in the Training Data Set
In certain cases, transactions in the data set that you use may show a different year than the illustrations in this book, or than the instructor shows in class. If your data set transactions show a different year, but all other details such as the account setup, vendor names, and jobs are identical, your data set will correspond to the materials in all respects but the date.
When you complete the activities that involve dates, you may see a different year in the instructions or screen shot than in your data. Use the appropriate year based on the data you are using for activities.
For example, if 2012 is the current year in your data and the activity prompts you to enter prior year information, enter a date in 2011. If the activity prompts you to enter current year information, enter a date in 2012.

Welcome Sage 100 Contractor
6 Local Training From Business Partners © 2013 Sage Software, Inc.
If you already have an older version of the training data installed, you can upgrade it using the directions below to download the latest training data set.
If you prefer to use another data set for the activities, you may do so, but your results may not resemble the images you see in the workbook.
To Download the Training Data Set
1. In an Internet browser, go to http://sageu.com/sage100contractor.
2. In the right-hand area under QuickLinks, click Training Data.
3. Select the ReadMe File file for instructions on load the sample data.
4. Click the Download the Sample Company Training Data link.
5. Click Run to install the training data. If you see a security warning about the publisher, click Run.
6. Browse to your MB7 folder, then click Unzip, and then click OK.
Menu Paths
In this workbook, menu paths show you the steps required to start a task. This is a sample menu path:
4-Accounts Payable > 3-Vendor Payments > 2-Pay Vendors
Many modules and tasks are also available through Sage 100 Contractor Desktop. The Desktop has a tree structure that reflects the same logical progression as the steps of a menu path.
Where to Get Additional Information
Application Help Files
Each application contains an extensive Help system. The Help is your primary resource for reference and how-to information for all tasks. Help includes Contents, Index, and Search features that help you locate information quickly.
You can start Help in two easy ways:
Select About this Window from the Help menu in any application.
Press the F1 key on the window in any application.
Technical Support Knowledgebase
The Technical Support Knowledgebase contains the latest information about application features. You must have a current service plan to access the knowledgebase.

Service Welcome
© 2013 Sage Software, Inc. Online Training at www.SageU.com 7
InfoCenter
Be sure to check the InfoCenter for product news, announcements, support, and training. Access the InfoCenter from Home and Resources tab > Customer Resources.
Submit Enhancement Requests
Do you have a suggestion for how we can improve our software? We want to hear your ideas! Open the Product Enhancement Request option from Home and Resources tab > Customer Resources. Ideas you enter will be submitted to our Product Management team.
Conventions Used in This Workbook
This workbook uses the following conventions:
The names of screens, windows, fields, buttons, and other features displayed by the software are shown in bold type.
Information you enter into the software is in bold type, as in the example below:
Type Miscellaneous in the Amount Type field.
Names of keys are shown in capitals; for example, ENTER, TAB. A plus sign (+) between two key names indicates that you should press both keys at the same time; for example, SHIFT + TAB.
NOTE: This symbol draws your attention to information of particular interest.
TIP: This symbol draws your attention to tips about using a helpful feature of the software.
WARNING: This symbol draws your attention to information that is important because it can help you avoid a costly or time-consuming error.
FOR MORE INFORMATION: This symbol draws your attention to a reference to another document or to another section in this document.

Welcome Sage 100 Contractor
8 Local Training From Business Partners © 2013 Sage Software, Inc.

Service Dispatch Board
© 2013 Sage Software, Inc. Online Training at www.SageU.com 9
Dispatch Board
This course is designed to teach you how to dispatch work orders utilizing the features of Sage 100 Contractor.
In this course you will learn how to:
Set up the Dispatch Board for managing work orders.
At the completion of this course, you will be able to:
Customize the Dispatch Board for your company.
Dispatch work orders onto the Dispatch Board.
Manipulate appointments, including moving, copying, and adjusting times.
Review the Calendar setup, view appointment types, and learn how to block out time for technicians who are unavailable.
Dispatch Board
Sage 100 Contractor’s Dispatch Board allows you to manage work orders and technician assignments. Using the Dispatch Board, you can assign technicians to work orders, change appointments, move work orders to different days, and delete work orders. You can also enter work orders in the 11-2 Work Orders/Invoices/

Dispatch Board Sage 100 Contractor
10 Local Training From Business Partners © 2013 Sage Software, Inc.
Credits window without assigning technicians. The Dispatch Board will display those work orders in the All Unassigned column.

Service Dispatch Board
© 2013 Sage Software, Inc. Online Training at www.SageU.com 11
Dispatch a Work Order
Method 1—(from the 11-2 Work Orders/Invoices/Credits grid to Dispatch Board)
1. Once work order is created, pull up existing record.
2. Enter information into the 11-2 Location tab.
3. Fill out field boxes in Date/Time area of the tab (all optional except “Scheduled” box).
Call – Date and time call came in. Program will default to system date and time.
Dispatch – Can enter separate time if work order is not dispatched when call came in.
Scheduled – Required field. Will be used in canned reports as well as Work Order printouts.
Start and Finish - for information purposes.
Estimated Hours and Actual Hours – for information purposes.
Dispatch Board Sage 100 Contractor
12 Local Training From Business Partners © 2013 Sage Software, Inc.
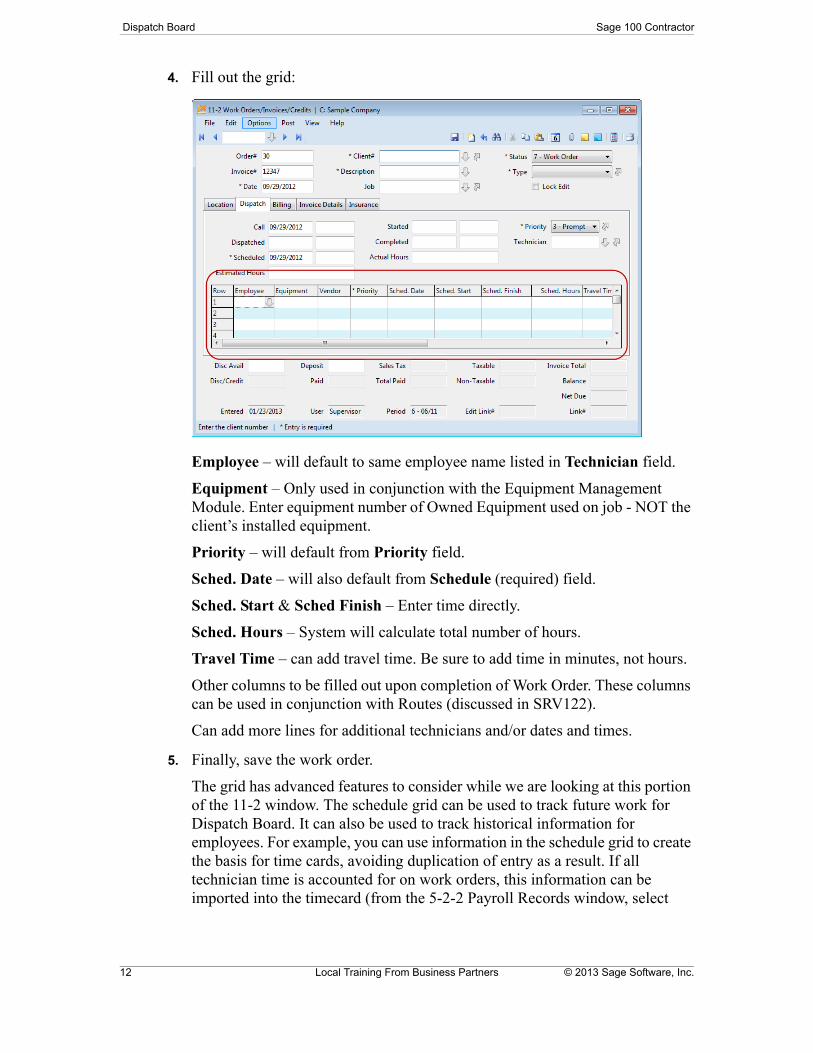
4. Fill out the grid:
Employee – will default to same employee name listed in Technician field.
Equipment – Only used in conjunction with the Equipment Management Module. Enter equipment number of Owned Equipment used on job - NOT the client’s installed equipment.
Priority – will default from Priority field.
Sched. Date – will also default from Schedule (required) field.
Sched. Start & Sched Finish – Enter time directly.
Sched. Hours – System will calculate total number of hours.
Travel Time – can add travel time. Be sure to add time in minutes, not hours.
Other columns to be filled out upon completion of Work Order. These columns can be used in conjunction with Routes (discussed in SRV122).
Can add more lines for additional technicians and/or dates and times.
5. Finally, save the work order.
The grid has advanced features to consider while we are looking at this portion of the 11-2 window. The schedule grid can be used to track future work for Dispatch Board. It can also be used to track historical information for employees. For example, you can use information in the schedule grid to create the basis for time cards, avoiding duplication of entry as a result. If all technician time is accounted for on work orders, this information can be imported into the timecard (from the 5-2-2 Payroll Records window, select

Service Dispatch Board
© 2013 Sage Software, Inc. Online Training at www.SageU.com 13
Options > Import Data > Service Orders). Time cards can then be reviewed and adjusted before creating paychecks.
View Dispatch Board
The Help menu has an excellent description of Dispatch Board.

Dispatch Board Sage 100 Contractor
14 Local Training From Business Partners © 2013 Sage Software, Inc.
Types - Color Picker
In the 11-2 Work Orders/Invoices/Credits window, let’s start with the Type field.
A new column called Dispatch Color was added in the Service Invoice Types grid.
Double-click in this column to select a color and apply it to the type. This also updates the work order on the dispatch board with the same color.
This allows you to see at a glance how many work orders are of one type compared to another type.
Color of appointment indicates record status
Color on top of appointment – left side indicates service area
Color on top of appointment – right side indicates priority
Travel time always indicated in green

Service Dispatch Board
© 2013 Sage Software, Inc. Online Training at www.SageU.com 15
Service Area - Priority Names and Color
Three more priority levels were added to select from the Priority field. You can edit the priorities color, label, rename sections, add sections, or removed unused sections. These levels show on the Dispatch Board on the left side.
NOTE: Only the user Supervisor has access to the Advanced Options.

Dispatch Board Sage 100 Contractor
16 Local Training From Business Partners © 2013 Sage Software, Inc.
Copy or Repeat this Record
In 11-2 Work Orders/Invoices/Credits window, you now have the ability to copy or repeat a work order. Instead of using the copy and paste function, this option allows you to designate how often to copy and does not copy information such as the data control number.

Service Dispatch Board
© 2013 Sage Software, Inc. Online Training at www.SageU.com 17
Posting Options
You can now handle posting options for work orders three different ways. From the Options menu, select Posting Options. Select from one of the following options:
When you use the Use today's date as the Invoice Date option, due dates, and discount dates calculate from today's date according to the client's terms.
When you use the Use each record's existing Invoice Date option, existing invoice dates, due dates, and discount dates will not be adjusted. Missing dates will be calculated.
When you use the Use [user-defined] as the Invoice Date option, due dates, and discount dates will calculate from the entered invoice date according to the client's terms.
NOTE: If you are the Supervisor, you can choose one of the three options and select the Always use the option selected above check box to make it the default posting option.

Dispatch Board Sage 100 Contractor
18 Local Training From Business Partners © 2013 Sage Software, Inc.
Dispatch Board Preferences
In the Board Layout tab, do the following:
Set the size of the one-hour time blocks by click and dragging on the resize handles.
Set the regular business hours by selecting the Begin the day at and End the day at times using the drop-down menu.
Adjust the width of the time blocks also adjusts the width of the technician columns in the Dispatch Board.
Column Setup - Employees and Vendors
1. Open menu option 11-3Dispatch Board.
2. In the Dispatch Board, on the Settings menu, click Column Setup. The Dispatch Board Column Setup window will open.
Column#: Enter Dispatch Board column number where each employee will be listed. First column is always reserved for Unassigned appointments.
Employee: Enter employee number to add to column in Dispatch Board. For ease of input, can type first few letters of last name.
Display As: Change employee’s names to represent department. For example put “P-” in front of all plumbers and “SM-” in front of all sheet metal technicians. Could also create employees to represent crews as opposed to individual employees. Can also set order different from employee number to make more sense for your company.

Service Dispatch Board
© 2013 Sage Software, Inc. Online Training at www.SageU.com 19
This is just for display purposes. If you delete an employee from the list the employee will be removed from the board, but no work orders will be altered.
Student Exercise 1
Please go to your desktop and open Sage 100 Contractor (with the Sample selected) if you have not already done so.
1. Open 11-3 Dispatch Board.
2. Click Settings > Column Setup.
3. Set up the Employee List as show on the previous page.
4. Save the list.
5. Close Dispatch Board Employee List and notice the changes made to the Dispatch Board column headers.
Closing the Dispatch Board, please return to the conference when you have completed this exercise.
Creating Service Area
When displaying Work Orders, Dispatch Board can be color coded for Priority as well as Service Area.
Service Area is user-defined grid.

Dispatch Board Sage 100 Contractor
20 Local Training From Business Partners © 2013 Sage Software, Inc.
Service Area detail grid is available in any menu that contains Service Area field, such as 3-6 Receivable Clients and 11-2 Work Orders/Invoices/Credits.
Student Exercise 2
Please return to your desktop and set up Service Area as shown above:
1. Open 11-2 Work Orders/Invoice/Credits.
2. Click the Location tab if it is not already visible.
3. Click on View/Add Records next to Service Area. The Service Areas window will open.
4. Create Service Area 1 – Northern County.
5. Double-click in the Dispatch Color cell and double-click to select any color from the Colors dialog box.
6. Create other areas as shown on the previous page
7. Save the list.
Please return to the conference when you have completed this exercise.
Dispatch a Work Order
Method 2—(from Dispatch Board to 11-2 Work Orders/Invoices/Credits grid)
This method makes the most sense because for ease of entry. Typically a dispatcher will look at the board first to see what is open before dispatching.
1. Once work order is created, pull up the existing record.
Double-click in dispatch color column to display list of colors to select for service area

Service Dispatch Board
© 2013 Sage Software, Inc. Online Training at www.SageU.com 21
2. Enter Dispatch Board.
3. On an open time slot for the desired employee, click and drag over the length of time required.
4. When mouse button is released, three options appear:
Time Off
New Work Order
Assign Time
5. Click Assign time. This will fill out schedule grid in open work order.
6. The Dispatch Board will close and the work order will now show the scheduled information in the grid. Save the work order to accept the appointment.
Add Travel Time
1. Click on top of appointment and drag up – dotted lines appear to indicate the addition of travel time to beginning of appointment.
2. Release and travel time will be added to appointment and appear in green.

Dispatch Board Sage 100 Contractor
22 Local Training From Business Partners © 2013 Sage Software, Inc.
3. The amount of travel time increases by 15-minute increments. Travel time is only entered at beginning of appointment, never at end of appointment.
Service Dispatch Board
© 2013 Sage Software, Inc. Online Training at www.SageU.com 23
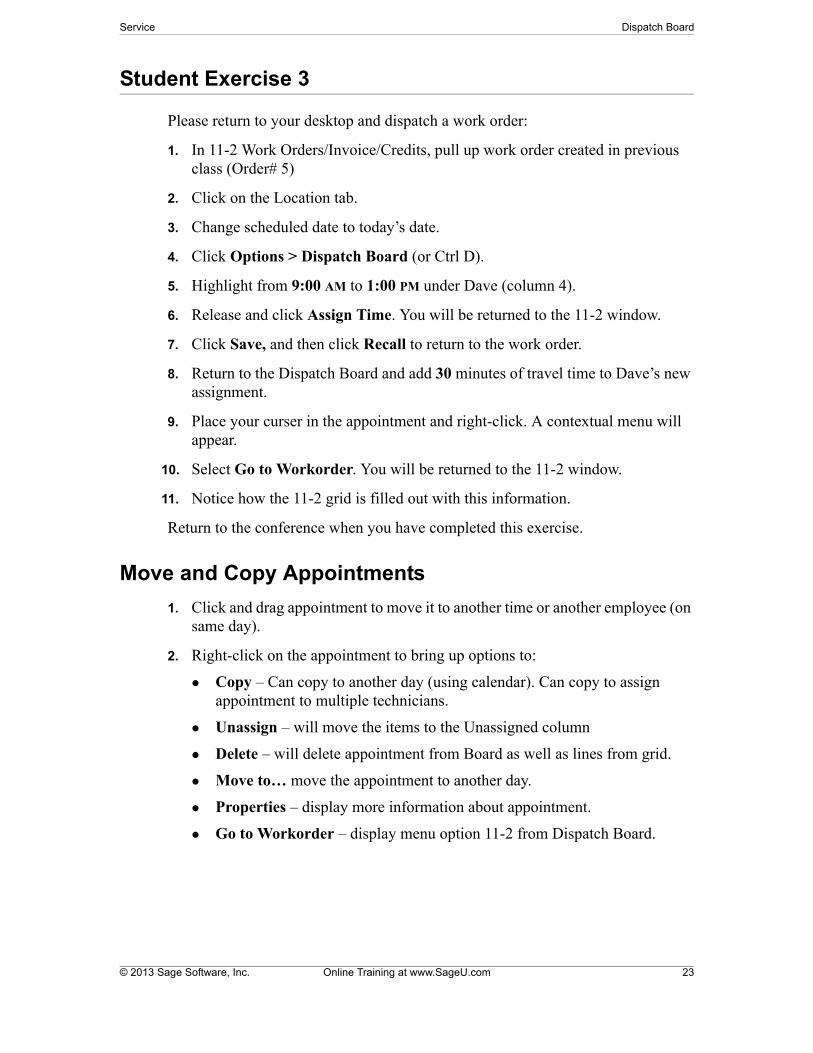
Student Exercise 3
Please return to your desktop and dispatch a work order:
1. In 11-2 Work Orders/Invoice/Credits, pull up work order created in previous class (Order# 5)
2. Click on the Location tab.
3. Change scheduled date to today’s date.
4. Click Options > Dispatch Board (or Ctrl D).
5. Highlight from 9:00 AM to 1:00 PM under Dave (column 4).
6. Release and click Assign Time. You will be returned to the 11-2 window.
7. Click Save, and then click Recall to return to the work order.
8. Return to the Dispatch Board and add 30 minutes of travel time to Dave’s new assignment.
9. Place your curser in the appointment and right-click. A contextual menu will appear.
10. Select Go to Workorder. You will be returned to the 11-2 window.
11. Notice how the 11-2 grid is filled out with this information.
Return to the conference when you have completed this exercise.
Move and Copy Appointments
1. Click and drag appointment to move it to another time or another employee (on same day).
2. Right-click on the appointment to bring up options to:
Copy – Can copy to another day (using calendar). Can copy to assign appointment to multiple technicians.
Unassign – will move the items to the Unassigned column
Delete – will delete appointment from Board as well as lines from grid.
Move to… move the appointment to another day.
Properties – display more information about appointment.
Go to Workorder – display menu option 11-2 from Dispatch Board.

Dispatch Board Sage 100 Contractor
24 Local Training From Business Partners © 2013 Sage Software, Inc.
Viewing Appointment Properties
1. Right-click on the appointment. The contextual menu will open.
2. Click Properties to display additional information.
Student Exercise 4
Please return to your desktop to move and view an appointment:
1. Find the Work Order created in previous class and used in the previous exercise.
2. Click Options > Dispatch Board (or press Ctrl D).
3. Click and move the appointment under Dave to Luke at 2:00 PM.
4. Right-click on the appointment you just moved and then click Go to Workorder on the contextual menu.
5. Notice that the 11-2 grid information has changed.
Please return to the conference when you have completed this exercise.
Unassigned Appointment
If a Work Order has a Scheduled Date in the field, but no information in the grid, it displays on Dispatch Board as All Unassigned.
Service Dispatch Board
© 2013 Sage Software, Inc. Online Training at www.SageU.com 25
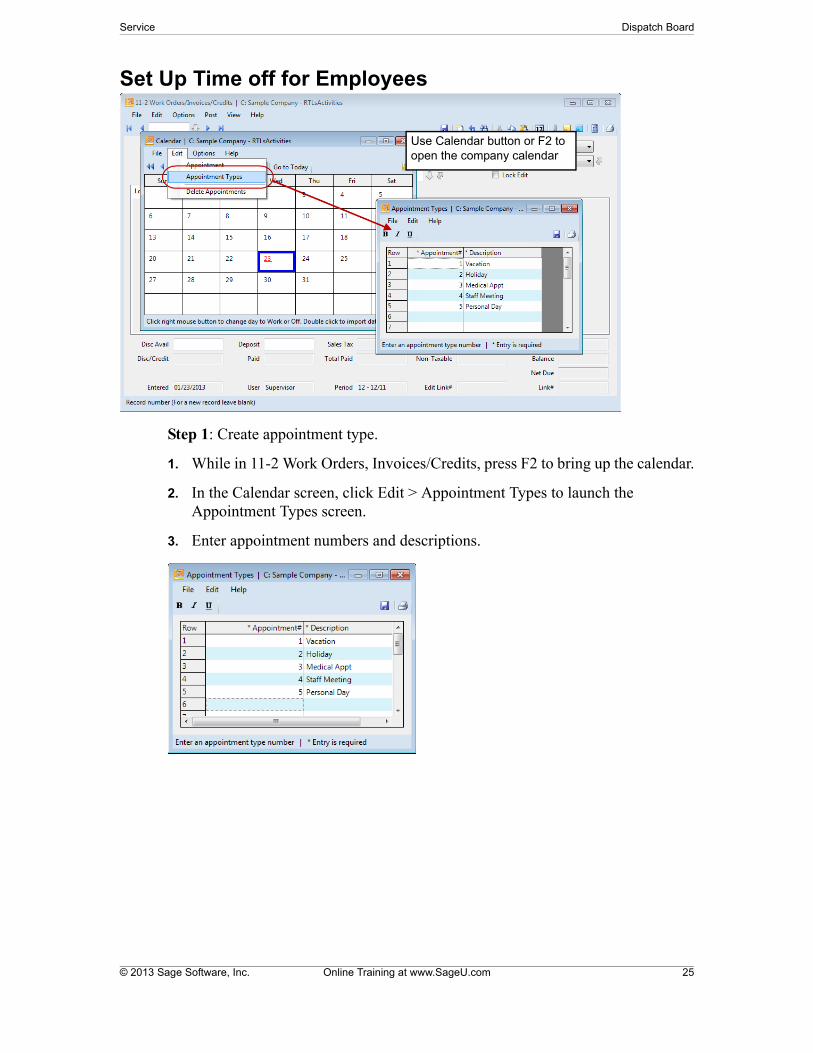
Set Up Time off for Employees
Step 1: Create appointment type.
1. While in 11-2 Work Orders, Invoices/Credits, press F2 to bring up the calendar.
2. In the Calendar screen, click Edit > Appointment Types to launch the Appointment Types screen.
3. Enter appointment numbers and descriptions.
Use Calendar button or F2 to open the company calendar
Dispatch Board Sage 100 Contractor
26 Local Training From Business Partners © 2013 Sage Software, Inc.
Student Exercise 5
Please return to your desktop and set up appointment types as shown above.
1. In 11-2 still, press F2 to pull up calendar.
2. In the Calendar screen, click Edit > Appointment Types. The Appointment Types window will open.
3. Create Appointment Types as shown in screen image above.
4. Save the Appointment Types and close the calendar.
Please return to the conference when you have completed this exercise.
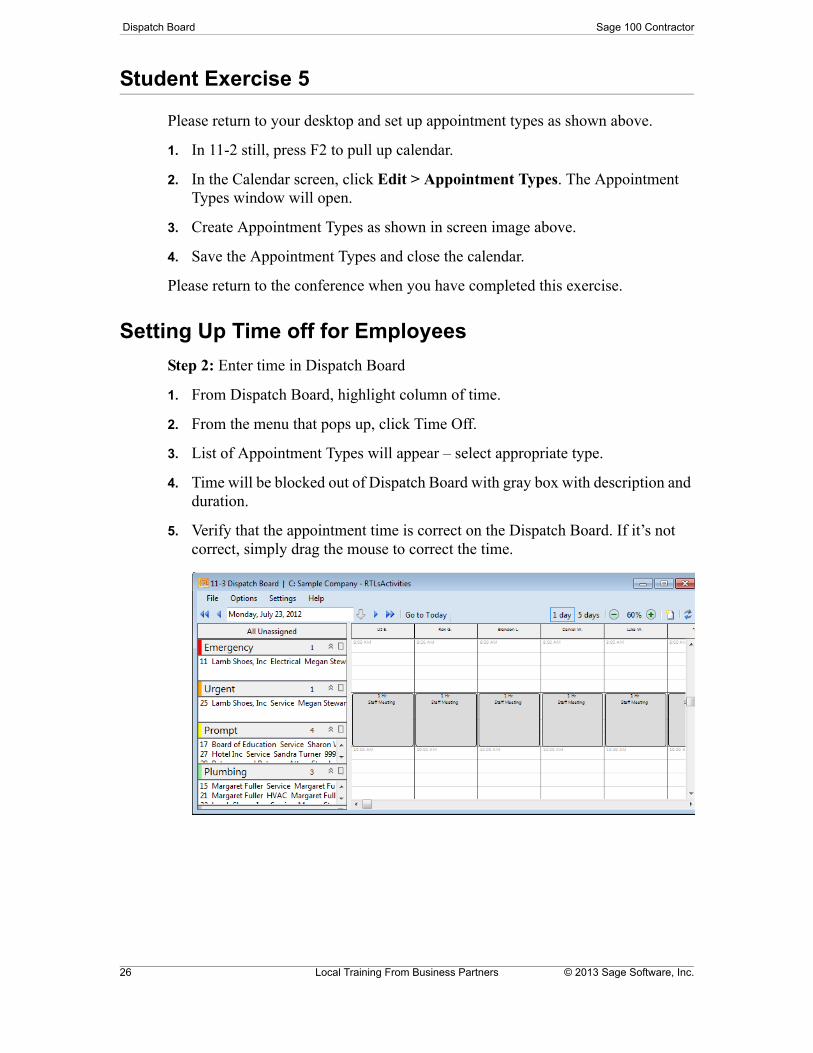
Setting Up Time off for Employees
Step 2: Enter time in Dispatch Board
1. From Dispatch Board, highlight column of time.
2. From the menu that pops up, click Time Off.
3. List of Appointment Types will appear – select appropriate type.
4. Time will be blocked out of Dispatch Board with gray box with description and duration.
5. Verify that the appointment time is correct on the Dispatch Board. If it’s not correct, simply drag the mouse to correct the time.

Service Dispatch Board
© 2013 Sage Software, Inc. Online Training at www.SageU.com 27
Student Exercise 6
Please return to your desktop and set up a staff meeting as shown above.
1. In 11-3 Dispatch Board.
2. Highlight from 9:00 AM to 10:00 AM for all employees.
3. In the contextual menu that appears, click Time Off. The Appointment Types window will open.
4. Double-click Staff Meeting.
5. Notice how the staff meeting is displayed as a row of gray boxes. (If the time is not correct, simply drag the box with your mouse to correct the time.)
Please return to the conference when you have completed this exercise.
Additional Information about the Dispatch Board
Each time the Dispatch Board is viewed it is actually reading the schedule grid of all existing records. Changes made on the Dispatch board will be updated and saved to the corresponding work order.
Dispatch Board should be closed instead of minimized so that it will be re-read each time it is opened.
Click the Refresh button to update the Dispatch Board if more than one person is working with the Dispatch Board (on a network.)
Menu option 11-3 – View Dispatch Board – is for display only. Cannot edit Dispatch Board from this menu option.
Are there any questions about the Dispatch Board or dispatching using Sage 100 Contractor?
Review of course objectives
We have covered dispatching in Sage 100 Contractor and discussed work orders. At this point you should feel comfortable with:
Creating and customizing the Dispatch Board.
Adding, moving, and adjusting work orders.
Accounting for travel time.
Working with the Schedule grid for dispatching purposes as well as for historical purposes to track technician’s time.
Thank you for participating in this online class.

Dispatch Board Sage 100 Contractor
28 Local Training From Business Partners © 2013 Sage Software, Inc.