smart home alarm - help.yale.co.uk · (06) conexis l1 smart lock + sync lock module ac-lm on / off...
TRANSCRIPT

Sync. Smart Home Alarm
Installation ManualIA-310IA-320IA-330IA-340
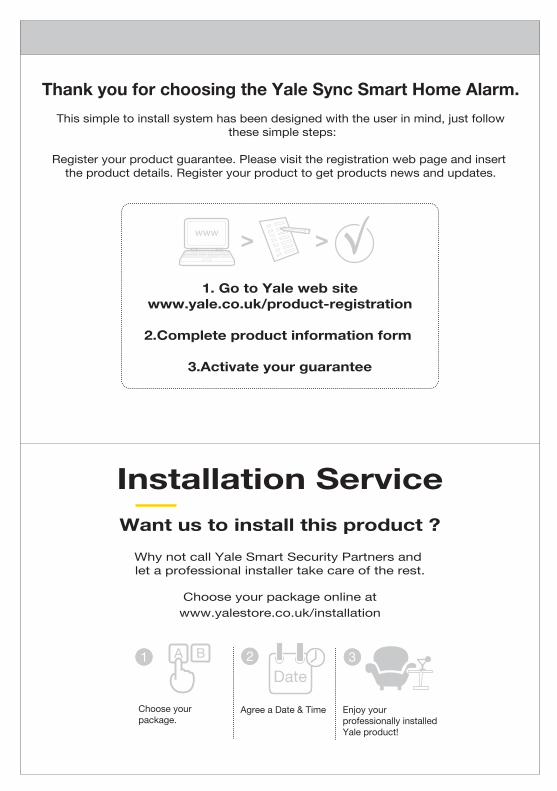
1. Go to Yale web sitewww.yale.co.uk/product-registration
2.Complete product information form
3.Activate your guarantee
Thank you for choosing the Yale Sync Smart Home Alarm.
This simple to install system has been designed with the user in mind, just follow these simple steps:
Register your product guarantee. Please visit the registration web page and insert the product details. Register your product to get products news and updates.
1
Installation ServiceWant us to install this product ?
Why not call Yale Smart Security Partners and let a professional installer take care of the rest.
Choose your package online atwww.yalestore.co.uk/installation
Choose yourpackage.
Agree a Date & Time
A B
Enjoy yourprofessionally installedYale product!
2 3
Date

(03)
1
2
3
4
5
6
7
(p. 04-06)
Unboxing
Location planning
App. download
Smart Hub Installation
Device activation Battery install / replacement
Installation
System setup
App. setup / operations
(p. 07)
(p. 08)
(p. 09-10)
(p. 22-24)(p. 11)
(p. 11)
(p. 18-22 + 25)(p. 12-21)
8
Install your system in a few easy steps. Please read through all of the steps shown below and then follow the detailed instructions in the following pages. See your product box for kit content information

(04)
Smart HubIA-HUB
Max. Total 40 pcs.
Motion DetectorAC-PIR
Motion Detector Pet FriendlyAC-PETPIR
AC-PIR AC-PETPIR
~12m~12m
110°
~ 1.82.1m
~ 1.82.1m
1
Max < 27 kg
Door/Window ContactAC-DC
KeypadAC-KP
110°
+ PIN CODE
Panic buttons press/hold
Panic Buttons can activate your alarm immediately - even when the system is disarmed.
How to Disarm
>3sec.<
How to Full-Arm
How to Part-Arm
All the devices in this kit are pre-paired for easy installation. If you are adding more devices (purchased separately to this kit) you will need to pair these into the system separately (see page 18)

(05)
>3sec.<Panic ButtonAC-PB
1KeyfobAC-KF
Smoke Detector+ Motion / HeatDetectionAC-PSD
All the devices in this kit are pre-paired for easy installation. If you are adding more devices (purchased separately to this kit) you will need to pair these into the system separately (see page 18)
Hold
PIR / Heat detection function
Smoke detection
10 m
5.5 m
2.4 - 3.0 m
C°- F°
Temperature DetectionThe Temperature Sensor will transmit temperature signals regularly according to setting. The factory default interval is 10min • The Smoke Detector will also send temperature signal when temperature changes by +/- 2°C.• You can also press the Test Button once to transmit a temperature signal manually.• The temperature detection range is about -10°C ~ 50°C.( 14°F ~ 122°F)
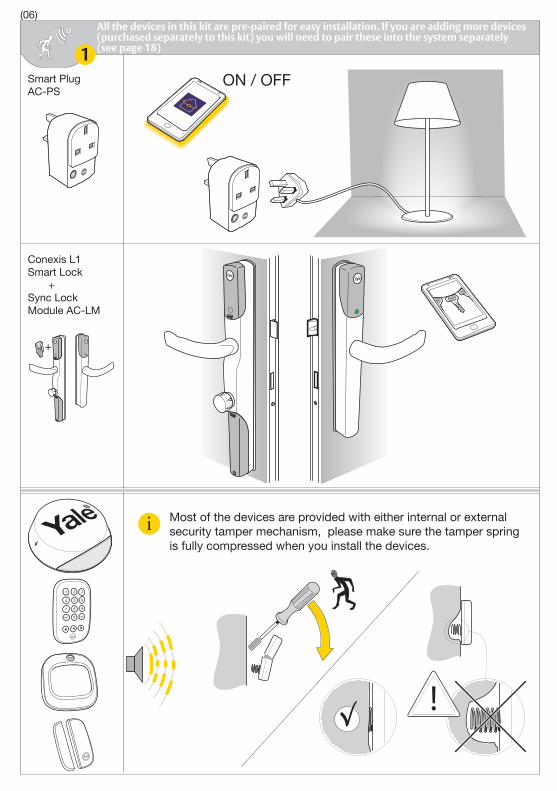
(06)
Conexis L1 Smart Lock + Sync LockModule AC-LM
ON / OFF
1
Most of the devices are provided with either internal or external security tamper mechanism, please make sure the tamper spring is fully compressed when you install the devices.
All the devices in this kit are pre-paired for easy installation. If you are adding more devices (purchased separately to this kit) you will need to pair these into the system separately (see page 18)
Smart PlugAC-PS

(07)
2
Plan Your home
Location tips: 1. Keypad should be accessible from a protected entry/exit point. Ensure that the Keypad is not visible from the outside of the premises.2. Mount Door/Window Contacts as high as possible on the door / window frame. 3. PIR Motion Detectors should be located in the corner of the room to maximise coverage. Do not point directly at a source of heat (eg.fires or boilers), facing a window or a door protected by a Door/Window Contact. Avoid installing directly above radiators.4. If you have Pets that may climb on furniture, avoid using PET PIR Motion detectors as this can cause false alarms. Instead replace with additional Door/ Window Contacts. 5. Mount the external siren as high as possible on an external wall.
Example
Plan your system: Before beginning the installation process, take some time to plan your system, decide where you want to locate the devices.

(08)
Yale Smart Living Home
3
IOS 9.0 +
Android 4.2 +
Serial No.
Please register the hub within one hour of power up, otherwise the app "authentication error" will appear. Re-boot the hub(including switch off/on the back up battery) and start the process again if necessary.
Download the app, create an account and follow the on screen step by step set up wizard.

1
2
4
(09)Smart Hub connection
3
4
RouterNOT INCLUDED
Battery
<On Off><On Off>
ab

(10)
Re-boot
<On Off> <On Off>
HOME SERVER
Network
Shows server connection status
Fault Status
Shows fault status and AC failure warning
Alarm Mode
Shows arming status
Fully Armed
Part Armed
Disarmed
Check app history log to see fault details.
4
Smart Hub connection
System normal.

Setting up
Remove battery strips
Test your planned location of components
200
Test location for radio signal strength
Press button to test connection
(11)
65
6
8 9
Device Activation
5

(12)Installation
71
a
a
d
b
b
c
2
3
4
5 6
Ø 5mm

(13)Installation
71
3
5
6 7
2
4
a
b
max 10mm
or
Clean the mounting surface before application with a suitable degreasing agent

1
1
2
2
3
(14)
Pair / Test button
Ø 5mm
Minimum 60cm
Installation
7
Pair / Test button

(15)
1
a
b
c
~1.8m 2.1m
d
2
a
a
b
3
4
5 6
Ø 5mm
Installation
7

1 2
Pair / Test button
ON
(16)Installation
7

(17)
1
3
4 5
2
6
a
a
a
b
b
b
c
d
Ø 5mm
7
Installation

Activate learning mode
(18)
All devices in the kit are pre-linked to the Smart Hub. If you want to add more devices, you can do this by using the “Add device” section in the Smart Living Home app.
200
Press button to test connection
8 9
1
2
3
Go to the app menu and select Add Device, then activate learning mode.
Press the learn button on the device you want to add, the Smart Hub will beep when the device is added. You will then see the new device on your app screen.
Exit Learning mode after you have added all the additional devices.
8
App setup / operation: Adding new devices

(19)
Burglar
Home Omit
Entry
Home Access
Part armed mode is usually used to protect the perimeter or a specific zone of the house (eg. ground floor) while you are free to be inside or in another part of the house (eg. upstairs)
Go to the App menuSettings > Alarm settings > Devices
In your device list, go into the settings for each device and select the required device mode.
4 different settings are available for PIR Motion Detectors and Door/Window Contacts. Devices are pre-set to Entry. When the system is armed first users will have 30 seconds to exit the building. If the system is already armed, triggering any sensors will cause an entry countdown to begin.
You can change the device behaviour settings to select the required action when the system is fully armed or part armed.
Key
SensorIgnored
InstantSiren
TriggersCountdown
8
Setting up part armed mode and devices behaviour

(20)
If you want to know more about your Home App features, check our app manual sections within the app. (select the ? at top right of the screen you need help with)
Changing your Key Pad PINYou can modify the existing PIN code using the app.You can set up to 10 sets of 4 digit PIN numbers in the app.
Go to app menuSettings > Alarm Settings > Key Pad PIN code settings
Adding new usersTo add more users to control your alarm system you can add a new account in the app.
Go to app menuSettings > User Settings > Account Management
Managing Alert NotificationYou can manage the different type of notifications, choose to have all events or burglar only reported via email. You can also add phone numbers to receive an SMS notification when burglar event is reported.
Go to app menuSettings > User Settings > Notification settingsSettings
8
App setup / operation

CR 2032
(21)Changing batteries
CR 2032
3 x 1.5V AAA
AC-KP
AC-DC
AC-PIR
AC-PB
LOWBATTERY
The smart hub will start to emit an intermittant beep to indicate that the batteries need changing on one of your devices. The hub will continue to beep until the batteries on this device have been replaced.
The App will display a low battery message under the relevant device when batteries are running low.
Please make sure the system is disarmed before changing devices batteries.
3V
CR 123

AC-BX
(22)
AC-PSD
AC-KF
3V
When batteries start getting low the siren will produce a series of audible beeps and flashing when arming and disarming.
CR 2032
CR 123
4 x 1.5V D1
2
4
5
3
Changing batteries

(23)
All devicesHousings ABS/polycarbonate
Outdoor Siren
-10˚C to 40˚C 70% -20˚C to 50˚C 95%
Congratulations you have completed the Yale Sync Smart Home Alarm installation.
Hereby, ASSA ABLOY Ltd., School Street, Willenhall, West Midlands, England WV13 3PW declares that the radio
equipment type IA-310, IA-320, IA-330, IA-340 is in compliance with Directive 2014/53/EU. The full text of the EU declaration of
conformity is available at the following internet address: www.yale.co.uk/declaration-of-conformity
The smart phone feature requires our central server. Yale offers no guarantee on the availability of ourserver. Yale cannot guarantee limitless availability of our free server. We would contact individual users via e-mail should this situation change. Alarm Notification functions must only be used with peopl who have consented to being contacted by the system. Information and illustrations are subject to changes within this document. Yale reserved the right to alter the specifications and product design at any time without notice.

THE YALE BRAND, with its unparalleled global reach andrange of products, reassures more people in more countries
than any other consumer locking solution.
THE ASSA ABLOY GROUP is the world´s leadingmanufacturer and supplier of locking solutions, dedicated to
satisfying end-user needs for security, safety and convenience.
PACKAGING FR
An ASSA ABLOY Group brand
Syn
c A
larm
v04
YaleSecurityUKYaleSecurityYaleUK
Customer Support
At Yale, we know the importance of providingsecurity products that are easy to install and use.
However, should you have any questions orexperience a problem with your purchase, pleasevisit www.yale.co.uk/help