smart 3 in 1 hollywood photos: installing your photo booth ... · hollywood photo booth program,...
TRANSCRIPT

Insert the “Acronis Full Boot” CD into the CD/DVD drive of the photo booth computer.
Start the photo booth computer and let it boot the system from the CD drive.
The next screen should look like this. If it starts the Hollywood Photo Booth program, shut down and press F12 when the Dell screen first appears and make sure the system is set to boot from the CD/DVD drive.
If your screen looks like this one, click on the top option, “Acronis Home Full Version”
SMART 3 IN 1 HOLLYWOOD PHOTOS:INSTALLING YOUR PHOTO BOOTH PROGRAM / FLASH DISC
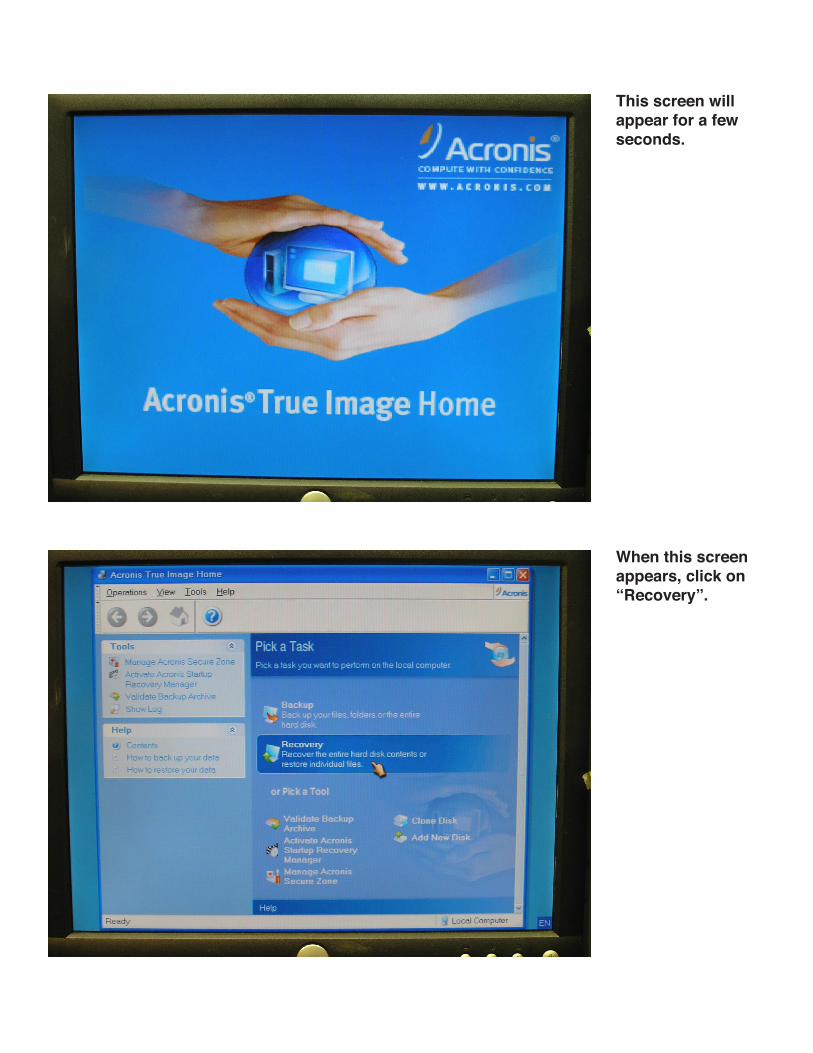
This screen will appear for a few seconds.
When this screen appears, click on “Recovery”.

Click “Next”
Click on the D: drive (CD Drive)icon on the left. Now eject the Acronis CD and insert your Hollywood Photos DVD into the CD/DVD drive.

Once the computer reads the new DVD you’ve inserted, you can click on the .tib file listed under the CD (D:) drive icon
Once this is selected, click “Next”.

Make sure “Restore disks or partitions” is selected, then click “Next”.
Highlight the NTFS (C:) option and make sure the box to the left of it is checked, then click “Next”.
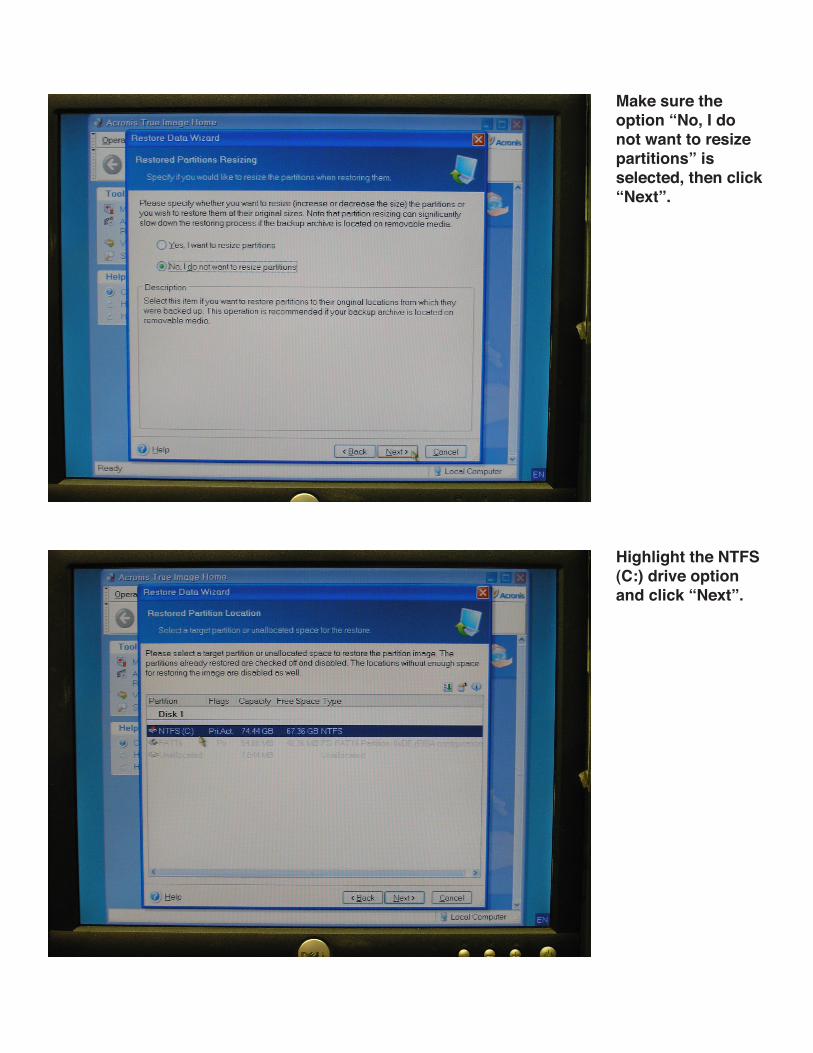
Make sure the option “No, I do not want to resize partitions” is selected, then click “Next”.
Highlight the NTFS (C:) drive option and click “Next”.
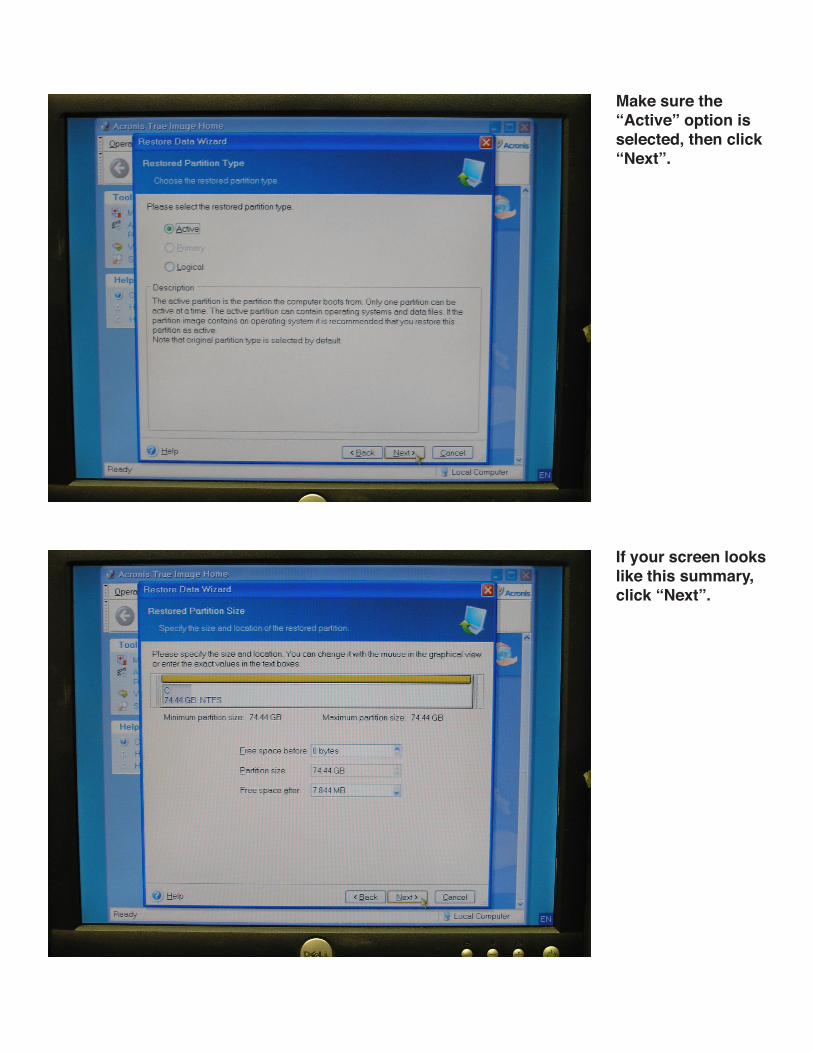
Make sure the “Active” option is selected, then click “Next”.
If your screen looks like this summary, click “Next”.

Make sure the option “No, I do not (want to restore another partition)” is selected, then click “Next”.
Leave this screen as it is shown here, then click “Next”.

Leave this screen as it is shown, you do not need to enter any Usernames or passwords.
Click “Next”.
If your screen looks like this summary, click “Proceed”.

The program will show its progress while loading the information for the photo booth. This will take about 10 to 20 minutes.
When the program is done loading, this screen will appear. Click “OK”.
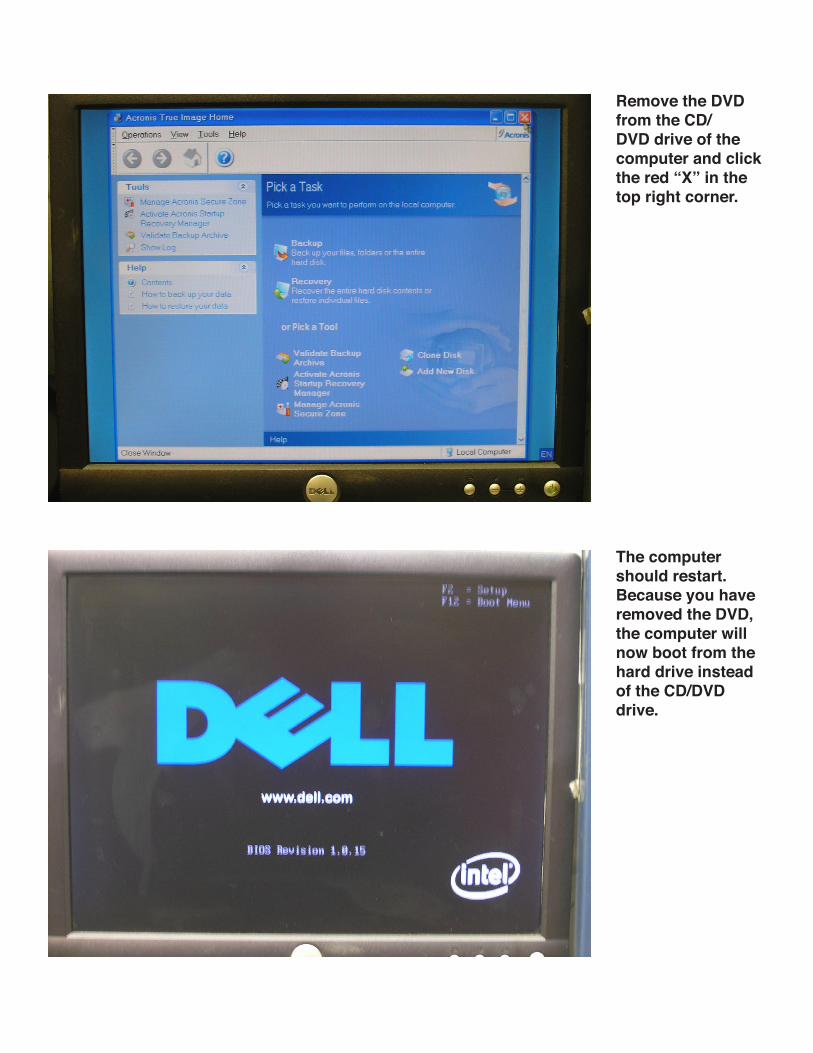
Remove the DVD from the CD/DVD drive of the computer and click the red “X” in the top right corner.
The computer should restart. Because you have removed the DVD, the computer will now boot from the hard drive instead of the CD/DVD drive.

Allow the Hollywood Photo Booth program to start. Right-click anywhere on this screen to enter the Setup mode and make sure to update any settings or information you may need to for this photo booth.