site studio 11g new features - oracle | integrated … studio new features load on demand editor...
TRANSCRIPT

Site Studio New Features
Load on Demand Editor
Goals:
• Increase load speed of the editor by launching in “read only” mode
• Add multiple elements to a Region Definition/Template
• Launch Contributor in read only mode
• Load an element for editing on demand
Tasks:
1. Add multiple elements to a Region Definition/Template
a. Open a Region Definition, and insert multiple instances (more than 4) of the element
definition, giving it a different name and label for each instance, then save and close the
Region Definition.

b. Open the Region Template created previously, and insert each element added to the region
definition, then save and close your Region Template.
c. View your website, and enter contribution mode (ctrl-Shift-F5)..

d. Note that the elements are in read-only mode. Edit a specific element by clicking on its
individual area. The editor should load “on demand” for that element.

Enable Section Level Replication
Goals:
• Prevent creation of section without content
• Turn on Section Level Replication
• Disable Replication
Tasks:
1. Note the presence of only a “View Differences” option in the Contribution Mode ribbon.
a. View your website and enter contribution mode:
2. Enable Section Level Replication in Site Studio Designer
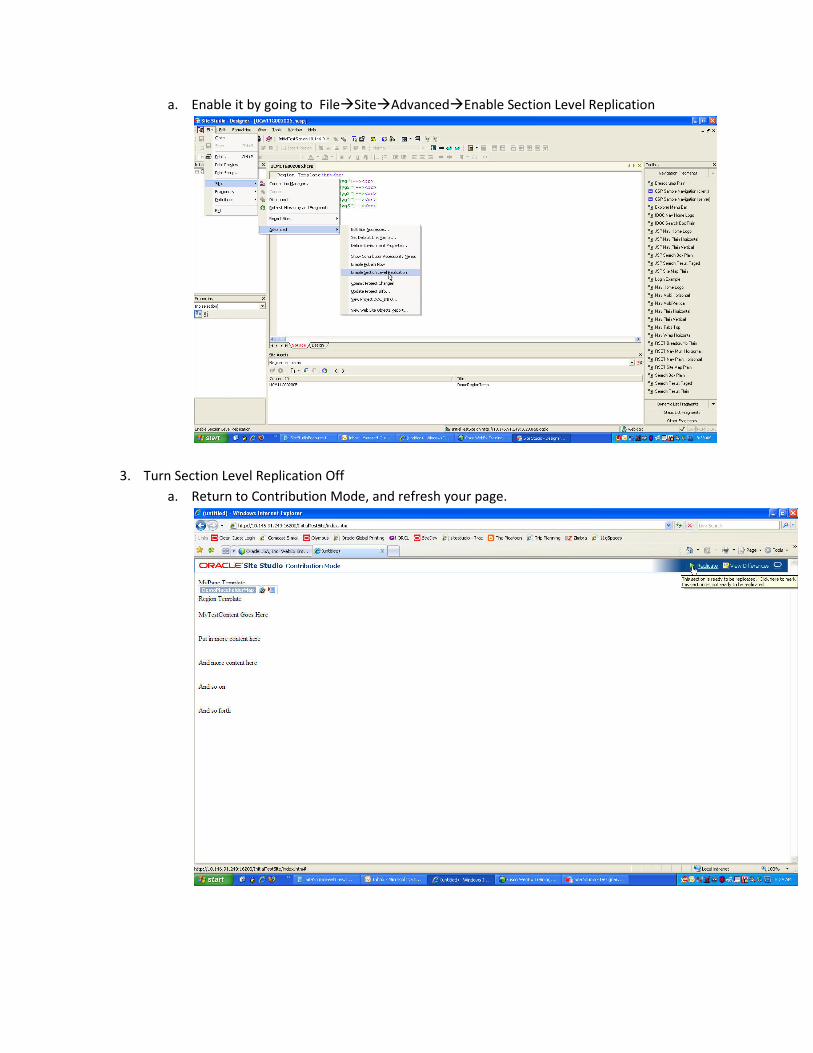
a. Enable it by going to File�Site�Advanced�Enable Section Level Replication
3. Turn Section Level Replication Off
a. Return to Contribution Mode, and refresh your page.

b. Click the Replicate link to disable Section Level Replication

Enable Default Primary Page Naming
Goals:
• Give user the ability to assign a default name for all primary page instances
• Enable Default Primary Page Naming
• Set Alternative URL Page Names
Tasks:
1. Verify renaming homepage fails
a. Rename homepage of your site from index.htm to index.html in the address bar. Site
should return a Content Server Request Error.
2. Go to the Admin Server, and enter in new configuration variables
a. From within Content Server, go to Administration�Admin Server�General
Configuration, and scroll down to Additional Configuration Variables .

b. Add the variables: “SSDefaultUrlPageName=index.html”, as well as
“SSUrlPageNames=index.htm,default.htm,home.html”
c. Save your configuration changes.

d. Shutdown and start the content server from the Enterprise Manager
3. Try the new URL Page Names
a. Return to your homepage and refresh your browser

b. Rename the homepage in the address bar to index.html, default.htm, or home.html. All
should work.

Enable Publish Now
Goals:
• Flag a page for a custom Publish Now crawl
• Turn on Publish Now
Tasks:
1. Turn on Publish Now, and verify in contribution mode
a. From Designer, go to Site�Advanced�Enable Publish Now
b. Return to your website, and enter Contribution Mode (or refresh window if already in
Contribution Mode). Publish Now should be available as an option within your

Contributor Toolbar.
View Definition Bundle Options
Goals:
• Increase Reusability of Bundles
• View Definition Bundle options from the File Menu in Designer
• View Definition Bundle options from the Site Assets Pane
• View Definition Bundle options from within Content Server

Tasks:
1. From File�Definitions�Download, note the existence of the Upload and Download Definition
Bundle Options
2. On the Site Assets Pane, select Placeholder Definitions, and right click your placeholder to view
definition bundle options

3. From within Content Server, search for your placeholder, go to the document information page,
and view Download Definition Bundle option available in the Content Actions drop down.

Workflow Approve All
Goals:
• Allow user to Approve All Data Files on a single page
• Create a Criteria Workflow for DataFiles
• Update Site
• Enable Approve All
• Update Content
• Approve All
Tasks:
1. Open the Workflow Applet and create a new workflow
a. Add a new criteria workflow where the Website Object Type metadata field matches
“Data File”

b. Create a review step where the approver is the weblogic user (you may have to uncheck
“Use Filter” to see the weblogic user.
2. Update your site to have two Placeholder Definitions and associated datafiles
a. From Site Studio Designer, open your Placeholder Definition, and check “Workflow
Approve” as well as “Workflow Reject”, then save and close your Placeholder Definition.

b. From Placeholder Definition Mappings, create a new mapping to your existing
Placeholder Definition.
c. Open your primary page, and insert a placeholder, using the new Placeholder Mapping,
then save and close your primary page template.

d. Assign a new datafile to the newly added placeholder.

3. Enable Approve All from the Content Server
a. Add the variable “SSEnableApproveAll=true” to the Content Server Additional
Configuration Variables, then restart Content Server from the Enterprise Manager.
4. Update content and Approve All
a. Go back to your website, enter contribution mode, and update content for both
placeholder areas.
b. The “Approve All” link should appear in the Contributor Mode Toolbar.

Direct Delivery
Goals:
• Set whether a file is converted or direct delivered for download
• Create and Check in a Word Document
• Enable Direct Delivery
• Create Custom Section Properties to manage Direct Delivery
Tasks:
1. Create and check in a sample word document
a. Create and save a word document to your machine.

b. From Content Server, launch the Configuration Manager Applet and go to
Option�FileFormat and set msword to passthru
c. Check the word document into the Content Server.

2. Set a default Region Template, and Enable Direct Delivery
a. From Admin Server, add the following Additional Configuration Variables.
SSDefaultRegionTemplate=SS_DEFAULT_REGION_TEMPLATE
SSEnableDirectDelivery=true
SSDirectDeliveryExtensions=pdf,doc

b. From Component Manager, enable the Dynamic Converter component, then restart the
Content Server from Enterprise Manager.
3. Create a Secondary Page with a Replaceable Region
a. In Site Studio Designer, create a secondary page insert a placeholder (using a mapping
that has your placeholder defintion as both the primary and secondary)

b. From the Assign Content screen, use the pop up menu to Set the Placeholder mapping
to Replaceable.
4. Define Custom Section Properties for Direct Delivery and Create Link
a. From Designer, go to Tools�Define Custom Section Properties

b. Create two new Custom Section Properties:
OverrideDirectDeliveryExtensions (boolean)
DirectDeliveryExtensions (text)
c. Select the “Home” section from the Navigation Pane in Designer, and edit the Custom
Section Property value OverrideDirectDeliveryExtensions to “true”

d. Go to your website and create a hyperlink in a WYSIWYG element that links to the Word
document created in Task 1 of this lab (Note: when searching for your word document,
it may not appear in the initial search results, you may have to execute a quick search to
retrieve it).

e. Click your link. The dynamically converted Word Document should appear as a
webpage.
f. Return to Designer, and set OverrideDirect DeliveryExtensions to false. Return to your
site and click on the link. It should now attempt to download the native file.