silent image user's guide - reconyximages.reconyx.com/file/si primos user guide-rev...
TRANSCRIPT

Silent Image User Guide – April 2006
User Guide
Copyright RECONYX, LLP – www.silent-image.com

Silent Image User Guide – April 2006
Inside This Manual
Inside This Manual ..................................................................................................................................... 1 Getting Started ............................................................................................................................................ 1 Using Your Camera .................................................................................................................................... 2
The Camera .............................................................................................................................................2 Batteries ..................................................................................................................................................3 CompactFlash® (CF) Cards.....................................................................................................................4 Camera Maintenance and Performance...................................................................................................5 Image Data ..............................................................................................................................................9 Image Storage and Naming...................................................................................................................10 Replacing the Date Battery ...................................................................................................................10
Changing Your Camera Settings............................................................................................................. 11 Set Date & Time....................................................................................................................................12 Triggers .................................................................................................................................................13 Time Lapse............................................................................................................................................18 Images ...................................................................................................................................................20 CodeLoc ................................................................................................................................................21 Saving Your Settings and Transferring Them to Your Camera ............................................................23
Viewing and Managing Your Images...................................................................................................... 24 Manage Sites .........................................................................................................................................27 Manage Locations .................................................................................................................................29 Erase CF Card .......................................................................................................................................32 Check Free Space..................................................................................................................................34 Load New Images .................................................................................................................................34 View Images..........................................................................................................................................39 Favorites................................................................................................................................................45 Find Images...........................................................................................................................................46 Tag Images and Manage Image Data ....................................................................................................49 Create Video..........................................................................................................................................50
Warranty and Safety Information........................................................................................................... 51 Satisfaction Guarantee ..........................................................................................................................51 Limited Warranty ..................................................................................................................................51 Safety Precautions.................................................................................................................................52 Preventing Malfunction.........................................................................................................................52 Warnings ...............................................................................................................................................53
Troubleshooting and Technical Support ................................................................................................ 55 Troubleshooting your Silent Image camera ..........................................................................................55 Troubleshooting your MapView software ............................................................................................56
Copyright and Trademark Information ................................................................................................. 61
Copyright RECONYX, LLP – www.silent-image.com
Silent Image User Guide – April 2006
Disclaimer
While every effort has been made to ensure that the information contained in this “User Guide” is accurate and complete, no liability can be accepted for any errors or omissions.
RECONYX reserves the right to change the specifications of the hardware and software described herein at any time without prior notice.
RECONYX makes no warranties for damages resulting from corrupted or lost data due to a mistake in operation or malfunction of the camera, the software, the CompactFlash® (CF) cards, personal computers, or peripheral devices.
Copyright RECONYX, LLP – www.silent-image.com

Silent Image User Guide – April 2006
Copyright RECONYX, LLP – www.silent-image.com - 1 Getting Started
Getting Started
Your Silent ImageTM Model RM30 camera is a digital camera, infrared illuminator, and Passive InfraRed (PIR) motion detector, all contained within a secure, rugged, and weather-resistant case. Also included with your camera is “MapView” software. Your Silent Image camera helps you get the best possible pictures in the field, and “MapView” offers you the ability to geographically organize and access your images, as well as selectively tag images with user-defined metadata for later analysis.
Silent Image Camera
Silent Image – MapView
This guide includes critical information on using your Silent Image camera, changing your camera settings, viewing and managing your images, and warranty and safety information. In addition to reading the Quick Start Guide (included with your camera) and camera operating instructions (printed on the inside of the camera for easy reference in the field), we encourage you to take some time to become familiar with the camera by reading the information about batteries, CompactFlash® cards, camera maintenance and performance, Image Data, image storage and naming, and replacing the date battery. A thorough understanding of your camera and the “MapView” software will help you get the most value from your Silent Image system!

Silent Image User Guide – April 2006
Using Your Camera
The Camera
Front View
Inside View
Copyright RECONYX, LLP – www.silent-image.com Using Your Camera - 2

Silent Image User Guide – April 2006
Bottom View
Carrying and Opening
Batteries
Your Silent ImageTM camera comes with an eight-cell AA battery holder. Because camera settings, animal activity, and temperature all vary, there is no way to precisely predict a camera’s run time, the total number of images that can be taken, or the temperature at which the camera will operate on any given set of batteries. Therefore the following table shows approximate operating temperatures, run times, and number of images that can be taken with alkaline, nickel-metal hydride, and lithium AA batteries, and can be used as a guide in determining what type of batteries will best suit your needs.
Copyright RECONYX, LLP – www.silent-image.com Using Your Camera - 3

Silent Image User Guide – April 2006
Note: Very high and very low temperatures adversely affect the performance of all types of batteries, some more than others.
AA Battery Type Operating Temperature Run Time Number of Images
Alkaline (disposable)
20º F (-7º C) and up 1 – 2 weeks Up to 40,000 or more
Nickel-Metal Hydride (rechargeable)
-20º F (-29º C) and up 1 – 2 weeks Up to 40,000 or more
Lithium (non-rechargeable)
-40º F (-40º C) and up 3 – 4 weeks Up to 80,000 or more
Warning! Do not mix battery types! You may run your Silent Image camera on Alkaline, NiMH, or Lithium batteries – but you should never mix battery types! Damage to the camera can result and your warranty may be voided if you do so.
C-Cell battery holders and are available from RECONYX if you require more capacity and longer run times (see www.silent-image.com to order).
CompactFlash® (CF) Cards
The CompactFlash (CF) card is used to store the pictures your camera captures. These images are transferred to your PC using MapView (see Load New Images). The CF card is also used to change your camera’s settings (see Changing Your Camera Settings).
CompactFlash cards have various speeds and capacities. Larger capacity cards are capable of storing more images. In general, a 256 MB card will hold about 5,000 images and a 2 GB card will hold about 40,000 images. The largest CF card you can use in your Silent Image camera is 2GB. Cards with higher speed ratings are capable of reading and writing (opening and storing) images faster. This is advantageous when taking Rapid Fire NearVideoTM sequences of images (see Triggers), as faster cards can store up to five images per second.
We recommend SanDisk® and Viking brand CF cards. We recommend you do not use LexarTM media, as we have seen a fairly high failure rate with Lexar cards.
Important! Your CF card must be formatted FAT (not FAT32). To be sure that your CF cards are properly formatted for your Silent Image camera, it is recommended that you always erase your cards using MapView (see Erase CF Card), and also “erase” any new CF card prior to first using it in the camera.
Copyright RECONYX, LLP – www.silent-image.com Using Your Camera - 4

Silent Image User Guide – April 2006
Inserting and Removing the CompactFlash® Card
Camera Maintenance and Performance
Keep the Camera Dry
Never open the camera in the rain! Carefully wipe off any moisture on the outside of the camera before opening the camera. Whether or not the outside of the camera appears dry, carefully wipe the small crevice along the edges of the camera – especially the top edge – to prevent any moisture trapped in this area from getting inside the camera when you open it.
If you are using your Silent Image camera in very humid conditions, you may wish to use a desiccant pack to absorb moisture that may get trapped inside the camera. You can purchase desiccant packs online (see www.silent-image.com to order).
Copyright RECONYX, LLP – www.silent-image.com Using Your Camera - 5

Silent Image User Guide – April 2006
Cleaning the Camera’s Lenses
There are three windows on the front of your Silent Image camera: the infrared illuminator (top), the camera lens (middle), and the PIR motion detector lens (bottom). All three windows should be gently cleaned as needed, using a soft cloth and lens cleaner. Be careful not to put too much pressure on the lenses, and make sure that the cloth you use is clean; the camera lens window is glass and can crack if too much pressure is applied, and the illuminator and motion detector windows will scratch if there is grit on the cleaning cloth.
Mounting the Camera
Your Silent Image camera can be mounted to a tripod or to a tree by using a bungee cord (as shown in the following photos). It is highly recommended that you use a cable and lock to secure your camera against possible theft at all times when it is in the field. Cables and locks are available from RECONYX (see www.silent-image.com to order).
Note: Any locking system can be defeated and RECONYX makes no warranty as to whether its cable lock system will actually stop a motivated thief.
Copyright RECONYX, LLP – www.silent-image.com Using Your Camera - 6

Silent Image User Guide – April 2006
Copyright RECONYX, LLP – www.silent-image.com Using Your Camera - 7

Silent Image User Guide – April 2006
Aiming the Camera
For best results, your Silent Image camera should be placed where the sun is not shining directly at the camera. Photographs taken when the sun is shining into the camera’s lens are often poor in quality. The performance of the PIR motion detector can also be adversely affected if the sun is shining directly into the lens, causing an increased number of false triggers.
The field of view of your Silent Image camera, infrared illuminator, and PIR motion detector are all 40 degrees. The camera has a convenient walktest mode for you to make sure that your camera is set up to detect motion in the area where you want to take pictures. When your camera is in walktest mode, a red light flashes in the center of the infrared illuminator each time motion is detected, allowing you to determine the camera’s precise field of view by walking in front of the camera, and then adjusting the aim as needed.
Your Silent Image camera uses a center weighted average for exposure control. This means that the closer an object is to the center of the camera’s field of view, the better the exposure of that object will be in the picture. When aiming your camera, consider where an animal is likely to be when it trips the motion detector and try to get that area closest to the center of the frame. This is especially important for night shots that rely on the infrared illuminator.
In the following example, the camera’s field of view is centered on some trees about 30 feet from the camera (these trees, shown surrounded by a box in the picture, are well-illuminated), but the grouse on the log in the foreground of the picture is overexposed. If the camera had been
Copyright RECONYX, LLP – www.silent-image.com Using Your Camera - 8

Silent Image User Guide – April 2006
mounted slightly higher and aimed more directly at the log (on which grouse were expected) much better images could have been obtained.
Image Data
Silent Image stores Image Data along with every picture it takes. Some of this information, including date, time, trigger and sequence information, the infrared illuminator “flash” indicator, moon phase, temperature, and camera label (see Images) is displayed in Image Data bands above and below the image (the Image Data bands are added to the pictures taken by the camera and do not cover any portion of the picture).
Phases of the moon displayed in the image bands include: (new moon), (waxing crescent), (first quarter), (waxing gibbous), (full moon), (waning gibbous), (last quarter),
and (waning crescent). Any time the infrared illuminator is used, (the infrared illuminator “flash” indicator) appears in the Image Data bands.
The information displayed in the Image Data bands is only a fraction of the information that’s stored with each picture. Image Data includes all of the following information: General (trigger, date, time, and infrared illumination), Settings (contrast, brightness, sharpness, and motion
Copyright RECONYX, LLP – www.silent-image.com Using Your Camera - 9

Silent Image User Guide – April 2006
sensor sensitivity), Environment (temperature, and light and battery levels), and Miscellaneous (original filename, serial number, hardware number, firmware number, and more.)
In addition to the Image Data that the camera stores within each image, you can add your own Image Data to your pictures using MapView. You can add user-defined Image Notes (text that you add to images, up to 5,000 characters for each image). Image Data can be viewed in its entirety using “MapView” (see Tag Images and Manage Image Data).
All Image Data can be searched (see Find Images), so that you can find exactly what you’re looking for, even in a large collection of images.
Image Storage and Naming
Silent Image uses date and time settings (see Images), trigger settings and NearVideo sequence numbers (see Triggers), and time lapse settings (see Time Lapse) to name your images.
Each time the camera is powered on and activated, a new image folder is created on the CF card in the RECONYX folder. These image folders are named based on the date and a sequence number. For example, the first folder created on April 1, 2006 would be named 20060401.000, and the second folder created on that day would be 20060401.001.
Images stored in these folders are named using a trigger code (M=internal motion trigger and T=time lapse), trigger number, and the NearVideo sequence number. For example, M0001103 was taken in response to the 11th motion trigger and was the 3rd NearVideo image taken in response to this trigger.
Replacing the Date Battery
Your camera uses a lithium coin battery to power its internal clock. This battery should last for several years. If the camera’s date settings are consistently lost, the battery charge is low and the battery should be replaced with a generic BR1225 3-volt lithium coin battery. See Troubleshooting and Technical Support for detailed information on replacing the date battery.
Important! Be especially careful to keep coin batteries out of the reach of children. Seek medical assistance immediately if a child swallows a battery since corrosive battery fluids could damage the stomach or intestinal wall.
Copyright RECONYX, LLP – www.silent-image.com Using Your Camera - 10
Silent Image User Guide – April 2006
Changing Your Camera Settings
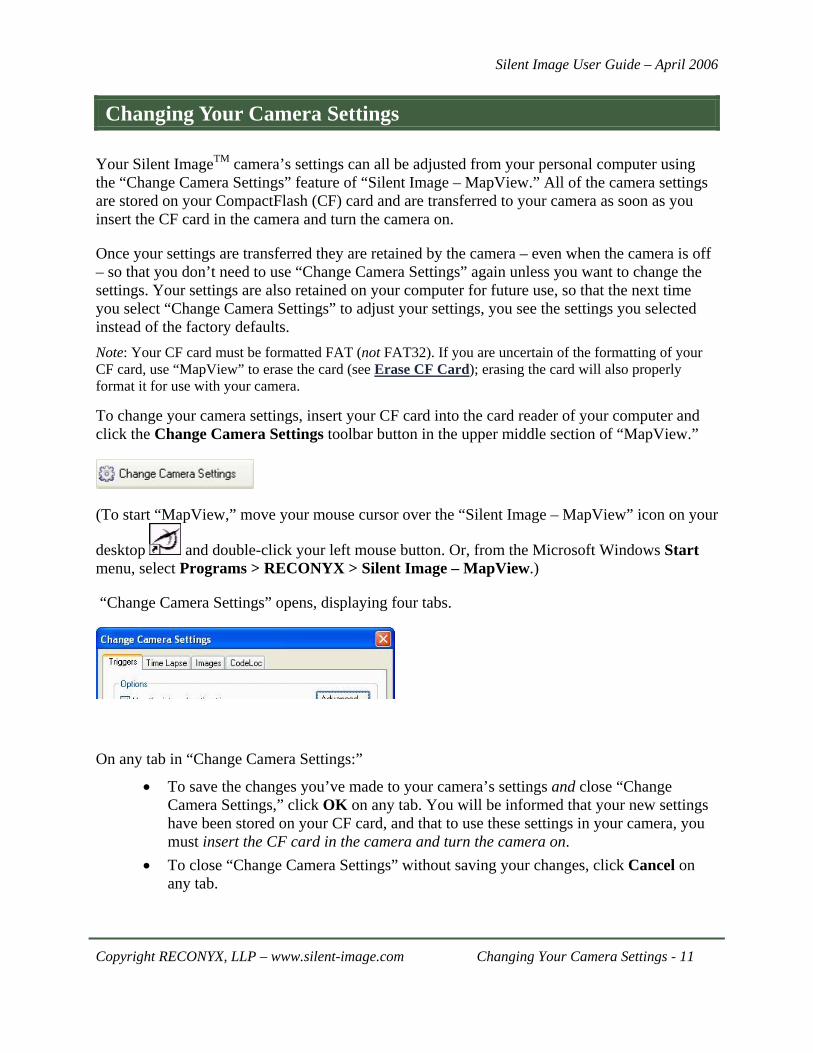
Your Silent ImageTM camera’s settings can all be adjusted from your personal computer using the “Change Camera Settings” feature of “Silent Image – MapView.” All of the camera settings are stored on your CompactFlash (CF) card and are transferred to your camera as soon as you insert the CF card in the camera and turn the camera on.
Once your settings are transferred they are retained by the camera – even when the camera is off – so that you don’t need to use “Change Camera Settings” again unless you want to change the settings. Your settings are also retained on your computer for future use, so that the next time you select “Change Camera Settings” to adjust your settings, you see the settings you selected instead of the factory defaults. Note: Your CF card must be formatted FAT (not FAT32). If you are uncertain of the formatting of your CF card, use “MapView” to erase the card (see Erase CF Card); erasing the card will also properly format it for use with your camera.
To change your camera settings, insert your CF card into the card reader of your computer and click the Change Camera Settings toolbar button in the upper middle section of “MapView.”
(To start “MapView,” move your mouse cursor over the “Silent Image – MapView” icon on your
desktop and double-click your left mouse button. Or, from the Microsoft Windows Start menu, select Programs > RECONYX > Silent Image – MapView.)
“Change Camera Settings” opens, displaying four tabs.
On any tab in “Change Camera Settings:”
• To save the changes you’ve made to your camera’s settings and close “Change Camera Settings,” click OK on any tab. You will be informed that your new settings have been stored on your CF card, and that to use these settings in your camera, you must insert the CF card in the camera and turn the camera on.
• To close “Change Camera Settings” without saving your changes, click Cancel on any tab.
Copyright RECONYX, LLP – www.silent-image.com Changing Your Camera Settings - 11

Silent Image User Guide – April 2006
• To set the camera’s date and time without closing “Change Camera Settings,” click Set Date & Time. “Set Date & Time” opens. See Set Date & Time for detailed instructions.
• To restore the original RECONYX factory settings to all tabs without closing “Change Camera Settings,” click Use Factory. You will be asked to confirm that you want to erase any changes you’ve made.
Select the tab that represents the camera settings you want to change:
Triggers – Select whether you want to use your camera’s internal motion trigger, adjust the trigger sensitivity and advanced trigger settings, select the number of pictures you want to take after a trigger occurs (the NearVideoTM sequence of images) and the number of seconds to pause between pictures, set a quiet period (trigger delay), and set up a schedule specifying on and off periods during the day/night when the camera will react to triggers.
Time Lapse – Select whether you want to take time lapse pictures, the number of minutes to wait between pictures, and set up a schedule specifying on and off periods during the day/night when the camera will be taking time-lapse images.
Images – Enter a camera label that will be stored in one of the Image Data bands on each picture your camera takes, adjust brightness, contrast, and sharpness, and select the temperature scale and type of hourly display your camera uses.
CodeLoc – Set a four-button CodeLocTM password sequence and specify whether or not it is required to activate your camera.
Set Date & Time
You should only need to set the camera’s data and time in the following situations: the first time you use the camera, when you’re switching to and from Daylight Savings Time, or the first time you use the camera after replacing the camera’s date battery (see Replacing the Date Battery).
After you select Set Date & Time from any tab in “Change Camera Settings,” you will be asked to confirm that you want to set the date and time since setting the date and time is only necessary if the camera’s settings are incorrect.
Copyright RECONYX, LLP – www.silent-image.com Changing Your Camera Settings - 12

Silent Image User Guide – April 2006
“Set Date & Time” opens.
• Enter the Time (hours and minutes) and select AM or PM.
Important! The hours and minutes you enter should be slightly ahead of the actual time, because your camera will not update to the time you set until you insert the CF card into the camera and turn the camera on. Note: The hourly display that’s record in your Image Data can be set to 12 hours or 24 hours on the Images tab of “Change Camera Settings.”
• Select the Date (month, day, and year).
Click OK to save your changes and close “Set Date & Time.” Click Cancel to close “Set Date & Time” without saving your changes.
Triggers
Your Silent Image camera can be set to take pictures as a result of triggered events (motion detected), via the internal motion sensor.
After your Silent Image camera is activated by a trigger, it takes a NearVideoTM sequence of images. You specify the number of pictures you want to take in a NearVideo sequence, and how quickly you want the pictures to be taken. Your Silent Image camera is capable of taking pictures at the rate of up to five frames per second continuously (Rapid Fire mode), although the speed at which the images are saved to your CompactFlash (CF) card may vary depending on the type of card you’re using (see CompactFlash® Cards). If you are using a slower CF card, your Rapid Fire performance may be only two or three frames per second.
The NearVideo feature allows you to see more than just the animal that triggered the camera; NearVideo sequences lets you see what the animal was doing and determine how long it was in the camera’s field of view. Although your Silent Image camera can be set to take only one image per trigger, it is generally advantageous to take three or more pictures per trigger to be sure that you can clearly see the features of the animal from multiple angles as it moves within the camera’s field of view.
Copyright RECONYX, LLP – www.silent-image.com Changing Your Camera Settings - 13

Silent Image User Guide – April 2006
1. Select whether you want to Use the internal motion trigger (use the Silent Image internal PIR motion sensor). Note: Your Silent Image camera uses InstaOnTM technology to “wake-up” within a fraction of a second of sensing motion.
2. To adjust the level of motion sensor sensitivity that you want to use, move your mouse cursor over the marker on the Sensitivity slider bar, click and hold your left mouse button, drag the marker to your desired level, and release the mouse button. There are five levels represented on the Sensitivity slider bar, ranging from Low to High. Note: The default sensitivity setting is High, but if you are experiencing false triggers, you may wish to lower the sensitivity of the camera. You can also adjust the sensitivity of the camera’s internal motion trigger in the field (see the camera operating instructions printed on the inside of the camera for more information). Tip: If you make an adjustment in the field (using the up and down arrows while in walktest mode), this change in sensitivity will only be in effect as long as the camera is powered on. If you power the camera down and then back up, the camera will then revert to the sensitivity setting you selected for it using the CF card and the “Change Camera Settings” feature of “MapView.” Therefore, if you want the camera to retain an altered sensitivity setting after the camera is powered down, you must make that change using “Change Camera Settings.”
Copyright RECONYX, LLP – www.silent-image.com Changing Your Camera Settings - 14

Silent Image User Guide – April 2006
3. To change the motion and time specifications that determine a trigger, click the Advanced button.
“Advanced Trigger Settings” opens.
• To change the number of motion “pulses” that it takes to trigger the camera to
begin taking pictures, enter a number or use the arrow buttons to adjust the Number of pulses required. A “pulse” occurs when an animal moves from zone to zone within the PIR field of view. Pulses can be easily recognized and counted while in walktest mode (see Aiming the Camera).
• To change the number of seconds that the number of pulses you specified must occur within to trigger the camera, enter the time in seconds or use the arrow buttons to adjust the Number of seconds in which pulses must occur.
Click OK to save your changes and close “Advanced Trigger Settings.” Click Cancel to close “Advanced Trigger Settings” without saving your changes. Tip: If you are attempting to take pictures of larger animals, it’s sometimes helpful to increase the number of pulses required for a trigger in order to avoid many “false” triggers that might occur from smaller animals moving about. However, it’s recommended that you first try the camera with default settings, and then adjust your camera settings as needed.
4. To change the number of NearVideo pictures taken after a trigger, enter the number of pictures to take when triggered. Note: The more pictures you take after a trigger and the less time you wait between pictures, the better the quality of your NearVideo sequence. However, increasing the number of pictures taken after a trigger increases the power used by your camera and increases your CF storage requirements. Tip: The default (and minimum recommended) number of pictures to take in a NearVideo sequence is three, but you can adjust the number of pictures taken after a trigger from 1 to 99.
5. To change the time the camera waits after taking one picture before taking another in a NearVideo sequence, select whether to take pictures as fast as possible (i.e. RapidFire) or select to wait a specific time between taking pictures and enter the waiting time in seconds. Note: The default time that the camera waits between pictures is one second, but you can adjust the time that the camera waits between pictures from 0.2 to 60 seconds. If you select the option to take RapidFire pictures, the camera will take pictures as fast as it can save them to your CF card (this speed may vary depending on the type of card you’re using; see CompactFlash® (CF) Cards). Fast cards can save up to five frames per second.
Copyright RECONYX, LLP – www.silent-image.com Changing Your Camera Settings - 15

Silent Image User Guide – April 2006
6. To change the Quiet Period (the time the camera will wait after a trigger before it “looks” for another trigger), enter the time in seconds to wait between triggers. Silent Image’s version of this “traditional” trigger delay feature includes many more options for setting the trigger delay (one second to one hour delays are possible; set in increments of one second).
7. To restrict triggers based on the time of day, click the View Schedule button. Note: The default trigger schedule is for the camera to be active 24 hours a day, taking pictures according to your trigger settings, but you can use the trigger “Schedule” to set times when the trigger feature of your camera is turned off.
Copyright RECONYX, LLP – www.silent-image.com Changing Your Camera Settings - 16

Silent Image User Guide – April 2006
The trigger “Schedule” opens.
Note: The “Schedule” (accessible from the View Schedule button on the Triggers tab) specifies times when the trigger feature of your camera is turned on or off. There is another “Schedule” (accessible from the View Schedule button on the Time Lapse tab) that specifies times when the time lapse functionality of your camera is turned on or off (see Time Lapse).
• Click the thirty-minute blocks to change the setting from Camera on to Camera off, or vice versa.
• To select larger blocks of time, click and hold your left mouse button in the half-hour block you want to start with. While holding the mouse button, drag your cursor down until the block of time you want is highlighted, and then release the mouse button to change the setting from Camera on to Camera off, or vice versa.
• To quickly change the setting for all time blocks to Camera on, click All On. • To quickly change the setting of all time blocks to Camera off, click All Off.
Click OK to save your changes and close the trigger “Schedule.” Click Cancel to close the trigger “Schedule” without saving your changes.
Copyright RECONYX, LLP – www.silent-image.com Changing Your Camera Settings - 17

Silent Image User Guide – April 2006
Time Lapse
Your Silent Image camera can be set to take time-lapse sequences of images.
1. To use time lapse photography, check Use time lapse.
If you’re not using time lapse photography, un-check Use time lapse; no other settings are required on this tab.
2. To select the time the camera waits after taking one time lapse picture before taking another, enter the Time lapse interval and select whether that interval is in Hours or Minutes. Note: The default time to wait between time lapse pictures is 5 minutes, but you can adjust the time to wait between pictures in either of these ranges: 1-90 minutes or 1-24 hours.
3. To restrict time lapse based on the time of day, click the View Schedule button. Note: The default time lapse schedule is for the camera to be active 24 hours a day, taking pictures according to your time lapse interval, but you can use the time lapse “Schedule” to set times when the time lapse feature of your camera is turned off.
Copyright RECONYX, LLP – www.silent-image.com Changing Your Camera Settings - 18

Silent Image User Guide – April 2006
The time lapse “Schedule” opens.
Note: The “Schedule” (accessible from the View Schedule button on the Time Lapse tab) specifies times when the time lapse feature of your camera is turned on or off. There is another “Schedule” (accessible from the View Schedule button on the Triggers tab) that specifies times when the trigger feature of your camera is turned on or off (see Triggers).
• Click the thirty-minute blocks to change the setting from Camera on to Camera off, or vice versa.
• To select larger blocks of time, click and hold your left mouse button in the half-hour block you want to start with. While holding the mouse button, drag your cursor down until the block of time you want is highlighted, and then release the mouse button to change the setting from Camera on to Camera off, or vice versa.
• To quickly change the setting for all time blocks to Camera on, click All On. • To quickly change the setting of all time blocks to Camera off, click All Off.
Click OK to save your changes and close the time lapse “Schedule.” Click Cancel to close the time lapse “Schedule” without saving your changes.
Copyright RECONYX, LLP – www.silent-image.com Changing Your Camera Settings - 19

Silent Image User Guide – April 2006
Images
Your images automatically display some of the Image Data (information electronically stored with your pictures) in Image Data bands above and below your pictures (see Image Data). Your camera label, and the temperature and time that the picture was taken, are some of the information that is displayed in the Image Data bands. You can specify the label, temperature scale (Fahrenheit or Celsius), type of hourly display (12 hour or 24 hour) that will be used in your Image Data, and whether or not a border is included for 4x6 prints. You can also adjust the brightness, contrast, and sharpness of your pictures.
1. To add your own text to the Image Data, enter your Label. Note: Your label can be a maximum of 20 characters and is added to the Image Data in all pictures your camera takes. You can change your camera’s label at any time using “Change Camera Settings.” Tip: You can use the Label to record your name or your organization’s name on images. Also, if you have more than one camera, you can use the Label to record the location of the camera so that you can tell where a picture was taken simply by viewing the picture.
2. To adjust the Brightness, Contrast, and Sharpness levels that you want to use in your pictures, move your mouse cursor over the marker on the corresponding slider bar, click and hold your left mouse button, drag the marker to your desired level, and release the mouse button. Note: Brightness, Contrast, and Sharpness default to optimal settings for most outdoor photography. However, you can adjust these levels as needed. For example, you might adjust the brightness and/or contrast levels in a location where morning sunlight is unavoidably direct.
Copyright RECONYX, LLP – www.silent-image.com Changing Your Camera Settings - 20

Silent Image User Guide – April 2006
About adjusting Brightness, Contrast, and Sharpness:
• Brightness is the amount of light in images. Pictures taken with higher brightness levels contain greater amounts of light.
• Contrast is the difference between dark and light tones in images. Pictures taken with higher contrast levels have a greater difference between dark and light areas, and fewer levels of gray between those areas.
• Sharpness is the difference between edges and contours in images. Pictures taken with higher sharpness levels show a greater difference between edges and contours of shapes.
There are nine levels represented on the Brightness, Contrast, and Sharpness slider bars, ranging from Low to High.
3. To change the temperature scale your camera uses, select Fahrenheit or Celsius.
4. To change the hourly display your camera uses, select 12 hr or 24 hr.
5. To include a border for 4x6-inch prints, check Include border for 4x6 prints. Note: If you intend to print your digital images as standard photographs (using a photofinishing service), check Include border for 4x6 prints to prevent image cropping during the development process. Your images will be scaled with a border to size them properly for 4x6-inch prints.
CodeLoc
CodeLoc™ is a theft deterrent since the fact that the Silent Image camera includes CodeLoc password protection is printed on the front of the camera. If CodeLoc is enabled, the camera will not function until the proper password is entered.
CodeLoc uses a four-digit password sequence that you select. The buttons you use to enter your password sequence (shown surrounded by an oval in the following picture) are located along the bottom edge of your Silent Image camera, under the operating instructions and to the left of the power switch. These buttons are numbered 1, 2, 3, and 4 for use when entering your CodeLoc password. Note: These buttons have additional uses in the field, and are also labeled for these purposes (see the operating instructions for more information).
Copyright RECONYX, LLP – www.silent-image.com Changing Your Camera Settings - 21

Silent Image User Guide – April 2006
Important! CodeLoc™ does not prevent theft; it only makes a stolen camera useless to the thief. For this reason, RECONYX strongly recommends using a cable and lock to secure your camera against possible theft at all times when the camera is in the field.
If your camera is stolen, you should notify us as soon as possible so that we can be on the lookout for your camera; if the thief contacts us in an effort to get the camera working again, we may be able to recover your camera and return it to you.
Copyright RECONYX, LLP – www.silent-image.com Changing Your Camera Settings - 22

Silent Image User Guide – April 2006
1. To use a password sequence to activate your camera, check Use CodeLoc. Tip: If you forget your CodeLoc password sequence, you can reset it using “Change Camera Settings.” The CodeLoc password cannot be reset without Silent Image MapView software. If you’re not using CodeLoc, un-check Use CodeLoc; no other settings are required on this tab.
2. Enter or select a number from the list (1, 2, 3, or 4) for each of the following: First button to push, Second button to push, Third button to push, and Fourth button to push.
To enter your CodeLoc password sequence, press the numbered buttons on your camera in the order you selected. See the CodeLoc tab for an example.
Saving Your Settings and Transferring Them to Your Camera
When you have finished customizing all of the settings for your camera, click OK to save your settings and close “Change Camera Settings.” Your CompactFlash (CF) card now contains your camera’s new settings. The next time you turn on your camera with this CF card inserted, your Silent Image camera will adjust its settings according to your customized changes.
Note: To view – without being able to change – the last settings you saved to a CF card, from the Tools menu in “MapView,” select View Camera Settings. The settings you see when you use View Camera Settings may or may not match the settings your Silent Image camera is currently using, depending on whether the CF card that the settings were stored on has been used in your camera.
Copyright RECONYX, LLP – www.silent-image.com Changing Your Camera Settings - 23

Silent Image User Guide – April 2006
Viewing and Managing Your Images
“MapView” is a complete image-handling system for pictures you take with your Silent ImageTM camera. You can organize (by site and location), view, and search any or all of your images. You can also erase your CompactFlash® (CF) card (see Erase CF Card) and change your camera’s settings (see Changing Your Camera Settings) from “MapView.”
To view and manage your images, move your mouse cursor over the “Silent Image – MapView”
icon on your desktop and double-click your left mouse button. Or, from the Microsoft Windows Start menu, select Programs > RECONYX > Silent Image – MapView.
“MapView” opens.
“MapView” is divided into sections. The top section includes the Silent Image Site Map. The bottom section includes camera locations in the current site. Standard drop-down menus appear across the top, along with “MapView” and site toolbar buttons to quickly perform common tasks
Copyright RECONYX, LLP – www.silent-image.com Viewing and Managing Your Images - 24

Silent Image User Guide – April 2006
like loading new images, changing your camera’s settings, viewing favorite images, placing camera markers on site maps, and viewing images at a site.
• The size of the bottom section of “MapView” can be adjusted. Move your mouse cursor over the dividing line between the sections, and when you see the cursor change to a double-headed arrow, click and hold your left mouse button. Then move the dividing line and release your mouse button when the sections are the sizes you want them. You can also adjust sizes of the right section of the “Load New Images Wizard” (see Load New Images), and the left sections of “Location Viewer” (see View Images) and “Site/Location Search” (see Find Images).
• The bottom section of “MapView” can be hidden or displayed (hiding sections provides more room to display site maps; see Manage Sites). To hide a section, click the section hide button in the middle of the dividing line between sections.
To display a section, click the section display button in the middle of the line along the edge of “MapView.” You can also display and hide the right section of the “Load New Images Wizard” (see Load New Images), and the left sections of “Location Viewer” (see View Images) and “Site/Location Search” (see Find Images).
Note: When a section is hidden, the section display button replaces the section hide button, and vice versa. Buttons shown in the preceding examples are for the bottom section.
There is also a section that includes Site, Camera Location, and CF Card Task Pane menus. This section is hidden by default, but can be displayed by checking Task Pane on the View drop-down menu (and hidden again by un-checking Task Pane on the View drop-down menu).
Copyright RECONYX, LLP – www.silent-image.com Viewing and Managing Your Images - 25

Silent Image User Guide – April 2006
Tip: The Task Pane can also be displayed using the vertical section display button in the middle of the dividing line between sections (and hidden again using the vertical section hide button). The vertical section display or section hide button is bounded by arrows pointing right or left, depending on whether the section can be displayed or hidden.
• Task Pane menus can be expanded or contracted. To contract a menu, click the contract button to the right of the menu name. To expand a menu, click the expand button.
• Note: When a Task Pane menu is contracted, the expand button replaces the contract button, and vice versa.
Select the task that you want to perform:
Manage Sites – Select a site (property or area where you set up your camera in one or more locations) to work with, rename and delete sites, search images in a site, add a site map and place or remove camera markers, and add new sites.
Manage Locations – Select a location (specific spot within a site where you set up your camera) to work with, rename and delete locations, view images stored in a location, load new images into a location, create new locations, and place or remove camera markers representing locations on a site map.
Erase CF Card – Format new CF cards to prepare them for use, and erase used cards to quickly delete old images.
Check Free Space – Check your CF card for free space.
Load New Images – Load (copy) any or all images from your CF card to your computer. You can also load images from one folder on your computer into any of your sites and locations. An image viewer for previewing images before you load them is included in the “Load New Images Wizard.”
View Images – View images that you’ve loaded onto your computer. You can also copy images to your “favorites,” save images to another folder, move or copy images from one location to another, and delete images using the “Viewer.”
Favorites – Add your “favorite” images to a folder for easy reference across sites and locations. You can use “MapView” to open this folder and order prints online, copy images to a CD, e-mail photos, and more.
Find Images – Find the images you’re looking for by searching the Image Data of all images in a site (including all locations in the site), or by searching the Image Data of all images in a location.
Copyright RECONYX, LLP – www.silent-image.com Viewing and Managing Your Images - 26

Silent Image User Guide – April 2006
Tag Images and Manage Image Data – Add or edit image notes to Image Data, and view all Image Data stored with an image.
Create Video – Use any of the images you’ve stored in a location to create a video clip.
Manage Sites
Use the Site drop-down menu at the top of “MapView” to select the current site, rename a site, delete a site, search images for a site, load a site map, place a camera marker, and create a new site. Tip: If you’ve displayed the Task Pane (see Viewing and Managing Your Images) on the left side of “MapView,” you can also use the Site Task Pane menu to perform many of these tasks (Task Pane and other alternate instructions, where available, are also included in this user guide).
1. To select an existing site to work with (the current site), from the Site drop-down menu, select Current Site, and then choose the site you want to work with from the list that appears. Or, in the Site Task Pane menu, Choose a site from the drop-down list.
2. To rename the current site, from the Site drop-down menu, select Rename Current. Or, in the Site Task Pane menu, click Rename site.
“Rename Site” opens.
Enter the new Name for your site.
Click OK to change the name of your site and close “Rename Site.” Click Cancel to close “Rename Site” without changing the name of your site.
3. To delete the current site, from the Site drop-down menu, select Delete Current. Or, in the Site Task Pane menu, click Delete site.
Important! When you delete a site, all images in all camera locations for that site are deleted. You will be asked to confirm that you want to delete the current site. Click Yes to delete the site. Click No to keep the site and cancel the deletion process. Note: You must have at least one site in “MapView” (if you have only one site, you cannot delete that site).
Copyright RECONYX, LLP – www.silent-image.com Viewing and Managing Your Images - 27

Silent Image User Guide – April 2006
4. To find images in the current site by searching their Image Data, from the Site drop-down menu, select Find Images. Or, click the Find Images toolbar button.
“Site Search” opens (where Site is the name of your current site). Searches that you perform in this search window will search all images in the current site. See Find Images for detailed instructions on searching your images.
5. To add a site map to the current site (for display in the top right section of “MapView”), from the Site drop-down menu, select Load Map. Or, in the Site Task Pane menu, click Load a new map. Tip: You can also click the Load a new map toolbar button.
Important! When you load a map, all camera markers for that site will be deleted, although no images will be lost. You will be asked to confirm that you want to load a new map for the current site. Click Continue to load a new map, and proceed to browse to the map or aerial photograph you want to display for the current site. Click Cancel to keep the current map and cancel the deletion process.
Tip: When you’re asked to confirm that you want to load a new map for the current site, you can also access information to help you obtain maps from Microsoft TerraServer website. Click Help me find a map of my land to view instructions for downloading public domain aerial photos and topographical maps from TerraServer.
Once you’ve selected a site map, you can Place Camera Markers on the map to represent locations in the site (see Manage Locations).
6. To create a new site, from the Site drop-down menu, select Add Site. Or, in the Site Task Pane menu, click Create a new site.
“Create a New Site” opens.
Enter the Name of your new site.
Click OK to create your new site and close “Create a New Site.” Click Cancel to close “Create a New Site” without creating a new site.
Copyright RECONYX, LLP – www.silent-image.com Viewing and Managing Your Images - 28

Silent Image User Guide – April 2006
Manage Locations
Note: Locations displayed in the Location drop-down menu, the Camera Location Task Pane menu, and Camera locations in the bottom section of “MapView” are for the current site (see Manage Sites).
Use the Location drop-down menu at the top of “MapView” to select the current location, rename a location, delete a location, search images for a location, view images for a location, load new images from your CF card or another directory into a location, and add a new location. Tip: If you’ve displayed the Task Pane (see Viewing and Managing Your Images) on the left side of “MapView,” you can also use the Camera Location Task Pane menu to perform many of these tasks (Task Pane and other alternate instructions, where available, are also included in this user guide).
If the current site includes a map (see Manage Sites), you can place and remove camera markers to represent your camera locations on the map.
1. To select a different location to work with (the current location), from the Location drop-down menu, select Current Location and then choose the location you want to work with from the list that appears. Or, in the Camera Locations Task Pane menu, Choose a location from the list. Tip: You can also click the location you want to work with from the Camera locations displayed in the bottom section of “MapView” to make it the current location. Or, if the location you want to work with is associated with a camera marker, you can also click the marker of the location that you want to select.
2. To rename the current location, from the Location drop-down menu, select Rename Current. Tip: You can also click the Other button in the “Camera locations” (bottom) section of “MapView” and from the menu that appears, select Rename Location.
“Rename Location” opens.
Change the Name of the location.
Click OK to save your changes and close “Rename Location.” Click Cancel to close “Rename Location” without saving your changes.
Copyright RECONYX, LLP – www.silent-image.com Viewing and Managing Your Images - 29

Silent Image User Guide – April 2006
3. To delete the current location, from the Location drop-down menu, select Delete Current. Tip: You can also click the Delete button in the “Camera locations” (bottom) section of “MapView.” Important! When you delete a location, all images in that location are deleted. You will be asked to confirm that you want to delete the current location. Click Yes to delete the location. Click No to keep the location and cancel the deletion process.
4. To find images in the current location by searching their Image Data, from the Location drop-down menu, select Find Images. Or, in the Camera Location Task Pane menu, click Search images. Tip: You can also click the Other button in the bottom right corner of “MapView,” and from the menu that appears, select Search Location. “Location Search” opens (where Location is the name of your current location); this will search all images in the current location. See Find Images for detailed instructions.
5. To view images for the current location, from the Location drop-down menu, select View Images. Or, in the Camera Location Task Pane menu, click View Images. See View Images for detailed instructions. Tip: You can also click the View Images at Location toolbar button (where Location is the name of the current location).
6. To place a camera marker, from the Site drop-down menu, check Place Camera Marker. Or, click the Place Camera Marker toolbar button.
Note: When your mouse cursor looks like a green map pin , “Place Camera Marker” appears any time you click on the site map. Your mouse cursor will automatically switch back to “standard” after you place your marker, or cancel the marker-placing process. Tip: Once you place a marker on a map, it appears as a green map pin with a red center. You can change locations by clicking the marker of the location you want to select. The selected marker has a blue background.
Copyright RECONYX, LLP – www.silent-image.com Viewing and Managing Your Images - 30

Silent Image User Guide – April 2006
“Place Camera Marker” opens.
Select whether you want to Create a new camera location (and enter the Name of the new location), or Associate with an existing camera location (and select the location from the list of Camera Locations that are not yet marked on the site map).
Click OK to place the camera marker for this location and close “Place Camera Marker.” Click Cancel to close “Place Camera Marker” without adding a camera marker.
7. To load new images into the current location, from the Location drop-down menu, select Load New Images, and then select where you’re loading images from (From CF Card or From Another Folder). See Load New Images for detailed instructions. Tip: The “Load New Images Wizard” includes an image viewer; you will be able to examine your images before deciding which – if any – you want to load on to your computer.
8. To remove the current site’s camera marker from the map, move your mouse cursor over the marker, click your right mouse button, and from the menu that appears, select Remove Camera Marker. Or, click the Other button in the in the bottom right corner of “MapView,” and from the menu that appears, select Remove Camera Marker. Tip: The Other button in the bottom right corner of “MapView” includes the same menu options that appear when you move your mouse cursor over a camera marker on the “Silent Image Site Map” and click your right mouse button: View Images, Load New Images, Search Location (see Find Images), and Remove Camera Marker. These menu options are also available when you move your mouse cursor over a Camera location (listed in the bottom section of “MapView”) and click your right mouse button (Remove Camera Marker is not available for locations which are not marked on the map.)
Copyright RECONYX, LLP – www.silent-image.com Viewing and Managing Your Images - 31

Silent Image User Guide – April 2006
If you want to move the current site’s camera marker from one position on the map to another, you must first remove the existing camera marker for the current site (use Remove Camera Marker) and then place a new camera marker and associate it with the site (use Place Camera Marker).
9. To create a new location, from the Location drop-down menu, select Add Location. Tip: You can also click the Add button in the bottom right corner of “MapView.”
“Add Location” opens.
Enter the Name of the location you’re adding.
Click OK to create your new location and close “Add Location.” Click Cancel to close “Add Location” without creating a new location.
Erase CF Card
Your CompactFlash (CF) card must be formatted FAT (not FAT32) for use with your Silent Image camera and software. If you are uncertain of the formatting of your CF card, use “MapView” to erase the card; erasing the card also properly formats it for use with your camera. Note: You must have permissions set on your computer to allow you to format removable media. If you cannot format CF cards using “MapView,” check with computer technical support personnel to be sure you have permissions set properly. Troubleshooting and Technical Support also includes instructions for how to set up formatting privileges. Tip: If you are using a laptop computer, consider a PCMCIA adapter card for accessing CF cards as they are more convenient than USB card readers.
Erasing a used card after you’ve loaded the images you want to save onto your computer is a much quicker method of clearing the card than deleting the images is. Options for erasing your CF card are available in the “Load New Images Wizard” (see Load New Images).
Although all information on a CF card is deleted when you erase the card, you can restore your camera settings by using “Change Camera Settings” because the last settings you used in “Change Camera Settings” are retained on your computer for future use. However, unless you want to change your camera settings, you do not need to use “Change Camera Settings” again, even after erasing your CF card, since your Silent Image camera also retains the last settings you used.
Copyright RECONYX, LLP – www.silent-image.com Viewing and Managing Your Images - 32

Silent Image User Guide – April 2006
To erase your CF card:
1. Insert the card in your computer’s CF card reader and from the Tools drop-down menu, select CF Card, and then select Erase (Format). Or, in the CF Card Task Pane menu, click Erase CF card. Tip: You can also click the Erase CF card toolbar button.
Note: Erasing a CF card will delete all images and other information on the card. You will be asked to confirm that you want to erase the card. Click Yes to erase the card. Click No to cancel the process.
2. Erasing is completed automatically.
Your Silent Image camera’s settings are changed by the information stored on your CF card (see Changing Your Camera Settings).
To change your camera’s settings, from the Tools menu, select Change Camera Settings. Or, in the CF Card Task Pane menu, click Change camera settings. Tip: You can also click the Change Camera Settings toolbar button in the upper middle section of “MapView.”
To view – without being able to change – the last settings you saved to a CF card, from the Tools menu, select View Camera Settings. Note: The settings you see when you use View Camera Settings may or may not match the settings your Silent Image camera is currently using, depending on whether the CF card that the settings were stored on has been used in your camera.
Copyright RECONYX, LLP – www.silent-image.com Viewing and Managing Your Images - 33

Silent Image User Guide – April 2006
Check Free Space
You can check your compact flash card for free and used space.
To check the free space available on your CF card:
1. Insert the card into your computer’s CF card reader and from the Tools drop-down menu, select CF Card, and then select Check Free Space. Or, in the CF Card Task Pane menu, click Check free space.
2. “Memory Card Status” opens.
The compact flash card is displayed as a lettered drive with available free space displayed as a percent.
Load New Images
The process of loading new images is automated by the “Load New Images Wizard.” The way that you start the “Load New Images Wizard” depends on if you know where you want to load the images, or if you want to choose the site and location where you want to load the images after you select the specific images you want to load. Note: The “Load New Images Wizard” includes an image viewer; you will be able to examine your images before deciding which – if any – you want to load on to your computer.
• If you want to load new images into the current site and location, click the arrow at the right of the View/Load New Images toolbar button (located above the Task Pane menus) and from the menu that appears, select the location you’re loading images from: From CF Card or From Another Folder.
Tip: If you’re loading images from your CF card and you want to load new images to the current site and location, you can also click the View/Load New Images toolbar button itself (not the arrow). Or, from the Tools drop-down menu, select CF Card, and then select Load New Images.
Copyright RECONYX, LLP – www.silent-image.com Viewing and Managing Your Images - 34

Silent Image User Guide – April 2006
• If you want to load new images into a different location within the current site, select the location you want in Camera locations (in the bottom section of “MapView”) and then click the Other button in the bottom right corner of “MapView.” Then, from the menu that appears, select Load New Images, and then select From CF Card or From Another Folder.
Note: You can also move your mouse cursor over the location in Camera locations and click your right mouse button. From the menu that appears, select Load New Images, and then select From CF Card or From Another Folder. Tip: If the location you want to load new images into is marked on the site map, you can move your mouse cursor over the location’s camera marker and click your right mouse button to access the same menu options as when you use the Other button (see preceding note). • If you want to decide the site and location you want to load new images into after you
select the specific images you’re going to load, from the Location drop-down menu, select Load New Images, and then select the location you’re loading images from: From CF Card or From Another Folder.
Note: If you’re loading images from your CF card and you want to decide the site and location you want to load images into after you select the images you’re going to load, in the CF Card Task Pane menu, select View/Load new images.
On screens within the wizard:
• Click Erase CF Card to remove all images from the card (see Erase CF Card). Note: This button is not available when you’re loading new images from another folder. • Click Back to return to the previous screen in the wizard. • Click Next to advance to the next screen in the wizard. • Click Finish to close the wizard after image loading is complete. • Click Cancel to close the wizard without loading any images.
Copyright RECONYX, LLP – www.silent-image.com Viewing and Managing Your Images - 35

Silent Image User Guide – April 2006
1. If you’re loading new images from a CF card, the “Load New Images Wizard” displays the “Choose Source Folder(s)” screen.
Select the folder or folders on your CF card that you want to load images from. As you make your selection(s), a preview of the first image in the selected folder appears at the right. Click Next to continue.
• To select an individual folder for loading, click the checkbox to the left of the folder’s name (so that a checkmark appears in the box). To un-select a folder, click the checkbox to the left of the folder’s name (so that no checkmark appears in the box).
• To quickly check all folders for loading, click Check All. • To quickly un-check all folders (so that no folders are selected for loading), click
Un-Check All.
If you’re loading new images from another folder on your computer, the “Load New Images Wizard” displays “Browse for Folder.” Select the folder you’re loading images from and click OK.
2. The “Load New Images Wizard” displays the “Choose Images” screen. Images within the available source folder(s) are displayed.
Copyright RECONYX, LLP – www.silent-image.com Viewing and Managing Your Images - 36

Silent Image User Guide – April 2006
Select the image or images that you want to load. As you make your selection(s), the Checked/Total in the center of the screen above the image viewer updates the number of images you’ve checked, and also displays the total number of images available for loading. Click Next to continue.
The image viewer is divided into two sections: thumbnail images on the left, and an enlarged view of the current thumbnail on the right. The right section can be hidden or displayed. Note: You can adjust the size of the right section of the image viewer, and hide or display this section as well (see Viewing and Managing Your Images).
At any time when the image viewer is open (with the enlarged image section displayed or hidden):
• To select an individual image for loading, click the checkbox to the left of the image (so that a checkmark appears in the box). To un-select an image, click the checkbox to the left of the image (so that no checkmark appears in the box).
• To mark all images in a sequence, click the first image you want to load (not the image’s checkbox). Press and hold the Shift key on your keyboard, click the last image in the sequence you want to select, and then release the Shift key. All of the image names from the first image you clicked to the last image you clicked are highlighted. Click the checkbox of any highlighted image to select all of the highlighted images for loading (or click Check Selected Images). You can un-check a sequence of selected images in the same way.
• To quickly select all images for loading, click Check All. • To quickly un-select all images (so that no images are marked for loading), click
Un-Check All.
Copyright RECONYX, LLP – www.silent-image.com Viewing and Managing Your Images - 37

Silent Image User Guide – April 2006
When the image viewer’s enlarged image section is displayed:
• To select the current image for loading, check the Checked checkbox under the enlarged image. To un-select the current image for loading, un-check the Checked checkbox under the enlarged image.
• To display the first image from each NearVideo sequence of images (hiding the rest), check the Show only first image of each NearVideo sequence checkbox. To display all images from each NearVideo sequence, un-check the Show only first image of each NearVideo sequence checkbox.
Note: Only images taken using the internal motion sensor (see Triggers) are affected by this setting. Images taken using time lapse settings (see Time Lapse) are not displayed when Show only first image of each NearVideo sequence is checked.
• To view the previous image, click the Previous Image button.
• To view the next image, click the Next Image button. • To view the images in a slideshow (automatically advancing display), click the
Start Slide Show button.
You can adjust the speed of the display by clicking Slow, Med(ium), or Fast, as desired. Click Stop Slide Show at any time after the slideshow begins to stop it.
Tip: Clicking the displayed image will also stop the slideshow. Note: When the slideshow is playing, the Stop Slide Show button replaces the Start Slide Show button, and vice versa. • To view image data for the current image, click view image data button (above
the upper right corner of the enlarged image). Note: You can view image data when you’re using the image viewer in the “Load New Images Wizard,” but you cannot edit it. See Tag Images and Manage Image Data to add, edit, or delete image data.
3. If you started the “Load New Images Wizard” using the View/Load New Images toolbar button or the Tools drop-down menu option for loading images, the “Load New Images Wizard” displays the “Choose Camera Location” screen.
Select the Site and Location where you want to load the images you selected. If you want to load the images you selected into a new location, select the Site where you want the new location and click Add a new location.
Copyright RECONYX, LLP – www.silent-image.com Viewing and Managing Your Images - 38

Silent Image User Guide – April 2006
“Add Location” opens.
Enter the Name of the location you’re adding.
Click OK to create your new location and close “Add Location.” Click Cancel to close “Add Location” without creating a new location.
Click Next to continue.
If you started the “Load New Images Wizard” using another method, skip to step 4.
4. The “Load New Images Wizard” displays the “Summary” screen. The total number of images you’ve selected to load and the folders from and to which you’re loading those images are displayed for your review. Click Next to continue. Tip: If you’re loading new images from a CF card and want to erase the card after the images you selected are loaded onto your computer, check Erase card after saving images. This option is not available if you’re loading new images from another folder.
5. The “Load New Images Wizard” displays the “Copying Images” screen. The progress of copying the images you selected is displayed and you will be notified when the process is complete. Click Finish to exit the wizard. Note: Errors, if any, are listed after the process is complete. See Troubleshooting and Technical Support.
View Images
You can view images that you haven’t loaded from your CompactFlash® (CF) card onto your computer using the image viewer that’s included in the “Load New Images Wizard” (see Load New Images). You can also view images that you’ve already loaded onto your computer. The Silent Image “Viewer” behaves similarly to the image viewer that’s included in the “Load New Images Wizard,” but includes many additional features, such as the ability to print images and create videos from images, search images, and copy images as favorites (see Favorites). Note: When you view images, images are displayed from the current site and location. Before beginning the viewing process, select the site (see Manage Sites) and location (see Manage Locations) you want to view images for.
Copyright RECONYX, LLP – www.silent-image.com Viewing and Managing Your Images - 39

Silent Image User Guide – April 2006
To open the “Viewer:”
• To view images in the current site and location, from the Location drop-down menu, select View Images. Or, in the Camera Location Task Pane menu, click View images. Or, in the Location toolbar, click the View Images at Location button (where Location is the name of the current location).
Tip: You can also view images from any Camera location by moving your mouse cursor over that location in the list at the bottom of “MapView” and double-clicking your left mouse button, or by selecting the Camera location and clicking the Other button (select View Images from the menu that appears). And, if the location is marked on the site map, you can move your “standard” mouse cursor over the camera marker, click your right mouse button, and from the menu that appears, select View Images.
The viewer window opens.
The title of the viewer is “Location Viewer” (where Location is the name of the current location), and images in this viewer are for this location only.
Copyright RECONYX, LLP – www.silent-image.com Viewing and Managing Your Images - 40

Silent Image User Guide – April 2006
The viewer is divided into two sections: available images (thumbnail or detail view styles) on the left, and an enlarged view of the current list on the right. The left section can be hidden or displayed (hiding this section displays the enlarged image only).
Images can be listed in thumbnail view (by image name, with a reduced-size version of the image also displayed) or detail view (by image name):
• To list your images in detail view, select Detail for the View Style at the top of the left section of the viewer, or from the View drop-down viewer menu, select Detail.
• To list your images in thumbnail view, select Thumbnail for the View Style, or from the View drop-down menu, select Thumbnail.
Note: You can adjust the size of the left section of the viewer, and hide or display this section as well (see Viewing and Managing Your Images).
To move through the images in this location, use the navigation buttons underneath the enlarged image display.
1. To view any image in the right section of the viewer in enlarged view, click the image you want in the list. This image is the current image.
2. To display the first image from each NearVideo sequence of images (hiding the rest), check the Show only first image of each NearVideo sequence checkbox. To display all images from each NearVideo sequence, un-check the Show only first image of each NearVideo sequence checkbox. Note: Only images taken using the internal motion sensor (see Triggers) are affected by this setting. Images taken using time lapse settings (see Time Lapse) are not displayed when Show only first image of each NearVideo sequence is checked.
3. To display the image before the current image, click the Previous Image button. Tip: You can also use the left arrow key on your keyboard to switch to the previous image.
4. To display the image after the current image, click the Next Image button. Tip: You can also use the right arrow key on your keyboard to switch to the next image.
5. To view the images in a slideshow (automatically advancing display), click the Start Slide Show button.
You can adjust the speed of the automatic display by clicking Slow, Med(ium), or Fast, as desired. Click Stop Slide Show at any time after the slideshow begins to stop it. Tip: Clicking the displayed image will also stop the slideshow.
Copyright RECONYX, LLP – www.silent-image.com Viewing and Managing Your Images - 41

Silent Image User Guide – April 2006
Note: When the slideshow is playing, the Stop Slide Show button replaces the Start Slide Show button, and vice versa.
6. To print the current image, from the File drop-down menu, select Print.
Tip: You can also click the Print toolbar button.
7. To create a video from a series of images, select the images you want to include in the video and from the File drop-down menu, select Create Video. See Create Video for more information.
Tip: You can also click the Create Video toolbar button.
8. To view, add to, or edit the current image’s Image Data, from the Image drop-down menu, select Image Data. “Add/Edit Image Data” opens. See Tag Images and Manage Image Data for more information.
Tip: You can also click the Image Data toolbar button.
9. To find images in the current location by searching their Image Data, click the Find Images toolbar button.
“Location Search” opens (where Location is the name of the current location). Searches that you perform in this search window will search all images in the current location. See Find Images for more information.
A “MultiViewer” is also available to display two, three, or four images at the same time.
• To select two, three, or four images that are all adjacent to one another in the list of available images, move your mouse cursor over the first image you want to select and click your left mouse button. Then, press and hold the Shift key on your keyboard. While holding the Shift key, move your mouse cursor over the last image you want to select and click your left mouse button.
• To select two, three, or four images that are not adjacent to one another in the list of available images, move your mouse cursor over any one of the images you want to select and click your left mouse button. Then, press and hold the Ctrl key on your keyboard. While holding the Ctrl key, move your mouse cursor over another image that you want to select and click your left mouse button, repeating until all the images you want to view are selected.
• From the View drop-down menu, select Side By Side. The “MultiViewer” opens with the selected images displayed.
Note: You can have multiple MultiViewers open at the same time.
Copyright RECONYX, LLP – www.silent-image.com Viewing and Managing Your Images - 42

Silent Image User Guide – April 2006
The “Viewer” also includes options for copying images to your favorites, saving images to another folder on your computer, exporting image data, moving or copying images to another location, and deleting images. All of these tasks can be performed on an individual image (the current image) or on multiple images.
• To select multiple images that are all adjacent to one another in the list of available images, move your mouse cursor over the first image you want to select and click your left mouse button. Then, press and hold the Shift key on your keyboard. While holding the Shift key, move your mouse cursor over the last image you want to select and click your left mouse button. All images listed between the first image you clicked and the last image you clicked are selected.
• To select multiple images that are not adjacent to one another in the list of available images, move your mouse cursor over any one of the images you want to select and click your left mouse button. Then, press and hold the Ctrl key on your keyboard. While holding the Ctrl key, move your mouse cursor over another image that you want to select and click your left mouse button, repeating until all the images you want are selected.
Copyright RECONYX, LLP – www.silent-image.com Viewing and Managing Your Images - 43

Silent Image User Guide – April 2006
1. To copy the selected image(s) to your favorites, from the File drop-down menu, select Copy Image(s) to Favorites. The image is copied into your Favorites folder.
Tip: You can also click the Copy to Favorites toolbar button. Note: To view your favorite images, see Favorites.
2. To save the selected image(s) into another folder on your computer, from the File drop-down menu, select Save Image(s) to and browse to the folder you want to save the image(s) in.
3. To remove the selected image(s) from this location and put it in another location, from the Image drop-down menu, select Move to Another Camera Location.
“Move to location” opens.
Select the Site and Location where you want to move the selected image(s).
Click OK to move the image(s) and close “Move to location.” Click Cancel to close “Move to location” without moving the image(s).
Copyright RECONYX, LLP – www.silent-image.com Viewing and Managing Your Images - 44

Silent Image User Guide – April 2006
4. To copy the selected image(s) and put the copy(ies) in another location, from the Image drop-down menu, select Copy to Another Location.
“Copy to location” opens.
Select the Site and Location where you want to copy the selected image(s).
Click OK to copy the image(s) and close “Copy to location.” Click Cancel to close “Copy to location” without copying the image(s).
5. To delete the selected image(s), from the Image drop-down menu, select Delete. You will be asked to confirm that you want to delete the image. Click Yes to delete the image(s). Click No to keep the image(s) and cancel the deletion process.
Tip: Several of the menu options in the File and Image drop-down menus in the “Viewer” are also available when you move your mouse cursor over a thumbnail or detail image name in the list of images on the left side of the viewer window and click your right mouse button: Image Data, Print, Create Video, Copy Image(s) to Favorites, Save Image(s) To, and Delete.
Favorites
You can add your “favorite” images (images that you want be able to reference quickly, across locations and even across sites) so that you can open the “My Favorite RECONYX Images Viewer” and view all your favorite images together. You can also access the folder that contains your favorites and use Microsoft Windows options to order prints online and copy images to a CD. Note: You can add images to your Favorites folder from any “Viewer” that you’re looking at the images in (see View Images).
1. To view your favorites, from the Favorites drop-down menu, select View Favorite Images. Or, click the View Favorite Images toolbar button.
Copyright RECONYX, LLP – www.silent-image.com Viewing and Managing Your Images - 45

Silent Image User Guide – April 2006
The “My Favorite RECONYX Images Viewer” opens. This viewer operates the same as any other Silent Images Viewer, but instead of displaying images by site or location, it displays only your favorites.
2. To open your Favorites folder, from the Favorites drop-down menu, select Open Favorites Folder. The My Favorite RECONYX Images folder opens, including a Pictures Tasks task panel menu on the left side. Select the images you want to work with and the tasks you want to perform. Note: Certain tasks do not appear in the list of task panel menus until you select one or more images. For example, E-mail this file (or E-mail the selected items if you’ve selected multiple images) does not appear in File and Folder Tasks until you select an image or images.
Find Images
You can find images by searching the Image Data of all images in a site (including all locations in the site), or by searching the Image Data of all images in a location. The Silent Image “Search” is the same in both cases. Note: When you search images, images in your search results are displayed from the current site or current location. Before beginning the search process, select the site (see Manage Sites) or location (see Manage Locations) you want to search.
The way that you start the “Search” from within “MapView” depends on whether you want to search an entire site or a specific location within a site.
• To search all images in the current site, click the Find Images toolbar button.
Or, from the Site drop-down menu, select Find Images.
• To search all images in the current location, from the Location drop-down menu, select Find Images. Or, in the Camera Location Task Pane menu, click Search images.
Tip: You can also click the Other button in the bottom right corner of “MapView,” and from the menu that appears, select Search Location.
You can also start a search from within the “Viewer” (see View Images).
Copyright RECONYX, LLP – www.silent-image.com Viewing and Managing Your Images - 46

Silent Image User Guide – April 2006
The search window opens.
The title of the search window is “Site Search” (where Site is the name of the current site) if you’re searching images in all locations in the current site, and “Location Search” (where Location is the name of the current location) if you’re searching images from the current location. Images that you find in searches in this window are from the current site or current location only, as noted in the title of the window. Note: In site searches, you can choose to limit your search to locations within the site using the Location Filter. In location searches, you can only search the location you selected.
Note: You can adjust the size of the left section of the search, and hide or display this section as well (see Viewing and Managing Your Images).
Copyright RECONYX, LLP – www.silent-image.com Viewing and Managing Your Images - 47

Silent Image User Guide – April 2006
To search the current site or the current location:
1. Enter the Search Text (word or words that you want to search for). Tip: When you enter more than one word with spaces between words, your search will find images that contain either word. When you enter more than one word with a plus sign (+) between words, your search will find images that contain both words. For more search tips, click Advanced Search Tips under the Search Text box.
2. If you’ve entered a phrase and want to search for the exact phrase you entered, check Match whole phrase only. Note: If you enter a phrase and do not check Match whole phrase only, your search will find images that include any of the words in the phrase.
3. If you’re searching a site and want to limit your search to a location within the site to search, select that location from the list in Location Filter.
If you’re searching a location, the Location Filter is not available. Go to step 4.
4. Click Search to perform your search. The total number of images found that match your search text is displayed above the search results area, and a full-size version of the first image found is displayed to the right of the search section.
Images can be listed in thumbnail view (by image name, with a reduced-size version of the image also displayed) or detail view (by image name):
• To list your images in detail view, select Detail for the View Style at the top of the list of search results, or from the View drop-down viewer menu, select Detail.
• To list your images in thumbnail view, select Thumbnail for the View Style, or from the View drop-down menu, select Thumbnail.
Note: You can adjust the size of the left section of the search, and hide or display this section as well (see Viewing and Managing Your Images). Tip: If you’re searching a site with multiple locations, list your images by detail view so that the location of each image found in the search is also displayed (as shown in the preceding example).
Tip: To clear the results of your most recent search, click Clear.
When you’re viewing images in your search results, you can view any image as full size on the right side of the search window, move through images in the list using the navigation buttons underneath the full size image display, copying images to your favorites, saving images to another folder on your computer, exporting image data, moving or copying images to another location, and deleting images. All of these tasks are the same as those described in View Images.
Copyright RECONYX, LLP – www.silent-image.com Viewing and Managing Your Images - 48

Silent Image User Guide – April 2006
Tag Images and Manage Image Data
View, add to, or edit the Image Data for any image you’re viewing, or any image you’ve found in a search. Click the Image Data button to open “Add/Edit Image Data” for the current image. Tip: You can also open “Add/Edit Image Data” from the Image menu in the search (see Find Images) or viewer (see View Images) windows (select Image Data). Note: If you’re using the image viewer (see Load New Images), you can view image data, but you cannot
edit it. Click the view image data button to view image data for the current image.
When you’re adding or editing image notes, you can perform these tasks on an individual image (the current image) or on multiple images. The process of selecting multiple images is described in View Images.
On any tab in “Add/Edit Image Data:”
• To save the changes you’ve made and close “Add/Edit Image Data,” click OK on any tab.
• To undo all of the changes you’ve made and close “Add/Edit Image Data,” click Cancel on any tab.
1. To add image notes to the selected image(s), select the Image Notes tab.
Enter the notes you want to include with the selected image(s) in the open area on the tab.
Copyright RECONYX, LLP – www.silent-image.com Viewing and Managing Your Images - 49

Silent Image User Guide – April 2006
2. To view all Image Data for the current image, select the System Metadata tab. Note: If you’re adding or editing image notes to multiple images, the System Metadata tab displays only the words “Image Metadata;” the System Metadata tab does not display image metadata when more than one image is selected. The System Metadata tab also does not display unsaved image notes. Note: Information displayed on the System Metadata tab can not be edited.
3. To view additional instructions on using “Add/Edit Image Data,” select the Help tab.
Create Video
Select a group of images and create a video clip using any of the images you’ve stored in a location in “MapView.” The video you create is saved as an .AVI (Audio Video Interleave) video and can be viewed using a number of widely available media players, including RealPlayer® and Microsoft Windows Media® Player.
Within the “Viewer,” select the images you want to include in the video clip (the process of selecting multiple images is described in View Images).
Once you have selected the images you want to use to create your video, from the Image drop-down menu, select Create Video, browse to the folder you want to save the video in, enter the file name you want to give the video, and click Save. The progress of creating your video is displayed.
Tip: You can also click the Create Video toolbar button.
To view your video, browse to the folder where you saved it and double-click the file. The video will play in your default video player. Tip: The default location where videos are stored is your My Favorite RECONYX Images folder; if you save your videos in this folder, you can access them quickly from “MapView” by opening your Favorites folder (see Favorites).
The video clip file can be attached to an email for sharing images with friends and colleagues and/or inserted into presentation tools such as Microsoft PowerPoint®. Note: Video files can become quite large depending upon the number of images included in the video. As a guide, 10 images from the Silent Image camera will result in a video file of about 500KB, and 20 images will create a video file around 1MB in size.
Copyright RECONYX, LLP – www.silent-image.com Viewing and Managing Your Images - 50

Silent Image User Guide – April 2006
Warranty and Safety Information
Satisfaction Guarantee
RECONYX offers a 30-day satisfaction guarantee for all cameras that are purchased directly from RECONYX. If, for any reason, you are not completely satisfied with products purchased from RECONYX, you may return the products within 30 days of purchase for a full refund of the purchase price and applicable taxes.
This guarantee is subject to the following conditions:
• Hardware products must be returned in the original packaging and must be complete and in “new” condition. Any damaged or worn products may be subject to a restocking fee.
• You must obtain a Return Material Authorization (RMA) number for all products returned under this money-back guarantee (contact RECONYX for an RMA before returning products).
• You must return the original CDs containing RECONYX software and will be required to sign an affidavit indicating that all copies of RECONYX software have been removed from your computers and any physical copies of the software have been destroyed.
• Shipping charges will not be refunded.
Limited Warranty
RECONYX hardware products are warranted for one (1) year. If during this period, through normal use, a hardware product becomes defective due to defects in materials or workmanship, RECONYX will either repair or replace the product. This warranty is void if a product failure results from accident, abuse, improper use by Buyer, disassembly, or unauthorized maintenance and repair.
Software products are licensed to Buyer under the terms of the applicable RECONYX software license (contained within installation programs). If Buyer wishes to review the software license agreement before purchasing products from RECONYX, a copy of the software license may be obtained by request.
Buyer must obtain a Return Material Authorization (RMA) number from RECONYX before returning any product(s) for repair or replacement. If RECONYX concludes that a returned product is not defective, Buyer will be notified, the product will be returned to Buyer at Buyer’s expense, and Buyer may be charged for RECONYX’s examination and testing of the product.
Copyright RECONYX, LLP – www.silent-image.com Warranty and Safety Information - 51

Silent Image User Guide – April 2006
This limited warranty is the sole warranty for hardware and software products offered by RECONYX and RECONYX shall not be liable for any amounts for said products except in compliance with this warranty.
Safety Precautions
Before using the camera, please ensure that you read and understand the safety precautions described below. Always ensure that the camera is operated correctly.
The safety precautions noted on the following pages are intended to instruct you in the safe and correct operation of the camera and its accessories to prevent injuries or damage to yourself, other persons, and equipment. Note: In the following pages, the term “equipment” refers primarily to the camera and its accessories.
Preventing Malfunction
Avoid Strong Magnetic Fields
Never place the camera in close proximity to electric motors or other equipment generating strong electromagnetic fields. Exposure to strong magnetic fields may cause malfunctions or corrupt image data.
Avoid Condensation
Moving the equipment rapidly between hot and cold temperatures may cause condensation (water droplets) to form on its external and internal surfaces. You can avoid this by placing the equipment in an airtight, re-sealable plastic bag and letting it adjust to temperature changes slowly before removing it from the bag.
If Condensation Forms Inside the Camera
Stop using the camera immediately if you detect condensation inside the camera. Continued use may damage the equipment. Remove the CF card and battery from the camera and wait until the moisture evaporates completely before resuming use.
Copyright RECONYX, LLP – www.silent-image.com Warranty and Safety Information - 52

Silent Image User Guide – April 2006
Warnings
• Store this equipment out of the reach of children and infants. Accidental damage to the camera or batteries by a child could result in serious injury.
• Be particularly careful to keep the date (coin) battery used in the camera away from children. Seek medical assistance immediately if a child swallows a battery.
• Do not allow water or other liquids to enter the interior of the camera. The interior has not been waterproofed. If the exterior comes into contact with liquids or salt air, wipe it dry with a soft, absorbent cloth. In the event that water or other foreign substances enter the interior, immediately turn the camera’s power off and remove the camera batteries. Continued use of the equipment may result in fire or electrical shock. Please consult your camera distributor or the closest RECONYX Customer Support Help Desk.
• Use of power sources not expressly recommended for this equipment may lead to overheating, distortion of the equipment, fire, electrical shock, or other hazards. Use only the recommended power accessories. Any use of non RECONYX power sources will void the warranty on your camera.
• Do not mix battery types. You may run your Silent Image camera on Alkaline, NiMH, or Lithium batteries – but you should NEVER MIX BATTERY TYPES! Damage to the camera can result and your warranty may be voided if you do so.
• Do not place the batteries near a heat source, expose them to direct flame or heat, or immerse them in water. Such exposure may damage the batteries and lead to the leakage of corrosive liquids, fire, electrical shock, explosion, or serious injury.
• Do not attempt to disassemble, alter, or apply heat to the batteries. There is serious risk of injury due to an explosion. Immediately flush with water any area of the body or clothing that comes into contact with the inner contents of a battery. If the eyes or mouth contact these substances, immediately flush with water and seek medical assistance.
• Avoid dropping or subjecting the batteries to severe impacts that could damage the casings. It could lead to leakage and injury.
• Do not short-circuit the battery terminals with metallic objects, such as key holders. It could lead to overheating, burns, and other injuries.
• Before you discard a battery, cover the terminals with tape or other insulators to prevent direct contact with other objects. Contact with the metallic components of other materials in waste containers may lead to fire or explosions. If available in your area, utilize specialized waste facilities to discard your batteries.
• Use of batteries not expressly recommended for this equipment may cause explosions or leaks, resulting in fire, injury, and damage to the surroundings. Use only recommended batteries and accessories.
Copyright RECONYX, LLP – www.silent-image.com Warranty and Safety Information - 53

Silent Image User Guide – April 2006
• Avoid using, placing, or storing the equipment in places subject to strong sunlight or high temperatures, such as the dashboard or trunk (boot) of a car. Exposure to intense sunlight and heat may cause the batteries to leak, overheat or explode, resulting in fire, burns or other injuries. High temperatures may also cause deformation of the casing.
• Be careful not to bang the camera or subject it to strong impacts or shocks that could lead to injury or damage the equipment.
• When using desiccant, the following precautions should be followed: Keep out of reach of children, do not eat, and do not inhale desiccant dust. If the desiccant packet tears or breaks, wash your hands if they come in direct contact with the desiccant. Desiccant may cause eye, skin, and mucous membrane irritation. Prolonged inhalation may cause lung damage. Asthma can be aggravated by exposure to desiccant.
• If you know or suspect desiccant has been ingested, seek medical assistance for further treatment, observation and support if necessary. For eye contact, flush with water for at least 15 minutes. For skin contact, wash affected area with soap and water. For inhalation of desiccant dust, move affected person into an environment with fresh air. For accidental ingestion, drink at least two glasses of water.
Copyright RECONYX, LLP – www.silent-image.com Warranty and Safety Information - 54

Silent Image User Guide – April 2006
Troubleshooting and Technical Support
For answers to questions about Silent Image for which you cannot find answers in this User Guide, please check the web site (www.silent-image.com) to see if the information you are looking for is covered in the on-line “Frequently Asked Questions” (FAQ) section.
If after searching this User Guide and checking the FAQ’s on the web, you still have questions about your Silent Image camera that you need assistance in answering, please email technical support ([email protected]) or call us at 866-493-6064 and ask for Technical Support. We will do everything we can to help you get the most from your Silent Image camera.
Troubleshooting your Silent Image camera
If your images appear cloudy or out of focus, first consider whether there was snow or frost on the camera lens. It is sometimes advisable to check your camera after a fresh snowfall to be sure the lenses are not covered with snow. Otherwise, the lens may be dirty or have water spots on it – if so, clean your lenses according to instructions in the first part of this guide.
If you are getting false triggers, check your camera setup: the sun should not be shining directly on the face of the camera and camera’s field of view should be cleared of as much moving vegetation as possible.
If you are still getting false triggers after checking your camera setup, try adjusting your trigger sensitivity, the number of seconds to wait between triggers, and your advanced trigger settings (see Triggers if you’re using Silent Image’s internal motion sensor). You can also try adjusting your NearVideoTM settings.
If your camera won’t start up properly (goes to red), try a different CF card. Be sure to “erase” the card using “MapView” before inserting it into the camera, and then try rebooting. Note that SanDisk and Viking media are the suggested CF cards for use with your Silent Image camera.
If animals appear overexposed (too bright) in your pictures, try adjusting the camera’s aim to be more directly at the area where animals are appearing (see Aiming the Camera).
If the temperature noted in Image Data seems too high, check your camera setup: if the camera is in direct sunlight temperature readings will not be accurate.
If the date and time on your images becomes incorrect after you’ve set it using “Change Camera Settings,” try replacing the camera’s date battery (see Replacing the Coin Battery near the end of this User Guide for detailed instructions on how to change the coin battery).
Important! Be especially careful to keep coin batteries out of the reach of children. Seek medical assistance immediately if a child swallows a battery since corrosive battery fluids could damage the stomach or intestinal wall.
Copyright RECONYX, LLP – www.silent-image.com Troubleshooting and Technical Support - 55
Silent Image User Guide – April 2006
Troubleshooting your MapView software
If you cannot see your customized Image Data (e.g. in Microsoft Excel®) after exporting tagged images, you must change the alignment of the cells containing keywords in order to make the data visible. The default alignment when opening a .CSV file is Bottom. Select the cells for which you wish to change the alignment and from the Format menu, select Cells. In the window that appears, click the Alignment tab. Change the Vertical setting to a more appropriate value, Top, for example. Click OK and your data should appear in the selected cells.
If you receive error messages while loading new images, this could be the result of either bad images or version incompatibility. If you see an error message that says, “Error Importing Image <filename> Cause: Error reading JPG Comment”, this would indicate a bad image was skipped. If the error message reads, “Error Importing Image <filename> Cause: Image could not be imported due to version incompatibility.”, this would indicate that the images you are trying to load were captured with the Professional version of the Silent Image camera. Images captured with Professional cameras are only compatible with “MapView Professional.”
If you receive error messages while loading images from another folder - it may be because there are too many characters in the path to the files (more than 130 characters). To read more about this known issue or to obtain a fix, go here. A simple solution is to rename or move the folder you are trying to load from. If the full path to the folder can be shortened to fewer than 130 characters, this problem will go away. If this does not solve your problem with loading images from another folder, contact Technical Support.
If you cannot erase your CF card, check with computer technical support personnel to be sure you have permissions set on your computer to allow you to format removable media. The instructions below explain how the appropriate privileges can be assigned.
Determine the version of your operating system. Follow the steps outlined below for your operating system. Windows XP Home Edition From a user account with Administrator privileges:
Click Start, click Run. Enter regedit at the prompt. Browse to: HKEY_LOCAL_MACHINE\Software\Microsoft\WindowsNT\CurrentVersion\Winlogon On the right side, find AllocateDASD. Double Click AllocateDASD, and change the value to 2. Click OK. Close the Registry Editor.
The next time the user logs in, they will be able to erase their CF card.
Copyright RECONYX, LLP – www.silent-image.com Troubleshooting and Technical Support - 56

Silent Image User Guide – April 2006
Window XP Professional Edition From a user account with Administrator privileges:
Click Start, click Run. Enter mmc at the prompt. Under File, click on Add/Remove Snap-in… On the Add/Remove Snap-in window, click Add. On the Add Standalone Snap-in window, choose Group Policy from list and click Add. In the wizard window that appears, make sure that Local Computer is typed in the Group Policy Object text box and click Finish. Click Close on the Add Standalone Snap-in window. Click OK on the Add/Remove Snap-in window. Under Local Computer Policy, browse to the following branch: Computer Configuration\Windows Settings\Security Settings\Local Policies\Security Options Right click on Devices: Allowed to format and eject removable media and click Properties. In the Local Security Setting box, click the group you want, and then click OK. Your choices are: Administrators - Only Administrators can format removable media. Administrators and Power Users - Admin and Power users can format removable media. Administrators and Interactive Users - Administrators and Interactive (Limited users) can format removable media. Quit MMC, click Start, and then click Run. Enter gpupdate at the prompt.
The next time the user logs in, they will be able to erase their CF card.
Copyright RECONYX, LLP – www.silent-image.com Troubleshooting and Technical Support - 57

Silent Image User Guide – April 2006
Copyright RECONYX, LLP – www.silent-image.com Troubleshooting and Technical Support - 58

Silent Image User Guide – April 2006
Copyright RECONYX, LLP – www.silent-image.com Troubleshooting and Technical Support - 59

Silent Image User Guide – April 2006
Copyright RECONYX, LLP – www.silent-image.com Troubleshooting and Technical Support - 60
Silent Image User Guide – April 2006
Copyright RECONYX, LLP – www.silent-image.com - 61 Copyright and Trademark Information
Copyright and Trademark Information
Silent ImageTM User Guide, April 2006 Copyright© 2006 by RECONYX 3600 Hwy 157, Suite 205, La Crosse, WI 54601
This manual provides detailed instructions for getting started with the Silent Image camera and software, installing the software, changing the camera settings, and viewing and managing images.
Silent Image is a trademark of RECONYX.
Other trademarks and registered trademarks referred to in this document:
• CodeLoc, InstaOn, MapView Image Management, and NearVideo are trademarks of RECONYX.
• CompactFlash is a registered trademark of the CompactFlash Association. • Excel, Microsoft, PowerPoint, Windows, and Windows Media are registered
trademarks of Microsoft® Corporation. • Lexar is a trademark of LexarMedia, Incorporated. • RealPlayer is a registered trademark of RealNetworks, Incorporated. • SanDisk is a registered trademark of SanDisk Corporation.
All other trademarks and copyrights referred to are the property of their respective owners.