sibelius film scoring
DESCRIPTION
handbookTRANSCRIPT
Notes 2013
Sibelius Film Scoring
Katie WardrobeMidnight Music

Getting Started With Film Scoring 3
Project #1: Box Clever 3
Aim 3
Skills 3
Steps 3
Empty bars and Panorama View 4
Add Video 4
The Transport Panel (Playback) 5
Playback 5
Add Hit Points 5
Rename Hit Points 6
Add Hit Point Staff 6
Create percussion parts 6
Add some extras 7
Project #2 Haunted House 7
Aim 7
Skills 7
Steps 7
Empty Bars and Panorama View 8
Add Video 8
Hit Points 8
All About Suspense Music 8
Creating Suspenseful Music With Students: Some Ideas 9
Project #3 Big Buck Bunny 10
Open Source Short Film 10
Cue sheets 10
Steps 10
Matching music tempo with hit points 10
Contact me 11

Getting Started With Film Scoring
Project #1: Box Clever
Aim
Start simply: use untuned percussion to add musical “sound effects” to the short movie Box Clever (one of the videos provided with Sibelius).
Skills
Students will learn how to:
• Synch visuals to sound
• Set up a new score with speci"c instruments
• Add video to the score
• Use the video window
• Play, rewind, fast forward, stop and scrub through their score
• Add hit points
• Create a hit point staff
• Input notes
• Copy and paste
• Add dynamics
Steps
Start new blank score with the following instruments from the Orchestral unpitched percussion family:
• Snare drum
• Triangle
• Bass drum
• Cymbals
• Large Gong
3

And from the Other unpitched percussion family:
• Finger cymbals
• Tambourine
• Wind chimes
Other score attributes:
• Time signature of 4/4
• Metronome mark of crotchet = 160
• C major
• Add a title and your name as the composer
• Click Finish
Empty bars and Panorama View
Change to Panorama view by pressing Shift+P. Then create some empty bars – 24 in total – by using Ctrl
+B or ⌘B to add bars at the end of your score.
Add Video
Add the Box Clever video by going to Play > Video > Video > Add Video (Sibelius 6: Play > Video and Time > Add video). Locate the video: it should be in your Example scores folder. If you can’t see the Example scores folder, you may not have it installed. You’ll need to "nd your installer disc and copy the Example Scores folder on to your hard drive.
Click Open and the video will appear in its own window in your score:
There is a series of buttons across the bottom of the video window:
• The Add hit point button4
• 4 buttons to control the video screen size (half size, full size, double size and full screen)
• Volume slider (controls the volume of the video only – not the score)
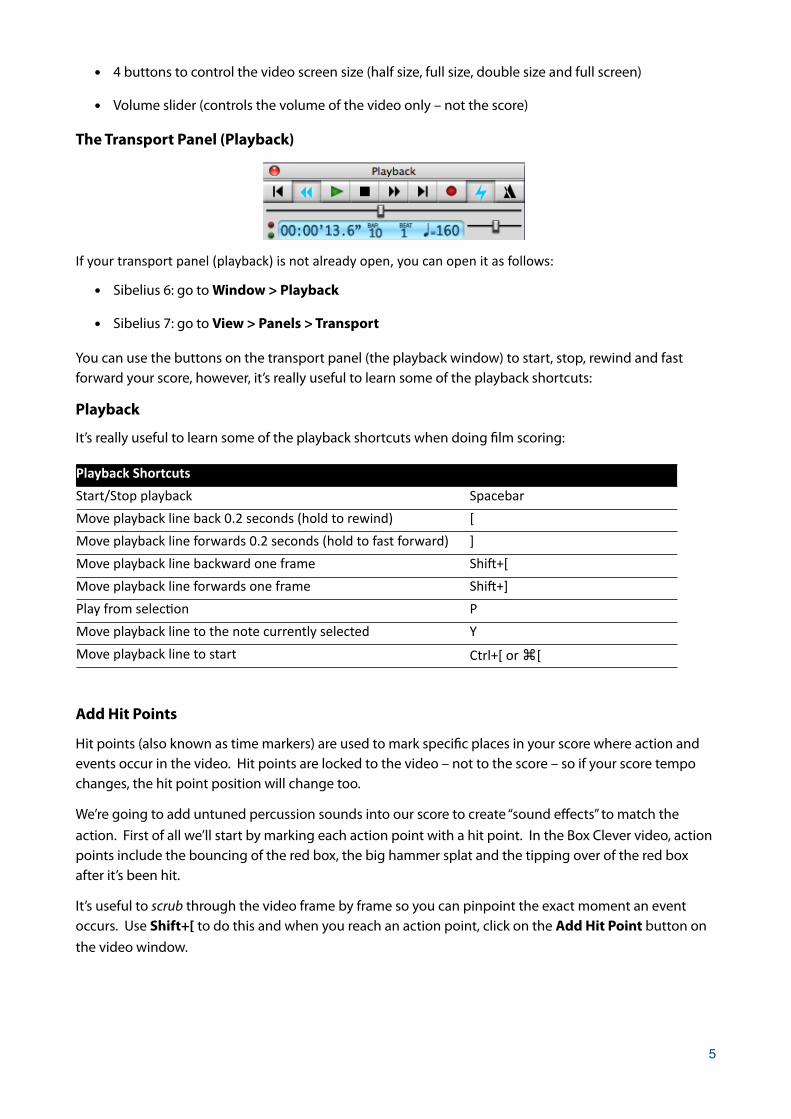
The Transport Panel (Playback)
If your transport panel (playback) is not already open, you can open it as follows:
• Sibelius 6: go to Window > Playback
• Sibelius 7: go to View > Panels > Transport
You can use the buttons on the transport panel (the playback window) to start, stop, rewind and fast forward your score, however, it’s really useful to learn some of the playback shortcuts:
Playback
It’s really useful to learn some of the playback shortcuts when doing "lm scoring:
Playback Shortcuts
Start/Stop playback Spacebar
Move playback line back 0.2 seconds (hold to rewind) [
Move playback line forwards 0.2 seconds (hold to fast forward) ]
Move playback line backward one frame ShiD+[
Move playback line forwards one frame ShiD+]
Play from selecGon P
Move playback line to the note currently selected Y
Move playback line to start Ctrl+[ or ⌘[
Add Hit Points
Hit points (also known as time markers) are used to mark speci"c places in your score where action and events occur in the video. Hit points are locked to the video – not to the score – so if your score tempo changes, the hit point position will change too.
We’re going to add untuned percussion sounds into our score to create “sound effects” to match the action. First of all we’ll start by marking each action point with a hit point. In the Box Clever video, action points include the bouncing of the red box, the big hammer splat and the tipping over of the red box after it’s been hit.
It’s useful to scrub through the video frame by frame so you can pinpoint the exact moment an event occurs. Use Shift+[ to do this and when you reach an action point, click on the Add Hit Point button on the video window.
5

A hit point will appear in your score and looks like the one to the right. It shows you the timecode at that position in the score, the position in bars, beats and hundredths and the name of the hit point. By default, Sibelius gives each hit point a generic name (ie. Hit Point 01). Next, we’ll learn how to change the name for easy identi"cation in the score.
Rename Hit Points
Open the hit points window by going to Play > Video, click on the lower half of the Hit Point button and then choose Edit Hit Points (Sibelius 6: Play > Video and Time > Hit Points). You can rename each hit point by clicking on the name and typing a new title.
You can also delete hit points in this window, or create new ones.
Add Hit Point Staff
Next, we want to add some percussive sounds at each hit point to audibly illustrate what’s happening in the video. In order to do that we need to work out the exact rhythmic position of each hit point so we can replicate it in a percussion part. Although this sounds difficult, Sibelius makes it easy with one of its plug-ins.
Go to Note Input > Plug-ins > Add Hit Point Staff (Sibelius 6: Plug-ins > Composing Tools > Add Hit Point Staff). This plug-in adds a staff at the top of the score which shows the rhythmic position of each hit point. The staff is silent - it won’t make a sound during playback.
Create percussion parts
Now all that’s left to do is to create percussive sounds that match the rhythmic position of each hit point. First you’ll need to decide which percussion instrument will represent each hit point. As an example, I used a tambourine sound for the red box bounces at the beginning of the video, but you may like to try something completely different.
6
Then you can simply copy the hit point staff notes into any (all!) of the other staves in your score.
It can be a good idea to change the noteheads on the hit point staff to normal noteheads before doing anything else: select the entire staff (double-click on it) and then use the shortcut Alt+Shift+0 (Opt+Shift+0).
Next, you can copy the notes on the hit point staff on to any of the other staves in your score. Select the bar/s on the hit point staff and then Alt-click on to one of the other staves to copy the notes across.
Playback your score frequently to hear the result.
Add some extras
• Dynamics: select a note, type Ctrl+E or ⌘E (E stands for “Expression” text) and then type the
dynamic in whilst holding down Ctrl or ⌘ (this makes the dynamic appear in the correct font style)
• Trills (rolls), ritardandos or ralls can be found in the Lines menu (press L to access Lines)
• Articulation such as staccatos, tenutos and accents can be found on the Keypad
Project #2 Haunted House
Aim
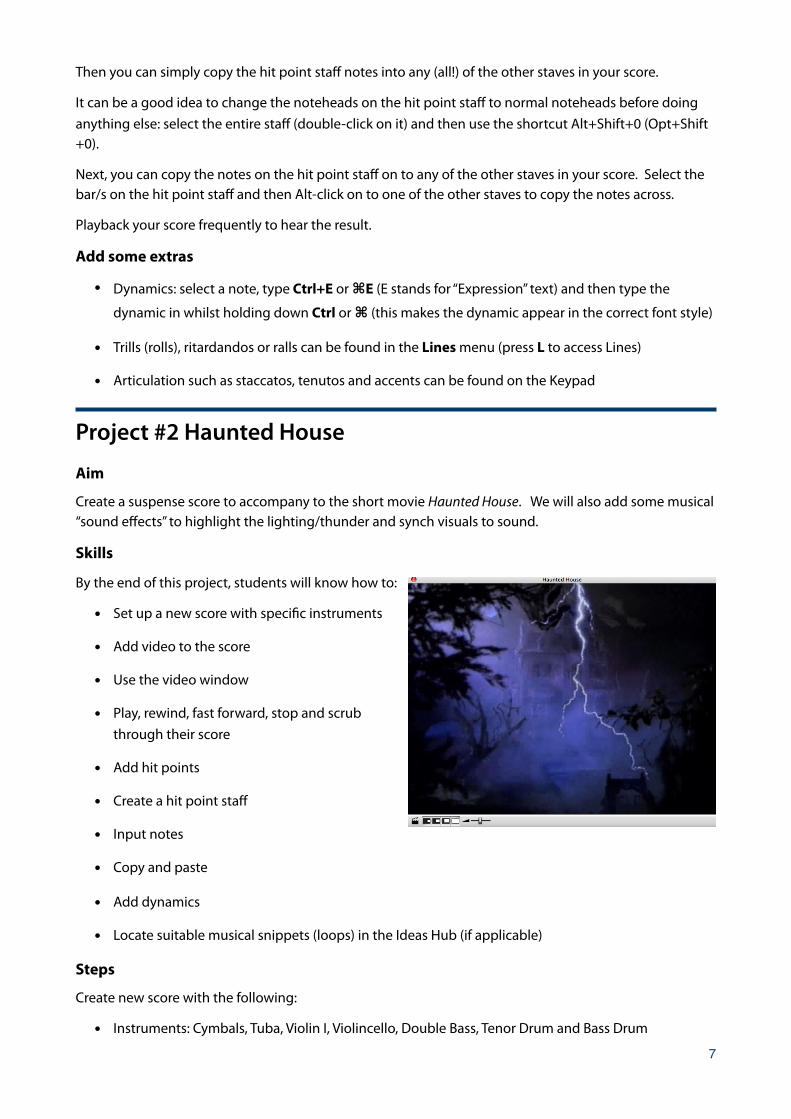
Create a suspense score to accompany to the short movie Haunted House. We will also add some musical “sound effects” to highlight the lighting/thunder and synch visuals to sound.
Skills
By the end of this project, students will know how to:
• Set up a new score with speci"c instruments
• Add video to the score
• Use the video window
• Play, rewind, fast forward, stop and scrub through their score
• Add hit points
• Create a hit point staff
• Input notes
• Copy and paste
• Add dynamics
• Locate suitable musical snippets (loops) in the Ideas Hub (if applicable)
Steps
Create new score with the following:
• Instruments: Cymbals, Tuba, Violin I, Violincello, Double Bass, Tenor Drum and Bass Drum
7

• Time signature of 4/4
• Metronome mark of crotchet = 100
• C major
• A title and your name as the composer
Empty Bars and Panorama View
• Change to Panorama view by pressing Shift+P
• Create some empty bars – 13 in total (Ctrl+B or ⌘B)
Add Video
Add the Box Clever video by going to Play > Video > Video > Add Video (Sibelius 6: Play > Video and Time > Add video). Locate the video and click Open.
Hit Points
Add hit points when you see the lightning $ash. Hint: the "rst one isn’t until around 21 seconds into the video and there are around 3 in total.
Go to Note Input > Plug-ins > Add Hit Point Staff (Sibelius 6: Plug-ins > Composing Tools > Add Hit Point Staff). Copy the rhythmic position of the hit points into the cymbal stave (or other instrument of your choosing).
All About Suspense Music
Discuss with students some of the compositional techniques commonly used to create suspense or tension:
• Rhythms that get faster (the way your heartbeat speeds up when you’re scared or under stress)
• Repetition (of almost anything)
• Non-chord tones
• Jagged articulations
• Dissonant harmony
• Dramatic devices
• Ascending lines8

• Increased volume
• Extreme register of instruments
• Emphasis on passing tones (non-chord/scale tones)
• Wide intervals (especially ascending)
• Alternating directions
• Use of space – rests/silence to create sense of anticipation
Creating Suspenseful Music With Students: Some Ideas
Depending on the age of your students and their musical experience, you can choose to approach this task in a number of ways.
1. Students add “pre-made” music to their score
• Using the Sibelius’s Ideas Hub (or even the Worksheet Creator), students can search for musical snippets that will suit the style of "lm they’re composing for. They could try a few different Ideas and discuss why some work and some don’t. How do different types of music change the "lm?
• More advanced students within the group may like to alter the pre-made Ideas by changing the instrumentation, key, extending the Idea or editing the Idea
2. Students compose with provided building blocks
Show students how to compose a suspense soundtrack by "rst providing them with compositional building blocks.
• Create a drone in the low strings and tuba staves that goes up slowly in pitch. End on a very low note
• Create a “heartbeat” rhythm in the bass drum
• Create a tension-building rhythm in the tenor drum that gets faster
• Add a high-pitched, eerie violin part
• Add dynamics so that the music starts quietly and gets louder. End on a loud accented low note
3. Students compose their own music from scratch completely, or use a combination of the above techniques.
9

Project #3 Big Buck Bunny
Open Source Short Film
As an extension to Project #2, students can compose music to a short excerpt from the open source video Big Buck Bunny.
Big Buck Bunny is a 10-minute animated movie that was released in 2008. Created by the Blender Institute (Amsterdam) it stars a very big bunny named Buck who decides to seek revenge on three little forest critters who spoil his day. Big Buck Bunny was released under a Creative Commons license meaning that it is free for everyone to watch it, download it, reuse it and learn from it, provided the creators of the movie are attributed.
Cue sheets
Really, the process for this project is the same as for the previous two projects, but this time you might like to have students map out their composition "rst by using a cue sheet.
A cue sheet - used by professional composers - is a list of the musical cues that will take place in a scene. It can be useful for students to watch their chosen excerpt a few times and write down the hit points in a list, with the timings. They can also make note of any musical ideas they may have - parts of the scene that might "t well with happy music or sad music or dramatic music.
Steps
• watch the movie (a few times!) and "ll out your cue sheet
• set up a new score with a combination of percussive and melodic instruments (your choice)
• add in the hit points
• create the hit point staff
• compose original music to enhance the scene - light, happy string parts, low ominous drones, sudden chords and percussive “sound effects”
Matching music tempo with hit points
One extra feature that’s useful to know about is the Fit Selection To Time plug-in. If you have composed a passage of music and you want to "t it exactly between a couple of hit points, Sibelius can automatically stretch (or contract) the music by adjusting the tempo marking to make it "t the video exactly.
To do this:
• Select the bar/s of music between two hit points
• Go to Note Input > Plugins > Fit selection to time (Sibelius 6: Plugins > Composing Tools > Fit selection to time)
• Choose to Set the end of the section to the Time of selected hit point at the bottom of the window. Select your end hit point from the drop-down menu and click OK
10

Sibelius will add two tempo markings into your score: one at the beginning of the section (which will make the section "t exactly to the length of the video) and then another at the end to return the score back to the original tempo. You can delete the second tempo marking if you want to retain the current speed.
Contact me
Contact me regarding
• Face-to-face training for your school/network/event
• Online courses
Email: [email protected]
Mobile: 0412 403 704
Website: www.midnightmusic.com.au
Facebook: www.facebook.com/midnightmusic
TwiTer: www.twiTer.com/kaGesw1
11