sharing folder using samba - heng sovannarith · pdf filesharing folder using samba ......
TRANSCRIPT
Introduction
• Samba is a software package that come with Linux Systems.
• It enables you to share file systems and printer on a network with computers that use the Simple Message Block (SMB) or Common Internet File System (CIFS) protocols.
• Samba is a software package used in Linux system to share file and printer between Linux and windows system.

Installing Samba

Installing Samba (cont.)
• There are several packages that relate to the Samba file server:– Samba: Includes the basic SMB server software for sharing
files and printers. – samba-common: Samba common files used by both the
server and the client.– samba-client: Provides the utilities needed to connect to
shares from Samba and Microsoft servers. – samba-doc: Samba documentation– system-config-samba: GUI for managing samba shares and
users– swat: Samba Web Administration Tool
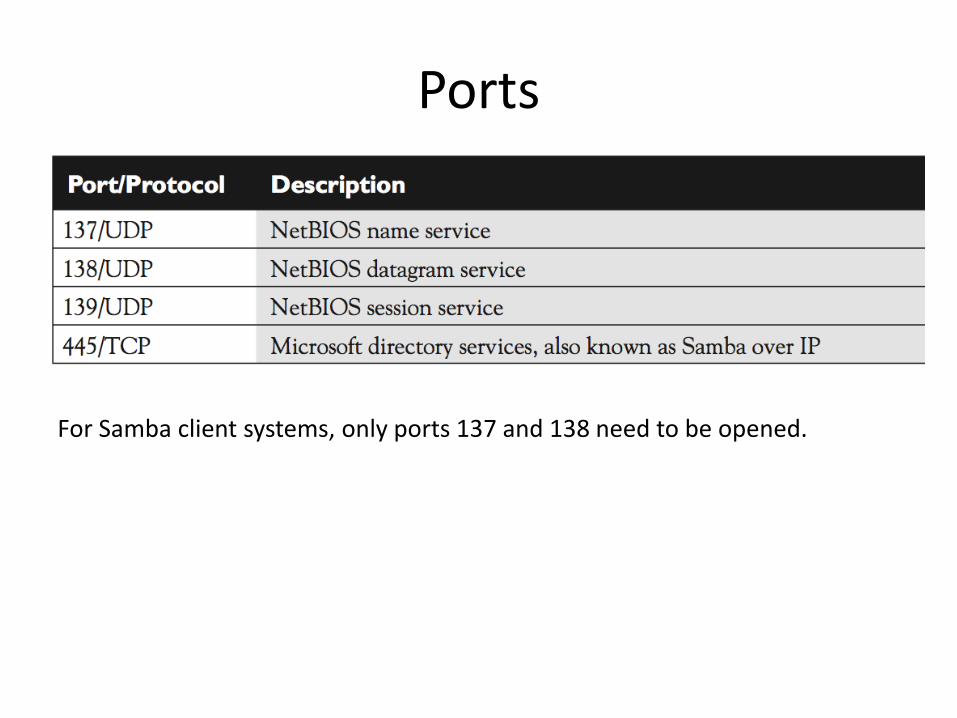
Ports
For Samba client systems, only ports 137 and 138 need to be opened.
Services
• smbd is the server daemon that provides filesharing and printing services to Windows clients.
• nmbd — NetBIOS name server to provide NetBIOS over IP naming services to clients
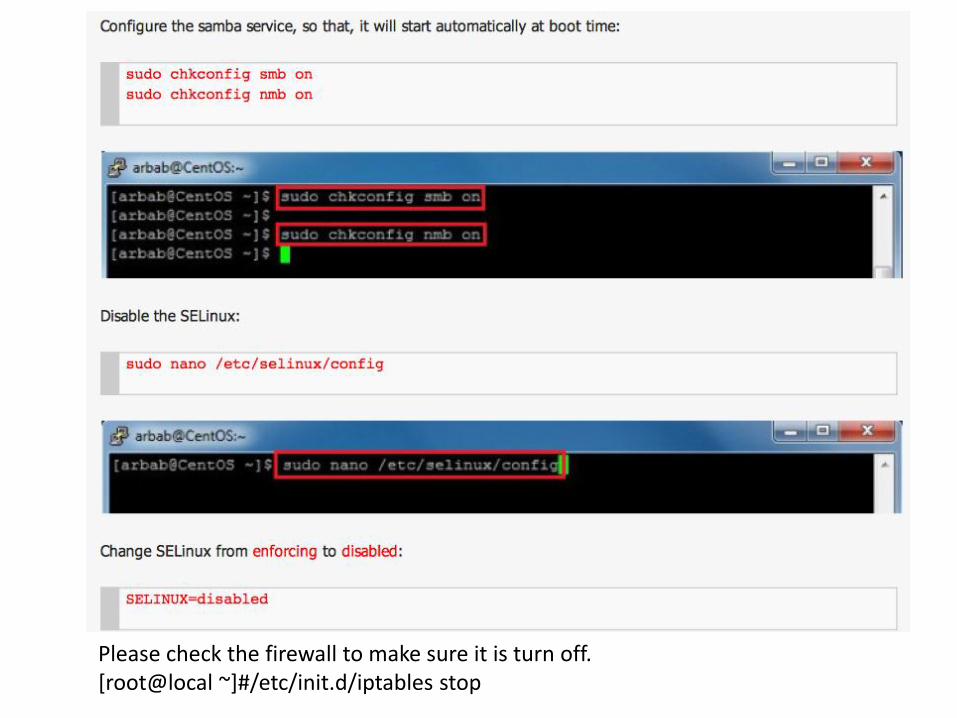
Please check the firewall to make sure it is turn off.[root@local ~]#/etc/init.d/iptables stop
Create Users and Groups
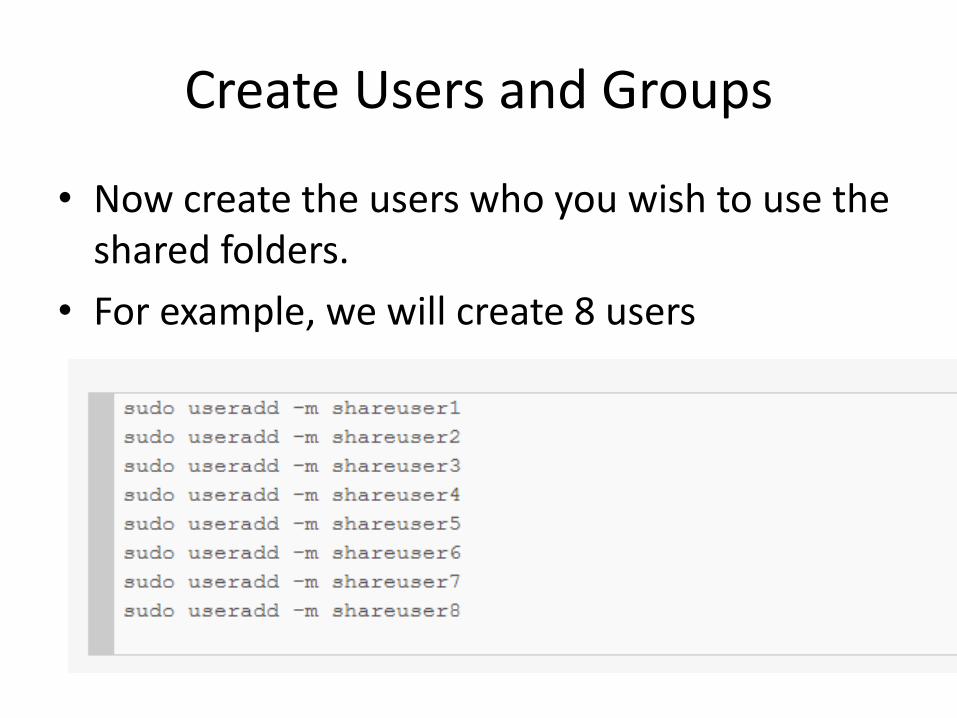
• Now create the users who you wish to use the shared folders.
• For example, we will create 8 users
Create Users and Groups (cont.)
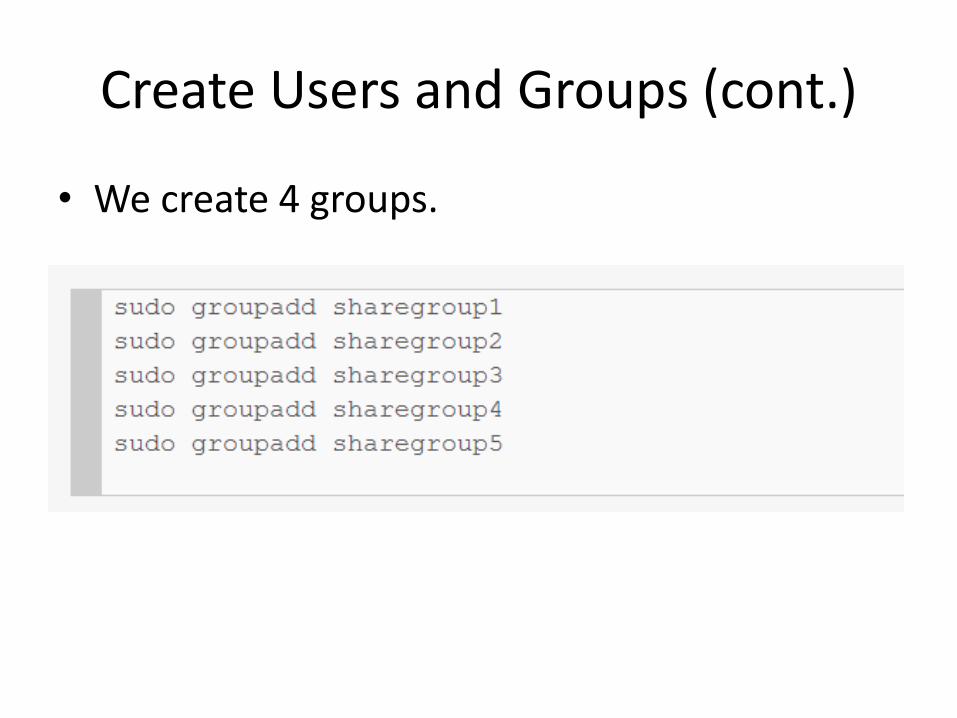
• We create 4 groups.
Create Users and Groups (cont.)
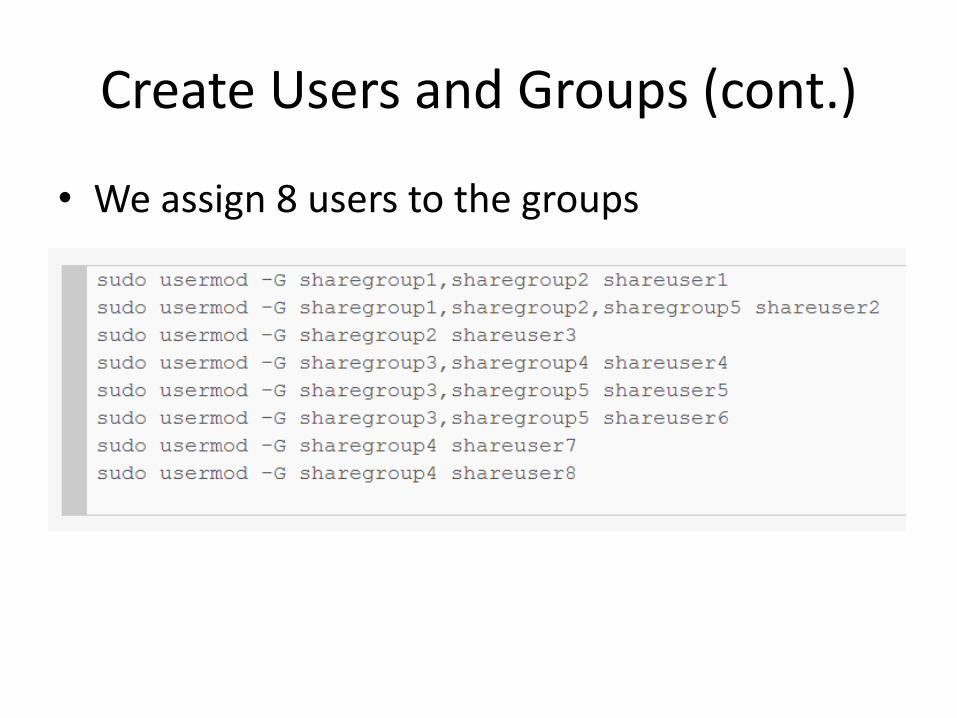
• We assign 8 users to the groups
Create Users and Groups (cont.)
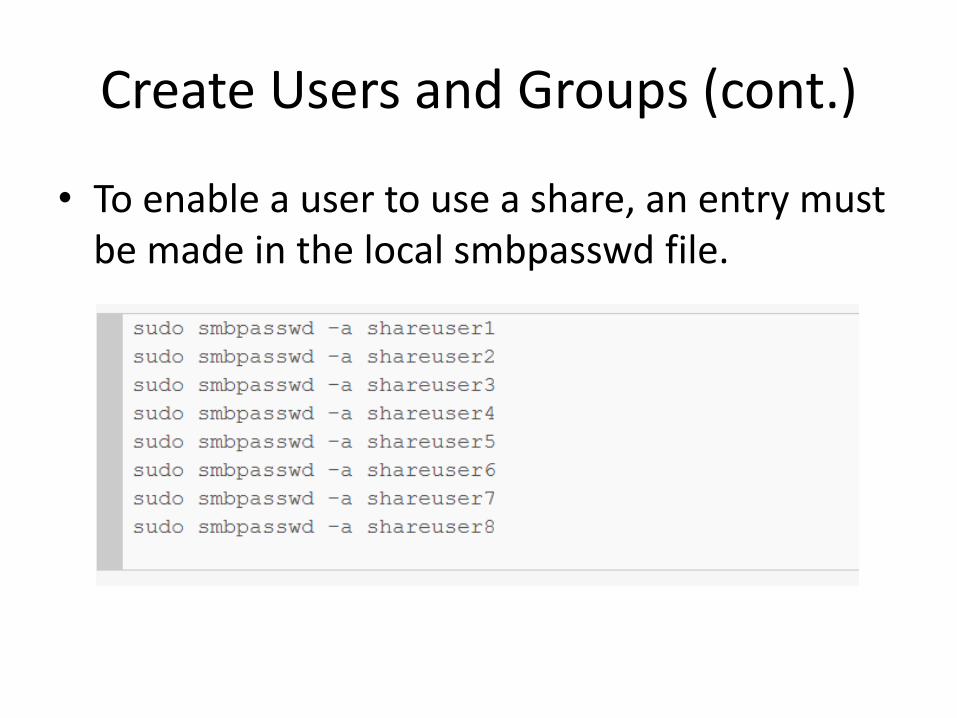
• To enable a user to use a share, an entry must be made in the local smbpasswd file.
Samba File Configuration
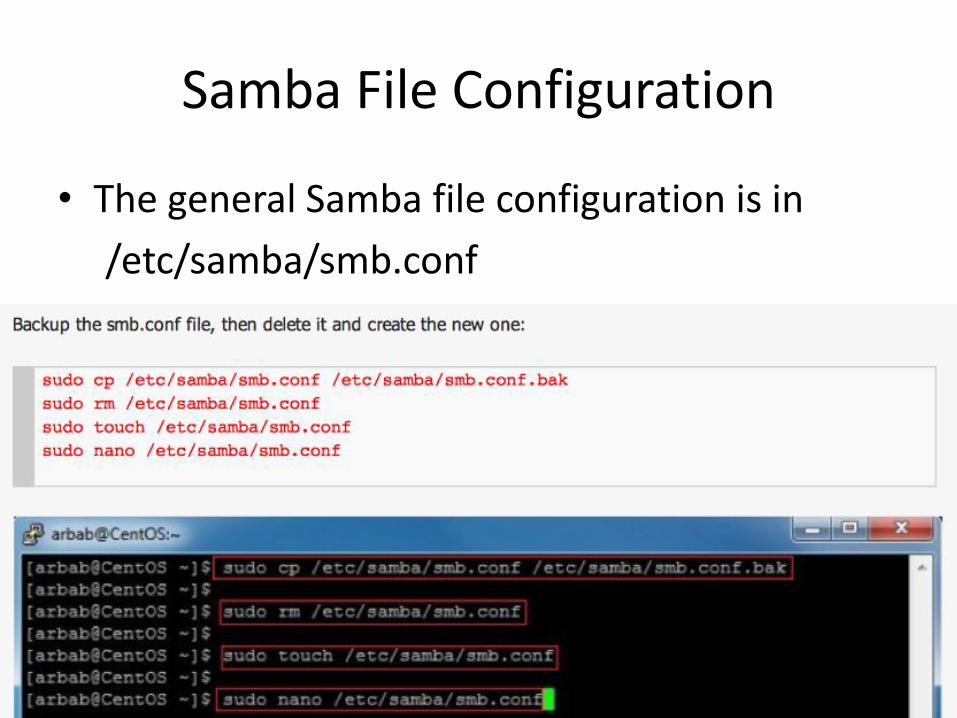
• The general Samba file configuration is in
/etc/samba/smb.conf

Share a Directory
• Make a share directory
• Configure the smb.conf file
Overview of smb.conf
• To share a file simply put the necessary information in smb.conf file
• Mainly consists of three sections:
– [global]
– [home]
– [printer]
Authentication of Clients
• The area of the security configuration option. Samba currently supports four security levels on its network: share, user, server, and domain.– Share-level security
• Each share in the workgroup has one or more passwords associated with it. Anyone who knows a valid password for the share can access it.
– User-level security• Each share in the workgroup is configured to allow access
from certain users. With each initial tree connection, the Samba server verifies users and their passwords to allow them access to the share.
Authentication of Clients
– Server-level security
• This is the same as user-level security, except that the Samba server uses another server to validate users and their passwords before granting access to the share.
– Domain-level security
• Samba becomes a member of a Windows NT domain and uses one of the domain's domain controller to perform authentication.
Base Options
• workgroup—The name of the workgroup associated with the group of SMB hosts. By default in CentOS, the value for this field is MYGROUP.
• netbios name—The name assigned to this Samba server. You can use the same name as your DNS hostname or leave it blank, in which case the DNS hostname is used automatically
• server string—A string of text identifying the server. This name appears in places such as the printer comment box. By default, it says Samba and the version number.
• interfaces—Lets you set upmore than one network interface. This enables Samba to browse several different subnetworks. The form of this field can be IP Address/Subnetwork Mask. Or, you could identify a network interface (such as eth0 for the first Ethernet card on your computer).

Security Options
• guest account— Specifies the username for the guest account. When a service is specified as ‘‘Guest OK,’’ the username entered here will be used to access that service. The account is usually the nobody username.
• invalid users—Can contain a list of users that should not be allowed to log in for Samba service. Add an at sign (@) before a name to have it interpreted as an NIS or UNIX (Linux) group name.
• valid users—Add a list of usernames that should be allowed to log in to the Samba service. If nothing is in this or the invalid users field, any user is allowed to log in.
• read list—Can contain a list of users who have only Read Only access to a service.
• write list—Can contain a list of users who have Read/Write access to a service.
Security Options (cont.)
• hosts allow—Contains a list of one or more hosts that are allowed to use your computer’s Samba services. By default, users from any computer can connect to the Samba server (of course, they still have to provide valid usernames and passwords). Usually, you use this option to allow connections from specific computers (such as 10.0.0.1) or computer networks (such as 10.0.0.) that are excluded by the hosts deny option.
• hosts deny—Contains a list of one or more hosts from which users are not allowed to use your computer’s Samba services. You can make this option fairly restrictive and then add the specific hosts and networks you want to use the Samba server. By default, no hosts are denied.
Security Options (cont.)
• create mask/mode: every new file you create will have this permission.
– Eg: create mask 0755
• directory mask/mode: folder will have this permission.
– Eg: directory mask 0755
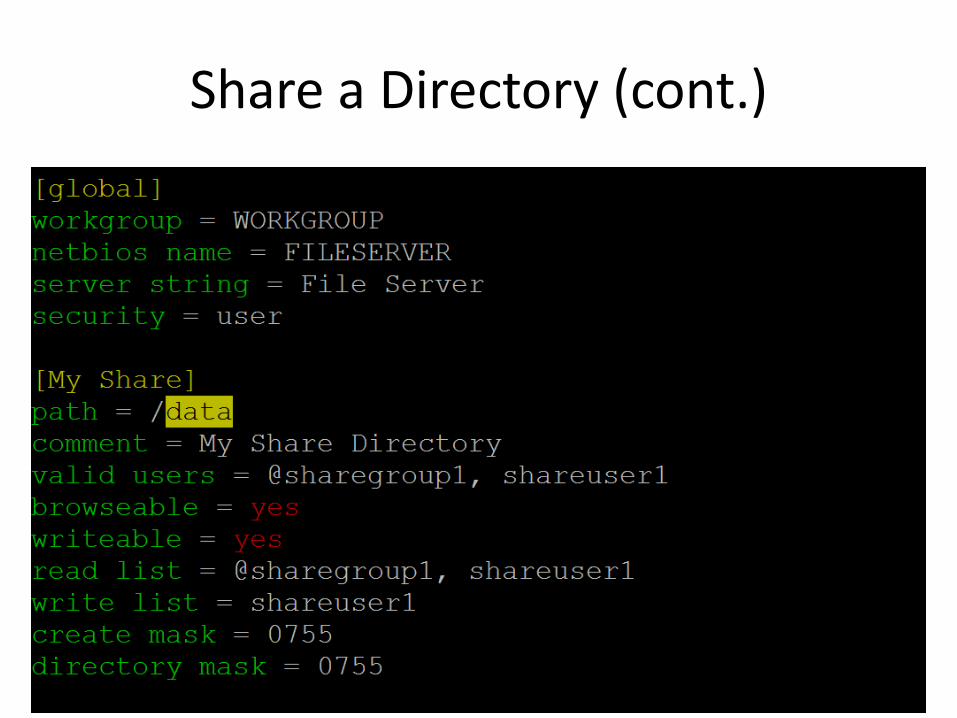
Share a Directory (cont.)
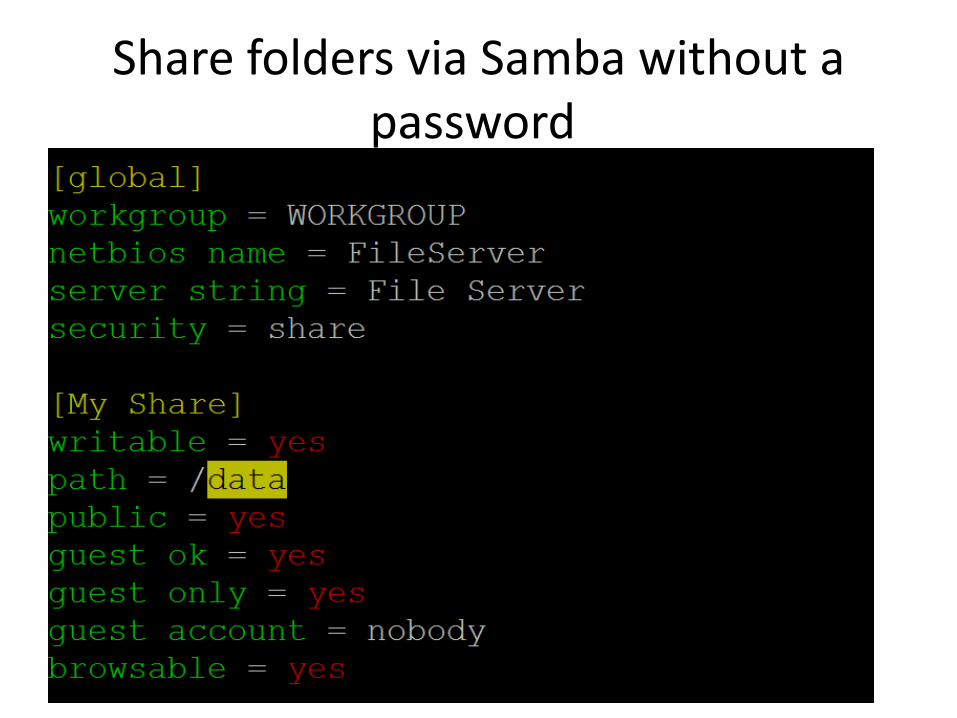
Share folders via Samba without a password
Some useful commands related to Samba
• findsmb can be used to find the machine which respond to smb queries.
• testparm command can be used to test the Samba configuration in the server.
• smbtree command can be used to list all the Samba and Windows file servers in the networks.
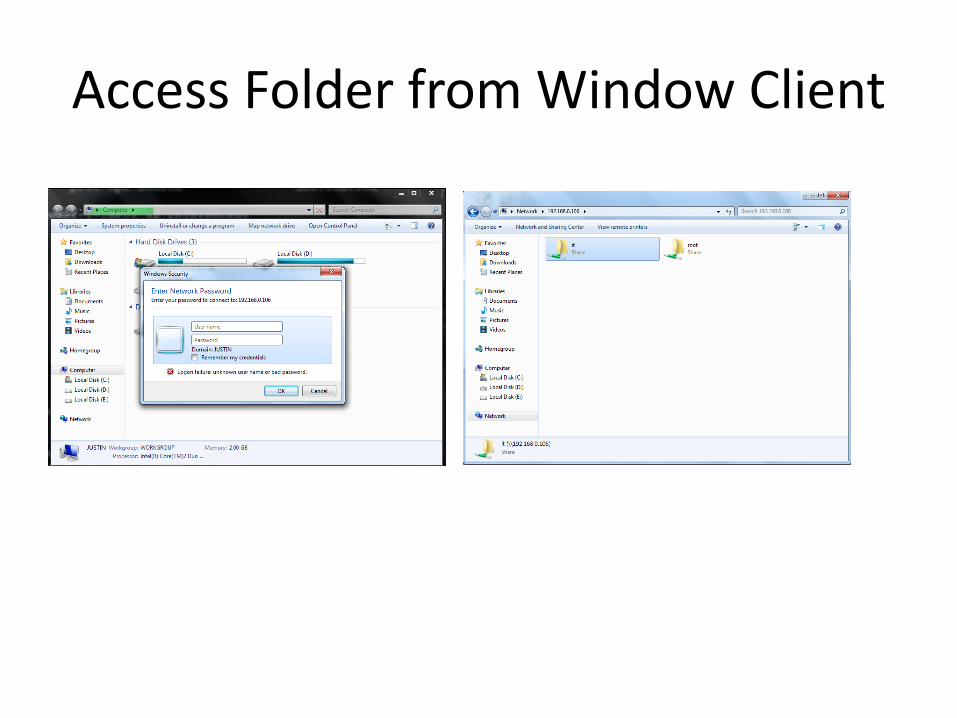
Access Folder from Window Client
Mount
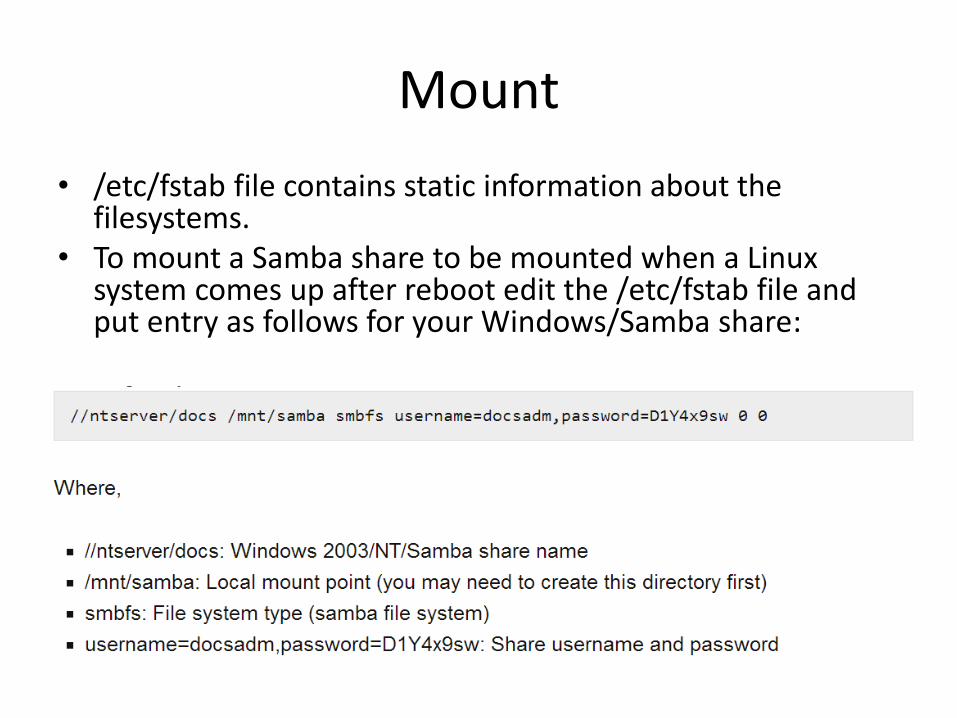
• /etc/fstab file contains static information about the filesystems.
• To mount a Samba share to be mounted when a Linux system comes up after reboot edit the /etc/fstab file and put entry as follows for your Windows/Samba share:
•
Important Note
• When client users access a Samba share, they have to pass two levels of restriction. – Unix permissions on files and directories apply as
usual, and configuration parameters specified in the Samba configuration file apply as well. In other words, a client must first pass Samba's security mechanisms (e.g., authenticating with a valid username and password, passing the check for the valid users parameter and the read only parameter, etc.),
– as well as the normal Unix file and directory permissions of its Unix-side user, before it can gain read/write access to a share.
Samba Web Administration Tools
• It’s relatively easy to configure Samba using command-line tools and by editing the /etc/samba/smb.conf file.
• However, the learning curve is rather sharp. If you want a more graphical interface, there’s a program called SWAT, the Samba Web Administration Tool.
• SWAT allows you to administer your Samba server through a web interface.
SWAT
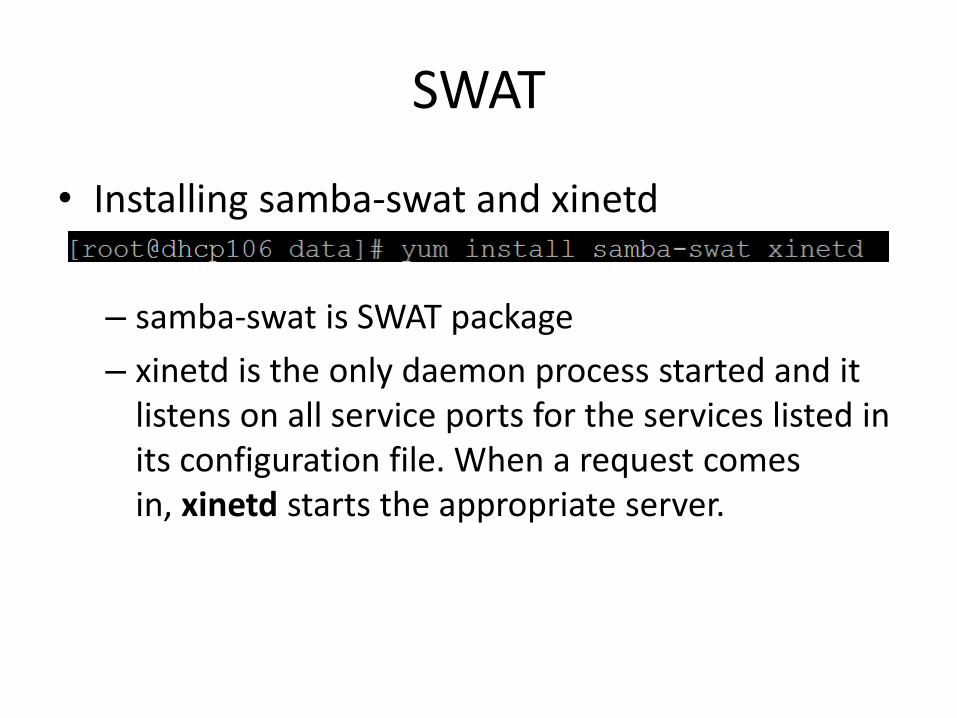
• Installing samba-swat and xinetd
– samba-swat is SWAT package
– xinetd is the only daemon process started and it listens on all service ports for the services listed in its configuration file. When a request comes in, xinetd starts the appropriate server.
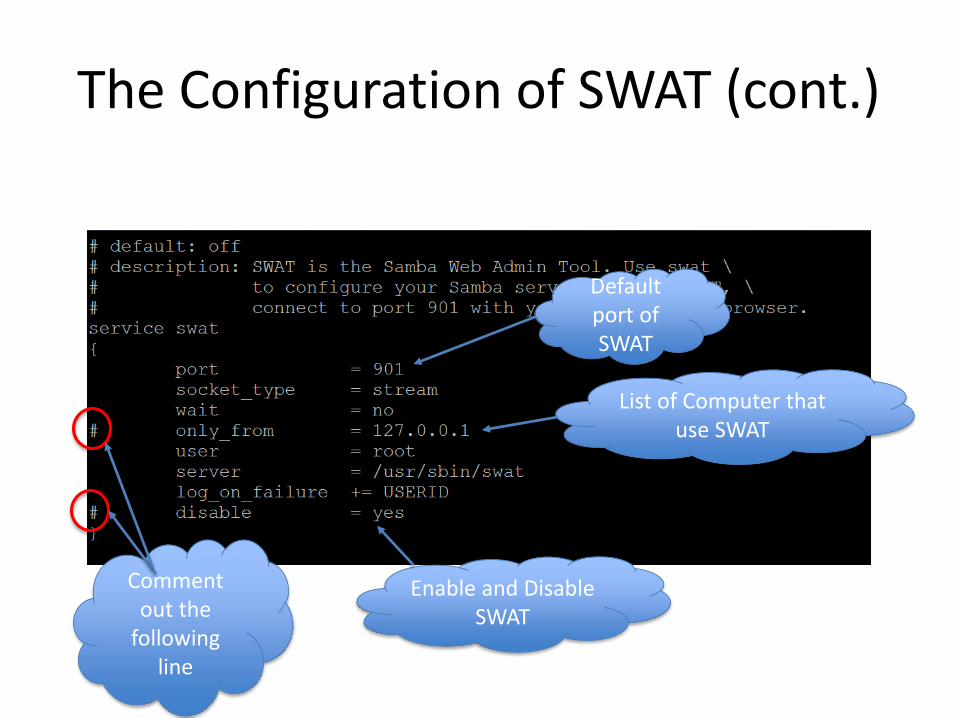
The Configuration of SWAT (cont.)
• sudo vi /etc/xinetd.d/swat
• sudo /etc/init.d/xinetd restart
Default port of SWAT
List of Computer that use SWAT
Enable and Disable SWAT
Comment out the
following line
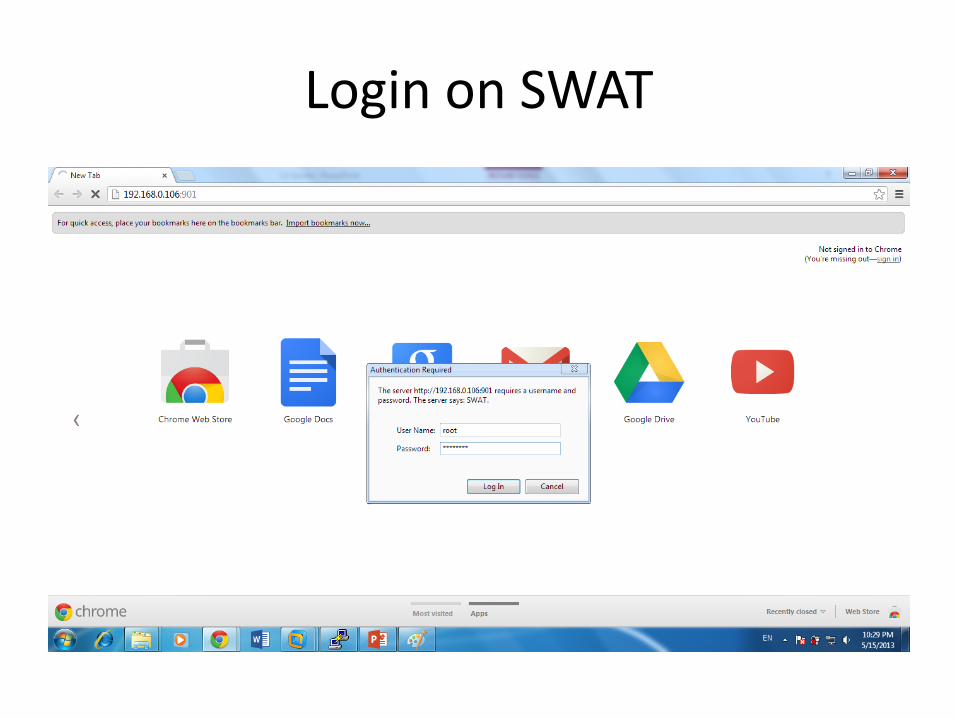
Login on SWAT
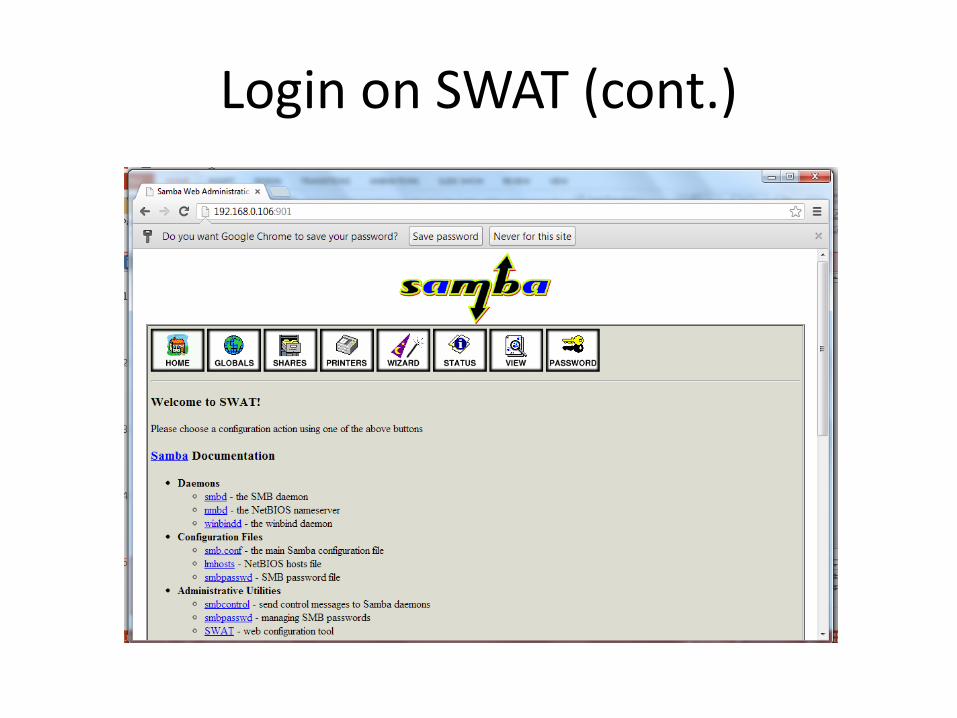
Login on SWAT (cont.)
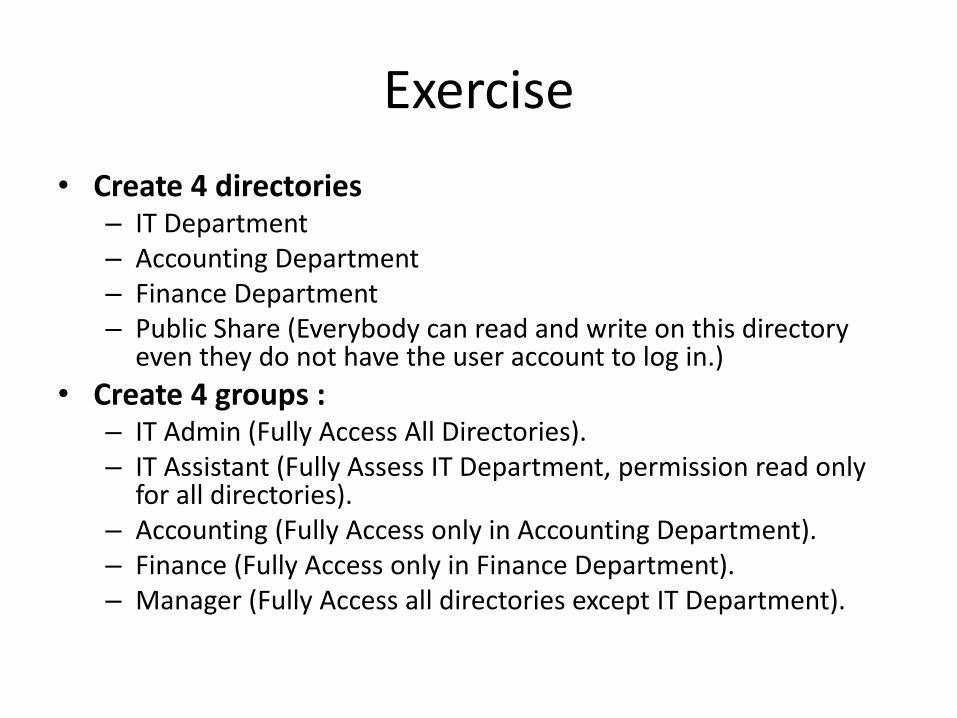
Exercise
• Create 4 directories – IT Department – Accounting Department – Finance Department – Public Share (Everybody can read and write on this directory
even they do not have the user account to log in.)
• Create 4 groups : – IT Admin (Fully Access All Directories). – IT Assistant (Fully Assess IT Department, permission read only
for all directories). – Accounting (Fully Access only in Accounting Department). – Finance (Fully Access only in Finance Department). – Manager (Fully Access all directories except IT Department).