setting up the dr series system as a backup target on
TRANSCRIPT

Setting Up the DR Series System as a Backup Target on CommVault
Technical White Paper Quest Engineering June 2017

© 2017 Quest Software Inc.
ALL RIGHTS RESERVED.
THIS WHITE PAPER IS FOR INFORMATIONAL PURPOSES ONLY, AND MAY CONTAIN TYPOGRAPHICAL ERRORS AND TECHNICAL INACCURACIES. THE CONTENT IS PROVIDED AS IS, WITHOUT EXPRESS OR IMPLIED WARRANTIES OFANY KIND This guide contains proprietary information protected by copyright. The software described in this guide is furnished under a software license or nondisclosure agreement. This software may be used or copied only in accordance with the terms of the applicable agreement. No part of this guide may be reproduced or transmitted in any form or by any means, electronic or mechanical, including photocopying and recording for any purpose other than the purchaser’s personal use without the written permission of Quest Software Inc. The information in this document is provided in connection with Quest Software products. No license, express or implied, by estoppel or otherwise, to any intellectual property right is granted by this document or in connection with the sale of Quest Software products. EXCEPT AS SET FORTH IN THE TERMS AND CONDITIONS AS SPECIFIED IN THE LICENSE AGREEMENT FOR THIS PRODUCT, QUEST SOFTWARE ASSUMES NO LIABILITY WHATSOEVER AND DISCLAIMS ANY EXPRESS, IMPLIED OR STATUTORY WARRANTY RELATING TO ITS PRODUCTS INCLUDING, BUT NOT LIMITED TO, THE IMPLIED WARRANTY OF MERCHANTABILITY, FITNESS FOR A PARTICULAR PURPOSE, OR NON-INFRINGEMENT. IN NO EVENT SHALL QUEST SOFTWARE BE LIABLE FOR ANY DIRECT, INDIRECT, CONSEQUENTIAL, PUNITIVE, SPECIAL OR INCIDENTAL DAMAGES (INCLUDING, WITHOUT LIMITATION, DAMAGES FOR LOSS OF PROFITS, BUSINESS INTERRUPTION OR LOSS OF INFORMATION) ARISING OUT OF THE USE OR INABILITY TO USE THIS DOCUMENT, EVEN IF QUEST SOFTWARE HAS BEEN ADVISED OF THE POSSIBILITY OF SUCH DAMAGES. Quest Software makes no representations or warranties with respect to the accuracy or completeness of the contents of this document and reserves the right to make changes to specifications and product descriptions at any time without notice. Quest Software does not make any commitment to update the information contained in this document. If you have any questions regarding your potential use of this material, contact: Quest Software Inc. Attn: LEGAL Dept 4 Polaris Way Aliso Viejo, CA 92656 Refer to our Web site (https://www.quest.com) for regional and international office information.
Patents
Quest Software is proud of our advanced technology. Patents and pending patents may apply to this product. For the most current information about applicable patents for this product, please visit our website at https://www.quest.com/legal .
Trademarks
Quest, the Quest logo, and Join the Innovation are trademarks and registered trademarks of Quest Software Inc. For a complete list of Quest marks, visit https://www.quest.com/legal/trademark-information.aspx. Microsoft®, Windows®, Windows Server®, Internet Explorer®, MS-DOS®, Windows Vista® and Active Directory® are either trademarks or registered trademarks of Microsoft Corporation in the United States and/or other countries. Red Hat® and Red Hat® Enterprise Linux® are registered trademarks of Red Hat, Inc. in the United States and/or other countries. Novell® and SUSE® are registered trademarks of Novell Inc. in the United States and other countries. CommVault and Simpana are trademarks or registered trademarks of CommVault Systems, Inc. All other trademarks and registered trademarks are property of their respective owners.
Legend
WARNING: A WARNING icon indicates a potential for property damage, personal injury, or death
CAUTION: A CAUTION icon indicates potential damage to hardware or loss of data if instructions are not followed.
IMPORTANT, NOTE, TIP, MOBILE, or VIDEO: An information icon indicates supporting information.
Setting Up the DR Series System as a Backup Target on CommVault Updated – November 14, 2017

Setting Up the DR Series System as a Backup Target on CommVault 3
Contents
Contents Revisions .............................................................................................................................. 6
Executive Summary .............................................................................................................. 7
Installing and configuring the DR Series system for use with CommVault .............................. 8
CommVault software prerequisites ............................................................................................ 8
Installing and configuring the DR Series system ....................................................................... 8
Creating containers in the DR Series system .......................................................................... 13
Adding target container(s) to CommVault ................................................................................ 15
Setting up a single system environment (DR Series system as NFS disk library) .................. 17
Setting up a replicated environment ........................................................................................ 19
Configuring Rapid CIFS and Rapid NFS for CommVault ..................................................... 26
For Windows ............................................................................................................................ 26
Windows prerequisites ...................................................................................................... 26
Installing Rapid CIFS on a CommVault Windows media agent ........................................ 26
For Linux .................................................................................................................................. 29
Linux prerequisites ............................................................................................................ 29
Installing Rapid NFS on a CommVault Linux media agent ............................................... 29
Configuring VTL for CommVault .......................................................................................... 31
Creating and configuring iSCSI VTL container(s) for CommVault ........................................... 31
Creating the iSCSI VTL container for CommVault ............................................................ 31
Configuring the iSCSI target - Windows ............................................................................ 33
Configuring the iSCSI target – Linux ................................................................................. 37
Configuring CommVault to use the newly created iSCSI VTL .......................................... 38
Creating and configuring NDMP target container(s) for CommVault ....................................... 47
Creating the NDMP VTL container for CommVault ........................................................... 47
Configuring CommVault to use the newly created NDMP VTL ......................................... 48
Running client restore from the NDMP VTL ...................................................................... 63

Setting Up the DR Series System as a Backup Target on CommVault 4
Contents
Creating and configuring FC target container(s) for CommVault ............................................ 65
Understanding FC switch zoning configuration ................................................................. 65
Creating a FC VTL container for CommVault .................................................................... 66
Verifying the FC VTL is recognized – Windows ................................................................ 69
Configuring CommVault to use the newly created FC VTL ............................................... 70
Configuring LAN-free ESX backup using iSCSI or FC ............................................................ 80
Requirements .................................................................................................................... 81
Recommendations ............................................................................................................. 81
Configuring the backup ...................................................................................................... 82
Using VTL replication with CommVault ................................................................................ 90
Configuring the DR Appliance for VTL Replication .................................................................. 90
Prerequisites ...................................................................................................................... 90
Setting up replication ......................................................................................................... 91
Restoring from a replica or replica cascade target .................................................................. 94
Understanding reserialization ............................................................................................ 94
Possible restore situations ................................................................................................. 94
Restoring from replica VTL on original CommCell ............................................................ 95
Restoring from a replica VTL on a new or alternative CommCell ..................................... 97
Deactivating a replica VTL ............................................................................................... 105
Setting up the DR Series system cleaner ......................................................................... 106
Monitoring deduplication, compression and performance .................................................. 108
Appendices ....................................................................................................................... 109
A - VTL configuration guidelines ........................................................................................ 109
Managing VTL protocol accounts and credentials ................................................................. 109
iSCSI account details and management ......................................................................... 109
NDMP account details and management ........................................................................ 110
VTL default account summary table ................................................................................ 111
Managing VTL media ............................................................................................................. 112
Adding VTL media to a container .................................................................................... 112
Updating CommVault to identify newly added VTL media .............................................. 113

Setting Up the DR Series System as a Backup Target on CommVault 5
Contents
Managing VTL space usage .................................................................................................. 116
General performance guidelines for DMA configuration ................................................. 116
Physical space sizing and planning ................................................................................. 116
Logical VTL geometry and media sizing ......................................................................... 117
Media retention and grouping .......................................................................................... 118
VTL media count guidelines ............................................................................................ 118
VTL space reclamation .......................................................................................................... 119
General guidelines ........................................................................................................... 119
Manual space reclamation in CommVault ....................................................................... 119
Using the CommVault erase spare media feature (optional) .......................................... 123

Setting Up the DR Series System as a Backup Target on CommVault 6
Revisions
Revisions
Date Description
January 2014 Initial release
March 2014 Updated for missed DR replication step.
April 2015 Added VTL Content for v3.2 Release
July 2015 Added content for configuring an iSCSI target on Linux
October 2016 Updated content for the DR Series system release 4.0 as well as information about the following: VTL sizing, Rapid CIFS/NFS, Fibre Channel VTL, VTL replication, and LAN Free backup configuration
June 2017 Rebranded document to Quest Software

Setting Up the DR Series System as a Backup Target on CommVault 7
Executive Summary
Executive Summary This document provides information about how to set up the DR Series system to run Virtual Synthetic Backup on CommVault 11. This document is a quick reference guide and does not include all DR Series system deployment best practices.
For additional information, see the DR Series system documentation and other data management application best practices whitepapers for your specific DR Series system at:
http://support.quest.com/DR-Series
NOTE: The DR Series system and CommVault screenshots used in this document may vary slightly, depending on the DR Series system firmware version and CommVault version you are using

Setting Up the DR Series System as a Backup Target on CommVault - 8 Installing and configuring the DR Series system for use with CommVault
1
Installing and configuring the DR Series system for use with CommVault
CommVault software prerequisites This guide applies to versions of CommVault version 11 and later. The screenshots used in this document may vary slightly, depending on the version of the software you are using.
For CommVault version 10, there are patch requirements to add support for NDMP VTL. Refer to the CommVault documentation for more information or contact support for details.
Installing and configuring the DR Series system
1 Rack and cable the DR Series System, and power it on.
2 In the DR Series System Administrator Guide, refer to the sections, “iDRAC Connection”, “Logging in and Initializing the DR Series System”, and “Accessing iDRAC6/iDRAC7/iDRAC8 Using RACADM” for more information about using the iDRAC connection and initializing the DR Series system.
3 Log on to iDRAC using the default address 192.168.0.120, or the IP address that is assigned to the iDRAC interface. Use the user name and password: “root/calvin”.

Setting Up the DR Series System as a Backup Target on CommVault - 9 Installing and configuring the DR Series system for use with CommVault
4 Launch the virtual console.
5 After the virtual console is open, log on to the system as user administrator with the password St0r@ge! (The “0” in the password is the numeral zero).

Setting Up the DR Series System as a Backup Target on CommVault - 10 Installing and configuring the DR Series system for use with CommVault
6 Set the user-defined networking preferences.
7 View the summary of preferences and confirm that the information is correct.
8 Log on to DR Series system administrator console with the IP address you just provided for the DR Series system. Use the username administrator and password St0r@ge! (The “0” in the password is the numeral zero.).

Setting Up the DR Series System as a Backup Target on CommVault - 11 Installing and configuring the DR Series system for use with CommVault
9 Join the DR Series system into the Active Directory domain.
NOTE: If you do not want to add DR Series system to Active Directory, see the DR Series System Owner’s Manual for guest logon instructions.
a In the left navigation area of the DR Series system GUI, click System Configuration > Active Directory.
b Click the Join hyperlink.

Setting Up the DR Series System as a Backup Target on CommVault - 12 Installing and configuring the DR Series system for use with CommVault
c Enter your Active Directory credentials and click Join.

Setting Up the DR Series System as a Backup Target on CommVault - 13 Installing and configuring the DR Series system for use with CommVault
2
Configuring CIFS and NFS containers for CommVault
The topics in this section describe how to configure the CIFS and NFS DR Series containers for use with CommVault.
Creating containers in the DR Series system For this procedure, you will need to create and mount the container.
In the left navigation area of the DR Series system GUI, click Containers, and, on the Action Menu in the 1upper right corner of the page, click Add Container.

Setting Up the DR Series System as a Backup Target on CommVault - 14 Installing and configuring the DR Series system for use with CommVault
2 Enter a Container Name, and, for Access Protocol, select NAS (NFS, CIFS), and click Next.
3 Select the check mark for NFS or CIFS as appropriate, (setting the Marker Type set as CommVault) and click Next.
NOTE: (CommVault supports both CIFS and NFS protocols.)
4 Enter backup container information for NFS or CIFS, as appropriate, and then click Next.
■ NFS Options:

Setting Up the DR Series System as a Backup Target on CommVault - 15 Installing and configuring the DR Series system for use with CommVault
■ CIFS Options:
NOTE: For improved security, Quest recommends adding IP addresses for the Backup console (CommVault Server, CommVault Media Agents). (Not all environments will have all components)
5 Confirm the settings and click Save. Confirm that the container is added.
Adding target container(s) to CommVault Follow these steps to add the target container(s) to CommVault.

Setting Up the DR Series System as a Backup Target on CommVault - 16 Installing and configuring the DR Series system for use with CommVault
Open the Commcell Console, expand Storage Resources, right-click Libraries, and select Add –> 1DiskLibrary…
2 In the Add Disk Library dialog box, enter a name for the Disk Library and information about the DR Series system container, and click OK.
3 Confirm that the library is created, and that the status is Ready.
Name the library
Enter credentials of DR container Default: administrator/St0r@ge!
Enter DR container share path

Setting Up the DR Series System as a Backup Target on CommVault - 17 Installing and configuring the DR Series system for use with CommVault
Setting up a single system environment (DR Series system as NFS disk library)
Mount the DR container NFS export onto a Unix/Linux Media Agent. 1
2 Open the CommCell Console, expand Storage Resources, right-click Libraries, and select Add > DiskLibrary…

Setting Up the DR Series System as a Backup Target on CommVault - 18 Installing and configuring the DR Series system for use with CommVault
3 In the Add Disk Library window, enter the name for the Disk Library and the mount path of the DR Series system container export, and click OK.
Name the library
Enter the mount path

Setting Up the DR Series System as a Backup Target on CommVault - 19 Installing and configuring the DR Series system for use with CommVault
4 Confirm that the library is created, and the Status is Ready.
Setting up a replicated environment The replicated system environment includes a minimum of two DR Series systems that are connected to two different Media Agents. For more information, refer to the CommVault documentation at:
http://documentation.commvault.com/hds/v10/article?p=features/remote_office/remote_office_how_to.htm
Follow these steps to set up replication.
In the CommCell Console, on the Storage tab, click Library and Drive. 1

Setting Up the DR Series System as a Backup Target on CommVault - 20 Installing and configuring the DR Series system for use with CommVault
2 Select all the Media Agent(s) that will participate in replication, click Add to add to Selected MediaAgents, and then click OK.
NOTE: To configure a shared library, make sure you select all of the MediaAgents that share that library.
3 In the Information dialog box, click OK to continue.
4 Click the Shared Disk Device tab.
a Click Start, and select Disk Device > Add Network Sharing Device…

Setting Up the DR Series System as a Backup Target on CommVault - 21 Installing and configuring the DR Series system for use with CommVault
5 In the Add Sharing Folder dialog box, enter the source DR Series system container share/export information and then click OK.
NOTE: This Device is the replication source. Device information is based on the protocol that the container exposed to the MediaAgents.
The system displays the device information with the MediaAgent that can access the device in Library and Drive Configuration window.
Select the name of MediaAgent accessing this mount path
Linux MediaAgent can only select local path
Windows MediaAgent can select both local and network path

Setting Up the DR Series System as a Backup Target on CommVault - 22 Installing and configuring the DR Series system for use with CommVault
6 Right-click the device, and then click Add Replica Sharing Folder.

Setting Up the DR Series System as a Backup Target on CommVault - 23 Installing and configuring the DR Series system for use with CommVault
7 In the Add Sharing Folder dialog box, enter the target DR Series system container share/export information and then click OK.
NOTE: This Device is the target destination of the replication. Device information is based on which protocol the container is exposed to the MediaAgents.
8 The system displays the device information with which the MediaAgent can access the device in the Library and Drive Configuration window.
Select the name of MediaAgent accessing this mount path
Linux MediaAgent can only select local path
Windows MediaAgent can select both local and network

Setting Up the DR Series System as a Backup Target on CommVault - 24 Installing and configuring the DR Series system for use with CommVault
9 On the Libraries tab, click the Start menu, and select Add > Replica Disk Library.
10 In the Add Disk Library dialog box, enter the Alias, clear the Enable replication checkbox, and click OK.
11 In the Share Mount Path dialog box, select the device configured previously, which has two sharing folders on both the replication source and replication target, and then click OK.
12 Verify the disk library is configured.
Name of the disk library
Select the disk device that you want to associate as the mount

Setting Up the DR Series System as a Backup Target on CommVault - 25 Installing and configuring the DR Series system for use with CommVault

Setting Up the DR Series System as a Backup Target on CommVault - 26 Configuring Rapid CIFS and Rapid NFS for CommVault
3
Configuring Rapid CIFS and Rapid NFS for CommVault
For Windows
Windows prerequisites ● The Media Agent OS must be the 64-bit version of Windows 2008 R2 or Windows 2012/R2.
● The DR container share must be mapped on the Media Agent.
NOTE: For the accelerator to work properly, the backup traffic must go directly to the DR Series system. For CommVault, you should install RDCIFS on the media agents.
Installing Rapid CIFS on a CommVault Windows media agent Follow these steps to install Rapid CIFS.
NOTE: Rapid CIFS should only be installed on a media agent. Any traffic between Client and Media Agent will not be accelerated.
Download the MSI to the Media Agent by doing the following: 1
a Go to support.quest.com/DR-Series and select your product (such as, DR4100, DR6300, etc).
b On the support page for your product, click Software Downloads.

Setting Up the DR Series System as a Backup Target on CommVault - 27 Configuring Rapid CIFS and Rapid NFS for CommVault
c For the RDCIFS plugin for your DR Series system OS version, click the Download icon to download the installer package (.msi file).
2 Run the MSI and follow the instructions in the installation wizard as shown in the screenshots below. Click Finish when installation is complete.

Setting Up the DR Series System as a Backup Target on CommVault - 28 Configuring Rapid CIFS and Rapid NFS for CommVault
3 Verify that the “rdcifsfd” driver is loaded by using the command fltmc.
NOTE: For more information, such as about troubleshooting and logging, refer to the DR Series Rapid CIFS & Rapid NFS Guide.
Setting Up the DR Series System as a Backup Target on CommVault - 29 Configuring Rapid CIFS and Rapid NFS for CommVault
For Linux
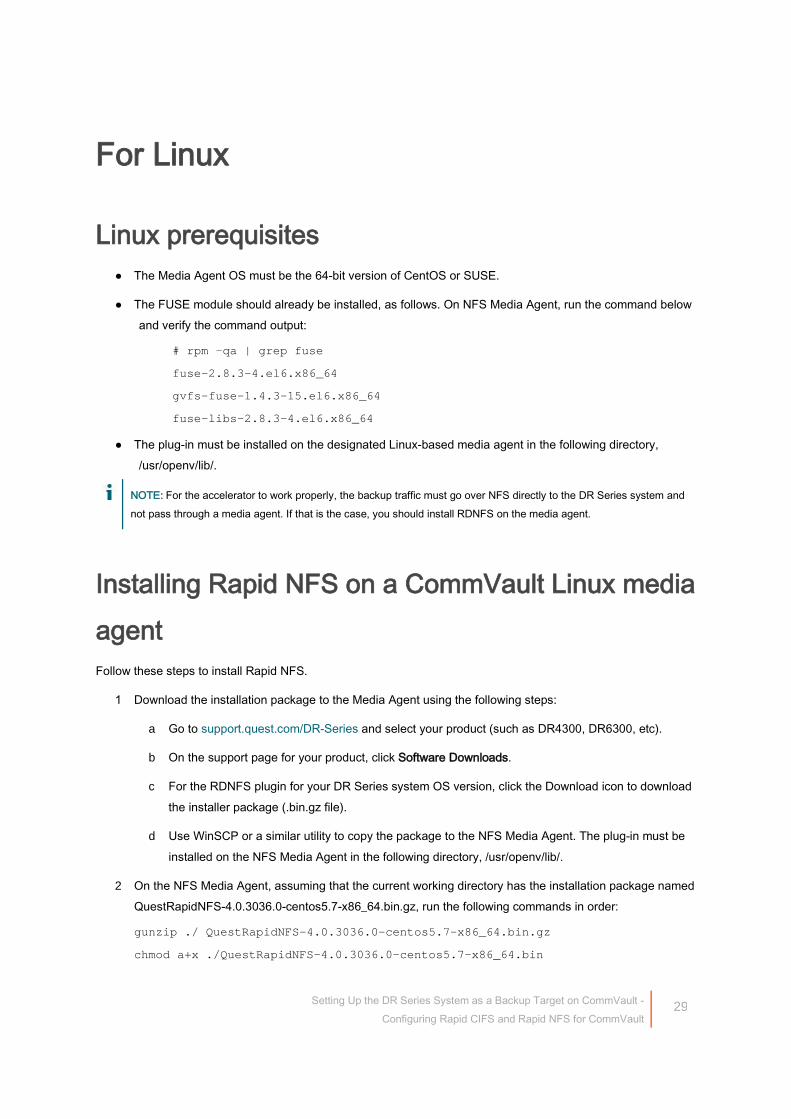
Linux prerequisites ● The Media Agent OS must be the 64-bit version of CentOS or SUSE.
● The FUSE module should already be installed, as follows. On NFS Media Agent, run the command below and verify the command output:
# rpm -qa | grep fuse
fuse-2.8.3-4.el6.x86_64
gvfs-fuse-1.4.3-15.el6.x86_64
fuse-libs-2.8.3-4.el6.x86_64
● The plug-in must be installed on the designated Linux-based media agent in the following directory, /usr/openv/lib/.
NOTE: For the accelerator to work properly, the backup traffic must go over NFS directly to the DR Series system and not pass through a media agent. If that is the case, you should install RDNFS on the media agent.
Installing Rapid NFS on a CommVault Linux media agent Follow these steps to install Rapid NFS.
Download the installation package to the Media Agent using the following steps: 1
a Go to support.quest.com/DR-Series and select your product (such as DR4300, DR6300, etc).
b On the support page for your product, click Software Downloads.
c For the RDNFS plugin for your DR Series system OS version, click the Download icon to download the installer package (.bin.gz file).
d Use WinSCP or a similar utility to copy the package to the NFS Media Agent. The plug-in must be installed on the NFS Media Agent in the following directory, /usr/openv/lib/.
2 On the NFS Media Agent, assuming that the current working directory has the installation package named QuestRapidNFS-4.0.3036.0-centos5.7-x86_64.bin.gz, run the following commands in order:
gunzip ./ QuestRapidNFS-4.0.3036.0-centos5.7-x86_64.bin.gz
chmod a+x ./QuestRapidNFS-4.0.3036.0-centos5.7-x86_64.bin

Setting Up the DR Series System as a Backup Target on CommVault - 30 Configuring Rapid CIFS and Rapid NFS for CommVault
3 Do the following:
a Run the installer:
./QuestRapidNFS-4.0.3036.0-centos5.7-x86_64.bin –install
b Create a directory on Media Agent:
mkdir /mnt/backup
c Mount the DR Series system NFS container on the Media Agent with the CommVault marker:
mount -t rdnfs dr4300-26:/containers/backup /mnt/backup –o marker=cv .
NOTE: For more information, such as about troubleshooting and logging, see the DR Series Rapid CIFS & Rapid NFS Guide.

Setting Up the DR Series System as a Backup Target on CommVault - 31 Configuring VTL for CommVault
4
Configuring VTL for CommVault
Creating and configuring iSCSI VTL container(s) for CommVault
Creating the iSCSI VTL container for CommVault You need to create and export the iSCSI container in the DR Series system GUI.
In the DR Series system GUI, select Containers in the left navigation area, and then, on the Action Menu 1in the upper right corner of the page, click Add Container.
2 Enter a container name, select the Virtual Tape Library (VTL) Access Protocol option, and then click Next.

Setting Up the DR Series System as a Backup Target on CommVault - 32 Configuring VTL for CommVault
3 Do the following:
a Make sure that the STK L700 Robot Model is selected.
b Select the iSCSI VTL Access Protocol.
c Specify the DMA Access Control by providing the storage node / media node IP Address, IQN or FQDN.
d Select the CommVault Marker Type.
e Click Next.
NOTE: Refer to the section, “Managing VTL space usage,” later in this document to determine the correct Tape Size to use.
4 Click Save to finalize VTL creation.

Setting Up the DR Series System as a Backup Target on CommVault - 33 Configuring VTL for CommVault
Configuring the iSCSI target - Windows You configure the iSCSI Initiator Software for Windows by providing the IP or FQDN of the DR Series 1
system in the Quick Connect > Target field.
Click Quick Connection to open the Quick Connect dialog box, which indicates that a connection is made 2but is set as inactive.
3 Close the dialog box, and then select the newly discovered target. This target will have an Inactive Status, as it requires authentication parameters for iSCSI login.
a Select the Target from the list.
b Click the Connect button.
c In the Connect to Target dialog box, click Advanced.

Setting Up the DR Series System as a Backup Target on CommVault - 34 Configuring VTL for CommVault
4 Select to Enable CHAP log on, enter the Name and Target Secret / Password, and then click OK. (Refer to Appendix A for more information about iSCSI accounts and credentials.)

Setting Up the DR Series System as a Backup Target on CommVault - 35 Configuring VTL for CommVault
The iSCSI target should now show as connected, and device discovery can now proceed.
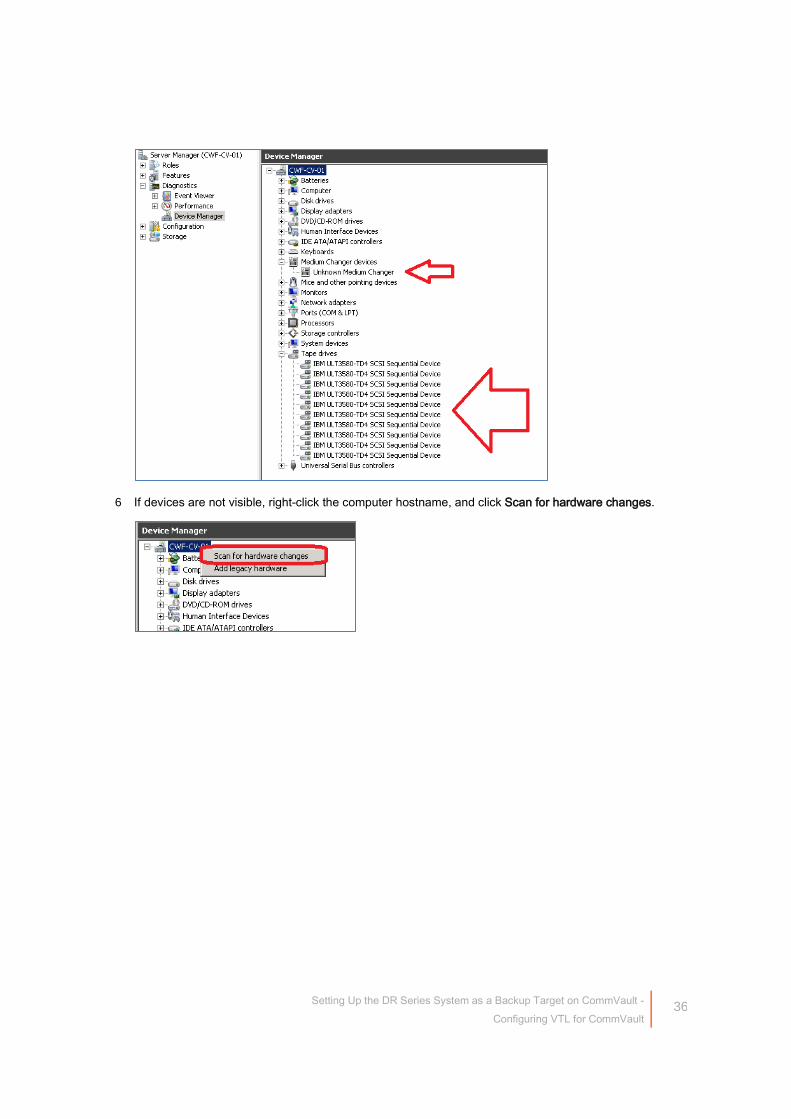
5 Open the Server Manager Snap-in and verify that the newly connected devices appear in the Device Manager. Verify that the Library and IBM Ultrium-TD4 Devices are visible.
NOTE: Refer to the article at: http://catalog.update.microsoft.com/v7/site/home.aspx for more information and assistance in acquiring Microsoft Device Drivers, for example, StorageTek Library Drivers.
Setting Up the DR Series System as a Backup Target on CommVault - 36 Configuring VTL for CommVault
6 If devices are not visible, right-click the computer hostname, and click Scan for hardware changes.

Setting Up the DR Series System as a Backup Target on CommVault - 37 Configuring VTL for CommVault
Configuring the iSCSI target – Linux Before you begin the following steps, ensure that the iSCSI initiator is installed (iscsi-initiator-utils). For example:
yum install iscsi-initiator-utils; /etc/init.d/iscsi start
To configure the iSCSI target for Linux, follow these steps.
Add the CHAP Authentication details for the DR Series system on the Linux Initiator as follows: 1
a Edit /etc/iscsi/iscsid.conf and uncomment the following line:
node.session.auth.authmethod = CHAP
b Modify the following lines:
# To set a CHAP username and password for initiator
# authentication by the target(s), uncomment the following lines:
node.session.auth.username = iscsi_user
node.session.auth.password = St0r@ge!iscsi
2 Set the Discovery Target Node(s) by using this command:
iscsiadm -m discovery -t st -p <IP or IQN of DR>
For example:
iscsiadm -m discovery -t st -p 10.8.230.108
3 Enable logon to the DR Series system iSCSI VTL target(s) by using the following command:
iscsiadm -m node --portal <IP or IQN of DR:PORT> --login
For example:
iscsiadm -m node --portal "10.8.230.108:3260" --login
4 Display the open session(s) with DR VTL(s) by using the following command:
iscsiadm -m session
For example:
iscsiadm -m session = tcp: [8] 10.8.230.108:3260,1 iqn.1984-05.com.quest:.3071067.interoprhel52n1.30
5 Review dmesg or /var/log/messages for details about the tape devices created upon adding the DR Series system iSCSI VTL.
Setting Up the DR Series System as a Backup Target on CommVault - 38 Configuring VTL for CommVault
Configuring CommVault to use the newly created iSCSI VTL
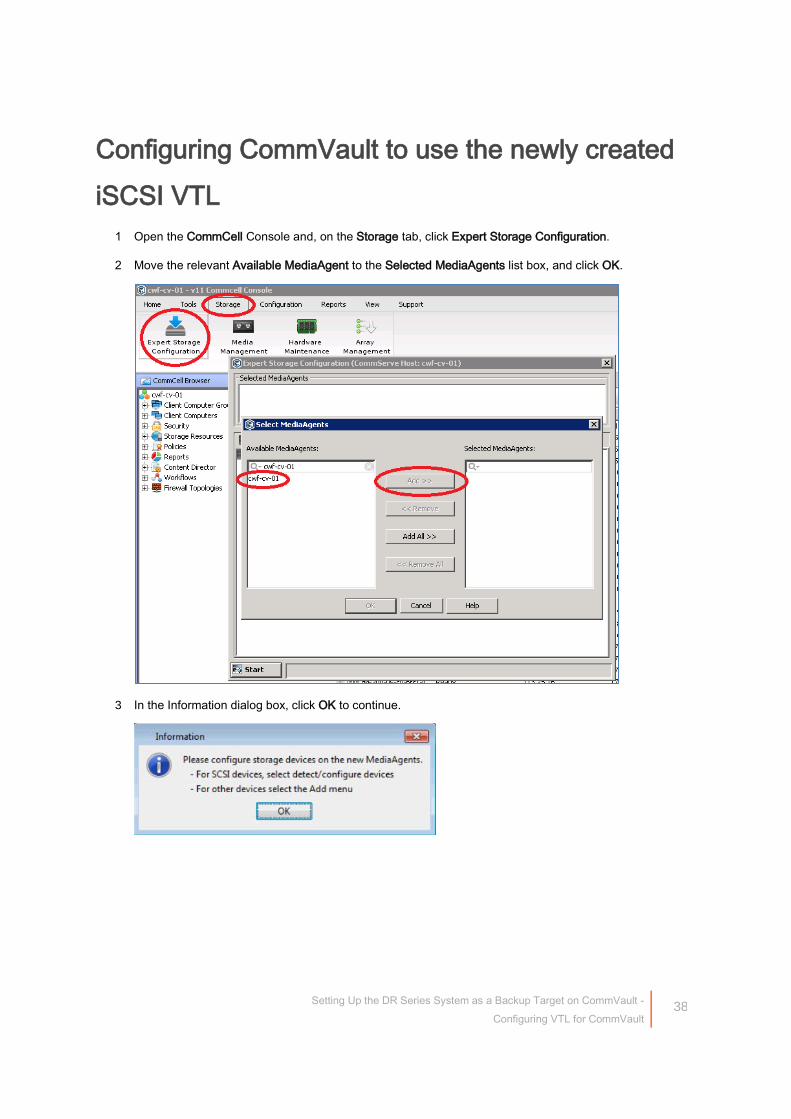
Open the CommCell Console and, on the Storage tab, click Expert Storage Configuration. 1
Move the relevant Available MediaAgent to the Selected MediaAgents list box, and click OK. 2
3 In the Information dialog box, click OK to continue.

Setting Up the DR Series System as a Backup Target on CommVault - 39 Configuring VTL for CommVault
4 On the Start menu, click Detect/Configure Devices…
5 Make sure that the options, SCSI Devices and Automatically Create DDS Drivepools, are selected, and then click OK.
A progress bar appears. It may take a few moments to detect the iSCSI VTL.

Setting Up the DR Series System as a Backup Target on CommVault - 40 Configuring VTL for CommVault
6 Click OK and then click Close.
7 Click OK.

Setting Up the DR Series System as a Backup Target on CommVault - 41 Configuring VTL for CommVault
8 Right-click the library you just added, and click Configure.
9 Select the Library and All Drives radio button and click OK.
10 Click Yes to confirm.
11 Select the appropriate media type, and then click Yes.

Setting Up the DR Series System as a Backup Target on CommVault - 42 Configuring VTL for CommVault
12 Right-click the new library, and then click Advanced Options…> Exhaustive Detection.
13 Click Yes to confirm.
14 Click Close
15 Click OK.

Setting Up the DR Series System as a Backup Target on CommVault - 43 Configuring VTL for CommVault
16 Close the Library and Drive Configuration dialog box.
17 Select Policies > Storage Polices in the navigation pane, and then select New Storage Policy.

Setting Up the DR Series System as a Backup Target on CommVault - 44 Configuring VTL for CommVault
18 Select Data Protection and Archiving and click Next.
19 Enter a Storage Policy Name and click Next.
20 Select the newly added library and click Next.

Setting Up the DR Series System as a Backup Target on CommVault - 45 Configuring VTL for CommVault
21 Select the Drive Pool for the newly added library and click Next.
22 Select the Scratch Pool that you want to use for this library.
23 Set Number of Device Streams to the number of tape drives in the library (10 is the default number), and click Next.
24 Clear the selection for Hardware Compression, and click Next.

Setting Up the DR Series System as a Backup Target on CommVault - 46 Configuring VTL for CommVault
25 Click Finish.

Setting Up the DR Series System as a Backup Target on CommVault - 47 Configuring VTL for CommVault
Creating and configuring NDMP target container(s) for CommVault
Creating the NDMP VTL container for CommVault You need to create and export the NDMP container in the DR Series system GUI.
In the left navigation area of the DR Series system GUI, select Containers, and then, on the Action Menu 1in the upper right corner of the page, click Add Container.
2 Enter a container name, select the Virtual Tape Library (VTL) Access Protocol option, and then click Next.
3 Do the following:
a Make sure that the STK L700 Robot Model is selected.
b Select the NDMP VTL Access Protocol.
c Specify the DMA Access Control by providing the storage node / media node IP Address, IQN or FQDN.
d Select the Unix Dump Marker Type.
e Click Next.

Setting Up the DR Series System as a Backup Target on CommVault - 48 Configuring VTL for CommVault
NOTE: Refer to the section, “Managing VTL media and space usage,” later in this guide for information about determining the correct Tape Size to use.
4 Click Save to finalize VTL creation.
NOTE: All of the tapes will display as having a capacity of 799 GB in CommVault. This will not affect the use of smaller tapes; and, smaller tapes will be managed properly.
Configuring CommVault to use the newly created NDMP VTL Follow these steps to configure CommVault to use the newly created NDMP VTL.
Setting Up the DR Series System as a Backup Target on CommVault - 49 Configuring VTL for CommVault
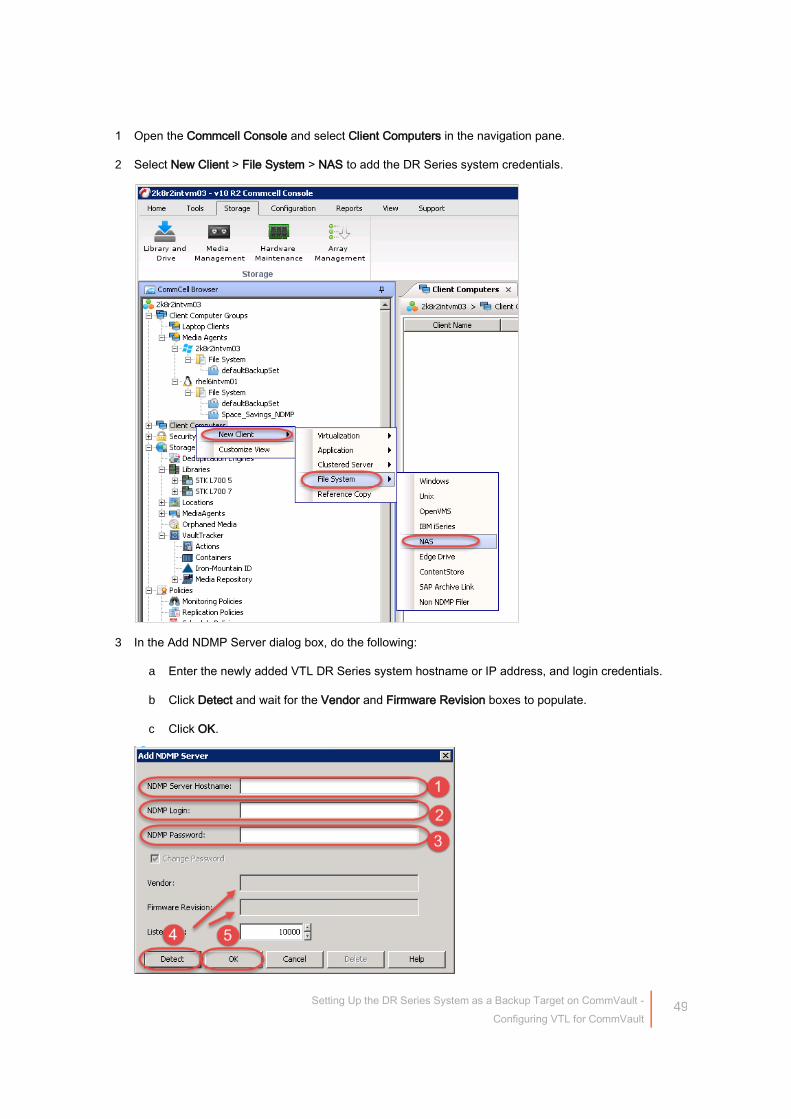
Open the Commcell Console and select Client Computers in the navigation pane. 1
2 Select New Client > File System > NAS to add the DR Series system credentials.
3 In the Add NDMP Server dialog box, do the following:
a Enter the newly added VTL DR Series system hostname or IP address, and login credentials.
b Click Detect and wait for the Vendor and Firmware Revision boxes to populate.
c Click OK.

Setting Up the DR Series System as a Backup Target on CommVault - 50 Configuring VTL for CommVault
4 In the CommCell Console, on the Storage tab, click Library and Drive.
5 Select the MediaAgent, and click Add.

Setting Up the DR Series System as a Backup Target on CommVault - 51 Configuring VTL for CommVault
6 Click OK.
7 In the Information dialog box, click OK to continue.
8 On the Start menu, click Detect/Configure Devices…

Setting Up the DR Series System as a Backup Target on CommVault - 52 Configuring VTL for CommVault
9 Select NDMP Devices and the MediaAgent of your choice, and click OK.
10 Select the DR Series system for the NDMP Server, click Add, and then click OK.
11 Click Yes to confirm.

Setting Up the DR Series System as a Backup Target on CommVault - 53 Configuring VTL for CommVault
A dialog box opens showing progress.
12 Close the Log dialog box.
13 Click OK.

Setting Up the DR Series System as a Backup Target on CommVault - 54 Configuring VTL for CommVault
14 Right-click the library you just added, and select Configure.
15 Select the Library and All Drives radio button and click OK.
16 Click Yes to confirm.
17 Select the appropriate media type and click Yes.
18 Right-click the tape library you just added, and select Advanced Options > Exhaustive Detection.

Setting Up the DR Series System as a Backup Target on CommVault - 55 Configuring VTL for CommVault
19 Click Yes to confirm.
20 Close the Log dialog box.
21 Click OK.

Setting Up the DR Series System as a Backup Target on CommVault - 56 Configuring VTL for CommVault
Results show that the library is now configured.
22 Close the Library and Drive Configuration dialog box.
23 Click Policies > Storage Policies in the navigation pane, and then select New Storage Policy to create a new Storage Policy.

Setting Up the DR Series System as a Backup Target on CommVault - 57 Configuring VTL for CommVault
24 Click Data Protection and Archiving and then click Next.
25 Enter a Storage Policy Name and click Next.
26 Select the Library you just added and click Next.

Setting Up the DR Series System as a Backup Target on CommVault - 58 Configuring VTL for CommVault
27 Make sure that these selections are correct and click Next.
28 Select the Scratch Pool that you want and click Next.
29 Set Number of Device Streams to the number of tape drives in the library (10 is the default number), and
click Next.

Setting Up the DR Series System as a Backup Target on CommVault - 59 Configuring VTL for CommVault
30 Clear the Hardware Compression checkbox, and click Next.
31 Click Finish.
32 In the CommCell Console, expand the newly added filer in the tree under Client Computers. You should
see a NAS node followed by a defaultBackupSet node.

Setting Up the DR Series System as a Backup Target on CommVault - 60 Configuring VTL for CommVault
33 Double-click default in the right pane.
34 On the Content tab, enter the path to back up and click Add; and then, on the drop-down menu, navigate
to the filer you want to back up, and click OK.

Setting Up the DR Series System as a Backup Target on CommVault - 61 Configuring VTL for CommVault
35 Specify the Storage Policy that you just added and click OK.
36 Select the updated defaultBackupSet and click All Tasks > Backup All Subclients to start the backup job.

Setting Up the DR Series System as a Backup Target on CommVault - 62 Configuring VTL for CommVault
37 Click Yes to confirm backup.
38 Choose Full for the first backup job. You may schedule the job for later if needed. Click OK.
39 Monitor the progress of the job from the Job Controller tab.

Setting Up the DR Series System as a Backup Target on CommVault - 63 Configuring VTL for CommVault
Running client restore from the NDMP VTL 1 Expand Client Computers in the tree with the filer to which you want to restore, and then expand NAS.
2 Right-click defaultBackupSet and select All Tasks > Browse and Restore for defaultBackupSet.

Setting Up the DR Series System as a Backup Target on CommVault - 64 Configuring VTL for CommVault
3 Select the backup you want to restore and click View Content.
4 Select the data you want to restore and click Recover All Selected…
5 Specify the destination of the restore and click OK.

Setting Up the DR Series System as a Backup Target on CommVault - 65 Configuring VTL for CommVault
6 Monitor the job’s progress from the Job Controller tab.
Creating and configuring FC target container(s) for CommVault
Understanding FC switch zoning configuration Before you can create the FC VTL on the DR Series system appliance, you must configure and enable FC switch zoning. Without this zoning, the Media Agent and DR Series system appliance will not be able to communicate. Also, it will be impossible to set an initiator WWN while attempting to create a FC VTL container.

Setting Up the DR Series System as a Backup Target on CommVault - 66 Configuring VTL for CommVault
NOTE: Please refer to your FC switch manufacture’s guide for instructions on how to create zones and enable your switch configuration
Please refer to the following guidelines while zoning the DR Series system:
● Single Target; Single Initiator zoning is required.
● Point-to-point, direct connections are not supported.
● Multi-pathing involving two initiator ports is not currently supported.
NOTE: Multi-Path zoning will be available in a future software release.
Creating a FC VTL container for CommVault You need to create and export the FC container in the DR Series system GUI.
In the left navigation area of the DR Series system GUI, select Containers, and then, on the Action Menu 1in the upper right corner of the page, click Add Container.
2 Enter a container name, select the Virtual Tape Library (VTL) Access Protocol option, and then click Next.
3 Do the following:
a Make sure that the STK L700 Robot Model is selected.
b Select the FC VTL Access Protocol.
c Set Number of Drives to the required amount.

Setting Up the DR Series System as a Backup Target on CommVault - 67 Configuring VTL for CommVault
d Specify Port Initiator WWN by clicking in the Select Initiator WWN box. This list should automatically populate.
e Select CommVault for Marker Type.
f Click Next.
NOTE: A maximum of 40 drives is supported. If the Port Initiator WWN does not automatically populate, double-check your FC switch zoning. If you still cannot resolve this, please contact support. Refer to the section, “Managing VTL media and space usage,” later in this guide for information about determining the correct Tape Size to use.

Setting Up the DR Series System as a Backup Target on CommVault - 68 Configuring VTL for CommVault
4 Click Save to finalize the VTL creation.
NOTE: All of the tapes will display as having a capacity of 799 GB in CommVault. This will not affect the use of smaller tapes; and, smaller tapes will be managed properly.

Setting Up the DR Series System as a Backup Target on CommVault - 69 Configuring VTL for CommVault
Verifying the FC VTL is recognized – Windows Open the Server Manager Snap-in and verify that the newly connected devices appear in the Device 1
Manager.
2 Verify that the Library and IBM Ultrium-TD4 Devices are visible.
NOTE: Refer to the article at: http://catalog.update.microsoft.com/v7/site/home.aspx, for more information and assistance in acquiring Microsoft Device Drivers, for example, StorageTek Library Drivers.
3 If devices are not visible, right-click the computer hostname, and click Scan for hardware changes.

Setting Up the DR Series System as a Backup Target on CommVault - 70 Configuring VTL for CommVault
Configuring CommVault to use the newly created FC VTL Follow these steps to configure CommVault to use the newly created FC VTL.
Open the CommCell Console and, on the Storage tab, click Expert Storage Configuration. Move the 1desired Available MediaAgent to the Selected MediaAgents list box and click OK.
2 Click OK to continue.

Setting Up the DR Series System as a Backup Target on CommVault - 71 Configuring VTL for CommVault
3 On the Start menu, select Detect/Configure Devices….
4 Make sure that the options, SCSI Devices and Automatically Create DDS Drivepools, are selected, and
then click OK.

Setting Up the DR Series System as a Backup Target on CommVault - 72 Configuring VTL for CommVault
A progress bar appears. It may take a few moments to detect the iSCSI VTL.
5 Click OK and then click Close.
6 Click OK.

Setting Up the DR Series System as a Backup Target on CommVault - 73 Configuring VTL for CommVault
7 Right-click the library you just added, and select Configure.
8 Select Library and All Drives and click OK.
9 Click Yes to confirm.
10 Select the appropriate media type, and then click Yes.

Setting Up the DR Series System as a Backup Target on CommVault - 74 Configuring VTL for CommVault
11 Right-click the new library and select Advanced Options…> Exhaustive Detection.
12 Click Yes to confirm.

Setting Up the DR Series System as a Backup Target on CommVault - 75 Configuring VTL for CommVault
13 Click Close.
14 Click OK.
15 Close the Library and Drive Configuration dialog box.

Setting Up the DR Series System as a Backup Target on CommVault - 76 Configuring VTL for CommVault
16 Select Policies > Storage Polices in the navigation pane and then select New Storage Policy.
17 Select Data Protection and Archiving and click Next.

Setting Up the DR Series System as a Backup Target on CommVault - 77 Configuring VTL for CommVault
18 Enter a Storage Policy Name and click Next.
19 Select the newly added library and click Next.

Setting Up the DR Series System as a Backup Target on CommVault - 78 Configuring VTL for CommVault
20 Select the Drive Pool for the newly added library and click Next.
21 Select the Scratch Pool that you want to use for this library, and click Next.

Setting Up the DR Series System as a Backup Target on CommVault - 79 Configuring VTL for CommVault
22 Set Number of Device Streams to the number of tape drives in the library (10 is the default number), and click Next.
23 Clear the selection for Hardware Compression and click Next.
Setting Up the DR Series System as a Backup Target on CommVault - 80 Configuring VTL for CommVault
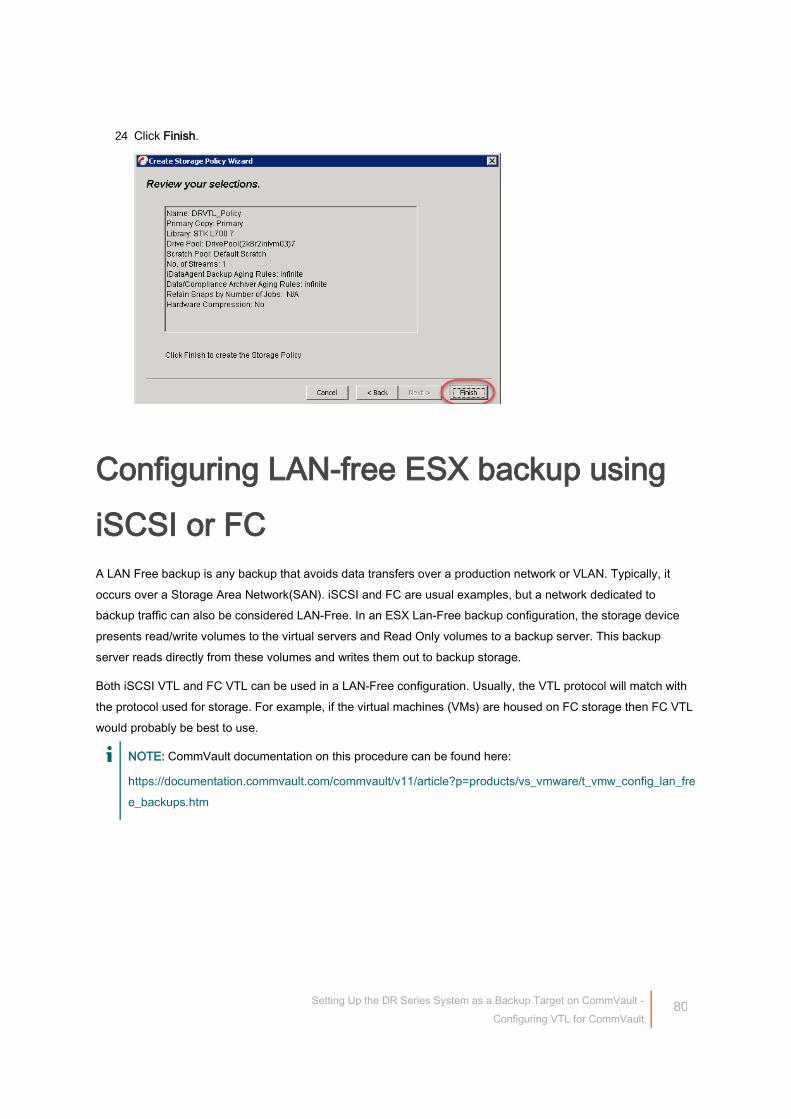
24 Click Finish.
Configuring LAN-free ESX backup using iSCSI or FC A LAN Free backup is any backup that avoids data transfers over a production network or VLAN. Typically, it occurs over a Storage Area Network(SAN). iSCSI and FC are usual examples, but a network dedicated to backup traffic can also be considered LAN-Free. In an ESX Lan-Free backup configuration, the storage device presents read/write volumes to the virtual servers and Read Only volumes to a backup server. This backup server reads directly from these volumes and writes them out to backup storage.
Both iSCSI VTL and FC VTL can be used in a LAN-Free configuration. Usually, the VTL protocol will match with the protocol used for storage. For example, if the virtual machines (VMs) are housed on FC storage then FC VTL would probably be best to use.
NOTE: CommVault documentation on this procedure can be found here:
https://documentation.commvault.com/commvault/v11/article?p=products/vs_vmware/t_vmw_config_lan_free_backups.htm

Setting Up the DR Series System as a Backup Target on CommVault - 81 Configuring VTL for CommVault
Requirements Ensure your environment meets the following requirements for LAN-free backup.
● Virtual Server iData agent is installed on a Backup Proxy.
● Media Agent is installed on the same Backup Proxy.
● If iSCSI is being used, then the iSCSI network or VLAN is required to be independent from a production network to be considered LAN free.
● If FC is being used, an FC switch is required; point-to-point FC connections are not supported.
For FC VTL Make sure to zone the DR Series system appliance to your backup proxy in your FC switch.
NOTE: Refer to your FC switch manufacture’s guide for instructions on how to create zones, enable your switch configuration, and change fillword settings.
For iSCSI VTL Make sure your iSCSI network is either on an independent VLAN or uses independent switches from your production network.
NOTE: Refer to your switch manufactures guide for instructions on how to create VLANS or configured MTU size.
Recommendations CAUTION: The following recommendations need to be applied on the DR Series system, Switch, Storage Device, and
Backup Proxy
● If iSCSI is being used, a Maximum Transmission Unit (MTU) size of 9000 is recommended for iSCSI VTL.
● If 8GB FC switch is being used, a fillword type of 3 is recommended

Setting Up the DR Series System as a Backup Target on CommVault - 82 Configuring VTL for CommVault
Configuring the backup Create an iSCSI or FC VTL following instructions in the previous sections of this document, “Creating and 1
configuring FC target container(s) for CommVault” or “Creating and configuring iSCSI target container(s) for CommVault.” Also, make sure these VTL tape devices are visible in the OS of the backup proxy.
NOTE: Set the Access Control or MAC of the VTL to be accessible by the Virtual Backup Proxy in Commvault.
2 Configure your Backup Proxy/Media Agent to use the VTL Library as needed, following instructions in the previous sections of this document, “Configure CommVault to use the newly created FC VTL” or “Configuring CommVault to use the newly created iSCSI VTL.”
3 On the Backup Proxy, do the following:
a On the Start menu, click Run, and then enter diskpart.
b Run the automount disable command to disable automatic drive letter assignment.
c Run the san policy=onlineAll command to ensure that newly discovered disks are brought online.
4 Configure your Backup Proxy to have Read Only access to your storage. This may involve switch and storage device configuration.
NOTE: Refer to your switch or storage device documentation for instructions.
5 Verify that your Storage Device volumes are detected by the Backup Proxy.
a Click Start, and then click Run.
b Type diskmgmt.msc in the run box and click OK.
c Select the Action menu and then click Rescan Disks.
d Verify the new disks show up without a drive letter as “Read Only.”

Setting Up the DR Series System as a Backup Target on CommVault - 83 Configuring VTL for CommVault
6 Add your ESX server or vCenter to CommVault.
a In the CommCell Console, right-click Client Computers.
b Select New Client > Virtualization > VMware vCenter.

Setting Up the DR Series System as a Backup Target on CommVault - 84 Configuring VTL for CommVault
7 In the Create VMware vCenter Client dialog box, do the following:
a Enter your vCenter/ESX host name in the Client Name field. This should automatically populate the vCenter Server Name field.
b Enter your User Name and Password. If a domain account is being used, you might need to enter your username as <domain>/<username>.
c Click Add… in the Proxies section.
d In the Select Client / Client Groups dialog box, for your Backup Proxy, click Include, and then click OK.
e In the Create VMware vCenter Client dialog box, click OK.
NOTE: If you do not see your Backup Proxy, make sure the Virtual Server iData Agent is installed correctly on the proxy.

Setting Up the DR Series System as a Backup Target on CommVault - 85 Configuring VTL for CommVault
8 Set backup content and verify the transport mode on the new Virtual Client.
a In the CommCell console, expand Client Computers, and then expand the virtual client.
b Expand the Virtual Server iData Agent, and then expand the VMware instance.
c Click defaultBackupSet, right-click default, and then click Properties.

Setting Up the DR Series System as a Backup Target on CommVault - 86 Configuring VTL for CommVault
9 In the Subclient Properties of the default dialog box, confirm the Transport Mode for VMware setting. The default value is “Auto”.
NOTE: The default value of Auto is recommended to ensure backups succeed. However, if the desired outcome is that the jobs fail, if SAN mode is unusable, then change this setting to SAN. For more details on ESX transportation modes, refer to the following documentation: https://documentation.commvault.com/commvault/v11/article?p=products/vs_vmware/c_vmw_transport_modes.htm

Setting Up the DR Series System as a Backup Target on CommVault - 87 Configuring VTL for CommVault
10 On the Content tab, select virtual machines for backup. By default, all virtual machines will be backed up. Click Browse if you need to select a specific virtual machine.
11 Notice the Hosts and Clusters view in the top left. This view can be changed to VMs and Templates, and Datastore view as well. Expand the datacenters and clusters, and select resources that need to be backed up. Click OK when finished.
NOTE: For information about how resource selecting causes different backup behavior at the datastore, resource pool, cluster, and datacenter levels refer to the following documentation:
http://documentation.commvault.com/commvault/v10/article?p=products/vs_vmware/config_adv.htm

Setting Up the DR Series System as a Backup Target on CommVault - 88 Configuring VTL for CommVault
12 On the Storage Device tab, click the Storage Policy dropdown, and select the storage policy created previously.
13 Select the Data Transfer Options subtab, and click Off under Software Compression.

Setting Up the DR Series System as a Backup Target on CommVault - 89 Configuring VTL for CommVault
14 On the Deduplication subtab, clear the checkbox for Enable Deduplication.
15 On the Encryption tab, click None or Network Only, and then click OK.
NOTE: None completely disables all encryption. Network Only is encryption “in flight,” that is, over the network only. For more information about these settings refer to the following documentation:
https://documentation.commvault.com/commvault/v10/article?p=features/data_encryption/data_encryption
getting_started.htm#Subclient_Encryption

Setting Up the DR Series System as a Backup Target on CommVault - 90 Using VTL replication with CommVault
5
Using VTL replication with CommVault The VTL replication feature allows for native data replication for up to three DR Series systems. This replication occurs at the tape level, which ensures “restorability” even if the replication is not completely in-sync at the point of failure.
Configuring the DR Appliance for VTL Replication Native VTL Replication occurs between two DR Series systems but can optionally be configured for up to three systems. The primary VTL is referred to as the Source, the first replication target is referred to as the Replica Target. The optional second replication target is referred to as the Replica Cascade.
Prerequisites ● The Source, Replica Target, and Replica Cascade VTLs should be created. Follow the steps in the
corresponding section in this guide, “Configuring VTL for CommVault,” to create VTLs.
● The Source, Replica Target, and Replica Cascade VTLs must be of type STK L700.
● The Source, Replica Target, and Replica Cascade VTLs must be of the same Tape Size.

Setting Up the DR Series System as a Backup Target on CommVault - 91 Using VTL replication with CommVault
Setting up replication In the DR Series system GUI of the Replication Source system, go to the Replications page, and, on the 1
Action Menu in the upper right part of the page, click Add Replication.
2 In the Add Replication pane, do the following:
a If only two DR Series systems are replicating, select Replica only.
b For a Replication Cascade, select Replica & Cascade.
c Click Next.
3 For the Select local container dropdown, click the source replication VTL name, and click Next.

Setting Up the DR Series System as a Backup Target on CommVault - 92 Using VTL replication with CommVault
4 For Encryption, select either AES 128-bit or AES 256-bit as needed. If encryption is not needed, select Not Enabled. Click Next.
5 Do the following:
a In the Username and Password fields, enter the corresponding information from the Replica target.
b Enter the Fully Qualified Domain Name or IP address of the Replica Target in the Remote Systems field.
c Click the Retrieve Remote Container(s) button.
d On the Select remote container drop down, click the Replica Target VTL name from the list.
e Click Next.
NOTE: Default Username is administrator with a Default Password of St0r@ge!
NOTE: If you are configuring a Replica Cascade the next screen will look exactly like Step 5. Enter the Username, Password, Remote system, and Select Remote Container fields as they pertain to the Replica Cascade VTL target.

Setting Up the DR Series System as a Backup Target on CommVault - 93 Using VTL replication with CommVault
6 Review the summary of the configuration, and click Finish.
7 You can monitor replication status by clicking the + icon to the left of the replication.

Setting Up the DR Series System as a Backup Target on CommVault - 94 Using VTL replication with CommVault
Restoring from a replica or replica cascade target Before attempting to restore from replication, it is important to understand how CommVault handles tape backups. First, each tape has an On Media Label (OML) based on the current barcode written to it. Since this OML is actually written on the tape itself, the data is also replicated to the target VTL. The second is that each OML has what CommVault refers to as a Magic Number. The Magic Number is a unique ID written inside the OML. The Magic Number and the OML have a relationship that is maintained in the CommServe database. If the barcode changes, it can impact restore and usability.
NOTE: It is import to note that only fully in-sync tapes are available on the replica site. What is restorable is effected by how in-sync the containers are at point of failure.
Understanding reserialization When activating a Replica VTL for restore, it is possible to reserialize the VTL. This operation temporarily changes the library serial number and the tape barcodes so that a DMA will see it as a completely new/independent Tape Library. This feature will not be used for replica restores in CommVault.
Possible restore situations There are two general situations in which restores from replicated data would be performed.
● A restore to the original CommCell for which it is assumed the CommVault database is intact.
■ In this example just the Primary Site DR or access to it might be down.
■ All the tapes will have OML’s with Magic Numbers that match what is stored in the CommVault database.
■ Reserialization is not needed.
● A restore to a new/temporary or alternative site CommCell in which case it is assumed the CommVault database is different.
■ A new/temporary CommCell install might be used to restore the original CommVault Database.
■ An independent CommCell at a DR site is being used for restore at an offsite location.
■ All the tapes will have OML’s that match the original serialization.

Setting Up the DR Series System as a Backup Target on CommVault - 95 Using VTL replication with CommVault
Restoring from replica VTL on original CommCell In this case, it is assumed that the CommVault database is intact. The On Media Label (OML) and Magic Number of each tape have an entry in the CommVault Database. Because of this, you do not need to reserialize or else the OML and Magic Number will no longer match the Barcode. It is also assumed that the source DR Series system is offline and the VTL is no longer mounted to the Media Agent.
First, you need to activate the VTL. This involves configuring it with a connection protocol and bringing the replica tape library online.
In the DR Series system GUI navigate to the Containers page. Click the edit button on the Replica 1target VTL.
2 Select the VTL Access Protocol and enter the IQN, FQDN, IP address, or port initiator WWN of the media agent depending on which protocol is selected.
3 Click Next, and then click Save on the Summery Page.
NOTE: Now that the Target VTL has an access protocol it must be activated, which makes the Replica VTL readable.

Setting Up the DR Series System as a Backup Target on CommVault - 96 Using VTL replication with CommVault
4 Navigate to the Replications page, and then expand the replication to review its replication statistics. Check the Percent Done, and if it is 100% In-Sync, then click the Activate button.
5 In the Activate VTL target replica container dialog box, do the following:
a Enter 00 for the Reserialization code for replica. This will ensure the library has the same serial numbers and barcodes it did originally.
b If the VTL is in sync click, Activate, if it is not in sync click Force Activate.
At this point the Library will be online and available.
6 You now need to connect the library to the Media Agent. Refer to the sections in this document specific to configuring your chosen protocol (such as “Configuring an iSCSI Target in Windows/Linux,” “Configuring CommVault to use the newly created NDMP VTL,” or “Configuring CommVault to use the newly created FC VTL.”)
Once the VTL is recognized by Windows, the Tape library will be visible to CommVault. Because the serial number and barcodes are the same they will match the CommVault database. The original library should come online and be accessible for restores without having to run through an add library process.

Setting Up the DR Series System as a Backup Target on CommVault - 97 Using VTL replication with CommVault
Restoring from a replica VTL on a new or alternative CommCell In this case, you cannot assume the CommVault database is intact. The On Media Label (OML) and Magic Number of each tape will not have an entry in the CommVault Database. Because the OML needs to match the tape barcode even in new CommVault installations, you should not reserialize or else the OML and Magic Number will no longer match the Barcode.
First, you need to activate the VTL. This involves configuring it with a connection protocol and bringing the 1replica tape library online. In the DR Series system GUI, navigate to the Containers page, and click the edit button for the replica target VTL.
2 Select the VTL Access Protocol and enter the IQN, FQDN, IP address, or port initiator WWN of the media agent depending on which protocol is selected.
3 Click Next, and then click Save on the Summary Page.
NOTE: Now that the Target VTL has an access protocol you need to activate it. This makes the Replica VTL readable.

Setting Up the DR Series System as a Backup Target on CommVault - 98 Using VTL replication with CommVault
4 Navigate to the Replications page, and expand the replication to review replication statistics. Check the Percent Done, and if it is 100% In-Sync, then click the Activate button.
5 In the Activate VTL target replica container dialog box, do the following:
a Enter 00 for the Reserialization code for replica. This will insure the library has the same serial numbers and barcodes it did originally.
b If the VTL is in sync click Activate; if it is not in sync click Force Activate.
At this point, the Library will be online and available.
6 Now, you need to connect the library to the Media Agent. Refer to the sections in this document specific to configuring your chosen protocol (such as “Configuring an iSCSI Target in Windows/Linux,” “Configuring CommVault to use the newly created NDMP VTL,” or “Configuring CommVault to use the newly created FC VTL.”)
7 Once the VTL is recognized by Windows, you need to add the tape library to CommVault. This is because this library is new to this CommCell instance. Refer to the sections in this document specific to configuring your chosen protocol (such as “Configuring CommVault to use the newly created iSCSI VTL” Configuring CommVault to use the newly created NDMP VTL,” or Verifying the FC VTL is recognized by Windows.”)

Setting Up the DR Series System as a Backup Target on CommVault - 99 Using VTL replication with CommVault
At this point, you will have a newly created Tape Library listed in CommVault.
8 You need to run a catalog of these tapes so that the instance of CommVault is aware of the restorable data. In your CommCell Console, expand Storage Resources, and then Libraries. Expand the newly added Tape Library, and then Media By Location. Click the Media in Library option and a list of tapes should appear.
NOTE: Only In-sync tapes will show up in this list. All other tapes did not complete replication and would not be restorable.
9 On the Media In Library tab, click any barcode and then use the Ctrl-A keyboard shortcut to select all tapes.

Setting Up the DR Series System as a Backup Target on CommVault - 100 Using VTL replication with CommVault
10 Right-click any tape, select the All Tasks menu, and click Catalog.

Setting Up the DR Series System as a Backup Target on CommVault - 101 Using VTL replication with CommVault
11 Click Catalog and Merge, change the Maximum Number of Drives to the maximum in the library (10 by Default), and click OK.
12 Monitor the Catalog Media operation in the Job Controller tab. The time this takes will vary depending on the number of tapes and size of data on them.
13 Go back to your CommCell Console, and expand Client Computers and then the client to be restored.
14 Expand the iDataAgent to be restored, and right-click a backup set.

Setting Up the DR Series System as a Backup Target on CommVault - 102 Using VTL replication with CommVault
15 Select All Tasks and click Restore by Jobs.
16 Clear the checkbox, Specify Time Range, and click OK.

Setting Up the DR Series System as a Backup Target on CommVault - 103 Using VTL replication with CommVault
17 On the Backup Job History tab, find the job you want to restore by checking start time.
18 Right-click the job, and click Restore Selected Jobs if you want looking to do a whole client restore, or click View backup items if you want to restore individual files/folders
NOTE: For more information about CommVault restore options refer to the following documentation: http://documentation.commvault.com/commvault/v10/article?p=products/windows/restore_adv.htm

Setting Up the DR Series System as a Backup Target on CommVault - 104 Using VTL replication with CommVault
19 In the Restore Options dialog box, change the restore destination and overwrite files settings if needed then click OK.
NOTE: If CommVault asks for more media to be placed in the library for restore then likely not all the tapes related to the backup were in-sync. Try again with another backup job for that client.

Setting Up the DR Series System as a Backup Target on CommVault - 105 Using VTL replication with CommVault
20 Monitor the restore progress in the Job Controller.
Deactivating a replica VTL Once all issues have been resolved, make sure to disconnect your library and deactivate it. Then reconfigure replication as needed.
To deactivate a library in the DR Series system GUI, navigate to the Replications page. 1
Expand the replication and click the Deactivate button. 2
3 In the warning dialog box, click Yes to confirm deactivation.

Setting Up the DR Series System as a Backup Target on CommVault - 106 Setting up the DR Series
system cleaner
5
Setting up the DR Series system cleaner
Performing scheduled disk space reclamation operations are recommended as a method for recovering disk space from system containers in which files were deleted as a result of deduplication.
The cleaner runs during idle time. If your workflow does not have a sufficient amount of idle time on a daily basis, then you should consider scheduling the cleaner to force it to run during a scheduled time.
If necessary, you can perform the procedure shown in the following screenshot to force the cleaner to run. After all of the backup jobs are set up, the DR Series system cleaner can be scheduled. The DR Series system cleaner should run at least 40 hours per week when backups are not taking place, and generally after a backup job has completed. Refer to the DR Series Cleaner Best Practices white paper for guidance on setting up the cleaner.
In the left navigation area of the DR Series system GUI, click System Configuration > Schedules. 1
On the Action Menu in the upper right corner of the page, click Add Cleaner Event. 2

Setting Up the DR Series System as a Backup Target on CommVault - 107 Setting up the DR Series
system cleaner
3 Define the schedule, and click Save.
The new cleaner event is displayed on the Schedules page.

Setting Up the DR Series System as a Backup Target on CommVault - 108 Monitoring deduplication, compression and performance
7
Monitoring deduplication, compression and performance
After backup jobs have run, the DR Series system tracks capacity, storage savings, and throughput in the DR Series system dashboard. This information is valuable in understanding the benefits of the DR Series system.
NOTE: Deduplication ratios increase over time. It is not uncommon to see a 2-4x reduction (25-50% total savings) on the initial backup. As additional full backup jobs are completed, the ratios will increase. Backup jobs with a 12-week retention will average a 15x ratio, in most cases.

Setting Up the DR Series System as a Backup Target on CommVault - 109 A - VTL configuration guidelines
Appendices
A - VTL configuration guidelines
Managing VTL protocol accounts and credentials
iSCSI account details and management By default, the iSCSI username is iscsi_user and can be confirmed by reviewing the output of the iscsi --show --user command. For example:
> iscsi --show --user
user: iscsi_user
The default iSCSI Password is “St0r@ge!iscsi”.
You can modify this password in the DR Series system GUI by selecting System Configuration > Users. On the Users page, click the edit icon for the iscsi_user.
IMPORTANT: iSCSI CHAP passwords must be between 12 and 16 characters long.

Setting Up the DR Series System as a Backup Target on CommVault - 110 A - VTL configuration guidelines
Alternatively, you may also use the “iscsi --setpassword” CLI command to change the iSCSI CHAP password setting as shown in the following example:
> iscsi --setpassword
WARNING: All existing iSCSI sessions will be terminated!
Do you want to continue? (Yes/no) [n]? y
Enter new CHAP password:############
Re-type CHAP password:############
NDMP account details and management The default username for the NDMP service is ndmp_user, which can be confirmed by reviewing the output of the CLI command, ndmp --show. For example:
> ndmp --show
NDMP User: ndmp_user
NDMP Port: 10000
The default NDMP Password is “St0r@ge!”.
You can modify this password in the DR Series system GUI by selecting System Configuration > Users. On the Users page, click the edit icon for the ndmp_user.

Setting Up the DR Series System as a Backup Target on CommVault - 111 A - VTL configuration guidelines
Alternatively, you may also use the ndmp –setpassword cli command to change the NDMP Password setting as shown in the following example:
> ndmp --setpassword
Enter new NDMP password:#########
Re-type NDMP password:#########
NDMP password successfully updated.
VTL default account summary table Service Account Default Credentials CLI Modifier
NDMP ndmp_user St0r@ge! ndmp --setpassword

Setting Up the DR Series System as a Backup Target on CommVault - 112 A - VTL configuration guidelines
Managing VTL media
Adding VTL media to a container IMPORTANT: Media can always be added as needed. Media cannot, however, be deleted; therefore, you should take
care to avoid creating too many media items.
To add media to an existing VTL container, follow these steps.
1 In the DR Series system GUI, go to the Containers page.
2 Click the edit icon for the VTL to which you want to add media.
3 In the field Add More Tapes (no of tapes), enter the number of tapes to add to the VTL container.
4 Click Next.
5 Click Save to finalize the change.
Alternatively, you can use the “vtl –create_carts” cli command for this operation. For example:
> vtl --update_carts --add --name sample --no_of_tapes 10
Created 10 cartridges

Setting Up the DR Series System as a Backup Target on CommVault - 113 A - VTL configuration guidelines
Updating CommVault to identify newly added VTL media After the VTL media has been added to the target VTL container, CommVault must now be updated to be able to use the media.
Select the Default Scratch of the library and click Import Media. 1
2 Click Continue.
3 Click OK.
4 Click OK.

Setting Up the DR Series System as a Backup Target on CommVault - 114 A - VTL configuration guidelines
5 Review the resulting log and click Close.

Setting Up the DR Series System as a Backup Target on CommVault - 115 A - VTL configuration guidelines
6 Select Start > Detect/Configure Devices…
7 Note the tapes that were added.

Setting Up the DR Series System as a Backup Target on CommVault - 116 A - VTL configuration guidelines
Managing VTL space usage
General performance guidelines for DMA configuration
● The DR Series system (version 3.2 and later) provides inline VTL deduplication, compression, and encryption at rest functionality. Backup applications (such as NetVault, Veritas BackupExec, Veritas NetBackup, and so on) should be configured so that any multiplexing, pre-compression, software-side deduplication, or encryption is disabled. Enabling any of these features may adversely affect the space savings and ingest performance of the DR Series system VTL feature.
● Slots and media should be configured so as to accommodate the environment backup requirements. Initially, the logical capacity of a VTL should be no more than twice the physical size of the DR Series system. If the initial VTL setup is over-subscribed at higher than a 2-1 ratio without proper planning the DR Series system could fill up prematurely and cause unexpected system outage. It is highly advisable to configure the DR Series system VTL feature such that the media count be made to accommodate your initial data protection requirements. and then media be added as the deduplication statistics become available to ascertain growth, media, and space requirements.
■ Media Type selection will depend on a number of factors including the DMA used, the backup cycles, data sources, and more. As a general rule, using smaller tapes is better than using larger tapes so as to allow for a higher level of control over space usage by backup operations. This also allows for easier handling in the event of a system running out of physical space as well as the normal data cleanup procedures.
■ Adding media to an existing DR Series system VTL is painless and should be leveraged to incrementally add media as needed. Although this may require a higher level of involvement in managing the media usage, it will result in better performance and avoid unplanned outages.
Physical space sizing and planning Various factors such as total data footprint, change rate, backup frequency and data lifecycle policies will dictate how much physical space will be needed to accommodate the Virtual Tape Libraries within a DR Series environment. In addition, if other container types are hosted these two must be factored into space requirement calculations.

Setting Up the DR Series System as a Backup Target on CommVault - 117 A - VTL configuration guidelines
As a general rule the following can be used as a reference architecture to determine the basic capacity needed for a given virtual tape library container:
Determine Existing Data Set 1
Determine the change rate (Differential) 2
Determine the retention period 3
Calculate the data footprint during the retention period for existing data sets based on a 10-1 4deduplication ratio
Calculate the data footprint during the retention period for change rate data sets based on a 10-1 5deduplication ratio
Calculate the ratios within the retention period for each of the data sets 6
Determine the lowest ratio data set to be retired within the retention period and create media of size that 7closest matches this data footprint so that when a retention period is met the most amount of media is recycled to invoke data reclamation alignment and optimizing media consumption.
IMPORTANT: If other containers are being configured to host CIFS/ NFS / RDA or OST, these must also be factored into the planning and management of space.
Logical VTL geometry and media sizing The logical size of the VTL including media size and media count should be made so as to accommodate the existing data footprint targeted for protection. The calculation for such should include the initial footprint, change rate and retention period. It should also take in account the size of both full and incremental data sets. Using the smallest iteration of the data sets to dictate the logical size of the VTL media affords users the ability to retire media in smaller increments which results in high levels of use and also provides the users the ability to conduct operations across smaller objects which results in higher levels of flexibility such as when a restore is needed during backup operations.
We can review a typical full weekly plus incremental daily example to demonstrate one method of conducting this calculation. In our example the total logical foot print for the customer environment is 20TB and with a 10% change within a weekly recovery point objective period for a complete weeks’ worth of protection we calculate that we will require 22TB of total logical media to retain the data footprint for the given environment for one week. In order to allow for disparities, we also include a 10% increase to allow for flexibility in the deployment and use of the VTL which results in a 24.2TB total virtual media requirement for a single weekly retention period.
IMPORTANT: Media can always be added as needed. Media cannot however be deleted so care must be taken in order to avoid creating too many media items.
In the previous example at the end of the 5-week cycle, the 1st week retires and frees up media to be reused or recycled which once processed will allow the DR to reclaim the physical space associated with the virtual media.

Setting Up the DR Series System as a Backup Target on CommVault - 118 A - VTL configuration guidelines
Since the smallest data set footprint resulting from the change rate is 2TB in each incremental iteration we create our media at 800GB increments and add as we grow. For this example, the initial Virtual Tape Library would be created with 152 (121TB divided by 800GB) pieces of media at 800GB for each piece media.
20TB Total initial footprint with a 10% change rate
Pre-Deduplication
Week Logical Size Logical Full Metrics 10% Change Rate
Logical Incremental Metrics
1 24.2TB 20TB 2TB
2 24.2TB 20TB 2TB
3 24.2TB 20TB 2TB
4 24.2TB 20TB 2TB
5 24.2TB 20TB 2TB
Total 121TB
Media retention and grouping Due to the nature of Virtual Tape Libraries media must be managed in order to insure that physical capacity is reclaimed in an orderly fashion to avoid running out of space and disrupting operations. Media must be grouped within the data management application, in a way that full data sets are targeted to separate media as incremental data and they in turn are grouped by data sets that expire within the same period or that share the same recovery point objective. This insures that media can be reused effectively so that when full all incremental data expire the logical space can be reconciled thus enabling the physical space to be reclaimed.
VTL media count guidelines Type Capacity Max number of Tapes supported
LTO-4 800GiB 2000
LTO-3 400GiB 4000
LTO-2 200GiB 8000
LTO-1 100Gib 10000

Setting Up the DR Series System as a Backup Target on CommVault - 119 A - VTL configuration guidelines
Type Capacity Max number of Tapes supported
LTO-1 50Gib 10000
LTO-1 10GiB 10000
VTL space reclamation
General guidelines The DR Appliance Virtual Tape Library feature is presented to operating systems and data management applications alike as devices either through iSCSI, NDMP, or FC protocol connectivity. The DMA interfaces with the virtual tape library and all its underlying components including the drives and media though these specific protocols.
The DMA must interact with the virtual tape media during a recycle, reuse or media initialization process in order for the DR to be able to reclaim space during its own cleaning cycle.
This two-step process is required so that the backup software can reconcile the space by marking the media as expired then reusing it, consolidating space across volumes/tapes or by simply recycling the media into a scratch pool. Once these operations have been completed the DRs own cleaning cycle should be used to reclaim that virtual tape media space which in turn will free up physical space on the DR unit.
Implementing proper media pool, groups and recycling practices will allow the virtual tape media to be used at optimal levels and that the underlying physical space be reclaimed accordingly by the scheduled DR reclamation.
NOTE: In general the guidelines provided above should be sufficient for normal operations to insure proper reclamation of space is conducted preemptively. Refer your individual DMA applications for best practices and guidelines regarding tape reuse.
Manual space reclamation in CommVault If space becomes an issue or a user impact requires manual cleaning, media can be manually Erased, Blanked, Scratched or recycled and a manual cleaning cycle initiated on the DR Series system.
Identify the DR VTL tapes from which you want to remove backups via the Commcell Console. Note the 1Barcodes of the Assigned tapes that you want to erase and reclaim their storage on the DR Series system.
CAUTION: This will permanently delete / destroy the data on these virtual volumes.

Setting Up the DR Series System as a Backup Target on CommVault - 120 A - VTL configuration guidelines
2 Select All Tasks > Delete Contents for the tapes you want to erase.
3 Click Yes in this warning box.
4 Enter “erase and reuse media” in the text box to confirm you want to remove the data from the selected tape.

Setting Up the DR Series System as a Backup Target on CommVault - 121 A - VTL configuration guidelines
5 Select the Media Pool you want the tape to be moved to.
6 Find the tape in the Media Pool and select the Options > Erase Media context menu.
7 Select Quick Erase and click OK.

Setting Up the DR Series System as a Backup Target on CommVault - 122 A - VTL configuration guidelines
8 Click Yes if you want to erase the media.
9 Monitor the progress of the erase from the Job Controller tab.
10 Once the reconciliation process has been completed on the CommVault software, from the DR Series system, initiate a cleaning cycle either via the UI or via the command line. For example:
> maintenance --filesystem --reclaim_space
Successfully started cleaner.
11 Make sure the space has now been reclaimed via the UI or via the command line. The Cleaner Status should transition from Pending to Running, and then to Done at which time the statistics should change to reflect the reclaimed space.

Setting Up the DR Series System as a Backup Target on CommVault - 123 A - VTL configuration guidelines
Using the CommVault erase spare media feature (optional) The following are optional and ensures that space is reclaimed more aggressively on DR Series system VTLs. This is a feature specific to CommVault and has advantages and disadvantages if used. Applying these setting will cause any tape that is aged (at retention for CommVault) to be moved to the spare media pool and then proactively deleted by CommVault. This will trigger space to be reclaimable on the DR Series appliance by the cleaning process. The advantage of this is the size on disk of your VTL data will be more closely aligned with actual data usage. The disadvantage is that when data on the VTL is at retention, it will be deleted proactively and will not be restorable past retention.
CAUTION: Using these settings will result in VTL data being deleted shortly after meeting retention and will not be restorable.
In the CommCell Console, expand Policies and then Storage Policies. Right-click the storage policy copy 1that uses the VTL, and click Properties.

Setting Up the DR Series System as a Backup Target on CommVault - 124 A - VTL configuration guidelines
2 On the Media tab, select the Mark Media to be Erased After Recycling option, and click Yes in the resulting dialog box.
3 Click OK in the Storage Policy Copy properties window.
NOTE: At this point, the storage copy will mark tapes as erasable as soon as they age. Steps 1 and 2 should be performed on every storage copy policy leveraging the DR Series system VTL. The next steps will schedule the actual erase to occur.

Setting Up the DR Series System as a Backup Target on CommVault - 125 A - VTL configuration guidelines
4 In the CommCell Console, expand Storage Resources and Libraries. Right-click the DR Series system VTL, and then select Erase Spare Media.
5 Do the following:
a On the General tab, keep all of the default settings.
b On the Job Initiation tab, click the radio button for Schedule.
c Click the Configure button.
d Set a Schedule and Schedule Name, and click OK.
e Click OK in the Erase Spare Media window.
NOTE: It is recommended that you give the schedule a name including the library name, indicating that it is a “Aged Tape Erase”. You should also match this to your data aging schedule, which is daily at 12:00 PM by default.

Setting Up the DR Series System as a Backup Target on CommVault - 126 A - VTL configuration guidelines
NOTE: Repeat Steps 3 and 4 for every VTL in which this behavior is desired.