setting up pptp on microsoft windows vista.docx up pptp on microsoft windows vista ( for...
TRANSCRIPT

Setting up PPTP on Microsoft Windows Vista
( For FocalpointNet)
NOTE: This is an interim solution and should only be used until such time as Nortel releases a version of
their Nortel VPN Client for Windows Vista.
From the Start Menu, selectControl Panel.
Select the link to “Viewnetwork status and tasks”.

You will see a screen similarto the one at the right.
Select “Set up a connectionor network”.
Select “Connect to aworkplace. Set up a dial upor VPN connection to yourworkplace” and click Next.
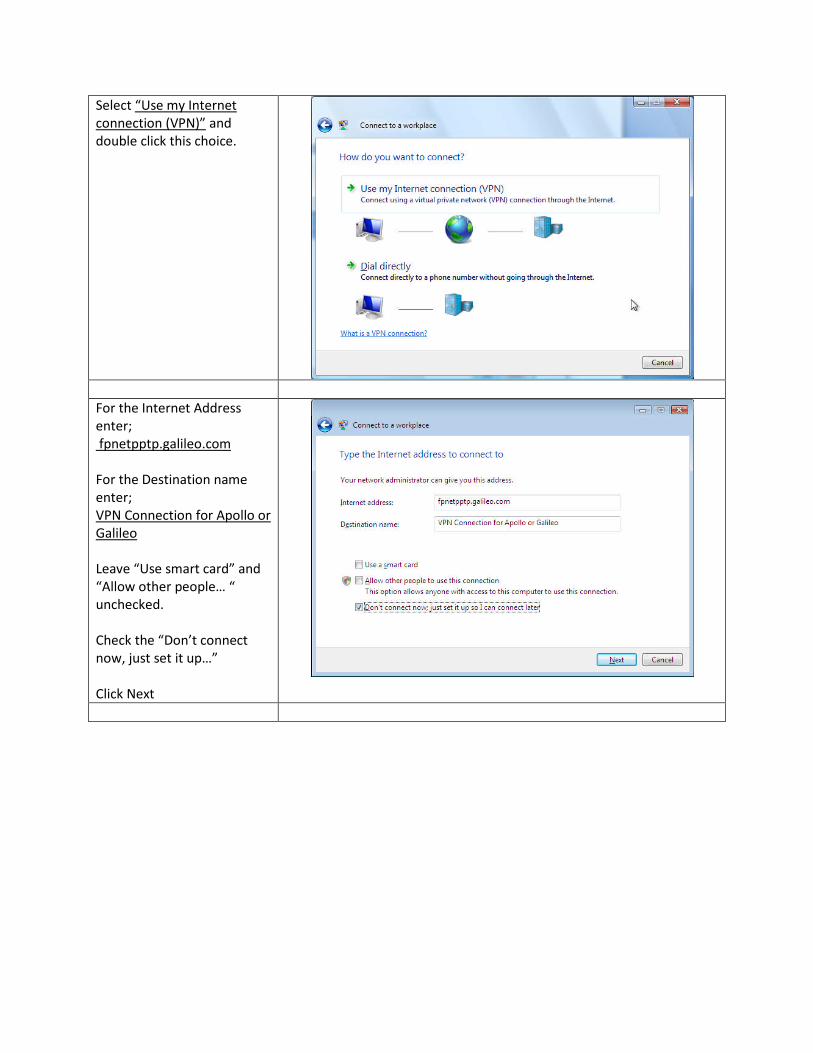
Select “Use my Internetconnection (VPN)” anddouble click this choice.
For the Internet Addressenter;fpnetpptp.galileo.com
For the Destination nameenter;VPN Connection for Apollo orGalileo
Leave “Use smart card” and“Allow other people… “unchecked.
Check the “Don’t connectnow, just set it up…”
Click Next

For the User name enteryour Client ID.
For the Password enter theGTID associated with theClient ID
Leave Show characters andRemember this passwordunchecked and the Domainfield empty.
Click Create
Click Close

This should take you back tothe main network page.
Select “Manage networkconnections”
Right click the VPNconnection you just builtabove.
In this example, that’s the“Connection Account ForApollo or Galileo”
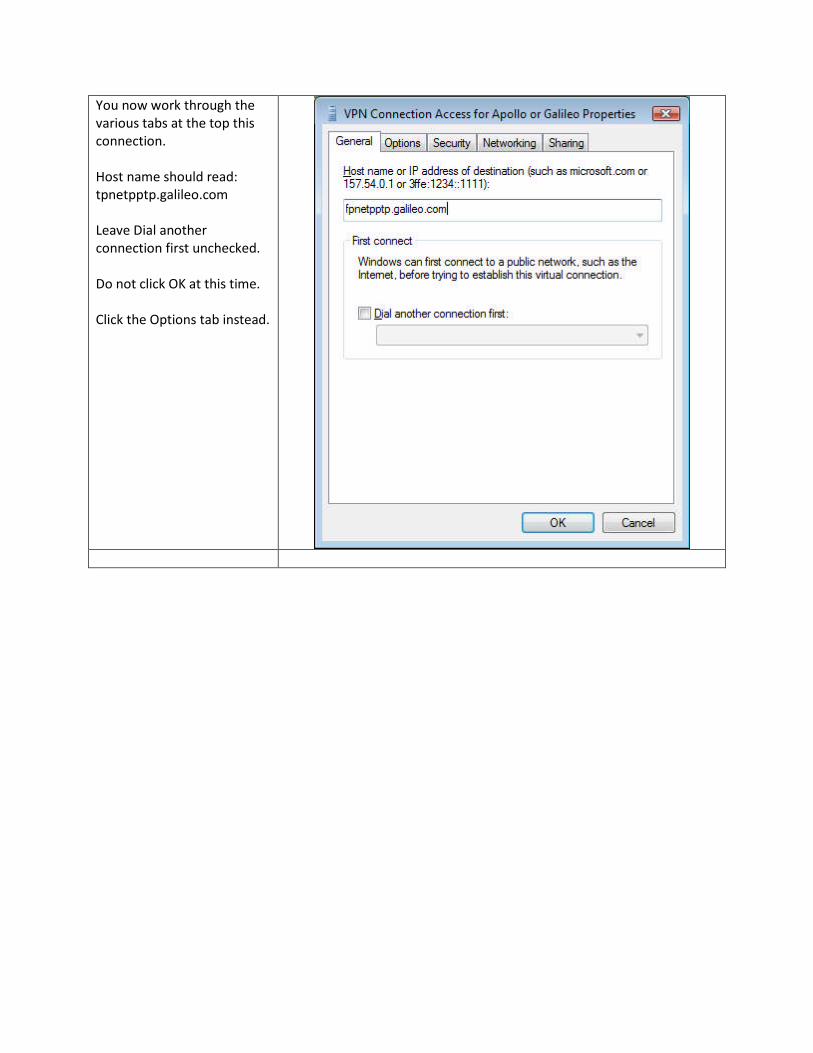
You now work through thevarious tabs at the top thisconnection.
Host name should read:tpnetpptp.galileo.com
Leave Dial anotherconnection first unchecked.
Do not click OK at this time.
Click the Options tab instead.

On the options tab;
Remove the check markfrom “Include Windowslogon domain”
Do Not Click OK at this time.
Click the Security tabinstead.

On the security tab;
Select Advanced (customsettings).
Then click the “Settings”button.

On the Advanced SecuritySettings screen;
Select “Allow theseprotocols”
Put a check mark in front of;-Encrypted password (PAP
Lease the follow un-checked;-Challenge HandshakeAuthentication Protocol(CHAP)-Microsoft CHAP Version 2(MS-CHAP v2)- Automatically use myWindows logon name andpassword blank.
Click OK.
Ignore this warning and clickYes to proceed to the nextstep.
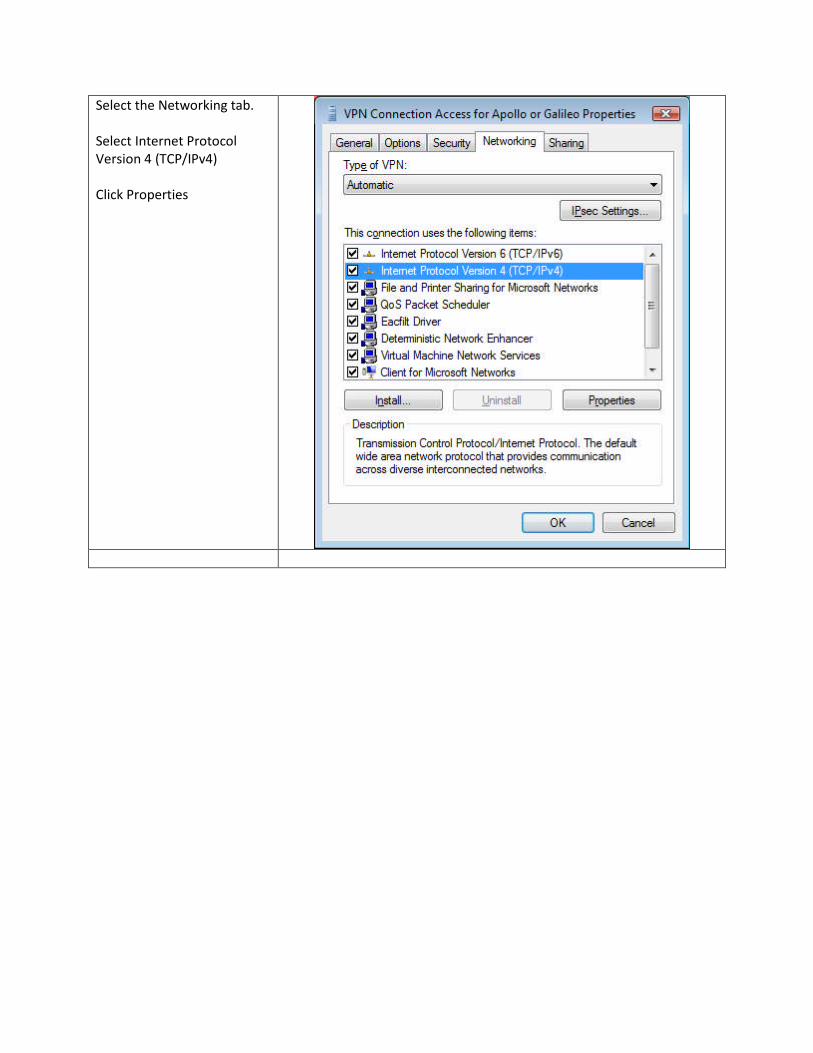
Select the Networking tab.
Select Internet ProtocolVersion 4 (TCP/IPv4)
Click Properties

On the Internet PropertiesVersion 4 (TCP/IPv4)Properties page, select theAdvanced button.

On the Advanced TCP/IPSettings page, remove thecheck mark from the “Usedefault gateway on remotenetwork”
Click OK three times and youshould be returned to themain network screen (seenext screen shot)
You should now be looking ata screen like the one shownin the next column.
Test your connection at thispoint.
Double click the VPNConnection you just built.

Enter your User name:This is the same as yourClient ID) and will begin withan ‘a0’ followed by severalnumbers and letters
Enter your Password:This is the same as yourApollo or Galileo GTID.
The password always six (6)characters long and usuallyconsists of both letters andnumbers.
This MUST be entered inupper case. HINT, touch theCaps Lock key ONCE, thenenter the password. DO NOThold down the shift keywhen you type.
AFTER you have successfullymade your first connection,you may put a check mark inthe “Save the user andpassword …” box.

From now on, to use yourconnection, go the Start anddouble click “ Connect To.
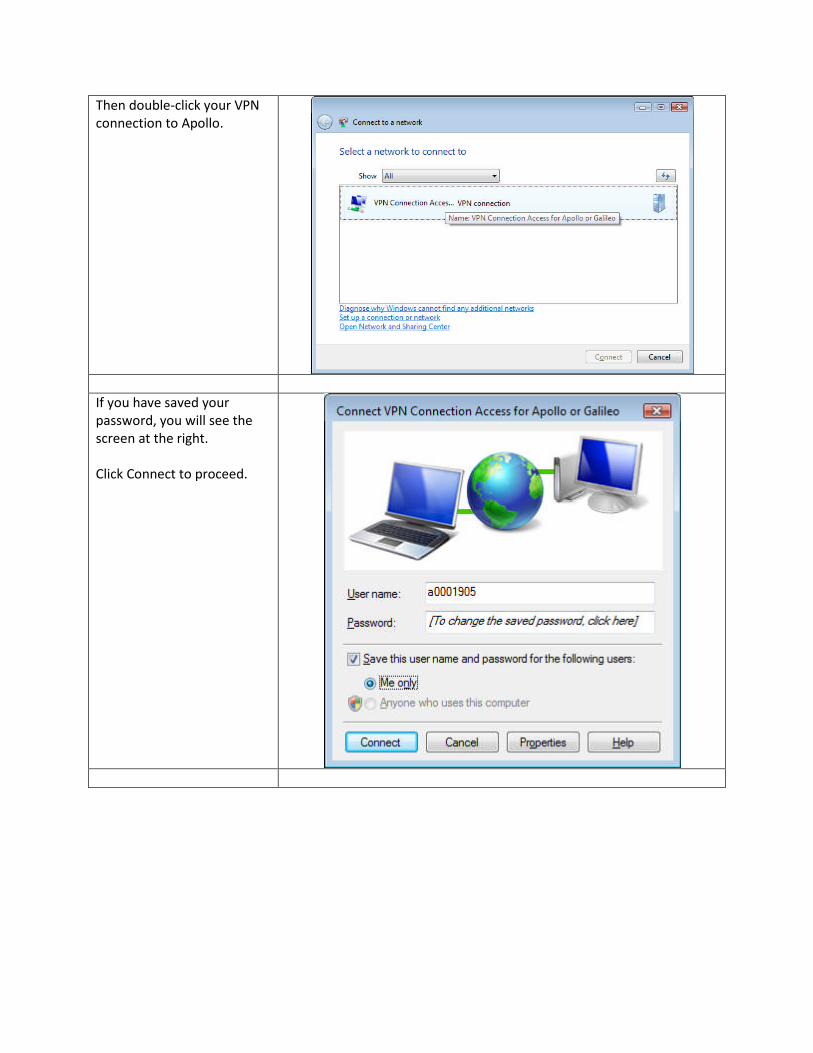
Then double-click your VPNconnection to Apollo.
If you have saved yourpassword, you will see thescreen at the right.
Click Connect to proceed.
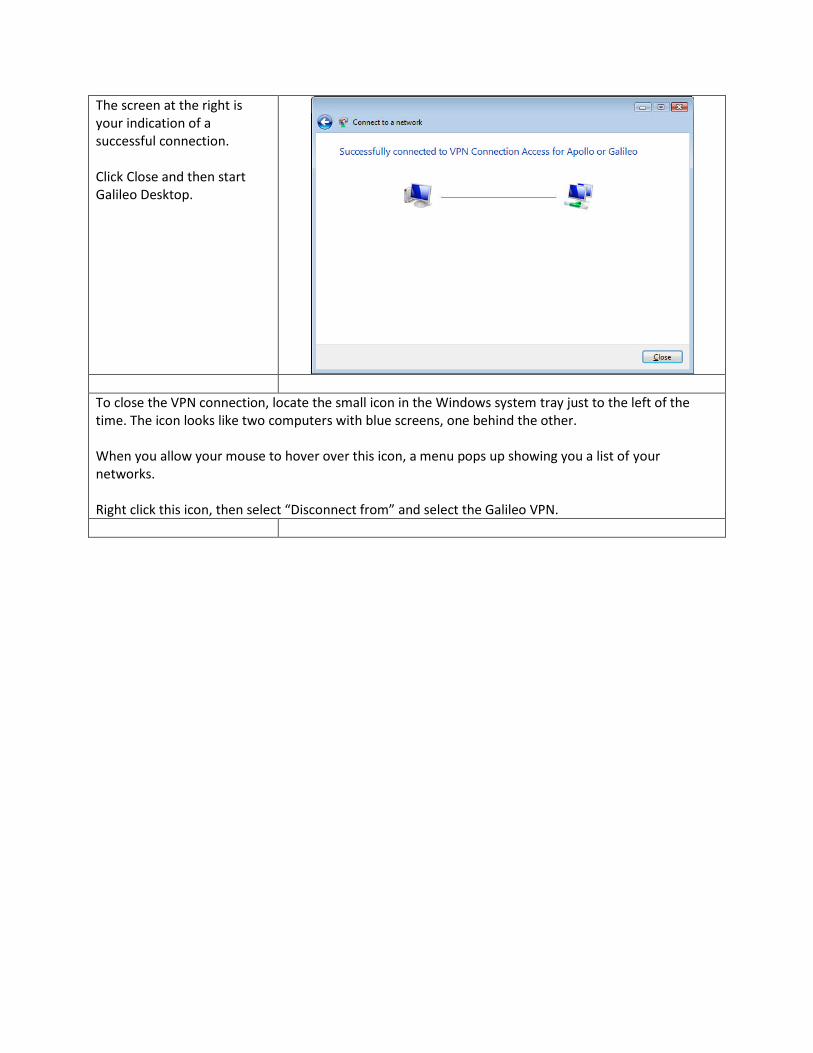
The screen at the right isyour indication of asuccessful connection.
Click Close and then startGalileo Desktop.
To close the VPN connection, locate the small icon in the Windows system tray just to the left of thetime. The icon looks like two computers with blue screens, one behind the other.
When you allow your mouse to hover over this icon, a menu pops up showing you a list of yournetworks.
Right click this icon, then select “Disconnect from” and select the Galileo VPN.