service and maintenance - sew-eurodrive: a world leader in...
TRANSCRIPT

SEW-EURODRIVE – J. Scott
1
02.07.2012
Service and Maintenance – SEW Motor Replacement

SEW-EURODRIVE – J. Scott
2
02.07.2012
Service and Maintenance – SEW Motor Replacement
The following presentation will guide you through the safe and proper steps needed to replace a SEW motor – Safety
Required tooling
Preparing to remove a motor
Removing a motor from a reducer
Preparing to install a new motor
Installing a new motor

SEW-EURODRIVE – J. Scott
3
02.07.2012
Service and Maintenance – SEW Motor Replacement
Safety First 1. Never perform any work that you are either
unqualified for or feel uncomfortable doing
2. Follow all local safety guidelines
3. Never perform work on equipment that is connected to a power source or energized
4. Always use the proper tooling
5. Make use of all required PPE or Personal Protective Equipment

SEW-EURODRIVE – J. Scott
4
02.07.2012
Service and Maintenance – SEW Motor Replacement
Required Tooling
Chisel Dead blow hammer
Aqueous cleaner (Degreasing agent)
File
Metric box wrench Non-shedding rags
Metric allen wrench
Torque wrench
Waste oil container
Loctite 574
Flat hone stone Loctite 5188

SEW-EURODRIVE – J. Scott
5
02.07.2012
Service and Maintenance – SEW Motor Replacement
Motor Removal Preparation 1. Disconnect all power sources

SEW-EURODRIVE – J. Scott
6
02.07.2012
Service and Maintenance – SEW Motor Replacement
Motor Removal Preparation 2. Remove power cables from motor

SEW-EURODRIVE – J. Scott
7
02.07.2012
Service and Maintenance – SEW Motor Replacement
Motor Removal Preparation 3. Using the appropriate allen wrench, remove the oil plugs at the lowest and highest point on the reducer/motor to completely drain the oil from the reducer.
Unit Size Allen Size
07 – 67 5mm
77 - 87 6mm
97 – 107 10mm
127 - 147 17mm
157 - 187 22mm

SEW-EURODRIVE – J. Scott
8
02.07.2012
Service and Maintenance – SEW Motor Replacement
Motor Removal Preparation 4. Secure the motor with proper rigging equipment to remove the motor if its size/position exceeds the local safety regulations for lifting/bending.

SEW-EURODRIVE – J. Scott
9
02.07.2012
Service and Maintenance – SEW Motor Replacement
Motor Removal 5. Loosen (do not remove) all the nuts/bolts that fix the motor to the gear reducer
Unit Size Wrench Size
07 – 37 10mm
47 – 67 13mm
77 – 87 17mm
97 - 107 19mm
127 - 187 24mm
SEW-EURODRIVE – J. Scott
10
02.07.2012
Service and Maintenance – SEW Motor Replacement
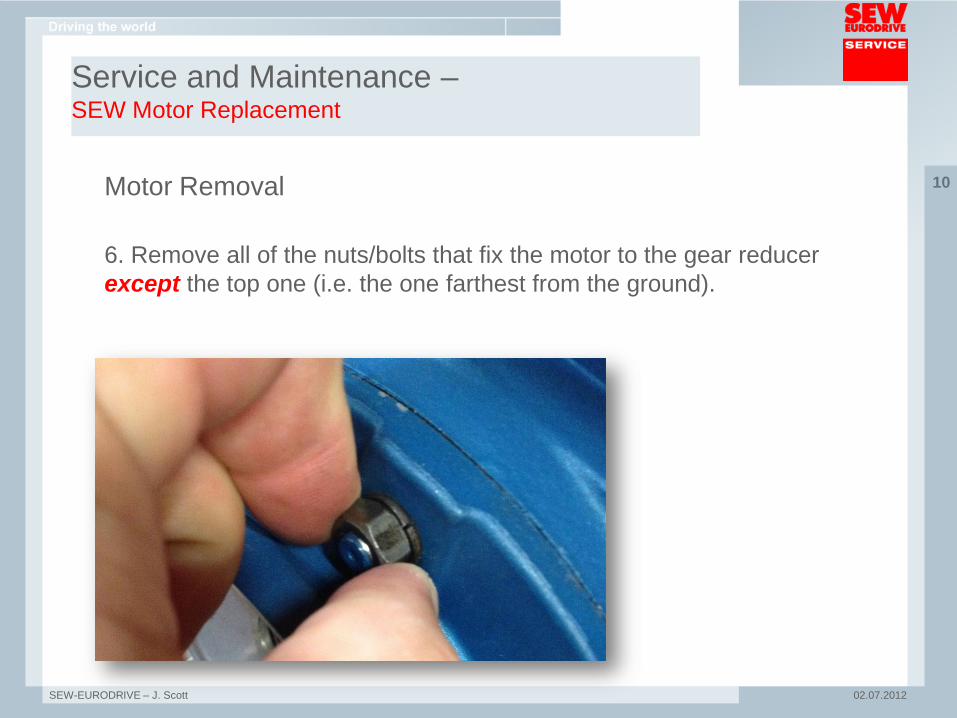
Motor Removal 6. Remove all of the nuts/bolts that fix the motor to the gear reducer except the top one (i.e. the one farthest from the ground).

SEW-EURODRIVE – J. Scott
11
02.07.2012
Service and Maintenance – SEW Motor Replacement
Motor Removal 7. Locate the recessed pry-points on the reducer and place the tip of the chisel into the recess. Tap the chisel to loosen the motor flange from the reducer. Do not hit any part of the motor with the hammer.
Note: The sealant between the motor and the reducer creates a strong bond; therefore, the need to break the seal will require watchful effort.

SEW-EURODRIVE – J. Scott
12
02.07.2012
Service and Maintenance – SEW Motor Replacement
Motor Removal 8. After the motor is broken free from the reducer, remove the top nut/bolt and gently remove the motor from the reducer.

SEW-EURODRIVE – J. Scott
13
02.07.2012
Service and Maintenance – SEW Motor Replacement
Motor Installation Preparation If the replacement motor was ordered without a new pinion, please refer to the Motor pinion removal and installation instructions found at the following link:
http://www.seweurodrive.com/s_service/index.php5

SEW-EURODRIVE – J. Scott
14
02.07.2012
Service and Maintenance – SEW Motor Replacement
Motor Installation Preparation 10. Scrape off any old Loctite from the reducer flange. Take care not to contaminate the reducer with any debris.
SEW-EURODRIVE – J. Scott
15
02.07.2012
Service and Maintenance – SEW Motor Replacement
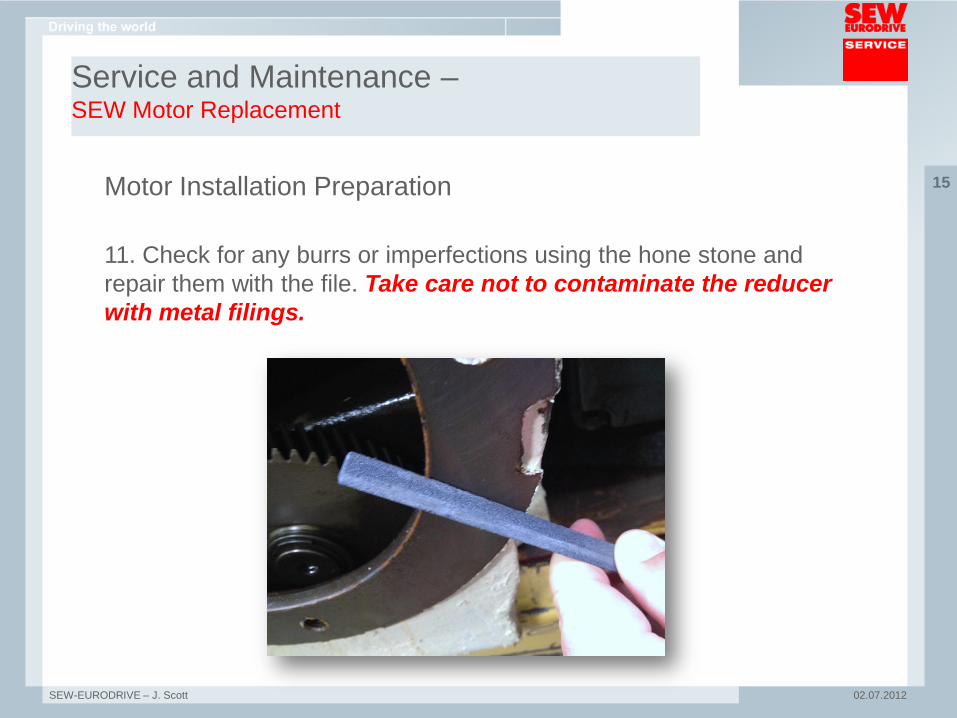
Motor Installation Preparation 11. Check for any burrs or imperfections using the hone stone and repair them with the file. Take care not to contaminate the reducer with metal filings.

SEW-EURODRIVE – J. Scott
16
02.07.2012
Service and Maintenance – SEW Motor Replacement
Motor Installation Preparation 12. Clean the surface of the reducer flange again, using an aqueous degreasing cleaner.

SEW-EURODRIVE – J. Scott
17
02.07.2012
Service and Maintenance – SEW Motor Replacement
Motor Installation Preparation 13. Apply the proper Loctite to the flange of the reducer.
Use Loctite 574 for all applications except F107/R97/R107 reducers
Only use Loctite 5188 for F107/R97/R107 reducers

SEW-EURODRIVE – J. Scott
18
02.07.2012
Service and Maintenance – SEW Motor Replacement
Motor Installation Preparation 14. Always apply the Loctite to the reducer surface and never to the motor surface.

SEW-EURODRIVE – J. Scott
19
02.07.2012
Service and Maintenance – SEW Motor Replacement
Motor Installation Preparation Always apply the Loctite in a 2-3mm bead, looping all bolt holes and cutouts.

SEW-EURODRIVE – J. Scott
20
02.07.2012
Service and Maintenance – SEW Motor Replacement
Motor Installation 15. Place the motor onto the bottom stud at an angle and gently slide it into place.
Never force the motor into the final position before the pinion and front gear wheel have properly engaged. Otherwise damage will occur.

SEW-EURODRIVE – J. Scott
21
02.07.2012
Service and Maintenance – SEW Motor Replacement
Motor Installation Installing the motor at an angle enables the gear teeth to mesh properly.

SEW-EURODRIVE – J. Scott
22
02.07.2012
Service and Maintenance – SEW Motor Replacement
Motor Installation 16. Install the bolts/nuts onto the reducer motor flange assembly.
Lock washers are used only when the motor flange is aluminum.

SEW-EURODRIVE – J. Scott
23
02.07.2012
Service and Maintenance – SEW Motor Replacement
Motor Installation 17. Tighten the nuts/bolts to the proper torque setting in a diametrically opposed pattern, as shown. Always start at the point closest to the mounting feet of the reducer.
Thread Size
Torque [lb-ft]
M6 9
M8 20
M10 40
M12 69
M16 170

SEW-EURODRIVE – J. Scott
24
02.07.2012
Service and Maintenance – SEW Motor Replacement
Motor Installation 18. Wipe away excess Loctite using a rag and aqueous cleaner

SEW-EURODRIVE – J. Scott
25
02.07.2012
Service and Maintenance – SEW Motor Replacement
Motor Installation 19. Reinstall bottom plug and fill with oil to the proper level. Then, install the top plug.

SEW-EURODRIVE – J. Scott
26
02.07.2012
Service and Maintenance – SEW Motor Replacement
Motor Installation 20. Reconnect the power to the new motor.

SEW-EURODRIVE – J. Scott
27
02.07.2012
Service and Maintenance – SEW Motor Replacement
For more information on this and other service and maintenance topics, please visit our website below:
www.seweurodrive.com/s_service/index.php5