serious interactivityscript functions that are on the same page that contains the flash movie....
TRANSCRIPT
121
4
Serious Interactivity
I
N
T
HIS
C
HAPTER
• Linking to the Outside World• Receiving Data• Sending Variables with
loadVariables
• FSCommand• Smart Clips
sing ActionScript to affect what’s going on inside theFlash player gives you an impressive number of ways
your movies can respond to user interaction. However,almost every Web site these days of any size or usefulness hasa database backend, and the site’s Web pages are generateddynamically.
U
04_121_166.fm Page 121 Tuesday, May 29, 2001 8:47 AM
122
Chapter 4 • Serious Interactivity
If Flash is to have any future as a Web interface, it has to beable to send and receive data from such backend systems. For-tunately, the folks at Macromedia realized this and built thatfunctionality into Flash. In this chapter, we’ll cover this func-tionality, which allows Flash to act as middleware in someways, like PHP and Cold Fusion, but it still can’t connectdirectly to a database. We’ll cover Flash’s use of XML in thenext chapter.
Linking to the Outside World
In your career as a Flash wizard, you’ll probably want to link toother Web pages at some point. This is pretty easy to do.
1.
Open
chapter4/linking1.fla
.
2.
Click on the arrow-in-a-circle button, shown in Figure4-1, and open its Object Actions panel.
3.
Enter this code:
on(release){
getURL("linking_page1.html")}
4.
File
�
Publish.
5.
Copy
chapter4/linking_page1.html
from the CD to whereveryour exported Flash file is.
6.
Open the resulting HTML file,
linking1.html,
in yourbrowser of choice and click on the button.
ABOUT THE CODE
As you may have guessed, the
getURL
action acts like theHREF of an anchor tag. Pressing the button will take thebrowser to whatever URL you specify.
You can also open a new browser window using
getURL
.You can add a target to the
getURL
action.
F
IGURE
4–1
The arrow button
04_121_166.fm Page 122 Tuesday, May 29, 2001 8:47 AM

Linking to the Outside World 123
1.
Change the code to:
on(release){
getURL("linking_page1.html", "_blank");}
2.
Save the file, publish it, and test the page in a browser.When you click on the button, a new browser windowappears, and the page loads in that window.
ABOUT THE CODE
If you add a second attribute to the
getURL
action, Flash seesthat as the same as the
target
attribute of an anchor tag. Thatis,
getURL("linking_page1.html", "_blank")
is the same as
<a href="linking_page1.html" target="_blank">
The
target
can be the name of a window, or one of sev-eral reserved words:
•
_blank
opens a new window.
•
_self
opens the new page in the current window.
•
_top
opens the page in the top-level frame in the currentwindow. In other words, it removes all the frames andfills the browser with the new page.
•
_parent
opens the page in next higher-level frame in thecurrent window.
You can also use
getURL
to send variables that exist inyour Flash file. This can be useful if you’re trying to update adatabase with data that the user just entered, or with whatthey’re doing (like adding items to their shopping cart). Youcan send them via
post
or
get
methods. Let’s try it.
1.
Open
chapter4/linking1.fla
, if it isn’t already open.
2.
Click on the frame in the actions layer, and open theFrame Actions panel.
3.
Enter the following code:
shirt = "red";
04_121_166.fm Page 123 Tuesday, May 29, 2001 8:47 AM
124
Chapter 4 • Serious Interactivity
4.
Click on the button and open its Object Actions panel.
5.
Change the code to:
on(release){
pants = "blue";getURL("linking_page1.html", "_blank",
"get");}
6.
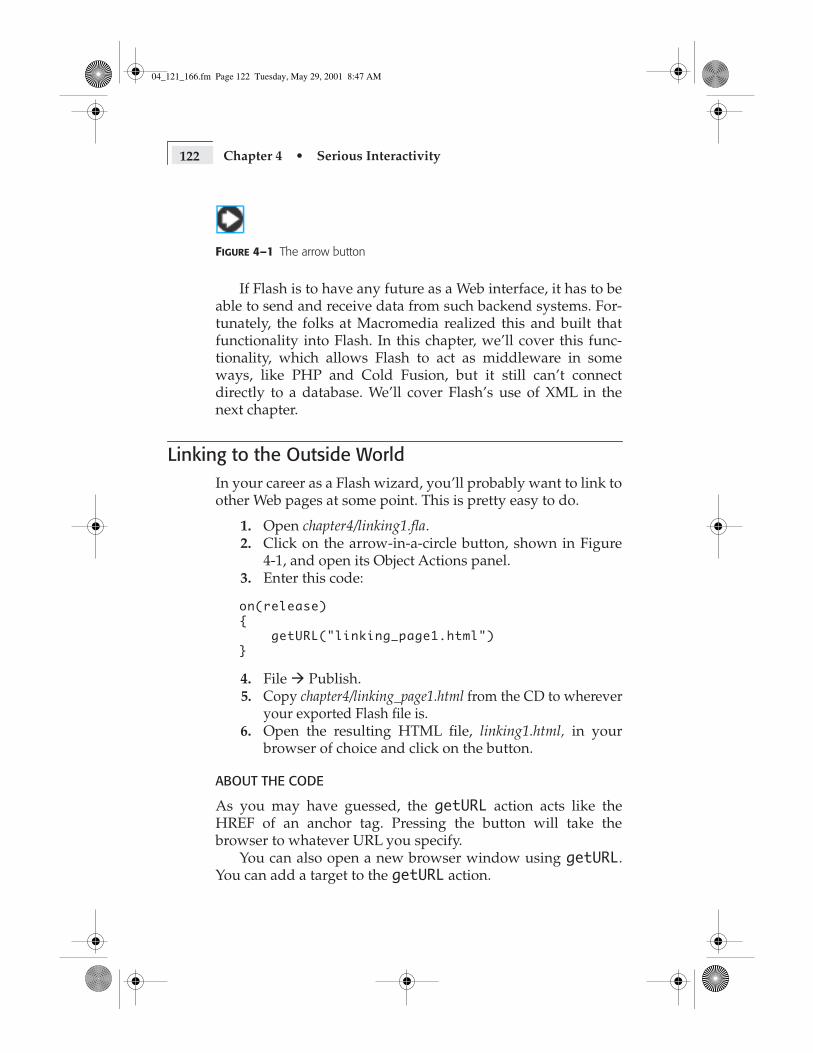
Save and publish the file. Open the page in a browser,click on the button, and notice the URL. As shown inFigure 4-2, the URL should end with:
linking_page1.html?shirt=red&pants=blue
ABOUT THE CODE
The third attribute in the
getURL
action determines whetherany existing variables are sent via the
get
method (in the URL)or the
post
method (in a separate HTTP header). Notice thatthe variables are those attached to the object (the button) andglobal variables. Variables attached to other movie clips are notsent. For example, if we had another movie clip in the moviethat contained a variable called
"shoes"
, that variable wouldnot be sent by the button’s
getURL
action.Flash will always view the second attribute as a target
assignment. That is, if your code is
getURL("linking_page1.html", "get")
Flash will look for a browser window called
"get"
. If Flashdoesn’t find one, it will open a new browser window. Andsince Flash thought
"get"
was the name of a browser window,it won’t try to send any variables.
If you want to send variables and stay in the same browserwindow, use this code:
getURL("linking_page1.html", "_self", "get")
F
IGURE
4–2
Screenshot of browser location bar
04_121_166.fm Page 124 Tuesday, May 29, 2001 8:47 AM
Linking to the Outside World 125
As an alternative, you can also replace
_self
with just twoquotation marks:
getURL("linking_page1.html", "", "get")
I recommend using
_self
, because when you read thecode later, it’s easier to tell what what’s going on. Doing whatyou can to use the code itself to indicate what it’s doing isknown as
self-documenting code.
It’s a good thing. Not a replace-ment for real documentation, but it’s still a good thing.
Instead of linking to an HMTL page, you can send vari-ables to a PHP or Cold Fusion page:
getURL("validate_form.php", "_self", "post")
or
getURL("update_resume.cfm", "_self", "post")
Transparent Buttons
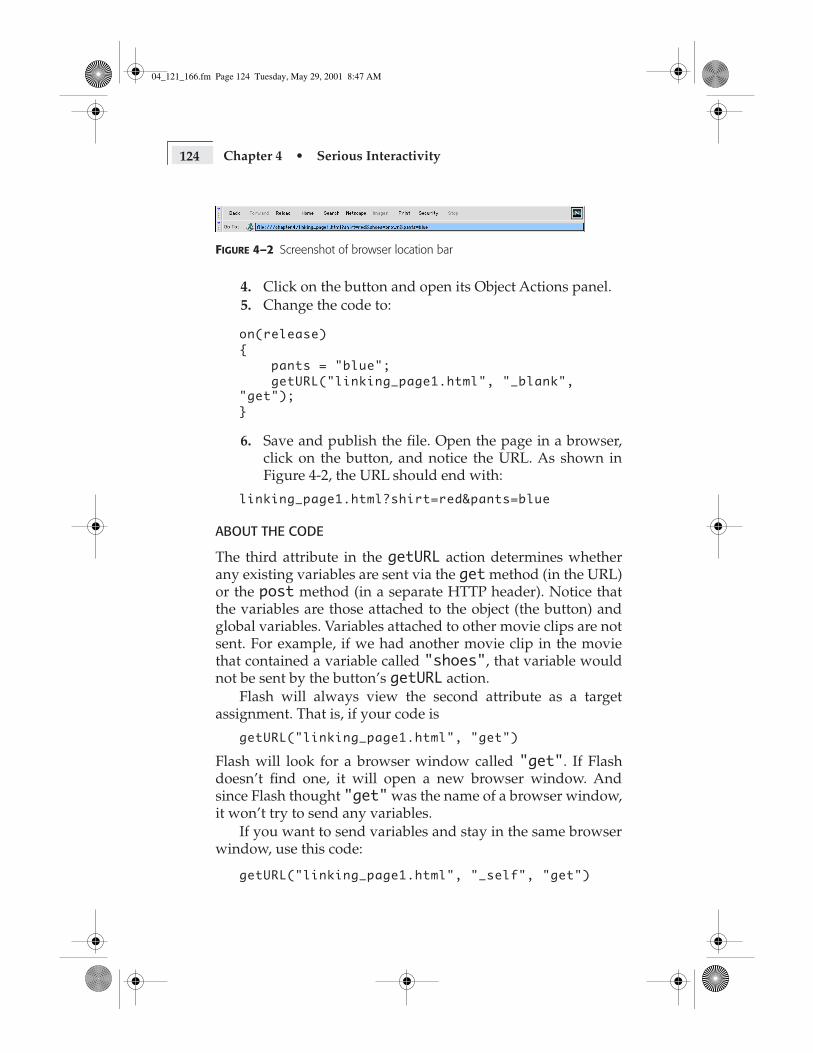
In the Flash file linking1.fla, did you notice the text with thegrey box over it? It’s shown in Figure 4-3 (if you open theactual file on your computer, the box is turquoise).
The text is plain ol’ text—nothing new there. The turquoisebox may be new to you, though. It’s a transparent button, andit can be a handy tool. Let’s look more closely at this button.
1. Open the file linking1.fla, if it isn’t open.2. Open the Library and double-click the transparent
symbol.3. Notice there’s nothing there. There are no keyframes
anywhere except in the hit frame, as you can see inFigure 4-4.
This button is invisible in the movie the user sees, but itworks exactly like its more visible brethren. Fortunately, Flashcolors these buttons turquoise automatically. Otherwise, they’dbe a mite hard to find once you’ve placed them on your stage.
FIGURE 4–3 Box with button
04_121_166.fm Page 125 Tuesday, May 29, 2001 8:47 AM

126 Chapter 4 • Serious Interactivity
But make sure you don’t have simple buttons enabled in thecontrol menu, or you won’t be able to see the button at all!
WHY A TRANSPARENT BUTTON?
A transparent button can be placed over anything: text, parts ofa movie clip, and so on. It can make some functionality mucheasier to implement. An example would be to place a few but-tons over selected words in a paragraph of text. Those buttonscould then act as links. That way, you can change the text asmuch as you want and not have to create separate text buttonsfor the words that are links. You can also have a single, invisi-ble button symbol that can be used over and over simply bychanging the scale and size once it’s on the stage.
We’ll be seeing some more examples in Chapter 7,“Complex Scripting.”
FIGURE 4–4 The frames and symbol of a transparent button
04_121_166.fm Page 126 Tuesday, May 29, 2001 8:47 AM

Linking to the Outside World 127
Calling JavaScript Using getURL
One of the fortunate uses of getURL is that it can call Java-Script functions that are on the same page that contains theFlash movie. Again, the syntax is similar to HTML’s HREFattribute in the anchor tag.
1. Open the file chapter4/javascript1.fla (see Figure 4-5).2. Note the name of the input text is "userMessage".
Remember that text can be static text, dynamic text, orinput text.
3. Click on the arrow button and open its Object Actionspanel.
4. Enter the following code:
on(release){
url = "javascript:showAlert('" + _root.userMessage + "')";
getURL(url);}
5. Export the movie to create an SWF file.6. Open a text editor, and load chapter4/javascript1.html.
FIGURE 4–5 javascript1.fla
04_121_166.fm Page 127 Tuesday, May 29, 2001 8:47 AM
128 Chapter 4 • Serious Interactivity
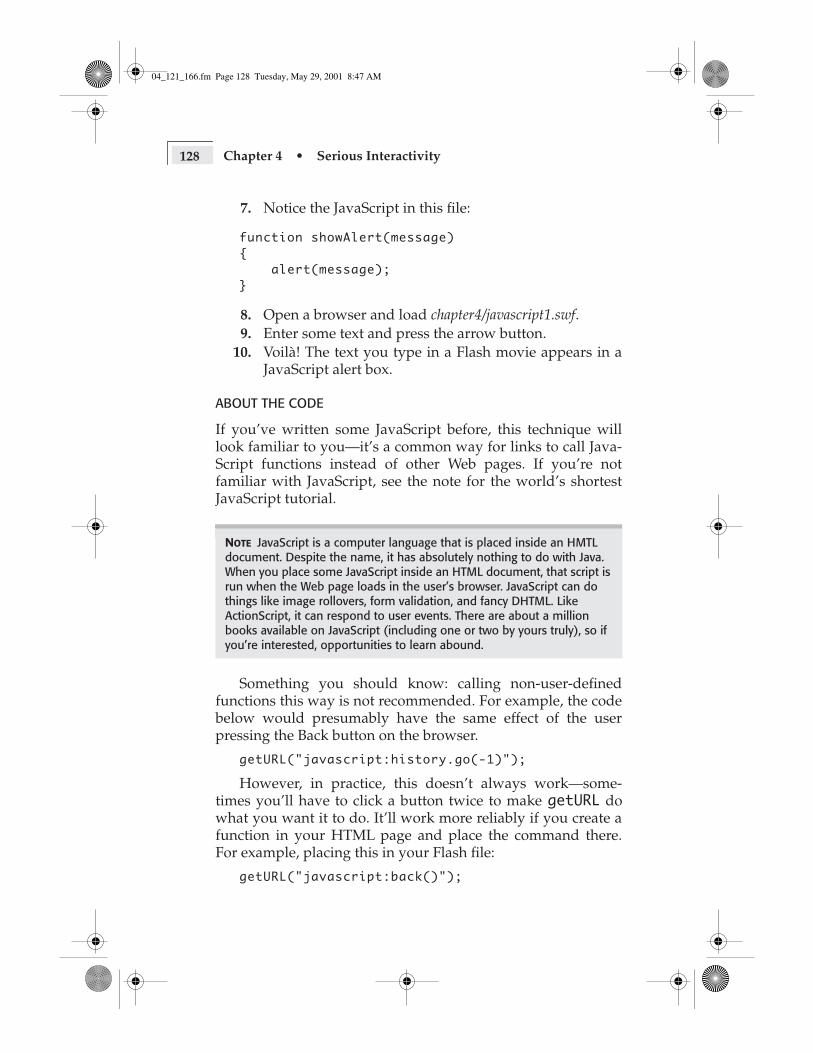
7. Notice the JavaScript in this file:
function showAlert(message){
alert(message);}
8. Open a browser and load chapter4/javascript1.swf.9. Enter some text and press the arrow button.
10. Voilà! The text you type in a Flash movie appears in aJavaScript alert box.
ABOUT THE CODE
If you’ve written some JavaScript before, this technique willlook familiar to you—it’s a common way for links to call Java-Script functions instead of other Web pages. If you’re notfamiliar with JavaScript, see the note for the world’s shortestJavaScript tutorial.
Something you should know: calling non-user-definedfunctions this way is not recommended. For example, the codebelow would presumably have the same effect of the userpressing the Back button on the browser.
getURL("javascript:history.go(-1)");
However, in practice, this doesn’t always work—some-times you’ll have to click a button twice to make getURL dowhat you want it to do. It’ll work more reliably if you create afunction in your HTML page and place the command there.For example, placing this in your Flash file:
getURL("javascript:back()");
NOTE JavaScript is a computer language that is placed inside an HMTL document. Despite the name, it has absolutely nothing to do with Java. When you place some JavaScript inside an HTML document, that script is run when the Web page loads in the user’s browser. JavaScript can do things like image rollovers, form validation, and fancy DHTML. Like ActionScript, it can respond to user events. There are about a million books available on JavaScript (including one or two by yours truly), so if you’re interested, opportunities to learn abound.
04_121_166.fm Page 128 Tuesday, May 29, 2001 8:47 AM
Receiving Data 129
and this in your HTML page:
function back(){
history.go(-1);}
will give you the result you want every time. Hint: sometimes,try setting the load order to “top down” in File � Publish Set-tings. It’s a solution that shouldn’t make a difference, butsometimes it does.
Receiving DataFlash 5 also has the ability to pull data from other pages. Thisdata can be dynamic or static. Your Flash movie can pull datafrom these pages at any point in your movie, and any object inthe movie can pull the data. You can access data using theloadVariables function.
The good news (great news, if you’re a backend program-mer) is that the loadVariables function can also sendvariables to a page. That is, the Flash movie can send data to ascript, which can access a database, interact with a Java servlet(or anything), and then send back any relevant data to theFlash movie, which can then update its display to show theuser the new, updated information. This is absolutely huge inimportance, and we’ll go over the details of how it works inthis section.
First, let’s start off with a simple example of pulling datafrom a text file. Say we have a Web site whose home page con-tains a new quote every day. The quote lives on a separate textfile, and it’s up to us to get it.
1. Open the text file chapter4/quotes.txt. Note that it hasonly one line:
quote=hi+there!
2. Open the file chapter4/quotes1.fla. 3. Note that there are two elements in this movie: some
static text and some dynamic text. The static text is theblue Quote of the Day, shown in Figure 4-6.
04_121_166.fm Page 129 Tuesday, May 29, 2001 8:47 AM
130 Chapter 4 • Serious Interactivity
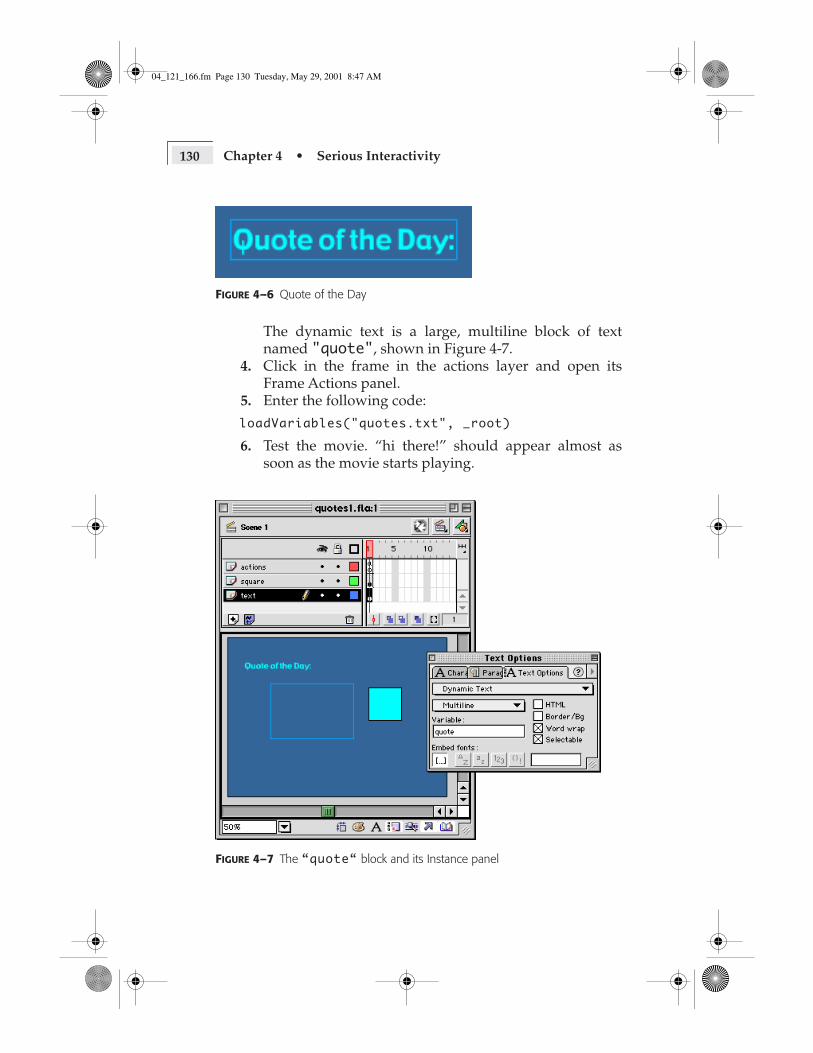
The dynamic text is a large, multiline block of textnamed "quote", shown in Figure 4-7.
4. Click in the frame in the actions layer and open itsFrame Actions panel.
5. Enter the following code:
loadVariables("quotes.txt", _root)
6. Test the movie. “hi there!” should appear almost assoon as the movie starts playing.
FIGURE 4–6 Quote of the Day
FIGURE 4–7 The “quote“ block and its Instance panel
04_121_166.fm Page 130 Tuesday, May 29, 2001 8:47 AM

Receiving Data 131
ABOUT THE CODE
The frame action looks for the file called quotes.txt and placesits URL-encoded variables at the movie’s root level. Sincethere’s only one variable, "quote", this action creates a singleglobal variable. And since that variable shares a name with thetext field, the text fields displays the variable’s value.
The first attribute of loadVariables determines whichfile Flash should load the variables from. This file can live any-where in the same subdomain as the Flash movie. For example,
Here’s the rule: if the domain has only two components,the subdomain is the same as the domain. If the domain hasmore than two components, then remove the last level to findthe subdomain.
The second attribute of loadVariables tells Flash whereto place the variable(s) that are in the file. You can place vari-ables in the root level, in a specific movie clip, or on a level.Let’s try placing the variable in some different places and seewhat happens.
1. Open the file chapter4/quotes1.fla if it isn’t already open.2. Open the Library.3. Drag the square symbol to the square layer (see Figure
4-8).
NOTE It’s important that you name all of your variables, objects, and text fields and that they have different names, no matter where they are in the movie or what level they’re on. Besides being good programming practice, Macromedia has noticed some irregularities when some items have the same name. So keep ’em all different. The two quotes vari-ables above are the same here because we want them to be the same thing—the value of the big quote box.
DOMAIN SUBDOMAIN
www.wire-man.com wire-man.com
camel.llama.wire-man.com llama.wire-man.com
wire-man.com wire-man.com
04_121_166.fm Page 131 Tuesday, May 29, 2001 8:47 AM

132 Chapter 4 • Serious Interactivity
4. Click on the frame in the actions layer and open itsFrame Actions panel.
5. Change the code to:
loadVariables("quotes.txt", square)
6. Test the movie. No dynamic text should appear.
ABOUT THE CODE
Since we’re placing the "quote" variable into the squareobject, it’s a different variable from the text field’s "quote"variable. Instead of _root.quote, the loaded variable is now_root.square.quote.
Now let’s place that variable into a level.
1. Change the code to:
loadVariables("quotes.txt", _level0);
2. Test the movie. It works!3. Now, change the code to:
loadVariables("quotes.txt", _level1);
4. Test the movie. No good! Placing the variable into level1 removes it from the root level’s view. To access thevariable now, we’d have to use _level1.quote.
5. Code-tweaking time again! Let’s call the level just byusing the level number:
loadVariables("quotes.txt", 0);
6. Test the movie. Nothing happens.7. Okay, let’s change the code one more time:
loadVariablesNum("quotes.txt", 0);
FIGURE 4–8 The square
04_121_166.fm Page 132 Tuesday, May 29, 2001 8:47 AM

Sending Variables with loadVariables 133
8. Test the movie. It works!
ABOUT THE CODE
We introduced a semi-new function called loadVariables-Num. If you’re going to place variables in a level and call thatlevel by its number only, you have to use loadVariables-Num. You won’t find much documentation about it, but ifyou’re working in Normal Mode, Flash will insert it for you.
Sending Variables with loadVariables
Sending variables and receiving variables as separate steps isuseful, but to build seriously useful applications, you have tobe able to send data to a script or database and receive infor-mation based on what you originally sent. We haven’t seen away to do that yet, but here it comes, and it’s pretty simple.
loadVariables(filename, target, "get"/"post")
That’s it—just the "get"/"post" part. That’ll send all avail-able variables to the indicated file. If that file has some script-ing in it, it can accept the variables Flash sends to it, dowhatever it needs to do, and then output its own variables,which Flash will then read and place in the target. As withgetURL, not all variables in the Flash movie are sent. Only glo-bal variables and those within the object that contains theloadVariables function are sent (like the getURL examplein the section “Linking to the Outside World”).
Formatting the Variables so Flash Can Read Them
When Flash looks at a file with the intent of reading some vari-ables, those variables need to be in a specific format. They needto be in URL-encoded format, like this:
variable1=value1&variable2=value2&variable3=value3
If there are spaces in one of the values, replace the spacewith a plus sign, like this:
quote1=Whever+you+go,+there+you+are.&addressNum=180&suite=2
04_121_166.fm Page 133 Tuesday, May 29, 2001 8:47 AM

134 Chapter 4 • Serious Interactivity
Also, there can’t be any carriage returns in the file beforethe list of variables. The variables have to be on the first line ofthe file, or Flash won’t recognize the list.
The other way to both send and receive variables in oneshot is to use XML.sendAndLoad, which we’ll cover in detailin the next chapter.
FSCommand
The fscommand in Flash 5 is an interesting thing. It can beused to access a specific JavaScript function, or it can be used tocontrol the standalone Flash Player. Note that fscommanddoesn’t work in Netscape 6.
Let’s look at the way to access JavaScript via fscommand.It’s not the way I recommend accessing JavaScript fromFlash—getURL is easier. We’ll go over it just so you know.
Let’s say you wanted to mimic the JavaScript functionshowAlert.
1. Open chapter4/javascrip1.fla, if it isn’t still open.2. Click on the arrow button and open its Object Actions
panel.3. Enter this code:
on(release){
fscommand("alert",_root.userMessage);}
4. Save the file. Don’t test it yet.5. Open your Publication Settings by going to File �
Publish Settings.6. Click the HTML tab, shown in Figure 4-9.
NOTE If you're using Cold Fusion as your middleware, be sure to use <CFSETTING ENABLECFOUTPUTONLY="yes"> in order to elimi-nate the white space that Cold Fusion automatically inserts into the resulting code.
04_121_166.fm Page 134 Tuesday, May 29, 2001 8:47 AM
FSCommand 135
7. From the Template pull-down menu, choose Flash withFSCommand.
8. Click the Publish button.9. Fire up your text editor of choice.
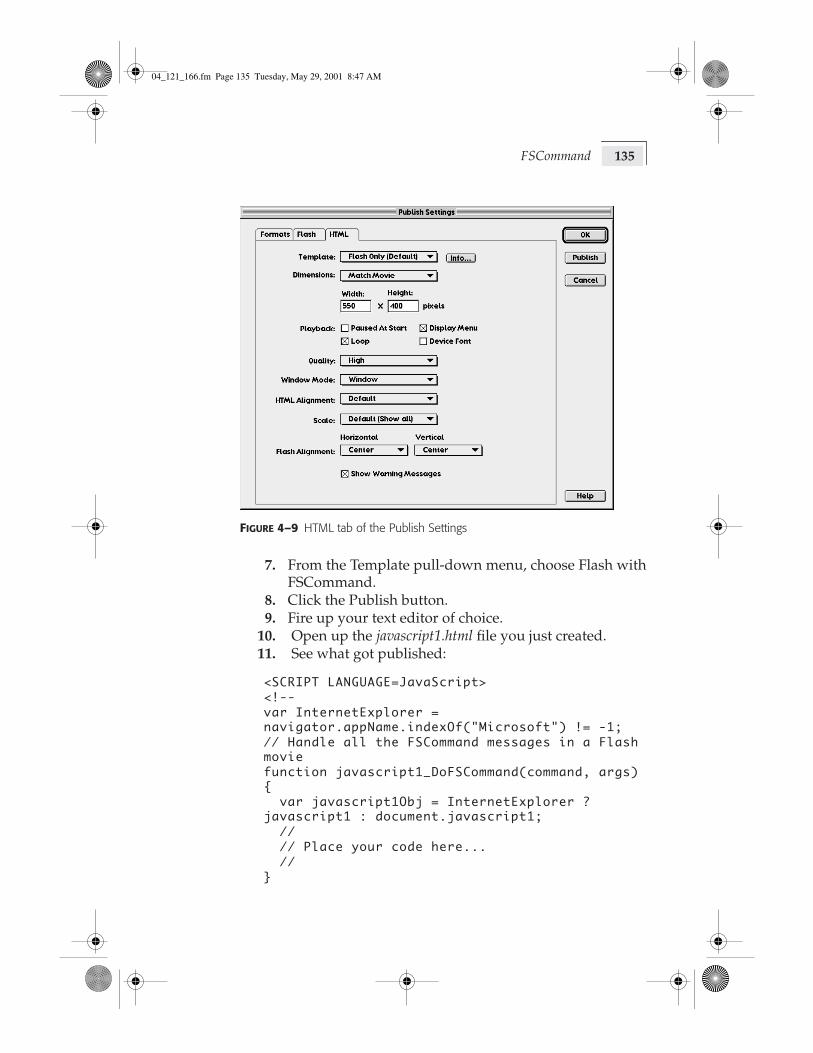
10. Open up the javascript1.html file you just created.11. See what got published:
<SCRIPT LANGUAGE=JavaScript><!--var InternetExplorer = navigator.appName.indexOf("Microsoft") != -1;// Handle all the FSCommand messages in a Flash moviefunction javascript1_DoFSCommand(command, args) { var javascript1Obj = InternetExplorer ? javascript1 : document.javascript1; // // Place your code here... //}
FIGURE 4–9 HTML tab of the Publish Settings
04_121_166.fm Page 135 Tuesday, May 29, 2001 8:47 AM
136 Chapter 4 • Serious Interactivity
// Hook for Internet Explorer if(navigator.appName && navigator.appName.indexOf("Microsoft") != -1 &&
navigator.userAgent.indexOf("Windows") != -1 && navigator.userAgent.indexOf("Windows 3.1") == -1) {
document.write('<SCRIPT LANGUAGE=VBScript\> \n');
document.write('on error resume next \n');document.write('Sub
javascript1_FSCommand(ByVal command, ByVal args)\n');
document.write(' call javascript1_DoFSCommand(command, args)\n');
document.write('end sub\n');document.write('</SCRIPT\> \n');
}//--></SCRIPT>
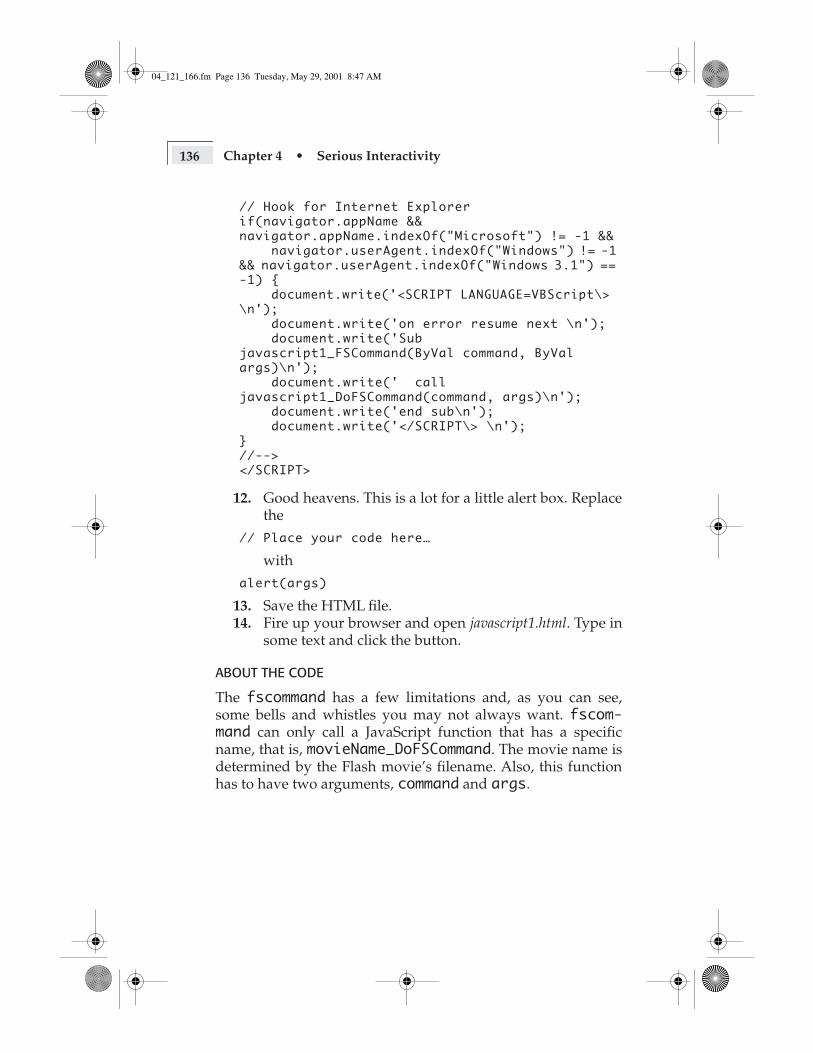
12. Good heavens. This is a lot for a little alert box. Replacethe
// Place your code here…
with
alert(args)
13. Save the HTML file.14. Fire up your browser and open javascript1.html. Type in
some text and click the button.
ABOUT THE CODE
The fscommand has a few limitations and, as you can see,some bells and whistles you may not always want. fscom-mand can only call a JavaScript function that has a specificname, that is, movieName_DoFSCommand. The movie name isdetermined by the Flash movie’s filename. Also, this functionhas to have two arguments, command and args.
04_121_166.fm Page 136 Tuesday, May 29, 2001 8:47 AM
FSCommand 137
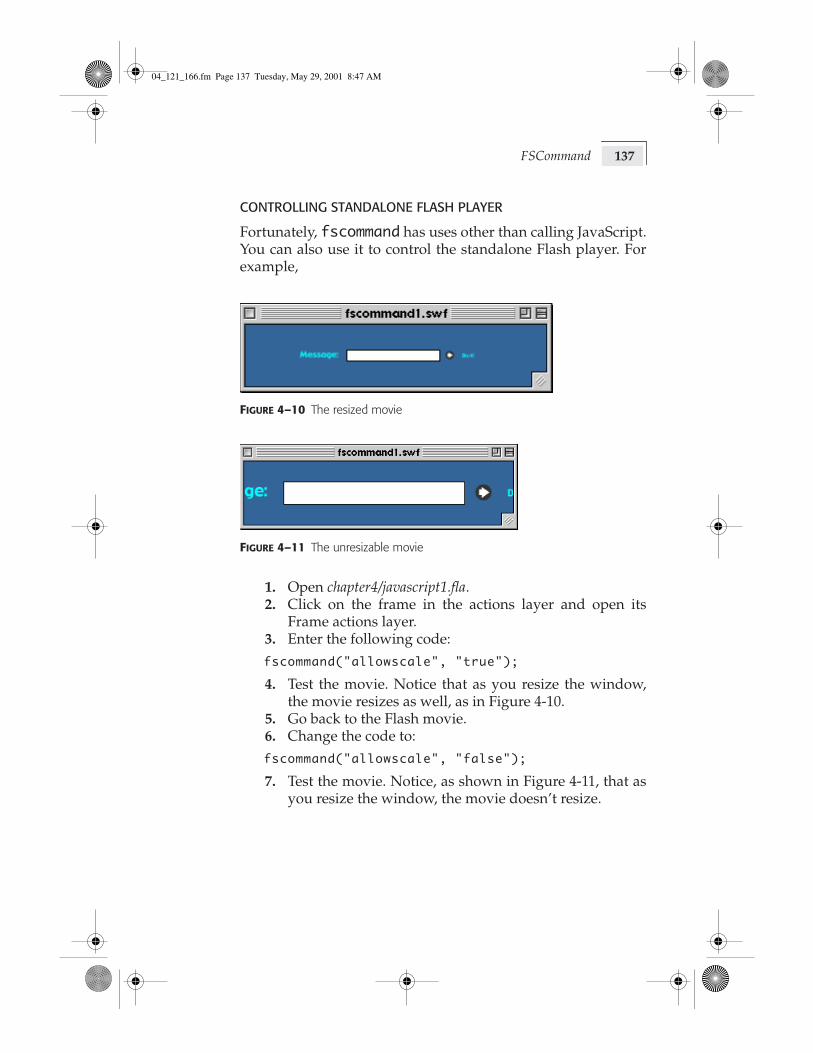
CONTROLLING STANDALONE FLASH PLAYER
Fortunately, fscommand has uses other than calling JavaScript.You can also use it to control the standalone Flash player. Forexample,
1. Open chapter4/javascript1.fla.2. Click on the frame in the actions layer and open its
Frame actions layer.3. Enter the following code:
fscommand("allowscale", "true");
4. Test the movie. Notice that as you resize the window,the movie resizes as well, as in Figure 4-10.
5. Go back to the Flash movie.6. Change the code to:
fscommand("allowscale", "false");
7. Test the movie. Notice, as shown in Figure 4-11, that asyou resize the window, the movie doesn’t resize.
FIGURE 4–10 The resized movie
FIGURE 4–11 The unresizable movie
04_121_166.fm Page 137 Tuesday, May 29, 2001 8:47 AM

138 Chapter 4 • Serious Interactivity
ABOUT THE CODE
This is a simple example of fscommand working with theFlash Player. We’re simply setting whether the user’s alteringof the window size affects the proportions of our movie.
fscommand can work with other aspects of the Flashplayer (with varying degrees of success, in my experience); forexample, you can use it to quit the player or to dim some of thecontextual menu items. You can also use fscommand to callother applications, but we won’t go into that functionality inthis book.
We’ll, we’ve covered some of the most useful aspects ofFlash in a few pages. To fully work with these functions, Istrongly recommend that you connect with someone whoknows a middleware language and can give you a way to cre-ate dynamic Web pages. Unfortunately, there’s only so muchwe can put on the CD.
Now we’ll look at a different aspect of Flash—Smart Clips.
Smart Clips
Smart Clips are just plain ol’ movie clips, like all the otherswe’ve seen in this book. Any movie clip we’ve made so farcould be a Smart Clip.
The only difference between a Smart Clip and a regularmovie clip is that Smart Clips allow certain variables withinthe movie clip to be changed via a new panel called ClipParameters. That’s it. You could change those variables by edit-ing the ActionScript yourself, but if the movie clip is a SmartClip, you can change the values of some of those variablesthrough the Clip Parameters panel.
What Good Are Smart Clips?
The whole idea behind Smart Clips is to allow a programmerto create a movie clip and all its actions, and then provide a lit-tle window for nonprogrammers to change certain aspects ofthe movie clip, without changing or breaking the program-mer’s code. It’s a great idea, and very useful for larger Web
04_121_166.fm Page 138 Tuesday, May 29, 2001 8:47 AM

Smart Clips 139
sites that have tons of people (or even just several) working onthem.
An Example: Dexter Dean Clothes
The example we’ll use to illustrate Smart Clips is the sales pageof Dexter Dean’s Web site. Dexter Dean is a fictional clothingstore catering to semi-hip Internet-type people. They have asales page that
1. Highlights a certain sales item2. Has a place for the price3. Says which colors the item is available in4. Shows four related items to further entice the user
Figure 4-12 shows what the finished page could look like.Now, say the marketing folk at Dexter Dean want to be able
to change sales items all the time—they want to be able tochange the items that are on sale, the sale prices, the availablecolors, and the related items. Smart Clips give us a way tocreate the Flash file and hand it over to the marketing folk, who
FIGURE 4–12 Dexter Dean’s sales page
04_121_166.fm Page 139 Tuesday, May 29, 2001 8:47 AM

140 Chapter 4 • Serious Interactivity
can then change certain aspects of the file to their heart’s con-tent, as long as they only change the Smart Clip.
To make the Smart Clip useful, we have to create somevariables that the movie clip takes into account and reacts to.Based on what the marketing folk want, this leaves us with:
• which item is on sale• the item’s price• the colors the item comes in (up to five)• the four related items
Let’s start!
1. Open chapter4/dexter-dean1.fla, shown in Figure 4-13.
FIGURE 4–13 The Dexter Dean movie—Scene 1
04_121_166.fm Page 140 Tuesday, May 29, 2001 8:47 AM

Smart Clips 141
2. Note that the page is divided into two basic sections:the header and the sales section. The whole sales sec-tion is a movie clip called all clothes.
3. Open the Library.4. Double-click the all clothes symbol to modify that
symbol.5. Click the top text box—the empty one.6. Open the Text Options panel. Note that this text field’s
variable is price.7. Go back to Scene 1.8. Click on the all clothes symbol in the Library.
9. Go to the Options menu in the Library and chooseDefine Clip Parameters…. You’ll see a dialog box thatlooks like Figure 4-14.
FIGURE 4–14 Define Clip Parameters dialog box
04_121_166.fm Page 141 Tuesday, May 29, 2001 8:47 AM
142 Chapter 4 • Serious Interactivity
A clip parameter is a variable that the Smart Clip uses and thatappears in the Clip Parameters panel. Thus, a clip parameter isa variable that someone can change without touching anyActionScript in your movie.
We’re going to make the value of the price box a clipparameter.
1. Click on the plus sign at the top of the dialog box.2. Double-click varName under the Name column.3. Replace varName with price.4. Double-click defaultValue in the Value column.5. Replace defaultValue with an empty string.
6. Ignore Type for now. We’ll get to it soon.7. Click OK.8. Look at the Library. The icon for all clothes has
changed, as shown in Figure 4-15. You just created aSmart Clip!
Now, let’s make that Smart Clip do something. Since we justadded a clip parameter, we have to delete the current instanceof mc_clothes_all on the Stage and drag in a newmc_clothes_all symbol. Unfortunately, changing a symbol’sclip parameters doesn’t carry over to any instances of the sym-bol on the stage before the parameters were applied.
1. Delete the instance of all clothes on the Stage.2. Drag a new instance of mc_clothes_all to the Stage from
the Library.3. Click on the new instance.4. Open the Clip Parameters panel by going to Window �
Panels � Clip Parameters, shown in Figure 4-16.5. Double-click the blank space under Value.6. Enter in some text. Any text will do.7. Test the movie. Your new text should appear in red next
to the large orange sweatshirt.
FIGURE 4–15 The Smart Clip icon
04_121_166.fm Page 142 Tuesday, May 29, 2001 8:47 AM

Smart Clips 143
ABOUT OUR ACTIONS
We started with an ordinary, everyday movie clip with a textfield called price. We then created a clip parameter for thatmovie clip, and we called it price as well. At the point that wecreated a clip parameter, our movie clip became a Smart Clip.We then updated our movie clip on the stage with the SmartClip from the Library. We then highlighted the instance andopened up that instance’s Clip Parameters. We said that thevalue of price should be whatever you typed in. Then, oncethe movie started playing, Flash saw that the value of priceshould be your text, and caused the variable price in the clipto have the value of what you typed. All clip parameters areplaced inside the clip object.
For example, if we called our Smart Clip instance sale,you would access the price variable from anywhere by calling_root.sale.price.
Now, let’s create a clip parameter to allow someone tochoose the item that’ll be on sale. First, let’s look at the movieclip that holds all of the clothes.
1. Open the Library, if it isn’t already open.2. Double-click on the clothes symbol. It should look like
Figure 4-17.
FIGURE 4–16 The Clip Parameters panel
04_121_166.fm Page 143 Tuesday, May 29, 2001 8:47 AM
144 Chapter 4 • Serious Interactivity
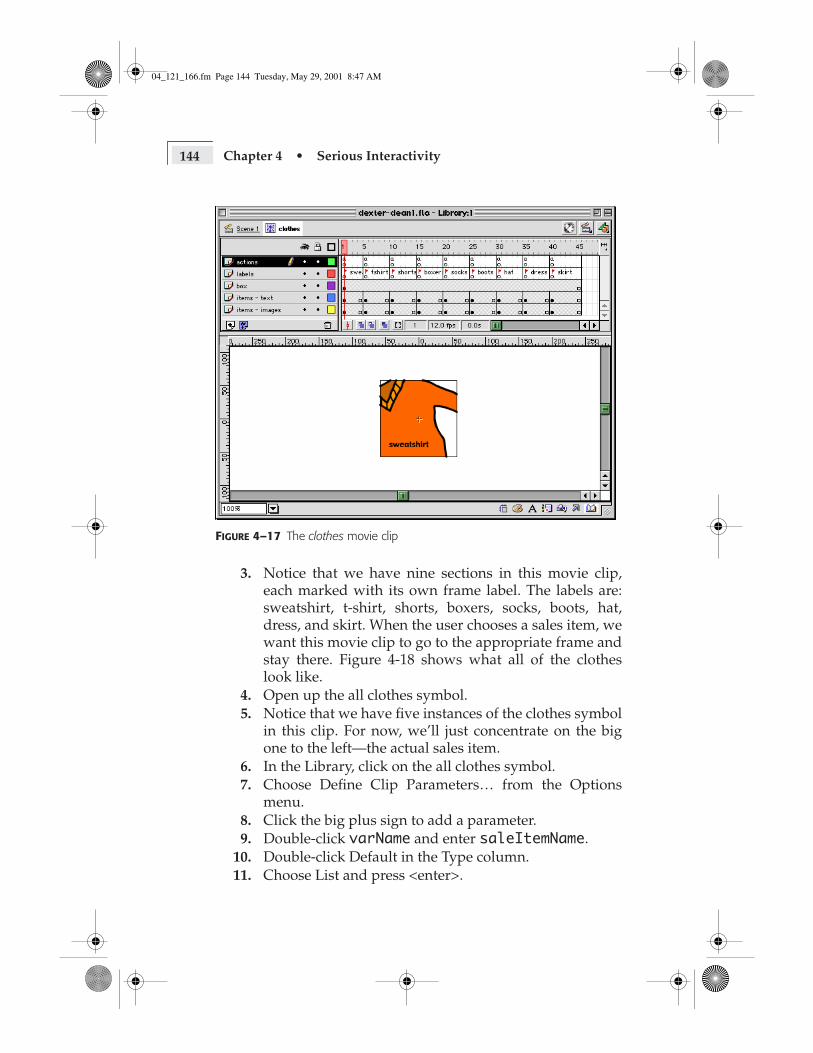
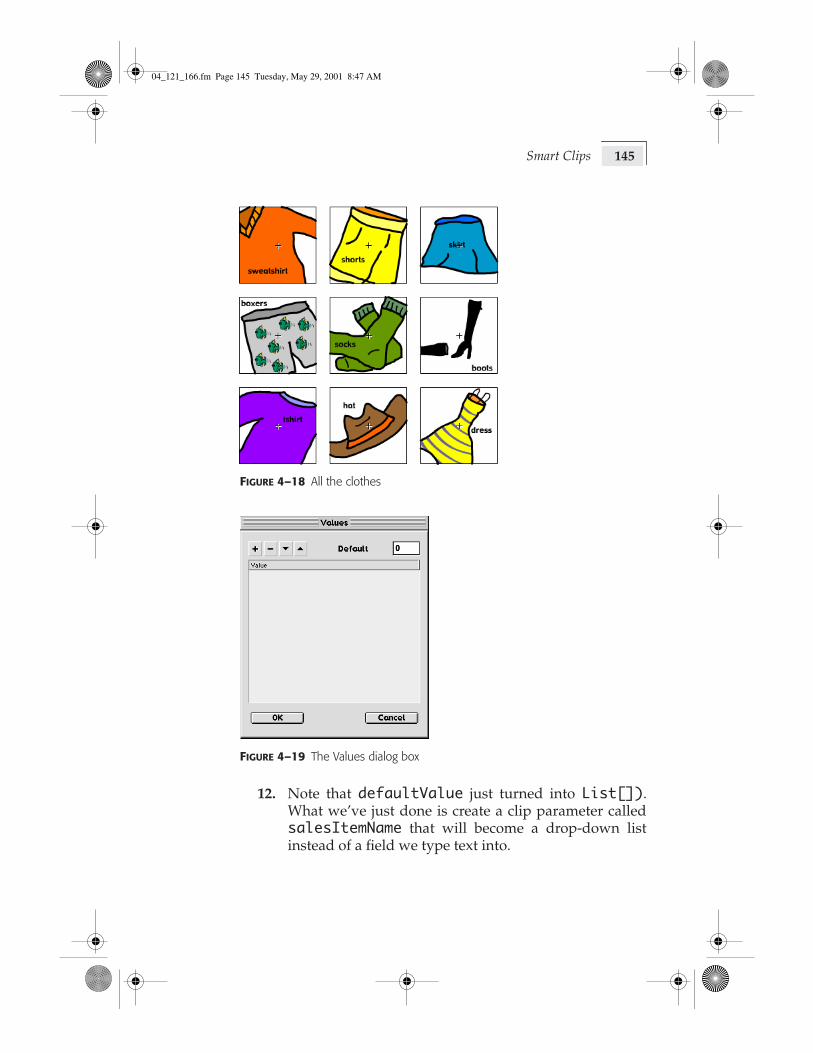
3. Notice that we have nine sections in this movie clip,each marked with its own frame label. The labels are:sweatshirt, t-shirt, shorts, boxers, socks, boots, hat,dress, and skirt. When the user chooses a sales item, wewant this movie clip to go to the appropriate frame andstay there. Figure 4-18 shows what all of the clotheslook like.
4. Open up the all clothes symbol.5. Notice that we have five instances of the clothes symbol
in this clip. For now, we’ll just concentrate on the bigone to the left—the actual sales item.
6. In the Library, click on the all clothes symbol.7. Choose Define Clip Parameters… from the Options
menu.8. Click the big plus sign to add a parameter.9. Double-click varName and enter saleItemName.
10. Double-click Default in the Type column.11. Choose List and press <enter>.
FIGURE 4–17 The clothes movie clip
04_121_166.fm Page 144 Tuesday, May 29, 2001 8:47 AM
Smart Clips 145
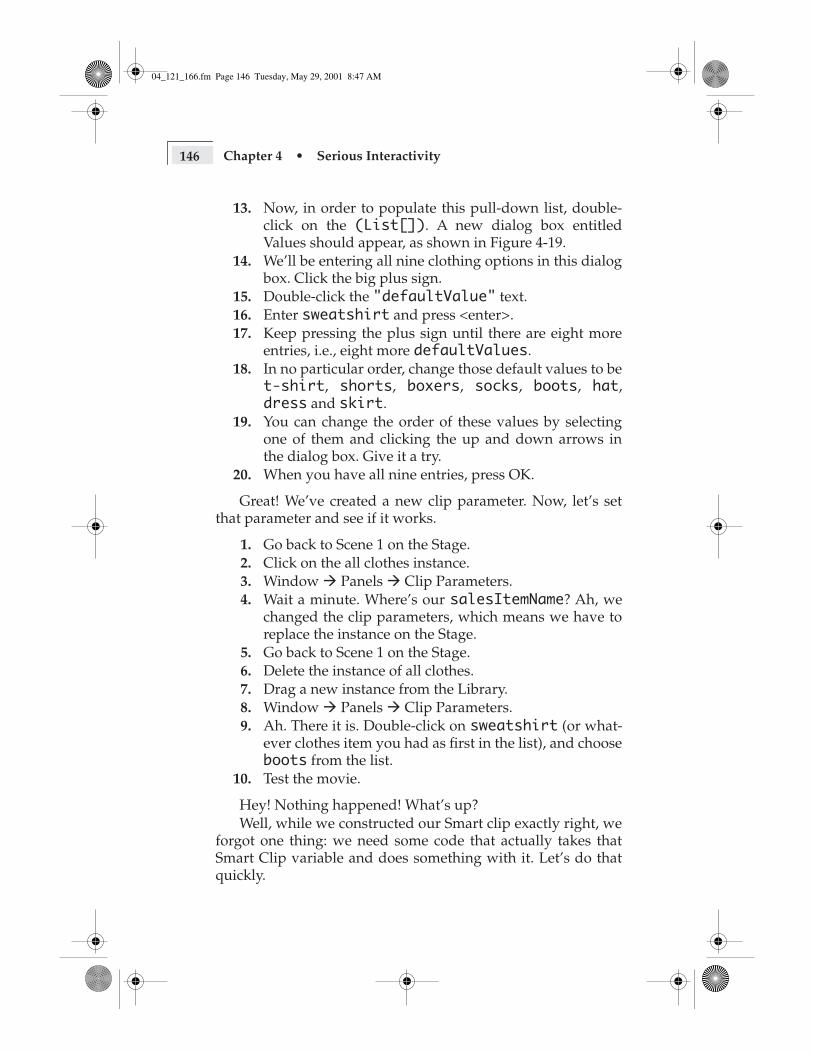
12. Note that defaultValue just turned into List[]).What we’ve just done is create a clip parameter calledsalesItemName that will become a drop-down listinstead of a field we type text into.
FIGURE 4–18 All the clothes
FIGURE 4–19 The Values dialog box
04_121_166.fm Page 145 Tuesday, May 29, 2001 8:47 AM
146 Chapter 4 • Serious Interactivity
13. Now, in order to populate this pull-down list, double-click on the (List[]). A new dialog box entitledValues should appear, as shown in Figure 4-19.
14. We’ll be entering all nine clothing options in this dialogbox. Click the big plus sign.
15. Double-click the "defaultValue" text.16. Enter sweatshirt and press <enter>.17. Keep pressing the plus sign until there are eight more
entries, i.e., eight more defaultValues.18. In no particular order, change those default values to be
t-shirt, shorts, boxers, socks, boots, hat,dress and skirt.
19. You can change the order of these values by selectingone of them and clicking the up and down arrows inthe dialog box. Give it a try.
20. When you have all nine entries, press OK.
Great! We’ve created a new clip parameter. Now, let’s setthat parameter and see if it works.
1. Go back to Scene 1 on the Stage.2. Click on the all clothes instance.3. Window � Panels � Clip Parameters.4. Wait a minute. Where’s our salesItemName? Ah, we
changed the clip parameters, which means we have toreplace the instance on the Stage.
5. Go back to Scene 1 on the Stage.6. Delete the instance of all clothes.7. Drag a new instance from the Library.8. Window � Panels � Clip Parameters.9. Ah. There it is. Double-click on sweatshirt (or what-
ever clothes item you had as first in the list), and chooseboots from the list.
10. Test the movie.
Hey! Nothing happened! What’s up?Well, while we constructed our Smart clip exactly right, we
forgot one thing: we need some code that actually takes thatSmart Clip variable and does something with it. Let’s do thatquickly.
04_121_166.fm Page 146 Tuesday, May 29, 2001 8:47 AM

Smart Clips 147
1. Double-click on the all clothes symbol in the Library toenter Editing Mode.
2. Click on the sales item instance and open its ObjectActions panel.
3. Enter this code:
onClipEvent(load){
this.gotoAndStop(_parent.saleItemName);}
4. Now test the movie.
ABOUT THE CODE
When this instance loads, the code moves the playhead to thevalue of _parent.salesItemName. Why _parent? Whenwe set the clip parameter, we set it for the instance of themc_clothes_all clip. Since this mc_clothes instance is apart of the mc_clothes_all instance, it’s a child ofmc_clothes_all. The clip parameter is part ofmc_clothes_all, so that’s where that variable lives. In orderfor the clothes instance to access the variable, it has to lookup one level. We could also access the variable using_root.sale.saleItemName, but using _parent makes thecode more modular and less dependent on the structure of themovie as a whole.
DETERMINE THE RELATED ITEMS
Since we’re building a decent retail site, we certainly want todo some cross-selling. We also want to be able to determinewhich four clothing items will be displayed in addition to themain sale item. We’ll do this by creating four more lists:xSale1Name, xSale2Name, xSale3Name, and xSale4Name.The values of these lists will be exactly the same as saleItem-Name. It’s a little tedious, but it’ll give you some needed prac-tice to become comfortable creating clip parameters.
We’ll go over all the steps to create xSale1Name, and thenleave you to create the other three on your own.
1. Click on the mc_clothes_all symbol in the Library.
04_121_166.fm Page 147 Tuesday, May 29, 2001 8:47 AM
148 Chapter 4 • Serious Interactivity
2. Choose Define Clip Parameters… from the Optionsmenu.
3. Click the big plus sign.4. Double-click varName in the Name column and
replace it with "xSale1Name".5. Double-click Default in the Type column and choose
List from the pull-down menu.6. Double-click (List[]) in the Value menu. The Values
dialog box should appear.7. Add these values: boots, boxers, dress, hat, shorts, skirt,
socks, sweatshirt, and t-shirt.8. Click OK.
You’ve created the necessary clip parameter forxSale1Name. Now, repeat these steps to create xSale2Name,xSale3Name, and xSale4Name.
Now that those are entered, let’s add the necessary actionsto the four related item instances in the all clothes Smart Clip.
1. In the Library, double-click on the mc_clothes_all sym-bol to open its editing mode.
2. Looking at the four smaller instances of themc_clothes_all symbol, click on the one to the far left.Its instance name is crossSale1.
3. Open that object’s Object Actions panel.4. Enter the following code:
onClipEvent(load){
this.gotoAndStop(_parent.xSale1Name);}
5. Now, click on the next instance to the right. Its name iscrossSale2.
6. Open its Object Actions panel and enter this code:
onClipEvent(load){
this.gotoAndStop(_parent.xSale2Name);}
7. Moving on, click on the next instance to the right. Itsname is crossSale3.
04_121_166.fm Page 148 Tuesday, May 29, 2001 8:47 AM
Smart Clips 149
8. Open its Object Actions panel and enter this code:
onClipEvent(load){
this.gotoAndStop(_parent.xSale3Name);}
9. Again, click on the next instance to the right. Its name iscrossSale4.
10. Open its Object Actions panel and enter this code:
onClipEvent(load){
this.gotoAndStop(_parent.xSale4Name);}
11. All we need to do now is replace the clothes_allinstance on the Stage, since we’ve changed the clipparameters. Go back to Scene 1.
12. Delete the instance of mc_clothes_all.13. Drag a new instance of mc_clothes_all from the
Library onto the Stage.14. Great! We’ve put all the pieces in place. 15. Window � Panels � Clip Parameters.16. The panel should look like Figure 4-20.17. Change the values of the related items to whatever you
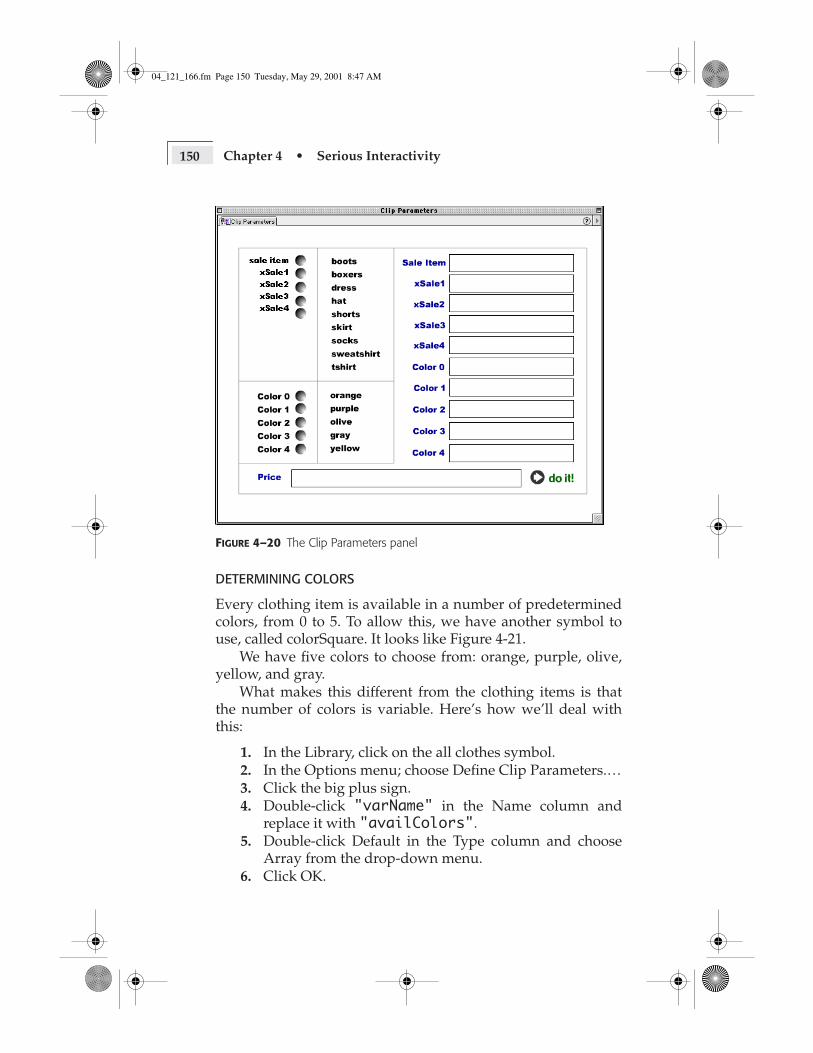
want.18. Test the movie!
ABOUT THE CODE
We’re doing the same thing for the related items as we did forthe main sale item. Based on the value of xSale[some-thing]Name, we’re moving the playhead of each of theclothes instances. And we’re using _parent, because thevariable is in the instance of all clothes, the parent objectof the clothes instances.
Congratulations! We’ve done a big job here and learned alot about Smart Clips. We’re not quite done, though. We stillneed to determine which colors are available for each salesitem.
04_121_166.fm Page 149 Tuesday, May 29, 2001 8:47 AM
150 Chapter 4 • Serious Interactivity
DETERMINING COLORS
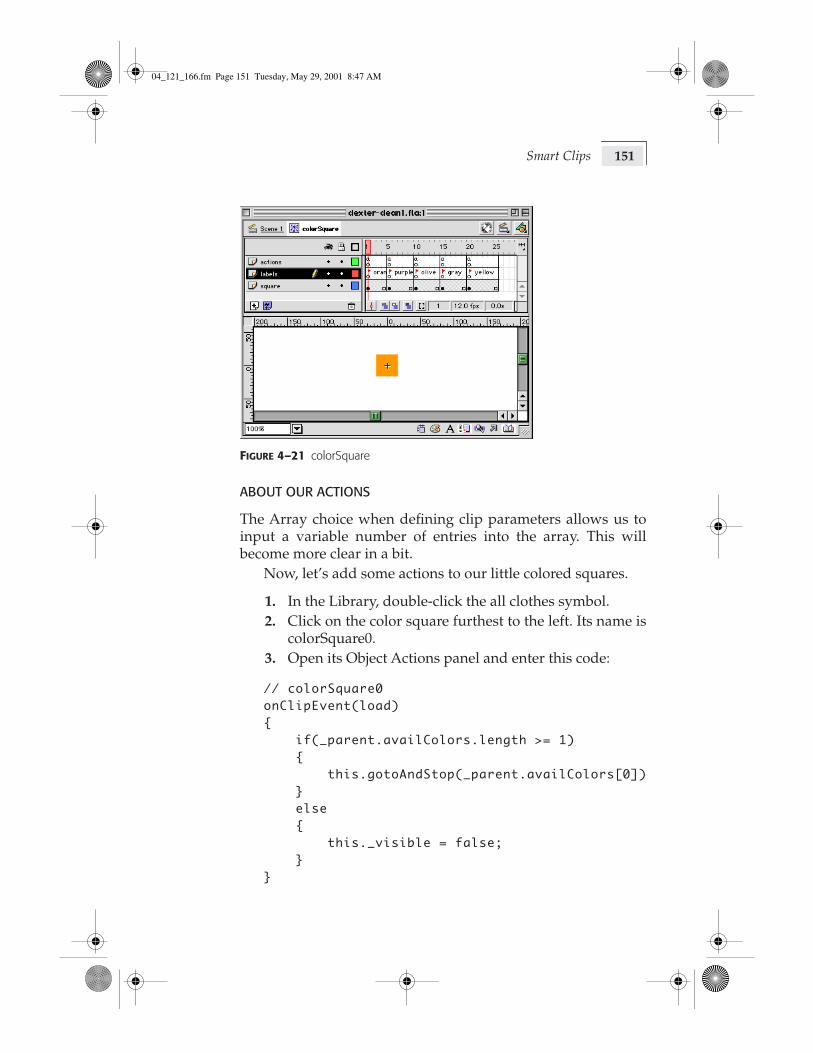
Every clothing item is available in a number of predeterminedcolors, from 0 to 5. To allow this, we have another symbol touse, called colorSquare. It looks like Figure 4-21.
We have five colors to choose from: orange, purple, olive,yellow, and gray.
What makes this different from the clothing items is thatthe number of colors is variable. Here’s how we’ll deal withthis:
1. In the Library, click on the all clothes symbol.2. In the Options menu; choose Define Clip Parameters.…3. Click the big plus sign.4. Double-click "varName" in the Name column and
replace it with "availColors".5. Double-click Default in the Type column and choose
Array from the drop-down menu.6. Click OK.
FIGURE 4–20 The Clip Parameters panel
04_121_166.fm Page 150 Tuesday, May 29, 2001 8:47 AM
Smart Clips 151
ABOUT OUR ACTIONS
The Array choice when defining clip parameters allows us toinput a variable number of entries into the array. This willbecome more clear in a bit.
Now, let’s add some actions to our little colored squares.
1. In the Library, double-click the all clothes symbol.2. Click on the color square furthest to the left. Its name is
colorSquare0. 3. Open its Object Actions panel and enter this code:
// colorSquare0onClipEvent(load){
if(_parent.availColors.length >= 1){
this.gotoAndStop(_parent.availColors[0])}else{
this._visible = false;}
}
FIGURE 4–21 colorSquare
04_121_166.fm Page 151 Tuesday, May 29, 2001 8:47 AM
152 Chapter 4 • Serious Interactivity
4. Now, click on the colored square just to the right. Itsname is colorSquare1.
5. Open its Object Actions panel and enter this code:
// colorSquare1onClipEvent(load){
if(_parent.availColors.length >= 2){
this.gotoAndStop(_parent.availColors[1])}else{
this._visible = false;}
}
6. Now, click on the colored square just to the right. Itsname is colorSquare2.
7. Open its Object Actions panel and enter this code:
// colorSquare2onClipEvent(load){
if(_parent.availColors.length >= 3){
this.gotoAndStop(_parent.availColors[2])}else{
this._visible = false;}
}
8. Now, click on the colored square just to the right. Itsname is colorSquare3.
9. Open its Object Actions panel and enter this code:
// colorSquare3onClipEvent(load){
if(_parent.availColors.length >= 4){
this.gotoAndStop(_parent.availColors[3])}else
04_121_166.fm Page 152 Tuesday, May 29, 2001 8:47 AM

Smart Clips 153
{this._visible = false;
}}
10. Now, click on the colored square just to the right. Itsname is colorSquare4.
11. Open its Object Actions panel and enter this code:
// colorSquare4onClipEvent(load){
if(_parent.availColors.length >= 5){
this.gotoAndStop(_parent.availColors[4])}else{
this._visible = false;}
}
12. Test the movie! Since we haven’t chosen any colors, thearray availColors is empty, and all the coloredsquare movie clips are invisible.
ABOUT THE CODE
We’re deciding on a case-by-case basis whether a color squareshould be visible or not. We’re deciding this by determiningwhether there’s a matching element in the availColorsarray or not. If we’re looking at square 1, we make sure thatthere’s something in availColors[1]. If there is something,then we take the playhead of that instance to whatever thevalue of availColors[1] is. Again, we’re using _parentbecause we need to look up one level.
Now let’s set some colors.
1. Go back to Scene 1.2. Click on the allClothes instance.3. Delete it and drag a new one from the Library.4. Window � Panels � Clip Parameters.5. Double-click on "(Array[])".6. Enter three values: gray, yellow, and orange.
04_121_166.fm Page 153 Tuesday, May 29, 2001 8:47 AM

154 Chapter 4 • Serious Interactivity
7. Test the movie! Did the colors show up? Only threesquares, hopefully.
Whew. That was a lot of work, but we plowed our waythrough a lot of Smart Clips. This movie is complete, butthere’s even more we can do. You know the interface of the clipparameters panel? We can customize that to look like whateverwe want.
To learn more about Smart Clips (and ActionScript ingeneral), I strongly recommend you poke through the SmartClips Library that comes with Flash 5. Go to Window �Common Libraries � Smart Clips. They’ve provided someexcellent examples, and dissecting them will teach you much.
Creating a Custom Interface for Clip Parameters
We’re going to create a custom interface for the Clip Parame-ters panel. It’ll end up look like Figure 4-22.
FIGURE 4–22 Our finished Clip Parameters panel
04_121_166.fm Page 154 Tuesday, May 29, 2001 8:47 AM
Smart Clips 155
You can create a custom interface by creating a speciallyconstructed SWF file and tying that into your clip parameters.
The key is to create an empty symbol, create an instance ofthat empty symbol in your movie, and call that instance xch.When the user finishes entering all the required information,they’ll hit some sort of button, and at that point, your code willhave to transfer all the data into that xch instance. Don’tworry—we’ll build this step by step.
1. Open the file chapter4/dexter-interface_0.fla.2. Insert � New Symbol.3. Call this new symbol mc_exchangeclip. Make it a Movie
Clip.4. Click OK.5. Without putting anything in the symbol, go back to
Scene 1.6. Create a new layer called Exchange Clip.7. If it isn’t already, open the Library.8. Drag the Exchange Clip symbol onto the Exchange Clip
layer. It doesn’t matter where—just someplace whereit’ll be easily visible. It will appear as a little dot.
9. Call the instance xch.
ABOUT OUR ACTIONS
The Exchange Clip symbol may seem pretty useless, but it’sabsolutely vital. That clip will act as the intermediary, orexchange, between this Flash file and the Clip Parameterspanel. The panel can only look at the instance called xch, socreating xch simply has to happen.
Now we need to build the file so that it actually grabs thecorrect data. Here’s how this thing works: the user first choosesone of the radio buttons in the first column. The user thenclicks one of the values in the second column. The name-valuepair then appears in the third column. The user can also enterany kind of text into the "price" text field. When the user hascompleted filling in all the fields they want, they click Do it!,and that should transfer all the data to the xch instance.
04_121_166.fm Page 155 Tuesday, May 29, 2001 8:47 AM

156 Chapter 4 • Serious Interactivity
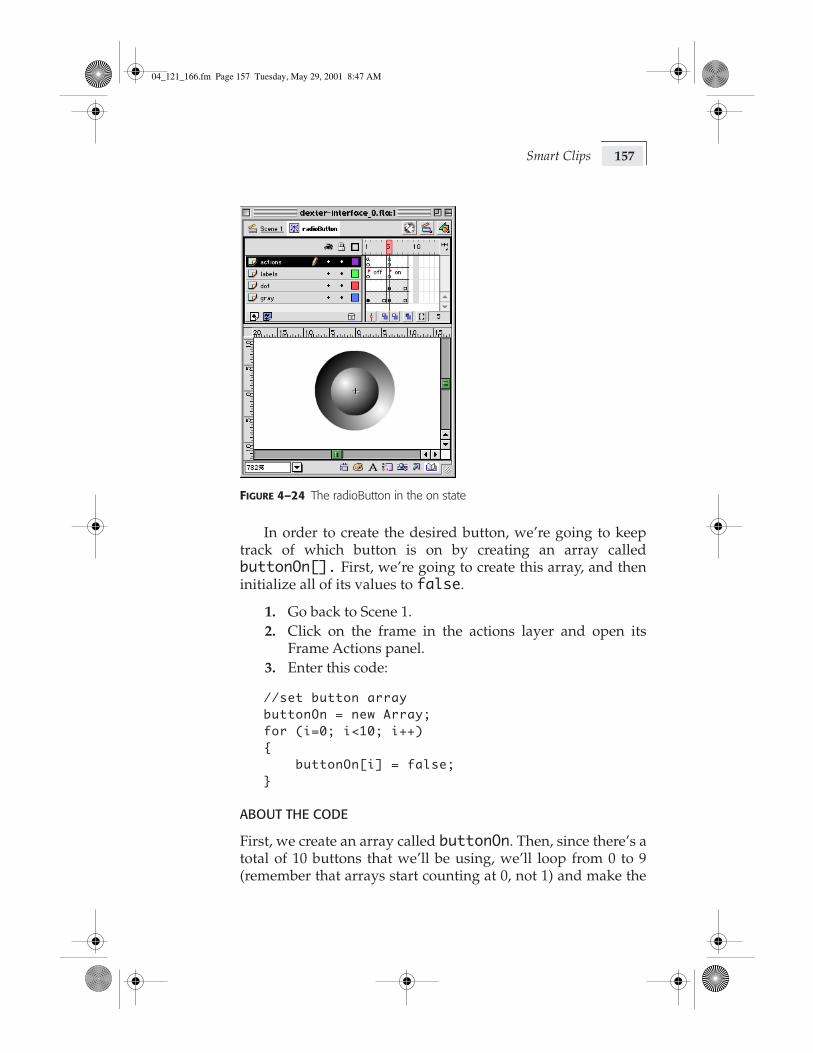
Let’s start by making the radio buttons work. First, let’slook at the two states of the radioButton symbol, shown inFigure 4-23 and Figure 4-24.
When the user clicks on this button, we want the button tomove to the on state and we want all other buttons to be in theoff state. Notice that there are two frame actions in this symbol:both are stop(), so the button doesn’t loop from the off stateto the on state and so on.
If you hide the transparent buttons layer and start clickingon buttons, you’ll notice that they’re named radioButtonN,where N is a number from 0 to 9. This becomes important later.For now, just note it.
You may have noticed that the radioButton symbol isn’tactually a button. It’s a movie clip. In order to make it respondlike a button, we’re going to cheat a little and place a transpar-ent button on top of the movie clip. We get the best of bothworlds that way—the easy scripting that’s associated with abutton and the controllable states of a movie clip.
FIGURE 4–23 The radioButton in the off state
04_121_166.fm Page 156 Tuesday, May 29, 2001 8:47 AM
Smart Clips 157
In order to create the desired button, we’re going to keeptrack of which button is on by creating an array calledbuttonOn[]. First, we’re going to create this array, and theninitialize all of its values to false.
1. Go back to Scene 1.2. Click on the frame in the actions layer and open its
Frame Actions panel.3. Enter this code:
//set button arraybuttonOn = new Array;for (i=0; i<10; i++){
buttonOn[i] = false;}
ABOUT THE CODE
First, we create an array called buttonOn. Then, since there’s atotal of 10 buttons that we’ll be using, we’ll loop from 0 to 9(remember that arrays start counting at 0, not 1) and make the
FIGURE 4–24 The radioButton in the on state
04_121_166.fm Page 157 Tuesday, May 29, 2001 8:47 AM
158 Chapter 4 • Serious Interactivity
value of each element in the array false. The value is falsebecause none of the buttons have been pressed yet.
When a user clicks on one of the buttons, we want to makethat button go to the on frame, and change all the other framesto off. We could do this by creating an Object Action for onebutton, and then copying and pasting that code nine times.However, there’s a much better and more modular way to dothis. We’ll write a little function that turns on one button andturns off all the others. We’ll place that function in one place,and then we’ll have each radio button call that function.
Huh?, I hear you ask. Here’s how—it’s a neat trick.
1. Insert � New Symbol.2. Call the symbol mc_switchButtons and make it a Movie
Clip.3. Don’t put anything in the symbol—just go back to
Scene 1.4. Open the Library, if it isn’t already open.5. Drag the switchButtons symbol onto the Stage. Drag it
anywhere—it doesn’t matter.6. Click on the little dot that’s the switchButtons symbol,
and call the instance switchButtons.7. Open its Object Actions panel, and enter this code:
onClipEvent(load){
function switchButtons(buttonNum){
// turn on current buttoneval("_root.radioButton" +
buttonNum).gotoAndStop("on");_root.buttonOn[buttonNum] = true;
// turn off all other buttonsfor(i=0; i<10; i++){
if(i != buttonNum){
eval("_root.radioButton" + i).gotoAndStop("off");
_root.buttonOn[i] = false;}
}
04_121_166.fm Page 158 Tuesday, May 29, 2001 8:47 AM

Smart Clips 159
}}
ABOUT THE CODE
Okay, we’re doing a number of new things here. Most impor-tantly, we’re creating a new way of performing ActionScript inFlash. We’ve created something called a constructor function.This is a chunk of code that does something only when it’scalled. When the switchButtons symbol is loaded into themovie, the switchButtons function is loaded and just sitsthere, ready for action, ready to be called.
This function takes one argument or input variable, calledbuttonNum. Whatever code calls this function has to supplythis input variable, or the function won’t work. As it turns out,this will be a number from 0 to 9, corresponding to the namesof the radioButton instances.
Once the function has the buttonNum, it sets that button’splayhead to on. Notice that we’re dynamically building thename of the symbol here, and we’re doing it using the evalfunction.
For example, if we pass in 6 for buttonNum,
eval("_root.radioButton" + buttonNum)
results in
_root.radiobutton6
and Flash interprets the whole line as
_root.radioButton6.gotoAndStop("on");
resulting in button 6 flipping to the on position. It also wouldset buttonOn[6] to true.
The code then begins looping through the rest of thebuttons. As long as it isn’t the button we just turned on, wemove its playhead to the off frame label, and set buttonOn tofalse.
Now that we’ve created the function, let’s start coding thebuttons that will call it.
1. Click on the turquoise rectangle over the top radiobutton. Remember, that’s the transparent button.
04_121_166.fm Page 159 Tuesday, May 29, 2001 8:47 AM
160 Chapter 4 • Serious Interactivity
2. Open the transparent button’s Object Actions panel andenter this code:
on(release){
_root.switchButtons.switchButtons(0);}
ABOUT THE CODE
This is how we call our switchButton function—all we haveto do is locate it and pass in the appropriate input variable. Thename of the function is switchButtons; it lives inside theswitchButtons instance on the root level.
Now let’s add actions to all the other transparent buttons ofthe radio buttons.
Moving down the line of buttons, each one gets this code:
Transparent Button over Instance radioButton1
on(release){
_root.switchButtons.switchButtons(1);}
Transparent Button over Instance radioButton2
on(release){
_root.switchButtons.switchButtons(2);}
Transparent Button over Instance radioButton3
on(release){
_root.switchButtons.switchButtons(3);}
Transparent Button over Instance radioButton4
on(release){
_root.switchButtons.switchButtons(4);}
04_121_166.fm Page 160 Tuesday, May 29, 2001 8:47 AM

Smart Clips 161
Transparent Button over Instance radioButton5
on(release){
_root.switchButtons.switchButtons(5);}
Transparent Button over Instance radioButton6
on(release){
_root.switchButtons.switchButtons(6);}
Transparent Button over Instance radioButton7
on(release){
_root.switchButtons.switchButtons(7);}
Transparent Button over Instance radioButton8
on(release){
_root.switchButtons.switchButtons(8);}
Transparent Button over Instance radioButton9
on(release){
_root.switchButtons.switchButtons(9);}
Feel free to test the movie. Your radio buttons should nowwork.
We’re partway done. After the user uses the radio buttonsto select the item or color they want to choose a value for, theyhave to actually choose that value. That value should thenappear in the correct text field. So, we need a function thatdetermines which radio button is pressed and what value wasjust pressed, and places the correct text in the correct text field.Fortunately, this isn’t too hard.
We’re going to use the same function trick to get this doneas we did to make the radio buttons work.
04_121_166.fm Page 161 Tuesday, May 29, 2001 8:47 AM

162 Chapter 4 • Serious Interactivity
1. Click on the switchButtons object and open itsObject Actions panel.
2. Add this code inside the onClipEvent(load) curlybraces:
function fillTextField(textVal){
//loop through buttonsfor(i=0; i<10; i++){
if(_root.buttonOn[i]){
eval("_root.text" + i) = textVal;break;
}}
}
ABOUT THE CODE
We’re creating a new function called fillTextField, and ittakes one argument, textVal. Simply, it cycles through thebuttonOn array and sees which one is true, that is, whichbutton is currently on. Once it finds the on button, it fills thecorresponding text field with the passed argument. The key tothis code’s simplicity is in the naming of the text fields. Notethat they’re all named textN, where N is a value from 0 to 9.It’s a boring naming scheme, but a useful one. Once we find thecorrect text field and fill it, we use break to exit the for loop.We already found the text field we were looking for, so wedon’t need to continue looping and looking.
Now that we’ve created the needed function, we need toadd some actions to buttons so that the function gets called.Again, we’re going to use the same method we did with theradio buttons. We’ve placed transparent buttons over the topof all the values in the second column. Let’s start addingactions to those buttons.
1. Click on the rectangle over the "boots" text.2. Open its Object Actions panel and enter this code:
on(release){
04_121_166.fm Page 162 Tuesday, May 29, 2001 8:47 AM
Smart Clips 163
_root.switchButtons.fillTextField("boots");}
ABOUT THE CODE
Pretty similar to the radio buttons’ code, isn’t it? The only dif-ference is that we’re calling a different function, and sincewe’re passing a string instead of a number, we have to enclosethe value in quotes.
Now let’s do the rest of them.
Transparent Button over boxers
on(release){
_root.switchButtons.fillTextField("boxers");}
Transparent Button over dress
on(release){
_root.switchButtons.fillTextField("dress");}
Transparent Button over hat
on(release){
_root.switchButtons.fillTextField("hat");}
Transparent Button over shorts
on(release){
_root.switchButtons.fillTextField("shorts");}
Transparent Button over skirt
on(release){
_root.switchButtons.fillTextField("skirt");}
04_121_166.fm Page 163 Tuesday, May 29, 2001 8:47 AM

164 Chapter 4 • Serious Interactivity
Transparent Button over socks
on(release){
_root.switchButtons.fillTextField("socks");}
Transparent Button over sweatshirt
on(release){
_root.switchButtons.fillTextField("sweatshirt");}
Transparent Button over orange
on(release){
_root.switchButtons.fillTextField("orange");}
Transparent Button over purple
on(release){
_root.switchButtons.fillTextField("purple");}
Transparent Button over olive
on(release){
_root.switchButtons.fillTextField("olive");}
Transparent Button over gray
on(release){
_root.switchButtons.fillTextField("gray");}
Transparent Button over yellow
on(release){
04_121_166.fm Page 164 Tuesday, May 29, 2001 8:47 AM
Smart Clips 165
_root.switchButtons.fillTextField("yellow");}
Great! Test the movie. Does the text appear in the rightplace? Notice that if there’s a problem, we only have to changethe code in one place: the function. We don’t have to make achange in one place and then copy that change 10 times.
There’s only one more step to take. We have to add someactions to the Do it! button, so that all the data gets transferredcorrectly to the xch instance. Let’s go ahead and do that.
1. Click on the arrow button next to the Do it! text.2. Open its Object Actions panel and enter this code:
on(release){
// set pricing_root.xch.price = _root.price;
//set clothing values_root.xch.saleItemName = _root.text0;_root.xch.xSale1Name = _root.text1;_root.xch.xSale2Name = _root.text2;_root.xch.xSale3Name = _root.text3;_root.xch.xSale4Name = _root.text4;
// set color values_root.xch.availColors = new Array;for (i=0; i<5; i++){
if(eval("_root.text"+(i+5)).length > 0){
_root.xch.availColors[i] = eval("_root.text"+(i+5));
}else{
break;}
}}
04_121_166.fm Page 165 Tuesday, May 29, 2001 8:47 AM
166 Chapter 4 • Serious Interactivity
ABOUT THE CODE
Setting the price and clothing values is pretty straightforward.We assign values to new variable in the xch instance that havethe same names as the values in our Clip Parameters. Settingthe color values is a little trickier, for a few reasons. First, we’rebuilding an array. Second, that array has a variable length—wedon’t know how many elements it has. We deal with this bylooking at text fields 5 through 9. Since our counter is countingfrom 0 to 4, we add 5 to our counter (i + 5) to look at the righttext fields. If the length of that text field is greater than 0 (i.e.,there’s a value there), we then assign that value to an elementin the availColors array. If there’s no value, then we assumethat we’ve reached the end of the list, and we remove ourselvesfrom the loop and stop looking at text fields. The one problemwith this method is that it assumes that the user has filled inthe color text fields sequentially. If the user has filled in, say,Color 0 and Color 4, the code will never see Color 4 because itwill see that Color 1 is blank and will stop looking further.
The next step is to export the movie. Choose File � ExportMovie… and click OK until you’re done. Name the file dexter-interface.swf and place it wherever you want.
Now we’re going load this SWF file into our Dexter Deanmovie as the desired interface.
1. Open chapter4/dexter-dean_done.fla.2. Open the Library and click on the mc_clothes_all
symbol.3. Choose Define Clip Parameters… from the Options
menu.4. Click on the little folder icon under the Link to Custom
UI header.5. Find and choose the SWF file you just created (dexter-
interface.swf).6. Click OK.7. Go back to the Stage and click the all clothes
instance.8. Window � Panels � Clip Parameters.9. Fill in the information and click Do it!
10. Test the movie! Woo hoo!
04_121_166.fm Page 166 Tuesday, May 29, 2001 8:47 AM
Conclusion 167
ConclusionCongratulations! You really took Flash to the next level in thischapter. And here’s the good news: you just finished the hard-est part of this book. The next chapter on XML isn’t this com-plicated.
So give yourself a good pat on the back, and be proud. Ready for some XML? Everyone’s talking about it…
04_121_166.fm Page 167 Tuesday, May 29, 2001 8:47 AM