seed dispersal - the great plant hunt web view• know seeds need warmth and water for germination....
TRANSCRIPT

- 1 -

- 2 -
Dear Darwin’s Investigators
I am here in Botswana where I have just been out collecting for Kew's Millennium Seed Bank. I collected the seed from a rare medicinal plant today – but strangely I also saw this very rare plant growing in another place a few days ago. The plants were separated by over 100 miles!
It seems extraordinary that the same plants can be found growing so far apart.
This plant must have some special way of making sure that its seed can be spread across a wide area.
It would really help me if you could have a look at some seed for me at school and try and work out how they travel from one place to another. Perhaps you could also check out how the seeds germinate as well.
All that information might provide some clues as to how my plant gets spread around here in Africa.
Happy experimenting!
Masego
- 3 -

Curriculum links
English Curriculum (Year 5)• That seeds can be dispersed• Some plants produce many seeds and some few• Consider conditions that might affect germination and how to test them• The life cycle of flowering plants including pollination,fertilisation, seed production, seed dispersal and germination
Northern Irish Curriculum (P6)Thinking skills and personal capabilities:Managing information: (All activities)Thinking, problem-solving and decision making: (All activities)KS2 The world around us:• Strand 1: Interdependence: How living things rely on each other within the natural world (S&T) (All activities)• Strand 1: Interdependence: The effects of people on the natural and built environment over time (S&T, G) (Activity 2)• Strand 3: Place: How place influences the nature of life (S&T) (All activities)• Strand 3: Place: Ways in which people, plants and animals depend on the features and materials in places and how they adapt to their environment (S&T, G) (Activities 1 and 2)• Strand 3: Place: Features of and variations in places, including physical, climatic, vegetation and animal life (S&T) (Activity 2)• Strand 3: Place: Positive and negative effects of natural and human events upon place over time (S&T, G) (Activity 2)• Strand 4: Change over time: How change is a feature of the human and natural world and may have consequences for our lives and the world around us (S&T) (Activity 1)
Scottish Curriculum (P6)These resources will be reviewed against specific experiences and outcomes in the new Curriculum for Excellence frameworks in 2009.
Scottish Curriculum (P6)Living things and the processes of life: Level C/D• Strand: Variety and characteristic features (to name some common plants using simple keys)• Strand: The processes of life (to describe the main stages in flowering plant reproduction)• Strand: Interaction of living things with their environment (to give examples of how plants and animals are suited to their environment)Skills in science - Investigating: Level C/D• Strand: Preparing for tasks (understanding, planning, designing tests and predicting)• Strand: Carrying out tasks (observing, measuring and recording findings)• Strand: Reviewing and reporting on tasks (presenting, evaluating and understanding the significance of findings)
Welsh Curriculum (Year 5)Scientific enquiry: Key Stage 2• Strand: The nature of science (to consider information obtained from their own work and other sources)• Strand: Communication in science (to report their work clearly in speech and writing using relevant scientific vocabulary; to use a range of methods including drawings, tables and charts to record and present information)• Strand: Investigative skills (to turn ideas into a form that can be investigated; to ask questions when planning what to do; to decide what information should be collected)Life processes and living things:Key stage 2• Strand: Green plants as organisms (the main stages in the life cycle of flowering plants including pollination, seed production, seed dispersal and germination)• Strand: Living things in their environment (to find out about the variety of plants found in different habitats including the local area; how plants can be identified and assigned to groups by making and using keys)
- 4 -

Welcome to The Great Plant Hunt
Learning outcomes• Know that flowers produce seeds.• Can predict how unknown seeds disperse according to their structure and shape.• Can devise and carry out a fair investigation.• Understand that not all seeds and seedlings survive – some would die from lack of light/water/space.• Know seeds need warmth and water for germination.• Know that a collection of seeds represents a population of individuals that vary just as much as we do.• Recognise that germination and seed dispersal are part of a life cycle.• Can identify and name some common UK plants.
ConceptsPlants have a number of mechanisms that allow them to spread their seed over a wide area. This gives seeds a better chance of finding enough space and other resources to grow well. Seed dispersal means that similar plants may be quite far from each other.
The life cycle of a plant is the process from seed through germination, growth, flower production, pollination, fruit production and back to seed. This set of activities covers the germination and dispersal aspects of the life cycle. You could weave in subject areas of reproduction, pollination and so on to complete the full plant life cycle.
In these activities the ‘Investigators’ will explore seed dispersal and germination and set up a fair test to explore the germination of collected seeds. The investigation will also show children that variation exists in plants, a concept integral to Darwin’s work. They will also be able to collect, prepare and send seed to the Kew’s Millennium Seed Bank.
Meet the Plant Hunters
• Read aloud Chapter 6 called ‘Darwin the Investigator’ from the Following in Darwin’s footsteps storybook to introduce ideas around how Darwin worked and set the context for the childrens’ work.• Introduce Masego the Plant Hunter by reading out her postcard and download the video from Masego from The Great Plant Hunt website at www.greatplanthunt.org• Watch Masego, a real life Plant Hunter, working in the field doing just the kind of observing and recording the children will be doing.
- 5 -

• These resources can be used for an assembly about the project, or to present in
class to introduce the project.
- 6 -

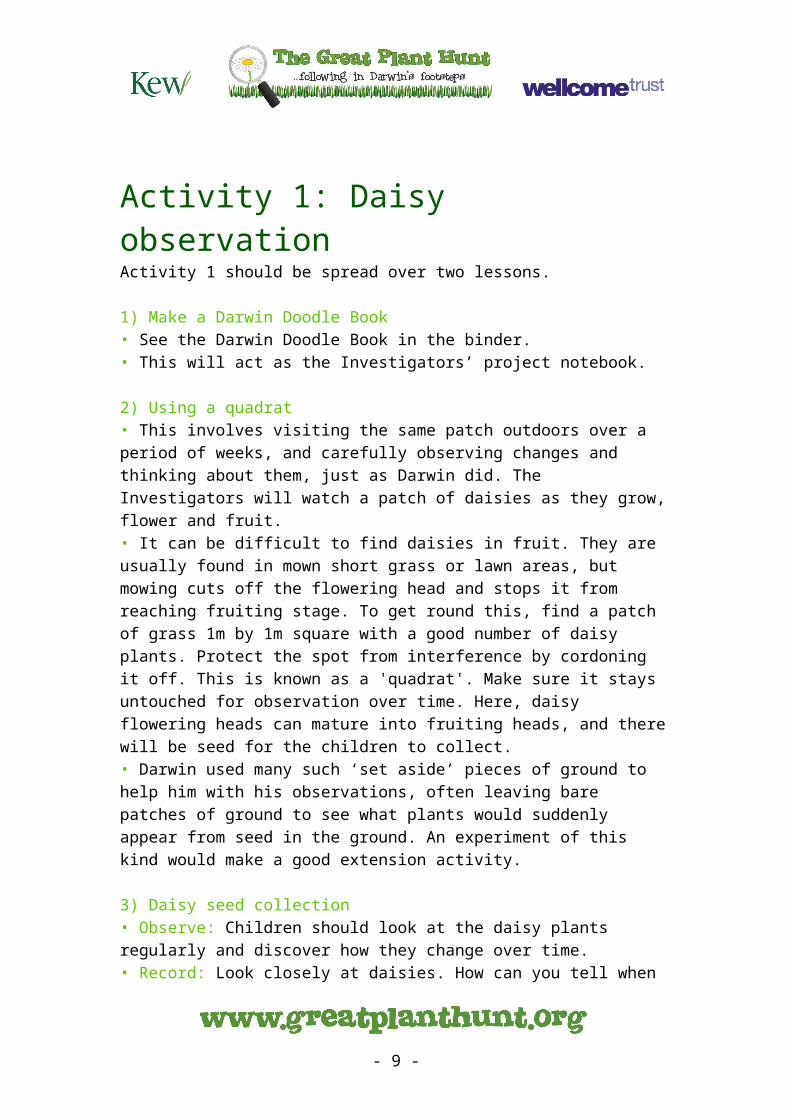
Activity 1: Daisy observationActivity 1 should be spread over two lessons.
1) Make a Darwin Doodle Book• See the Darwin Doodle Book in the binder.• This will act as the Investigators’ project notebook.
2) Using a quadrat• This involves visiting the same patch outdoors over a period of weeks, and carefully observing changes and thinking about them, just as Darwin did. The Investigators will watch a patch of daisies as they grow, flower and fruit.• It can be difficult to find daisies in fruit. They are usually found in mown short grass or lawn areas, but mowing cuts off the flowering head and stops it from reaching fruiting stage. To get round this, find a patch of grass 1m by 1m square with a good number of daisy plants. Protect the spot from interference by cordoning it off. This is known as a 'quadrat'. Make sure it stays untouched for observation over time. Here, daisy flowering heads can mature into fruiting heads, and there will be seed for the children to collect.• Darwin used many such ‘set aside’ pieces of ground to help him with his observations, often leaving bare patches of ground to see what plants would suddenly appear from seed in the ground. An experiment of this kind would make a good extension activity.
3) Daisy seed collection• Observe: Children should look at the daisy plants regularly and discover how they change over time.• Record: Look closely at daisies. How can you tell when they are in bud, in flower and when they have set fruit? Take photos of a daisy at all these stages and upload the photos to the website at www.greatplanthunt.org to share with other schools.• Collect: Tell the children to collect seed when the daisies have set seed. It is important to record exactly where the daisy seeds were collected. This can be done using an Ordnance Survey map (1-50,000 land ranger series) giving grid references, or using Google Maps to pinpoint where you are (maps.google.com). If the seed is collected in the school grounds, the school postcode is enough.
- 7 -

• Back in class: The daisy seed should be processed. See the guide to banking seed and using the mini seed bank.• Send daisy seed to Kew’s Millennium Seed Bank: Once the daisy seed is processed and dried the class should send it back to Kew’s Millennium Seed Bank using the envelope in the mini seed bank kit. This collection will form part of the most diverse collection of a single UK species ever made. It will be stored at Kew’s Millennium Seed Bank for future use in research into genetic variation within a single species.
NB: SENDING SEED TO KEW’S MILLENNIUM SEED BANK IS A SPECIAL ACTIVITY TAKING PLACE IN 2009 ONLY.
Helpful Hints
• Care should be taken when working with wild flowers. Please make sure that the children work to good practice protocols. (See seed collection guidelines). • Do not use plastic bags for collecting seed as they can quickly go mouldy.• Follow appropriate procedures after handling plant material. Health and safety information can be found in the binder.• The seed collecting protocol and the mini seed bank can be used to preserve and store any seed. You could collect wild flower seed or seed from the school garden to use in germination experiments.
Resources
What else is in this booklet?- Collecting daisy seed and sending it back to Kew’s Milllenium Seed BankWhat else is in the binder?- Darwin Doodle Book page- Health and Safety information- Seed collecting guidelines- Seed collection data form- Seed banking using the mini seed bankThings you need to collect- Darwin Doodle Books- More collecting bags if needed
What’s in the Treasure Chest?- Collecting bags- Mini seed bank- The Great Plant Hunt Identikit (you will need to refer to images of daisies in fruit)The fun stuff- Check the Great Plant Hunt website at www.greatplanthunt.org for details of what to do with your daisy collection and data, videos about Kew’s Millennium Seed Bank, and interactive games
- 8 -
Collecting daisy seed and sending I to Kew’s Millennium Seed BankWhen is daisy seed ready to collect?• As the seeds of the daisy approach maturity, its ray florets (the white ‘petals’ round the outside) wither and may disappear completely.• The disc florets (the yellow part in the centre) turn golden-brown and become loosely attached.• In a fully ripe seed head, the disc florets should come away quite easily when rubbed with a finger. This leaves behind a green conical structure (the receptacle).• The tiny seeds are contained within the brown remains of the disc florets.• Seed should be collected once seeds have reached the ‘point of natural dispersal’, meaning they are being shed naturally – like in the picture above.• Collect the seed either by rubbing the seeds free into a bag, or by removing individual flower heads intact. The former method ensures that all the seeds being collected are ripe – if they are difficult to rub off the receptacle, it is probably too early to collect the seed.
Sending daisy seed to Kew’s Millennium Seed BankPlease process (dry) and bank your daisy seed according to the instructions on seed banking using the mini seed bank before sending it. After drying, daisy seed collections should be sealed in the small seed envelope and posted using the addressed envelope – both found in the mini seed bank. If it is near the end of term and time is scarce, package and send the seed straight to the MSB after collecting.
Data to send with your seedKew’s Millennium Seed Bank would like schools to enter data on the form below and send it along with the daisy seed collection.
- 9 -

Activity 2: Shaking, flying, sticking!Activity 2 should be spread over two lessons.
Thinking Walk• Plan: Ask the children to plan their Thinking Walk. What will they need to take? How can they avoid damaging plants or living things when on their walk? Ask children to draw up a code of conduct for working with living things.• Discuss: Children discuss how many ways they think seeds can be spread.• On the walk: Go on the thinking walk for about thirty minutes. Children should look out for plants with seeds and think about how they spread seed.• Observe: Look closely at different plants with fruits and seeds. Is it obvious how seed is spread? Can the children spot more than one way seeds spread?• Collect: Tell the children to collect seed from any plants in the Identikit.• Record: Using a camera or by drawing in the Darwin Doodle Books, record some of the different ways in which seeds are spread, such as parachutes on dandelions, wings on sycamore seeds.• Back in class: Children should think about how they can replicate some of the seed dispersal techniques. These ideas can be written up in their Darwin Doodle books along with a list of equipment needed and anything else they will need to test out their ideas.• Create: Children should produce and test out models of seed dispersal.
Helpful hints• A fun way to show how seeds can be moved from place to place by humans or animals is to get the children to put an old sock over their shoe and take a walk through some grass, playing field nearby. Once back indoors, you can remove the sock and have a look to see if any seeds or fruits have been caught up in the material.• Care should be taken when working with wild flowers. Make sure the children create and work to a code of conduct. See the guide to seed collection in the binder.• Check with the ‘Discoverers’ teacher (ages 6-7) if they saw daisies.• Do not use plastic bags for collecting seed as they can quickly go mouldy.• Follow appropriate procedures after handling plant material. Health and safety information can be found in the binder.• Any seed can be processed and banked for future use like germination experiments. See the guide to banking seed using the Mini Seed Bank.
Resources
What else is in the binder?Seed dispersal table with model-making ideas
Things you to collectMaterials to make models
- 10 -

Activity 3: Time for seeds!Investigating Darwin's theory on variation using sunflower
Activity 3 should spread over three lessons. Also allow for observation time.
Materials• Sunflower seed from mini seed bank. This is the same as you can buy in any garden centre. Give each child one or two sunflower seeds.• Newspaper pots (see binder for how to make these), small flowerpots or yoghurt pots.• Multi-purpose compost or soil.• Sunflower info and germination images on the back cover.
1) Looking at the seeds• Ask children to plan an experiment to see how long seeds take to germinate and think what they will need to help the seed germinate.• Ask the children to draw round a seed on their Investigators worksheet• Measure the length and width of the outline in mms and compare seed sizes from the class.• Pool the class measurements and plot the length and width of each seed on a bar chart.• What can you say about the range of sizes?
2) Germinating seed• Get each child to fill their pot to within 2cm of the top with compost and tap the pot to settle the contents.• Plant one or two seeds in each pot, pointed end down, and push it 2cm into the compost.• Label each pot with the pupil’s name and date. Water until compost is damp.• Place on a tray on a light window ledge, avoiding hot south facing windows.• To be a fair test, everyone must plant seeds in the same way and agree what point counts as germinated (see photos on the back cover).• Count the number of days for each seed to germinate (show ‘green’ above the compost) and plot the number of seeds germinating each day on a frequency histogram• Data from the class should be combined and the number of seeds germinating for each successive day of the test plotted on a bar chart.• Ask the children what this range of results shows.• Use the tools on the Great Plant Hunt website at www.greatplanthunt.org to share your germination data with schools across the country! How does yours compare?
- 11 -

3)
Planting, growing and saving seed for next year• When the second set of leaves appear the sunflower plants may be planted in the school garden or taken home and planted in a sunny spot in the garden or in a large pot on a patio. Remind the children to water them regularly.• The height of sunflowers can be measured when they flower and further class comparisons can be made• After the flower has finished, the seed head may be hung outside in a dry place to feed birds during the winter. Alternatively, seeds may be processed, dried and saved in the Mini Seed Bank ready to be grown next year
Helpful hints• Germination occurs in approximately 2-5 days, so time planting to suit the class.• It is unlikely that any more seeds will germinate after14 days.• The histogram should be bellshaped as shown, illustrating a normal distribution of emergence times. This shows that there is variation even between plants of the same species – a key finding that Darwin worked on. This means that if there is a disaster like a snail coming to feed or a very sunny day that shrivels them up, some seeds that come up later will still be OK.• Plotting length and width of all the individual seeds and the heights of each plant when they flower will provide more evidence of variation even in one type of plant.• As an extension activity, children can explore what difference size of seed makes to the time it takes to germinate. Which germinated first, large or small seeds?
ResourcesWhat else is in the binder?- Newspaper plant pot instructions- Health and safety informationThings to collect- Darwin Doodle Books, rulers- Old newspapers, compost or soil
The fun stuffUse the Great Plant Hunt website at www.greatplanthunt.org to share your germination data with schools across the country! How does yours compare?
- 12 -

- 13 -

- 14 -

About sunflower
The sunflower is a large annual plant that can grow up to three metres tall, depending which variety you plant. The tall, rather hairy stem carries many large oval and bristly leaves. The large head is actually a group of flowers (like daisy, dandelion, thistle and coltsfoot), with sets of non-fertile florets around the outer edge (ray florets) and many inner smaller flowers across the flat central disc (disc florets). When fertilised, the single egg develops into a fruit, covered with a thin papery skin. These fruits - often called the ‘sunflower seeds’ – are arranged in amazing interconnected spiral patterns across the central flat disc of the flowering head.
Sunflower uses• The seeds are good to eat and contain Vitamin E and a chemical called linoleic acid which helps to reduce cholesterol.• Sunflower is frequently an ingredient in breakfast cereals and snack bars as well as a topping for breads and salads.• The seeds also make very good bird-food or can be kept to sow the following year.• Sunflowers are grown by farmers for the valuable seeds which are added to animal feed and also as a source of oil.• Sunflower oil has a pleasant flavour and is one of the best all-purpose oils. It is suitable for frying, for making salad dressings and can be used to make margarine.
Fun facts• The enormous nodding sunflower head inspired Van Gogh’s famous paintings.• The flowering and fruiting spirals you see across the head are consistent in number, with 34 in one direction and 55 in the other. On large sunflowers you may find 89 and 144. This mathematical patterning, shown by many plants, was first written about by Fibonacci – try an internet search to find out more about his fun mathematics.• Sunflowers have been domesticated for almost 5000 years. They were probably first cultivated in Mexico.• Many peoples throughout history, including the Aztecs and Incas, have worshipped the sunflower as a symbol of the sun god.• The botanical name is made up from the Greek word ‘helios’ which means sun and
- 15 -

‘anthos’ which means flower.
- 16 -

Germinating sunflower
When has the seed germinated? It's important to agree what counts - like as soon as some green shows above the soil.
When the second set of leaves appears the sunflower plants may be planted in the school garden or taken home and planted in a sunny spot.
- 17 -