seattle chapter newsipms-seattle.org/newsletters/2014newsletters/2014june.pdf · seattle chapter...
TRANSCRIPT

Sea
ttle
Ch
apte
r N
ews
Seattle Chapter IPMS/USAJune 2014
PREZNOTES
In This Issue
IPMS Seattle Spring ShowResults 3
Hasegawa Ju 87R-2“Desert Snake” 9
Revell/MonogramTBM Avenger 14
Nirvana: An ArmorModeler’s Day in Heaven?
On Monday, May 26, I joined a smallgroup of about a half-dozen IPMS Seattlemembers at the Flying HeritageCollection’s TankFest event. IPMS Seattlehad been invited to set up a small displayto show off the art of scale modeling aspart of the day’s events. The FHC peopleprovided us with five tables measuring 6’by 2.5’, and we modelers turned up withvarious built tank models, a few tankbusting aircraft models, our modelingtools, and some kits to work on. Through-out the day we were visited by over 400FHC visitors who stopped by to see whatwe were up to, discuss the hobby, etc.
About 50 yards from where we were set upand clearly visible from our seats where weworked on our models, FHC had con-structed a tank driving demonstrationcourse. At various times we were ser-enaded by the hum (roar?) of 1/1 tankengines, as a Sherman M4A1, an M3Stuart, Soviet T-34/85, Hetzer WW2German tank destroyer, and a BritishAbbot SPG all ran the course. Occasion-ally they would fire a blank round, causingsmall children to burst into tears, and weadults to uncontrollably jump a number ofinches off the ground. Also firing roundsnext to the tank driving course were twoWW2 German 88mm Flak guns.
Could anything be cooler for the tankmodeler: Building models, being askedquestions by an admiring public, all to thesound and sights of real tanks paradingabout not 50 yards from where you sit?? Iam hard pressed to figure out what couldbe better? Did I mention the FHC providedus with free lunch…
This is the second event that IPMS Seattlehas teamed with FHC to present ourhobby to the public, and it won’t be thelast. The first involved us sitting around1/1 Japanese Zeros while displaying
Skyway Model Shop Sale
Skyway Model Shop will be having asale the weekend of June 14/15. Therewill be 20% off everything in the store,with selected 50% off items and asidewalk sale if the weather cooperates.For more information or directions visitthe web site at www.skywaymodel.com,or call 206-772-1211
Mitsubishi Zero models in various scales,and helping kids build Make N Take Zeromodels. Again, how cool is that?
Saturday August 16 is Luftwaffe Day at theFHC, and IPMS Seattle has been asked toput on a display of suitable Luftwaffeaircraft models, work on Luftwaffe modelkits, answer questions, while theCollection’s Messerschmitt Bf 109, FockeWulf Fw 190, and Fiesler Storch take to theair nearby. Why not join some of yourfellow modelers as we share our love of thehobby at such an event?
See you at the June meeting.
Cheers
Andrew

SEATTLE CHAPTER CONTACTS
President: Vice President: Treasurer: Show Chairs:Andrew Birkbeck Eric Christianson Spencer Tom Andrew BirkbeckP.O. Box 15983 18215 NE 95th Way #103 318 N.E. 81st St. Spencer TomSeattle, WA 98115 Redmond, WA 98052 Seattle, WA 98115Ph: 206-522-3539 Ph: 425-591-7385 Ph: [email protected] [email protected] [email protected]
IPMS Seattle Web Site (Web Co-Ordinator, John Kaylor): http://www.ipms-seattle.org
Public Disclaimers, Information, and Appeals for Help
This is the official publication of the Seattle Chapter, IPMS-USA. As such, it serves as the voice for our Chapter, and depends largelyupon the generous contributions of our members for articles, comments, club news, and anything else involving plastic scale modeling andassociated subjects. Our meetings are generally held on the second Saturday of each month, (see below for actual meeting dates), at the NorthBellevue Community/Senior Center, 4063-148th Ave NE, in Bellevue. See the back page for a map. Our meetings begin at 10:00 AM, exceptas noted, and usually last for two to three hours. Our meetings are very informal, and are open to any interested modeler, regardless of interests.Modelers are encouraged to bring their models to the meetings. Subscriptions to the newsletter are included with the Chapter dues. Dues are $25a year for regular mail delivery of the newsletter, and $15 for e-mail delivery, and may be paid to Spencer Tom, our Treasurer. (See addressabove). We also highly recommend our members join and support IPMS-USA, the national organization. See below for form. Any of the memberslisted above will gladly assist you with further information about the Chapter or Society.
The views and opinions expressed in this newsletter are those of the individual writers, and do not constitute the official position of theChapter or IPMS-USA. You are encouraged to submit any material for this newsletter to the editor. He will gladly work with you and see thatyour material is put into print and included in the newsletter, no matter your level of writing experience or computer expertise. The newsletter iscurrently being edited using a PC, and PageMaker 6.5. Any Word, WordPerfect, or text document for the PC would be suitable for publication.Please do not embed photos or graphics in the text file. Photos and graphics should be submitted as single, separate files. Articles can also besubmitted via e-mail, to the editor’s address above. Deadline for submission of articles is generally twelve days prior to the next meeting - earlierwould be appreciated! Please call me at 425-823-4658 if you have any questions.
If you use or reprint the material contained in the newsletter, we would appreciate attribution both to the author and the sourcedocument. Our newsletter is prepared with one thing in mind; this is information for our members, and all fellow modelers, and is prepared andprinted in the newsletter in order to expand the skills and knowledge of those fellow modelers.
IPMS Seattle Chapter Newsletter Page 2
Upcoming Meeting DatesThe IPMS Seattle 2014 meeting schedule is as follows. All meetings are from 10 AM to 1 PM, except as indicated. To avoidconflicts with other groups using our meeting facility, we must NOT be in the building before our scheduled start times, andMUST be finished and have the room restored to its proper layout by our scheduled finish time. We suggest that you keep thisinformation in a readily accessable place.
June 14 July 12August 9 September 13
Newsletter Editor:Robert Allen12534 NE 128th Way #E3Kirkland, WA 98034Ph: [email protected]

IPMS Seattle Chapter Newsletter Page 3
Place Model Modeler
Junior-Aircraft1st Hurricane Joseph Minerich2nd P-47N Joseph Minerich3rd Zero Joseph MinerichHM Fw 190 Joseph Minerich
Junior-Armor1st Komatsu Dozer Bradley Highsmith2nd Jagdtiger Trevor Gaffney3rd E-100 Dom HolmstromHM German Tank Joseph MinerichOoB Tiger 1 Nolan Gaffney
Junior-Auto1st Kenworth 900 Unknown
Junior-Space Fact/ Future Tech.1st F91 Gundam Hayden Qi2nd ZZKU Gundam Hayden Qi
Junior-Miscellaneous1st Knight Joseph Minerich2nd Knight Joseph Minerich3rd Civil War dude Joseph Minerich
Aircraft-1/73 & Smaller1st F-18E David Hemdel2nd CF-18 Robert Latimer3rd Su-27 Flanker B Robert LatimerHM Gloster Meteor James McCowenOoB C-17 Globemaster Brian Birk
Aircraft-1/72 Single Prop1st Ilyushin Il-2 Robert Latimer2nd P-47D Terry Schuler3rd F4U-1D David HansenHM Spitfire Mk.XIX David HansenOoB Ilyushin Il-2 Robert Latimer
Aircraft-1/48 Single Prop-Axis1st Kawanishi N1K2 Bob Windus2nd Fw 190A-8 Bob Windus3rd Mitsubishi A6M5 Zero Terry SchulerHM Fiat G.55 Chris CowxHM Fi 156C Storch Brian BirkOoB Ki-44 Shoki Gary Jackson
2014 IPMS Seattle Spring Show Category Winners
Aircraft-1/48 Single Prop-Allied1st P-47D Razorback Terry Schuler2nd P-51D Mustang Bob Windus3rd L-19 Birddog Terry DavisHM P-40N Alan GatesHM MQ-1 Predator Mike OberholtzerOoB Ilyushin Il-2 Brian Birk
Aircraft-1/72 Multi Prop1st E-2C Hawkeye Robert Latimer2nd Ju 52 David Hemdel3rd He 115 Dan SmithHM SM 81 Larry BaldwinOoB E-2C Hawkeye Robert Latimer
Aircraft-1/48 Multi Prop1st Mitsubishi Ki-46 III Scott Buffett2nd Mitsubishi Ki-46 Joe Brown3rd V-173 Terry DavisHM Bf 110E Bob Windus
Aircraft-1/32 & Larger-Prop1st Supermarine Spitfire Wolf Buddee2nd Hawker Tempest Mk.V Chris Morris3rd P-40E Brian MedinaHM Caudron C.714C.1 Cyclone Chris MorrisHM Kittyhawk Mk.III RNZAF Chris MorrisOoB SBD Dauntless Brian Birk

IPMS Seattle Chapter Newsletter Page 4
Aircraft-1/32 & Larger-Prop1st Nakajima Ki-44 Joe Brown2nd Nakajima Ki-44 Prototype James Mustarde3rd Mistubishi J2M3 Raiden Brian WillettHM Fw 190C-O V18/U-1 James Mustarde
Aircraft-1/72 Single Jet1st Mitsubishi F-2A Jackson Wai2nd U-2 Tim Bradley3rd T-45 Daniel CareyHM F-21 Kfir Daniel CareyOoB Nesher S Robert Latimer
Aircraft-1/48 Single Jet1st F-16 Scott Carpenter2nd A-4 Joe Brown3rd F-105 Gary Meinert
Aircraft-1/72 Multi Jet1st F-5F Tiger II Daniel Carey2nd S-3A Viking Gary Meinert3rd EF-18G Daniel CareyHM He 162 David HemdelOoB Eurofighter Robert Latimer
Aircraft-1/48 Multi Jet1st YP-59 Walt Babst2nd F-4B Brian Birk3rd F-4B Robert LatimerOoB F-4B Brian Birk
Aircraft-1/32 & Larger- Jet-Single Engine1st A-6A Rory Pennington2nd Sabre 5 Brian Birk3rd F-15E Joe Zvara
Aircraft-Airliners/Civil/Sport/ Racing1st P-51B Tim Bradey2nd NASA MQ-9 Reaper Tim Nelson3rd Vultee V-1A Tim NelsonHM Boeing 40B-4 Eric HagedornOoB Disney 747 George Ruscoff
Aircraft-Rotary Wing1st Westland Whirlwind Bob Chenoweth2nd OH-136 Bob Chenoweth3rd AH-60L Alan Streeter
Aircraft-Biplanes, Vintage 1/72 & smaller1st Monoplane (Blue Max Movie) Tim Nelson2nd Fokker D.VII Tim Nelson3rd Bristol M.1C Bullet Will PerryHM Albatros D.I Bob Chenoweth
Aircraft-Biplanes, Vintage 1/71 & larger1st Fokker D.VII Harry Avis2nd Fokker D.VII Gary Meinert3rd DH.9a Brian BirkOoB Hanriot HD-1 Ken Murphy
Aircraft-Misc/Scratchbuilt/ vac/conversions1st Fokker D.VII Harry Avis2nd Rogallo Morgan Girling3rd Castaibert Morgan GirlingHM P-12 Harry AvisHM Breda BA-65 Dan Smith
Armor-1/35<Closed Top to ‘45-Axis1st Vickers Crossley A.C. Mike Tsoumpas2nd Semovente M-40 75/18 George Bacon3rd Captured KV-2 Justin DengHM Tiger IE Ross HillmanOoB Tiger IE Ross Hillman
Armor-1/35<Closed Top to ‘45-Allied1st Ford Tf-c George Stray2nd Vickers Mk.1B Mark Ford3rd Soviet BT-7 George BaconHM Locust Bruce McKinneyHM Renault D.1 David HansenOoB M26 Pershing Elbert Lin
Armor-1/35<Closed Top after ‘451st M4A3 Dozer Tank Peter Hickey2nd Challenger I Brian Lockwood3rd Chinese 2LC 2000 George BaconHM Merkava ARV Mark AlgrichHM M26 Pershing Peter HickeyOoB Soviet IT-1 Morgan Girling
IPMS Seattle Chapter Newsletter Page 5
Armor-1/35<Open Top1st Land Wasserschlepper George Stray2nd SdKfz 234/4 Brian Wadsworth3rd LAV-25 George BaconHM PzJag I Gary WeeksHM M16 Halfftrack Chris MorrisOoB SdKfz 234/3 Howitzer Doug Reed
Armor-1/36 & Smaller, All Types (except 1/48)1st T34/85 Doug Woy2nd Steyr Armored Railcar Djordje Nikolic3rd T-62 MBT Ken Murphy
Armor-1/48, All Types1st Stug IIIG Gary Weeks2nd Stug IIIB Peter Hickey3rd King Tiger Joe BrownOoB Stug IIIB Peter Hickey
Armor-Soft–skinned1st British Ford MMGS George Bacon2nd Kubelwagen Steve McNaughton3rd Humber Utility Car Bob ChenowethOOB DKW Motorcycle Shawn Gehling
Armor-Towed Artilllery & Missles1st Versuchsflakwagen 8.8cm Flak 41 Mark Ford2nd NATO SA3 GOA SAM Morgan Girling3rd 120mm German Mortar Gary WeeksOOB NATO SA3 GOA SAM Morgan Girling
Armor-Misc, Conversions & Scratchbuilt1st T32 Dan Rowbottom2nd Jadgpanzer I Justin Deng3rd Merkava Mk.2 Damon Burke
Figure-Less than 54mm1st French Napoleanic Trumpeter Gordon Enquist2nd Imperial Army Standard Bearer Gordon Enquist3rd Syrian Soldier w/missile Morgan Girling
Figures-54mm & 1/351st El Jugular Mike Cramer2nd Prussian Infantry Gordon Enquist3rd Werner Voss Scott CarpenterHM Fusiller Private Mike Cramer
Figures-Larger than 54mm1st King Jan Sobieski Mike Cramer2nd Zulu Comander Paul Dunham3rd Medic, US Army WWII William ZhangHM Wrath of God Talino Bruno
Figures-Sci-Fi, All1st Mars Attacks! Martian Warrior George Tufnail2nd Vampire Talino Bruno3rd ArJac RockFirst Mark AlgrichOOB Mars Attacks! Martian Warrior George Tufnail
Ships-Powered 1/700 & smaller1st HMCS Magnificent Neil Ramage2nd HMS Renown Rob Brown3rd USS Rhode Island Rick HeinbaughHM HMS Repulse Rob BrownHM USS Bronstein Rick HeinbaughOOB USS Maryland J.T. Tami
Ships-Powered 1/699 to 1/3501st Prinze Eugen Les Knerr2nd 1945 USS Chevalier Peter Hickey3rd USS Wichita Roger TorgesonHM USS Chavalie Gordon Bjorklund
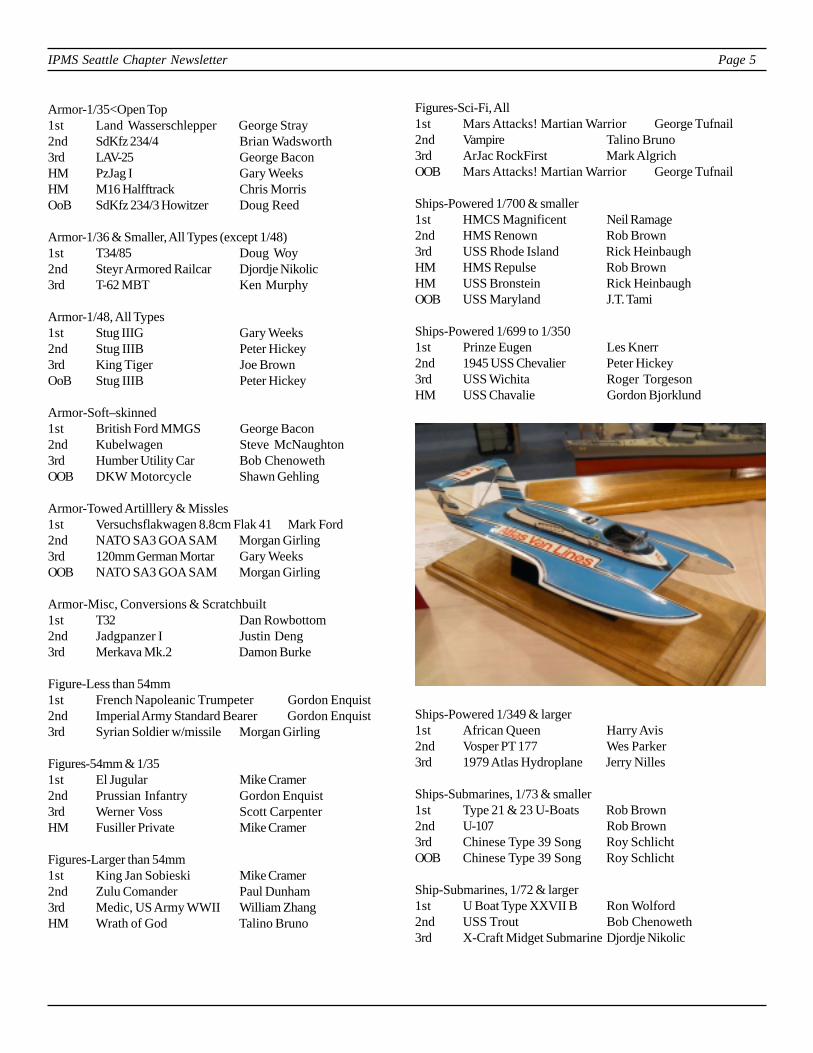
Ships-Powered 1/349 & larger1st African Queen Harry Avis2nd Vosper PT 177 Wes Parker3rd 1979 Atlas Hydroplane Jerry Nilles
Ships-Submarines, 1/73 & smaller1st Type 21 & 23 U-Boats Rob Brown2nd U-107 Rob Brown3rd Chinese Type 39 Song Roy SchlichtOOB Chinese Type 39 Song Roy Schlicht
Ship-Submarines, 1/72 & larger1st U Boat Type XXVII B Ron Wolford2nd USS Trout Bob Chenoweth3rd X-Craft Midget Submarine Djordje Nikolic
IPMS Seattle Chapter Newsletter Page 6
Auto-Factory Stock1st 1959 Cadillac ElDorado Isao Tokeuchi 2nd Camaro ZL1 Paul Stedman3rd Porche 911 Turbo Cabriolet Isao TokeuchiHM 1966 Mustang GT-350H Isao TokeuchiHM 1958 Edsel Pacer Gordon EnquistOoB 1964 Pontiac GTO Tom Krajicek
Auto-Hot Rods1st 1959 Chevrolet Impala Isao Tokeuchi2nd Jack Daniels Whisky Wagon Gordon Enquist3rd 1957 Chevrolet Street Racer Gary DavisHM Forderari F40 Sedan Delivery Eyner TOoB 1958 Chevrolet Impala Laurie Tower
Auto-Custom1st Custom 1948 Ford Tom Krajicek2nd 52 Chevy Truck Custom Ken Meyer3rd 48 Ford Dave LawniczakHM 49 Mercury Custom Jameston KroonHM 1951 Chevy Bel Air Ed Gilbert
Auto-Pick-ups1st 1959 Chevrolet El Camino Isao Tokeuchi2nd 1941 Chevy Gasser Dave Lawniczak3rd 1951 Chevrolet Pickup David HemdelHM 1951 Chevrolet Pickup Laurie Tower
Auto - Commercial, Truck, Van, Fire, Rescue1st "Geek Squad" Beetle Gordon Enquist2nd TIF 24/50 Hauler Wes Parker3rd CMC Tow Truck Dale Schmitt
Competition - Closed Wheel1st 1964 GS Corvette Paul Stedman2nd Porche 935 "Jagermeister" Rob Glowinkiowski3rd 69 Dodge Dart Robert AlescioOOB Dale Earnhardt "Goodwrench" Randy Klein
Competition - Open Wheel1st Lotus 79 JPS Rob Glowinkiowski2nd McLaren MP4/13 Rob Glowinkiowski3rd Leyton House 901CG Rob GlowinkiowskiHM Lotus 99T Rob GlowinkiowskiHM Brabham BT-44B Rob GlowinkiowskiOOB 34 Ford Slammer Gordon Enquist
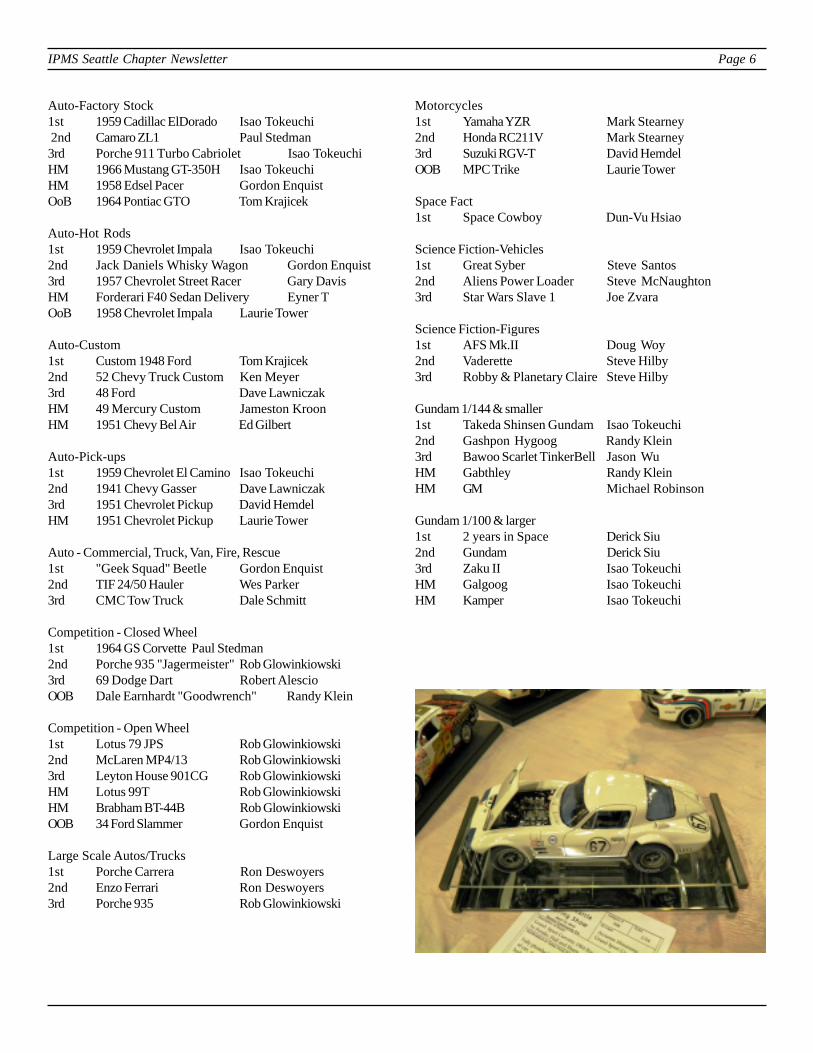
Large Scale Autos/Trucks1st Porche Carrera Ron Deswoyers2nd Enzo Ferrari Ron Deswoyers3rd Porche 935 Rob Glowinkiowski
Motorcycles1st Yamaha YZR Mark Stearney2nd Honda RC211V Mark Stearney3rd Suzuki RGV-T David HemdelOOB MPC Trike Laurie Tower
Space Fact1st Space Cowboy Dun-Vu Hsiao
Science Fiction-Vehicles1st Great Syber Steve Santos2nd Aliens Power Loader Steve McNaughton3rd Star Wars Slave 1 Joe Zvara
Science Fiction-Figures1st AFS Mk.II Doug Woy2nd Vaderette Steve Hilby3rd Robby & Planetary Claire Steve Hilby
Gundam 1/144 & smaller1st Takeda Shinsen Gundam Isao Tokeuchi2nd Gashpon Hygoog Randy Klein3rd Bawoo Scarlet TinkerBell Jason WuHM Gabthley Randy KleinHM GM Michael Robinson
Gundam 1/100 & larger1st 2 years in Space Derick Siu2nd Gundam Derick Siu3rd Zaku II Isao TokeuchiHM Galgoog Isao TokeuchiHM Kamper Isao Tokeuchi

IPMS Seattle Chapter Newsletter Page 7
Diorama-Aircraft1st Corsair Terry Davis2nd Rogozarski Djordje Nikolic3rd Devastator Gary Weeks
Diorama-Auto1st Bulldozer John Geigle2nd Jeep in mud Gordon Enquist3rd Railroad Diorama Steve BuchananHM Rusty Pickups Dale Schmitt
Diorama-Armor1st Katiushka Truck Bruce McKinney2nd Desert Jeep Ed Schnabel3rd Su-100 Bruce McKinneyHM Long Range Truck Ed SchnabelHM Marder III Mark Ford
Diorama-Sci-Fi, Space Fact1st Zombie Destroyer Bruce McKinney2nd Letter From Home Steve Hilby3rd The Chase Miguel Bastarrchea
Diorama-Naval1st HMCS Rainbow Eric Hagedorn2nd Monitor vs. Virginia Rob Brown3rd LCM & M4 Ernie O'Brien
Diorama-More than 5 Figures1st US Special Forces James Gates2nd Sniper Talino Bruno3rd Trench Scene James Gates
Collections1st Farnborough Nov 1945 Terry Moore2nd 88 Collection of PAK & FLAK Steve Faxon3rd Eastern Front German Armor Doug WoyHM Fictitious Felines Steven Russo
Flights of Fancy1st Avro Arrow CF-105 Scott Kruize2nd Gripen CF-189 Brian Birk3rd Penguin Armored Car Shawn Gehling
Animals/Dinos1st T-Rex Brandon Chutich2nd T-Rex Brandon Chutich3rd Triceratops Brandon ChutichHM Gigantosaurus Brandon Chutich
Group Builds1st M4 Shermans Ron Wolford
Miscellaneous1st The "Frantics" Band Gordon Enquist2nd Steampunk Submarine David Goudie3rd Curse You Red Baron Gordon EnquistHM M19-3 Grenade Launcher Charles PhillipsHM Home Made Go-Cart Terry DavisOoB M19-3 Grenade Launcher Charles Phillips
Mentored Models1st El Chupacabra Plane Brian Hennessey

IPMS Seattle Chapter Newsletter Page 8
Special Award Winners
Award Model Winner
Best Finish 1/32nd F4U Corsair Brian BirkBest British DH.9A Brian BirkBest Canadian HMCS Rainbow Eric HagedornBest Submarine USS-202 "Trout" Bob ChenowethBest Bare Metal Finish F-86 Brian BirkBest Small Air forces F-5F Daniel CareyBest Pacific War M6A1 Seiran Mike OberholtzerBest US Subject Rare Finds Dale SchmittBest Fire/Life Safety Vehicle 1959 Ambulance Dale SchmittBest 1/32 Aircraft Tempest Mk.V Chris MorrisBest Street Rod Porche Carrera Ron DeswoyersBest Sci-Fi Slave 1 Joe ZvaraBest Finish of a Military Vehicle Vickers Crossley Mike TsoumpasBest French Subject FT-17 George BaconBest German Subject Prince Eugen Les KnerrBest Japanese Subject Yamaha YZR-M1 Mark StearneyBest Middle East Subject M-51 Steve FaxonBest Kaylormad - Kit Bash Letters from Home Steve HilbyBest Italian Subject Ferrari F60 Rob GlowinkiowskiPeople’s Choice Edwardian Aerial House Car Steve Hilby
“Best of” Winners
Best Junior Komatsu Dozer Bradley HighsmithBest Aircraft Supermarine Spitfire Wolf BuddeeBest Armor Land Wasserschlepper George StrayBest Figure King Jan Sobieski Mike CramerBest Ship Prinze Eugen Les KnerrBest Auto Porche Carrera Ron DeswoyersBest Sci-Fi Great Syber Steve SantosBest Diorama Zombie Destroyer Bruce McKinney

IPMS Seattle Chapter Newsletter Page 9
Hasegawa 1/48th Scale Junkers Ju 87R-2 Stuka "Desert Snake" Limited Edition
by Ken Murphy
This kit is one of a long line of Hasegawa Stukas. The moldingshave been engineered to adapt to virtually every Stuka version.The R-2 is basically a B with the only discernible difference beingthe external long range tanks. They come on a separate sprue,along with the special “snake” decals. Otherwise, along with theeleven unused parts, you could model any number of B or Cversions.
So now we’ll just go into the build (with a few exceptions regard-ing the color scheme and markings which I will touch on later).
Since I was given this kit with the express purpose of writing areview, I decided from the start to build the kit out of the box andby the directions – two things I seldom do and probably won’t doagain for reasons which will soon become apparent.
As usual, cockpit assembly is step 1. The cockpit floor and seats, etc., comprise seven parts and represent some nice detail. After basicpainting and weathering with oil wash and dry brushing, I highlighted the dials and controls on the radio equipment and made Tamiyatape seat belts and harnesses with wire buckles (tediously wrapped around the end of an X-acto knife to bend them into a more or lessbuckle-like shape). So far, that’s the only non-out-of-the-box addition, but an important one to say the least. Of course, for the reallypicky modeler, there are plenty of aftermarket alternatives.
The next rather unusual step involves the instrument panel, gun sight and rudder pedals that form a unit, which then is suspended fromthe upper deck which sits atop the forward fuselage. I know, sounds confusing. At first I couldn’t figure out what the things werehanging from the instrument panel, but when they were inserted it became clear: rudder pedals that leave the space below them open tothe floor and the target-finding window.
The insides of the fuselage halves have been scored and cut outin a rather crude way to accept the side consoles, in a way notunlike you might do yourself if you were installing resin inserts.Hasegawa came out with a new tool of the Stuka in 1996 and thismay be a recent alteration to upgrade the kit. At any rate, theconsoles are nicely done with the kind of detail you would expectfrom more modern mold making technology. The fit is good and asyou can see, the office looks pretty good.
The engine cowling is another separate assembly designed to beswapped out for later versions. The odd bit with this assembly isthat the bomb cradle attaches to it. Normally I would leave such adelicate thing off until last, knowing my proclivity for snapping,
bending, breaking, destroying or otherwise losing fragile parts like that, but in keeping with the directions I did as instructed andsweated bullets for the rest of the build.
Next came the propeller. Six parts: spinner, base, three blades, and a cap. The base includes a shaft that inserts through a hole in theengine cowling face to be held in place by the cap. This is another thing I would never do. Usually I would create some arrangementthat would let me attach the propeller last like the way Tamiya includes a polypropylene washer so the prop can be inserted and pulledoff again at any time. That keeps it out of the way and gives me a nice ‘finishing touch’ at the end of the build. Unfortunately in thiscase, the shaft is loose enough that just fitting it through the whole will not keep it in place, requiring the glued on cap to secure it. Notmy druthers, but again, I stuck to the instructions.
IPMS Seattle Chapter Newsletter Page 10
After the fuselage has been buttoned up, the upper decking with instrument panel, etc. is dropped on top and the lower section of theforward fuselage attached. This lower half houses the cockpit floor window which is a triangular glazing that fits into that assembly – orat least it’s supposed to. I tried putting it together as shown, but could not get it to fit. I tried doing it upside down, right side left,inside out, nothing fit! I checked other build reviews but no one mentioned this problem. Either they had no problem, they’re keeping ita secret or I’m an idiot. Wait – don’t answer that. In the end I just said “screw it” and left it off. It’s in about the least visible place itcould be. I don’t think it will be noticed, so don’t tell anyone. (By the way, the profile of the fuselage without the canopy, wing or tailfeathers, bears a striking resemblance to nothing less than a menacing serpent.)
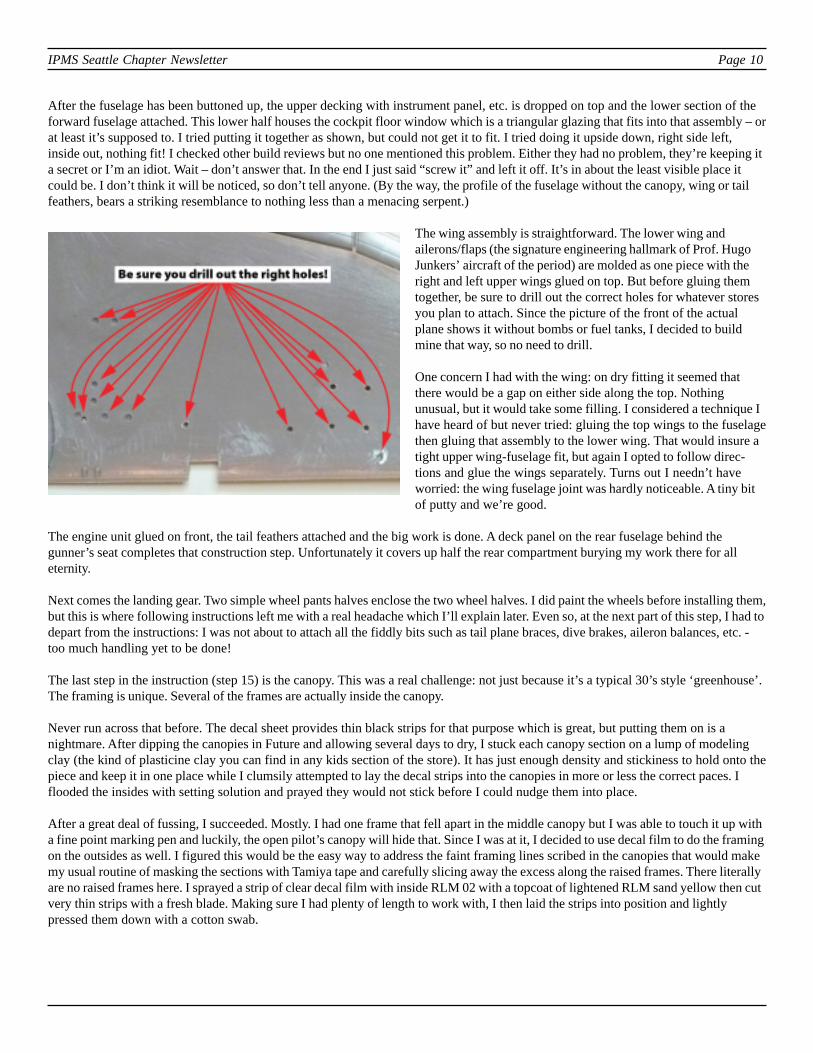
The wing assembly is straightforward. The lower wing andailerons/flaps (the signature engineering hallmark of Prof. HugoJunkers’ aircraft of the period) are molded as one piece with theright and left upper wings glued on top. But before gluing themtogether, be sure to drill out the correct holes for whatever storesyou plan to attach. Since the picture of the front of the actualplane shows it without bombs or fuel tanks, I decided to buildmine that way, so no need to drill.
One concern I had with the wing: on dry fitting it seemed thatthere would be a gap on either side along the top. Nothingunusual, but it would take some filling. I considered a technique Ihave heard of but never tried: gluing the top wings to the fuselagethen gluing that assembly to the lower wing. That would insure atight upper wing-fuselage fit, but again I opted to follow direc-tions and glue the wings separately. Turns out I needn’t haveworried: the wing fuselage joint was hardly noticeable. A tiny bitof putty and we’re good.
The engine unit glued on front, the tail feathers attached and the big work is done. A deck panel on the rear fuselage behind thegunner’s seat completes that construction step. Unfortunately it covers up half the rear compartment burying my work there for alleternity.
Next comes the landing gear. Two simple wheel pants halves enclose the two wheel halves. I did paint the wheels before installing them,but this is where following instructions left me with a real headache which I’ll explain later. Even so, at the next part of this step, I had todepart from the instructions: I was not about to attach all the fiddly bits such as tail plane braces, dive brakes, aileron balances, etc. -too much handling yet to be done!
The last step in the instruction (step 15) is the canopy. This was a real challenge: not just because it’s a typical 30’s style ‘greenhouse’.The framing is unique. Several of the frames are actually inside the canopy.
Never run across that before. The decal sheet provides thin black strips for that purpose which is great, but putting them on is anightmare. After dipping the canopies in Future and allowing several days to dry, I stuck each canopy section on a lump of modelingclay (the kind of plasticine clay you can find in any kids section of the store). It has just enough density and stickiness to hold onto thepiece and keep it in one place while I clumsily attempted to lay the decal strips into the canopies in more or less the correct paces. Iflooded the insides with setting solution and prayed they would not stick before I could nudge them into place.
After a great deal of fussing, I succeeded. Mostly. I had one frame that fell apart in the middle canopy but I was able to touch it up witha fine point marking pen and luckily, the open pilot’s canopy will hide that. Since I was at it, I decided to use decal film to do the framingon the outsides as well. I figured this would be the easy way to address the faint framing lines scribed in the canopies that would makemy usual routine of masking the sections with Tamiya tape and carefully slicing away the excess along the raised frames. There literallyare no raised frames here. I sprayed a strip of clear decal film with inside RLM 02 with a topcoat of lightened RLM sand yellow then cutvery thin strips with a fresh blade. Making sure I had plenty of length to work with, I then laid the strips into position and lightlypressed them down with a cotton swab.

IPMS Seattle Chapter Newsletter Page 11
For the most part this technique worked fine. Tedious, but fine,with just one problem…
At this point I realized that some of the splinter camouflage wouldbe visible on the rather wide lower frames. If the camouflage is allone color, I usually do the canopy separately and install it at theend, such as the instructions indicated and as I was intending todo here, but now I would have to match the patterns on theframes after the fact meaning more masking. Almost certainly anytape – even Tamiya tape – would pull off the decals. Great, justgreat – I decided to put it off until the end. (Hmmm, just anotherexample of how I manage to model myself into a corner. Actually, Ifind it interesting to see how many mistakes I will make in a givenbuild. And how, I hope, I will overcome them. Modeling is nothing if not challenging!)
I began by painting the undersides RLM 65 (Luftwaffe blue gray), for which I owe fellow club member Scott Kruize. He made anemergency run to Emil’s for me, as my local hobby shop has sadly closed. It was during this step I ran into mistake number two: I hadglued on the landing gear – which is not blue gray. Not fatal, but now I had to mask off the gear when I should have just left them off.
Mistake number three (a close relative of number two) was evenworse, for now I had to paint the landing gear along with theupper surfaces – so now I had to mask off the entire underside!
Somehow I can’t help but think a little thoughtful planning mayhave come in handy…
That completed, I painted the upper surfaces a lightened RLM 71medium green overall. Minor mistake four: I had to mask thealready painted dark gray propeller - if I had let it off, no problem.That *$@’</!*+!!! prop was just in the way the whole build!
Next I painted the standard Luftwaffe splinter scheme with RLM70 dark green, also slightly lightened with Model Master NavyWhite, which is a slightly beige off-white. I feel it gives a warmertone to the color. (One thing I found helpful when trying tointerpret the complex camouflage scheme in the gray-on-grayinstructions was to color the various areas with highlighter pens).
The desert camouflage scheme of 1941 consisted of a quick overspray of sand yellow over the standard European splinter pattern. Myoriginal clever plan was to simply accomplish this with some deft free hand airbrushing, but after practicing on an old model, I realized Iwas not getting the consistent results I had hoped for. Time for Plan B. Out came the modeling clay. I rolled out thin ropes and laid themover the model then covered the space in between with flattened sheets of the same stuff.
Many of my fellow modelers use something like Silly Putty for this because it does not leave any residue. I find that it doesn’t stay puteither. The modeling clay will stay put (just don’t press too hard) and whatever residue it leaves is easily removed with a little dilutedalcohol. Maybe the fact that I use acrylics is why this works, I’m not sure, all I can say is it works for me. The results are a consistentfine-feathered edge.
After a coat of gloss lacquer, it’s time for the decals. They are very nice, in register and lay down very well. The only challenge was thesnake. The decal is divided into three parts, one of which is just the tongue above the exhaust stubs (the left side has an extra decal tocover the carburetor air intake). The dividing line is cleverly placed to fall behind the fuselage cross. However, this means that threequarters of the snake from the head back is one long piece! Needless to say, it was another sweating bullets moment. But with a lot ofsolution, a soft brush and patience it went on fairly easily.

IPMS Seattle Chapter Newsletter Page 12
Thoroughbred
Of course if you made a mistake at this point, you could alwaysdo the alternative markings, which don’t involve a snake. In myprevious in-the-box review, I mentioned several anomalies withthe markings. Here’s one more: the “snake” version includesfuselage crosses that have the top missing. The painting instruc-tions indicate painting out the missing area in RLM 70 dark gray.This is based on the only photo that shows the rear fuselage.
Clearly this is repaired battle damage, yet the decals are for bothsides in the same place as if a shell or splinter had gone straightthrough perpendicularly. Seems unlikely to me, but I decided todepict my version the day before the damage. I just used thecrosses from the alternate marking set. One last point (also shownin the picture), the instructions show the back half of the rudderas being painted in the underside blue gray, as depicted in the boxtop art. That seemed very odd to me. You can clearly see the areain question in the picture, but to me it looks like the rudder isslightly canted to the left and what we are seeing is the lightstriking that area. Trying to interpret color from a black and white image is a dicey business to say the least, but in this case I disagreewith their conclusion, so I just continued the camo scheme across the rudder.
For the weathering, I decided to really do it up. In fact, I wanted to weather it like a tank. After all, it was operating in the harshestenvironment imaginable and in the two pictures I found of that particular plane, it looked pretty worn. A large part of my inspiration forfollowing the build instructions so religiously was to use the tank approach: build, build, build, paint, paint, paint (instead of the aircraftapproach: build, paint, build, paint, build, paint). I attempted to use some of the techniques Eric Christensen outlines in his armor buildsbut I quickly realized that I didn’t have the proper materials to do it, so it was back to the drawing board. In the end I used a combina-tion of pencils for panel lines, silver pencil for scuffing, overspray of off white and oil washes. I used very fine sandpaper to removesome of the overspray where I thought appropriate to avoid too even a coating of “dust.”
All that spraying buried most of the panel lines I had accented with a mechanical pencil, so I had to redo most of it. The fineness ofthose lines which I was concerned would be lost under all that paint turned out to not be such a concern. The only line I lost was therudder tab which I redrew using tape and a ruler as guides. The final touch was trying another thing I hadn’t before: sanding soft pencillead into dust and applying it with a stiff brush. Previously I had always airbrushed exhaust stains, but this method gave me muchbetter control and far less headache! Lastly, I attached the canopy sections and did my best to match the colors, tearing off a couple ofthe frame decals in the process necessitating more masking and repainting.
In retrospect, a much better approach would have been to use the fine Eduard masks.
The last step was to attach the fiddly bits. The aileron counterbalances, tail struts, fuselage steps, etc. All of these parts have hardlyanything in the way of attachment points. Each has barely a suggestion of a nub and the attachment points were little more than aslight dimple. Some scrapping, sanding and drilling help create a bondable surface and with patience and fussing all were attached. Thelast part was the antenna.
I was concerned that the small attachment point on top of the canopy would not be strong enough to resist any pull from the antennawire. But here again, I tried something new - Wonder Wire ceramic rigging fiber (or so the label calls it). It comes wound up in a packetbut springs into a stiff straight length when cut. The big advantage in this case is that the stiff wire actually supports the antenna. Cutto length, attached with a tiny drop of white glue, and it’s done.
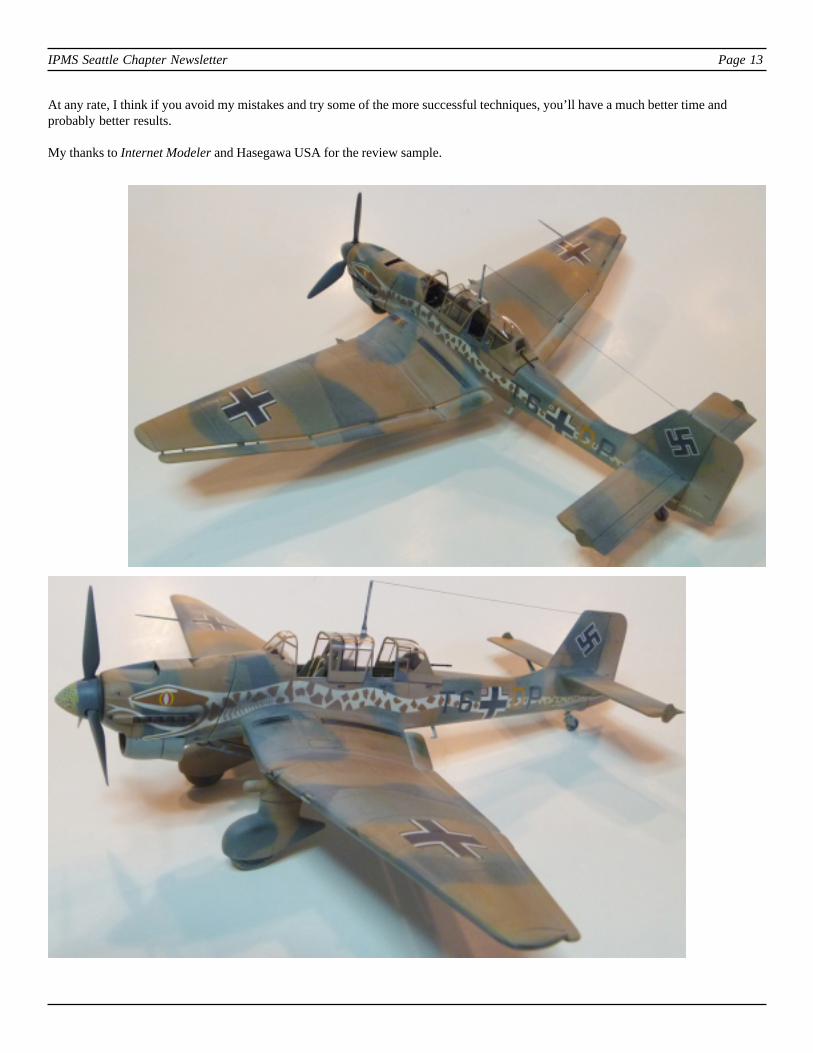
This is a fine model of the R-2 and will certainly be an attention grabber on your shelf. You can certainly do much more with this kit ifyou are so inclined, but even out of the box it gives a great representation of the Ju 87. Having the ailerons so firmly molded to thewings is a drawback for accuracy, but a real advantage in doing a more or less quick build. I think this is a kit one could reasonablecomplete in a few weeks, even though in my case I started it some seven months ago (Ok, I’m a slow builder, but like many of you, I’mfinding build time hard to come by what with a new house, grandkids, dogs, etc.).
IPMS Seattle Chapter Newsletter Page 13
At any rate, I think if you avoid my mistakes and try some of the more successful techniques, you’ll have a much better time andprobably better results.
My thanks to Internet Modeler and Hasegawa USA for the review sample.

IPMS Seattle Chapter Newsletter Page 14
Revell/Monogram 1/48th Scale TBF Avenger ‘Presidential’ Re-release
by Scott Kruize
Way back Then, I built several Aurora World War II “FamousFighters”: Spitfire, Fw 190, Messerschmitt Me 109, and Zero. Inmy innocent ignorance, I didn't realize there was anythingbetter—until I got the Monogram SBD Dauntless as a Christmasgift.
Wow! What a difference! The Monogram model had far moreparts than the Auroras. There was an actual cockpit interior withseparate crewmen, as opposed to Aurora’s flat top with the pilotmolded integrally with the fuselage halves. The surfaces all hadpanel lines, tiny close-spaced riveting, and other fine details. Bestof all: working features!
Once it was assembled, I flew the Dauntless on vital-but-danger-ous dive-bombing missions: spin the prop, retract the landinggear, extend the dive brakes, raise and swivel the rear gunner’s machine gun to defend against Zeros, dive onto target…touch the latchunder the fuselage, back of the wing. The big 500-pound bomb swings forward and down on its trapeze, clearing the prop…A hit! Righton target!
What then didn’t happen, back Then: my building the rest of Monogram’s ¼”-scale kits. I got sidetracked by the arrival at ThunderbirdDrugs of the Airfix-72 constant-scale series. These could be gotten one per weekly allowance, at thirty-nine cents each. The Mono-grams were ninety-eight cents, two weekly allowances …or in the case of the P-38 Lightning, $1.49; THREE!
But I hadn’t forgotten them through all the intervening years of my “Dark Ages”. When I resumed our hobby a dozen years ago - in mywealthy maturity (!) - I planned to eventually build every one of those kits Monogram had back in the mid-‘60s, plus whatever newones had been introduced since.
How fortuitous, therefore, that Internet Modeler editor Chris Banyai-Reipl handed me this kit. Revell and Monogram merged awhileback and kept all their old moldings. Re-releases in recent times have new boxings, with new box art and new decals. This is one such. Ialso had acquired an old boxing, and was able to do comparisons while doing the build for this review.
Everybody knows former President Bush (senior) was an Avenger pilot during the Second World War, and this re-release is specific forhis airplane. The new box artwork and decal set make it so; no changes were made to the ancient plastic moldings.
These hold 58 pieces. Fifty-one make up the plane. There are four figures: pilot, turret gunner, running radioman, and Landing SignalOfficer. With the latter’s freestanding screen and a pair of chocks, a mini-diorama can be arranged.
I read that Monogram’s engineers were instructed - from the earliest days - to put a lot of detail into as few parts as possible, so itwouldn’t be too hard for young modelers to build a good replica. The engine, for example, is molded in deep relief into the cowl. Thesemoldings are an astonishing achievement for 1958, and still assemble well and look good.
Seven of the moldings are ‘glass’: the greenhouse, turret top bowl, ventral observer’s station, and the four small windows low on theaft fuselage. Only two pieces make the cockpit: a continuous floor from the pilot’s cockpit through to the turret mount, plus a separatepilot’s head rest. The instrument panel is molded into the fuselage sides and is finished with a single decal.
Eight tiny pieces still on these new moldings have no reference in the new instructions! They’re hinge parts to permit the wing outerpanels to fold. The new instructions only say to glue the wing panels together. The old instructions have six additional illustratedsteps…
Out of nostalgic curiosity - could I have made wing folds work, way back Then? I tried the old instructions, elaborate and exacting inthose six steps. And I was able to make it all work…sort of!
IPMS Seattle Chapter Newsletter Page 15
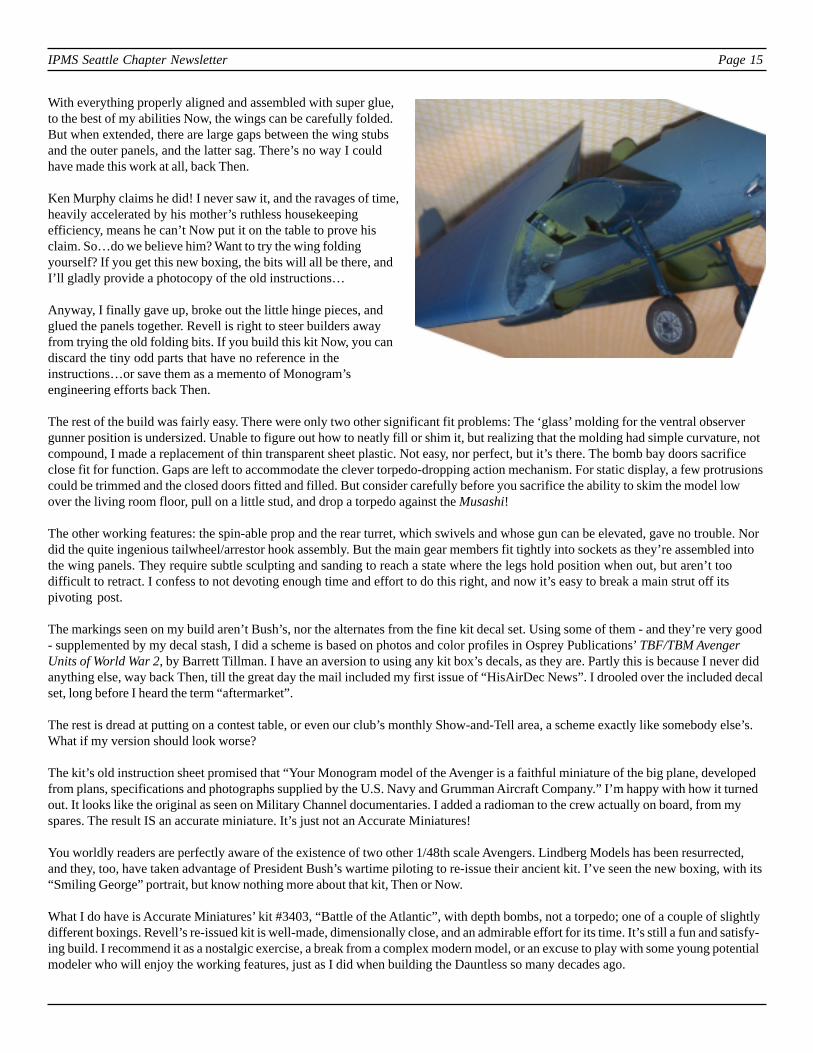
With everything properly aligned and assembled with super glue,to the best of my abilities Now, the wings can be carefully folded.But when extended, there are large gaps between the wing stubsand the outer panels, and the latter sag. There’s no way I couldhave made this work at all, back Then.
Ken Murphy claims he did! I never saw it, and the ravages of time,heavily accelerated by his mother’s ruthless housekeepingefficiency, means he can’t Now put it on the table to prove hisclaim. So…do we believe him? Want to try the wing foldingyourself? If you get this new boxing, the bits will all be there, andI’ll gladly provide a photocopy of the old instructions…
Anyway, I finally gave up, broke out the little hinge pieces, andglued the panels together. Revell is right to steer builders awayfrom trying the old folding bits. If you build this kit Now, you candiscard the tiny odd parts that have no reference in theinstructions…or save them as a memento of Monogram’sengineering efforts back Then.
The rest of the build was fairly easy. There were only two other significant fit problems: The ‘glass’ molding for the ventral observergunner position is undersized. Unable to figure out how to neatly fill or shim it, but realizing that the molding had simple curvature, notcompound, I made a replacement of thin transparent sheet plastic. Not easy, nor perfect, but it’s there. The bomb bay doors sacrificeclose fit for function. Gaps are left to accommodate the clever torpedo-dropping action mechanism. For static display, a few protrusionscould be trimmed and the closed doors fitted and filled. But consider carefully before you sacrifice the ability to skim the model lowover the living room floor, pull on a little stud, and drop a torpedo against the Musashi!
The other working features: the spin-able prop and the rear turret, which swivels and whose gun can be elevated, gave no trouble. Nordid the quite ingenious tailwheel/arrestor hook assembly. But the main gear members fit tightly into sockets as they’re assembled intothe wing panels. They require subtle sculpting and sanding to reach a state where the legs hold position when out, but aren’t toodifficult to retract. I confess to not devoting enough time and effort to do this right, and now it’s easy to break a main strut off itspivoting post.
The markings seen on my build aren’t Bush’s, nor the alternates from the fine kit decal set. Using some of them - and they’re very good- supplemented by my decal stash, I did a scheme is based on photos and color profiles in Osprey Publications’ TBF/TBM AvengerUnits of World War 2, by Barrett Tillman. I have an aversion to using any kit box’s decals, as they are. Partly this is because I never didanything else, way back Then, till the great day the mail included my first issue of “HisAirDec News”. I drooled over the included decalset, long before I heard the term “aftermarket”.
The rest is dread at putting on a contest table, or even our club’s monthly Show-and-Tell area, a scheme exactly like somebody else’s.What if my version should look worse?
The kit’s old instruction sheet promised that “Your Monogram model of the Avenger is a faithful miniature of the big plane, developedfrom plans, specifications and photographs supplied by the U.S. Navy and Grumman Aircraft Company.” I’m happy with how it turnedout. It looks like the original as seen on Military Channel documentaries. I added a radioman to the crew actually on board, from myspares. The result IS an accurate miniature. It’s just not an Accurate Miniatures!
You worldly readers are perfectly aware of the existence of two other 1/48th scale Avengers. Lindberg Models has been resurrected,and they, too, have taken advantage of President Bush’s wartime piloting to re-issue their ancient kit. I’ve seen the new boxing, with its“Smiling George” portrait, but know nothing more about that kit, Then or Now.
What I do have is Accurate Miniatures’ kit #3403, “Battle of the Atlantic”, with depth bombs, not a torpedo; one of a couple of slightlydifferent boxings. Revell’s re-issued kit is well-made, dimensionally close, and an admirable effort for its time. It’s still a fun and satisfy-ing build. I recommend it as a nostalgic exercise, a break from a complex modern model, or an excuse to play with some young potentialmodeler who will enjoy the working features, just as I did when building the Dauntless so many decades ago.

IPMS Seattle Chapter Newsletter Page 16
Meeting Reminder June 14
North Bellevue Community/Senior Center4063-148th Ave NE, Bellevue
Directions to NBCSC: From Seattle or from I-405, take 520East to the 148th Ave NE exit. Take the 148th Ave North exit(the second of the two 148th Ave. exits) and continue northon 148th until you reach the Senior Center. The SeniorCenter will be on your left. The Center itself is not easilyvisible from the road, but there is a signpost in the median.
If you're serious modeler, you'll break the shrinkwrap on your Accurate Miniatures and get right to work on its 108 exquisitely detailedparts. Twenty-five are ‘glass’, including a gun sight. The engine’s separate and made of three components. Its engraving is subtle; littletiny parts make up much of its detailed duplication of the Avenger’s structure and fittings. And so on: it’s an order of magnitude betterthan the old kit, in every way.
Except that its wing panels are molded together. You can’t fold them. Oh, wait! --You CAN fold them…all you need is to do is a lot ofsurgery with a bunch of elaborate and expensive resin and photo-etched aftermarket parts. That’s how we do things now, eagerlysuccumbing to AMS. We’ve come a long way from 1958, huh?
My thanks to Internet Modeler and Revell for this reviewsample kit.
[Thanks to Chris Banyai-Riepl and www.internetmodeler.comfor permission to use Scott’s and Ken’s articles. - ED]