sdaccel development environment - xilinx · sdaccel installation and licensing guide 4 ug1020...
TRANSCRIPT

SDAccel Development Environment
Installation and Licensing Guide
UG1020 (v2016.1) May 13, 2016
SDAccel Installation and Licensing Guide www.xilinx.com 2UG1020 (v2016.1) May 13, 2016
Revision HistoryThe following table shows the revision history for this document.
Date Version Revision
05/13/2016 2016.1 Added board and driver installation instructions for TUL KU115 Card.
Send Feedback

SDAccel Installation and Licensing Guide www.xilinx.com 3UG1020 (v2016.1) May 13, 2016
Table of ContentsRevision History . . . . . . . . . . . . . . . . . . . . . . . . . . . . . . . . . . . . . . . . . . . . . . . . . . . . . . . . . . . . . . . . . . . . 2
Chapter 1: IntroductionOverview . . . . . . . . . . . . . . . . . . . . . . . . . . . . . . . . . . . . . . . . . . . . . . . . . . . . . . . . . . . . . . . . . . . . . . . . 4Hardware Requirements . . . . . . . . . . . . . . . . . . . . . . . . . . . . . . . . . . . . . . . . . . . . . . . . . . . . . . . . . . . . 4Software Requirements. . . . . . . . . . . . . . . . . . . . . . . . . . . . . . . . . . . . . . . . . . . . . . . . . . . . . . . . . . . . . 5
Chapter 2: Obtaining a LicenseObtaining a License for SDAccel . . . . . . . . . . . . . . . . . . . . . . . . . . . . . . . . . . . . . . . . . . . . . . . . . . . . . . 6
Chapter 3: Software InstallationDownload . . . . . . . . . . . . . . . . . . . . . . . . . . . . . . . . . . . . . . . . . . . . . . . . . . . . . . . . . . . . . . . . . . . . . . . . 8Installation . . . . . . . . . . . . . . . . . . . . . . . . . . . . . . . . . . . . . . . . . . . . . . . . . . . . . . . . . . . . . . . . . . . . . . . 9
Chapter 4: Board InstallationsInstalling the Alpha Data ADM-PCIE-KU3 Card . . . . . . . . . . . . . . . . . . . . . . . . . . . . . . . . . . . . . . . . . 12Installing the Alpha Data ADM-PCIE-7V3 Card. . . . . . . . . . . . . . . . . . . . . . . . . . . . . . . . . . . . . . . . . . 23Installing the TUL-PCIE3-KU115 Card . . . . . . . . . . . . . . . . . . . . . . . . . . . . . . . . . . . . . . . . . . . . . . . . . 33
Chapter 5: Verifying Installation
Appendix A: xbinst Command Reference
Appendix B: SDAccel System Info Checker UtilityLaunching System Info Checker Utility . . . . . . . . . . . . . . . . . . . . . . . . . . . . . . . . . . . . . . . . . . . . . . . . 47
Appendix C: Additional Resources and Legal NoticesXilinx Resources . . . . . . . . . . . . . . . . . . . . . . . . . . . . . . . . . . . . . . . . . . . . . . . . . . . . . . . . . . . . . . . . . . 49Solution Centers. . . . . . . . . . . . . . . . . . . . . . . . . . . . . . . . . . . . . . . . . . . . . . . . . . . . . . . . . . . . . . . . . . 49References . . . . . . . . . . . . . . . . . . . . . . . . . . . . . . . . . . . . . . . . . . . . . . . . . . . . . . . . . . . . . . . . . . . . . . 49Please Read: Important Legal Notices . . . . . . . . . . . . . . . . . . . . . . . . . . . . . . . . . . . . . . . . . . . . . . . . 49
Send Feedback
Chapter 1
Introduction
OverviewSDAccel™ is a development environment for OpenCL™ applications targeting Xilinx® FPGA based accelerator cards. This environment enables concurrent programming of the in-system processor and the FPGA fabric without the need for RTL design experience. The application is captured as a host program written in C/C++ and a set of computation kernels expressed in C, C++, or the OpenCL C language.
This guide describes how to obtain a license, install the SDAccel development environment, and install the supported FPGA acceleration cards.
Hardware Requirements• Acceleration Card. Use one of the following:
° Alpha Data ADM-PCIE-KU3 card. The card is based on the Kintex® UltraScale™ XCKU060T-2FFVA1156E FPGA.
° Alpha Data ADM-PCIE-7V3 card. The card is based on the Virtex®-7 XC7VX690T-2FFG1157C FPGA.
° Xilinx TUL-PCIE3-KU115 card. The card is based on the Kintex UltraScale XCKU115-FLVB2104-2-E FPGA.
• Host computer: Desktop computer for hosting the acceleration card. The host computer must provide:
° Motherboard with a PCIe Gen3 X8 slot
° 16 GB RAM
° 100GB free disk space
° DVD drive
• Programming computer: Laptop or desktop computer running Vivado Design Suite 2016.1 for programing the FPGA.
SDAccel Installation and Licensing Guide www.xilinx.com 4UG1020 (v2016.1) May 13, 2016
Send Feedback

Chapter 1: Introduction
• Xilinx® Platform Cable USB 2, part number HW-USB-II-G for connecting the programming computer to the acceleration card (see Platform Cable USB II (DS593)
Software Requirements• Vivado Lab Edition 2016.1 for programming the FPGA device on the programming
computer.
• RedHat Enterprise Linux or CentOS 6.4-6.7 64-bit
• The following packages must be installed on the host machine.
° $sudo yum install gcc
° $sudo yum install kernel-devel
° $sudo yum install glibc.i686 glibc.x86_64
SDAccel Installation and Licensing Guide www.xilinx.com 5UG1020 (v2016.1) May 13, 2016
Send Feedback

Chapter 2
Obtaining a License
Obtaining a License for SDAccelThe steps to obtain a license for the SDAccel™ development environment are:
1. Sign in to the Xilinx® licensing website: www.xilinx.com/getproduct (see Figure 2-1).
You need a valid account for www.xilinx.com to sign in and generate licenses. If this is your first time generating a license for SDAccel - Xilinx OpenCL Design Environment, contact your Xilinx representative to enable your access to the SDAccel licensing website.
2. Select XILINX - SDACCEL in the account drop-down menu, as shown in Figure 2-2.
X-Ref Target - Figure 2-1
Figure 2-1: Sign in Screen
X-Ref Target - Figure 2-2
Figure 2-2: Account Selection Screen
SDAccel Installation and Licensing Guide www.xilinx.com 6UG1020 (v2016.1) May 13, 2016
Send Feedback

Chapter 2: Obtaining a License
3. Select SDAccel Development Environment, Node-Locked License from the Certificate Based Licenses menu:
4. Click Generate node-locked license.
5. Enter a Host ID in the License Generation screen and click Next.
6. Verify that the Host ID for the license is correct and click Next.
7. Accept the licensing agreement by clicking Accept.
8. You will receive an email from [email protected] with the license file.
9. Set the XILINXD_LICENSE_FILE environment variable to point to the location of the license file on your system.
X-Ref Target - Figure 2-3
Figure 2-3: Certificate Based Licenses Menu
SDAccel Installation and Licensing Guide www.xilinx.com 7UG1020 (v2016.1) May 13, 2016
Send Feedback

Chapter 3
Software Installation
Download1. Log into www.xilinx.com/getproduct.
2. In the account drop-down menu, select XILINX – SDACCEL.
3. Click the Restricted Downloads tab to gain access to the SDAccel™ installation package as shown in Figure 3-1.
X-Ref Target - Figure 3-1
Figure 3-1: Restricted Downloads Tab
SDAccel Installation and Licensing Guide www.xilinx.com 8UG1020 (v2016.1) May 13, 2016
Send Feedback

Chapter 3: Software Installation
Installation1. To start the installation process, execute xsetup inside the top-level directory for the
SDAccel installer package.
IMPORTANT: Superuser privileges may be required to install the software on a system-level directory.
This command starts the installation of SDAccel and displays the welcome screen shown in Figure 3-2.
2. Click Next.
X-Ref Target - Figure 3-2
Figure 3-2: SDAccel Installer Welcome Screen
SDAccel Installation and Licensing Guide www.xilinx.com 9UG1020 (v2016.1) May 13, 2016
Send Feedback

Chapter 3: Software Installation
3. Select I agree to agree to the license terms of the software and click Next (see Figure 3-3).
X-Ref Target - Figure 3-3
Figure 3-3: License Terms and Conditions
SDAccel Installation and Licensing Guide www.xilinx.com 10UG1020 (v2016.1) May 13, 2016
Send Feedback

Chapter 3: Software Installation
4. Select installation options. SDAccel is a self-contained software tool suite and installs all of the necessary tools. The only choice on this menu is whether to get a new license for the software or reuse an existing license. Click Next.
5. Select the installation directory for the software, as shown in Figure 3-4.
The installation directory name must not contain any spaces in any part of the directory path. SDAccel requires 18 GB of free space for the installation to complete.
6. Review the Installation Summary page and click Install.The installation process will take several minutes to complete.
7. To set up the environment to run SDAccel, source the file below so that sdaccel command is in the PATH:
C Shell: source <SDACELL_INSTALL_DIR>/settings64.cshBash: source <SDACELL_INSTALL_DIR>/settings64.sh
X-Ref Target - Figure 3-4
Figure 3-4: Select Installation Directory Screen
SDAccel Installation and Licensing Guide www.xilinx.com 11UG1020 (v2016.1) May 13, 2016
Send Feedback

Chapter 4
Board InstallationsFollow the installation instructions appropriate for your the acceleration card:
• Installing the Alpha Data ADM-PCIE-KU3 Card
• Installing the Alpha Data ADM-PCIE-7V3 Card
• Installing the TUL-PCIE3-KU115 Card
Installing the Alpha Data ADM-PCIE-KU3 CardThe ADM-PCIE-KU3 card is a high-performance reconfigurable computing card for data center applications. It features:
• Kintex® UltraScale™ XCKU060T-2FFVA1156E FPGA
• 16 GB of DDR3 memory
Step 1: Prepare Board Installation Files1. SDAccel™ provides a utility, xbinst, that generates firmware and driver files for the
target board plugged into the host computer. Run the commands below to prepare files
X-Ref Target - Figure 4-1
Figure 4-1: ADM-PCIE-KU3/KU060E card
SDAccel Installation and Licensing Guide www.xilinx.com 12UG1020 (v2016.1) May 13, 2016
Send Feedback

Chapter 4: Board Installations
for ADM-PCIE-KU3 card installation. See Appendix A, xbinst Command Reference for more details on the xbinst utility.
Note: All commands must be run with root or sudo privilege.
$sudo mkdir ku3_dsa$ sudo xbinst -x xilinx:adm-pcie-ku3:1ddr:3.0 -d ku3_dsa****** xbinst v2016.1 **** Copyright 1986-2016 Xilinx, Inc. All Rights Reserved.INFO: [XBINST 60-267] Packaging for PCIe...INFO: [XBINST 60-268] Packaging for PCIe...COMPLETEINFO: [XBINST 60-667] xbinst has successfully created a board installation directory at /opt/dsa/ku3_dsa
Make a note of the board installation directory. This procedure uses /opt/dsa/ku3_dsa as an example in this chapter.
Copy the following file path to the programming computer:
/opt/dsa/ku3_dsa/xbinst/pkg/pcie/firmware/xilinx_adm-pcie-ku3_1ddr_3_0.mcs
Make a note of the file location on the programming computer as it will be required for programming the configuration memory in a later step.
Step 2: Setting up the Card and Computer1. Make sure the host computer is completely turned off.
2. Locate DIP switch SW1 on the back side of the board near the center of top edge and set it as shown here:
3. Install the ADM-PCIE-KU3 card into an open PCIe slot in the host computer.
IMPORTANT: Follow host computer manufacturer recommendations to ensure proper mounting and adequate cooling.
4. Turn on the host computer.
X-Ref Target - Figure 4-2
Figure 4-2: DIP Switch SW1
23
41
On
Off
Pin 1
SDAccel Installation and Licensing Guide www.xilinx.com 13UG1020 (v2016.1) May 13, 2016
Send Feedback

Chapter 4: Board Installations
Step 3: Programming the Base PlatformAll applications compiled by the SDAccel™ compiler for the Alpha Data card are compiled against a specific device. A device is a combination of interfaces and infrastructure components on the card, which are required for proper execution of the user program. The base device program or firmware is different for all devices. This program must be loaded onto the FPGA before the user application is loaded. To program the firmware program:
1. Connect the Alpha Data ADM-PCIE-KU3 card to the programming computer with an installation of Vivado® Design Suite as shown here:
2. On the programming computer, start the Vivado Design Suite then on the Welcome page, select Open Hardware Manager.
X-Ref Target - Figure 4-3
Figure 4-3: Programming Connections
X-Ref Target - Figure 4-4
Figure 4-4: Open Hardware Manager Icon
Wally
SDAccel Installation and Licensing Guide www.xilinx.com 14UG1020 (v2016.1) May 13, 2016
Send Feedback

Chapter 4: Board Installations
3. Select Open a New Hardware Target.
4. Click Next in the Open Hardware Target window.
X-Ref Target - Figure 4-5
Figure 4-5: Open a New Hardware Target
X-Ref Target - Figure 4-6
Figure 4-6: Open New Hardware Target Window
SDAccel Installation and Licensing Guide www.xilinx.com 15UG1020 (v2016.1) May 13, 2016
Send Feedback

Chapter 4: Board Installations
5. Select Local server in the Connect to field and click Next.X-Ref Target - Figure 4-7
Figure 4-7: Hardware Server Settings
SDAccel Installation and Licensing Guide www.xilinx.com 16UG1020 (v2016.1) May 13, 2016
Send Feedback

Chapter 4: Board Installations
6. In the Open New Hardware Target window, select xilinx_tcf and click Next.X-Ref Target - Figure 4-8
Figure 4-8: Select Hardware Target
SDAccel Installation and Licensing Guide www.xilinx.com 17UG1020 (v2016.1) May 13, 2016
Send Feedback

Chapter 4: Board Installations
7. In the Open Hardware Target Summary window, click Finish.
8. Right-click your FPGA (xku060_0), and select Add Configuration Memory Device.
X-Ref Target - Figure 4-9
Figure 4-9: Open Hardware Target Summary
X-Ref Target - Figure 4-10
Figure 4-10: Add Configuration Memory Device
SDAccel Installation and Licensing Guide www.xilinx.com 18UG1020 (v2016.1) May 13, 2016
Send Feedback

Chapter 4: Board Installations
9. Select mt28gu01gaax1e-bpi-x16 as the configuration memory.
10. Click OK to program the configuration memory.
11. In the Programming Configuration Memory Device window (Figure 4-13), go to the Configuration File entry box, browse to and select the MCS file (xilinx_adm-pcie-ku3_1ddr_3_0.mcs) that you copied to the programming
X-Ref Target - Figure 4-11
Figure 4-11: Select Configuration Memory
X-Ref Target - Figure 4-12
Figure 4-12: Program Configuration Memory
SDAccel Installation and Licensing Guide www.xilinx.com 19UG1020 (v2016.1) May 13, 2016
Send Feedback

Chapter 4: Board Installations
computer in Step 1. Verify all other settings as shown in the Program Configuration Memory Device window. Click OK to start programming the configuration memory.
X-Ref Target - Figure 4-13
Figure 4-13: Program Configuration Memory Device Window
SDAccel Installation and Licensing Guide www.xilinx.com 20UG1020 (v2016.1) May 13, 2016
Send Feedback

Chapter 4: Board Installations
12. After the memory has been configured, right-click the FPGA (xku060_0) and select Boot From Configuration Device.
The Tcl console displays Done pin status: HIGH after the FPGA device is booted successfully.
13. Reboot the host computer.
IMPORTANT: Programming of the device firmware is required only once per device support archive (dsa). All applications targeting the same dsa can share a single programming instance of the card firmware.
Step 4: Installing Driver for the CardYou must install proper drivers for the card before you can use it to run SDAccel applications. Follow the instructions below to install the required drivers.
Change to the board installation directory generated in Step 1 and run installation script:
X-Ref Target - Figure 4-14
Figure 4-14: Boot from Configuration Memory Device
X-Ref Target - Figure 4-15
Figure 4-15: Done Pin Status
SDAccel Installation and Licensing Guide www.xilinx.com 21UG1020 (v2016.1) May 13, 2016
Send Feedback

Chapter 4: Board Installations
$cd /opt/dsa/ku3_dsa/xbinst/pkg/pcie$sudo ./install.sh
This will do the following.
• Compile and install Linux kernel device drivers.
• Install the firmware to the Linux firmware area.
• Generate a setup.sh (Bash) or setup.csh (for csh/tcsh) to set up the runtime environment. You must source the setup script before running any application on the target FPGA card.
• Install Xilinx OpenCL Installable Client Driver (ICD) to /etc/OpenCL/vendors. The OpenCL ICD) allows multiple implementations of OpenCL to co-exist on the same system. It allows applications to choose a platform from the list of installed platforms and dispatches OpenCL API calls to the underlying implementation.
SDAccel Installation and Licensing Guide www.xilinx.com 22UG1020 (v2016.1) May 13, 2016
Send Feedback

Chapter 4: Board Installations
Installing the Alpha Data ADM-PCIE-7V3 CardThe ADM-PCIE-7V3 card is a high-performance reconfigurable computing card for data center applications. It features:
• A Virtex®-7 XC7VX690T-2FFG1157C FPGA
• 16 GB of DDR3 memory
Step 1: Prepare Board Installation Files1. SDAccel provides a utility. xbinst. that generates firmware and driver files for the
target board plugged into the host computer. Run the commands below to prepare files for ADM-PCIE-7V3 card installation. See Appendix A, xbinst Command Reference for more details on xbinst utility.
Note: All commands need to be run with root or sudo privilege.
$sudo mkdir 7v3_dsa$ sudo xbinst -x xilinx:adm-pcie-7v3:1ddr:3.0 -d 7v3_dsa****** xbinst v2016.1 **** Copyright 1986-2016 Xilinx, Inc. All Rights Reserved.INFO: [XBINST 60-267] Packaging for PCIe...INFO: [XBINST 60-268] Packaging for PCIe...COMPLETEINFO: [XBINST 60-667] xbinst has successfully created a board installation directory at /opt/dsa/7v3_dsa
Make a note of the board installation directory. This procedure uses /opt/dsa/7v3_dsa in this chapter.
X-Ref Target - Figure 4-16
Figure 4-16: ADM-PCIE-7V3 card
SDAccel Installation and Licensing Guide www.xilinx.com 23UG1020 (v2016.1) May 13, 2016
Send Feedback

Chapter 4: Board Installations
Copy the following file path to the programming computer:
/opt/dsa/7v3_dsa/xbinst/pkg/pcie/firmware/xilinx_adm-pcie-7v3_1ddr_3_0.mcs
Make a note the file location on the programming computer as it will be required for programming the configuration memory in later step.
Step 2. Setting Up the Card and Computer1. Make sure the host computer is completely turned off.
2. Locate DIP switch SW1 on the back side of the board near the center of top edge and set
it as shown here:
3. Install the ADM-PCIE-7V3 card into an open PCIe slot in the host computer.
IMPORTANT: Follow host computer manufacturer recommendations to ensure proper mounting and adequate cooling.
4. Turn on the host computer.
Step 3: Programming the Base PlatformAll applications compiled by the SDAccel™ compiler for the Alpha Data card are compiled against a specific device. A device is a combination of interfaces and infrastructure components on the card, which are required for proper execution of the user program. The base device program or firmware is different for all devices. This program must be loaded onto the FPGA before the user application is loaded. To program the firmware program:
X-Ref Target - Figure 4-17
Figure 4-17: DIP Switch SW1
2 3 41
On
Off
Pin
1
SDAccel Installation and Licensing Guide www.xilinx.com 24UG1020 (v2016.1) May 13, 2016
Send Feedback

Chapter 4: Board Installations
1. Connect the Alpha Data ADM-PCIE-7V3 card to the control computer having an installation of Vivado® Design Suite as shown here:
2. On the programming computer, Open Hardware Manager.
3. Select Open a New Hardware Target.
X-Ref Target - Figure 4-18
Figure 4-18: Programming Connections
X-Ref Target - Figure 4-19
Figure 4-19: Open Hardware Manager Icon
X-Ref Target - Figure 4-20
Figure 4-20: Open a New Hardware Target Link
Wally
SDAccel Installation and Licensing Guide www.xilinx.com 25UG1020 (v2016.1) May 13, 2016
Send Feedback

Chapter 4: Board Installations
4. 4. Click Next in the Open Hardware Target window.X-Ref Target - Figure 4-21
Figure 4-21: Open New Hardware Target Window
SDAccel Installation and Licensing Guide www.xilinx.com 26UG1020 (v2016.1) May 13, 2016
Send Feedback

Chapter 4: Board Installations
5. 5. Select Local server in the Connect to field and click Next.X-Ref Target - Figure 4-22
Figure 4-22: Hardware Server Settings
SDAccel Installation and Licensing Guide www.xilinx.com 27UG1020 (v2016.1) May 13, 2016
Send Feedback

Chapter 4: Board Installations
6. In the Open New Hardware Target window, select xilinx_tcf and click Next.X-Ref Target - Figure 4-23
Figure 4-23: Select Hardware Target
SDAccel Installation and Licensing Guide www.xilinx.com 28UG1020 (v2016.1) May 13, 2016
Send Feedback

Chapter 4: Board Installations
7. In the Open Hardware Target Summary window, click Finish.
8. Right-click the FPGA (xc7vx690T_0) and select Add Configuration Memory Device.
X-Ref Target - Figure 4-24
Figure 4-24: Open Hardware Target Summary
X-Ref Target - Figure 4-25
Figure 4-25: Add Configuration Memory Device
SDAccel Installation and Licensing Guide www.xilinx.com 29UG1020 (v2016.1) May 13, 2016
Send Feedback

Chapter 4: Board Installations
9. Select mt28gu01gaax1e-bpi-x16 as the configuration memory.
10. Click OK to program the configuration memory.
11. In the Programming Configuration Memory Device window (Figure 4-28), go to the Configuration File entry box, browse to, and select the MCS file (xilinx_adm-pcie-7v3_1ddr_3_0.mcs) that you copied to the programming
X-Ref Target - Figure 4-26
Figure 4-26: Select Configuration Memory
X-Ref Target - Figure 4-27
Figure 4-27: Program Configuration Memory
SDAccel Installation and Licensing Guide www.xilinx.com 30UG1020 (v2016.1) May 13, 2016
Send Feedback

Chapter 4: Board Installations
computer in Step 1. Verify all other settings as shown in the Program Configuration Memory Device window. Click OK to start programming the configuration memory.
12. After the memory has been configured, right-click the FPGA (xc7vx690T_0) and select Boot From Configuration Device.
X-Ref Target - Figure 4-28
Figure 4-28: Program Configuration Window
X-Ref Target - Figure 4-29
Figure 4-29: Boot from Configuration Memory
SDAccel Installation and Licensing Guide www.xilinx.com 31UG1020 (v2016.1) May 13, 2016
Send Feedback

Chapter 4: Board Installations
The Tcl console displays Done pin status: HIGH after the FPGA is booted successfully.
13. Reboot the host computer.
IMPORTANT: Programming of the device firmware is required only once per device. All applications targeting the same device can share a single programming instance of the card firmware.
Step 4: Installing Driver for the CardYou must install proper drivers for the card before you can use it to run SDAccel applications. Follow the instructions below to install the required drivers.
Change to the board installation directory generated in Step 1, and run installation script:
$cd /opt/dsa/7v3_dsa/xbinst/pkg/pcie$ sudo ./install.sh
This will do the following:
• Compile and install Linux kernel device drivers.
• Install the firmware to the Linux firmware area.
• Generate a setup.sh (Bash) or setup.csh (for csh/tcsh) to set up the runtime environment. Users must source the setup script before running any application on the target FPGA card.
• Install Xilinx OpenCL Installable Client Driver (ICD) to /etc/OpenCL/vendors. The OpenCL ICD) allows multiple implementations of OpenCL to co-exist on the same system. It allows applications to choose a platform from the list of installed platforms and dispatches OpenCL API calls to the underlying implementation.
X-Ref Target - Figure 4-30
Figure 4-30: Done Pin Status
SDAccel Installation and Licensing Guide www.xilinx.com 32UG1020 (v2016.1) May 13, 2016
Send Feedback

Chapter 4: Board Installations
Installing the TUL-PCIE3-KU115 CardThe TUL-PCIE3-KU115 card is a high-performance reconfigurable computing card for data center applications. It features:
• Kintex® UltraScale™ XCKU115-FLVB2104-2-E FPGA
• Four 4GB DDR4 banks (16GB total)
Step 1: Prepare Board Installation Files1. SDAccel™ provides a utility, xbinst, that generates firmware and driver files for the
target board plugged into the host computer. Run the commands below to prepare files for TUL-PCIE3-KU115 card installation. See Appendix A, xbinst Command Reference for more details on the xbinst utility.
Note: All commands must be run with root or sudo privilege.
$sudo mkdir tul_dsa
X-Ref Target - Figure 4-31
Figure 4-31: TUL-PCIE3-KU115 Card
SDAccel Installation and Licensing Guide www.xilinx.com 33UG1020 (v2016.1) May 13, 2016
Send Feedback
Chapter 4: Board Installations
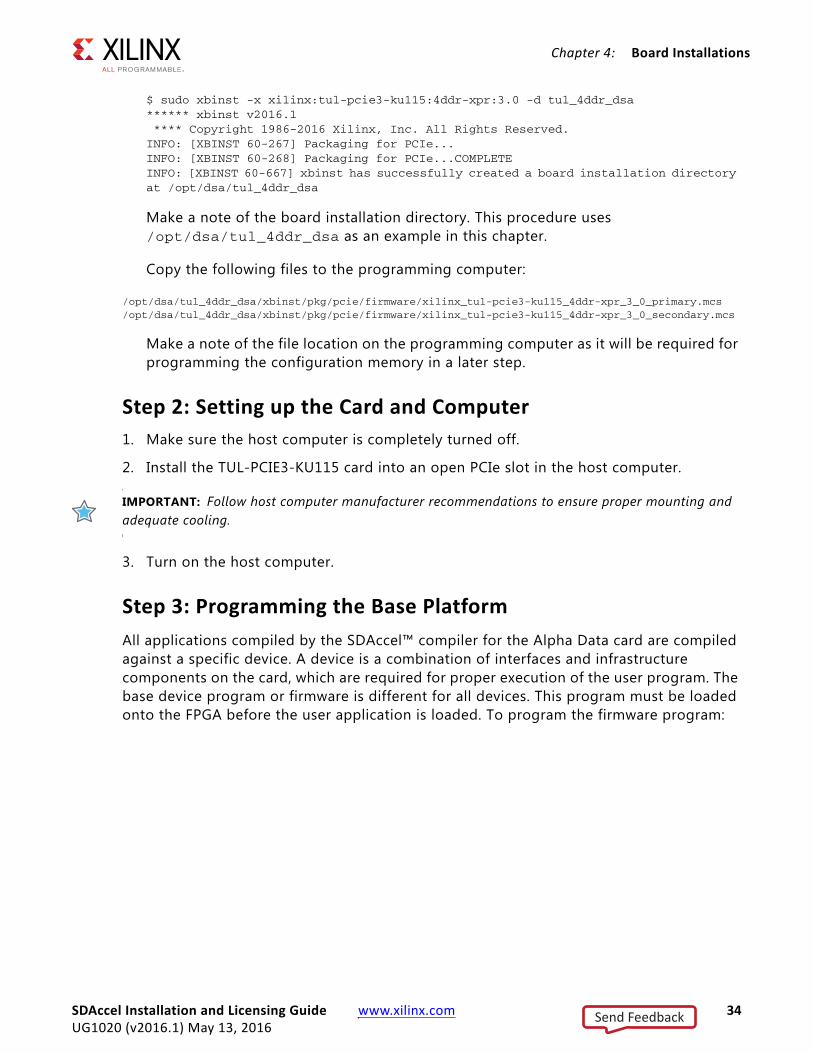
$ sudo xbinst -x xilinx:tul-pcie3-ku115:4ddr-xpr:3.0 -d tul_4ddr_dsa****** xbinst v2016.1 **** Copyright 1986-2016 Xilinx, Inc. All Rights Reserved.INFO: [XBINST 60-267] Packaging for PCIe...INFO: [XBINST 60-268] Packaging for PCIe...COMPLETEINFO: [XBINST 60-667] xbinst has successfully created a board installation directory at /opt/dsa/tul_4ddr_dsa
Make a note of the board installation directory. This procedure uses /opt/dsa/tul_4ddr_dsa as an example in this chapter.
Copy the following files to the programming computer:
/opt/dsa/tul_4ddr_dsa/xbinst/pkg/pcie/firmware/xilinx_tul-pcie3-ku115_4ddr-xpr_3_0_primary.mcs/opt/dsa/tul_4ddr_dsa/xbinst/pkg/pcie/firmware/xilinx_tul-pcie3-ku115_4ddr-xpr_3_0_secondary.mcs
Make a note of the file location on the programming computer as it will be required for programming the configuration memory in a later step.
Step 2: Setting up the Card and Computer1. Make sure the host computer is completely turned off.
2. Install the TUL-PCIE3-KU115 card into an open PCIe slot in the host computer.
IMPORTANT: Follow host computer manufacturer recommendations to ensure proper mounting and adequate cooling.
3. Turn on the host computer.
Step 3: Programming the Base PlatformAll applications compiled by the SDAccel™ compiler for the Alpha Data card are compiled against a specific device. A device is a combination of interfaces and infrastructure components on the card, which are required for proper execution of the user program. The base device program or firmware is different for all devices. This program must be loaded onto the FPGA before the user application is loaded. To program the firmware program:
SDAccel Installation and Licensing Guide www.xilinx.com 34UG1020 (v2016.1) May 13, 2016
Send Feedback
Chapter 4: Board Installations
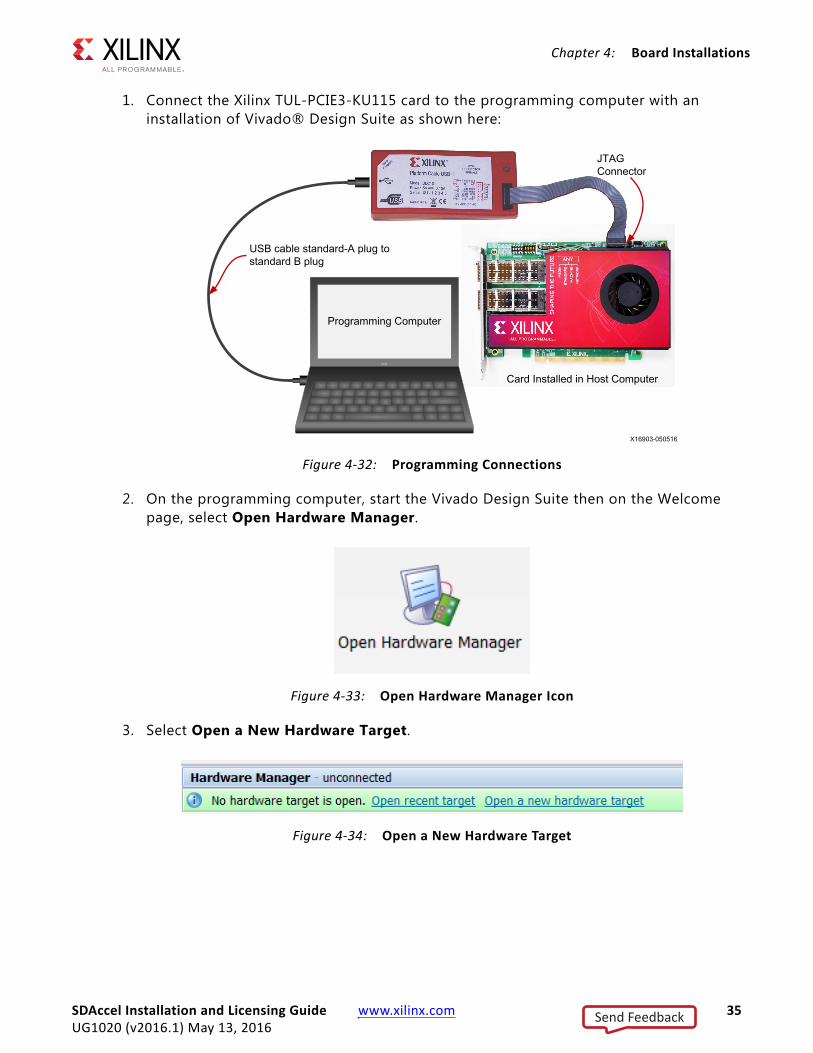
1. Connect the Xilinx TUL-PCIE3-KU115 card to the programming computer with an installation of Vivado® Design Suite as shown here:
2. On the programming computer, start the Vivado Design Suite then on the Welcome page, select Open Hardware Manager.
3. Select Open a New Hardware Target.
X-Ref Target - Figure 4-32
Figure 4-32: Programming Connections
X-Ref Target - Figure 4-33
Figure 4-33: Open Hardware Manager Icon
X-Ref Target - Figure 4-34
Figure 4-34: Open a New Hardware Target
Wally
SDAccel Installation and Licensing Guide www.xilinx.com 35UG1020 (v2016.1) May 13, 2016
Send Feedback
Chapter 4: Board Installations
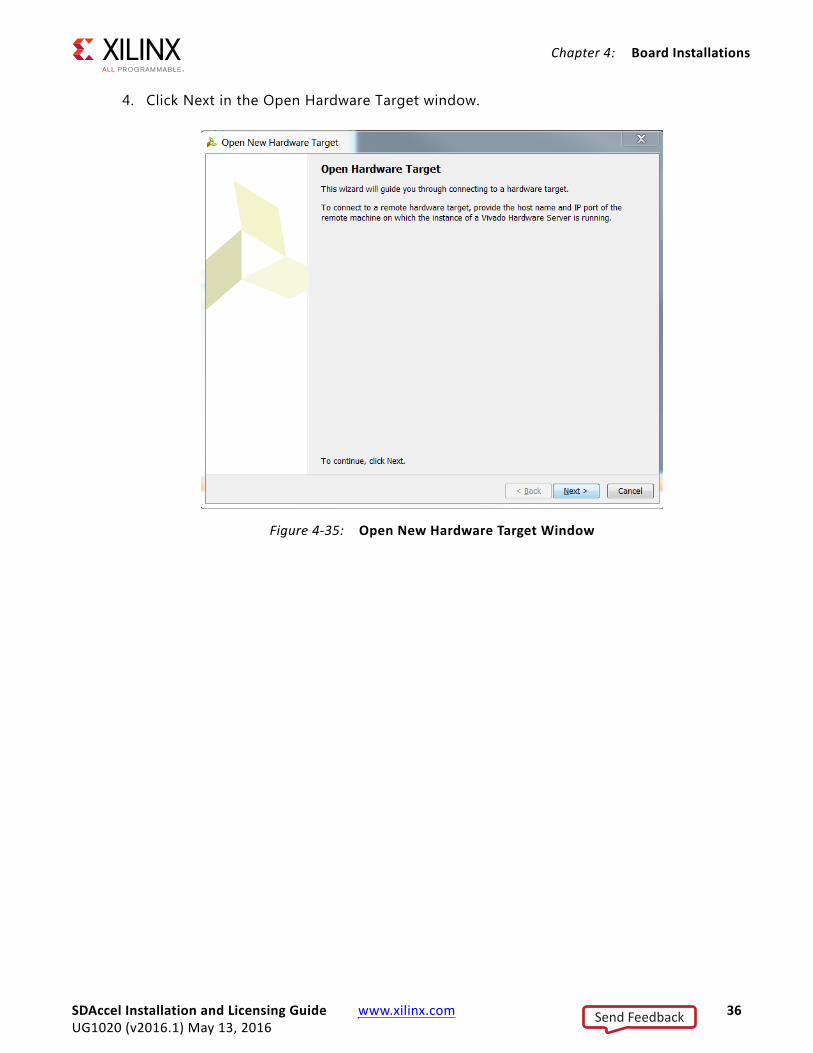
4. Click Next in the Open Hardware Target window.X-Ref Target - Figure 4-35
Figure 4-35: Open New Hardware Target Window
SDAccel Installation and Licensing Guide www.xilinx.com 36UG1020 (v2016.1) May 13, 2016
Send Feedback
Chapter 4: Board Installations
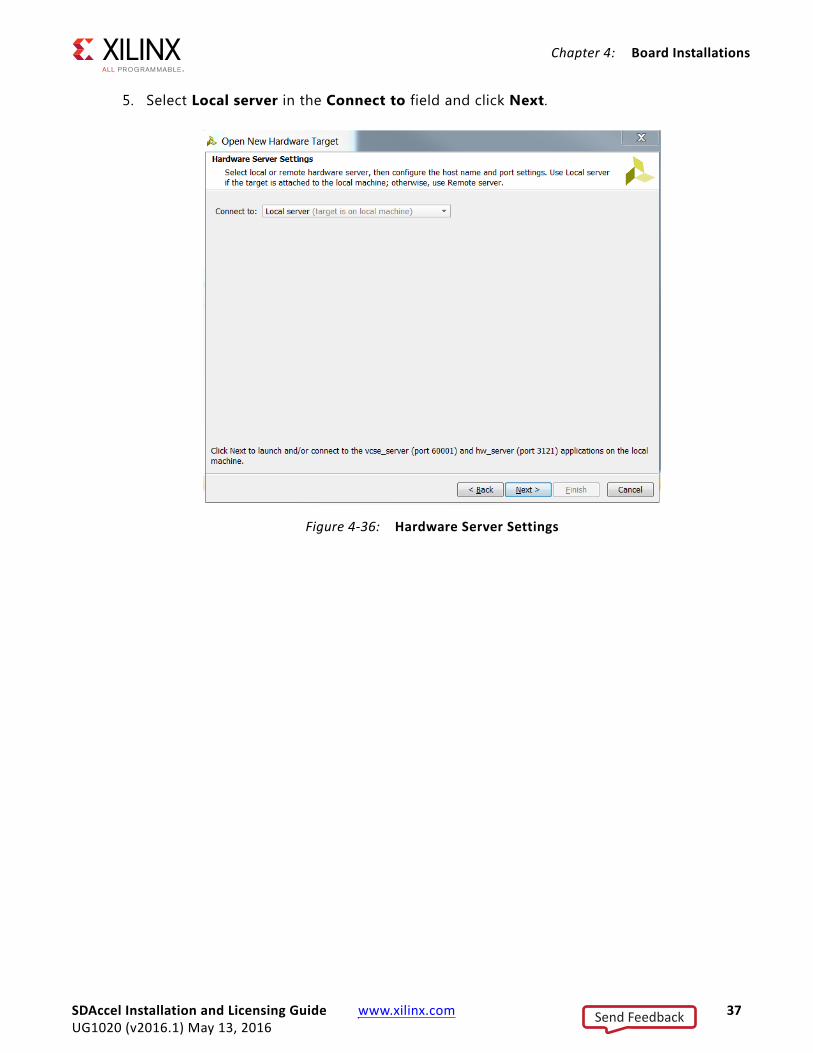
5. Select Local server in the Connect to field and click Next.X-Ref Target - Figure 4-36
Figure 4-36: Hardware Server Settings
SDAccel Installation and Licensing Guide www.xilinx.com 37UG1020 (v2016.1) May 13, 2016
Send Feedback

Chapter 4: Board Installations
6. In the Open New Hardware Target window, select xilinx_tcf and click Next.X-Ref Target - Figure 4-37
Figure 4-37: Select Hardware Target
SDAccel Installation and Licensing Guide www.xilinx.com 38UG1020 (v2016.1) May 13, 2016
Send Feedback

Chapter 4: Board Installations
7. In the Open Hardware Target Summary window, click Finish.
8. Right-click your FPGA (xcku115_0), and select Add Configuration Memory Device.
X-Ref Target - Figure 4-38
Figure 4-38: Open Hardware Target Summary
X-Ref Target - Figure 4-39
Figure 4-39: Add Configuration Memory Device
SDAccel Installation and Licensing Guide www.xilinx.com 39UG1020 (v2016.1) May 13, 2016
Send Feedback

Chapter 4: Board Installations
9. Select mt25qu512-spi-x1_x2_x4_x8 as the configuration memory.
10. Click OK to program the configuration memory.
11. In the Programming Configuration Memory Device window (Figure 4-13), go to the Configuration File entry box, browse to and select the MCS file (xilinx_tul-pcie3-ku115_4ddr-xpr_3_0_primary.mcs) that you copied to the programming computer in Step 1. Go to the Configuration File 2 entry box, browse to and select the MCS file (xilinx_tul-pcie3-ku115_4ddr-xpr_3_0_secondary.mcs). Verify all other
X-Ref Target - Figure 4-40
Figure 4-40: Select Configuration Memory
X-Ref Target - Figure 4-41
Figure 4-41: Program Configuration Memory
SDAccel Installation and Licensing Guide www.xilinx.com 40UG1020 (v2016.1) May 13, 2016
Send Feedback

Chapter 4: Board Installations
settings as shown in the Program Configuration Memory Device window. Click OK to start programming the configuration memory.
X-Ref Target - Figure 4-42
Figure 4-42: Program Configuration Memory Device Window
SDAccel Installation and Licensing Guide www.xilinx.com 41UG1020 (v2016.1) May 13, 2016
Send Feedback

Chapter 4: Board Installations
12. After the memory has been configured, right-click the FPGA (xcku115_0) and select Boot From Configuration Device.
The Tcl console displays Done pin status: HIGH after the FPGA device is booted successfully.
13. Reboot the host computer.
IMPORTANT: Programming of the device firmware is required only once per device support archive (dsa). All applications targeting the same dsa can share a single programming instance of the card firmware.
Step 4: Installing Driver for the CardYou must install proper drivers for the card before you can use it to run SDAccel applications. Follow the instructions below to install the required drivers.
Change to the board installation directory generated in Step 1 and run installation script:
X-Ref Target - Figure 4-43
Figure 4-43: Boot from Configuration Memory Device
X-Ref Target - Figure 4-44
Figure 4-44: Done Pin Status
SDAccel Installation and Licensing Guide www.xilinx.com 42UG1020 (v2016.1) May 13, 2016
Send Feedback
Chapter 4: Board Installations
$cd /opt/dsa/tul_4ddr_dsa/xbinst/pkg/pcie$sudo ./install.sh
This will do the following.
• Compile and install Linux kernel device drivers.
• Install the firmware to the Linux firmware area.
• Generate a setup.sh (Bash) or setup.csh (for csh/tcsh) to set up the runtime environment. You must source the setup script before running any application on the target FPGA card.
• Install Xilinx OpenCL Installable Client Driver (ICD) to /etc/OpenCL/vendors. The OpenCL ICD) allows multiple implementations of OpenCL to co-exist on the same system. It allows applications to choose a platform from the list of installed platforms and dispatches OpenCL API calls to the underlying implementation.
SDAccel Installation and Licensing Guide www.xilinx.com 43UG1020 (v2016.1) May 13, 2016
Send Feedback
SDAccel Installation and Licensing Guide www.xilinx.com 44UG1020 (v2016.1) May 17, 2016
Chapter 5
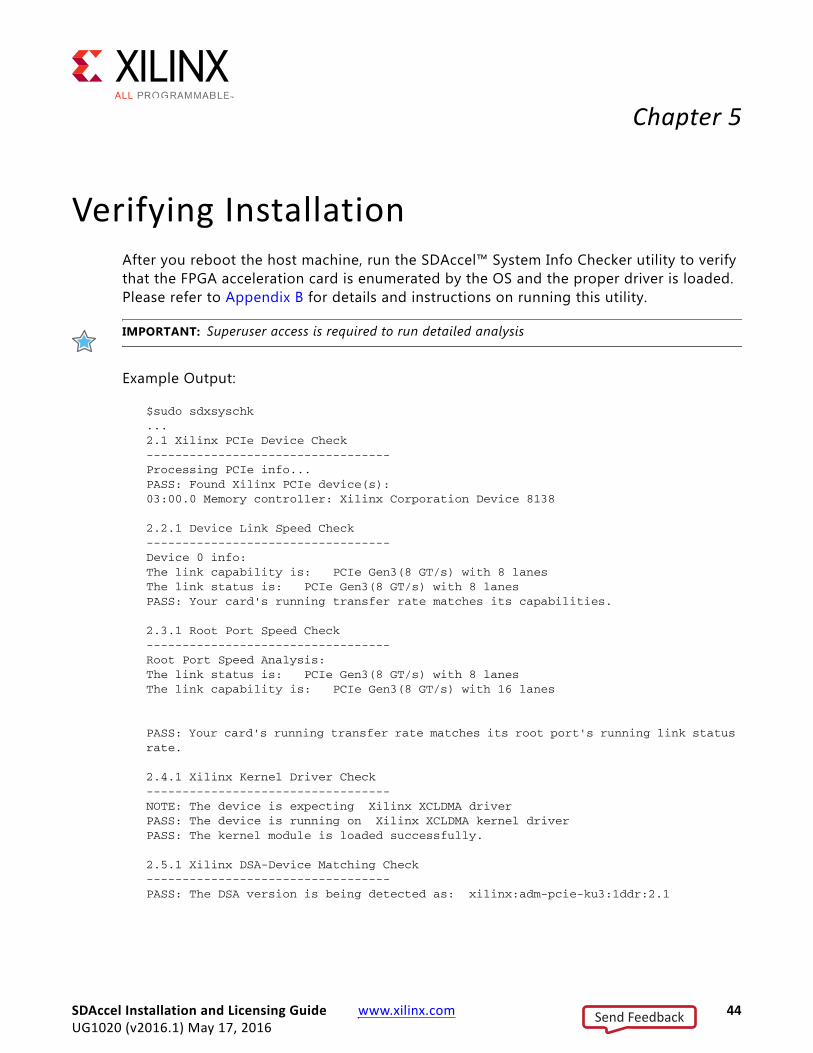
Verifying InstallationAfter you reboot the host machine, run the SDAccel™ System Info Checker utility to verify that the FPGA acceleration card is enumerated by the OS and the proper driver is loaded. Please refer to Appendix B for details and instructions on running this utility.
IMPORTANT: Superuser access is required to run detailed analysis
Example Output:
$sudo sdxsyschk...2.1 Xilinx PCIe Device Check----------------------------------Processing PCIe info...PASS: Found Xilinx PCIe device(s):03:00.0 Memory controller: Xilinx Corporation Device 8138
2.2.1 Device Link Speed Check----------------------------------Device 0 info:The link capability is: PCIe Gen3(8 GT/s) with 8 lanesThe link status is: PCIe Gen3(8 GT/s) with 8 lanesPASS: Your card's running transfer rate matches its capabilities.
2.3.1 Root Port Speed Check----------------------------------Root Port Speed Analysis: The link status is: PCIe Gen3(8 GT/s) with 8 lanesThe link capability is: PCIe Gen3(8 GT/s) with 16 lanes
PASS: Your card's running transfer rate matches its root port's running link status rate.
2.4.1 Xilinx Kernel Driver Check----------------------------------NOTE: The device is expecting Xilinx XCLDMA driverPASS: The device is running on Xilinx XCLDMA kernel driverPASS: The kernel module is loaded successfully.
2.5.1 Xilinx DSA-Device Matching Check----------------------------------PASS: The DSA version is being detected as: xilinx:adm-pcie-ku3:1ddr:2.1
Send Feedback

Appendix A
xbinst Command ReferenceThe FPGA acceleration card plugged into the host machine needs to have the associated Linux kernel driver, firmware and runtime libraries installed before it can be used for running user applications. SDAccel provides a Xilinx board installation utility, xbinst to generate all necessary files for the device support archive (DSA) for the FPGA card. It also generates an installation script to compile and install the driver, firmware and runtime libraries.
The xbinst utility requires superuser privileges on the host machine to run. The supported options are listed below:
Follow the instructions below to install the driver and firmware for the FPGA card on the host machine. The ADM-PCIE-7V3 DSA is used as an example. Replace it with the DSA for the actual card plugged into the system.
Note: All commands need to be run with superuser privileges.
1. Create a board installation directory
$sudo mkdir 7v3_dsa_v21
2. Run xbinst to generate all necessary files
$ sudo xbinst -x xilinx:adm-pcie-7v3:1ddr:2.0 -d 7v3_dsa_v21****** xbinst v2016.1 **** Copyright 1986-2016 Xilinx, Inc. All Rights Reserved.INFO: [XBINST 60-267] Packaging for PCIe...
Table A-1: xbinst Options
Short Option Long Option Valid Values Description
-h --help NA Print Usage Message
-x <arg> --dsa <arg> Supported acceleration devices by Xilinx and third-party board partners.
Required. All supported devices are listed in Appendix B: SDAccel Environment Supported Devices in SDAccel Development Environment User Guide: Features and Development Flows, [Ref 2].
-d <arg> --destination <arg>
Valid path on the file system.
Required destination directory for driver and firmware for the specified DSA
-i <arg> --dsadir <arg> Valid path on the file system with user DSA files.
Specify the search path for user DSAs that are not installed with SDAccel. e.g. a DSA from an SDAccel board partner.
SDAccel Installation and Licensing Guide www.xilinx.com 45UG1020 (v2016.1) May 13, 2016
Send Feedback

Appendix A: xbinst Command Reference
INFO: [XBINST 60-268] Packaging for PCIe...COMPLETEINFO: [XBINST 60-667] xbinst has successfully created a board installation directory at /opt/dsa/7v3_dsa_v21
3. Install the driver, firmware, and runtime libraries
$cd 7v3_dsa_v21/xbinst/pkg/pcie/$ sudo ./install.sh
This will do the following:
• Compile and install Linux kernel device drivers.
• Install the firmware files to the Linux firmware area.
• Generate a setup.sh (Bash) or setup.csh (for csh/tcsh) to set up the runtime environment. Users must source the setup script before running any application on the target FPGA card.
SDAccel Installation and Licensing Guide www.xilinx.com 46UG1020 (v2016.1) May 13, 2016
Send Feedback

Appendix B
SDAccel System Info Checker UtilityThe SDAccel™ System Info Checker utility (sdxsyschk) performs analysis of system and hardware setup on the PCIe acceleration cards that are supported by the Xilinx® SDAccel integrated environment.
When you launch the utility, it compiles and generates an informative status report. It also provides some basic debug and troubleshooting capabilities by issuing messages describing any problems.
The following is a list of analyses the utility performs:
• System and Environment Diagnosis
° Python Version Check
° Linux OS System Check
° 64-bit Architecture Check
° Environment Variables Check
° Motherboard System Info
• PCIe Diagnosis
° Xilinx PCIe Device Check
° Device Link Speed Check
° Root Port Speed Check
° Xilinx Kernel Driver Check
° Xilinx DSA-Device Matching Check
Launching System Info Checker UtilityThe following requirements must be met before running the Info Checker Utility:
1. You MUST have SDAccel installed and environment set up to run SDAccel tools.
2. You MUST have superuser privileges (sudo or root access).
SDAccel Installation and Licensing Guide www.xilinx.com 47UG1020 (v2016.1) May 13, 2016
Send Feedback

Appendix B: SDAccel System Info Checker Utility
3. You MUST have lspci package installed either under the /sbin or /usr/bin directory and the path to the lspci command added to your PATH environment variable.
Run the following command to launch the utility to query the system and get detailed PCIe platform diagnosis.
$sudo sdxsyschk
The following are a few examples showing how the System Info Checker Utility can be used.
• To query the system and basic platform detection status:
$sdxsyschk
• To query the system and detailed PCIe platform diagnosis:
$sudo sdxsyschk
• To query detailed analysis with verbose (optional) outputs:
$sudo sdxsyschk -v
• To query status and redirect the output to a text file specified with an argument:
$sudo sdxsyschk > <path_and_file_name>
• To query basic system status plus environment variables information.
Note: This must to run without sudo access.
$sdxsyschk -e
SDAccel Installation and Licensing Guide www.xilinx.com 48UG1020 (v2016.1) May 13, 2016
Send Feedback

Appendix C
Additional Resources and Legal Notices
Xilinx ResourcesFor support resources such as Answers, Documentation, Downloads, and Forums, see Xilinx Support.
Solution CentersSee the Xilinx Solution Centers for support on devices, software tools, and intellectual property at all stages of the design cycle. Topics include design assistance, advisories, and troubleshooting tips.
References1. SDAccel Development Environment Tutorial (UG1021)
2. SDAccel Development Environment User Guide (UG1023)
Please Read: Important Legal NoticesThe information disclosed to you hereunder (the “Materials”) is provided solely for the selection and use of Xilinx products. To the maximum extent permitted by applicable law: (1) Materials are made available "AS IS" and with all faults, Xilinx hereby DISCLAIMS ALL WARRANTIES AND CONDITIONS, EXPRESS, IMPLIED, OR STATUTORY, INCLUDING BUT NOT LIMITED TO WARRANTIES OF MERCHANTABILITY, NON-INFRINGEMENT, OR FITNESS FOR ANY PARTICULAR PURPOSE; and (2) Xilinx shall not be liable (whether in contract or tort, including negligence, or under any other theory of liability) for any loss or damage of any kind or nature related to, arising under, or in connection with, the Materials (including your use of the Materials), including for any direct, indirect, special, incidental, or consequential loss or damage (including loss of data, profits, goodwill, or any type of loss or damage suffered as a result of any action brought by a third party) even if such damage or loss was reasonably foreseeable or Xilinx had been advised of the possibility of the same. Xilinx assumes no obligation to correct any errors contained in the Materials or to notify you of updates to the Materials or to product specifications. You may not reproduce, modify, distribute, or publicly display the Materials without prior written consent. Certain products are subject to the terms and conditions of Xilinx’s limited warranty, please refer to Xilinx’s Terms of Sale which can be viewed at http://www.xilinx.com/legal.htm#tos; IP cores may be subject to warranty and support terms contained in a license issued to you by Xilinx. Xilinx products are not designed or intended to be fail-safe or for use in any application requiring fail-safe performance; you assume sole risk and liability for use of Xilinx products in such critical applications, please refer to Xilinx’s Terms of Sale which can be viewed at http://www.xilinx.com/legal.htm#tos.
SDAccel Installation and Licensing Guide www.xilinx.com 49UG1020 (v2016.1) May 13, 2016
Send Feedback

Appendix C: Additional Resources and Legal Notices
© Copyright 2012-2016 Xilinx, Inc. Xilinx, the Xilinx logo, Artix, ISE, Kintex, Spartan, Virtex, Vivado, Zynq, and other designated brands included herein are trademarks of Xilinx in the United States and other countries. OpenCL and the OpenCL logo are trademarks of Apple Inc. used by permission by Khronos. All other trademarks are the property of their respective owners
SDAccel Installation and Licensing Guide www.xilinx.com 50UG1020 (v2016.1) May 13, 2016
Send Feedback