schliemann - netbeansin addition to tokens. the grammar that the schliemann approach requires is...
TRANSCRIPT

Schliemann
Integrating syntax coloring, code completion, and other editor features into the IDE used
to be a lot of work. Not anymore! This article describes how a 19th century explorer called
Heinrich Schliemann is inspiring the IDE to become fluent in many languages.
Easy Integration of Scripting Languages
in NetBeans 6.0Geertjan Wielenga

Issue Three N 1�
Schliemann: Easy Integration of Scripting Languages in NetBeans 6.0
Schliemann
Integrating syntax coloring, code completion, and other editor features into the IDE used
to be a lot of work. Not anymore! This article describes how a 19th century explorer called
Heinrich Schliemann is inspiring the IDE to become fluent in many languages.
Traditionally, when creat-
ing editor support for a
new programming lan-
guage in the IDE, a vast
variety of NetBeans APIs
must be implemented. By
“editor support”, we typically mean syntax
coloring, code completion, and the source
navigation features provided by the IDE’s
Navigator. Other examples include code
indentation and brace matching. Out of the
box, the NetBeans IDE provides this kind
of support for several languages and tech-
nologies, such as Java (of course), JSP,
and HTML.
There are many NetBeans APIs that one
needs to implement to provide editor sup-
port for a programming language. This is
unfortunate for two reasons. Firstly, the
domain knowledge that a language pro-
grammer typically brings to the table is
the language itself, not the versatile knowl-
edge of the NetBeans APIs required to pro-
vide the necessary features. Secondly, the
underlying infrastructure for editor support
is the same for all languages. For example,
the only difference between the Navigator
for Java and the Navigator for HTML is the
actual code, not the container. For these
reasons, the language programmer should
only need to provide the content of the lan-
guage in the form of tokens that are com-
municated in regular expressions. Nothing
more than that should be needed.
Given the tokens and an indication of
where they should be used, the NetBeans
Platform should be able to figure out how
to hook the tokens to the support features.
Not only would this approach simplify the
process of integrating a new language into
the IDE, but it would leverage the current
knowledge of the language programmer – rather than requiring a
steep learning curve of acquiring new knowledge before coding can
even begin.
Enter SchliemannThis, in sum, is what the new Schliemann project (languages.
netbeans.org) is all about. And why is it called Schliemann? Heinrich
Schliemann was a 19th century explorer who had a gift for languages.
He traveled the world while keeping a diary in the language of the
country he happened to be in. In the spirit of Schliemann, the
6.0 release of the NetBeans Platform envisages the IDE as being
Schliemannesque, able to pick up languages very quickly and then
being able to communicate in them fluently.
The project is especially pitched towards scripting languages, be-
cause the Schliemann project does not provide compilation support,
which is not required by scripting languages – and because script-
ing languages, in particular, are increasingly in vogue today. In this
article, we will explore the main facets of the Schliemann project and
touch on some contrasts with the traditional NetBeans API approach
to providing the editor features it supports.
Everything in a single file!A central contrast between the traditional API approach and the
Schliemann approach is that the latter lets you specify all editor
features declaratively in one single file. This file has the .NBS file ex-
tension, which stands for NetBeans Scripting. To get a quick flavor
of some typical content of an NBS file, let’s examine a code snippet
– see Listing 1.
This template is what you are given when you use the new Generic
Languages Framework wizard, which is part of NetBeans IDE 6.0. It
gives you a single NBS file with sample content, which begins with
the definition of four tokens. These tokens are named “keyword”,
“operator”, “identifier” and “whitespace”. Within brackets, in the
same line as the name of the tokens, a regular expression is used
to define them.
Right away, one can see the power of this new approach to lan-
guage support provision: a regular expression language, rather than
Java, is used to define tokens. As a result, programmers outside
the Java ecosystem can integrate their programming languages into
the NetBeans IDE. Not needing to know Java, at least for the sim-
pler integrations of languages, is a central benefit of the Schliemann
Issue Three N 1�
The Schliemann page in the NetBeans Wiki
wiki
.net
bean
s.org
/wik
i/vie
w/Sc
hlie
man
n
The official Schliemann project page on netbeans.org
lang
uage
s.net
bean
s.org

Beyo
nd Ja
va
1� N NetBeans Magazine
project.
Once tokens are defined, one can already begin assigning features.
For example, this single statement would fill the Navigator with the
values provided by the “keyword” token:
NAVIGATOR:keyword
Readers who are familiar with the NetBeans Navigator API can only
be amazed at this drastic simplification! However, normally you would
like more robust support for a language and to provide a grammar
in addition to tokens. The grammar that the Schliemann approach
requires is also highly simplified. It is comparable to JavaCC or AntLR.
Ideally, one would wish that the grammar provided by JavaCC and
AntLR could be directly integrated into NetBeans IDE. Unfortunately,
however, these grammars are not tailored to usage within an IDE. For
this reason, a conversion process needs to take place, from AntLR or
JavaCC (or from a similar approach) to the Schliemann NBS format.
Early experiments have shown that both a manual and an auto-
matic solution for this process is feasible. However, this aspect of
the Schliemann project is definitely the area
where most work needs to be done. A uni-
fied, simple approach to integrating gram-
mars provided by AntLR, JavaCC, and the
like, is needed in order for the Schliemann
project to reach its full potential.
In the NBS code shown before, you can
see, in addition to the tokens, that the gram-
mar forms the basis of both the Navigator
implementation and the code folding imple-
mentation. In the case of code folding, the
Block grammar definition determines each
code fold, while the Navigator is populated
by values conforming to the WhileStatement
definition.
Finally, notice that the code also shows
how brace completion and indentation is
defined, all within the same single file, and
that one can fine-tune further by specifying
that white space should be skipped by the
parser.
Hence, when the NBS file in Listing 1 is
associated with a MIME type, documents
corresponding to the MIME type immedi-
ately have the following features:
Syntax coloring
Navigator
Code folding
Brace matching
Indentation
In similar ways, a wide range of other
language-support features can be created,
including code completion, which is fre-
quently very high up on the list of features
that language programmers want to provide
support for.
Getting startedNow that we have a general flavor of
the Schliemann approach, let’s put it into
Listing 1. NBS file snippet.B�
## NBS Template#
# definition of tokensTOKEN:keyword:( “while” | “if” | “else”)TOKEN:operator:( “{“ | “}” | “(“ | “)” )TOKEN:identifier:( [“a”-”z”] [“a”-”z” “0”-”9”]* )TOKEN:whitespace:( [“ “ “\t” “\n” “\r”]+ )
# parser should ignore whitespacesSKIP:whitespace
# definition of grammarS = (Statement)*;Statement = WhileStatement | IfStatement | ExpressionStatement;WhileStatement = “while” “(“ ConditionalExpression “)” Block;IfStatement = “if” “(“ ConditionalExpression “)” Block;Block = “{“ (Statement)* “}”;ConditionalExpression = <identifier>;ExpressionStatement = <identifier>;
# code foldingFOLD:Block
# navigator supportNAVIGATOR:WhileStatement:”{$ConditionalExpression}”
# brace completionCOMPLETE “{:}”COMPLETE “(:)”
# indentation supportINDENT “{:}”INDENT “(:)”INDENT “\\s*(((if|while)\\s*\\(|else\\s*|else\\s+if\\s*\\(|for\\s*\\(.*\\))[^{;]*)”b
Blog by Jan Jancura, the
lead NetBeans engineer for Schliemann
blog
s.sun
.com
/han
z

Issue Three N 1�
Schliemann: Easy Integration of Scripting Languages in NetBeans 6.0
4A
completed the wizard, you have a single new file, in
which we will do all our coding for this module (see
Figure 4).
Now, let’s begin! Unlike in the previous section, the
syntax we are dealing with here has the notion of state.
By state we mean that if we know in which token we
find ourselves, we can always know where we are in
relation to all the other tokens. So, for example, if we
are in the “key” part of a key/value statement in a Man-
ifest, we know that when we reach the colon we are
entering the “value” part of the statement. As a result, we can define
our tokens in the context of their states. Below you see how this is
done. Not much of this should be foreign to you if you are familiar
with regular expressions:
TOKEN:key:( [^”#”] [^ “:” “\n” “\r”]* ):<VALUE>
3A
practice and create an NBS file for Java
Manifests. Manifests, as you know, are
constructed from key/value pairs. In the
IDE, there is no language support for Mani-
fests, not even syntax coloring. Let’s pro-
vide that... and a lot more besides.
We begin as one always does when cre-
ating a plug-in for the IDE: by creating a
new module project (see Figure 1). Next,
in the New Project wizard, name the proj-
ect “ManifestEditorFeatures” and specify
“org.netbeans.modules.manifesteditorfea-
tures” as the Code Name Base. At the end
of the wizard, after having clicked Finish,
you’ll see that the IDE has created a basic
source structure, as it does for every Net-
Beans module (see Figure 2).
Next, we can use the Generic Languages
Framework wizard to generate the NBS
template discussed in the previous section.
This template is found in the NetBeans
Module Development section in the New
File wizard (see Figure 3). Once you’ve
2A
1A Figure 1 Creating a new module project.
A
Figure 2 Result of the New Projects window: Plugin Source Structure
A
Figure 3 Generic Languages Framework Template.
A
Figure 4 Result of the New File wizard: One additional file!
A

Beyo
nd Ja
va
20 N NetBeans Magazine
6A
5A
7A
C�Geertjan Wielenga (geertjan.wielenga@
sun.com) is a technical writer for NetBeans IDE and a co-author
of the book “Rich Client Programming:
Plugging into the NetBeans Platform”.
He is passionate about NetBeans and blogs
about it daily at blogs.sun.com/geertjan.
<VALUE> { TOKEN:whitespace:( [“\n” “\r”]+ ):<DEFAULT> TOKEN:operator:( “:” ):<IN_VALUE>}<IN_VALUE> { TOKEN:whitespace:( [“\n” “\r”]+ ):<DEFAULT> TOKEN:value:( [^ “\n” “\r”]* )}
Notice that we start out by saying that we are not in a key if the first
character is a hash (#). In that case we are, in fact, in a comment. It
would also be good to provide a specific syntax color for comments,
so let’s define a token for comments:
TOKEN:comment:( “#” [^ “\n” “\r”]* [“\n” “\r”]+ )
Right now, without going any further, we can already assign colors.
Again we do so declaratively:
COLOR:key: { foreground_color: “blue”;}COLOR:operator: { foreground_color: “black”;}COLOR:value: { foreground_color: “magenta”;}
Apart from the foreground color, there are many other attributes
that we can set per token, such as the style and background color.
Without going much further, though, we can already install our mod-
ule and then we’ll have syntax coloring (see Figure 5)! It couldn’t be
much simpler. Before we do so, however, we need to create a MIME
type resolver, which is a small XML file that specifies the file extension
of the files we want to deal with.
If you use the New File Type wizard, you
can let the IDE generate such a MIME type re-
solver for you. You then need to register both
the resolver and the NBS file in the XML layer
file and declare a dependency on the Generic
Languages Framework API. Eventually, the
Generic Languages Framework template will
do all of this for you, one imagines; but at the
time of writing this is not the case.
After installing the module, we can develop
it further. To help you, NetBeans 6.0 will pro-
vide a number of developer tools, such as
the new AST window (see Figure 6), which
lets you analyze a file, based on the tokens
you have assigned to its MIME type. Ultimate-
ly, for Manifests, you could create a very
detailed Navigator (see Figure 7), among
other useful features for the end user.
ConclusionsHopefully this broad introduction gives
you a flavor of what NetBeans 6.0 will do
for scripting languages. Quickly and with-
out much fuss, language developers will
be able to integrate their favorite script-
ing languages into the IDE, thus turning
NetBeans more and more into their own,
customized development environ-
ment. In short, just like Heinrich
Schliemann, NetBeans IDE will be
able to pick up new languages
and expand its usefulness across
more and more development
communities.
Figure 5
A Manifest file with
syntax coloring.
A
Figure 6
AST window.
A
Figure 7
Navigator.
A

Mob
ile D
evel
opm
ent
�4 N NetBeans Magazine
IDE automatically makes it available to us from the Resources folder
in the Navigator window, on the lower left side of the IDE.) Drag a
SplashScreen component from the Tools Palette on the right of the
window on to the Flow Designer. Next, Drag the image1[Image] from
the Navigator window and drag it on top of the splash screen.
Presto! Our splash screen has been created. You can look at it
by double-clicking on the SplashScreen component, which takes
you into the Screen Designer. The splash screen should look like
Figure 4.
Now let’s make the splash screen part of the application flow. Click
the Flow Design button to go back to the Flow Designer. Grab the
tip of the Start Point Arrow and drag it over to the splashScreen1
component. Click on the orange square next to Dismiss and drag
the arrow over the helloForm component. The flow should now look
something like Figure 5.
Let’s just make one more quick change to the program to illustrate
the Screen Designer. Double click on the form component. In the
Screen Designer, click on the “Hello, World!” text and change it to
something else, say “Hello, Universe!”
Now go ahead and run the MIDlet again. Click the button under
“Launch,” and the emulator displays the splash screen as shown in
Figure 6. Then you see the new message.
That was just a simple example of how
you can quickly design the screens and flow
of your application in the VMD. The Splash-
Screen component is one of three custom
components, along with WaitScreen and
TableItem, created by the NetBeans Mobil-
ity Pack team and added to the palette to
make visual programming easier. You can
also create your own custom components
and add them to the palette.
Another important VMD feature is its sup-
port for Scalable Vector Graphics (SVG).
SVG is an XML-based standard defined
by the W3C and supported by MIDP 2.0
through JSR 226. The compact size and
consistent appearance across different
platforms and screen resolutions makes
it an attractive graphics format for mobile
developers. SVG also enables scripting and
animation that allows users to interact with
Figure 6
Splash screen in the device
emulator.
A
Figure 5
Application flow with a
splash screen.
A 5A
6A
netb
eans
.org
/kb/
��/m
obili
ty.ht
mlMobility Pack
for CLDC/MIDP documentation
index

Issue Three N ��
Write Once, Deploy Anywhere
the visual content. To use SVG, you’ll need
the Sun Java Wireless Toolkit 2.5, which
is currently available as a module from
NetBeans Update Center, and is bundled
with the Mobility Pack starting with version
5.5.1.
In the VMD, you can add an external SVG
editing tool, such as Hyperion or Ikivo, and
use it to create your initial SVG graphic.
Like we did in the example we just looked
at, you can create a splash screen, an in-
teractive menu, or a wait screen by drag-
ging and dropping components into the
Flow Designer. You can drop the graphic or
animation on the component, and inspect
the behavior of the graphic or animation as
the application is run.
Figure 7 shows the VMD inspecting an
animated SVG menu. You can use the VMD
flow designer interface to link each menu
item to a separate screen that would be
called when the menu item is selected.
Reducing fragmentation with project configurations
One of the most difficult aspects of de-
veloping applications is device fragmentation. Mobile devices differ
in a variety of attributes, such as screen size, color depth, and the
proprietary or optional APIs they support. These differences often
require special code or project settings for successful deployment.
One solution is to create separate source code for each device
you’re programming to, which is almost guaranteed to be a logis-
tics nightmare. We’ve already touched on the Mobility Pack solution
for device fragmentation – project configurations.
Project configurations enable you to define the execution environ-
ment for each target device. With project configurations and code
pre-processing, you can write an application and – using a single
set of source code – customize, debug, and deploy a separate
distribution JAR for each target device. If you need to customize
your MIDlet for more devices, you add a new configuration for each
device, modify the project properties, add some pre-processing
code, then build and deploy the application. In most cases, you
should create one configuration for each distribution JAR you plan
to build for your project. For example, if you are planning to support
three different screen sizes using two sets of vendor specific APIs,
you should create six configurations.
Before we look at deploying our MIDlet to different devices, let’s
examine the three main concepts behind project configurations.
The Emulator Platform
An emulator platform simulates the execution of an application on
one or more target devices. It enables you to understand the user
Figure 7 An interactive SVG-based menu.
A7A
The Sun Java Wireless Toolkit 2.�
The Sun Java Wireless Toolkit 2.5 includes all of the advanced development features found in earlier versions, such as MIDlet signing, certificate management, integrated OTA emulation, push registry emulation, and more. New features include support for the Mobile Service Architecture (JSR-248) platform. Although this JSR does not define any new APIs, it does standardize many existing ones into a common API stack, to increase interoperability and make mobile development easier. There are also many new APIs supported, such as Security and Trust Services (JSR 177), Location (JSR 179), SIP (JSR 180), Content Handler (JSR 211), Scalable 2D Vector Graphics (JSR 226), Payment (JSR 229), and several others.
Mobility Pack for CDC Quick Start Guide
netb
eans
.org
/kb/
��/q
uick
star
t-mob
ility
cdc.
htm
l

Mob
ile D
evel
opm
ent
�6 N NetBeans Magazine
experience for an application on a particular device, and to test the
portability of the application across different devices. As you have
seen, the J2ME Wireless Toolkit 2.2, bundled with Mobility Pack 5.5
for CLDC/MIDP, provides several sample devices, like the Default-
ColorPhone (and you can easily update to WTK 2.5).
It is important, however, to remember that an emulator can only
approximate a device’s performance. Environmental variables like
processing speed or the strength of the wireless signal can affect
performance on a real device, and should be taken into account.
A very important feature of the Mobility Pack is its ability to work
with the emulators provided by major man-
ufacturers, such as Nokia, Sony Ericsson,
Siemens, and Motorola. Using the Java
Platform Manager (see Figure 8), you can
easily add any emulator that supports the
Unified Emulator Interface (UEI) standards.
Simply choose Tools>Java Platform Man-
ager, select the J2ME Platform, and the
wizard detects the emulator platforms in-
stalled on your system. Other emulators
can also be added with a little more effort.
Project properties
We can use the project properties to de-
fine many aspects of the program. As you
can see in Figure 9, the property catego-
ries are on the left, and the properties for
that category are on the right. A short list
of things you can do in properties includes:
defining the emulator platform, setting/
checking Configuration and Profile versions
and optional APIs the device supports; add-
ing or removing the contents of the JAR and
JAD files; setting the Push Registry; setting
obfuscation and optimization levels; add-
ing signing and security certificates; and
setting deployment options. The Abilities
shown in Figure 9 list attributes that might
be shared by different devices, and there-
fore might be shared when you are adding
pre-processing code.
Let’s take a look at this using the two con-
figurations we’ve created for our TestMIDlet.
The first is the DefaultConfiguration we’ve
been using so far. The second is the Me-
diaControlSkin that you selected when first
creating the project. Before we discuss
project properties and pre-processing
code, let’s take a quick look at the Media-
ControlSkin device emulator.
To switch configurations, choose the
9A Figure 9
Abilities page.
A
8A Figure 8
The Java Platform Manager.
A

Issue Three N ��
Write Once, Deploy Anywhere
MediaControlSkin from the Configuration
drop-down menu in the IDE toolbar. Then
choose Run>Run Main Project. It’s the
same TestMIDlet as before, but this time
the device emulator and its display are
thinner – so we lose a little bit of the splash
screen, as shown in Figure 10.
Preprocessing code
Preprocessing modifies the code in your
source files before the code is parsed by
the compiler. The preprocessor modifies
the code according to preprocessor di-
rectives you insert into the code as code
blocks with beginning and ending direc-
tives. These code blocks are marked visu-
ally in the Source Editor and are included
(or excluded) when you build the JAR for a specific project configu-
ration or ability. You can use these code blocks to create, manage,
and track code that is specific to one or more project configura-
tions or abilities.
Now that we’ve defined the key concepts of project configura-
tions, let’s go back to our example and say now that we want to
use a different graphic for the MediaControlSkin device. We already
have our two project configurations defined, so what we need to
do is add some pre-processing code so that the compiler knows
it should use one image for DefaultConfiguration and another for
MediaControlSkin.
Click the Source button to view the TestMIDlet source code. Then
scroll down to the get_image1() method. Notice that some sections
have a blue background – these are “guarded blocks” that are gen-
erated by the VMD, and cannot be edited. Highlight the code be-
ginning with “//Insert pre-init code here and ending with “//Insert
post-init code here.” Right click on the selection and choose Prepro-
cessor Blocks>Create If/Else Block. A menu with all the available
configurations and abilities appears. Double click on DefaultCon-
figuration. Your code should look like Figure 11.
Notice that the //#else directive has a pink background. This
code can be edited. Change the graphic name “/mobileduke.
png” to the name of another graphic (such as “/veryproudduke.
10A
11A Figure 11 Preprocessor code.
A
Figure 10 The MediaControlSkin Emulator.
A
netb
eans
.org
/kb/
��/m
obili
tycd
c.ht
ml Mobility
Pack for CDC documentation index

Mob
ile D
evel
opm
ent
�� N NetBeans Magazine
png”). Now, when you run our MIDlet using the DefaultConfigura-
tion, the emulator will display the “mobile duke” image. When
you run the MIDlet using the MediaControlSkin configuration, or
any other configuration you add later, the emulator will display
the second graphic. This is a very simple example of what’s pos-
sible with preprocessor blocks, but it hopefully gives you a taste
of what they can do.
Deploying to multiple devices
Now that you have an application that works with two devices, it’s
time to deploy it. The deployment property page shown in Figure 12
shows the different deployment methods available.
Because deployment is set in the project Properties, you can de-
fine a different deployment for each configuration. When you have
chosen your deployment method, choose Build>Build All Main Proj-
ect Configurations. Then you’ll have a JAR for each target device
you’re programming for.
Other features Our example was purposefully kept simple to focus on the design,
configuration, and deployment features of the Mobility Pack for
CLDC. But there are two other important
features we’d like to mention quickly before
we move on to the CDC Pack.
The End-to-End Bridge technology is a set
of two wizards that enable you to quickly
modify your MIDlet to consume Web
Services. The J2ME Web Service Client
creates a client-side proxy that connects
directly to Web Services that support the
JSR-172 (J2ME Web Services) specifica-
tion. The Mobile Client to Web Application
Generator generates a servlet that con-
nects to a web application that includes a
Web Service client.
Another important feature is JMUnit test-
ing support. The Mobilty Pack for CLDC pro-
vides built-in JMUnit support for generating
and executing unit tests for MIDP/CLDC ap-
plications. You can generate and navigate
to tests by selecting any class or package
node in the Projects window and choosing
from the Tools>JUnit menu.
12A Figure 12
Deployment properties.
A

Issue Three N ��
Write Once, Deploy Anywhere
C�Anatole Wilson ([email protected]) lives in Pittsburgh, Pennsylvania and has been the Senior Technical Writer for the Mobility Pack since its inception. He has worked for various high-tech companies, including IBM and Oracle, and, as a freelance writer, has written articles for publication in various magazines.
NetBeans Mobility Pack for CDC
The Mobility Pack for CDC (Connected
Device Configuration) makes it possible to
create, test, and deploy applications for
several CDC platforms including the Sun
Java CDC Toolkit, Sony Ericsson CDC Plat-
form 1, Nokia S80, SavaJe and Ricoh MFP,
as well as Windows CE using NSIcom’s
CrEme CDC virtual machine. Although it
is not yet as complete as the MIDP/CLDC
Pack, many new features will be added
when Mobility Pack 6.0 is released.
You create CDC projects in the same
manner as MIDP/CLDC projects, using the
New Project Wizard. Before you begin, you
will want to install the Sun Java Toolkit for
CDC or an emulator platform from one of
the growing list of manufacturers the Mo-
bility Pack supports. You can find this list in
the NetBeans Mobility
Pack for CDC Quick Start Guide.
To get started on a project, Choose File>New Project. Choose the
category CDC, project type CDC Application. The wizard will guide
you through the rest of the steps for creating your Main Project.
Once you’ve created a project, you can use the Matisse GUI Build-
er with either the AGUI toolkit or the Personal Profile 1.0, in the
same way you would use it for regular Java SE development. For
Personal Profile GUI development, right click the Main.java form in
the GUI Builder, and choose Set Layout>Free Layout. Then drag
and drop components from the Palette window into the Design Area
of the GUI Builder. You can also take advantage of JUnit testing and
other key features of the NetBeans IDE when developing CDC ap-
plications in the Mobility Pack for CDC.
What’s coming in NetBeans Mobility Pack 6.0
The NetBeans Mobility Pack has many dramatic changes coming
up. One of the most significant changes, as we’ve mentioned be-
fore, is that the CLDC/MIDP and CDC Packs will be merged into a
single UI, making it easier to create end-to-end applications. Other
exciting new features include:
New custom components to simplify programming, including
a File Browser, an SMS Composer, a Login Screen and a Personal
Information Manager (PIM) Browser
VMD support for the MIDP 2.x Game API that allows creating
tiled and animated layers for environment design, and support for
animated character and sprites.
Improved VMD UI, including support for non-visual components
and a design analyzer.
CDC support for project configurations and pre-processing
blocks.
ConclusionsThis article was intended to give you a hands-on sense of the
capabilities of the Mobility Pack for CLDC/MIDP and CDC, and a
running start on building your first mobile application. You can learn
more about the Mobility Pack by reading the tutorials and articles
on the NetBeans website, joining the NetBeans community of devel-
opers, and most importantly, by going out there and creating great
mobile applications!
Issue Three N 21
Schliemann: Easy Integration of Scripting Languages in NetBeans 6.0
“Welcome to the world
of rich client devel-
opment on the Net-
Beans Platform.”
So begins the new book on the NetBeans
Platform, called “Rich Client Programming:
Plugging into the NetBeans Platform”. Writ-
ten by three stalwarts of the NetBeans IDE,
Tim Boudreau, Jaroslav Tulach, and Geert-
jan Wielenga, this new title from Prentice
Hall introduces you to the central concepts
of the NetBeans Platform.
The book begins by discussing the ratio-
nale for modular programming. “Loose cou-
pling”, whereby spaghetti code is avoided
through a set of related but independent
modules, is discussed with reference to a
set of concrete examples. Gradually, the
need for this approach to robust program-
ming is introduced and, piece by piece, the
authors highlight NetBeans’ responses to
this need. The tooling for modular program-
ming since the release of NetBeans IDE 5.0
has proven its value to numerous program-
mers, and the reasons for this quickly be-
come clear in the book. Typical stumbling
blocks that new developers come across,
such as “nodes” and “cookies” are explored
in detail.
The second part of the book deals with
a set of concrete NetBeans API scenarios.
How, for example, can one provide code
completion? Or hyperlinks in the Source Editor?
And what about palettes with items that can be
dragged and dropped? These and other scenar-
ios are discussed in detail. Each chapter travels
through a very specific example scenario, based
on the example in the CD that accompanies the
book. At the end of this part, the reader should
understand some of the basic APIs that are typi-
cally implemented by developers making use of
the NetBeans Platform.
The book closes with two chapters contributed
by two developers with years of experience with the Net-
Beans Platform. First, Jens Trapp, from Germany, discuss-
es how he integrated the HTML Tidy project into NetBeans
IDE. In doing so, he brings together many of the principles
and APIs discussed in the preceding chapters. Next, US-
based Rich Unger describes a complete application built
on top of the NetBeans Platform, for editing WAV files.
Typical concerns involved in creating Platform-based applications are
discussed in this chapter. Together Jens and Rich provide the two “use
cases” of the NetBeans Platform – allowing you to extend NetBeans
IDE with new features, and creating completely separate applications,
which in turn could constitute the platform of still other applications.
This is the first book since Tim Boudreau’s and Jesse Glick’s “Net-
Beans: The Definitive Guide” – the popular title from some years ago
which had a large section on the NetBeans Platform – to cover the
length and breadth of the NetBeans Platform. Judging from the level of
interest shown in the Safari Rough Cuts version of the book, which pro-
vides an early draft in PDF format, “Rich Client Programming: Plugging
into the NetBeans Platform” promises to take the Swing development
world by storm. If you want to leverage the full potential of the Net-
Beans Platform, this is definitely not a book that you want to miss!
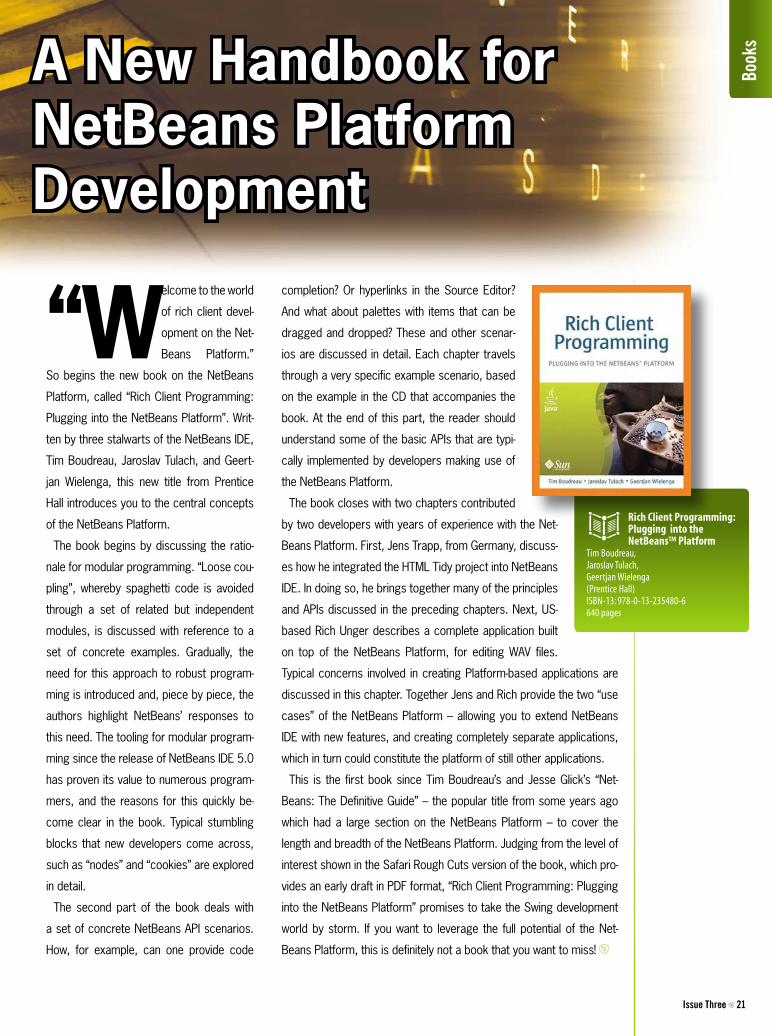
Rich Client Programming: Plugging into the NetBeans™ Platform
Tim Boudreau, Jaroslav Tulach, Geertjan Wielenga (Prentice Hall) ISBN-13: 978-0-13-235480-6 640 pages
A New Handbook for NetBeans Platform Development
Book
s