sas visual process orchestration 2 sas visual process orchestration is a web client that enables you...
TRANSCRIPT

SAS® Visual Process Orchestration 2.2User’s Guide
SAS® Documentation

The correct bibliographic citation for this manual is as follows: SAS Institute Inc. 2015. SAS® Visual Process Orchestration 2.2: User's Guide. Cary, NC: SAS Institute Inc.
SAS® Visual Process Orchestration 2.2: User's Guide
Copyright © 2015, SAS Institute Inc., Cary, NC, USA
All rights reserved. Produced in the United States of America.
For a hard-copy book: No part of this publication may be reproduced, stored in a retrieval system, or transmitted, in any form or by any means, electronic, mechanical, photocopying, or otherwise, without the prior written permission of the publisher, SAS Institute Inc.
For a web download or e-book: Your use of this publication shall be governed by the terms established by the vendor at the time you acquire this publication.
The scanning, uploading, and distribution of this book via the Internet or any other means without the permission of the publisher is illegal and punishable by law. Please purchase only authorized electronic editions and do not participate in or encourage electronic piracy of copyrighted materials. Your support of others' rights is appreciated.
U.S. Government License Rights; Restricted Rights: The Software and its documentation is commercial computer software developed at private expense and is provided with RESTRICTED RIGHTS to the United States Government. Use, duplication or disclosure of the Software by the United States Government is subject to the license terms of this Agreement pursuant to, as applicable, FAR 12.212, DFAR 227.7202-1(a), DFAR 227.7202-3(a) and DFAR 227.7202-4 and, to the extent required under U.S. federal law, the minimum restricted rights as set out in FAR 52.227-19 (DEC 2007). If FAR 52.227-19 is applicable, this provision serves as notice under clause (c) thereof and no other notice is required to be affixed to the Software or documentation. The Government's rights in Software and documentation shall be only those set forth in this Agreement.
SAS Institute Inc., SAS Campus Drive, Cary, North Carolina 27513-2414.
March 2015
SAS provides a complete selection of books and electronic products to help customers use SAS® software to its fullest potential. For more information about our offerings, visit support.sas.com/bookstore or call 1-800-727-3228.
SAS® and all other SAS Institute Inc. product or service names are registered trademarks or trademarks of SAS Institute Inc. in the USA and other countries. ® indicates USA registration.
Other brand and product names are trademarks of their respective companies.

Contents
What's New in SAS Visual Process Orchestration 2.2 . . . . . . . . . . . . . . . . . viiAccessibility Features of SAS Visual Process Orchestration . . . . . . . . . . ix
Chapter 1 • Introduction to SAS Visual Process Orchestration . . . . . . . . . . . . . . . . . . . . . . . . . . . . . 1What Is SAS Visual Process Orchestration? . . . . . . . . . . . . . . . . . . . 1Benefits of SAS Visual Process Orchestration . . . . . . . . . . . . . . . . . . 2SAS Visual Process Orchestration and SAS Data Management . . . . 3Role-Based Access to Features . . . . . . . . . . . . . . . . . . . . . . . . . . . . . 6Post-Installation Tasks for SAS Visual Process Orchestration . . . . . . 8
Chapter 2 • Accessing SAS Visual Process Orchestration . . . . . . . . . . . . . . . . . . . . . . . . . . . . . . . . 11Log on to SAS Data Management Console . . . . . . . . . . . . . . . . . . . 11SAS Data Management Console Home Page . . . . . . . . . . . . . . . . . 13Preferences Window . . . . . . . . . . . . . . . . . . . . . . . . . . . . . . . . . . . . . 15Adding Links to the SAS Data Management Console Home Page . 15
Chapter 3 • Understanding the Interface . . . . . . . . . . . . . . . . . . . . . . . . . . . . . . . . . . . . . . . . . . . . . . . 17SAS Folders Tab . . . . . . . . . . . . . . . . . . . . . . . . . . . . . . . . . . . . . . . . 17Orchestration Job Tab . . . . . . . . . . . . . . . . . . . . . . . . . . . . . . . . . . . . 19Orchestration Job – Run Status Tab . . . . . . . . . . . . . . . . . . . . . . . . . 22
Chapter 4 • Understanding Orchestration Jobs . . . . . . . . . . . . . . . . . . . . . . . . . . . . . . . . . . . . . . . . . 27Understanding Flow Patterns for Orchestration Jobs . . . . . . . . . . . . 27Understanding Job and Node Settings . . . . . . . . . . . . . . . . . . . . . . . 44Understanding Inputs and Outputs . . . . . . . . . . . . . . . . . . . . . . . . . . 49Understanding Bindings . . . . . . . . . . . . . . . . . . . . . . . . . . . . . . . . . . 51Understanding DataFlux Expression Language . . . . . . . . . . . . . . . . 55
Chapter 5 • Working with Orchestration Jobs . . . . . . . . . . . . . . . . . . . . . . . . . . . . . . . . . . . . . . . . . . 59Creating an Orchestration Job . . . . . . . . . . . . . . . . . . . . . . . . . . . . . 60Reviewing Errors and Warnings . . . . . . . . . . . . . . . . . . . . . . . . . . . . 62Locking and Unlocking Jobs . . . . . . . . . . . . . . . . . . . . . . . . . . . . . . . 66
Working with Versions . . . . . . . . . . . . . . . . . . . . . . . . . . . . . . . . . . . . 68Export Lineage Metadata to SAS Lineage . . . . . . . . . . . . . . . . . . . . 70Promoting Orchestration Jobs . . . . . . . . . . . . . . . . . . . . . . . . . . . . . 72Using the REST-Based Service to Run and
Schedule Orchestration Jobs . . . . . . . . . . . . . . . . . . . . . . . . . . . . 74Displaying Run-Time Statistics in SAS Job Monitor . . . . . . . . . . . . . 82
Chapter 6 • Working with Orchestration Job Nodes . . . . . . . . . . . . . . . . . . . . . . . . . . . . . . . . . . . . . 85Working with the Event Listener Node . . . . . . . . . . . . . . . . . . . . . . . 87Working with the Raise Event Node . . . . . . . . . . . . . . . . . . . . . . . . . 92Working with the Expression Node . . . . . . . . . . . . . . . . . . . . . . . . . . 95Working with the If Then Node . . . . . . . . . . . . . . . . . . . . . . . . . . . . . 97Working with the Parallel Fork Node . . . . . . . . . . . . . . . . . . . . . . . . 101Working with the Terminate Job Node . . . . . . . . . . . . . . . . . . . . . . 106Working with the Command Execute Node . . . . . . . . . . . . . . . . . . 108Working with the Data Management Job Node . . . . . . . . . . . . . . . . 111Working with the Data Management Profile Node . . . . . . . . . . . . . 116Working with the Data Management Service Node . . . . . . . . . . . . 120Working with the HTTP Request Node . . . . . . . . . . . . . . . . . . . . . . 124Working with the Orchestration Job Node . . . . . . . . . . . . . . . . . . . 131Working with the SAS Deployed Job Node . . . . . . . . . . . . . . . . . . . 139Working with the SAS Program Node . . . . . . . . . . . . . . . . . . . . . . . 142Working with the SOAP Request Nodes . . . . . . . . . . . . . . . . . . . . . 147Working with the Echo Node . . . . . . . . . . . . . . . . . . . . . . . . . . . . . . 154Working with the Variable Read Write Node . . . . . . . . . . . . . . . . . . 156
Recommended Reading . . . . . . . . . . . . . . . . . . . . . . . . . . . . . . . . . . . . . . . . . . . . . . . . 165
vi Contents

Whatʼs New
What's New in SAS Visual Process Orchestration 2.2
Overview
The main enhancements for SAS Visual Process Orchestration 2.2 include the following:
n You can use SAS Lineage to view the lineage of sources and targets in an Orchestration job.
n The documentation for SAS Data Management Console and SAS Job Monitor has been enhanced.
View Orchestration Jobs in SAS Lineage
SAS Lineage is a web client that enables you to view the lineage of sources and targets in a job. If the SAS Relationship Content Service has been enabled, you can export lineage metadata from SAS Visual Process Orchestration to the service, where it can be accessed by SAS Lineage. For more information, see “Export Lineage Metadata to SAS Lineage” on page 70.
vii

Documentation Enhancements
The logon topic for SAS Data Management Console now describes a number of ways to access that application. For more information, see “Log on to SAS Data Management Console” on page 11.
If your site has licensed SAS Environment Manager and SAS Job Monitor, then you can use a web browser to display run-time statistics for SAS Visual Process Orchestration jobs. The topic for SAS Job Monitor now includes more detail about configuring that application for Orchestration jobs. For more information, see “Displaying Run-Time Statistics in SAS Job Monitor” on page 82.
viii What's New in SAS Visual Process Orchestration 2.2

Accessibility
Accessibility Features of SAS Visual Process Orchestration
Overview
SAS Visual Process Orchestration has not been tested for compliance with U.S. Section 508 standards and W3C web content accessibility guidelines. If you have specific questions about the accessibility of SAS products, send them to [email protected] or call SAS Technical Support.
Documentation Format
Please contact [email protected] if you need this document in an alternative digital format.
Themes
An application’s theme is the collection of colors, graphics, and fonts that appear in the application. The following themes are provided with this application: SAS Blue Steel, SAS Corporate, SAS Dark, SAS High Contrast, and SAS Light. To change the theme for the application, select File Preferences, and go to the Global Preferences page.
ix

Note: If you have special requirements for your themes, then contact your system administrator or visual designer about using the SAS Theme Designer for Flex application to build custom themes. SAS Theme Designer for Flex is installed with SAS themes. For more information about this tool, see SAS Theme Designer for Flex: User's Guide.
x Accessibility / Accessibility Features

1Introduction to SAS Visual Process Orchestration
What Is SAS Visual Process Orchestration? . . . . . . . . . . . . . . . . . . . . . . . . . 1
Benefits of SAS Visual Process Orchestration . . . . . . . . . . . . . . . . . . . . . . . 2
SAS Visual Process Orchestration and SAS Data Management . . . . . . . . . . . . . . . . . . . . . . . . . . . . . . . . . . . . . . . . . . . . . . . . . . . . . . . . . . . . . . . . . 3
Role-Based Access to Features . . . . . . . . . . . . . . . . . . . . . . . . . . . . . . . . . . . . . . . . . 6Overview . . . . . . . . . . . . . . . . . . . . . . . . . . . . . . . . . . . . . . . . . . . . . . . . . . . . . . . . . . . . . . . . . . 6Default Groups, Roles, and Capabilities . . . . . . . . . . . . . . . . . . . . . . . . . . . . . . 6Define Users and Link Them to Groups (and Roles) . . . . . . . . . . . . . . . . 7Usage Notes for Roles and Capabilities . . . . . . . . . . . . . . . . . . . . . . . . . . . . . . 8
Post-Installation Tasks for SAS Visual Process Orchestration . . . . . . . . . . . . . . . . . . . . . . . . . . . . . . . . . . . . . . . . . . . . . . . . . . . . . . . . . . . . . . . 8
Overview . . . . . . . . . . . . . . . . . . . . . . . . . . . . . . . . . . . . . . . . . . . . . . . . . . . . . . . . . . . . . . . . . . 8Define Users and Link Them to Groups and Roles . . . . . . . . . . . . . . . . . 8
What Is SAS Visual Process Orchestration?
SAS Visual Process Orchestration is a web authoring environment that is launched from SAS Data Management Console. The authoring environment provides nodes that can be used to build orchestration jobs, which are process jobs that run other jobs.
1

An orchestration job can integrate executable files from various systems into a single process flow, as shown in the next display.
Display 1.1 Orchestration Job
A single orchestration job can run one or more executable files, such as SAS Data Integration Studio jobs, DataFlux Data Management Studio jobs, SAS code files, third-party programs, scripts, and web services. SAS Visual Process Orchestration can execute referenced jobs in parallel; apply control logic such as looping and IF/THEN/ELSE handling; and handle events, error-checking, and run-time statistics for each node in the orchestration job.
Benefits of SAS Visual Process Orchestration
SAS Visual Process Orchestration provides the following benefits:
n It enables you to integrate jobs (executable files) from various systems into a single orchestration job. Referenced jobs can include SAS Data Integration Studio jobs, DataFlux Data Management Studio jobs, SAS code, third-party programs, scripts, and web services.
n Orchestration jobs can execute referenced jobs in parallel.
2 Chapter 1 / Introduction to SAS Visual Process Orchestration

n Orchestration jobs can apply control logic such as looping and IF/THEN/ELSE handling.
n Orchestration jobs can handle events, error-checking, and run-time statistics for each node in the job.
n Orchestration jobs can be versioned and locked.
n SAS Visual Process Orchestration is fully integrated with the SAS platform. For example, orchestration jobs are stored in SAS folders. You can use the SAS object promotion framework in SAS Management Console to move orchestration jobs between test, development, and production environments.
SAS Visual Process Orchestration and SAS Data Management
SAS Visual Process Orchestration is fully integrated with the SAS platform and SAS data management.
SAS Visual Process Orchestration and SAS Data Management 3

The following diagram shows the main clients and servers that work with SAS Visual Process Orchestration.
Figure 1.1 SAS Visual Process Orchestration and SAS Data Management
SASMetadata
Server
HTTPS
IOM
SAS Data Management Console:- SAS Visual Process Orchestration- SAS Job Monitor
DataFluxData
ManagementStudio
SASManagement
Console
EnterpriseApplications
SAS Web Application Server
DesignServer
SAS Visual ProcessOrchestration
SASContentServer
RuntimeServer
DataFluxData Management
Server
SAS FederationServer, DataFlux
Authentication Server
SASWorkspace
Server
Enterprise Data
n SAS Data Management Console is a framework that displays status information and enables the invocation of data management applications such as SAS Visual Process Orchestration and SAS Job Monitor.
4 Chapter 1 / Introduction to SAS Visual Process Orchestration

n SAS Visual Process Orchestration is a web client that enables you to create orchestration jobs, which are process jobs that run other jobs. This client is launched from SAS Data Management Console.
n If SAS Job Monitor is installed, then the SAS Data Management Console home page contains a link to Monitor Center in SAS Environment Manager. A Monitor Center portlet is displayed on the home page. This portlet displays run-time statistics for monitored jobs, such as orchestration jobs from SAS Visual Process Orchestration.
n The SAS Web Application Server helps the SAS Visual Process Orchestration Run-time Server coordinate access to resources that are requested by multiple web clients. The web server also works with the SAS Metadata Server to authorize and authenticate users.
n The SAS Visual Process Orchestration Design Server, working with SAS Content Services, stores orchestration jobs on a SAS Content Server.
n The SAS Visual Process Orchestration Run-time Server executes orchestration jobs. Each job node within the orchestration job executes in sequence, each on its specified server. The run-time server monitors and reports the status of each job as it runs. The run-time server can deliver job results to your enterprise applications using enhanced-security HTTPS web addresses. HTTPS also enables enterprise applications to trigger the execution of process flows. HTTPS is implemented using Secure Sockets Layer (SSL) technology.
n DataFlux Data Management Studio enables you to create, test, and upload jobs to DataFlux Data Management Servers. These jobs can be included as part of the flow in an orchestration job.
n The optional SAS Federation Server and SAS Application Server run data federation jobs that are created in DataFlux Data Management Studio. The data federation jobs collect (federate) data from disparate sources across your enterprise. The resulting data sets can be accessed by the creation of data source names on the federation server and on your enterprise applications.
n The DataFlux Authentication Server works with the SAS Federation Server to authenticate the users that access jobs, data sets, and enterprise relational databases. The DataFlux Authentication Server can also work with DataFlux Data Management Servers for these same purposes.
SAS Visual Process Orchestration and SAS Data Management 5

n SAS Data Integration Studio is a rich client that can provide component jobs and real-time services for orchestration jobs.
n SAS Management Console enables you to maintain metadata definitions for the design and run-time servers and assign roles and capabilities to users. You can also stop, start, and restart the design and run-time servers.
n The SAS Metadata Server manages metadata definitions for servers, users, and other resources. The metadata server also works with the SAS Web Application Server and with DataFlux Data Management Servers to provide authorization and authentication.
Communication between clients and servers uses the SAS Integrated Object Model (IOM), which is based on TCP/IP. All IOM connections are encrypted. The default encryption algorithm is SASProprietary. You can configure your system to use the Advanced Encryption Standard (AES). AES features keys lengths from 128 to 256 bits.
Role-Based Access to Features
Overview
When you log on to SAS Data Management Console, you are granted access to applications and features based on the roles and capabilities that are associated with your login. Typically, these roles are assigned to a group to which you belong. For example, by default, members of the Data Management Executives group have the Data Management: Process Orchestration role. This role has one capability: ViewApplication, which enables access to SAS Visual Process Orchestration. Without this capability, you cannot see SAS Visual Process Orchestration features in SAS Data Management Console.
Default Groups, Roles, and Capabilities
The following groups, roles, and capabilities are installed in SAS Management Console when SAS Visual Process Orchestration is installed.
6 Chapter 1 / Introduction to SAS Visual Process Orchestration

Table 1.1 Default Groups, Roles, and Capabilities
Role Name Role Description Capability IDs
Groups That Get This Role by Default
Process Orchestration: Job Administration
Provides all functionality related to administrative activities for SAS Visual Process Orchestration jobs.
ViewApplication; UnlockOtherUsersJobs; StopOtherUsersJobs (see Usage Notes below); EditJobs; RunJobs
Data Management Administrators
Process Orchestration: Job Development
Provides functionality related to editing SAS Visual Process Orchestration jobs.
ViewApplication; EditJobs; RunJobs
Data Management Stewards; Data Management Power Users
Process Orchestration: Job Execution
Provides functionality related to running SAS Visual Process Orchestration jobs.
ViewApplication; RunJobs
Data Management Business Users
Data Management: Process Orchestration
Provides default access to the SAS Visual Process Orchestration application.
ViewApplication Data Management Business Approvers; Data Management Executives
Define Users and Link Them to Groups (and Roles)
SAS Visual Process Orchestration is installed as part of a bundle of products. After installation, an administrator uses SAS Management Console to perform the following tasks:
n Create a user definition for each person who uses SAS Visual Process Orchestration.
Role-Based Access to Features 7

n Create any custom groups (and roles) that you might require if the default groups provided by SAS Visual Process Orchestration do not meet your needs.
n Assign each user to one or more of the default or custom groups in order to grant each user the capabilities that he or she requires.
For more information about defining users and groups in SAS Management Console, see SAS Management Console: Guide to Users and Permissions.
Usage Notes for Roles and Capabilities
Capabilities Work in Combination with Other Methods for Granting Privilege
Capabilities cannot grant privileges in excess of those that are granted by other, relevant systems. For example, suppose that you have the capability called StopOtherUsersJobs. This capability alone is not sufficient to stop someone else’s job that is running on a DataFlux Data Management Server. To do that, you (or a group to which you belong) must be a member of the administrative group that is defined on the DataFlux Data Management Server.
Post-Installation Tasks for SAS Visual Process Orchestration
Overview
The SAS Deployment Wizard is used to install SAS Visual Process Orchestration as part of a software bundle. After the software is installed, an administrator must perform one or more setup tasks.
Define Users and Link Them to Groups and Roles
An administrator uses SAS Management Console to create a user definition for each person who uses SAS Visual Process Orchestration. These definitions are associated
8 Chapter 1 / Introduction to SAS Visual Process Orchestration

with the groups and roles. For more information, see “Role-Based Access to Features” on page 6.
Post-Installation Tasks for SAS Visual Process Orchestration 9

10 Chapter 1 / Introduction to SAS Visual Process Orchestration

2Accessing SAS Visual Process Orchestration
Log on to SAS Data Management Console . . . . . . . . . . . . . . . . . . . . . . . . . . 11
SAS Data Management Console Home Page . . . . . . . . . . . . . . . . . . . . . . . 13Overview . . . . . . . . . . . . . . . . . . . . . . . . . . . . . . . . . . . . . . . . . . . . . . . . . . . . . . . . . . . . . . . . 13Usage Notes for SAS Data Management Console . . . . . . . . . . . . . . . . 14
Preferences Window . . . . . . . . . . . . . . . . . . . . . . . . . . . . . . . . . . . . . . . . . . . . . . . . . . . . . 15
Adding Links to the SAS Data Management Console Home Page . . . . . . . . . . . . . . . . . . . . . . . . . . . . . . . . . . . . . . . . . . . . . . . . . . . . . 15
Log on to SAS Data Management Console
You can access SAS Visual Process Orchestration through the standard logon window for SAS applications. This window opens SAS Data Management Console from which you can launch SAS Visual Process Orchestration.
The port for all SAS Data Management web components is configured during installation. The default port number is 80. If your site is using the default port for these web components, you can access SAS Data Management Console from the following URL: http://hostname/SASDataManagement.
11

If your site is not using the default port for these web components, you must specify the port in the URL. For example, if the port is 7980, you can access SAS Data Management Console from the following URL: http://hostname:7980/SASDataManagement.
To log on to SAS Data Management Console:
1 Click the URL that is supplied by your system administrator, or paste it into the address field of your browser to display the SAS logon window:
Figure 2.1 Logon Window for SAS Data Management Console
2 In the User ID field, enter your user ID.
3 In the Password field, enter the password for your user ID.
Note: Your password is case-sensitive. Your user ID might be case-sensitive, depending on the operating system that is used to host the web application server. If you need assistance, contact your system administrator.
4 Click Log On to display the home page for SAS Data Management Console.
For more information about the home page, see “SAS Data Management Console Home Page” on page 13.
12 Chapter 2 / Accessing SAS Visual Process Orchestration

SAS Data Management Console Home Page
Overview
The SAS Data Management Console home page enables you to open installed applications, set preferences for these applications, and view information from these applications. The home page displays applications and features based on the roles and capabilities that are associated with your login. For more information about capabilities, see “Role-Based Access to Features” on page 6.
The home page is shown in the following display:
Display 2.1 Console Home Page
The File menu enables you to set preferences for SAS Data Management Console and any of its applications. For more information about setting preferences, see “Preferences Window” on page 15. The Help menu enables you to display user guides for any installed applications and to access various resources on support.sas.com. The Log Off link at far right enables you to log off from the console and from all applications which you have accessed from the console.
SAS Data Management Console Home Page 13

One or more portlets can be displayed in the home page, such as The Data Roundtable portlet shown in the previous display. These portlets are registered on the SAS Metadata Server when SAS software is installed. You can use the Preferences window to manage how portlets are displayed on the home page.
The Apps section at far right lists installed applications or components. When SAS Visual Process Orchestration is installed, the Apps section will contain links to the SAS Folders tab and the New Orchestration Job window. For more information about the SAS Folders tab, see “SAS Folders Tab” on page 17. For more information about the New Orchestration Job window, see “Creating an Orchestration Job” on page 60.
If SAS Job Monitor is installed, then the Apps section contains a link to the Monitoring Center interface in SAS Environment Manager. A Monitoring Center portlet might be displayed on the home page. This portlet displays run-time statistics for monitored jobs, such as orchestration jobs from SAS Visual Process Orchestration. For more information, see “Displaying Run-Time Statistics in SAS Job Monitor” on page 82.
If links have been added as described in “Adding Links to the SAS Data Management Console Home Page” on page 15, then these links are displayed under a Links section on the home page.
Usage Notes for SAS Data Management Console
If the appropriate roles and capabilities are associated with your login, then you can access a number of applications from SAS Data Management Console. Some of these applications have their own logoff link. If you click the logoff link in one of those applications, then you are logged off from that application without logging off from the console. Any portlet or other component in the console that depends on the application from which you have logged out is left in an unstable state. In that case, log off from the console.
For example, suppose that you use SAS Data Management Console to access the SAS Job Monitor application (Monitoring Center interface) in SAS Environment Manager. The console has a Monitoring Center portlet that depends on SAS Job Monitor. If you log off from SAS Job Monitor, then the Monitoring Center portlet in the console will be left in an unstable state. In that case, click Log Off at upper right of the console.
14 Chapter 2 / Accessing SAS Visual Process Orchestration

Preferences Window
You can click Preferences in the File menu to set default preferences, as follows:
n Click Global Preferences to specify user locale, theme, and display preferences for SAS Data Management Console.
n Click Data Management Console to manage the portlets contained in the console.
n Click Orchestration Job to select default node and note colors and specify a time-out value for stopping a SAS Visual Process Orchestration job.
n Click New Job Default Settings to specify default settings for new SAS Visual Process Orchestration jobs that include grid, layout, error processing, and source binding failure preferences.
Adding Links to the SAS Data Management Console Home Page
An administrator can use SAS Management Console to define web links on the SAS Data Management Console home page. The links appear under a Links heading on the home page. To add links:
1 Log on to SAS Management Console as an administrator.
2 Expand the following folders on the Plugins tab: Application Management Configuration Manager Data Management Cnsle 2.1 Home Page.
3 Right-click Data Management Cnsle 2.1 Home Page and select Properties.
4 Click the Settings tab.
5 Select Home Page Settings in the panel at left.
Adding Links to the SAS Data Management Console Home Page 15

6 Use the Home Page Settings panel to add the URL for the desired web page.
7 Click OK to save your changes.
8 Restart the SAS Web Application Server in order for the new URL to show up on the home page for SAS Data Management Console.
16 Chapter 2 / Accessing SAS Visual Process Orchestration

3Understanding the Interface
SAS Folders Tab . . . . . . . . . . . . . . . . . . . . . . . . . . . . . . . . . . . . . . . . . . . . . . . . . . . . . . . . . . 17
Orchestration Job Tab . . . . . . . . . . . . . . . . . . . . . . . . . . . . . . . . . . . . . . . . . . . . . . . . . . . 19
Orchestration Job – Run Status Tab . . . . . . . . . . . . . . . . . . . . . . . . . . . . . . . . . . 22
SAS Folders Tab
The SAS Folders tab contains the standard set of SAS Intelligence Platform folders. These folders are also displayed in the SAS Management Console. They are used to store the metadata in the SAS Metadata Server that was installed with SAS Visual Process Orchestration. Currently, this content consists of orchestration jobs.
The SAS Folders tab is shown in the following display:
Display 3.1 SAS Folders Tab
The SAS Folders tab contains the following elements:
17

My Foldercontains items such as folders and orchestration jobs that the user who is currently logged on has created. These items are accessible to the current user only.
Productscontains folders for individual SAS products. These folders contain content that is installed along with the product. For example, some products have a set of initial jobs, transformations, stored processes, or reports which users can modify for their own purposes. Other products include sample content (for example, sample stored processes) to demonstrate product capabilities.
Shared Datais provided for you to store user-created content that is shared among multiple users. Under this folder, you can create any number of subfolders, each with the appropriate permissions, to further organize this content.
Systemcontains SAS system objects that are not directly accessed by business users.
User Folderscontains folders that belong to individual users. These folders are referred to as the users' home folders. These folders are accessible only to administrators and this user.
The toolbar in the SAS Folders tab contains the following items:
n Action
n Back
n Up one level
n New
n Delete
n Search
n Refresh
n Help
18 Chapter 3 / Understanding the Interface

Note that the Action button enables you to open selected versions, unlock items, and update relationships. For information about updating relationships, see “Export Lineage Metadata to SAS Lineage” on page 70. The New button enables you to add a new folder or orchestration job to a selected folder. Finally, you can search the SAS Folders tab and open a selected search result.
Orchestration Job Tab
The Orchestration Job tab is displayed when you create a new orchestration job or open an existing job in the SAS Folders tab. Note that you can find buttons for Actions, Save, Run, and Help in the toolbar at the top of the tab.
By default, the Flow tab is displayed first.
Orchestration Job Tab 19

The orchestration job Flow tab is shown in the following display:
Display 3.2 Orchestration Job Flow Tab
20 Chapter 3 / Understanding the Interface

The Flow tab contains the elements that have been numbered as follows in the display above:
1 The riser bar contains risers for Nodes, Data Management Folders, SAS Folders. These risers perform the following functions:
Nodes Risercontains the processing nodes that are supplied with SAS Visual Process Orchestration. These nodes are divided into categories for Event and Alert, Flow Control, Reference Job, and Utilities. For information about the nodes, see Chapter 6, “Working with Orchestration Job Nodes,” on page 87.
Data Management Folders Riserprovides access to the content available in the DataFlux Data Management Server. This content consists of the following deployed items from DataFlux Data Management Studio: batch jobs, profile jobs, and real-time process services. Note that this content can also be accessed with the following SAS Visual Process Orchestration nodes: Data Management Job, Data Management Profile, and Data Management Service.
SAS Folders Riserprovides access to the content available in the SAS Metadata Server. This content consists SAS Data Integration Studio deployed jobs and SAS Visual Process Orchestration orchestration jobs. Note that this content can also be accessed with the following SAS Visual Process Orchestration nodes: Orchestration Job and SAS Deployed Job.
2 The Work Area provides space to build flows for orchestration jobs. The toolbar above the work area enables you to access the following functions:
n Actions
n Properties
n Insert a new note
n Show or Hide Node Details Pane
n Layout left to right
Orchestration Job Tab 21

n Zoom to fit
n Zoom out
n Zoom in
n Reset zoom
Note: The first node in the orchestration job flow is marked by a badge with the number 1 in the lower left corner. If the job has more than one flow, a first node is marked in this way for each flow.
3 The Node Details Pane displays detailed information about a selected node in the flow. This pane can be hidden and only shows a basic set of node attributes. The full set of attributes for a selected node can be accessed by clicking Properties in the toolbar.
The Orchestration Job tab includes the following tabs in addition to the Flow tab:
Settingsenables you to modify or review identification, lock status, and options settings for the orchestration job.
Variablesenables you to create new job variables and modify or delete existing job variables.
Run Historydisplays status and run information for run submissions of the orchestration job.
Orchestration Job – Run Status Tab
The Run Status tab in an orchestration job displays information about the job after you have run it. To access this tab, click Status in the toolbar in the Run History tab that is displayed when you submit a job for processing. Two panes are displayed: a read-only version of the orchestration job flow and the Status tab.
22 Chapter 3 / Understanding the Interface

The read-only version of the orchestration job flow is shown in the following display:
Display 3.3 Read-Only Version of Submitted Job
Note that status indicators are displayed in the bottom right corners of the nodes processed in the orchestration job. You can open each node to view information about the node, but you cannot change that information. You can also review the Settings, Variables, Status, and Run Time tabs for more detailed information. See “Orchestration Job Tab” on page 19.
Orchestration Job – Run Status Tab 23

The following display shows the Status tab, which lists the jobs and nodes included in the job submission:
Display 3.4 Status Tab
Note that the Status tab shows information about both currently running jobs and jobs that have completed. The table contains the following columns: Order, Node Name, Node ID, Node Type, Contained in, Instance, Status, Run Time (minutes), Start Time, End Time, and Log. The Contained in column specifies the name of a node that contains the node in a given row in the table. The Instance column is incremented for nodes used in a parallel iterator to indicate which iteration the node status was for. The available statuses for the Status column are Running, Error, Completed Successfully, Submitted, and Terminated. Finally, note that job variables and node inputs and outputs are extended to show run-time values of the data passed when ran.
You can also use the Action button and the context menu to perform additional functions in the Status tab. Some of these functions, like displaying the Details window and Help, duplicate the functions in the toolbar. Others, like Download Log File, Download Node’s Log File, and Download Node’s SAS Output file are displayed only under appropriate circumstances. For example, you can see only the Download Log File for a job when the output at run time has a path to the file. The Download Node’s Log File option only applies to Orchestration Job, Data Management Job, SAS Program, and SAS Deployed Job nodes that have been configured to retain logs. The Download Node’s Output File option only applies to SAS Program and SAS Deployed Job nodes that have been configured to retain SAS Output.
24 Chapter 3 / Understanding the Interface

The Details window for a selected row in the Status tab is shown in the following display:
Display 3.5 Details Window
Access this window by selecting a row in the Status tab and clicking Detail. The window contains appropriate information for a selected item: Inputs, Outputs, and
Orchestration Job – Run Status Tab 25

Description and Notes for nodes and Variables, Outputs, and Description and Notes for jobs.
The Run Time tab displays timing information for the elements of the job, as shown in the following display:
Display 3.6 Run Time Tab
26 Chapter 3 / Understanding the Interface

4Understanding Orchestration Jobs
Understanding Flow Patterns for Orchestration Jobs . . . . . . . . . . . . 27Identify the Jobs to Be Orchestrated . . . . . . . . . . . . . . . . . . . . . . . . . . . . . . . . . 27Patterns Overview . . . . . . . . . . . . . . . . . . . . . . . . . . . . . . . . . . . . . . . . . . . . . . . . . . . . . . 28Supported Patterns . . . . . . . . . . . . . . . . . . . . . . . . . . . . . . . . . . . . . . . . . . . . . . . . . . . . 28Unsupported Patterns . . . . . . . . . . . . . . . . . . . . . . . . . . . . . . . . . . . . . . . . . . . . . . . . . 41
Understanding Job and Node Settings . . . . . . . . . . . . . . . . . . . . . . . . . . . . . . 44Overview . . . . . . . . . . . . . . . . . . . . . . . . . . . . . . . . . . . . . . . . . . . . . . . . . . . . . . . . . . . . . . . . 44Understanding Job Settings . . . . . . . . . . . . . . . . . . . . . . . . . . . . . . . . . . . . . . . . . . 45Understanding Node Settings . . . . . . . . . . . . . . . . . . . . . . . . . . . . . . . . . . . . . . . . 47
Understanding Inputs and Outputs . . . . . . . . . . . . . . . . . . . . . . . . . . . . . . . . . . . 49
Understanding Bindings . . . . . . . . . . . . . . . . . . . . . . . . . . . . . . . . . . . . . . . . . . . . . . . . 51
Understanding DataFlux Expression Language . . . . . . . . . . . . . . . . . . . . 55
Understanding Flow Patterns for Orchestration Jobs
Identify the Jobs to Be Orchestrated
A single orchestration job can run one or more jobs, such as SAS Data Integration Studio jobs, DataFlux Data Management Studio jobs, SAS code files, third-party programs, scripts, and web services. Identify the jobs that you want to combine into an
27
orchestration job. Document the associated paths and other information that you need to access and run these files.
Patterns Overview
Some of the patterns covered in this document are supported, and other patterns are unsupported. The unsupported patterns are included so that you can avoid them.
Supported Patterns
Sequence Pattern
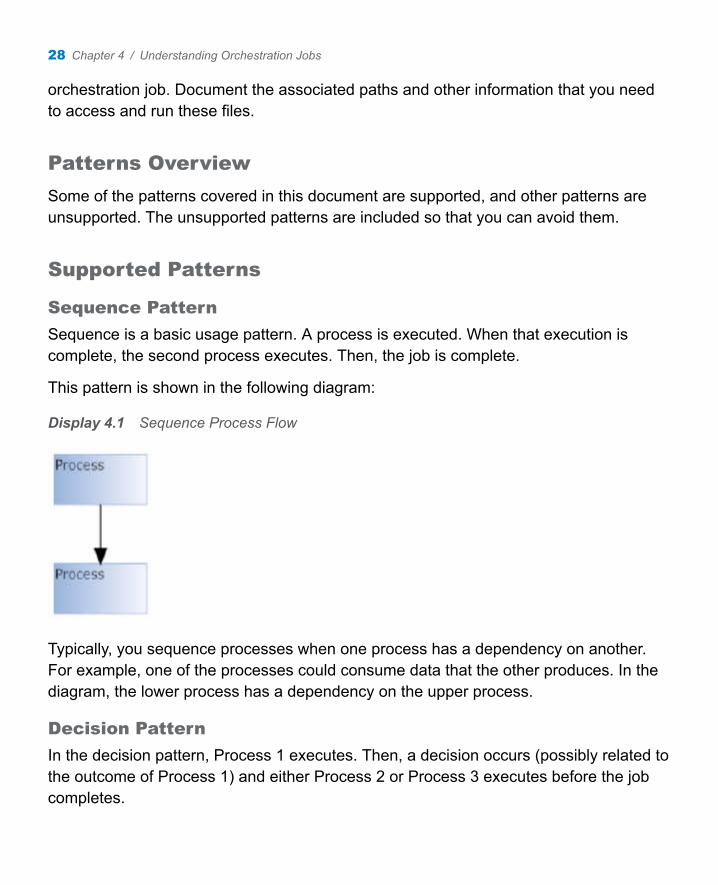
Sequence is a basic usage pattern. A process is executed. When that execution is complete, the second process executes. Then, the job is complete.
This pattern is shown in the following diagram:
Display 4.1 Sequence Process Flow
Typically, you sequence processes when one process has a dependency on another. For example, one of the processes could consume data that the other produces. In the diagram, the lower process has a dependency on the upper process.
Decision Pattern
In the decision pattern, Process 1 executes. Then, a decision occurs (possibly related to the outcome of Process 1) and either Process 2 or Process 3 executes before the job completes.
28 Chapter 4 / Understanding Orchestration Jobs

This pattern is shown in the following diagram:
Display 4.2 Decision Process Flow
Repetition Pattern
In the repetition pattern, multiple processes are connected in a repetitive fashion. In the first repetition pattern, Process 1 executes, followed by Process 2. Execution then returns to Process 1 and continues indefinitely,
Understanding Flow Patterns for Orchestration Jobs 29

The first repetition pattern is shown in the following display:
Display 4.3 Repetition Pattern One
In the second repetition pattern, Process 1 executes, followed by Process 2. After a decision is made, execution either returns to Process 1 or continues to Process 3, In this case, the job ends after Process 3 finishes.
30 Chapter 4 / Understanding Orchestration Jobs

The second repetition pattern is shown in the following display:
Display 4.4 Repetition Pattern Two
Multiple Dependencies Pattern
Processes that execute sequentially might have dependencies, as mentioned in “Sequence Pattern” on page 28. Process 3 depends on both Process 1 and Process 2. Therefore, it is sequenced after them. The dotted lines indicate a dependency. Process 1 and Process 2 need to be in a complete state before Process 3 can successfully execute. Ensure that these dependencies are correct so that you can handle looping situations when you cannot determine dependencies.
Understanding Flow Patterns for Orchestration Jobs 31

The following display shows the multiple dependencies pattern:
Display 4.5 Multiple Dependencies Pattern
Iterate n Times Pattern
In this case, the iterator is set to iterate n times after Process 1 executes. Then, Process 2 is entered. After it completes, the iterator is incremented and checked against the threshold. If the threshold is not reached, Process 2 executes again. If the threshold is reached, Process 3 is entered.
32 Chapter 4 / Understanding Orchestration Jobs

The following display shows the iterate n times pattern:
Display 4.6 Iterate n Times
Iterate over a Collection Pattern
In this pattern, Process 1 generates a set of data rows. The iterator depends on this data set. Therefore, it depends on Process 1. When the iterator is entered, it fetches the first row and stores its value as an output value of itself. Process 2 then executes. Typically, process 2 references this output value and uses it as a parameter for some action. When the process has finished, the iterator is entered again, and another row is fetched. If no more rows exist, Process 3 is entered.
Understanding Flow Patterns for Orchestration Jobs 33

The following display shows the iterate over a collection pattern:
Display 4.7 Iterate over a Collection Pattern
Embedded Iteration Pattern
This pattern is similar to the basic iteration pattern. After Process 2 completes, a new iterator is entered, which executes Process 3 n times. When complete, it exits and returns to the first iterator to continue. Finally, it executes Process 4 when that is complete.
34 Chapter 4 / Understanding Orchestration Jobs

The following display shows the embedded iteration pattern:
Display 4.8 Embedded Iteration Pattern
Multiple Paths to Same Target Pattern
In this pattern, either Process 2 or Process 3 is entered after a decision is made. Following that, Process 4 is always entered and the job completes.
Understanding Flow Patterns for Orchestration Jobs 35

The following display shows the multiple paths to the same target pattern:
Display 4.9 Multiple Paths to Same Target Pattern
Wait for Event Pattern
Process 1 and “wait for event” both start executing. (See “Implicit Fork or Join Pattern” on page 40). Wait for event does not exit until it receives an event, which could come from inside the job or through an external factor. When the event is received, it exits, and the Process 3 runs. The job is complete when both Process 2 and Process 3 are complete or a terminate event is received by the job.
36 Chapter 4 / Understanding Orchestration Jobs

The following display shows the wait for event pattern:
Display 4.10 Wait for Event
Wait for Event Indefinitely Pattern
In this pattern, a job waits for some event such as a file appearing in a directory. Then, the job executes Process 3, which might take some action on that file. After Process 3 runs, control loops back to wait for event. This sequence happens indefinitely until the job is terminated.
The following display shows the wait for event indefinitely pattern:
Display 4.11 Wait for Event Indefinitely Pattern
Fork and Join Pattern
In this pattern, Process 1 executes. Two execution contexts now exist at the fork, and Process 2 and Process 3 run simultaneously (as long as multiple threads are allocated for the job). When join is entered, it waits for both execution contexts to enter. Process 4
Understanding Flow Patterns for Orchestration Jobs 37

is then entered. Fork and join are implemented as a single node fork that has child nodes (Process 2 and Process 3). There is no join node in the implementation
The following display shows the fork and join pattern:
Display 4.12 Fork and Join Pattern
Fork Loop and Join Pattern
In this pattern, Process 1 executes and creates a data set that indicates partitions such as a list of country codes. The fork loop has a parameter indicating number of threads. When it is entered, it creates n instances of the fork (in this case Process 2). It then begins iterating over the data set and handing each entry as a parameter to the next available thread. The thread executes Process 2. When finished, it returns to the fork for the next row in the data set (as a parameter). In this case, n instances of Process 2 execute simultaneously. When the data set is expended and all the threads are done, Process 4 is entered. Fork loop and join are implemented as a single fork loop node (with no join node). The fork loop node’s child in this case would be Process 2.
38 Chapter 4 / Understanding Orchestration Jobs

The following display shows the fork loop and join pattern:
Display 4.13 Fork Loop and Join Pattern
Dependency for Forked Process within Fork and over Fork Pattern
In this pattern, Process 3 is allowed to depend on Process 1. For example, Process 1 could produce data that Process 3 consumes. Also, Process 3 could depend on Process 2 (Process 2 produces data that Process 3 consumes). Similarly, Process 2b could depend on Process 1, and Process 4 could depend on Process 1. Finally, Process 4 could also depend on Process 2, Process 2b, and Process 3.
Understanding Flow Patterns for Orchestration Jobs 39

The following display shows the dependency for forked process within fork and over fork pattern:
Display 4.14 Dependency for Forked Process within Fork and over Fork
Implicit Fork or Join Pattern
In this pattern, an implicit fork is created above Process 1 and Process 2. An implicit join is created below Process 1b and Process 2. All fork and join rules apply.
The following display shows the implicit fork or join pattern:
Display 4.15 Implicit Fork or Join Pattern
40 Chapter 4 / Understanding Orchestration Jobs

Circular Dependency Pattern
In this pattern, Process 1 can depend on Process 1b and the reverse can also be true. You must ensure that the job runs as desired. If a dependency on another node is not found, you can reconfigure in a number of ways.
The following display shows the circular dependency pattern:
Display 4.16 Circular Dependency Pattern
Unsupported Patterns
Dependency between Forks Pattern
In this unsupported pattern, Process 2b cannot depend on Process 2 because the two processes are in the branches of different forks.
Understanding Flow Patterns for Orchestration Jobs 41

The following display shows the unsupported dependency between forks pattern:
Display 4.17 Dependency between Forks Pattern
Dependency into Fork Loop or Join Pattern
In this unsupported pattern, Process 4 could not depend on process 3 because multiple instances of Process 3 would have run, and there is no way to reference which one. However, Process 4 could depend on Process 1.
42 Chapter 4 / Understanding Orchestration Jobs

The following display shows the unsupported dependency into fork loop or join pattern:
Display 4.18 Dependency into Fork Loop or Join Pattern
Sequence between Forks Pattern
In this unsupported pattern, Process 2 cannot enter Process 3 because Process 3 is on a different fork. (It follows Process 2.) Also, Process 2 cannot enter Process 4 because it is outside the fork or join.
Understanding Flow Patterns for Orchestration Jobs 43

The following display shows the sequence between forks pattern:
Display 4.19 Sequence between Forks Pattern
Understanding Job and Node Settings
Overview
You can use the Settings tab for jobs and nodes to specify identification, lock status, error handling, and processing settings. Typically, you should be able to manipulate orchestration jobs and nodes using the Settings tab.
44 Chapter 4 / Understanding Orchestration Jobs

Understanding Job Settings
The Settings tab for a sample job is shown in the following display:
Display 4.20 Job Settings Tab
The Identification section enables you to review and modify the name, version, location, and a description of the job. The Lock Status section shows when the job was locked and who locked it.
Note: Job names should not contain asterisks, or the job might fail to run.
Understanding Job and Node Settings 45

The settings in the Options section are covered in the following table:
Field Option Description
Job Node Errors Handling: This setting configures what to do when the job has a node that ends in an error.
Node Errors Use the server's default (Abort the job run)
When this option is selected, the node follows the current default server setting. This setting, abort the job run, ends the job with an error if this node ends in an error.
Node Errors Abort the job run End in an error when any node ends in an error.
Node Errors Continue running the job
Log the status of the node and continue running. The job completes successfully.
Node Errors Only abort the flow that had the error
If there are multiple parallel flows, only the flow that contained the error ends. Other nodes continue to run in other flows.
Job Source Binding Errors Handling: Source bindings tie an input of a node to the output of some other node or job variable at run time. When the job runs, the node input gets the value of the output that it is bound to. Sometimes a binding can fail when the job runs (for example, if a node fails before it can complete to produce an output). You can capture this error and decide how to handle it with this setting.
Source binding failures
Use the server's default (Signal a node error)
When this option is selected, the node follows the current default server setting. This setting is signal a node error, which ends the node with an error when a source binding failure is detected.
Source binding failures
Signal a node error When this option is selected, any node that has a source binding error ends with an error. Note that the node errors setting determines how the job handles any node errors.
Source binding failures
Use the node’s default input value
When you configure a source binding, you have the option of also setting a default value for the binding. Use this option if you want to use the default value if the source binding fails.
46 Chapter 4 / Understanding Orchestration Jobs

Understanding Node Settings
The Identification section enables you to review and modify the name and a description of the job.
The Settings tab for a node in a sample job is shown in the following display:
Display 4.21 Node Settings Tab
The settings in the Options section are covered in the following table:
Field Option Description
Exclude node from run not applicable When selected, specifies that the selected node is not included when the job is run.
Node Errors Handling: This setting configures what to do when a node ends in an error.
Node errors Use the job’s setting When this option is selected, the node follows whatever the setting is for the job.
Understanding Job and Node Settings 47

Field Option Description
Node errors Abort the job run End the job with an error if this node ends in an error.
Node errors Continue running the job
Log the status of this node and continue running. The job completes successfully.
Node errors Only abort the flow that had the error
For multiple parallel flows, only the flow that contains the node with an error ends. Other parallel flows continue to run.
Node Source Binding Errors Handling: Source bindings tie an input of a node to the output of some other node or job variable at run time. When the job runs, the node input gets the value of the output that it is bound to. Sometimes a binding can fail when the job runs (for example, if a node fails before it can complete to produce an output). You can capture this error and decide how to handle it with this setting.
Source binding failures
Use the job’s setting When this option is selected, the node follows whatever the setting is for the job.
Source binding failures
Signal a node error When this option is selected, if there is a source binding error the node ends with an error.
Source binding failures
Use the node’s default input value
When you configure a source binding, you have the option of also setting a default value for the binding. Use this option if you want to use the default value if the source binding fails.
Process Handling: This is an advanced setting. For most cases, you should not have to change this setting. Nodes can run in the same process as the job is running in (in process) or in a separate process from the job (out of process). Each node has a preferred default for this setting. Typically, control nodes such as expression or event nodes run in-process, and nodes that reference other objects such as other jobs run out-of-process. You can use this setting to change the nodes the preferred default. You might want to change this default might be if you want to run all nodes in the same process as the job to make it easier to see run logs. You also might want to control how many processes are running on the machine.
Process Run node in its default process
This is the preferred setting. This setting allows the node to run using its preferred default.
48 Chapter 4 / Understanding Orchestration Jobs

Field Option Description
Process Run node in separate process (if possible)
The node attempts to run in a separate process as the job. Note that some nodes might not be able to run this way. Therefore, this setting might not have any impact on the node.
Process Run node in current process (if possible)
The node attempts to run in the same process as the job. Note that some nodes might not be able to run this way. Therefore, this setting might not have any impact on the node.
Understanding Inputs and Outputs
Inputs and outputs are settings that are part of the underlying nodes. When you add the nodes to the orchestration job flow and connect them together, you can configure the settings using the Settings tab of the node. The Inputs and Outputs tabs are available for advanced users who need to perform advanced manipulations. Typically, you should be able to manipulate the node using the Settings tab. Working directly with inputs is not needed under most circumstances.
For those rare occasions when you need to perform advanced input and output processing, many of the orchestration job nodes contain Inputs and Outputs tabs. These tabs enable you to manage the data that comes into the node and the data that exits the node.
The Inputs tab contains a toolbar, a table that lists the inputs, and a section that shows the properties for a selected input.
Understanding Inputs and Outputs 49

The following display shows the Inputs tab for a selected node:
Display 4.22 Inputs Tab
The toolbar in the Inputs tab enables you to perform the following functions:
n add new inputs
n import inputs and bind them to the node
n view the properties for a selected input
50 Chapter 4 / Understanding Orchestration Jobs

n delete a selected input
n refresh the inputs list
n view Help for the Inputs tab
The properties section at the bottom of the Inputs tab enables you to review and update properties for the selected input. These properties include the name, description, default value, and source binding of a selected input.
The following display shows the Outputs tab for a selected node:
Display 4.23 Outputs Tab
Understanding Bindings
Bindings are essentially a way to pass variables between steps in a job or from outside of the job into a node in the job. For example, you can bind to the output of one node in a job so that you can react to it inside the other node. Frequently, users might want to import the output of some other node into their node. Then they can do something with that data that is coming into the node, such as make a decision if a value coming in is greater than some number or perform IF and then branching. They might also want to increment it and pass it on to the next node.
Understanding Bindings 51

For another example, you might check a return code in an Expression node from some previous node and then start a different job if the return code is nonzero. Note that you can bind only to nodes that are in your own flow. You cannot bind to nodes that are in some other parallel and totally unconnected flow in the same job.
You can use the Bind To Input option in the context menu to help you with work with bindings, particularly when doing control actions such as acting on the value or incrementing it. Right-click a node in an orchestration job flow, and click Bind To Input in the pop-up menu.
The Bind To Input submenu in the pop-up menu is shown in the following display;
Display 4.24 Bind to Input Menu
The existing inputs in the node are listed at the top of the submenu. You can click an input to see a list of the available outputs from the previous node in the orchestration job flow. Then you can designate the appropriate output as the source value for the selected input.
52 Chapter 4 / Understanding Orchestration Jobs

The Select Source window for the NAME input is shown in the following display:
Display 4.25 Select Source Window for Input_NAME
You can also click New Input in the Bind To Input submenu to add an input to the selected node.
Understanding Bindings 53

The New Input window is shown in the following display:
Display 4.26 New Input Window
Finally, you can click Import and Bind To in the submenu. This function enables you to import a job variable or node output that is not present in the node and bind it to the node.
54 Chapter 4 / Understanding Orchestration Jobs

The Import and Bind To window is shown in the following display:
Display 4.27 Import and Bind to Window
You can also perform these same functions in the Inputs tab in the properties pane for the node. For more information, see “Understanding Inputs and Outputs” on page 49.
Understanding DataFlux Expression Language
You can use the Expression node to add DataFlux Expression Language expression to an orchestration job. The DataFlux Expression Language provides many statements, functions, and variables for manipulating data. See the DataFlux Expression Language: Reference Guide for more information.
Understanding DataFlux Expression Language 55

Expressions are entered in the Expression tab, as shown in the following display:
Display 4.28 Expression Tab
The Expression tab contains the following elements:
Functionscontains a list of the available DataFlux Expression Language functions. Click Insert to add a selected function into the Expression Editor. Note that help text for the selected function is displayed in the text field in lower left corner of the Expression tab.
56 Chapter 4 / Understanding Orchestration Jobs

Variables and Outputscontains a list of any variables that are available for use in your expression. Click Insert to add a selected function into the Expression Editor. Note that help text for the selected item is displayed in the text field in lower left corner of the Expression tab.
Templatescontains a set of templates for processes that are useful in orchestration jobs. Click Insert to add a selected template into the Expression Editor. Note that help text for the selected template is displayed in the text field in lower left corner of the Expression tab.
Toolbarenables you to perform the following tasks in editing your expression: validating, adding and removing comments, increasing and decreasing indent levels, searching and replacing text, and going to a specified line.
Expression Editorprovides an editor for creating the expression.
Understanding DataFlux Expression Language 57

58 Chapter 4 / Understanding Orchestration Jobs

5Working with Orchestration Jobs
Creating an Orchestration Job . . . . . . . . . . . . . . . . . . . . . . . . . . . . . . . . . . . . . . . . . 60
Reviewing Errors and Warnings . . . . . . . . . . . . . . . . . . . . . . . . . . . . . . . . . . . . . . . 62
Locking and Unlocking Jobs . . . . . . . . . . . . . . . . . . . . . . . . . . . . . . . . . . . . . . . . . . . 66
Working with Versions . . . . . . . . . . . . . . . . . . . . . . . . . . . . . . . . . . . . . . . . . . . . . . . . . . . 68
Export Lineage Metadata to SAS Lineage . . . . . . . . . . . . . . . . . . . . . . . . . . . 70Overview . . . . . . . . . . . . . . . . . . . . . . . . . . . . . . . . . . . . . . . . . . . . . . . . . . . . . . . . . . . . . . . . 70Export Lineage Metadata for Selected Orchestration Jobs . . . . . . . 70Export Lineage Metadata for All Orchestration
Jobs in the SAS Folders Tree . . . . . . . . . . . . . . . . . . . . . . . . . . . . . . . . . . . . . . 71
Promoting Orchestration Jobs . . . . . . . . . . . . . . . . . . . . . . . . . . . . . . . . . . . . . . . . . 72Overview of Promoting Orchestration Jobs . . . . . . . . . . . . . . . . . . . . . . . . . 72Usage Notes for Promoting Orchestration Jobs . . . . . . . . . . . . . . . . . . . . 72
Using the REST-Based Service to Run and Schedule Orchestration Jobs . . . . . . . . . . . . . . . . . . . . . . . . . . . . . . . . . . . . . . . . . . 74
Overview of the REST-Based Service . . . . . . . . . . . . . . . . . . . . . . . . . . . . . . . 74Example URI to Run an Orchestration Job . . . . . . . . . . . . . . . . . . . . . . . . . 76Example Command Line to Run an Orchestration Job . . . . . . . . . . . . 77Overview of the REST API . . . . . . . . . . . . . . . . . . . . . . . . . . . . . . . . . . . . . . . . . . . . 79
Displaying Run-Time Statistics in SAS Job Monitor . . . . . . . . . . . . . . 82Overview of SAS Job Monitor . . . . . . . . . . . . . . . . . . . . . . . . . . . . . . . . . . . . . . . . 82Configuring SAS Job Monitor for Orchestration Jobs . . . . . . . . . . . . . 83
59

Creating an Orchestration Job
If your login has been granted the EditJobs capability, then you can create and edit orchestration jobs. For information about capabilities, see “Default Groups, Roles, and Capabilities” on page 6.
To create an orchestration job, you must display the New Orchestration Job window. There are two main ways to display this window. If you are on the SAS Data Management Console home page, then you can click the New Orchestration Job link under the Apps section of the home page.
If you are on the SAS Folders tab, then you can select a folder in the tree and click the Orchestration Job button in the drop-down menu attached to the New item. This button is located in the toolbar.
The following display shows the Orchestration Job button.
Display 5.1 Orchestration Job Button
Note that the folder can be located in the SAS Folders tab or it can be one of the subfolders displayed when you select one of the SAS folders. If you want other users to have access to your job, create it in the Shared Data folder.
60 Chapter 5 / Working with Orchestration Jobs

The Orchestration Job window is shown in the following display:
Display 5.2 Orchestration Job Window
The following display shows a newly created job:
Display 5.3 Newly Created Job
The next task is to add nodes to the job. For an example of how this is done, see “Working with the Data Management Job Node” on page 111. See also the topics for the other nodes in the same chapter, "Working with Orchestration Job Nodes."
Creating an Orchestration Job 61

Reviewing Errors and Warnings
You can use the error and warning detection features in SAS Visual Process Orchestration to discover errors and warnings in orchestration jobs. For example, you can review the warnings and errors displayed for a Data Management Service node in a sample orchestration job.
The following display shows a warning badge attached to a node in an unsubmitted job:
Display 5.4 Warning Badge
The warning badge alerts you to potential problems so that you can address them before you run the job, as shown in the following display:
Display 5.5 Warning Text
The errors badge is generated after the orchestration job is run, as shown in the following display:
Display 5.6 Errors Badge
62 Chapter 5 / Working with Orchestration Jobs

The following display shows the message that is displayed when you click the error badge on the Expression node:
Display 5.7 Errors Text
This particular message alerts you to a file not found error.
You can click the Status button in the toolbar to see this node flagged in the status table, as shown in the following display:
Display 5.8 Status Tab
Reviewing Errors and Warnings 63

Then you can click Details to see the same error message in the Details window, as shown in the following display:
64 Chapter 5 / Working with Orchestration Jobs

You can click the Outputs tab to see an error message reported in the outputs of the node, as shown in the following display:
Display 5.9 Outputs Tab in the Details Window
Note that you can specify how nodes handle errors in the Settings tab for an orchestration job or a node in a job. The Settings tab contains options that you can set for Node errors and Source binding failures.
The following settings are available for Node errors:
n Use the job settings
n Abort the job run
n Continue running the job
n Only abort the flow that had the error
The following settings are available for Source binding failures:
n Use the job settings
n Signal a node error
n Use the node’s default input value
Reviewing Errors and Warnings 65

Locking and Unlocking Jobs
Orchestration jobs are locked when opened in the editor and unlocked when the editor tab is closed. This feature supports collaborative development so that multiple users can work with jobs in the same system. For information about versioning, see “Working with Versions” on page 68.
The following display shows the lock status indicator, which is located in the top right corner of the SAS Folders tab:
Display 5.10 Lock Status Indicator
When a job is locked, other users can open the job in Read-Only mode. Furthermore, the job cannot be renamed or deleted. However, an explicit unlock operation is provided for cases where it might be needed, though only for administrative users who have rights to unlock other users’ jobs. For example, if User A has an orchestration job open for editing, User B can click Unlock to unlock the job. This feature should be used with caution because it overrides the versioning system. Again, only administrators can unlock jobs.
66 Chapter 5 / Working with Orchestration Jobs

The following display shows the Unlock option for a selected job in the SAS Folders tab:
Display 5.11 Unlock Option
The Unlock Orchestration Job window is shown in the following display:
Display 5.12 Unlock Orchestration Job Window
This window warns you that you are unlocking a job that has been locked by another user. It also gives you the opportunity to either unlock the job or cancel the operation. Typically, only administrators have the ability to unlock jobs that were created by others. For more information and the required capabilities, see “Default Groups, Roles, and Capabilities” on page 6.
Locking and Unlocking Jobs 67

Working with Versions
You can save versions of your orchestration jobs and open a version that you select. Note that a new version of the process orchestration job is created each time you save it. You can open old versions of jobs in Read-Only mode.
For example, you can select a job such as Event_NodeSpecificEvents and click Open Version, as shown in the following display:
68 Chapter 5 / Working with Orchestration Jobs

The following display shows the Versions window, where you can select the version that you need to open:
Display 5.13 Versions Window
You can also restore an old version of a job to the current version. For example, you could open version 1.0 of the Event_NodeSpecificEvents orchestration job. Then, you could click the Action button in the job and click Restore as Current Version. This action saves the contents of the editor and creates a new version of the job with those contents. This version then becomes the current version.
Working with Versions 69

The Restore as Current Version option is shown in the following display:
Display 5.14 Restore as Current Version Option
Export Lineage Metadata to SAS Lineage
Overview
SAS Lineage is a web client that enables you to view the lineage of sources and targets in a job. If the SAS Relationship Content Service has been enabled, you can export lineage metadata from SAS Visual Process Orchestration to the service, where it can be accessed by SAS Lineage. For more information about setting up and using SAS Lineage, see its documentation page on support.sas.com: http://support.sas.com/documentation/onlinedoc/dmlin/.
Export Lineage Metadata for Selected Orchestration Jobs
To export lineage metadata for one or more selected orchestration jobs, perform the following steps:
1 Click SAS Folders on the SAS Data Management Console home page.
70 Chapter 5 / Working with Orchestration Jobs

2 Expand the folders of the job or jobs whose metadata you want to export to SAS Lineage Viewer.
3 Select and right-click the jobs, and then select Update Relationships. A dialog box is displayed.
4 Specify the URL to the lineage REST service for SAS Lineage Viewer (or accept the default URL). An example URL is as follows: http://server-name:port-number/SASLineage.
5 Specify the user name and password for a SAS Lineage Viewer user.
6 Click OK to export the lineage metadata for the selected jobs.
7 A status bar appears at the bottom of the SAS Folders tab. When the export is complete, click Details to get information about the completed operation.
Export Lineage Metadata for All Orchestration Jobs in the SAS Folders Tree
To export lineage metadata for all orchestration jobs in the current SAS Folders tree, perform the following steps:
1 Click SAS Folders on the SAS Data Management Console home page.
2 Click the Actions menu in the SAS Folders window, and then select Update Relationships. A dialog box is displayed.
3 Specify the URL to the lineage REST service for SAS Lineage Viewer (or accept the default URL). An example URL is as follows: http://server-name:port-number/SASLineage.
4 Specify the user name and password for a SAS Lineage Viewer user.
5 Click OK to export the lineage metadata for all jobs in the SAS Folders tree.
Export Lineage Metadata to SAS Lineage 71

6 A status bar appears at the bottom of the SAS Folders tab. When the export is complete, click Details to get information about the completed operation.
Promoting Orchestration Jobs
Overview of Promoting Orchestration Jobs
You can use the promotion features in SAS Management Console to promote orchestration jobs between planned deployments of SAS software. For example, you might want to promote orchestration jobs from a metadata server on a test machine to a metadata server on a production machine. For more information, see the “Using the Promotion Tools” chapter in the SAS 9.3 Intelligence Platform: System Administration Guide.
Orchestration jobs generally are migrated like any other SAS object. The following usage notes are unique to orchestration jobs.
Usage Notes for Promoting Orchestration Jobs
The Include/Replace SAS Code File Option Is Valid Only When the Job Includes the SAS Program Node
The import and export wizards in SAS Management Console contain a Include/replace SAS Code file check box in the Options tab. This option is valid only when the SAS Analytical Process Orchestration job that you are processing contains a SAS Program node. Note that this Include/replace SAS Code file check box is also displayed when the SAS Analytical Process Orchestration job contains the following nodes:
n Data Management Job
n SAS Deployed Job
n Orchestration Job
n Data Management Profile
72 Chapter 5 / Working with Orchestration Jobs

n Data Management Service
You can select the Include/replace SAS Code file check box for the nodes listed. However, it has no effect when you run an import or export wizard for jobs that include these nodes.
You Must Select the Include/Replace SAS Code File Option to Import or Export a SAS Code File
You must select the Include/replace SAS Code file check box if you want to import or export a SAS code file. This check box is located in the Options tab in the import and export wizards in SAS Management Console. If you do not select this check box, the SAS code file is not processed in the import and export wizards.
Best Performance for Exporting or Importing SAS Visual Process Orchestration Jobs Requires an Unrestricted Administrator
For best performance when exporting or importing many SAS Visual Process Orchestration jobs,log on to SAS Management Console as an unrestricted administrator.
Review Input Parameters When a Promoted Job Includes the Real Time Service Transformation
When you promote a SAS Visual Analytics Process Orchestration job that contains a Real Time Service transformation, review the input parameters. You should ensure that the input parameters of the real-time service that was selected are the only input parameters of the imported orchestration job that reference the real-time service. If there are remaining input parameters left over from the previously exported real-time service that were not selected or mapped during the import wizard, then you need to delete them. If these input parameters are not deleted, the following error will occur during the run of the job:
Code: SOAP-ENV Client Error: Failed To Set Service Input
Promoting Orchestration Jobs 73

Using the REST-Based Service to Run and Schedule Orchestration Jobs
Overview of the REST-Based Service
Representational state transfer (REST) is a set of architectural principles for designing web services that access a system's resources. A resource is accessed with a Uniform Resource Identifier (URI).
When SAS Visual Process Orchestration is installed, a REST-based service is installed on the web server. You can formulate a URI that invokes the service and specifies options for the service. You can then include this URI in a command-line tool in order to run orchestration jobs or schedule them to run in batch mode.
A typical usage scenario for the REST-based service is as follows:
1 Identify the path to the orchestration job to be run. One way to do this is to navigate to the orchestration job in the SAS Folders tree, and then note the path to the job. Example path: SAS Folders/Shared Data/Subfolder1/Orch Job1
2 Formulate the URI that is required to run the job. Example URI:
http://POWebServer.com/SASProcessOrchestration/rest/executions/run?path=/Shared%20Data/Subfolder1/Orch%20Job1
For more information about the format of this URI, see “Example URI to Run an Orchestration Job” on page 76.
3 Add the URI that you formulated in Step 2 to a command that can be executed in batch or from the command line. Example cURL command:
cURL -v -b --location-trusted -u "ETLGuest:pw1" -H "Accept:application/json" -H "Content-Type:application/json"--url "http://POWebServer.com/SASProcessOrchestration/rest/executions/run?path=/Shared%20Data/Subfolder1/Orch%20Job1" -X POST
For more information about this cURL command, see “Example Command Line to Run an Orchestration Job” on page 77.
74 Chapter 5 / Working with Orchestration Jobs

4 Run the command from Step 3. A response is returned in XML or JSON format.
A response to a REST request is a snapshot of the job’s status when the response was made. To find out what happened with the job after a response is made, you must request the status of the job, as described in the next steps.
5 Parse the response to obtain the ID of the job. Look for the “id” label in the response. The job ID includes the user name that was used in the command from Step 3. The next display shows a job ID in the context of a response.
Display 5.15 Job ID (“id”) in the Context of a Response
6 Use the job ID from Step 5 to formulate a URI that receives the status of the job while it is running. Example URI:
http://POWebServer.com/SASProcessOrchestration/rest/executions/1375318231:1419:ETLGuest
For more information and the executions/{id} command, see “Overview of the REST API ” on page 79.
7 Add the URI that you formulated in Step 6 to a command that can be executed in batch or from the command line. Example cURL command:
cURL -v -b --location-trusted -u "ETLGuest:pw1" -H "Accept:application/json" -H "Content-Type:application/json"--url "http://POWebServer.com/SASProcessOrchestration/rest/executions/1375318231:1419:ETLGuest"
In cURL, GET is the default method if there is no specified method. Accordingly, there is no need to specify -X GET for the command above.
Using the REST-Based Service to Run and Schedule Orchestration Jobs 75

Example URI to Run an Orchestration Job
Suppose that you want to execute the orchestration job Orch Job 1 that is shown in the next display.
Display 5.16 Orchestration Jobs in a Subfolder of the SAS Folders Tree
The URI to run Orch Job1 would be similar to the following:
http://POWebServer.com/SASProcessOrchestration/rest/executions/run?path=/Shared%20Data/Subfolder1/Orch%20Job1
The components of the example URI are as follows:
Table 5.1 Example URI Components
Component Description
POWebServer.com Name of the web server for SAS Visual Process Orchestration. The default port for the web server is port 80. Port 80 is used unless the default port for the web server was changed during installation. If you changed the default web server port, specify that port, like so: POWebServer.com:7880.
/SASProcessOrchestration/rest/ Default path to the folder on the web host that contains the REST-based service.
76 Chapter 5 / Working with Orchestration Jobs

Component Description
executions/run? The executions/run command is used to run orchestration jobs. For a description of the main commands that are used to manage jobs, see “Overview of the REST API ” on page 79.
path= Path to the orchestration job to be executed. Jobs can be stored in any convenient folder in the SAS Folders tree on the SAS Visual Process Orchestration Design Server.
Shared%20Data The Shared Data folder in the SAS Folders tree. The “%20” characters in this example are used to encode a space in the context of a URI.
Subfolder1 Example subfolder where orchestration jobs are stored. The person who runs the job must have access to the folder.
Orch%20Job1 Name of the orchestration job to be executed.
Example Command Line to Run an Orchestration Job
After you have formulated the URI to execute an orchestration job, you can use a command-line tool to execute it. The tool must be able to handle URIs. cURL (command-line URL) is an open-source tool that can handle URIs. The cURL command to execute Orch Job1 would be similar to the following:
cURL -v -b --location-trusted -u "ETLGuest:pw1" -H "Accept:application/json" -H "Content-Type:application/json"--url "http://POWebServer.com/SASProcessOrchestration/rest/executions/run?path=/Shared%20Data/Subfolder1/Orch%20Job1" -X POST
Using the REST-Based Service to Run and Schedule Orchestration Jobs 77

Table 5.2 Options Used in the Example cURL Command
Option Purpose
-v Verbose logging. Used to log as much information as possible if debugging is necessary.
-b Passes data to the HTTP server as a cookie.
--location-trusted Sends the user's information to all of the hosts that the site might redirect to.Note: cURL option names that are two or more characters long must be preceded by two hyphens (--). This enables cURL to distinguish between a one-character option name (such as -u) from a multiple character option name (such as --location-trusted).
-u The user ID and password that are required to run the orchestration job. The user ID that executes an orchestration job must have the RunJobs capability.
-H An extra header used when retrieving your job. This option enables you to add as many headers as needed. You are also allowed to use this option to overwrite any internal headers that are defaulted if you do not add your own.Note: The response from the job is in XML format unless you specify JSON in the header, as shown in the example cURL command.
--url The URL to the web service that executes an orchestration job. The path is the folder path to the orchestration job on the SAS Visual Process Orchestration Design Server.Note: cURL option names that are two or more characters long must be preceded by two hyphens (--).
-X POST Specifies which request method you want to use. The POST method is used to execute jobs. GET is the default method if there is no specified method.
For more information about cURL, see their website at http://curl.haxx.se/.
78 Chapter 5 / Working with Orchestration Jobs

Overview of the REST API
The next table lists the main REST API commands used to manage orchestration jobs.
Table 5.3 REST API Commands for Managing Orchestration Jobs
Task REST API Commands Method Optional Parameters
Run orchestration jobs.
"/executions/run" POST n status - True/false. If true, a status file for this job is kept during execution. Default is false.
n timeout - Length of time for the client to wait for the run request to respond.
n served - ID of the SAS Visual Process Orchestration Run-time Server that should run the jobs. If null, then the first run-time server found in the deployment is used.
n id - The orchestration job ID to execute.
n path - A SAS Folder path to a job or to a subfolder that contains jobs to be executed.
n recursive - True/false. If true and the path is a SAS Folder, then all the subfolders are searched.
Note: The user ID that executes an orchestration job must have the RunJobs capability. For information about capabilities for orchestration jobs, see “Default Groups, Roles, and Capabilities” on page 6.
Using the REST-Based Service to Run and Schedule Orchestration Jobs 79

Task REST API Commands Method Optional Parameters
Stop an orchestration job that is running.
"/executions/{id}/stop" POST n timeout - Length of time for the client to wait for the stop request to respond.
n killprocess - True/false. If true, then a request to immediately terminate the job is issued. If false, then the job is allowed to stop gracefully.
n waittime - The amount of time (in seconds) for the server to wait for the job to end gracefully before sending back an error. Pass null to use the default.
n serverid - ID of the SAS Visual Process Orchestration Run-time Server that is running the job. If null, then the first run-time server found in the deployment is used.
80 Chapter 5 / Working with Orchestration Jobs

Task REST API Commands Method Optional Parameters
Get the status for a single job run, identified by ID.
"/executions/{id}" GET n path - A path to a SAS Folder or to an orchestration job. If a path is not provided, then the root folder of the SAS Folders tree is assumed.
n recursive -True/False. If true, then subfolders are also searched.
n timeout - Length of time for the client to wait for the status request to respond.
n serverid - ID of the SAS Visual Process Orchestration Run-time Server that should run the jobs. If null, then the first run-time server found in the deployment is used.
The following job status codes are returned by the "/executions/{id}" command: COMPLETE, CRASHED, ERROR_UNSPECIFIED, QUEUED, RUNNING, SUBMITTED, UNKNOWN_JOB_STATUS_CODE, USER_TERMINATED.
Using the REST-Based Service to Run and Schedule Orchestration Jobs 81

Task REST API Commands Method Optional Parameters
Get the log for a job identified by ID.
"/executions/{id}/log" GET n id - ID of the job for which you want the log.
n timeout - Length of time for the client to wait for the log request to respond.
n serverid - ID of the SAS Visual Process Orchestration Run-time Server that ran the job. If null, then the first run-time server found in the deployment is used
The IDs that are mentioned in the previous table, such as the orchestration job ID, are returned in XML or JSON format when you issue the "/executions/run" command. You must parse the response to obtain these IDs.
Displaying Run-Time Statistics in SAS Job Monitor
Overview of SAS Job Monitor
SAS Environment Manager is a web-based monitoring solution for a SAS environment. SAS Job Monitor is an optional component of SAS Environment Manager. It reads job logs at specified locations and displays run-time statistics from the logs. If your site has licensed SAS Environment Manager and SAS job Monitor, then you can use a web browser to display run-time statistics for SAS Visual Process Orchestration jobs.
If SAS Job Monitor is installed, then the Apps section of the SAS Data Management Console contains a link to the Monitoring Center in SAS Environment Manager. Use that link to access SAS Job Monitor.
82 Chapter 5 / Working with Orchestration Jobs

Configuring SAS Job Monitor for Orchestration Jobs
Job statistics are collected from the job log files that are generated by the Monitor logger on the SAS Visual Process Orchestration Runtime Server. The Monitor logger is active and configured by default. For more information about job statistics and the run-time server, see the "Collect Job Status Information in the SAS Job Monitor" topic in the SAS Visual Process Orchestration Server: Administrator's Guide.
SAS Job Monitor must be configured to access the logs for SAS Visual Process Orchestration Runtime Server. The SAS Visual Process Orchestration Runtime Server is based on DataFlux Data Management Server software. Accordingly, the SAS Job Monitor configuration instructions for the DataFlux Data Management Server apply to the SAS Visual Process Orchestration Runtime Server as well. For more information, see the following topics in the Help for SAS Job Monitor:
n "Adding Servers for Job Monitoring"
n "Configuring a Server"
n “DataFlux Data Management Server”
The agent for SAS Job Monitor expects the log files to be written in UTF-8. If the log file is written in a different encoding, SAS Job Monitor might not be able to read the log correctly unless you change some default options. These options are described in the topic “DataFlux Data Management Server” in the Help for SAS Job Monitor. For example, suppose that you execute an Orchestration job on a server, and the server’s locale setting results in a job log that is not in UTF-8. You might need to update some default options for SAS Job Monitor, or it might not be able to read the log. This situation is most likely to occur for locales that do not use the Western European encoding.
Displaying Run-Time Statistics in SAS Job Monitor 83

84 Chapter 5 / Working with Orchestration Jobs

6Working with Orchestration Job Nodes
Working with the Event Listener Node . . . . . . . . . . . . . . . . . . . . . . . . . . . . . . . 87Overview of the Event Listener Node . . . . . . . . . . . . . . . . . . . . . . . . . . . . . . . . 87Inputs and Outputs to the Event Listener Node . . . . . . . . . . . . . . . . . . . . 88Using the Event Listener Node . . . . . . . . . . . . . . . . . . . . . . . . . . . . . . . . . . . . . . . 88
Working with the Raise Event Node . . . . . . . . . . . . . . . . . . . . . . . . . . . . . . . . . . 92Overview of the Node . . . . . . . . . . . . . . . . . . . . . . . . . . . . . . . . . . . . . . . . . . . . . . . . . . 92Inputs and Outputs to the Raise Event Node . . . . . . . . . . . . . . . . . . . . . . . 93Using the Raise Event Node . . . . . . . . . . . . . . . . . . . . . . . . . . . . . . . . . . . . . . . . . . 93
Working with the Expression Node . . . . . . . . . . . . . . . . . . . . . . . . . . . . . . . . . . . 95Overview of the Expression Node . . . . . . . . . . . . . . . . . . . . . . . . . . . . . . . . . . . . 95Inputs and Outputs to the Expression Node . . . . . . . . . . . . . . . . . . . . . . . . 96Using the Expression Node . . . . . . . . . . . . . . . . . . . . . . . . . . . . . . . . . . . . . . . . . . . 96
Working with the If Then Node . . . . . . . . . . . . . . . . . . . . . . . . . . . . . . . . . . . . . . . . . 97Overview of the If Then Node . . . . . . . . . . . . . . . . . . . . . . . . . . . . . . . . . . . . . . . . 97Inputs and Outputs to the If Then Node . . . . . . . . . . . . . . . . . . . . . . . . . . . . . 98Using the If Then Node . . . . . . . . . . . . . . . . . . . . . . . . . . . . . . . . . . . . . . . . . . . . . . . . 98
Working with the Parallel Fork Node . . . . . . . . . . . . . . . . . . . . . . . . . . . . . . . . 101Overview of the Parallel Fork Node . . . . . . . . . . . . . . . . . . . . . . . . . . . . . . . . 101Inputs and Outputs to the Parallel Fork Node . . . . . . . . . . . . . . . . . . . . . 101Using the Parallel Fork Node . . . . . . . . . . . . . . . . . . . . . . . . . . . . . . . . . . . . . . . . 102
Working with the Terminate Job Node . . . . . . . . . . . . . . . . . . . . . . . . . . . . . . 106Overview of the Terminate Job Node . . . . . . . . . . . . . . . . . . . . . . . . . . . . . . 106Inputs and Outputs to the Terminate Job Node . . . . . . . . . . . . . . . . . . . 106
85

Using the Terminate Job Node . . . . . . . . . . . . . . . . . . . . . . . . . . . . . . . . . . . . . . 106
Working with the Command Execute Node . . . . . . . . . . . . . . . . . . . . . . . . 108Overview of the Command Execute Node . . . . . . . . . . . . . . . . . . . . . . . . 108Inputs and Outputs to the Command Execute Node . . . . . . . . . . . . . 109Using the Command Execute Node . . . . . . . . . . . . . . . . . . . . . . . . . . . . . . . . 109
Working with the Data Management Job Node . . . . . . . . . . . . . . . . . . . . 111Overview of the Data Management Job Node . . . . . . . . . . . . . . . . . . . . 111Inputs and Outputs to the Data Management Job Node . . . . . . . . . 112Using the Data Management Job Node . . . . . . . . . . . . . . . . . . . . . . . . . . . . 113
Working with the Data Management Profile Node . . . . . . . . . . . . . . . . 116Overview of the Data Management Profile Node . . . . . . . . . . . . . . . . . 116Inputs and Outputs to the Data Management Profile Node . . . . . 116Using the Data Management Profile Node . . . . . . . . . . . . . . . . . . . . . . . . 118
Working with the Data Management Service Node . . . . . . . . . . . . . . . 120Overview of the Data Management Service Node . . . . . . . . . . . . . . . 120Inputs and Outputs to the Data Management Service Node . . . . 121Using the Data Management Service Node . . . . . . . . . . . . . . . . . . . . . . . 122
Working with the HTTP Request Node . . . . . . . . . . . . . . . . . . . . . . . . . . . . . . 124Overview of the HTTP Request Node . . . . . . . . . . . . . . . . . . . . . . . . . . . . . . 124Inputs and Outputs to the HTTP Request Node . . . . . . . . . . . . . . . . . . 125Using the HTTP Request Node . . . . . . . . . . . . . . . . . . . . . . . . . . . . . . . . . . . . . 126Usage Notes for HTTP Request Nodes . . . . . . . . . . . . . . . . . . . . . . . . . . . 131
Working with the Orchestration Job Node . . . . . . . . . . . . . . . . . . . . . . . . . 131Overview of the Orchestration Job Node . . . . . . . . . . . . . . . . . . . . . . . . . . 131Inputs and Outputs to the Orchestration Job Node . . . . . . . . . . . . . . . 132Using the Orchestration Job Node . . . . . . . . . . . . . . . . . . . . . . . . . . . . . . . . . 132
Working with the SAS Deployed Job Node . . . . . . . . . . . . . . . . . . . . . . . . 139Overview of the SAS Deployed Job Node . . . . . . . . . . . . . . . . . . . . . . . . . 139Inputs and Outputs to the SAS Deployed Job Node . . . . . . . . . . . . . 139Using the SAS Deployed Job Node . . . . . . . . . . . . . . . . . . . . . . . . . . . . . . . . 140
Working with the SAS Program Node . . . . . . . . . . . . . . . . . . . . . . . . . . . . . . . 142
86 Chapter 6 / Working with Orchestration Job Nodes

Overview of the SAS Program Node . . . . . . . . . . . . . . . . . . . . . . . . . . . . . . . 142Inputs and Outputs to the SAS Program Node . . . . . . . . . . . . . . . . . . . 142Using the SAS Program Node . . . . . . . . . . . . . . . . . . . . . . . . . . . . . . . . . . . . . . 143
Working with the SOAP Request Nodes . . . . . . . . . . . . . . . . . . . . . . . . . . . 147Overview of the SOAP Request Node . . . . . . . . . . . . . . . . . . . . . . . . . . . . . 147Inputs and Outputs to the SOAP Service Node . . . . . . . . . . . . . . . . . . . 147Using the SOAP Request Node . . . . . . . . . . . . . . . . . . . . . . . . . . . . . . . . . . . . 149Usage Notes for SOAP Request Nodes . . . . . . . . . . . . . . . . . . . . . . . . . . . 153
Working with the Echo Node . . . . . . . . . . . . . . . . . . . . . . . . . . . . . . . . . . . . . . . . . 154Overview of the Echo Node . . . . . . . . . . . . . . . . . . . . . . . . . . . . . . . . . . . . . . . . . 154Inputs and Outputs to the Echo Node . . . . . . . . . . . . . . . . . . . . . . . . . . . . . . 154Using the Echo Node . . . . . . . . . . . . . . . . . . . . . . . . . . . . . . . . . . . . . . . . . . . . . . . . . 154
Working with the Variable Read Write Node . . . . . . . . . . . . . . . . . . . . . . . 156Overview of the Variable Read Write Node . . . . . . . . . . . . . . . . . . . . . . . 156Inputs and Outputs to the Variable Read Write Node . . . . . . . . . . . . 157Using the Variable Read Write Node . . . . . . . . . . . . . . . . . . . . . . . . . . . . . . . 157
Working with the Event Listener Node
Overview of the Event Listener Node
You can add an Event Listener node to a Flow tab in an orchestration job to listen for events posted by other nodes. The listener can catch all events or smaller scopes. These scopes can be an event type, a job node ID, or node types. When a listener starts, it sits in the running state and checks for events as the job executes. When an event that matches the listener completes and exits on slot one, any node connected to slot one then runs. For multiple events, the Event Listener node can loop back in the workflow chain after the event is processed to listen for another event.
Working with the Event Listener Node 87

Inputs and Outputs to the Event Listener Node
The Event Listener node can take the inputs and outputs listed in the following table:
Table 6.1 Inputs and Outputs to the Event Listener Node
Name Description
Inputs:
NAME The filter for the event name
SOURCE The filter for the event source
SOURCETYPE The filter for the event source type
Unique Outputs:
_LAST_SEEN The ID of the event that was last seen by the node
_NAME The name of the triggered event
_SOURCE The source node of the triggered event
_SOURCETYPE The type of the source node
Using the Event Listener Node
You can create an orchestration job that uses one or more Event Listener nodes in the Flow tab to process the events generated by other nodes in the job. This job also demonstrates how Event Listener nodes interact with other nodes.
88 Chapter 6 / Working with Orchestration Job Nodes

The following display shows a sample orchestration job that uses four Event Listener nodes in this way:
Display 6.1 Event Node Job with Specific Events
The Event Listener 1 node listens for events from the Echo node. For information about Echo nodes, see “Working with the Echo Node” on page 154.
Working with the Event Listener Node 89

The settings for this node are shown in the following display:
Display 6.2 Event Listener I Settings
Note that the unique outputs for each Event Listener node in the sample job serve as the inputs for the Expression node that follows it. (These inputs are LAST_SEEN, _NAME, _SOURCE, and _SOURCETYPE. For example, the unique outputs for the Event Listener 1 node become inputs to the expression in the Expression 1 node that follows it in the job. For information about Expression nodes, see “Working with the Expression Node” on page 95.
The Event Listener 2 node listens for events from the Raise Event node. For information about Raise Event nodes, see “Working with the Raise Event Node” on page 92.
90 Chapter 6 / Working with Orchestration Job Nodes

The settings for this node are shown in the following display:
Display 6.3 Event Listener 2 Settings
Finally, The Event Listener 3 and Event Listener 4 nodes listen for events from the Data Management Service node. For information about Data Management Service nodes, see “Working with the Data Management Service Node” on page 120.
Working with the Event Listener Node 91

The settings for these nodes are shown in the following display:
Display 6.4 Event Listener 3 Settings
The Event Listener 4 node has the same settings as the Event Listener 3 node.
Working with the Raise Event Node
Overview of the Node
You can add a Raise Event node to a Flow tab in an orchestration job to raise an event. When the node starts running, it raises the specified event. A dataflow might expose an option to raise an event if a certain condition is met.
92 Chapter 6 / Working with Orchestration Job Nodes

Inputs and Outputs to the Raise Event Node
The Raise Event node has discoverable inputs and outputs. Therefore, the content of the node has to be passed to the server in order to determine inputs and outputs.
Using the Raise Event Node
You can create an orchestration job that is designed to demonstrate how Event Listener nodes interact with other nodes. This job uses a Raise Event node to raise specified events when certain conditions are met.
The following display shows the sample job. It uses a Raise Event node in the Flow tab that is connected to an Event Listener node:
Display 6.5 Event Node Job with Specific Events
Working with the Raise Event Node 93

The settings for the Raise Event node are shown in the following display:
Display 6.6 Raise Event Settings
94 Chapter 6 / Working with Orchestration Job Nodes

The settings for the Event Listener node that listens for the raised event are shown in the following display:
Display 6.7 Event Listener 2 Settings
For information about Event Listener nodes, see “Working with the Event Listener Node” on page 87.
Working with the Expression Node
Overview of the Expression Node
You can add an Expression node to a Flow tab in an orchestration job to embed DataFlux Expression Engine Language expressions. These expressions enable you to write complex job control flow logic. You can also use an expression to define slots that can change the flow of a job.
Working with the Expression Node 95

Inputs and Outputs to the Expression Node
The Expression node enables you to create a DataFlux Expression Engine Language expression in the context of an orchestration job. The expression takes data from a source such as a table or a node that precedes it a job as its inputs. Then, it processes these inputs in some way and sends the processed results out as outputs that are used later in the job.
Using the Expression Node
You can create an orchestration job that uses Expression nodes in the Flow tab to embed Expression Engine Language expressions in the context of the job. For example, a job that is intended to demonstrate the interactions of Event Listener nodes with other types of nodes includes Expression nodes. Each Expression node embeds unique output from the Event Listener node that precedes it in the job flow into an expression that is used in the job.
This sample orchestration job is shown in the following display:
Display 6.8 Event Node Job with Specific Events
96 Chapter 6 / Working with Orchestration Job Nodes

The Outputs tab for the Event Listener 1 node is shown in the following display:
Display 6.9 Event Listener 1 Output
For more information about Event Listener nodes, see “Working with the Event Listener Node” on page 87.
The following display shows the expression entered in the Expression 1 node.
Display 6.10 Expression 1
Working with the If Then Node
Overview of the If Then Node
You can add an If then node to a Flow tab in an orchestration job to enter an expression that implicitly determines the output slot. The return value of the expression determines which output slot the node uses. This particular workflow node has one node-specific input string parameter that is meant to strictly handle only one input condition expression. Furthermore, this workflow node implicitly determines the output
Working with the If Then Node 97

slot. It does generate, however, one implicit output parameter based on the if/then processing of the one node-specific input EXPRESSION parameter.
Inputs and Outputs to the If Then Node
The following are the only valid characters for node input names: A through Z, a through z, _ (underscore), and 0 through 9. Note that numbers 0-9 must be preceded by a valid character or _(underscore). All other characters and text are considered invalid. Blanks are not allowed anywhere. The input name is case insensitive.
The output of the If then node is determined by the disposition of the input condition. If the input parameter condition returns TRUE, then the implicit output parameter TRUE exits the node. Furthermore, if the input parameter condition returns FALSE, then the implicit output parameter FALSE exits the node. Finally, although you cannot explicitly create additional output parameters for this workflow node, you can create new string input parameters along with the one node-specific input string parameter. This parameter should be used in the expression input.
Using the If Then Node
You can create an orchestration job that uses an If then node in the Flow tab to add conditional processing to the job. For example, a job could use text from an Echo node as the source of the value for an if condition in an If then node.
98 Chapter 6 / Working with Orchestration Job Nodes

This sample orchestration job is shown in the following display:
Display 6.11 If Then Node Flow
The Input tab in the Echo node is shown in the following display:
Display 6.12 Echo Input Setting
Working with the If Then Node 99

The If Condition tab in the If then node is shown in the following display:
Display 6.13 If Condition Settings
Note these settings use the value output from the Echo node as the source of the input value for the If then node. For more information about Echo nodes, see “Working with the Echo Node” on page 154.
The following display shows Expression 1, which handles the false condition:
Display 6.14 Expression 1
100 Chapter 6 / Working with Orchestration Job Nodes

The following display shows Expression 2, which handles the true condition:
Display 6.15 Expression 2
For more information about Expressions nodes, see “Working with the Expression Node” on page 95.
Working with the Parallel Fork Node
Overview of the Parallel Fork Node
You can add a Parallel Fork node to a Flow tab in an orchestration job to run multiple nodes in the orchestration job in parallel partitions. A fork node is considered running when any or all of its child nodes are running. It is considered complete when none of the child nodes are running. In an orchestration job that includes a Parallel Fork node, the Parallel Fork node is an implicit top level fork. Any node that is a child of the top level fork is started when the job starts running.
Inputs and Outputs to the Parallel Fork Node
The Parallel Fork node can take the inputs and outputs listed in the following table:
Table 6.2 Inputs and Outputs to the Parallel Fork Node
Name Description
Inputs: No unique inputs
Outputs:
Working with the Parallel Fork Node 101

Name Description
CONTEXT_COUNT The count of execution contexts that are created
Using the Parallel Fork Node
You can create an orchestration job that uses a Parallel Fork node in the Flow tab to run multiple nodes in a parallel partition. For example, you can create a job in which two Echo nodes create string outputs that are processed in additional Echo nodes that run in a Parallel Fork node. Then, the string outputs from the Echo nodes in the Parallel Fork node are written back in the Expression node in the top-level job.
The top level of this job is shown in the following display:
Display 6.16 Parallel Fork Job
102 Chapter 6 / Working with Orchestration Job Nodes

The contents of the Parallel Fork node are shown in the following display:
We can begin by examining the input values in the Echo 1 node, as shown in the following display:
Display 6.17 Outer Echo Node Inputs
Working with the Parallel Fork Node 103

Then, we can examine the output values in the Echo 1 node, which are shown in the following display;
Display 6.18 Outer Echo Node Outputs
Note that Echo1_String from the input is picked up in the output. You can see the same results for the Echo 2 node, except that the shared value is Echo1_String.
Now we can open the Parallel Fork node and examine the values there.
The following display shows the input values for the Echo 3 node:
Display 6.19 Inner Echo Node Inputs
Note source binding to the string from the Echo 1 node. The Echo 2 and Echo 4 nodes work together in the same way.
104 Chapter 6 / Working with Orchestration Job Nodes

The following display shows the output values for the Echo 3 node:
Display 6.20 Inner Echo Node Outputs
Note the Echo3_Inside_Fork output.
The following display shows the Expression tab in the Expression node at the top level of the job.
Display 6.21 Expression Tab
The output from the Echo nodes is picked up in this expression, which generates a text file with the following content: Fork_String1 = 100; Fork_String2 = 100.
Working with the Parallel Fork Node 105

Working with the Terminate Job Node
Overview of the Terminate Job Node
You can add a Terminate Job node to a Flow tab in an orchestration job to terminate a job. You can terminate the job in two possible ways. First, you can instruct it to stop running after all currently executing nodes are finished (the NICE mode). Second, you can instruct it to send a cancel to all running nodes (the KILL mode).
Note that the Terminate Job node ends processing within the SAS Visual Process Orchestration context, but results vary for jobs running on external servers.
Inputs and Outputs to the Terminate Job Node
The Terminate Job node can take the inputs and outputs listed in the following table:
Table 6.3 Inputs and Outputs to the Terminate Job Node
Name Description
Inputs:
TYPE The type of termination. Valid values are NICE and KILL.
Outputs: No unique outputs
Using the Terminate Job Node
You can create an orchestration job that uses a Terminate Job node in the Flow tab to end the processing of an orchestration job. For example, you could create an orchestration job that uses a Data Management Job node to run a SAS Data Management Studio job. Then, you could add a Terminate Job node to ensure that the
106 Chapter 6 / Working with Orchestration Job Nodes

orchestration job terminates after the deployed job successfully completes. (For information about Data Management Job nodes, see “Working with the Data Management Job Node” on page 111.)
This sample orchestration job is shown in the following display:
Display 6.22 Batch Job
The following display shows the Terminate Job node settings:
Display 6.23 Terminate Job Settings
Working with the Terminate Job Node 107

The following display shows run status details for the completed job:
Display 6.24 Run Status
Working with the Command Execute Node
Overview of the Command Execute Node
You can add a Command Execute node to a Flow tab in an orchestration job to run a command when a job or node is running. The command can run a system executable, any other executable, or a batch or shell file. You must provide the full path to the executable or a valid macro and any arguments for the command. Arguments can be supplied by either an input table or a delimited string. If a table is found, then it will be used. If there is no table, then the node will look for an input string.
108 Chapter 6 / Working with Orchestration Job Nodes

Inputs and Outputs to the Command Execute Node
The Command Execute node can take the inputs listed in the following table:
Table 6.4 Inputs and Outputs to the Command Execute Node
Name Description
Inputs
EXECUTE_ARGUMENTS_AS_STRING
The command arguments in delimited string format. Each argument is delimited by a "|". There is a maximum of 100 arguments.
EXECUTE_COMMAND The command to execute
EXECUTE_ERROR The standard error redirection file
EXECUTE_OUTPUT The standard output redirection file
Outputs: None No unique outputs
Using the Command Execute Node
Create an orchestration job and add the Command Execute node to the Flow tab.
Working with the Command Execute Node 109

The job is shown in the following display:
Display 6.25 Command Execute Job Flow
Then, you can select the Command Execute node and open its properties. Click Command and enter the commands that you need to run.
The commands for a sample job are shown in the following display:
Display 6.26 Command Values
Note that this job incorporates multiple input parameters, which are entered in the Arguments field. After the job completes successfully, you should validate that the commands executed. For example, the following content should be present in the output of the sample job:
110 Chapter 6 / Working with Orchestration Job Nodes

n two Echo folders (Echo and EchoM3) are created in \\server name.na.sas.com\PO_Output\CommandExecute\targets\win64\
n the text "Hello World!!!" is written out to the EchoSingle.txt file that is created in: \\server name.na.sas.com\PO_Output\CommandExecute\targets\win64\Echo\EchoM3\EchoM3.txt
Working with the Data Management Job Node
Overview of the Data Management Job Node
You can add a Data Management Job node to a Flow tab in an orchestration job to run DataFlux Data Management Studio jobs on DataFlux Data Management Servers. The available jobs are automatically populated into the Data management job field in the Data Management Job tab of the node. The following types of batch jobs are available:
n DataFlux Data Management Studio data jobs
n DataFlux Data Management Studio process jobs
n architect jobs from dfPower Studio
For the most seamless integration possible, these jobs should be located on a DataFlux Data Management Server 2.5.
Working with the Data Management Job Node 111

Inputs and Outputs to the Data Management Job Node
The Data Management Job node can take the inputs and outputs listed in the following table:
Table 6.5 Inputs and Outputs to the Data Management Job Node
Name Description
Inputs:
DWB_DELETE_SERVER_LOGS (TRUE, FALSE) Determines whether the server log and status files are deleted at completion. Defaults to null, which deletes the log and status files
DWB_JOBNAME The name of the batch job to run on the server
DWB_PROXY_HOST The proxy server host name
DWB_PROXY_PORT The proxy server port name
DWB_SAVE_LOG (TRUE, FALSE) Determines whether the log file is stored locally or placed in the temp directory
DWB_SAVE_STATUS (TRUE, FALSE) Determines whether the status file is stored locally or placed in the temp directory. Only works with DWB_WAIT = true.
DWB_SERVER_NAME The DataFlux Data Management Server name to connect to the server
DWB_TIMEOUT The time-out length for each call to the server. This value is the time to actually start the process running. Values >0 = seconds, <0 = microseconds (10^-6), 0 = no time-out
DWB_WAIT (TRUE, FALSE) Determines whether this node waits (stay running) until a finished state is returned
Outputs:
112 Chapter 6 / Working with Orchestration Job Nodes

Name Description
DWB_AUTHTYPE The resolved authentication type
DWB_JOBID The job request ID for this run of the job
DWB_JOBSTATUS The status message from the server
DWB_LOGFILE The path to the log file, if requested
DWB_RESOLVED_DOMAIN The resolved authentication domain
DWB_RESOLVED_HOST The DataFlux Data Management Server resolved host name, including the URI scheme (http:// or https://)
DWB_RESOLVED_PORT The DataFlux Data Management Server listen port
DWB_RESOLVED_PROXY_HOST The resolved proxy host name
DWB_RESOLVED_PROXY_PORT The resolved proxy port
DWB_STATUSFILE The path to the status file, if requested
Using the Data Management Job Node
You can create an orchestration job that uses a Data Management Job node in the Flow tab to add a batch job to the overall job. For example, you could create a sample orchestration job that contains a Data Management Job node, an Expression node, and a Terminate Job node.
Working with the Data Management Job Node 113

This sample orchestration job is shown in the following display:
Display 6.27 Batch Job Flow
The settings for the batch job are entered in the Batch Job tab in the Data Management Job node, as shown in the following display:
Display 6.28 Data Management Job Settings
114 Chapter 6 / Working with Orchestration Job Nodes

Select the DataFlux Data Management Server that contains the job that you need to run from the list of registered servers. These servers must be registered in SAS Management Console. Then navigate to the job on the selected server. The batch job for this particular example is a DataFlux Data Management Studio data job named PO_Datajob.
The settings for the Expression node are shown in the following display:
The expression validates the success of the job. For more information about Expressions nodes, see “Working with the Expression Node” on page 95.
The Terminate Job node is used to stop processing in the job after all of the nodes have successfully run. For information about Terminate Job nodes, see “Working with the Terminate Job Node” on page 106.
Working with the Data Management Job Node 115

Working with the Data Management Profile Node
Overview of the Data Management Profile Node
You can add a Data Management Profile node to a Flow tab in an orchestration job to run DataFlux Data Management Studio profile jobs on DataFlux Data Management Servers. The available profile jobs are automatically populated into the Data management profile field in the Data Management Profile tab of the node.
Inputs and Outputs to the Data Management Profile Node
The Data Management Profile node can take the inputs and outputs listed in the following table:
Table 6.6 Inputs and Outputs to the Data Management Profile Node
Name Description
Inputs:
DWB_DELETE_SERVER_LOGS (TRUE, FALSE) Determines whether the server log and status files are deleted at completion. Defaults to null, which deletes the log and status files
DWB_DESCRIPTION The profile report description
DWB_JOBNAME The name of the profile job to run on the server
DWB_PROXY_HOST The proxy server host name
DWB_PROXY_PORT The proxy server port name
116 Chapter 6 / Working with Orchestration Job Nodes

Name Description
DWB_SAVE_LOG (TRUE, FALSE) Determines whether the log file is stored locally or placed in the temp directory
DWB_SERVER_NAME The DataFlux Data Management Server name to connect to the server
DWB_TIMEOUT The time-out length for each call to the server. This value is the time to actually start the process running. Values >0 = seconds, <0 = microseconds (10^-6), 0 = no time-out
DWB_WAIT (TRUE, FALSE) Determines whether this node waits (stays running) until a finished state is returned
Unique Outputs:
DWB_AUTHTYPE The resolved server authentication type
DWB_JOBID The job request ID for this run of the job
DWB_JOBSTATUS The status message from the server
DWB_LOGFILE The path to the log file, if requested
DWB_RESOLVED_DOMAIN The resolved authentication domain
DWB_RESOLVED_HOST The resolved host name, including the URI scheme (http:// or https://)
DWB_RESOLVED_PORT The resolved listen port
DWB_RESOLVED_PROXY_HOST The resolved proxy server host
DWB_RESOLVED_PROXY_PORT The resolved proxy server port
Working with the Data Management Profile Node 117

Using the Data Management Profile Node
You can create an orchestration job that uses a Data Management Profile node in the Flow tab to add a profile job to the overall job. For example, you could create a sample orchestration job that contains a Data Management Profile node that adds a reference to a simple profile job from DataFlux Data Management Studio.
This sample orchestration job is shown in the following display:
Display 6.29 Data Management Profile Job
The settings for the batch job are entered in the Data Management Profile tab in the Data Management Profile node, as shown in the following display:
Display 6.30 Data Management Profile Settings
118 Chapter 6 / Working with Orchestration Job Nodes

Select the DataFlux Data Management Server that contains the job that you need to run from the list of registered servers. These servers must be registered in SAS Management Console. Then navigate to the job on the selected server. The batch job for this particular example is a DataFlux Data Management Studio data job named PO_SimpleProfile1.
The selection window for the DataFlux Data Management profile job is shown in the following display:
Display 6.31 Data Management Profile Selection Window
Working with the Data Management Profile Node 119

The following display shows the Status tab for a successfully completed profile job:
Display 6.32 Status Tab for the PO_SimpleProfile1 Job
Working with the Data Management Service Node
Overview of the Data Management Service Node
You can add a Data Management Service node to a Flow tab in an orchestration job to execute the real-time server. The job inputs can either be passed in one at a time as strings or passed in as a table (DWR_INPUTS) with name and values. Job-specific inputs are returned in the discovery, as well as the inputs listed in the table below.
Real-time services are supposed to run quickly. Currently only real-time services run out of process have the ability to cancel. Canceling when run out of process kills the process and allows the server call to go away. The available batch jobs are automatically populated into the Data management service field in the Data Management Service tab of the node.
120 Chapter 6 / Working with Orchestration Job Nodes

Inputs and Outputs to the Data Management Service Node
The Data Management Service Job node can take the inputs and outputs listed in the following table:
Table 6.7 Inputs and Outputs to the Data Management Service Node
Name Description
Inputs:
DWR_JOBNAME The name of the real-time service to run on the server
DWR_PROXY_HOST The proxy server host name
DWR_PROXY_PORT The proxy server port name
DWR_SERVER_NAME The DataFlux Data Management Server name to connect to the server
DWR_TIMEOUT The time-out length for each call to the server. This value is the time to actually start the process running. Values >0 = seconds, <0 = microseconds (10^-6), 0 = no time-out
Other inputs Any service-specific inputs are also displayed on the node. Discovery displays a list of inputs as well.
Outputs:
DWR_AUTHTYPE The resolved authentication type
DWR_RESOLVED_DOMAIN The resolved authentication domain
DWR_RESOLVED_HOST The resolved host name, including the URI scheme (http:// or https://)
DWR_RESOLVED_PORT The resolved listen port
Working with the Data Management Service Node 121

Name Description
DWR_RESOLVED_PROXY_HOST -
The resolved proxy host name
DWR_RESOLVED_PROXY_PORT The resolved proxy port
Other outputs One output for each real-time service output that can be pulled back from the discovery
Using the Data Management Service Node
You can create an orchestration job that uses a Data Management Service node in the Flow tab to execute a real-time service in the context of the job. For example, a job could include a Data Management Service node that executes a real-time service that is detected by Event Listener nodes. This particular job is designed to demonstrate how Event Listener nodes can interact with other nodes.
This sample orchestration job is shown in the following display:
Display 6.33 Event Node Job with Specific Events
122 Chapter 6 / Working with Orchestration Job Nodes

The settings for the Data Management Service node are shown in the following display:
Display 6.34 Data Management Service Settings
Note that the node specifies the Okemo Data Management 2.5 Server in the Server field and the PO_ProcessServices/Jobs/PO_RTP_ProcessJobcallsProcessJob_NonExisting.djf in the Data management service field. These settings are designed to generate an error that is detected by the Event Listener 3 and Event Listener 4 nodes.
Working with the Data Management Service Node 123

The settings for Event Listener 3 are shown in the following display:
Display 6.35 Event Listener 3 Settings
Events Listener 4 uses identical settings. For information about Event Listener nodes, see “Working with the Event Listener Node” on page 87.
Working with the HTTP Request Node
Overview of the HTTP Request Node
You can add an HTTP Request node to a Diagram tab in an orchestration job to access a third-party web service that uses a REST (HTTP) interface. Representational State Transfer (REST) is a set of architectural principles for designing web services that
124 Chapter 6 / Working with Orchestration Job Nodes

access a system's resources. The HTTP Request node is used to send raw HTTP requests to an HTTP server and handle any response received from the server.
A resource is accessed with a Uniform Resource Identifier (URI). The REST transformation generates SAS HTTP procedure code to read from and write to a web service in the context of a job.
It is assumed that you are familiar with how to use the REST interface to access web services. Gather the same information that you need to use the SAS HTTP procedure to read from and write to the desired web service. Example options and values are shown in the next section. For detailed information about the SAS HTTP procedure, see the documentation for that procedure in the Base SAS Procedures Guide.
Inputs and Outputs to the HTTP Request Node
The HTTP Request node can take the inputs and outputs listed in the following table:
Table 6.8 Inputs and Outputs to the HTTP Request Node
Name Description
Inputs:
WSCP_ADDRESS The URI to process
WSCP_DOMAIN The authentication domain of the credentials to use
WSCP_HTTP_CONTENT_TYPE The content type to include in the HTTP request headers
WSCP_INPUT The HTTP request data to send
WSCP_INPUT_TYPE The HTTP request data input type
WSCP_PASS The user’s password
WSCP_POLL_INTERVAL The interval to check for cancellation
Working with the HTTP Request Node 125

Name Description
WSCP_PREEMPTIVE_AUTHENTICATION
The preemptive authentication setting
WSCP_PROXY_DOMAIN The proxy authentication domain
WSCP_PROXY_HOST The host name of the proxy
WSCP_PROXY_PASS The proxy user’s password
WSCP_PROXY_PORT The proxy port number
WSCP_PROXY_USER The proxy user
WSCP_TRANSPORT_HTTP The HTTP method
WSCP_USER The user name
Unique Outputs:
WSCP_RESPONSE The request response
WSCP_RESPONSE_HEADERS_OUT_STR
The response headers are output as strings and listed as key=value pairs, with one pair per line. Newline characters are used to distinguish the line breaks.
Using the HTTP Request Node
You can add an HTTP Request node to a Flow tab in an orchestration job to access a third-party web service that uses an HTTP interface. For example, you can create an orchestration job that inputs a customer ID in an Echo node. Then, you can use the actions available in the HTTP Request node to delete, put, and get the ID data. Finally, you can create an expression to write out the HTTP response to a text file.
126 Chapter 6 / Working with Orchestration Job Nodes

The following display shows the sample HTTP Request job:
Display 6.36 HTTP Request Node
The Echo node in the job has been renamed to Set the Customer ID. An input named CustomerID has been created and given a default value of 3039.
The Input tab for the first HTTP Request node in the job is shown in the following job:
Display 6.37 HTTP Delete Input
Create an ID input and bind it to CustomerID.CustomerID from the Echo node. Note the default value of 3039.
Working with the HTTP Request Node 127

The input that you just created carries over to the HTTP Request tab that is shown in the following display:
Display 6.38 HTTP Request with Delete Method
Note the Delete method is specified.
128 Chapter 6 / Working with Orchestration Job Nodes

The following display shows the HTTP Request node with the put method selected:
Display 6.39 HTTP Request with Put Method
Working with the HTTP Request Node 129

The following display shows the HTTP Request node with the get method selected:
Display 6.40 HTTP Request with Get Method
An expression in the Expression node writes the output to a text file.
130 Chapter 6 / Working with Orchestration Job Nodes

This file, which is named HTTP_PUTAndDELETE_ProxServer_Domain.txt, should contain the following content:
Display 6.41 Job Output
Usage Notes for HTTP Request Nodes
Out-of -Memory Errors for HTTP Request Nodes
SAS Visual Process Orchestration jobs with a SOAP Request node or an HTTP Request node can run out of memory if you are using a Sun Java Virtual Machine (JVM). If this happens, add the following option to the Java start command that is specified in the app.cfg file for the server that executes the job.
The Java option is: -XX:MaxPermSize=256m -XX:+CMSClassUnloadingEnabled
Working with the Orchestration Job Node
Overview of the Orchestration Job Node
You can add an Orchestration Job node to a Flow tab in an orchestration job to run an external SAS Visual Process Orchestration flow when the node executes. The node requires that the name of the workflow job be specified as input. This job becomes the inner, or embedded job. When it executes, the inner job is loaded into the workflow engine and executed as a job.
Working with the Orchestration Job Node 131

You can set job-level input or output variables on an embedded job that enable it to be more useful. When the job is embedded, the variables designated as input are published in the discovery in the Orchestration Job node. The outer job can map these values. They then become valid when the inner job runs. The output designation allows the embedded job to set values which then become available as output on the outer job. From the perspective of the inner job, these variables are just regular job level variables and are not special in any way. It should also be noted that this input or output designation is used when workflow jobs are run as services.
Inputs and Outputs to the Orchestration Job Node
The Orchestration Job node can take the inputs and outputs listed in the following table:
Table 6.9 Inputs and Outputs to the Orchestration Job Node
Name Description
Inputs:
FILENAME The name of the SAS Visual Process Orchestration workflow job
SAS_FOLDER_PATH The SAS folder path of the SAS Visual Process Orchestration workflow job
Outputs: No unique outputs
Using the Orchestration Job Node
You can add an Orchestration Job node to a Flow tab in an orchestration job to run embedded orchestration jobs. For example, you can create an orchestration job that uses two levels of Orchestration Job nodes to create a three-level job.
132 Chapter 6 / Working with Orchestration Job Nodes

The following display shows the base-level orchestration job:
Display 6.42 Base-Level Orchestration Job
This base-level job is opened in the properties window for the Orchestration node in the middle-level job, which is shown in the following display:
Display 6.43 Middle-Level Orchestration Reference
The following display shows the inputs for the Expression node in the base-level job:
Display 6.44 Base-Level Expression
Note that the ref_refinput variable from the middle-level job is picked up here.
Working with the Orchestration Job Node 133

The Variable Read Write node in the base-level job enables you to specify a job variable. You can write the job’s output to this variable, as shown in the following display:
Display 6.45 Base-Level Read or Write Variable Settings
The following display shows the middle-level orchestration job:
Display 6.46 Middle-Level Orchestration Job
134 Chapter 6 / Working with Orchestration Job Nodes

This middle-level job is opened in the properties window for the Orchestration node in the top-level job, which is shown in the following display:
Display 6.47 Top-Level Orchestration Job Reference
The following display shows the settings for the middle-level orchestration job:
Display 6.48 Middle-Level Orchestration Job Settings
You must enter a filename and path for the job. You also need to create a source binding for the variable associated with the job.
Working with the Orchestration Job Node 135

The input and output variables created for the top-level orchestration job are shown in the following display:
Display 6.49 Middle-Level Orchestration Job Variables
Note that the refinput variable from the top-level job is picked up here.
The Variable Read Write node in the middle-level enables you to specify a job variable. You can write the job’s output to this variable, as shown in the following display:
Display 6.50 Middle-Level Read or Write Variable Settings
For information about Variable Read Write node, see “Working with the Variable Read Write Node” on page 156 .
136 Chapter 6 / Working with Orchestration Job Nodes

The following display shows the top-level orchestration job:
Display 6.51 Top-Level Orchestration Job
The following display shows the settings for the top-level orchestration job:
Display 6.52 Top-Level Orchestration Job Settings
Just as you did with the middle-level job, you must enter a filename and path for the job. You also need to create a source binding for the variable associated with the job.
Working with the Orchestration Job Node 137

The input variable created for the top-level orchestration job is shown in the following display:
Display 6.53 Top-Level Orchestration Job Variables
The following display shows the expression created in the Expression node included in the top-level job:
Display 6.54 Top-Level Expression
This expression generates a text file that summarizes the output from the nested orchestration jobs.
You can verify that this sample job ran successfully by checking the variable input, which should be ORCHREF_3Levels a Success! Variable input = mainValueTopLevelJob 3 levels.
138 Chapter 6 / Working with Orchestration Job Nodes

Working with the SAS Deployed Job Node
Overview of the SAS Deployed Job Node
You can add a SAS Deployed Job node to a Flow tab in an orchestration job to run a job that has been deployed from SAS Data Integration Studio. Jobs are deployed in SAS Data Integration Studio for scheduling, as a SAS stored process, and as a SAS stored process that can be accessed by a web service client.
Inputs and Outputs to the SAS Deployed Job Node
The SAS Deployed Job node can take the inputs and outputs listed in the following table:
Table 6.10 Inputs and Outputs to the SAS Deployed Job Node
Name Description
Inputs:
SAS_CODE_REMOTE_FILE The location on the metadata server where the deployed job object resides
SAS_LIST_STATUS If equal to TRUE, a fragment of the output is sent as node status on each step boundary.
SAS_LIST_WORKTABLE_XML When selected, saves the list output of the job. This output can be very large.
SAS_LOG_STATUS If equal to TRUE a fragment of the log is sent as node status on each step boundary
SAS_LOG_WORKTABLE_XML When selected, saves the log of the job. This log can be very large.
Working with the SAS Deployed Job Node 139

SAS_SERVER_NAME The name of the logical pooled or non-pooled branch/component of the SAS Application server
SAS_STEPEVENTS If equal to TRUE when the node is running, events are fired at each step boundary in the SAS program.
Unique Outputs:
FILE_DATA The SAS code
SAS_LIST_CONTENTS_XML The contents of the SAS program listing
SAS_LOG_CONTENTS_XML The contents of the SAS program log
SAS_RC The final return code from the SAS job.
Using the SAS Deployed Job Node
You can create an orchestration job that uses a SAS Deployed Job node in the Flow tab to run a deployed SAS Data Integration Studio job in the context of an orchestration job. For example, you could create a job that runs a deployed job.
This sample orchestration job is shown in the following display:
Display 6.55 SAS Deployed Job Flow
140 Chapter 6 / Working with Orchestration Job Nodes

The following display shows SAS Deployed Job node settings:
Display 6.56 SAS Deployed Job Setting
Use this tab to access a job that was deployed from SAS Data Integration Studio. The default server was registered in SAS Management Console when SAS Visual Process Orchestration was installed. It corresponds to the SAS Logical Pooled Workspace Server. If necessary, you can instead explicitly select a SAS Logical Workspace Server. Note that the default server option is equivalent to the pooled workspace server.
If you select a non-pooled workspace server, then you or the user logged in to the Visual Process Orchestration environment needs a password stored in metadata. You can store the password in SAS Management Console’s User Manager. Also note that you might need to change the SAS Logical Workspace server component to SAS token authentication. In this case, refer to the Options tab step in the procedure covered in the “How to Configure SAS Token Authentication” section in the “Authentication Tasks” chapter in SAS Intelligence Platform: Security Administration Guide.
Note that you can use the Raise events for each step check box to specify that events are fired at each step boundary when the deployed job is running. You can also select
Working with the SAS Deployed Job Node 141

the appropriate check box if you need to retain the log or the SAS output for the deployed job. Then, you can download the log or the output in the Run Status view.
Working with the SAS Program Node
Overview of the SAS Program Node
You can add a SAS Program node to a Flow tab in an orchestration job to run a SAS program. The SAS program is located on the SAS Workspace Server that you specify in the node.
Inputs and Outputs to the SAS Program Node
The SAS Program node can take the inputs and outputs listed in the following table
Table 6.11 Inputs and Outputs to the SAS Program Node
Name Description
Inputs:
SAS_CODE_REMOTE_FILE The physical location accessible with the SAS Workspace Server where the SAS program resides
SAS_LIST_STATUS If equal to TRUE, a fragment of the output is sent as node status on each step boundary.
SAS_LIST_WORKTABLE_XML When selected, saves the list output of the job. This output can be very large.
SAS_LOG_STATUS If equal to TRUE a fragment of the log is sent as node status on each step boundary
SAS_LOG_WORKTABLE_XML When selected, saves the log of the job. This log can be very large.
SAS_SERVER_NAME The name of the logical pooled or non-pooled branch/component of the SAS Application server
142 Chapter 6 / Working with Orchestration Job Nodes

Name Description
SAS_STEPEVENTS If equal to TRUE when the node is running, events are fired at each step boundary in the SAS program.
Unique Outputs:
FILE_DATA The SAS code
SAS_LIST_CONTENTS_XML The contents of the SAS program listing
SAS_LOG_CONTENTS_XML The contents of the SAS program log
SAS_RC The final return code from the SAS job.
Using the SAS Program Node
You can create an orchestration job that uses a SAS Program node in the Flow tab to run SAS code in the context of an orchestration job. For example, you could create a job that runs SAS code. The SAS Program node in the job is configured to retain its log and list output.
This sample orchestration job is shown in the following display:
Display 6.57 SAS Program Job Flow
Working with the SAS Program Node 143

The reference settings for the SAS Program node are shown in the following display:
Display 6.58 SAS Program Reference Settings
Select the server that executes the SAS code that you need to run. These servers must be registered in SAS Management Console. Then navigate to the file on the selected server. The file in this job is named sascoderetain.sas.
If you select a non-pooled workspace server, then you or the user logged in to the Visual Process Orchestration environment needs a password stored in metadata. You can store the password in SAS Management Console’s User Manager. Also note that you might need to change the SAS Logical Workspace server component to SAS token authentication. In this case, refer to the Options tab step in the procedure covered in the “How to Configure SAS Token Authentication” section in the “Authentication Tasks” chapter in SAS Intelligence Platform: Security Administration Guide.
Note that you can use the Raise events for each step check box to specify that events are fired at each step boundary when the SAS program is running. You can also select the appropriate check box if you need to retain the log or the SAS output for the SAS program. Then, you can download the log or the output in the Run Status view.
144 Chapter 6 / Working with Orchestration Job Nodes

The SAS Program node inputs are shown in the following display:
Display 6.59 SAS Program Node Inputs
Note that the SASCodeEcho_Input is created. This is a newly created input string. The default value of this input parameter (as well as all input parameters) is passed into the SAS code that is submitted. The SAS code contains a SAS macro with a name that is based on the input name. In this case, it is referenced as &SASCodeEcho_Input. This default value must be resolved in the SAS code macro at run time.
The SAS program used in this job is contained in the SASCodeRetainSASOutput.txt file. The file contains the following code:
data _null_; set sashelp.class; attrib Name length = $8; attrib Sex length = $1; attrib Age length = 8; attrib Height length = 8; attrib Weight length = 8; quote='"'; file "&SASCodeEcho_Input" dlm=' '; put quote +(-1) Name +(-1) quote quote +(-1) Sex +(-1) quote
Working with the SAS Program Node 145

quote +(-1) Age +(-1) quote quote +(-1) Height +(-1) quote quote +(-1) Weight +(-1) quote ;
run;
The outputs for the SAS Program node are shown in the following display:
Display 6.60 SAS Program Node Outputs
Note that the unique outputs for SAS Program include XML output of the list and log contents of the node and a completion status indicator.
146 Chapter 6 / Working with Orchestration Job Nodes

Working with the SOAP Request Nodes
Overview of the SOAP Request Node
You can add a SOAP Request node to a Diagram tab in an orchestration job to access a third-party web service that uses a SOAP interface. SOAP (Simple Object Access Protocol) is a simple XML-based protocol to let applications exchange information over HTTP. The SOAP transformation generates SAS SOAP procedure code to access a web service in the context of a job. The procedure invokes a SOAP web service through Java Native Interface (JNI). The procedure provides options for the request XML document (IN), the service endpoint (URL), the SOAP action or operation (SOAPACTION), and the map used to handle the response (OUT).
It is assumed that you are familiar with how to use the SOAP interface to access web services. Gather the same information that you need to use the SAS SOAP procedure to read from and write to the desired web service. Example options and values are shown in the next section. For detailed information about the SAS SOAP procedure, see the documentation for that procedure in the Base SAS Procedures Guide.
Inputs and Outputs to the SOAP Service Node
The SOAP Request node can take the inputs and outputs listed in the following table:
Table 6.12 Inputs and Outputs to the SOAP Request Node
Name Description
WSCP_ACTION The SOAP action
WSCP_ADDRESS The URI to process
WSCP_BINDING The binding to use
WSCP_DOMAIN The authentication domain of the credentials to use
Working with the SOAP Request Nodes 147

Name Description
WSCP_OPERATION The web service operation to invoke
WSCP_PASS The user’s password
WSCP_POLL_INTERVAL The interval to check for cancellation
WSCP_PREEMPTIVE_AUTHENTICATION
The preemptive authentication setting
WSCP_PROXY_DOMAIN The proxy authentication domain
WSCP_PROXY_HOST The host name of the proxy
WSCP_PROXY_PASS The proxy user’s password
WSCP_PROXY_PORT The proxy port number
WSCP_PROXY_USER The proxy user
WSCP_REQUEST The XML request template
WSCP_RESPONSE The XML response template
WSCP_USER The user name
WSCP_WS_SECURITY_DOMAIN Specifies whether to determine the user and password from the domain server
WSCP_WS_SECURITY_MUST Specifies whether the mustUnderstand attribute in WS_Security is set
WSCP_WS_SECURITY_PASS The password in WS_Security input to the provider
WSCP_WS_SECURITY_USER The user in WS_Security input to the provider
WSCP_WSDL_ADDRESS The URI of the SOAP service
WSCP_WSDL The WSDL expressed as a string
Unique Outputs: No unique outputs
148 Chapter 6 / Working with Orchestration Job Nodes

Using the SOAP Request Node
You can add a SOAP Request node to a Flow tab in an orchestration job to access a third-party web service that uses a SOAP interface. For example, you can use a SOAP Request node in an orchestration job to connect to a web service that performs currency conversions.
The Flow tab for the SOAP Request Job is shown in the following display:
Display 6.61 SOAP Request Job
Click Use WSDL to create request in the SOAP Request tab, as shown in the following display:
Display 6.62 SOAP Request Tab
Working with the SOAP Request Nodes 149

Now, you can use the Create Request window to specify the WSDL, WSDL binding, and operation for the SOAP request. This window is shown in the following display:
Display 6.63 Create Request Window
Note the WSDL is specified as a URI. You can click the key icon if you need to set up security for the request. You can also click OK to rediscover bindings and operations, even if the WSDL has not been updated. Note that you can manually enter the WSDL or WSDL address on the Inputs tab. However, then you are also responsible for entering a valid binding and operation for that WSDL or WSDL address.
150 Chapter 6 / Working with Orchestration Job Nodes

The following display shows the data generated by the WSDL request in the SOAP Request tab :
Display 6.64 SOAP Request Tab
Note that the URI and operation are specified in the Use WSDL to create request section. The two request variables, FromCurrency and ToCurrency, are listed under Request data. Finally, the response variable, ConversionRateResult, is shown in the Response data section.
Working with the SOAP Request Nodes 151

You can also see these request variables in the XML-based Request Template, which is shown in the following display:
Display 6.65 Request Template
152 Chapter 6 / Working with Orchestration Job Nodes

The response variable, similarly, is included in the XML-based Response Template window. This template is shown in the following display:
Display 6.66 Response Template Window
Usage Notes for SOAP Request Nodes
Out-of -Memory Errors for SOAP Request Nodes
SAS Visual Process Orchestration jobs with a SOAP Request node or an HTTP Request node can run out of memory if you are using a Sun Java Virtual Machine (JVM). If this happens, add the following option to the Java start command that is specified in the app.cfg file for the server that executes the job.
The Java option is: -XX:MaxPermSize=256m -XX:+CMSClassUnloadingEnabled
Working with the SOAP Request Nodes 153

Working with the Echo Node
Overview of the Echo Node
You can add an Echo node to a Flow tab in an orchestration job to pass inputs that you specify to outputs. This function helps make jobs more readable.
The Echo node can also be used to gather output values from around the orchestration job into a central place. For example, you could have a series of nodes that output a few values. You can add an echo node to the Flow tab and map several of those outputs into the Echo node. The output of the Echo node will contain the values that you mapped.
Finally, you can use the Echo node as a placeholder in an orchestration job. For example, you could have a loop situation with a logical branch. In this case, you might need both paths from the logical branch to go back to the looping node. You could establish an Echo node as the last node in the loop construct instead of having to draw a line from each of these nodes. Then it would be the only node that loops back to the beginning.
Inputs and Outputs to the Echo Node
You can specify any string as an input on the Input tab. This input is passed to the Output tab.
Using the Echo Node
You can create an orchestration job that uses an Echo node to pass inputs into outputs in the context of the job. For example, a job could include an Echo node that has a bad source binding that generates an error. This error, in turn, is detected by the Event Listener 1 node.
154 Chapter 6 / Working with Orchestration Job Nodes

This sample orchestration job is shown in the following display:
Display 6.67 Event Node Job with Specific Events
The settings for the Echo node are shown in the following display:
Display 6.68 Echo Settings
Working with the Echo Node 155

The settings for the Event Listener 1 node are shown in the following display:
Display 6.69 Event Listener 1 Settings
Note that all events from the Echo node are listened for by the Event Listener node.
Working with the Variable Read Write Node
Overview of the Variable Read Write Node
You can add a Variable Read Write node to a Flow tab in an orchestration job to set the value of a job level variable and to retrieve the value. The node's type is JOBVARIABLE. This node is typically used in a nested job to publish variables coming from inside of the nested job out to the outputs of the nested job. It can also be user to
156 Chapter 6 / Working with Orchestration Job Nodes

read variables coming into the nested job and make them available. Similar functions can be performed with the Expression node.
Inputs and Outputs to the Variable Read Write Node
Name Description
Inputs:
NAME Should be set to the name of the variable that you want to affect. The variable must be defined in the job before running the node.
OPERATION You can perform 3 operations: NOOP - the value of the variable is not changed; ADD - a specific numeric value is added to the variable; SUB - a specific numeric value is subtracted from the variable; ASSIGN - a specific value is assigned to the variable
PARAMETER In the case of ADD and SUB, this is a numeric value. In the case of ASSIGN, this is the value assigned to the variable. In the case of NOOP, this is ignored.
Unique Outputs:
VALUE The current value of the variable after execution of the node
Using the Variable Read Write Node
You can add a Variable Read Write node to a Flow tab in an orchestration job to update variables and pass values between nested jobs. For example, you can create an orchestration job that consists of an inner job nested within an outer job. Then, you can use a Variable Read Write node to publish the variable from the inner job to the outer job.
Working with the Variable Read Write Node 157

The inner job is shown in the following display:
Display 6.70 Inner Job
You can create job variables and set the description, external use of input or output, and the default value for each variable. The inner job variables are shown in the following display:
Display 6.71 Inner Job Variables
Note that the input variable InnerVar1 has a default value of 5. The output variable InnerVar2 has a null default value.
158 Chapter 6 / Working with Orchestration Job Nodes

Use the Read or Write tab in the Variable Read Write node to select the Write to a job variable (InnerVar2) and the Operation( Assign), as shown in the following display:
Display 6.72 Read or Write Tab Settings
The Parameter input is located on the Inputs tab, as shown in the following display:
Display 6.73 Inputs Settings
Select Parameter and bind it to InnerVar1. Because Parameter is the argument to the operation on Inner Var2, this step binds InnerVar1 to InnerVar2.
Working with the Variable Read Write Node 159

The following display shows the outer job.
Display 6.74 Outer Job
The Orchestration Job tab is shown in the following display:
Display 6.75 Orchestration Job Tab
This tab contains a reference to the inner job in the Orchestration job field. This reference embeds the inner job into the outer job. For information about Orchestration Job nodes, see “Working with the Orchestration Job Node” on page 131.
You need to create an input in the Echo node to capture the output from the inner job. To do this, open the Inputs tab in properties for the Echo node and click New Input.
160 Chapter 6 / Working with Orchestration Job Nodes

An Echo node is shown in the following display:
Display 6.76 Echo Input Settings
Note that the input is named EchoInputVar.
Next, you need to import and bind the job output parameter from the inner job to the outer job. Click OK to close the New Input window and save the echo input. Then, click Import and Save from the Echo node properties toolbar. Note that the Variable Read Write node in the inner job published the variable InnerVar2 as output from the inner job. Therefore, InnerVar2 can be accessed from any node connected to the Orchestration Job node that references the inner job.
Working with the Variable Read Write Node 161

The Import and Bind window is shown in the following display:
Display 6.77 Import and Bind Window
Note that the EchoInput input is bound to InnerVar2, which is the Orchestration Job node output from the inner job. If the value of InnerVar2 changes, the value of EchoInput also changes. You can verify the output from the inner job was passed to the input of the Echo node in the outer job after you run the outer job. Select the Run History tab of the outer job after the job is submitted. Then, double click on the entry for the run. Finally, drill into the Echo node and select the Inputs tab.
162 Chapter 6 / Working with Orchestration Job Nodes

The following display shows that the run-time value of 5 is passed to EchoInput in the Echo node after the outer job is successfully run.
Display 6.78 Run Time Value of EchoInput
Working with the Variable Read Write Node 163

164 Chapter 6 / Working with Orchestration Job Nodes

Recommended Reading
n SAS Visual Process Orchestration Server Administrator's Guide
n SAS Management Console: Guide to Users and Permissions
For a complete list of SAS books, go to support.sas.com/bookstore. If you have questions about which titles you need, please contact a SAS Book Sales Representative:
SAS BooksSAS Campus DriveCary, NC 27513-2414Phone: 1-800-727-3228Fax: 1-919-677-8166E-mail: [email protected] address: support.sas.com/bookstore
165

166 Recommended Reading

