saniflow e05a hand dryer -...
TRANSCRIPT
Saniflow E05A hand dryer
Safety regulations
All installation, maintenance and repair tasks must be carried out by qualified
technicians.
Mediclinics remembers the importance of:
1. Becoming familiar with the equipment and carefully reading the user manual prior to
operating.
2. Disconnecting power prior to beginning any repair or maintenance action.
3. Exercising care in accordance with the procedures included herein.
General maintenance Preventive Maintenance - Cleaning Inspect the units annually or quarterly, depending on the dryer’s operating cycles.
Clean the active parts of the unit, such as: the motor, the heating element, the fan and
the electronic circuit board with a soft brush.
Maintain the air inlet and outlet free of dust and other obstructions; use a soft flat ended
brush.

Motor
Characteristics
- Type: Universal brush motor - Power: 250 W - Speed of rotation: 5,500 rpm - Class F - Incorporates a safety thermal limiter
Maintenance As preventive maintenance, we recommend using a soft brush to remove dust and dirt
on an annual or bi-annual basis, depending on the dryer’s operating cycles.
Replacement of the fuse
The fuse will blow if there is an overvoltage or short circuit to prevent any damage from
occurring to the motor.
The fuse is located in the fuse box that is fixed to the motor mounting. Note: To replace the fuse, it is not necessary to remove the motor. The images show
the fuse disassembled for a better view.

Remove the fuse by unscrewing it counter-clockwise. Remove the fuse from its location and replace it. Fit it by following the
previous steps in reverse order.

Replacement of the brushes
The brushes are installed on the sides of the motor. The brushes have a theoretical useful life of 3,000 hours and must be replaced when
their length is shorter than 5 mm.
Apply pressure to the clip that is covering the brushes.

Move the clip to one side to free the brush.
Remove the brush from its location and replace it. Carry out the same
procedure for the second motor brush. Fit it by following the previous steps in reverse order.

Replacement of the motor Release the screws that attach the electronic circuit board to the base. Disconnect the two cables from the motor (blue and red) that go to the terminal block of
the electronic circuit board.

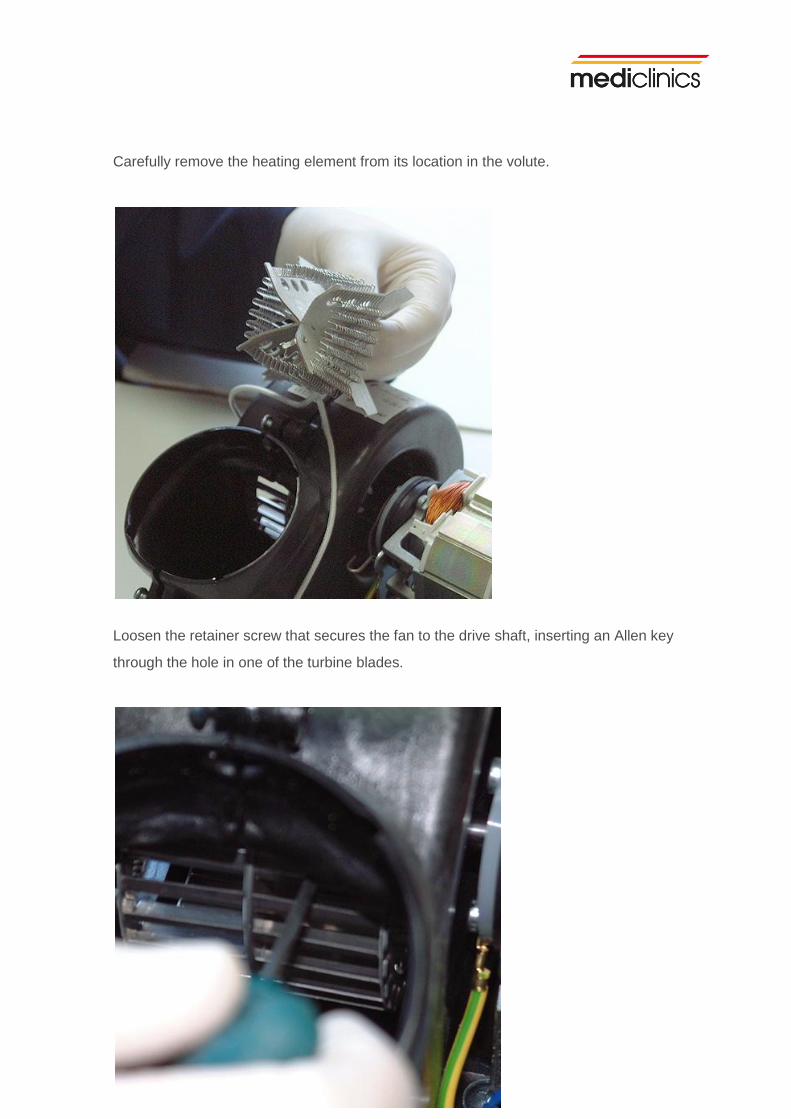
Remove the three screws that join the two parts that form the volute.
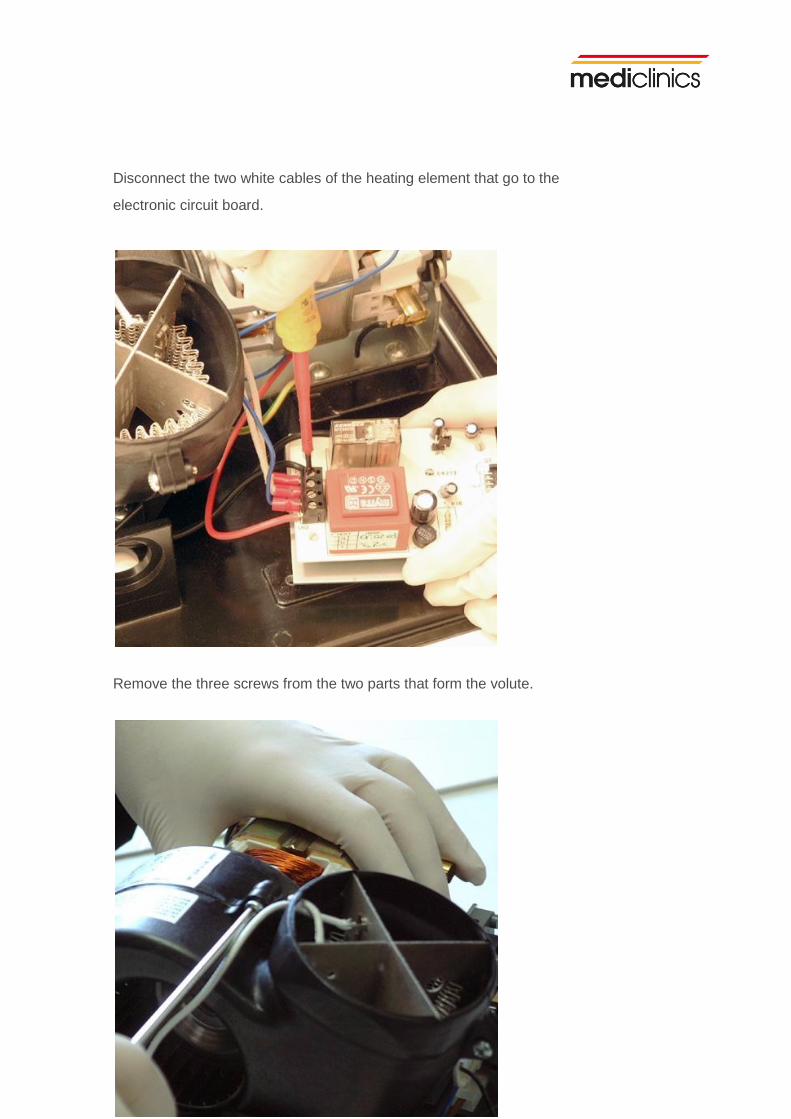
Remove the two parts of the volute so you can access the interior.
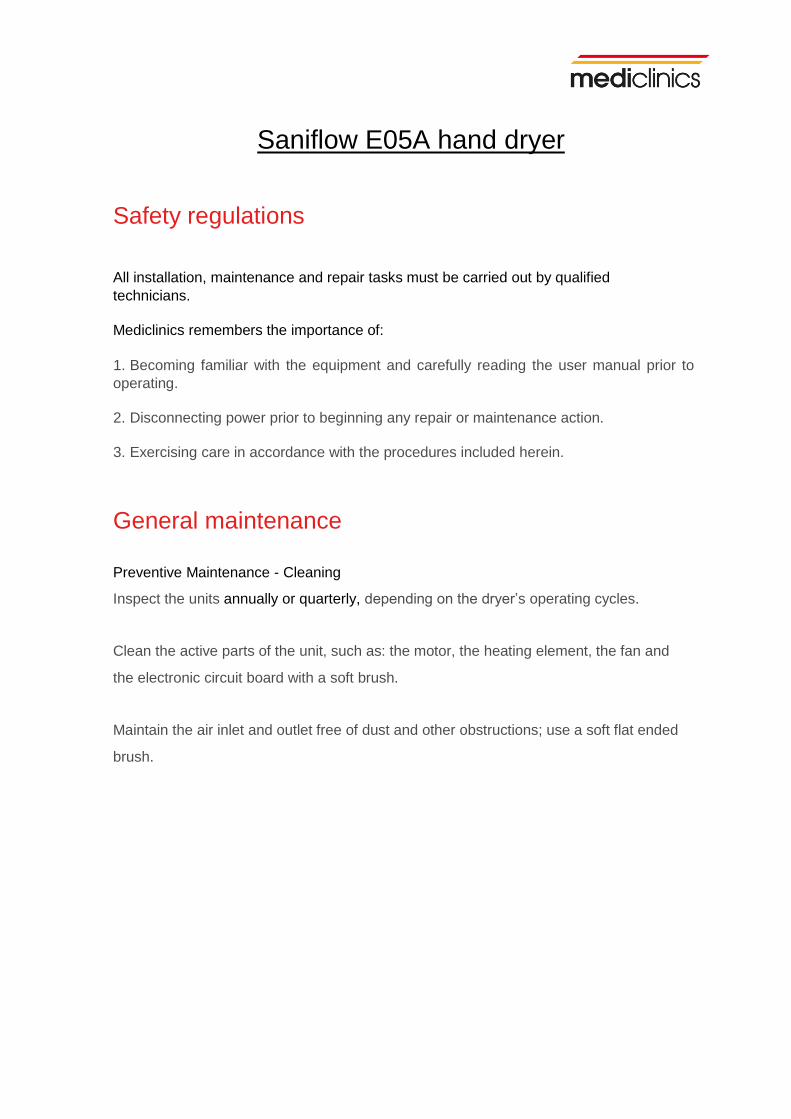
Carefully remove the heating element from its location in the volute. Loosen the retainer screw that secures the fan to the drive shaft, inserting an Allen key
through the hole in one of the turbine blades.

Release the lateral springs that secure the motor. Disconnect the motor cable that goes to the fuse.

Carefully remove the motor from its position and replace it. Do not forget to
disconnect the earth connection for the device in order to free it completely.
Fit it by following the previous steps in reverse order.
Heating element
Characteristics - Type: Coiled wire heating element - Material: NiCr winding. 40 - Body: Mica - Power: 2.000 W - Includes thermal limiter
Maintenance As preventive maintenance, we recommend using a soft brush to remove dust and dirt
on an annual or bi-annual basis, depending on the dryer’s operating cycles.

Replacement of the heating element Remove the two parts of the volute so you can access the interior.
Release the screws that attach the electronic circuit board to the base.
Disconnect the two white cables of the heating element that go to the
electronic circuit board.
Remove the three screws from the two parts that form the volute.
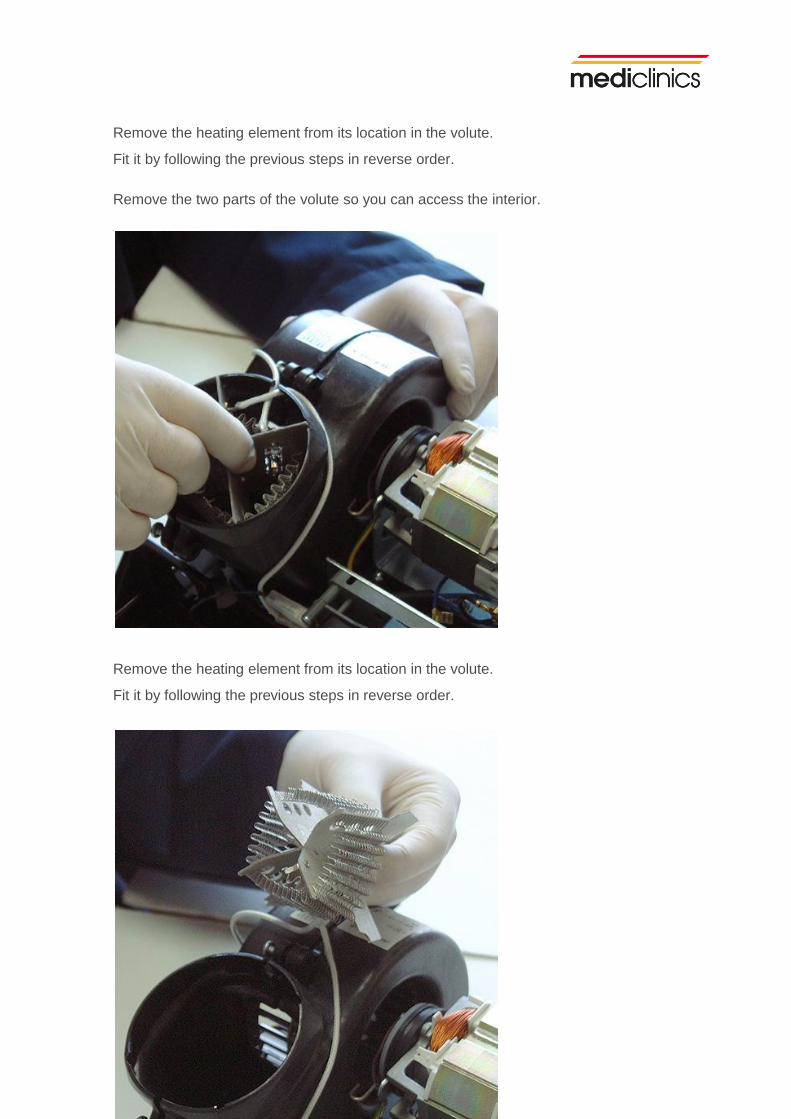
Remove the heating element from its location in the volute. Fit it by following the previous steps in reverse order.
Remove the two parts of the volute so you can access the interior. Remove the heating element from its location in the volute. Fit it by following the previous steps in reverse order.

Electronic Circuit Board
Characteristics - Electronic sensor, with infrared beam. - Detection distance adjustable by potentiometer (15-25 cm).
Maintenance As preventive maintenance, we recommend using a soft brush to remove dust and
dirt on an annual or bi-annual basis, depending on the dryer’s operating cycles. Additionally, you should regularly clean the LEDs with a cloth slightly dampened
with alcohol.
Replacement of the electronic circuit board Using a Saniflow security screwdriver, unscrew the two screws located at the lower
part of the casing.

Lift the casing 45º, without actually removing it. Disconnect the LED cable from the electronic circuit board, and remove the casing.
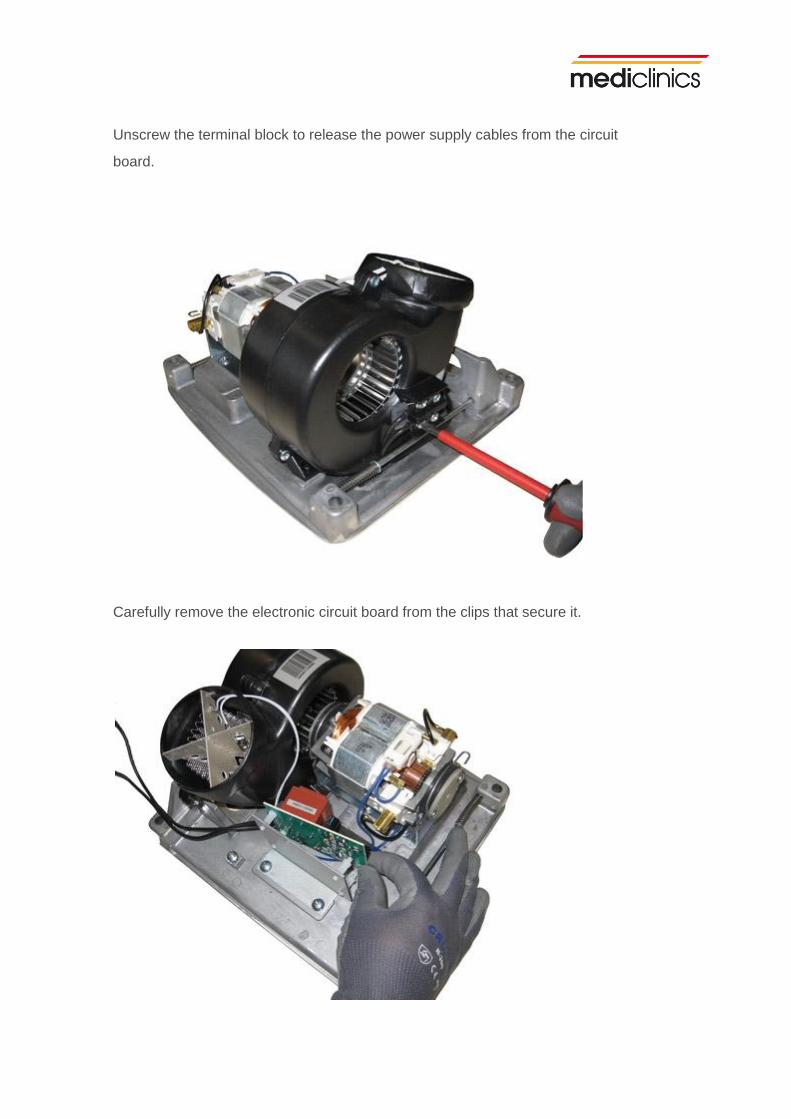
Unscrew the terminal block to release the power supply cables from the circuit
board.
Carefully remove the electronic circuit board from the clips that secure it.

Unscrew the cables of the heating element and motor from the electronic circuit board.