sample content from mcts self-paced training kit (exam...
TRANSCRIPT

Lesson 1 Installing Exchange Server 2007 71
Quick Check1. According to the information on the Client Settings page of the Exchange
Server 2007 Setup Wizard, what will happen if you inform the installationwizard that there are client computers running Outlook 2003 or Entouragein your organization?
Quick Check Answer
1. A public folder database will be created during setup. For more informationon why a public folder database is necessary for computers running Out-look 2003 or Entourage, see Chapter 4, “Configuring Public Folders.”
� Practice 3 Installing Exchange Server Using the Command Line
When you have to deploy multiple Exchange multiple times, you’ll find it more effi-cient to use the command line rather than the graphical tools. In this practice, you willperform a command-line installation of Exchange Server 2003, adding exactly thesame roles as were added in Practice 2. In essence, this practice achieves the sameresults as Practice 2 but does so using an alternate method. If you have performedPractice 2, it is not necessary to complete this practice. To complete this practice, per-form the following steps:
1. Log on with the Kim_Akers account.
2. Insert the Exchange Server 2007 installation media. If the Exchange Server 2007splash screen does not appear, open a command prompt and change to the drivethat contains the Exchange Server 2007 installation media.
3. Enter the command
setup /mode:install /roles:HubTransport,ClientAccess,Mailbox,UnifiedMessaging
NOTE Exchange Management tools
The Exchange Management tools will be automatically installed when the other roles areinstalled.
� Practice 4 Assigning Users Administrative Roles
In this practice, you will assign two of the user accounts that you created in the firstpractice. To complete this practice, perform the following steps:
1. Log on to the computer on which you have installed Exchange Server 2007 withthe Kim_Akers user account.
Mclean_Ch02.fm Page 71 Saturday, July 21, 2007 10:21 AM
PREVIEW CONTENT This excerpt contains early content from an upcoming Microsoft Press title and is subject to change prior to release.

72 Chapter 2 Installing Exchange Server and Configuring Server Roles
2. Open the Exchange Management Console.
3. Select the Organization Configuration node, right-click, and then click AddExchange Administrator.
4. On the Add Exchange Administrator dialog box shown in Figure 2-13, clickBrowse and navigate to the Sam Abolrous account. Select the Exchange View-Only Administrator role and then click Add.
Figure 2-13 Configuring Exchange administrator roles
5. Click Finish to close the Completion dialog box.
6. Right-click the Organization Configuration node and then click Add ExchangeAdministrator.
7. Click Browse and navigate to the Terry Adams user account.
8. Select the Exchange Server Administrator role option and then click Add.
9. In the Select Exchange Server dialog box shown in Figure 2-14, select GLAS-GOW and then click OK.
10. Click Add in the Add Exchange Administrator dialog box.
11. Review the warning and then click Finish.
Mclean_Ch02.fm Page 72 Saturday, July 21, 2007 10:21 AM
PREVIEW CONTENT This excerpt contains early content from an upcoming Microsoft Press title and is subject to change prior to release.

Lesson 1 Installing Exchange Server 2007 73
Figure 2-14 Configuring the Exchange Server administrator role
Quick Check1. What does the warning instruct you to do?
Quick Check Answer
1. The warning instructs you to add the Terry Adams user account to the LocalAdministrators group on the computer hosting Exchange Server 2007.
� Practice 5 Installing an SSL Certificate on Exchange Server 2007
In this practice, you will install an Enterprise Root Certificate Authority and configureit to generate SSL certificates. Although Exchange will automatically generate an SSLcertificate and install it when you install the Client Access server role, clients attempt-ing to access the server using SSL will not trust the issuing CA. By installing a CA andperforming a request for an SSL certificate, this practice will simulate the steps youwould take in requesting and installing an SSL certificate trusted by a third-party CA.
You will then install an SSL certificate on Exchange. To complete this practice, youwill need access to the Windows Server 2003 installation media. Once you have veri-fied that you have access to the installation media, perform the following steps:
1. Log on to the computer that hosts Exchange Server 2007 using the Kim_Akersaccount.
Mclean_Ch02.fm Page 73 Saturday, July 21, 2007 10:21 AM
PREVIEW CONTENT This excerpt contains early content from an upcoming Microsoft Press title and is subject to change prior to release.

74 Chapter 2 Installing Exchange Server and Configuring Server Roles
2. From Control Panel, open Add Or Remove Programs and then click Add/Remove Windows Components.
3. Select Certificate Services. Click Yes to dismiss the warning that informs you thatthe computer name and domain membership cannot be changed. Click Next.
4. On the CA Type page of the Windows Components Wizard, select EnterpriseRoot CA, as shown in Figure 2-15, and then click Next.
Figure 2-15 Installing an Enterprise Root CA
5. On the CA Identifying Information page, enter the common name for the CA asGlasgow and then click Next.
6. On the Certificate Database Settings page, review the default locations and thenclick Next.
7. In the warning dialog box that informs you that Internet Information Servicesneeds to be temporarily stopped, click Yes. Certificate Services will now beinstalled. You will be prompted for the Windows Server 2003 installation mediaduring the installation process.
8. You will be asked to enable Active Server Pages as a part of the Certificate Ser-vices installation process. Click Yes.
9. On the Completing The Windows Components Wizard page, click Finish.
10. Open Internet Information Services and expand the Server And Web Sites node.
Mclean_Ch02.fm Page 74 Saturday, July 21, 2007 10:21 AM
PREVIEW CONTENT This excerpt contains early content from an upcoming Microsoft Press title and is subject to change prior to release.
Lesson 1 Installing Exchange Server 2007 75
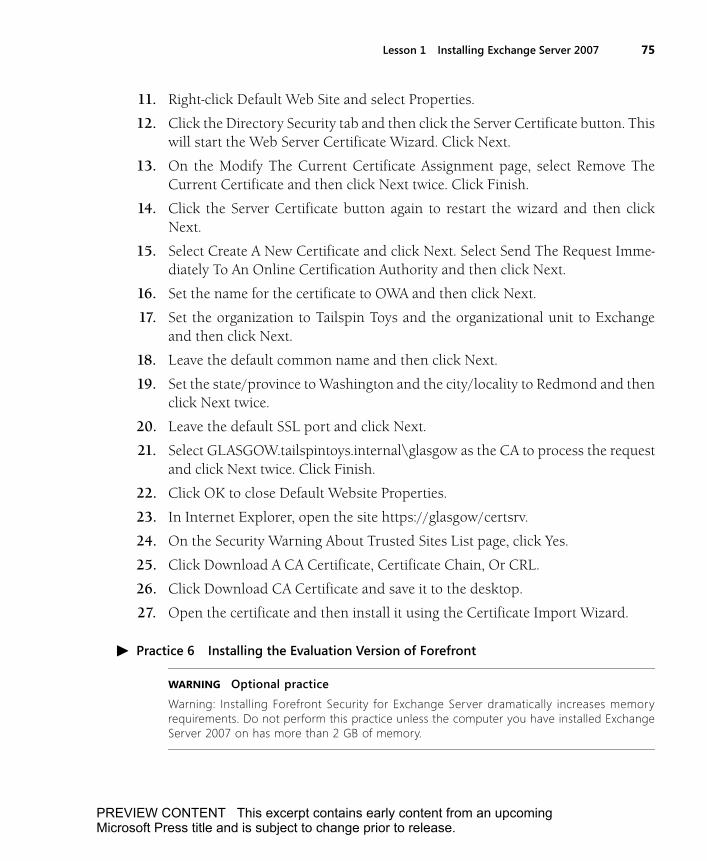
11. Right-click Default Web Site and select Properties.
12. Click the Directory Security tab and then click the Server Certificate button. Thiswill start the Web Server Certificate Wizard. Click Next.
13. On the Modify The Current Certificate Assignment page, select Remove TheCurrent Certificate and then click Next twice. Click Finish.
14. Click the Server Certificate button again to restart the wizard and then clickNext.
15. Select Create A New Certificate and click Next. Select Send The Request Imme-diately To An Online Certification Authority and then click Next.
16. Set the name for the certificate to OWA and then click Next.
17. Set the organization to Tailspin Toys and the organizational unit to Exchangeand then click Next.
18. Leave the default common name and then click Next.
19. Set the state/province to Washington and the city/locality to Redmond and thenclick Next twice.
20. Leave the default SSL port and click Next.
21. Select GLASGOW.tailspintoys.internal\glasgow as the CA to process the requestand click Next twice. Click Finish.
22. Click OK to close Default Website Properties.
23. In Internet Explorer, open the site https://glasgow/certsrv.
24. On the Security Warning About Trusted Sites List page, click Yes.
25. Click Download A CA Certificate, Certificate Chain, Or CRL.
26. Click Download CA Certificate and save it to the desktop.
27. Open the certificate and then install it using the Certificate Import Wizard.
� Practice 6 Installing the Evaluation Version of Forefront
WARNING Optional practice
Warning: Installing Forefront Security for Exchange Server dramatically increases memoryrequirements. Do not perform this practice unless the computer you have installed ExchangeServer 2007 on has more than 2 GB of memory.
Mclean_Ch02.fm Page 75 Saturday, July 21, 2007 10:21 AM
PREVIEW CONTENT This excerpt contains early content from an upcoming Microsoft Press title and is subject to change prior to release.

76 Chapter 2 Installing Exchange Server and Configuring Server Roles
An evaluation version of Forefront Security for Exchange Server is included withthe Exchange Server 2007 installation media. Although you would normally per-form message screening on an Edge Tansport server on a perimeter network, wewill install this package on the computer assigned the Hub Transport server role.
NOTE Downloading Forefront Security for Exchange Server
Although included on the Exchange Server 2007 installation media, an evaluation version ofForefront Security for Exchange Server can be downloaded by accessing the following link:http://www.microsoft.com/technet/prodtechnol/eval/fses/default.mspx.
To complete this practice, perform the following steps:
1. Log on to the computer hosting Exchange Server 2007 using the Kim_Akersaccount.
2. Navigate to the Forefront directory on the Exchange Server 2007 installationmedia and double-click Setup.exe. This will start the Microsoft Forefront Secu-rity for Exchange Server Installation Wizard, as shown in Figure 2-16. Click Nextto continue.
Figure 2-16 Starting installation of Forefront for Exchange Server
3. Review the license agreement and then click Yes.
4. On the Customer Information page, click Next.
5. On the Installation Location page, ensure that Local Installation is selected andthen click Next.
Mclean_Ch02.fm Page 76 Saturday, July 21, 2007 10:21 AM
PREVIEW CONTENT This excerpt contains early content from an upcoming Microsoft Press title and is subject to change prior to release.

Lesson 1 Installing Exchange Server 2007 77
6. On the Installation Type page, ensure that Full Installation is selected, as shownin Figure 2-17, and then click Next.
Figure 2-17 Forefront installation type
7. On the Quarantine Security Settings page, ensure that Secure Mode is selectedand then click Next.
8. Review the five randomly selected five antivirus scan engines and then click Next.
9. Review the information on the Engine Updates Required page and then clickNext.
10. On the Choose Destination Location page, review the installation location andthen click Next.
11. In the Select Program Folder, review the location the program icons will beinstalled to and then click Next.
12. On the Start Copying Files page, review the installation settings and then clickNext. The installation process will now commence.
13. During the installation process, you will be asked if you would like setup torestart the Exchange Transport service. Click Next to have the service restarted.
BEST PRACTICES Restarting Transport service
In a production environment, you might choose to wait until an off-peak period to performthis operation. In general, you would add a component such as this during a period whenhaving the server offline would cause minimal impact to your organization’s operations.
Mclean_Ch02.fm Page 77 Saturday, July 21, 2007 10:21 AM
PREVIEW CONTENT This excerpt contains early content from an upcoming Microsoft Press title and is subject to change prior to release.

78 Chapter 2 Installing Exchange Server and Configuring Server Roles
14. After the service has been restarted, click Next and then click Finish. The readmefile for Forefront Security for Exchange will open automatically. Review its con-tents and then close the file.
15. Restart the computer.
NOTE Restart optional
Restarting the computer is not strictly necessary but will refresh all services that ExchangeServer 2007 relies on.
16. When the computer has restarted, log back on using the Kim_Akers useraccount. From the Programs menu, open Forefront Server Security Administra-tor. Click OK in the Connect To Server dialog box to open the local instance ofthis program. Click OK to dismiss the License Notice dialog box.
17. Click Scanner Updates under Settings.
18. Click Update Now in the right-hand-side pane of Forefront Server SecurityAdministrator when Scanner Updates is selected, as shown in Figure 2-18.
Figure 2-18 Updating virus definitions
Mclean_Ch02.fm Page 78 Saturday, July 21, 2007 10:21 AM
PREVIEW CONTENT This excerpt contains early content from an upcoming Microsoft Press title and is subject to change prior to release.

Lesson 1 Installing Exchange Server 2007 79
Lesson Summary■ Mailbox servers host message data. Client Access servers allow access to Mailbox
servers. Hub Transport servers route message data. Edge Transport servers routemessages to and from the Internet, though this can also be done by Hub Trans-port servers. Unified Messaging servers store voice and fax data.
■ The active Clustered Mailbox, passive Clustered Mailbox, and Edge Transportserver roles cannot be installed with other roles.
■ Computers assigned the Edge Transport server role are located on perimeter net-works. They should not be members of an Active Directory environment.
■ The standard way to set up Exchange Server 2007 is using a wizard that allowsyou to perform either a typical install, which installs the Client Access, Mailbox,and Hub Transport roles, or a custom install, where the combination of roles isselected by the administrator. The Unified Messaging, Edge Transport, and Clus-tered Mailbox roles can be installed graphically only by using a custom install.
■ Command-line installation allows for a greater number of configuration optionsthan the graphic installation. The majority of setup options must be passeddirectly from the command line. Answer files are used primarily to set up clusters.
■ Communications with Client Access servers are encrypted using SSL. Installingthe Client Access server role creates a default SSL certificate, though this won’tbe trusted by clients.
■ Clustered roles require that the host server already be a node in a cluster. Clus-ters can be implemented on the enterprise editions of Windows Server 2003 andWindows Server 2008. You can implement active or passive mailbox clusters.
■ Load balancing can be used to ensure that computers that host the ClientAccess, Hub Transport, and Edge Transport roles aren’t overwhelmed. This isdone by adding servers hosting identical roles as nodes in an NLB cluster.
■ An evaluation version of Forefront Security for Exchange Server is included withthe Exchange Server 2007 installation media.
Lesson ReviewYou can use the following questions to test your knowledge of the information in Les-son 1, “Installing Exchange Server.” The questions are also available on the compan-ion CD if you prefer to review them in electronic form.
Mclean_Ch02.fm Page 79 Saturday, July 21, 2007 10:21 AM
PREVIEW CONTENT This excerpt contains early content from an upcoming Microsoft Press title and is subject to change prior to release.

80 Chapter 2 Installing Exchange Server and Configuring Server Roles
NOTE Answers
Answers to these questions and explanations of why each answer choice is correct or incorrect are located in the “Answers” section at the end of the book.
1. You are preparing a new deployment of Exchange Server 2007 in a single-domain environment spread over five separate Active Directory sites. Users at allsites will need speedy access to mail. Branch office sites are connected by a vir-tual private network (VPN) tunnel to the head office site, where you have alreadydeployed an Edge Transport server and a server with the Hub Transport, ClientAccess, and Mailbox server roles. A single computer running Exchange Server2007 will be deployed at each site. Which of the following roles should bedeployed on these computers? (Choose three.)
A. Edge Transport
B. Hub Transport
C. Client Access
D. Mailbox server
E. Unified Messaging server
2. In which of the following network locations should you deploy an Edge Trans-port server?
A. Direct connection to the Internet
B. Perimeter network
C. Internal network
D. Encrypted network
3. Which of the following digital certificate templates should you use whenrequesting and installing a digital certificate on a computer that will provide theOWA service to remote clients?
A. Code signing
B. SSL
C. IPSec
D. EFS
Mclean_Ch02.fm Page 80 Saturday, July 21, 2007 10:21 AM
PREVIEW CONTENT This excerpt contains early content from an upcoming Microsoft Press title and is subject to change prior to release.

Lesson 1 Installing Exchange Server 2007 81
4. Your organization has a single computer with Exchange Server 2007 installed.This Exchange Server 2007 computer hosts the Hub Transport, Client Access,and Mailbox server roles. Users in your organization, who use primarily OWA,report slow connections to the server. You examine the performance of theserver and find that although only 25 percent of the disk space on the server isconsumed by mailbox databases, the processor usage statistics are consistentlyabove 80 percent. To alleviate this problem, you will install a second computerrunning Exchange Server 2007. If you were to deploy only a single role on thatcomputer, removing it from the existing server, which of the roles would youdeploy to improve performance?
A. Hub Transport
B. Client Access
C. Edge Transport
D. Mailbox server
5. Which of the following Exchange Server 2007 setup commands will install theClient Access, Hub Transport, and Mailbox server roles on a computer in anexisting Exchange 2007 organization?
A. setup /mode:install /roles:ClientAccess,Mailbox,EdgeTransport
B. setup /mode:install /r:C,E,M,H
C. setup /mode:upgrade /r:C,E,M,H
D. setup /mode:install /r:C,M,H,U
E. setup /mode:install /r::Mailbox,UnifiedMessaging,ClientAccess
6. Each Exchange Server computer at your single site organization is assigned onlyone Exchange Server role. Your organization has five computers runningExchange Server 2007. You want to deal with messages containing spam orviruses before they reach user mailboxes. Which of the following computers run-ning Exchange Server 2007 should you deploy Forefront Security for ExchangeServer on? (Choose two.)
A. The computer assigned the Edge Transport server role
B. The computer assigned the Hub Transport server role
C. The computer assigned the Client Access server role
D. The computer assigned the Mailbox server role
E. The computer assigned the Unified Messaging server role
Mclean_Ch02.fm Page 81 Saturday, July 21, 2007 10:21 AM
PREVIEW CONTENT This excerpt contains early content from an upcoming Microsoft Press title and is subject to change prior to release.

82 Chapter 2 Installing Exchange Server and Configuring Server Roles
Lesson 2 Configuring Exchange Server RolesInstalling roles is not the end point of deploying Exchange 2007. Once roles aredeployed, it is necessary to configure them. Configuring a role to best meet the needsof your organization is a critical part of the postinstallation process. Although whenyou install a role it is configured to suit the needs of most organizations, you’ll findthat you can make a number of tweaks that best suit your organization. Although laterchapters in this book look in more detail at specific configuration settings, this lessonprovides an overview of the general postinstallation tasks an Exchange administratorwould carry out on servers assigned these roles.
After this lesson, you will be able to:
■ Configure Exchange Server roles.
❑ Configure the Hub Transport server role.
❑ Configure the Edge Transport server role.
❑ Configure the Client Access server role.
● Configure Outlook Anywhere.
● Configure the server to enable client and mobile device connectivity.
● Configure OWA for changing passwords.
● Configure OWA for file sharing.
● Configure OWA for SharePoint.
❑ Configure the Mailbox server role.
● Create, modify, and delete databases and storage groups.
● Manage mailbox size limits.
❑ Add and remove roles.
❑ Remove the Exchange Server.
Estimated lesson time: 40 minutes
Mclean_Ch02.fm Page 82 Saturday, July 21, 2007 10:21 AM
PREVIEW CONTENT This excerpt contains early content from an upcoming Microsoft Press title and is subject to change prior to release.

Lesson 2 Configuring Exchange Server Roles 83
Configuring the Edge Transport Server RoleOnce the Edge Transport server role is installed, you need to configure it to work withEdgeSync. EdgeSync links Active Directory with ADAM. Prior to establishing replica-tion from Active Directory to ADAM, it is necessary to create an Edge subscription file.Each Edge Transport server requires a unique Edge subscription file. Three EdgeTransport servers means three separate Edge subscription files.
To create an Edge subscription file, perform the following steps:
1. Verify that the Edge Transport server can resolve the FQDN of the Hub Trans-port server to an IP address using the nslookup command-line utility. Verify thatthe Hub Transport server can resolve the FQDN of the Edge Transport server toan IP address using the nslookup command-line utility.
2. Create the Edge subscription file on the Edge Transport server by issuing the fol-lowing command from Exchange Management Shell: New-EdgeSubscription –file“C:\EdgeSubExport.xml”.
NOTE Loss of manual configuration settings
When you configure an Edge Transport server to be managed by EdgeSync, you will loseconfiguration settings that may have already been made to the Edge Transport server man-ually, such as accepted domains, message classifications, remote domains, and send connec-tors. Once the subscription is configured, the Exchange Management Shell commands thatallow you to make these configuration settings will be blocked on the Edge Transport server.All these settings will be configured through the organization-wide Hub Transport settings.
3. Copy the exported file to a Hub Transport server. This file needs to be importedwithin 1,440 minutes (24 hours) of creating the file; otherwise, you will need tore-create it.
4. On the Hub Transport server, open the Exchange Management Console andclick on Hub Transport under Organization Configuration.
5. Click the Edge Subscriptions tab and then click New Edge Subscription in theActions pane.
6. This will launch the New Edge Subscription Wizard, shown in Figure 2-19.Ensure that you have selected the site for which the Edge Transport server willbecome a member and then click Browse to locate the subscription file.
Mclean_Ch02.fm Page 83 Saturday, July 21, 2007 10:21 AM
PREVIEW CONTENT This excerpt contains early content from an upcoming Microsoft Press title and is subject to change prior to release.

84 Chapter 2 Installing Exchange Server and Configuring Server Roles
Figure 2-19 Enabling antispam updates
7. Click New to create the new subscription.
Once an Edge Transport server is subscribed, all Hub Transport servers located in thesite to which the Edge Transport server is subscribed can contribute to the EdgeSyncprocess. This does not apply to any new Hub Transport servers added to the site afterthe subscription has occurred. If you add more Hub Transport servers to the site, itwill be necessary to remove and re-create the Edge subscription. In the event that thelicensing status of the Edge Transport server changes, for example, if you created thesubscription prior to activating the Edge Transport server, it will be necessary to per-form the subscription process again.
MORE INFO Subscribing the Edge Transport server
For more information on subscribing the Edge Transport server to your Exchange organization, consult the following link: http://technet.microsoft.com/en-us/library/bb125236.aspx.
For successful synchronization between Active Directory and ADAM to occur, the fire-wall between the secure network and the perimeter network needs to have TCP/IP port50636 open. Once the subscription has been set up, the Hub Transport server will peri-odically sync with the Edge Transport server, transmitting information about accepteddomains, remote domains, and internal Simple Mail Transfer Protocol (SMTP) servers.To force synchronization, issue the Start-Edge Synchronization command in theExchange Management Shell.
Mclean_Ch02.fm Page 84 Saturday, July 21, 2007 10:21 AM
PREVIEW CONTENT This excerpt contains early content from an upcoming Microsoft Press title and is subject to change prior to release.

Lesson 2 Configuring Exchange Server Roles 85
Configuring the Hub Transport Server RoleHub Transport servers are configured both at the server and at the organizationallevel. Server-level configuration includes external and internal DNS configuration,domain controller, and global catalog server configuration and message limit con-figurations. The domains for which your Exchange Server 2007 computers willaccept e-mail are configured on an organizational level rather than a per server level.The New Accepted Domain Wizard allows you to configure Exchange Server 2007to be authoritative for a domain. This configures your Exchange organization toaccept e-mail sent to particular e-mail addresses, such as @tailspintoys.com [email protected]. If mail arrives at the server and is not addressed to a domain onthe accepted domain list, it will bounce. The accepted domain list stops nefariousthird parties from using your mail servers as relays to send spam and viruses.
You can configure an accepted domain through the wizard or from the ExchangeManagement Shell by issuing the command new-AcceptedDomain –Name ‘tailspin-toys.com’ –DomainType ‘Authoritative’, where you substitute tailspintoys.com for thedomain name for which you wish your Exchange organization to accept mail.
You can also use the New Accepted Domain Wizard to configure an internal relaydomain and an external relay domain. The internal relay domain option is used if youwant e-mail relayed to another Active Directory forest within your organization. Anexternal relay domain is used to relay traffic to an e-mail server outside the Exchangeorganization.
Any e-mail received by the Hub Transport server that is not addressed to an accepteddomain will be dropped. As companies often change their names, it is important toensure that messages addressed to previously registered domain names will still bereceived properly. For example, Tailspintoys.com was known several years ago asWingtiptoys.com. Several customers might still send e-mail to wingtiptoys.comaddresses. If Wingtiptoys.com is not on the list of accepted domains, this e-mail willbe dropped by the server.
Configuring Remote DomainsRemote domains allow the configuration of formatting and messaging policies to spe-cific remote domains. For example, if you know that a partner company requires spe-cifically configured e-mail, you can set up a remote domain policy for all e-mail sent tothat particular domain. Remote domain policies can be applied to a specific domain
Mclean_Ch02.fm Page 85 Saturday, July 21, 2007 10:21 AM
PREVIEW CONTENT This excerpt contains early content from an upcoming Microsoft Press title and is subject to change prior to release.
86 Chapter 2 Installing Exchange Server and Configuring Server Roles
only or to all subdomains of that specific domain. Configuring mail for specific desti-nations is covered in more detail in Chapter 7, “Connectors and Connectivity.”
Create a Postmaster MailboxThe postmaster address is the address listed on nondelivery reports and other deliv-ery status notifications. The postmaster at a particular mail domain is the personwhom you contact if you want to follow up on an offensive or problematic e-mail. Thestandard postmaster alias allows anyone to send an e-mail for whatever reason to theperson in charge of the e-mail servers at a particular organization.
Each Transport server will have a separate postmaster address. To view the currentlyassigned postmaster address, issue the following command in Exchange ManagementShell:
Get-TransportServer | Format-List Name,ExternalPostMasterAddress
In the event that you want to redirect the postmaster address to another address, youcan use the following Exchange Management Shell command:
Set-TransportServer –Identity ‘ServerName’ –ExternalPostMasterAddress ‘[email protected]’
Alternatively, you could then assign the postmaster address as a secondary addresson the user account that will be responsible for dealing with postmaster inquiries. Inthe event that person leaves your organization, you can move the postmaster addressas necessary. Ensuring that the postmaster address is watched is an important partof the responsibility of being a mail administrator. For example, if someone fromwithin your organization has been sending spam, the postmaster e-mail address isthe first place that some notification about it will exist. It is better to monitor thisaddress than to find out that your mail domain has been placed on a blocking listbecause you weren’t aware that a rogue user was sending out unsolicited commerciale-mail.
Enabling Antispam Features on Transport ServersAlthough Edge Transport servers have antispam features enabled by default, HubTransport servers do not. To enable the Exchange Server 2007 antispam features on acomputer with the Hub Transport server role installed, issue the following ExchangeManagement Shell command:
Set-TransportServer –Identity ‘ServerName’ –AntispamAgentsEnabled $true
Mclean_Ch02.fm Page 86 Saturday, July 21, 2007 10:21 AM
PREVIEW CONTENT This excerpt contains early content from an upcoming Microsoft Press title and is subject to change prior to release.

Lesson 2 Configuring Exchange Server Roles 87
You will then need to restart the Exchange Server Transport service and any openExchange Management Consoles before the antispam features are enabled. You canverify that antispam features have been enabled, as the Enable Anti-Spam Updates itemwill now be available in the Actions pane when the Hub Transport server is selectedunder Server Configuration in the Exchange Management Console. The Anti-spam tabwill also become available in the Actions pane when the Hub Transport option isselected under Organization Configuration in Exchange Management Console.
Clicking on Enable Anti-spam Updates in the Action pane allows you to configure howthe antispam definitions and application will be updated, as shown in Figure 2-20. Youcan allow automatic updating of spam signatures as well as IP reputation updates. Con-figuring antispam settings is covered in more detail in Chapter 6.
Figure 2-20 Enabling antispam updates
Configuring the Client Access Server RoleThe Client Access role is the gateway between clients and their mailbox data. It is pos-sible to use NLB to load balance the Client Access role in the event that client trafficis putting too much strain on resources. In most instances, you can install the clientaccess server role, and your users will automatically be able to access e-mail. If you areusing SSL, you should remember that clients will not trust the default SSL certificategenerated during the installation of the Client Access server role. You have to eitherobtain an SSL certificate from a commercial and trusted source or find a way for yourorganization to manage and generate its own SSL certificate.
Mclean_Ch02.fm Page 87 Saturday, July 21, 2007 10:21 AM
PREVIEW CONTENT This excerpt contains early content from an upcoming Microsoft Press title and is subject to change prior to release.

88 Chapter 2 Installing Exchange Server and Configuring Server Roles
Configuring Outlook AnywhereOutlook Anywhere allows clients using Microsoft Outlook 2007 and Outlook 2003to access Exchange Server 2007 using the RPC over HTTP protocol. The primarybenefit of using Outlook Anywhere is that it simplifies the configuration of remoteaccess to Exchange. Access can be granted without having to use VPN connections,and rules allowing the quick setup of RPC over HTTP access to Exchange are builtinto Internet Security and Acceleration (ISA) Server, Microsoft’s firewall and proxyproduct.
Outlook Anywhere can be enabled by clicking on Enable Outlook Anywhere on theActions pane when the Client Access role is selected under the Server Configurationnode. When configuring Outlook Anywhere, you need to specify the external hostname, the authentication type, and whether you want to allow SSL offloading. Theauthentication options are Basic and NTLM with the option to use SSL offloading.SSL offloading allows you to use an SSL accelerator device to assist with the process-ing load involved in encrypting network connections to the Client Access server, asshown in Figure 2-21. You should not enable SSL offloading unless your server has anSSL accelerator device, as this can cause connection problems.
Figure 2-21 Outlook Anywhere properties
Mclean_Ch02.fm Page 88 Saturday, July 21, 2007 10:21 AM
PREVIEW CONTENT This excerpt contains early content from an upcoming Microsoft Press title and is subject to change prior to release.

Lesson 2 Configuring Exchange Server Roles 89
You can also enable Outlook Anywhere from the Exchange Management Shell by issu-ing the following command:
Enable-OutlookAnywhere -Server 'GLASGOW' -ExternalHostname 'externalhostname. tailspintoys.com' -ExternalAuthenticationMethod 'Basic' -SSLOffloading $false
MORE INFO Enabling Outlook Anywhere
To find out more about Outlook Anywhere, access the following link: http://technet.microsoft.com/en-us/library/bb123741.aspx.
Configuring Client and Mobile Device ConnectivityExchange ActiveSync is automatically enabled when the Client Access server role isinstalled on a computer running Exchange Server 2007. ActiveSync allows for the syn-chronization of data between mobile devices and Exchange Server 2007. Supporteddevices include Pocket PC 2002, Pocket PC 2003, and Windows Mobile 5.0. Win-dows Mobile 5.0 devices that have the Messaging Security and Feature Pack installedalso support Direct Push, a technology that keeps a mobile device continuously syn-chronized with Exchange Server 2007.
The primary configuration that you have to make is on the clients themselves. Lesson2 of Chapter 7 provides more information on configuring mobile device policies.
MORE INFO Managing ActiveSync
For more information on managing ActiveSync, consult the following link: http://tech-net.microsoft.com/en-us/library/bb124396.aspx.
Configuring OWAOWA can be used for more than just reading and responding to e-mail. Depending onhow the Client Access role is configured, OWA clients can use their browser to accessstandard file shares or SharePoint sites. Access to Windows file shares and WindowsSharePoint services can be enabled on the basis of whether a remote user is accessingOWA using a public or shared computer or is using a private computer. This way, youcan disable access to Windows file shares or SharePoint when a user is connecting toOWA from an Internet café but allow access to Windows file shares and SharePointwhen connecting to OWA from a company mobile computer using a café’s WiFi con-nection. This demarcation relies on the user selecting the correct option when loggingon to OWA, as shown in Figure 2-22.
Mclean_Ch02.fm Page 89 Saturday, July 21, 2007 10:21 AM
PREVIEW CONTENT This excerpt contains early content from an upcoming Microsoft Press title and is subject to change prior to release.

90 Chapter 2 Installing Exchange Server and Configuring Server Roles
Figure 2-22 When logging on to OWA, the users specify whether they are using a public or a private computer
This access is granted by setting options within the OWA Web site’s Properties dialogbox. The Public Computer File Access tab allows you to configure the access grantedto users accessing OWA from computers designated as public or shared. The PrivateComputer File Access tab allows you to configure the access granted to users access-ing OWA from computers designated as private.
Once you have determined what type of access you want to grant users who are con-necting remotely to OWA from public, shared, and private computers, you can config-ure the specific servers on your local network that they can access. You perform this taskon the Remote File Servers tab of the OWA Web site properties, as shown in Figure 2-23.
The Remote File Servers tab has four items that can be configured:
■ Block list. A list of servers that OWA clients cannot access. Items on this listoverride items on the allow list.
■ Allow list. A list of servers that OWA clients can access.
■ Unknown servers. How servers not on either the block list or the allow list areto be treated. The default option is Block. This setting can also be configured toAllow.
Mclean_Ch02.fm Page 90 Saturday, July 21, 2007 10:21 AM
PREVIEW CONTENT This excerpt contains early content from an upcoming Microsoft Press title and is subject to change prior to release.

Lesson 2 Configuring Exchange Server Roles 91
Figure 2-23 Remote File Servers tab
■ Domain suffixes that should be treated as internal. OWA clients can accessonly servers that are recognized as internal. If a server that an OWA clientattempts to access has a DNS suffix that is not on the list, it will be consideredexternal and will not be accessible to the client.
By their nature, OWA clients are usually using computers that are not managed byyour organization. You can’t always be 100 percent certain that the person logging inusing the publicly available computer in an airport in Volgograd, Russia, is actuallyyour company’s sales rep who is currently traveling in the area. It is not unheard of fornefarious third parties to place keylogging devices on public computers at airports orInternet cafés in an attempt to capture user names and passwords from the unwary.Although considering these threats might lead you to block off remote access to OWAentirely, some options that you can use to limit the damage are available. One config-urable option allows you to block the ability to make password changes using OWA.In the event that a password is compromised, at least the person who has stolen thepassword will be unable to entirely hijack the compromised account by changing thepassword to something unknown to the user. To configure the option to block pass-word changes for OWA users, edit the properties of the OWA Web site in Exchange
Mclean_Ch02.fm Page 91 Saturday, July 21, 2007 10:21 AM
PREVIEW CONTENT This excerpt contains early content from an upcoming Microsoft Press title and is subject to change prior to release.

92 Chapter 2 Installing Exchange Server and Configuring Server Roles
Management Console, click the Segmentation tab, and then disable the Change Pass-word feature, as shown in Figure 2-24.
Figure 2-24 Blocking password change
MORE INFO Managing OWA
For more information on managing OWA, navigate to the following link: http://technet. microsoft.com/en-us/library/aa996373.aspx.
POP3 and IMAP4POP3 and IMAP4 are disabled by default on a computer configured with the ClientAccess role. As almost all e-mail clients use one of these protocols to retrieve e-mail,it is necessary to activate them prior to putting the Client Access role into a produc-tion environment. You can activate these services using two methods: using the Ser-vices console or using the NET START command from a command prompt. Youshould use the Services console, as this will also allow you to change the service star-tup type from manual to automatic. If you don’t do this, you may reboot the serverafter applying updates and forget that neither the POP3 nor the IMAP4 service starts
Mclean_Ch02.fm Page 92 Saturday, July 21, 2007 10:21 AM
PREVIEW CONTENT This excerpt contains early content from an upcoming Microsoft Press title and is subject to change prior to release.

Lesson 2 Configuring Exchange Server Roles 93
automatically. To enable each service, right-click on it within the Services consoleand select Properties. Change the startup type to automatic and then click Start, asshown in Figure 2-25.
Figure 2-25 Setting the startup type of the IMAP4 service
Quick Check1. How does OWA determine whether a remote client is using a public or
shared computer or a private computer?
2. Which SharePoint sites does a client connecting to OWA have access to bydefault?
Quick Check Answer
1. The remote client is queried when connected to OWA.
2. None. Sites must be added explicitly or by domain suffix.
Configuring the Mailbox Server RoleThe immediate postinstallation tasks that you need to perform on a computer hostingthe Mailbox server role are creating, modifying, and deleting databases and storage
Mclean_Ch02.fm Page 93 Saturday, July 21, 2007 10:21 AM
PREVIEW CONTENT This excerpt contains early content from an upcoming Microsoft Press title and is subject to change prior to release.

94 Chapter 2 Installing Exchange Server and Configuring Server Roles
groups. Prior to performing those acts, you need to understand the differencesbetween the two editions of Exchange Server 2007:
■ The standard edition of Exchange Server 2007 supports five storage groups andfive mailbox databases per server. The standard edition supports a maximum offive mailbox databases in a single storage group, one of which is reserved forrecovery.
■ The enterprise edition of Exchange Server 2007 supports up to 50 storagegroups and a maximum of 50 databases per server, with a maximum of five mail-box databases per storage group.
Microsoft recommends that you allocate only one mailbox database per storagegroup, although it is possible to locate five mailbox databases in a single storagegroup. All databases within the same storage group share the same backup schedule.Having only a single database within a storage group provides greater flexibility in set-ting backup schedules on a per mailbox database basis. Storage groups are managedby separate server processes, and separating mailbox databases into their own sepa-rate storage group reduces transaction log complexity. Chapter 12, “ConfiguringDisaster Recovery,” provides more information on backups and storage groups.
Storage groups can be created using the GUI by clicking New Storage Group in theActions pane. You can also manage storage groups from Exchange Management Shell.The following Exchange Management Console command will create a storage groupnamed Second Storage Group in the location C:\Program Files\Microsoft\ExchangeServer\Mailbox\Second Storage Group:
new-StorageGroup –Server ‘GLASGOW’ –Name ‘Second Storage Group’ –LogFolderPath ‘C:\Program Files\Microsoft\Exchange Server\Mailbox\Second Storage Group’ –SystemFolderPath ‘C:\Program Files\Microsoft\Exchange Server\Mailbox\Second Storage Group’
To create a new mailbox database, select the storage group that will host the databaseand then click New Mailbox Database. You can achieve the same thing using theExchange Management Shell by issuing the following command:
new-mailboxdatabase -StorageGroup 'CN=Second Storage Group,CN=InformationStore,CN=GLASGOW,CN=Servers,CN=Exchange Administrative Group (FYDIBOHF23SPDLT),CN=Administrative Groups,CN=Tailspintoys,CN=Microsoft Exchange,CN=Services,CN=Configuration,DC=tailspintoys,DC=internal' -Name 'Second Mailbox Database' -EdbFilePath 'C:\Program Files\Microsoft\Exchange Server\Mailbox\Second Storage Group\Second Mailbox Database.edb'
This command creates a mailbox database called Second Mailbox Database in theSecond Storage Group of a server named Glasgow. You will create this database andstorage group in the practices at the end of this lesson.
Mclean_Ch02.fm Page 94 Saturday, July 21, 2007 10:21 AM
PREVIEW CONTENT This excerpt contains early content from an upcoming Microsoft Press title and is subject to change prior to release.

Lesson 2 Configuring Exchange Server Roles 95
You can view the location mailbox database by viewing the Mailbox Database proper-ties, as shown in Figure 2-26. From this dialog box, it is possible to view the last timethe mailbox database was backed up and the location of the database mailbox copy iflocal continuous replication is enabled and to configure the mailbox maintenanceschedule.
Figure 2-26 Mailbox database properties
During the period specified in the maintenance schedule, the following tasks arecompleted:
■ Dumpster cleanup involves the removal of deleted messages that have passedthe deleted item retention date.
■ Public folder expiration involves messages posted to public folders expiring aftera certain amount of time and being removed by the maintenance process.
■ Deleted mailboxes are cleaned up.
■ An online defragmentation of the mailbox is performed.
Managing Mailbox Size LimitsAlthough on a per gigabyte basis hard disk drive storage costs are always dropping, atsome point you will most likely want to limit the amount of information that users can
Mclean_Ch02.fm Page 95 Saturday, July 21, 2007 10:21 AM
PREVIEW CONTENT This excerpt contains early content from an upcoming Microsoft Press title and is subject to change prior to release.

96 Chapter 2 Installing Exchange Server and Configuring Server Roles
store in a mailbox. Although some users will be diligent about removing unnecessarymaterial, the mailboxes of other users will continue to grow unless they reach somepreconfigured limit. Some users never delete an attachment, even if it is completelyoutdated and hasn’t been relevant for several years. If you don’t impose mailbox lim-its, it is possible that a small number of mailboxes might account for the majority ofthe disk space on your mailbox servers.
BEST PRACTICES The 80/20 rule
One common rule of thumb in many fields, including systems administration, is that 80 percent of resources will be consumed by 20 percent of the users. This applies to mailbox usage. You’ll find that without mailbox size limits, 20 percent (or less) of your users will end up taking 80 percent (or more) of the available disk space.
Besides the issue of a small number of users using a disproportionate amount of diskspace, another practical reason for limiting the size of mailboxes involves backups.Data can be backed up and restored at only a finite rate. The larger the mailboxes, thelonger the backup process is and the greater the amount of backup media that will berequired. Larger mailboxes have a similar impact on restore operations. It takes longerto restore data from backups containing larger mailboxes than it does to restore datafrom backups containing smaller mailboxes.
You can manage mailbox size limits by editing the properties of the mailbox databaseand clicking the Limits tab. From this tab, it is possible to configure the followingproperties:
■ Issue Warning At (KB). The threshold in kilobytes when a warning is automat-ically issued to the user about the amount of data stored in a mailbox.
■ Prohibit Send At (KB). The threshold in kilobytes when the user is no longerable to send e-mail.
■ Prohibit Send And Receive At (KB). The threshold in kilobytes when the useris no longer able to send and receive e-mail.
■ Warning Message Interval. The schedule by which warning messages will besent to users who have mailboxes larger than the specified thresholds.
■ Keep Deleted Items For (Days). How long deleted items are kept before beingremoved from the mailbox database.
■ Keep Deleted Mailboxes For (Days). How long a deleted mailbox is kept in thedatabase before being permanently deleted.
Mclean_Ch02.fm Page 96 Saturday, July 21, 2007 10:21 AM
PREVIEW CONTENT This excerpt contains early content from an upcoming Microsoft Press title and is subject to change prior to release.

Lesson 2 Configuring Exchange Server Roles 97
■ Do Not Permanently Delete Items Until The Database Has Been Backed Up.This option overrides the above settings, keeping deleted items past their expi-ration date until the database has been backed up.
Mailbox limits are configured in a practice at the end of this lesson.
Removing Exchange Server 2007Three separate Exchange Server 2007 removal scenarios exist, each of which must betreated differently. These are the removal of one or more roles from an ExchangeServer while keeping the server operational, removing Exchange Server 2007 in itsentirety from a computer, and removing the Exchange Server 2007 organization froman Active Directory forest. Also covered in this section are the steps that must be takento remove a final Exchange Server 2003 or Exchange 2000 from a mixed Exchangeenvironment.
Removing RolesTo remove roles that have been previously installed on a computer running ExchangeServer 2007, your user account must have been added to the Exchange organizationadministrator role. To remove the roles, open Add Or Remove Programs, clickMicrosoft Exchange Server 2007, and then click Change. This will bring up theExchange Server 2007 Setup Wizard in Exchange Maintenance Mode, as shown inFigure 2-27. On the next page of the wizard, you select the roles that you wish to unin-stall from the server. Readiness checks are performed warning you of potential prob-lems, and then the role removal is completed.
When removing the Mailbox server role, ensure that existing mailboxes have beeneither moved, disabled, or deleted. You should also ensure that all public folders andpublic folder replicas have been migrated to another Mailbox server. Similarly, ifremoving a Client Access server, ensure that clients that are directly connecting toOWA are redirected to an appropriate alternative.
Roles can be removed from an Exchange Server using setup from the command line.The command setup /mode:uninstall /roles:<roles to remove> will remove the specifiedroles from the computer running Exchange Server. If, in the future, you decide to rein-stall the Mailbox server role on a computer that has had that role removed, it will benecessary to manually remove the existing database and log files from the server.
Mclean_Ch02.fm Page 97 Saturday, July 21, 2007 10:21 AM
PREVIEW CONTENT This excerpt contains early content from an upcoming Microsoft Press title and is subject to change prior to release.

98 Chapter 2 Installing Exchange Server and Configuring Server Roles
Figure 2-27 Removing roles using the GUI
Removing Exchange from a ServerIn some cases you may want to remove not only an Exchange role but the entire pro-gram itself. It is important to perform a proper uninstall rather than just wiping theserver and reinstalling the operating system, as a proper installation updates the restof the Exchange organization about the status of the decommissioned server. Remov-ing Exchange Server 2007 entirely includes removing all server roles, installation files,the Exchange Server object, and all the associated child objects from the Active Direc-tory forest. For this reason, you can perform a complete removal of Exchange Server2007 only by using an account that has been delegated the Exchange organizationadministrator role.
Prior to attempting to remove Exchange Server 2007 entirely, ensure that any mail-boxes hosted on the computer have been deleted, disabled, or moved. Also verify thatpublic folders and public folder replicas have been migrated to another server.Removal of Exchange Server 2007 is accomplished using the Add/Remove Programsitem in Control Panel. It can also be achieved using the command setup /mode:unin-stall. As with the removal and reinstallation of the Mailbox server role mentioned ear-lier, if you reinstall Exchange with the Mailbox server role on a computer that hashosted this role in the past, it is necessary to remove the existing database and log filesfrom the server.
Mclean_Ch02.fm Page 98 Saturday, July 21, 2007 10:21 AM
PREVIEW CONTENT This excerpt contains early content from an upcoming Microsoft Press title and is subject to change prior to release.

Lesson 2 Configuring Exchange Server Roles 99
Removing an Exchange 2007 OrganizationIn the event that you want to completely remove an Exchange Server 2007 organiza-tion, you must first remove Exchange from all servers in the organization. OnceExchange is removed from all servers, the following data and settings will remain:
■ Microsoft Exchange System Objects container in Active Directory
■ Exchange Configuration container in Active Directory
■ Active Directory schema modification
■ User data, including database files, log files, public folder, and public folderreplica data
Although it is relatively simple to remove the Active Directory containers and objectsas well as the leftover user data, rolling back the schema modifications made by ActiveDirectory setup is technically possible but very difficult to implement in a productionenvironment. Unless you are well prepared, returning a large environment to the pre-cise state it was in prior to the deployment of Exchange Server 2007 is next to impos-sible. This is another reason why you need to get deployment right from the start.
MORE INFO Schema rollback
To learn how Microsoft manages its Active Directory schema, including some techniques used for rolling back schema changes, consult the following link: http://www.microsoft.com/technet/itshowcase/content/adschemamgmt.mspx.
Removing the Last Exchange 2000 or Exchange Server 2003 Server in a Coexistence EnvironmentMany organizations that implement Exchange Server 2007 are likely to have an exist-ing Exchange Server infrastructure. As you roll out Exchange Server 2007 across yourorganization, you are likely to want to decommission the previous versions ofExchange. Before decommissioning legacy Exchange server computers, you need toensure that people in your organization aren’t using services that only those editionsof Exchange provide and that all relevant user data has been migrated to ExchangeServer 2007.
Just as Exchange Server 2007 includes new features not available in previous editions,previous editions of Exchange Server have features that do not exist in ExchangeServer 2007. If your organization still uses these services, you will need to migrate
Mclean_Ch02.fm Page 99 Saturday, July 21, 2007 10:21 AM
PREVIEW CONTENT This excerpt contains early content from an upcoming Microsoft Press title and is subject to change prior to release.

100 Chapter 2 Installing Exchange Server and Configuring Server Roles
users to alternatives prior to removing the legacy Exchange servers that support them.The features that you have to be careful about are the following:
■ Exchange Server 2003. Novell GroupWise connector and NNTP Protocol
■ Exchange 2000 Server. Mobile Information Server, Instant Messaging Service,Exchange Chat Service, Exchange 2000 Conferencing Server, Key ManagementService, cc: Mail connector, and MS Mail connector
You don’t want to remove a prior version of Exchange server only to discover that itprovides a critical service to some department in your organization of which you wereunaware. Other steps that you need to take prior to decommissioning a legacyExchange Server include the following:
■ Move all mailboxes to a computer running Exchange Server 2007.
■ Move all public folder replicas to a computer running Exchange Server 2007.
■ Move all offline address book generation processes to a computer runningExchange Server 2007.
■ Configure send connectors on a computer hosting the Exchange Server 2007Hub or Edge Transport roles (depending on your Exchange architecture) toreplace all existing outbound SMTP connectors.
■ Alter DNS MX records to ensure that they resolve to computers running ExchangeServer 2007 with the Hub or Edge Transport roles installed. Ensure that no DNSMX records point to the computer hosting the legacy edition of Exchange.
■ Ensure that inbound protocol services, including ActiveSync, OWA, POP3, andIMAP4, point to a computer running Exchange 2007 with the Client Access roleinstalled.
■ Remove routing group connectors connecting legacy Exchange routing groupsto the Exchange 2007 routing group.
MORE INFO Removing and modifying Exchange Server 2007
For more information on how to remove Microsoft Exchange Server 2007 server roles from a com-puter on which they are already installed, consult the following link: http://technet.microsoft.com/en-us/library/aa998193.aspx.
Mclean_Ch02.fm Page 100 Saturday, July 21, 2007 10:21 AM
PREVIEW CONTENT This excerpt contains early content from an upcoming Microsoft Press title and is subject to change prior to release.

Lesson 2 Configuring Exchange Server Roles 101
TIP Exam Tip
When sitting the exam, take a moment to reread the question before you look at the answers. Many people taking multiple-choice exams glance at the answers before they have fully comprehended the question. When they reread the question, they have an incorrect answer in their mind, bending their interpretation of the question text. A helpful technique is to write the answer down on the scratch pad before glancing at the answers on the screen. That way, you won’t be tempted to try to fit a wrong answer to the question setup.
Practice: Exchange Server Role ConfigurationIn these practices, you will perform several exercises that will familiarize you with theconfiguration of Exchange Server 2007 roles. Each of the practices in this sectionrelates to the most common role configuration tasks that you will have to perform asan Exchange Server 2007 administrator. Before attempting these practices, ensurethat you have performed all the practices in Lesson 1 of this chapter.
� Practice 1 Configuring the Hub Transport Role
In this practice, we will examine Hub Transport role configuration on both the serverand the organizational level. We will be examining organizational policies in moredetail in later chapters, and the coverage of organizational configuration is intendedonly to familiarize you with the configuration options that are available at both theserver and the organizational level. To complete this practice, perform the followingsteps:
1. Log on to the Exchange Server 2007 computer using the Kim_Akers useraccount.
2. Open Exchange Management Console. Dismiss the unlicensed server warningand expand the Server Configuration node.
3. Click Hub Transport, then right-click the GLASGOW entry and select Prop-erties. This will bring up the GLASGOW Properties dialog box, as shown inFigure 2-28.
4. Verify that the domain controller and global catalog servers being used byExchange are set to GLASGOW.tailspintoys.internal. Click the External DNSLookups tab.
5. On the External DNS Lookups tab, select the Use These DNS Servers option. Inthe field, enter the IP address 207.68.160.190 and then click Add.
Mclean_Ch02.fm Page 101 Saturday, July 21, 2007 10:21 AM
PREVIEW CONTENT This excerpt contains early content from an upcoming Microsoft Press title and is subject to change prior to release.

102 Chapter 2 Installing Exchange Server and Configuring Server Roles
Figure 2-28 Hub Transport server general properties
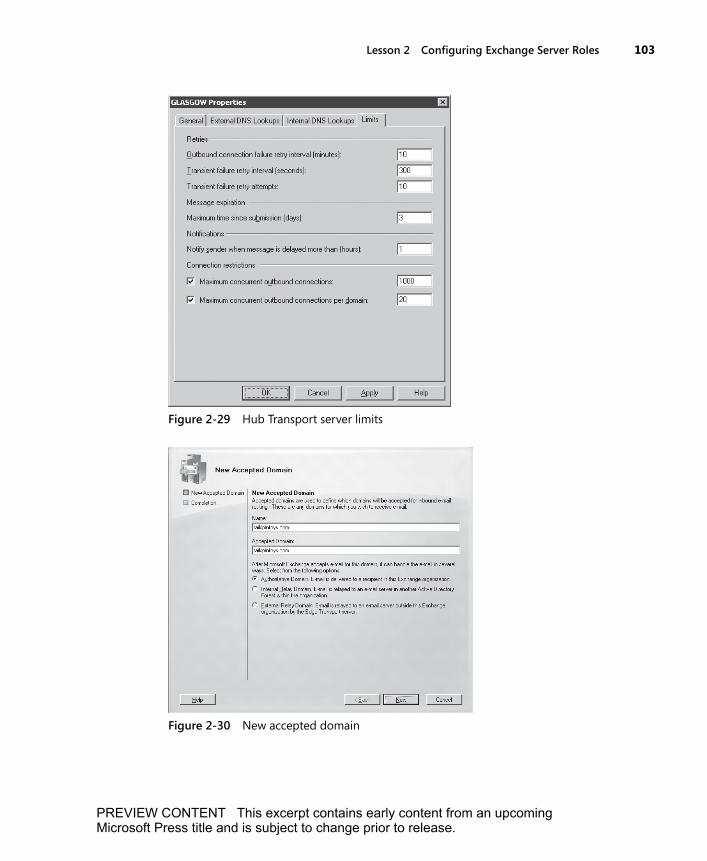
6. Click the Limits tab. Change the settings so that the value for transient failureretry attempts is set to 10, that the maximum time since submission for messageexpiration is three days, and that senders will be notified if their message isdelayed more than one hour, as shown in Figure 2-29. Click OK to close theGlasgow Properties dialog box.
7. Under Microsoft Exchange, expand the Organization Configuration node andthen click the Hub Transport node.
8. Click the Accepted Domains tab and then click New Accepted Domains underActions. This will start the New Accepted Domain Wizard.
9. On the New Accepted Domain page, enter Tailspintoys.com in the Name boxand tailspintoys.com in Accepted Domain. Verify that the Authoritative Domainoption is selected, as shown in Figure 2-30. Click New.
10. Flick Finish to close the wizard. The Exchange Server 2007 organization thatyou deployed in the first lesson of this chapter is now authoritative for both thetailspintoys.com and the tailspintoys.internal domain.
Mclean_Ch02.fm Page 102 Saturday, July 21, 2007 10:21 AM
PREVIEW CONTENT This excerpt contains early content from an upcoming Microsoft Press title and is subject to change prior to release.
Lesson 2 Configuring Exchange Server Roles 103
Figure 2-29 Hub Transport server limits
Figure 2-30 New accepted domain
Mclean_Ch02.fm Page 103 Saturday, July 21, 2007 10:21 AM
PREVIEW CONTENT This excerpt contains early content from an upcoming Microsoft Press title and is subject to change prior to release.
104 Chapter 2 Installing Exchange Server and Configuring Server Roles
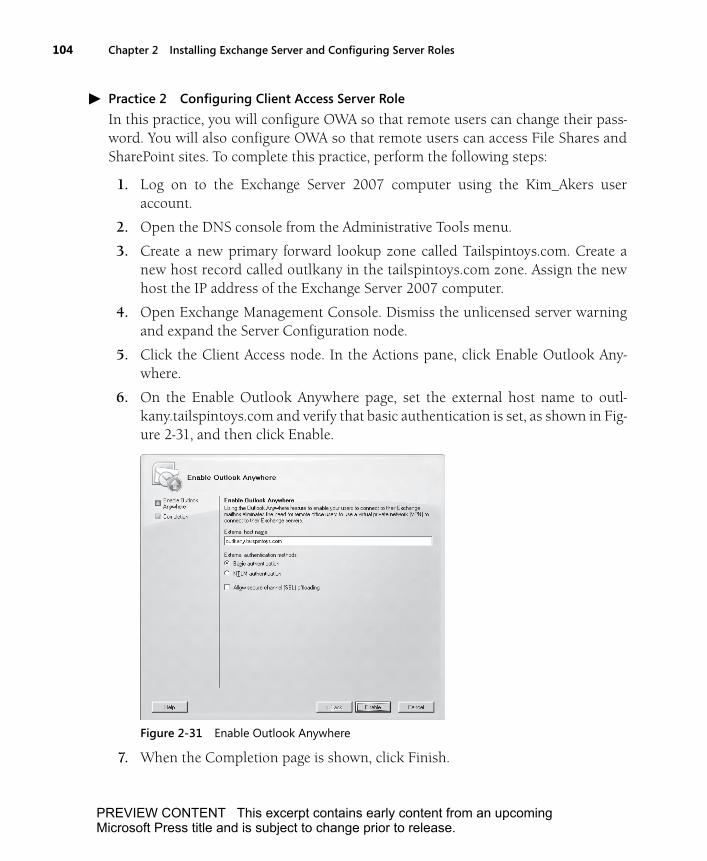
� Practice 2 Configuring Client Access Server Role
In this practice, you will configure OWA so that remote users can change their pass-word. You will also configure OWA so that remote users can access File Shares andSharePoint sites. To complete this practice, perform the following steps:
1. Log on to the Exchange Server 2007 computer using the Kim_Akers useraccount.
2. Open the DNS console from the Administrative Tools menu.
3. Create a new primary forward lookup zone called Tailspintoys.com. Create anew host record called outlkany in the tailspintoys.com zone. Assign the newhost the IP address of the Exchange Server 2007 computer.
4. Open Exchange Management Console. Dismiss the unlicensed server warningand expand the Server Configuration node.
5. Click the Client Access node. In the Actions pane, click Enable Outlook Any-where.
6. On the Enable Outlook Anywhere page, set the external host name to outl-kany.tailspintoys.com and verify that basic authentication is set, as shown in Fig-ure 2-31, and then click Enable.
Figure 2-31 Enable Outlook Anywhere
7. When the Completion page is shown, click Finish.
Mclean_Ch02.fm Page 104 Saturday, July 21, 2007 10:21 AM
PREVIEW CONTENT This excerpt contains early content from an upcoming Microsoft Press title and is subject to change prior to release.

Lesson 2 Configuring Exchange Server Roles 105
8. Under the Outlook Web Access tab, right-click owa (Default Web Site) and thenclick Properties.
9. Click the Segmentation tab, as shown in Figure 2-32. Verify that the ChangePassword item is set to be enabled.
Figure 2-32 Allowing OWA users to change passwords
10. Click the Public Computer File Access tab and remove the checks next to theWindows File Shares and Windows SharePoint Services items, as shown in Fig-ure 2-33. Click Apply.
11. Click the Remote File Servers tab and then click Allow.
12. In the Allow list, enter the hosts sharepoint.tailspintoys.internal and fileserver.tailspintoys.internal and click OK twice to close the dialog box.
13. From the Administrative Tools Program menu, open the Services console.
14. Right-click the Microsoft Exchange IMAP4 service and then click Properties.
15. On the General tab, change Startup Type to Automatic and then click Start. ClickOK to close the Properties dialog box.
16. Repeat this process for the Microsoft Exchange POP3 service.
Mclean_Ch02.fm Page 105 Saturday, July 21, 2007 10:21 AM
PREVIEW CONTENT This excerpt contains early content from an upcoming Microsoft Press title and is subject to change prior to release.

106 Chapter 2 Installing Exchange Server and Configuring Server Roles
Figure 2-33 Restricting access to shared files on public computers
� Practice 3 Configuring the Mailbox Server Role
In this practice, you will create a storage group. Once you have created the storagegroup, you will create a new mailbox database within the group. You will then alsoconfigure the retention settings of the new mailbox database. To complete this prac-tice, perform the following steps:
1. Log on to the Exchange Server 2007 computer using the Kim_Akers user account.
2. Open the Exchange Management Console. Dismiss the unlicensed server warn-ing and expand the Server Configuration node.
3. Click the Mailbox item.
4. In the Actions pane, click New Storage Group. This will bring up the New Stor-age Group dialog box.
5. Enter the name Second Storage Group in the Storage group name text box andaccept the default values for the Log Files And System Files path, as shown inFigure 2-34. Click New.
6. Click Finish to close the New Storage Group Wizard.
7. Verify the creation of the new storage group by examining the Database Manage-ment pane when the Mailbox node is selected under Server Configuration. ClickSecond Storage Group.
Mclean_Ch02.fm Page 106 Saturday, July 21, 2007 10:21 AM
PREVIEW CONTENT This excerpt contains early content from an upcoming Microsoft Press title and is subject to change prior to release.

Lesson 2 Configuring Exchange Server Roles 107
Figure 2-34 New Storage Group dialog box
8. With the Second Storage Group highlighted, in the Actions pane, click NewMailbox Database. This will bring up the New Mailbox Database page.
9. Enter Second Mailbox Database in the Mailbox database name text box, asshown in Figure 2-35, and then click New.
Figure 2-35 New Mailbox Database dialog box
10. The exchange mailbox will be created and then mounted, click Finish.
Mclean_Ch02.fm Page 107 Saturday, July 21, 2007 10:21 AM
PREVIEW CONTENT This excerpt contains early content from an upcoming Microsoft Press title and is subject to change prior to release.

108 Chapter 2 Installing Exchange Server and Configuring Server Roles
11. Right-click on Second Mailbox Database under the Second Storage group andthen click Properties.
12. Click the Limits tab, as shown in Figure 2-36.
Figure 2-36 Configuring mailbox database limits
13. Change the Keep Deleted Items value to 21 days and the Keep Deleted Mail-boxes value to 50 days.
14. Check the Do Not Permanently Delete Items Until The Database Has BeenBacked Up option and then click OK.
Lesson Summary■ By default, Exchange Server 2007’s antispam features are enabled on Edge
Transport servers but not enabled on Hub Transport servers. You can enable thisfeature on Hub Transport servers by executing an Exchange Management Shellcommand.
■ Edge Transport servers need to have EdgeSync configured to replicate data fromActive Directory to ADAM.
■ Outlook Anywhere replaces RPC over HTTP, allowing remote clients to accessExchange Server 2007 without connecting through a VPN.
Mclean_Ch02.fm Page 108 Saturday, July 21, 2007 10:21 AM
PREVIEW CONTENT This excerpt contains early content from an upcoming Microsoft Press title and is subject to change prior to release.

Lesson 2 Configuring Exchange Server Roles 109
■ By default, mobile devices can access servers configured with the Client Accessserver role.
■ OWA can be configured to differentiate access to File Shares and SharePoint serv-ers based on whether a client is connecting using a public or shared computer ora private computer. You can allow or block password changes by accessingSharePoint properties.
■ The standard edition of Exchange Server 2007 can host five mailbox databasesand five storage groups. The enterprise edition of Exchange Server 2007 canhost up to 50 mailbox databases and 50 storage groups.
Lesson ReviewYou can use the following questions to test your knowledge of the information in Les-son 2. The questions are also available on the companion CD if you prefer to reviewthem in electronic form.
NOTE Answers
Answers to these questions and explanations of why each answer choice is correct or incorrect are located in the “Answers” section at the end of the book.
1. You have recently deployed Exchange Server 2007 for Coho Vineyard, a largelocal wine manufacturer. The deployment involves a single computer runningExchange Server 2007 with the Hub Transport, Mailbox, and Client Access rolesdeployed. You receive a complaint from the manager of the winery that severallong-term clients have called to complain that their e-mails have bounced back.One clue to the problem is that the messages were addressed to addresses usingthe cohowinery.com domain, an addressed used by the winery for many years.Messages addressed to people in the cohovineyard.com domain always arrivesuccessfully at their destination. Which of the following configuration changescould you make to Exchange Server 2007 to ensure that e-mails from these long-term clients do not bounce?
A. Configure cohowinery.com as an authoritative domain in accepteddomains
B. Configure cohovineyard.com as an authoritative domain in accepteddomains
C. Configure cohowinery.com as an internal relay domain in accepteddomains
Mclean_Ch02.fm Page 109 Saturday, July 21, 2007 10:21 AM
PREVIEW CONTENT This excerpt contains early content from an upcoming Microsoft Press title and is subject to change prior to release.
110 Chapter 2 Installing Exchange Server and Configuring Server Roles
D. Configure cohowinery.com as a remote domain
E. Configure cohovineyard.com as a remote domain
2. Which of the following Exchange Server 2007 roles would you configure toensure that users received a warning when their mailbox was becoming toolarge?
A. Client Access
B. Mailbox
C. Hub Transport
D. Edge Transport
3. You want to allow OWA clients in your organization the ability to access theSharePoint site hosted on server sharepoint.tailspintoys.internal. You do notwant them to access the SharePoint site hosted on server secureshare.tailspin-toys.internal. Which of the following steps do you need to take to allow this tooccur?
A. Add the site sharepoint.tailspintoys.internal to the block list on the RemoteFile Servers tab of the OWA Web site properties
B. Add the site sharepoint.tailspintoys.internal to the allow list on the RemoteFile Servers tab of the OWA Web site properties
C. Add the site secureshare.tailspintoys.internal to the block list on theRemote File Servers tab of the OWA Web site properties
D. Add the domain suffix tailspintoys.internal to the list of domain suffixesthat should be treated as internal
E. Add the site secure.tailspintoys.internal to the allow list on the Remote FileServers tab of the OWA Web site properties
4. You are planning the deployment of Exchange Server 2007 enterprise edition.This server will host the Mailbox server role. The server will host 16 mailboxdatabases. What is the minimum number of storage groups that will be neces-sary to host these mailbox databases?
A. One
B. Two
C. Three
D. Four
E. Five
Mclean_Ch02.fm Page 110 Saturday, July 21, 2007 10:21 AM
PREVIEW CONTENT This excerpt contains early content from an upcoming Microsoft Press title and is subject to change prior to release.

Lesson 2 Configuring Exchange Server Roles 111
5. Your Exchange Server 2007 organization has a single site and a single server. Theserver’s name is Canberra. This server hosts the Hub Transport, Mailbox, andClient Access server roles. You want to enable Exchange’s antispam features onthis server but cannot locate the Enable Anti-spam item in the Actions panewhen the Hub Transport server is selected. Which of the following must you doprior to enabling the antispam features of Exchange Server 2007?
A. Install the Edge Transport role
B. Run the command Set-TransportServer –Identity ‘Canberra’ –AntispamAgentsEnabled $true from the Exchange Management Shell
C. Install Forefront Security for Exchange Server
D. Reinstall the Hub Transport role
6. Several months ago, you removed the Mailbox server role from a computer run-ning Exchange Server 2007. The computer retained the Client Access server role.Conditions at the location where the server is deployed have changed, and youneed to reinstall the Mailbox server role. Which of the following steps must youtake before reinstalling this role?
A. Remove the Client Access server role
B. Remove the Mailbox server role
C. Remove the computer hosting Exchange from the domain and then rejointhe computer to the domain
D. Manually remove the existing Mailbox database files and log files
E. Reinstall the Client Access server role
Mclean_Ch02.fm Page 111 Saturday, July 21, 2007 10:21 AM
PREVIEW CONTENT This excerpt contains early content from an upcoming Microsoft Press title and is subject to change prior to release.

112 Chapter 2 Review
Chapter ReviewTo further practice and reinforce the skills you learned in this chapter, you can per-form the following tasks:
■ Review the chapter summary.
■ Review the list of key terms introduced in this chapter.
■ Complete the case scenarios. These scenarios set up real-word situations involv-ing the topics of this chapter and ask you to create a solution.
■ Complete the suggested practices.
■ Take a practice test.
Chapter Summary■ The roles that can be installed on an Exchange Server 2007 computer are the
Edge Transport, Hub Transport, Mailbox, active Clustered Mailbox, passiveClustered Mailbox, and Client Access. You can install Exchange using a wizardor from the command line. The wizard provides more helpful hints if a prereq-uisite is missing.
■ You can install the active Clustered Mailbox and passive Clustered Mailbox rolesonly on a server that is already part of a cluster. NLB is best suited for the HubTransport, Edge Transport, and Client Access roles.
■ Installation of the Client Access role generates a self-signed SSL certificate. As cli-ents require special configuration to trust this certificate, installing an SSL certif-icate from a trusted CA is often more convenient
■ OWA can be configured to allow access to internal SharePoint servers and fileshares. You can configure the security options to deny OWA users the ability tochange their passwords.
■ If Exchange Server 2007 is removed entirely from your organization, you have tomanually remove the objects that it has created in Active Directory. Rolling backthe schema to the condition it was in prior to the deployment of Exchange is pos-sible, though it is a complex operation.
Key TermsDo you know what these key terms mean? You can check your answers by looking upthe terms in the glossary at the end of the book.
Mclean_Ch02.fm Page 112 Saturday, July 21, 2007 10:21 AM
PREVIEW CONTENT This excerpt contains early content from an upcoming Microsoft Press title and is subject to change prior to release.

Chapter 2 Review 113
■ Perimeter network
■ Spam
■ SSL (Secure Sockets Layer)
■ Virus
Case ScenariosIn the following case scenarios, you will apply what you’ve learned about installingExchange Server and configuring server roles. You can find answers to these ques-tions in the “Answers” section at the end of this book.
Case Scenario 1: Wingtip Toys Exchange Server 2007 DeploymentWingtip Toys, formerly known as Tailspin Toys, is considering a new Exchange Server2007 deployment. Wingtip Toys has three separate sites. Two sites are connected tothe third site by a dedicated Integrated Services Digital Network (ISDN) line. Incom-ing and outgoing traffic to the Internet passes through a Windows Server 2003 com-puter with ISA Server 2006 installed:
1. 1. What is the minimum number of Edge Transport servers you need to deployat Wingtip Toys?
2. How many Hub Transport servers should you deploy at Wingtip Toys?
3. How can you ensure that mail sent to tailspintoys.com addresses will not berejected by Exchange Server?
Case Scenario 2: Contoso Postdeployment Role ConfigurationExchange Server 2007 was deployed several months ago at Contoso. Since then, therehave been some teething problems that they have asked you to come in to resolve. Theproblems are as follows:
1. A member of the sales team was recently traveling through the South Pacific,accessing e-mail through OWA in Internet cafés. One of the computers wasinfected with a Trojan that logged keyboard data and forwarded it to hackers inEastern Europe. The account password was changed, and the member of thesales team was locked out. How can you ensure that a user whose account iscompromised can’t be locked out from that account by a changed password?
Mclean_Ch02.fm Page 113 Saturday, July 21, 2007 10:21 AM
PREVIEW CONTENT This excerpt contains early content from an upcoming Microsoft Press title and is subject to change prior to release.

114 Chapter 2 Review
2. Currently, OWA users are able to access the three SharePoint sites that arelocated on the Contoso internal network. You need to limit this to a single Share-Point site. How could you achieve this?
Suggested PracticesTo help you successfully master the exam objectives presented in this chapter, com-plete the following tasks.
Install ExchangeDo all the practices in this section.
■ Practice 1: Edge Transport Server Install the Edge Transport server role on astand-alone computer that is not a member of your domain running WindowsServer 2003.
■ Correctly configure a subscription relationship with a Hub Transport server.
■ Install the Forefront Security for Exchange Server 2007 evaluation on the EdgeTransport server role.
■ Practice 2: Enable Antispam Enable the antispam features of Exchange usingExchange Management Shell.
■ Enable automatic updating of Exchange’s antispam features.
Configure Exchange Server RolesDo all the practices in this section.
■ Practice 1: OWA Configuration Configure the Client Access server role so thatOWA clients are able to use notes and e-mail signatures and to select OWAthemes.
■ Configure the Client Access server role so that OWA clients are able to accessWindows SharePoint Services but not Windows file shares.
■ Practice 2: Mailbox Server Role Configuration Create an additional storage groupand add a mailbox database.
■ Change the settings on the new mailbox database so that deleted mailboxes arekept for 90 days.
Mclean_Ch02.fm Page 114 Saturday, July 21, 2007 10:21 AM
PREVIEW CONTENT This excerpt contains early content from an upcoming Microsoft Press title and is subject to change prior to release.

Chapter 2 Review 115
■ Practice 3: Hub Transport Role Configuration Configure the computer to acceptmail for the Contoso.com domain.
■ Configure Fabrikam.com as an internal relay domain.
■ Configure an Edge subscription for an Edge Transport server if there is one inyour test environment.
Take a Practice TestThe practice tests on this book’s companion CD offer many options. For example, youcan test yourself on just one exam objective, or you can test yourself on all the 70-236certification exam content. You can set up the test so that it closely simulates the expe-rience of taking a certification exam, or you can set it up in study mode so that you canlook at the correct answers and explanations after you answer each question.
MORE INFO Practice tests
For details about all the practice test options available, see the “How to Use the Practice Tests” sec-tion in this book’s introduction.
Mclean_Ch02.fm Page 115 Saturday, July 21, 2007 10:21 AM
PREVIEW CONTENT This excerpt contains early content from an upcoming Microsoft Press title and is subject to change prior to release.