saml 2.0 at sap gateway and msft adfs -...
TRANSCRIPT

1
SAML 2.0 Configurations at SAP NetWeaver ASABAP and Microsoft ADFS
Applies to:SAP Gateway 2.0
SummaryThis guide describes how you install and configure SAML 2.0 on Microsoft ADFS server and SAPNetWeaver AS ABAP server.
Author(s): Navin Sahadev
Company: SAP Labs India
Created on: 23 July 2014
Author BioNavin Sahadev works in SAP Gateway for the Customer Product Success organization and theInfrastructure team at SAP Labs India. He has also worked in Duet, Duet Enterprise. He hasmore than 9 years of Experience in SAP Technology.

2
Table of ContentsTable of Contents
Table of Contents ...................................................................................................................................... 2
1. Overview .......................................................................................................................................... 31.1 Target Audience .................................................................................................................................. 3
2. Introduction ...................................................................................................................................... 3
3. Configuring SAML 2.0 authentication ................................................................................................ 53.1 Preparing the System for SAML2 Configuration ................................................................................... 53.2 Configuring Microsoft Active Directory Federation Services (ADFS) ..................................................... 7
3.2.1 Prerequisites ................................................................................................................................................ 73.2.2 Installing Microsoft ADFS: ............................................................................................................................. 93.2.3 Editing ADFS properties ............................................................................................................................. 123.2.4 ADFS – Add a trust Relying Party ............................................................................................................... 133.2.5 Configuring Single Sign-On Authentication for IIS ........................................................................................ 183.2.6 Exporting IIS certificate ............................................................................................................................... 203.2.7 Exporting ADFS Token signing certificate .................................................................................................... 203.2.8 Exporting the AFDS server Metadata .......................................................................................................... 21
3.3 Configuring SAP NetWeaver AS ABAP .............................................................................................. 223.3.1 Importing Certificates and Clearing Cache................................................................................................... 223.3.2 Configuring SAML Configurations for a specific client .................................................................................. 223.3.3 Importing metadata file of Identity provider .................................................................................................. 24
4. Enabling SAP NetWeaver AS ABAP server to perform User Authentication Using SAML ................ 28
5. Appendix ........................................................................................................................................ 295.1 Mapping Domain user to an ABAP user ............................................................................................. 295.2 Mapping Domain user to SAP NetWeaver AS ABAP user from a Table View ..................................... 305.3 User Mapping for the Same User ....................................................................................................... 30
6. Trouble Shooting ............................................................................................................................ 31
Copyright .................................................................................................................................................... 34

3
1. OverviewThis document provides information on how to configure: ADFS on Windows Server 2008 R2 (with Basic Authentication) SAML 2.0 on SAP NetWeaver AS ABAP 7.02 SP08
1.1 Target AudienceThis document aims to assist SAP and Microsoft Consultants and System architects who are interestedin understanding both functional and operational modes of SAML 2.0 at Network (Intranet).
2. IntroductionUsing the SAP NetWeaver AS ABAP 7.02 underlying infrastructure, SAP Gateway 2.0 supportsexchange of authentication and authorization of a user via SAML 2.0.
Security Assertion Markup Language (SAML) 2.0 is an XML-based standard for exchangingauthentication and authorization data between an Identity Provider (IdP); producer of SAML assertionsand Service Provider (SP); consumer of assertions.
An assertion is a package of information that supplies zero or more statements made by a SAMLauthority. For assertion, SAML version 2.0 includes the following authentication response bindings: HTTP POST: This is a push model that enables transfer of SAML assertion directed to Service
Provider through a browser intermediary;
HTTP Artifact: This is a pull model that enables SP to retrieve SAML assertion directly from IdPusing a reference (generated by IdP, and passed through the browser).
Along with web-based authentication and authorization, SAML 2.0 also enable cross-domain SingleSign-on (SSO), which helps reduce the administrative overhead of distributing multiple authenticationtokens to the user.
The Interactions between a user and SAP Gateway during SAML 2.0 service provided-initiated flow isdepicted in the following figure:

4
During SAML 2.0 Service Provided-initiated flow following interactions are observed on the User agent side:1. The user request for a resource (for example: OData service) to SAP Gateway.2. On receiving the request, SAP Gateway redirects to Identity provider.3. The user is redirected to Identity provider (ADFS).4. Identity provider responds with the 401 (Integrated Windows authentication or Basic Authentication).5. The User provides the authentication information.6. Identity provider redirects the user to Assertion Consumer Service (ACS) endpoint, where your service
provider will receive assertions.7. The user calls ACS with SAML artifact in the SAP Gateway.8. The ACS validates the SAML artifact information with Identity provider (ADFS).
Note: Step 7 and 8 execution takes place in background.9. The ACS redirects the user to the requested SAP Gateway resource.10. The user requests SAP Gateway resources with SAML cookie.11. The SAP Gateway responds with a secure SAML cookie. Using this cookie user can communicate with
SAP Gateway for accessing resources until this cookie expires.
Note: This document provides information on configuring SAML HTTP Post. However, you can alsoconfigure the SAML Artifacts. SAML Artifact handling is easier due to missing of CSRF token, andtherefore does not require 403 Forbidden errors handling.
5
3. Configuring SAML 2.0 authenticationThe configuration steps provided in this document have been executed on the below mentionedplatforms versions. Microsoft ADFS 2.0 (Windows Server 2008 R2) SAP NetWeaver AS ABAP 7.02 SP08
Note: If you are configuring SAML 2.0 depending upon the product release version you are working on, thescreenshots may appear different.
3.1 Preparing the System for SAML2 ConfigurationBefore you proceed to configuring SAML 2 on your SAP NetWeaver AS ABAP server, ensure you havemet the following requirements: Ensure the Secure socket communication (HTTPS) port number is 443 or the communication port
you are using has super user root authority. To achieve super user authority in the SAP system port,perform the following steps:a) Change the ownership of program icmbnd in directory /usr/sap/<SID>/SYS/exe/run using the
chown root command:sapsys icmbnd.b) Check if the profile parameter for your webserver is set in the instance profile. In this case, the
value for icm/server_port_2 = PROT=HTTPS,PORT=443,TIMEOUT=30,EXTBIND=1.c) Restart the SAP server instance
Note: The SAP system achieves by using a process called icmbnd. This process runs with root user authority and binds to the required port. It then returns the listening socket to the SAP server instance, which can then communicate using that port.
Install SAPCRYPTOLIBhttp://help.sap.com/saphelp_nw70ehp2/helpdata/en/49/236897bf5a1902e10000000a42189cframeset.htm ).
Before you start using SAML 2.0, we recommend you to install the latest SAP crypto library forenabling SSL and providing signing and encryption functionality.
Note: You can use different versions of SAPCRYPTOLIB for different Operating Systems. When Gateway applications are accessed using a client browser, it is essential that SAML 2.0 authentication preserves the original HTTP GET method. Thus, SAML 2.0 Artifact binding must be used instead of POST. ICM should be able to load crypto functionality in order to establish SSL connection for back channel system-to-system communication to IdP
If you have latest version of the Kernel then you can avoid importing of the cryptolib.
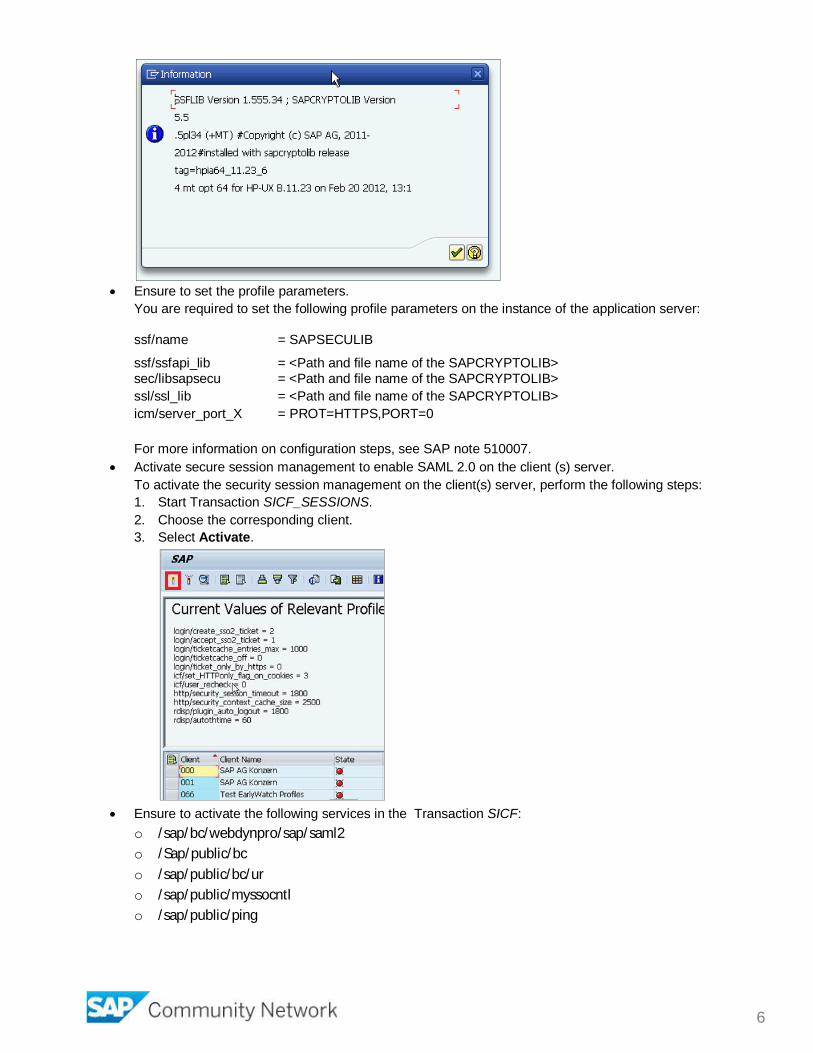
In Transaction STRUST, select Environment > Display SSF Version.
6
Ensure to set the profile parameters.You are required to set the following profile parameters on the instance of the application server:
ssf/name = SAPSECULIB
ssf/ssfapi_lib = <Path and file name of the SAPCRYPTOLIB>sec/libsapsecu = <Path and file name of the SAPCRYPTOLIB>ssl/ssl_lib = <Path and file name of the SAPCRYPTOLIB>icm/server_port_X = PROT=HTTPS,PORT=0
For more information on configuration steps, see SAP note 510007. Activate secure session management to enable SAML 2.0 on the client (s) server.
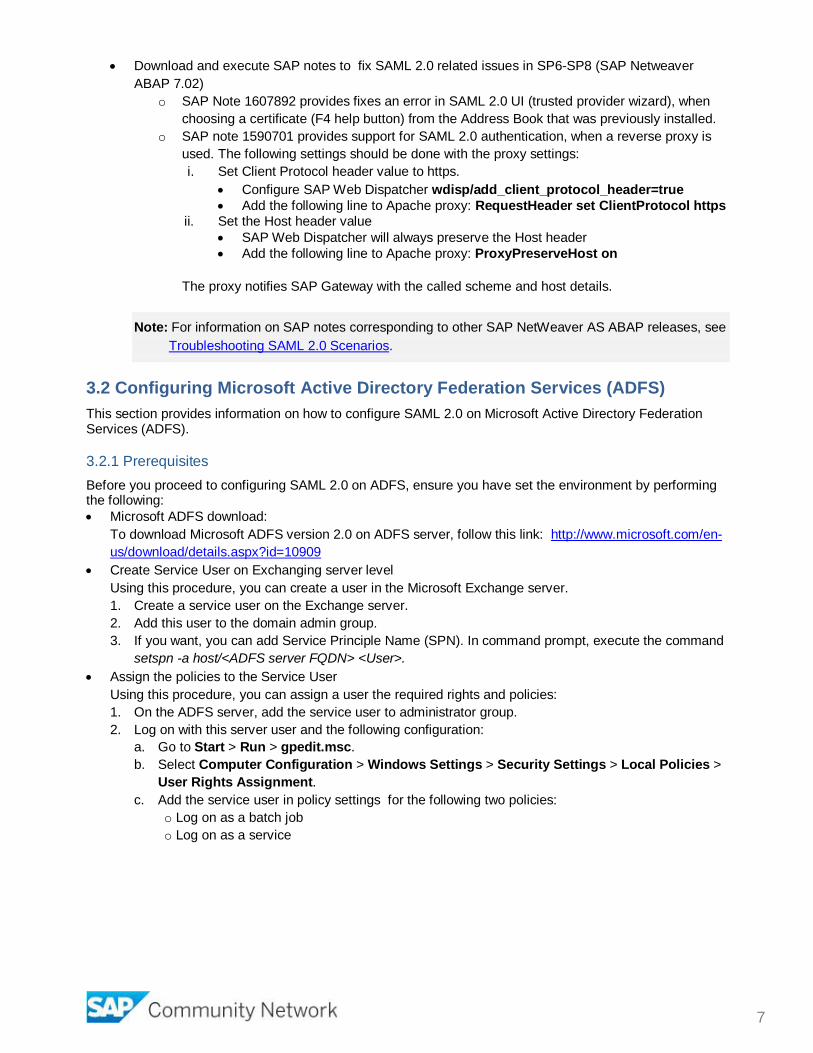
To activate the security session management on the client(s) server, perform the following steps:1. Start Transaction SICF_SESSIONS.2. Choose the corresponding client.3. Select Activate.
Ensure to activate the following services in the Transaction SICF:o /sap/bc/webdynpro/sap/saml2o /Sap/public/bco /sap/public/bc/uro /sap/public/myssocntlo /sap/public/ping
7
Download and execute SAP notes to fix SAML 2.0 related issues in SP6-SP8 (SAP NetweaverABAP 7.02)
o SAP Note 1607892 provides fixes an error in SAML 2.0 UI (trusted provider wizard), whenchoosing a certificate (F4 help button) from the Address Book that was previously installed.
o SAP note 1590701 provides support for SAML 2.0 authentication, when a reverse proxy isused. The following settings should be done with the proxy settings:i. Set Client Protocol header value to https.
Configure SAP Web Dispatcher wdisp/add_client_protocol_header=true Add the following line to Apache proxy: RequestHeader set ClientProtocol https
ii. Set the Host header value SAP Web Dispatcher will always preserve the Host header Add the following line to Apache proxy: ProxyPreserveHost on
The proxy notifies SAP Gateway with the called scheme and host details.
Note: For information on SAP notes corresponding to other SAP NetWeaver AS ABAP releases, seeTroubleshooting SAML 2.0 Scenarios.
3.2 Configuring Microsoft Active Directory Federation Services (ADFS)This section provides information on how to configure SAML 2.0 on Microsoft Active Directory FederationServices (ADFS).
3.2.1 PrerequisitesBefore you proceed to configuring SAML 2.0 on ADFS, ensure you have set the environment by performingthe following: Microsoft ADFS download:
To download Microsoft ADFS version 2.0 on ADFS server, follow this link: http://www.microsoft.com/en-us/download/details.aspx?id=10909
Create Service User on Exchanging server levelUsing this procedure, you can create a user in the Microsoft Exchange server.1. Create a service user on the Exchange server.2. Add this user to the domain admin group.3. If you want, you can add Service Principle Name (SPN). In command prompt, execute the command
setspn -a host/<ADFS server FQDN> <User>. Assign the policies to the Service User
Using this procedure, you can assign a user the required rights and policies:1. On the ADFS server, add the service user to administrator group.2. Log on with this server user and the following configuration:
a. Go to Start > Run > gpedit.msc.b. Select Computer Configuration > Windows Settings > Security Settings > Local Policies >
User Rights Assignment.c. Add the service user in policy settings for the following two policies:
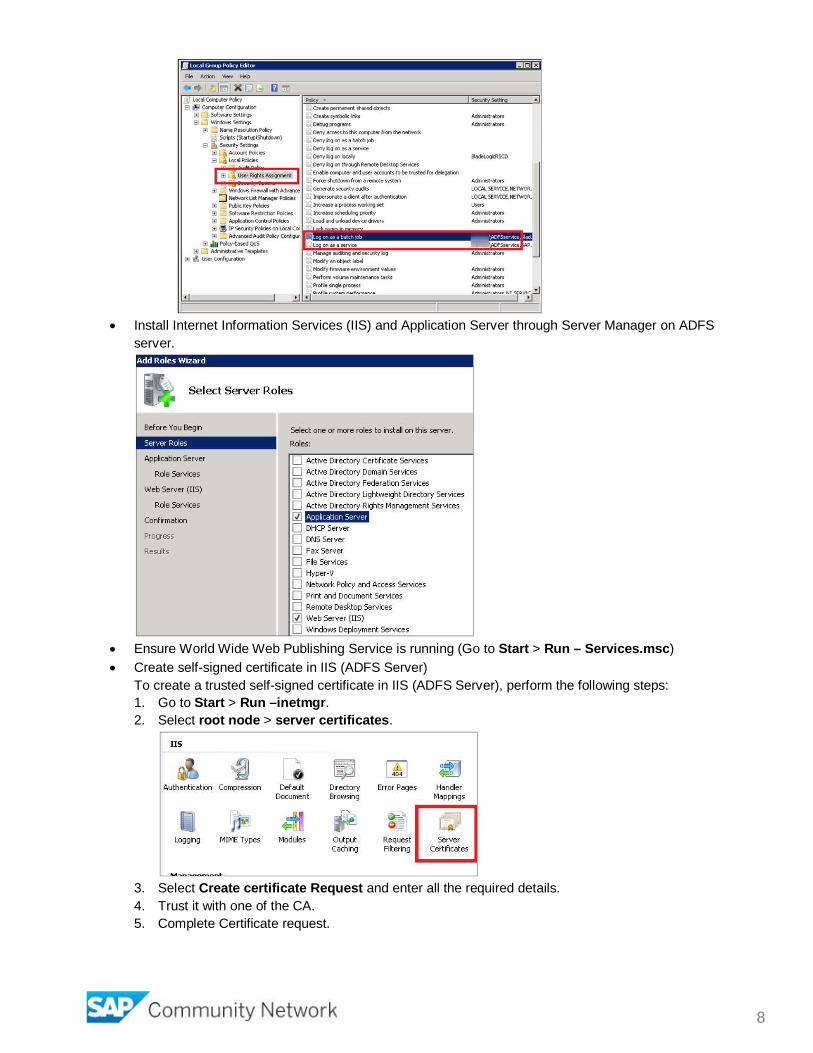
o Log on as a batch jobo Log on as a service
8
Install Internet Information Services (IIS) and Application Server through Server Manager on ADFSserver.
Ensure World Wide Web Publishing Service is running (Go to Start > Run – Services.msc) Create self-signed certificate in IIS (ADFS Server)
To create a trusted self-signed certificate in IIS (ADFS Server), perform the following steps:1. Go to Start > Run –inetmgr.2. Select root node > server certificates.
3. Select Create certificate Request and enter all the required details.4. Trust it with one of the CA.5. Complete Certificate request.

9
3.2.2 Installing Microsoft ADFS:To install the Microsoft ADFS server, perform the following steps:1. Run the setup.exe.2. Select Next.
3. Select the check box to Accept the License and select Next.
4. Select Federation server and select Next.
5. Install Prerequisite and select Next.

10
6. Select Start the ADFS 2.0 Management snap-in when this wizard closes and select Finish.
7. Select ADFS 2.0 Federation Server Configuration Wizard.
Note: You can also launch ADFS 2.0 Management from Start > Programs > Administrative Tools > ADFS 2.0 Management.

11
8. Select Create a new Federation Service and select Next.
9. Select New Federation server farm and select Next.
10. ADFS search for IIS certificate, SSL Server certificate and auto-fills the certificate fields and selectNext.

12
11. Enter the user and password and select Next.
12. Select subsequent Next to finish the installation.
3.2.3 Editing ADFS properties
1. To edit Go to Start > All programs > Administrative tools and select ADFS 2.0 Management.2. Right click Service node and select Edit Federation Service Properties.
3. Confirm that the General settings match the DNS entries and certificate names. Take note of theFederation Service Identifier, as this is used in the Service-Now SAML 2.0 configuration

13
settings.
4. Navigate to ADFS 2.0 > Service > Endpoints, enable the endpoints URL:“/adfs/services/trust/artifactresolution”.
3.2.4 ADFS – Add a trust Relying Party1. Browse to SAP NetWeaver AS ABAP URL:
https://<proxy_host>:<proxy_port>/sap/bc/webdynpro/sap/saml2?sap-client=<ABAP client>.Alternatively, you can access SAML2 UI through the proxy host. On the SAML2 ABAP window,select Metadata and save it as a local file.
2. Select Required: Add a trusted relying party.

14
3. Select Import Data about the relying party from a file and select Browse to navigate to the ABAPfile saved in step 5.
4. Copy the provider name from the following URL:https://<proxy_host>:<proxy_port>/sap/bc/webdynpro/sap/saml2?sap-client=<ABAP client>. In theDisplay name field, enter this Provider name.

15
5. Select Next.6. Select Permit all users to access the relying party and select Next.
16
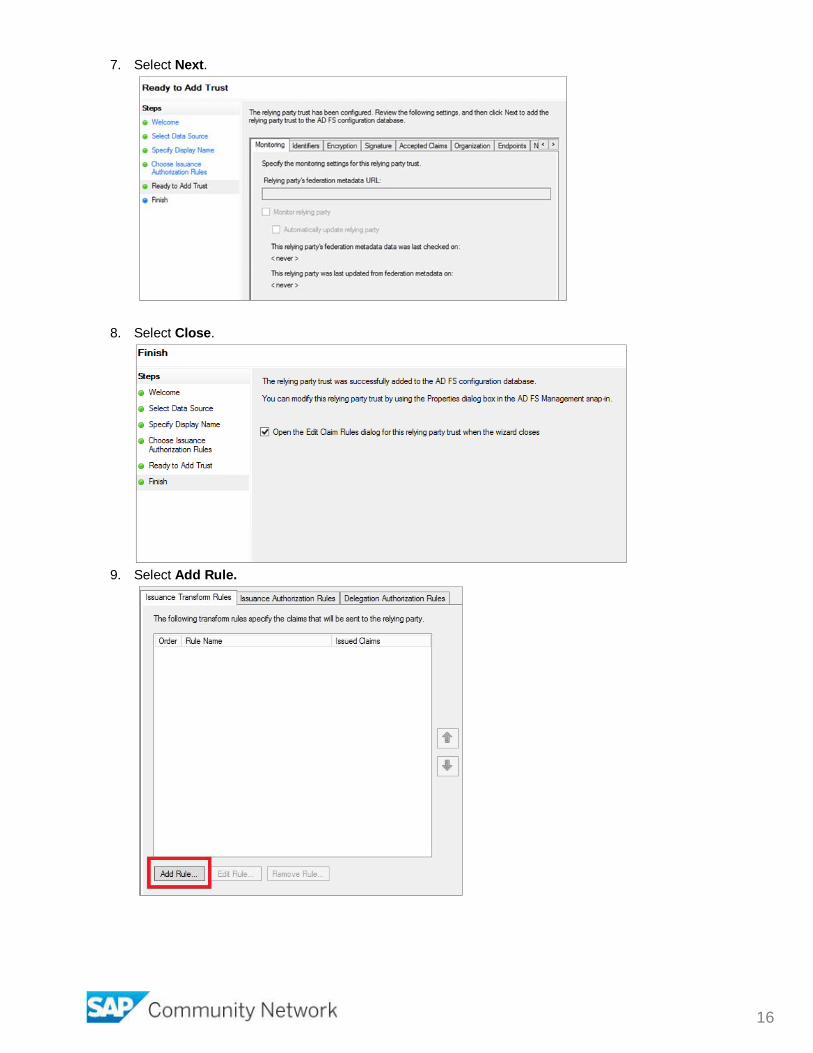
7. Select Next.
8. Select Close.
9. Select Add Rule.

17
10. Under Claim rule template, select “Send LDAP Attributes as Claims” and select Next.
11. On the Configure Rule screen, perform the following sub-steps:a. In the Claim rule name field, enter Claim Rule name.b. Under Attribute store, select Active Directory.c. In Mapping of LDAP attributes to outgoing claim types:
Under LDAP Attribute, select SAM-Account-Name. Under Outgoing Claim Types, select Name ID.
d. Select Finish.
12. Select Apply.

18
The following screen appears with the configured rule name.
13. (Optional) If you want, you can choose either Algorithm SHA-1 or SHA-256 to establish a securetrust. To do this, perform the following steps:
a) Under Trust Relationships, Select Replying Party Trust.b) On the right hand side, under Replying Party Trust, select and right click on a Replying
Party Trust. (For example: In the following screen shot, the option selected is XX_New).c) On the XX_New, select Advanced tab.d) Under Secure hash algorithm, select SHA-1 or SHA-256 corresponding to your security
trust environment.e) Select Apply and OK.
3.2.5 Configuring Single Sign-On Authentication for IIS
The following section provides information on how to configure Single Sign-On for Basic Authentication.

19
Note: In case you are using integrated Windows authentication, ignore this section.
To configure SSO for IIS, perform the following steps:1. Navigate to Sites > Default Web sites > adfs, right click on ls and select Explore.
2. Open the web.config file in a Notepad.3. In the localAuthenticationTypes, comment the following lines:
<add name="Integrated" page="auth/integrated/" /><add name="Forms" page="FormsSignIn.aspx" /><add name="TlsClient" page="auth/sslclient/" />
Note: By commenting the above lines, the ADFS application will authenticate the Login Page beforeattempting to use Windows Authentication.
4. Save web.config file.

20
5. Check if the Basic authentication is enabled for the site.
6. Go to command prompt and enter command iisreset.7. To test SSO, navigate to https://<hostname FQDN>/adfs/ls/IdpInitiatedSignon.aspx and perform the
following sub-steps:a. Select Sign in to this site.b. Select Continue to Sign In.c. On the Authentication Required pop-up, enter the ADFS domain User Name and Password.
You log in to the configured secure party trusted site.
3.2.6 Exporting IIS certificateTo export the IIS certificate from the ADFS server, perform the following steps:1. Log on to ADFS server.2. Go to Start > Run > MMC.3. Add Certificate snap-in.4. Select Computer Account and Select Ok.5. From Trusted Root Certificate Authorities > Certificates search for the IIS certificate.6. Export the certificate in DER encoded binary X.509(.CER) format.
3.2.7 Exporting ADFS Token signing certificateTo export the ADFS token signing certificate, perform the following steps:1. Log on to ADFS Server.2. Go to Start > All Programs > Administrative Tools > ADFS 2.0 Management.3. Navigate to Service > Certificates.
4. On the right hand panel, under the Token-signing, double click on the Certificate.5. On the Certificate window, select Details tab.

21
6. Select Copy to File and Select Next.
7. Select Base-64 encoded X.509 (.CER).
8. Subsequently select Next to export the certificate.
3.2.8 Exporting the AFDS server MetadataFrom the ADFS server, you can export the metadata file to build a secure trust with the relying party usingthe following URL https://<hostname FQDN>/FederationMetadata/2007-06/FederationMetadata.xml

22
3.3 Configuring SAP NetWeaver AS ABAPThis section provides information on how to configure SAML 2.0 on SAP NetWeaver AS ABAP server.
3.3.1 Importing Certificates and Clearing CacheBefore you proceed to configure SAML 2.0 on SAP NetWeaver AS ABAP server, import the downloaded IIscertificate and clear cache by performing the following steps:.1. Import ADFS IIS certificate to SAP NetWeaver ABAP server.
To import an IIS certificate, go to Transaction Strust and select SSL Client SSL Client (standard).
2. Once the certificates are imported, go to Transaction SMICM.3. Select Administration > ICM > Exit Soft > Local.
3.3.2 Configuring SAML Configurations for a specific clientTo configure SAML 2.0 for a specific SAP NetWeaver ABAP client, perform the following steps:1. Go to Transaction SAML2 and select Enable SAML 2.0 Support.
2. Enter Provider Name and select Next.

23
3. In General Settings, enter a value for Clock Skew Tolerance.
4. In the Service Provider Settings, choose Automatic for Selection Mode.
5. Select Finish.6. Select Edit > Include Certificate in Signature to establish connection between SAP NetWeaver AS
ABAP Server and Microsoft ADFS.

24
7. Select Metadata to export metadata.
8. Save a local copy of the metadata to share this information with the Identity provider.9. In the Service Provider settings tab, you can view the configuration details.
3.3.3 Importing metadata file of Identity providerTo import the metadata file of Identity provider, perform the following steps:1. Select Trusted Providers tab and select Identity Providers in Show.

25
2. Select Add > Upload Metadata File.
3. On Metadata Verification screen, select upload from file > Browse to the ADFS IIS certificate.For information on how to export IIS certificate of ADFS, see section 3.2.6 Exporting IIS certificate
4. Select Next.
5. On Provider name screen, Name field is pre-filled and select Next.
26
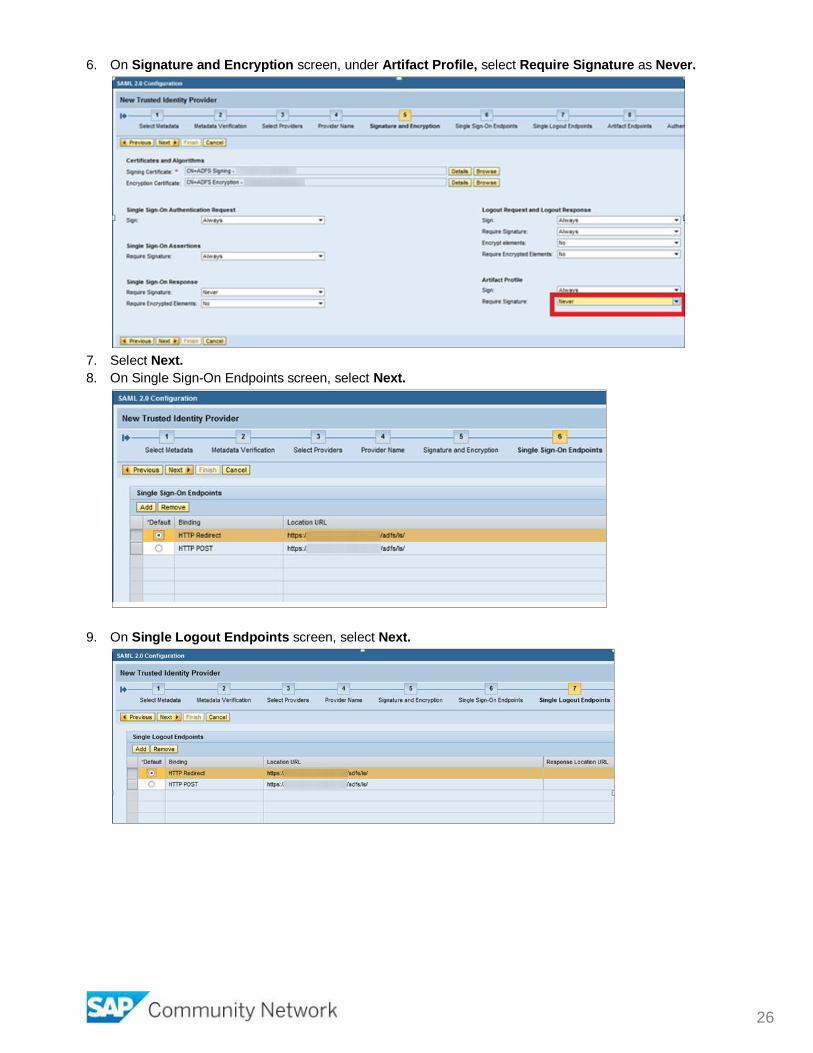
6. On Signature and Encryption screen, under Artifact Profile, select Require Signature as Never.
7. Select Next.8. On Single Sign-On Endpoints screen, select Next.
9. On Single Logout Endpoints screen, select Next.

27
10. On Artifact EndPoints Screen, select Next.
11. Select Binding as HTTP Post and select Finish.
Note: Depending on your scenario, you can select Binding HTTP Artifact.
12. Under List of Trusted Providers, Select Edit.13. Select Identity Federation tab and select Add to add Name ID.
Note: For Unspecified Name ID format, you have an option to select the Source as “Logon ID” (ABAPUser ID), “Logon Alias” (ABAP Alias, through Transaction SU01) and “Mapping in USREXTID

28
Table” (Mapping in table VUSREXTID).
It is recommended that not to use USEREXTID table. On using the USREXTID table complete the Steps in the Appendix section
14. Select Save.15. To enable the Trusted provider, select Enable.
4. Enabling SAP NetWeaver AS ABAP server to perform UserAuthentication Using SAML
This section provides information on how to enable SAML on one of the services.
To enable SAP NetWeaver server to perform user authentication using SAML, perform the following steps:1. Go to Transaction SICF.2. Navigate to sap/opu/odata/iwfnd/catalogservice service and select Edit.3. Select Logon Data tab and perform the following sub-steps:
a) Set Procedure field to Alternative Logon Procedure.b) Set Security Requirement to SSL.
Once the “Alternative Logon Procedure” has been changed, you can scroll down within theLogon Data tab area and you will see a list of Logon Procedures. By default, SAML Logon isitem 7 in the list.To change this order, simply overtype the number in the left-hand column with 1 (or 2).

29
4. To change this order, in the left-hand No column, overwrite the number.The list is automatically sorted according to the new order, but Logon Through HTTP Fields willalways be item one.
5. Save your changes.6. Go to Transaction SAML2, on the Trusted Provider tab, select Disable and Enable it again.
On executing Gateway service, the client will be redirected to the logon screen of the external SAML 2.0IdP server.
Note: To test the service, edit the following link with server details –https://<FQDN>:<port>/sap/opu/odata/iwfnd/catalogservice/?sap-client=<client no>&$format=xml
5. AppendixThis section provides information on how to map a domain user to an ABAP user on the SAP NetWeaver ASABAP server. We would be using Unspecified Name ID format, Source as “Mapping in USREXTID Table”(Mapping in table VUSREXTID)
5.1 Mapping Domain user to an ABAP userTo map a domain user to an ABAP user through Transaction SAML2, perform the following steps:1. Select the Name ID Management tab and search for the ABAP user.2. Select the NAME ID Format as Unspecified and select Go.3. Under the list of Trusted Providers, select a Provider name.4. Select Add to map Windows users to the SAP user.

30
Note: Ensure to check with your Exchange server admin for the text case sensitive (i.e. uppercase orlowercase) for the user name.
5.2 Mapping Domain user to SAP NetWeaver AS ABAP user from a Table ViewAlternatively, you can also map user from the table view in SAP NetWeaver AS ABAP. To do this, performthe following steps:1. Go to Transaction SM30 and enter the table/View VUSREXTID.2. Select Maintain.3. In Determine Work Area pop-up, set External ID type to SA.
4. Select Continue.You will find entries added in the table. However, in case of missing entries, you can add new entries byselecting New Entries.
5.3 User Mapping for the Same UserUser mapping maps a user ID on the domain server to the user ID in the SAP NetWeaver AS ABAPserver for the same user.1. If the saml:Assertion/saml:Subject/saml:NameIdentifier element contains the SAP user ID, go to
Transaction SA38.2. On the Program Execution screen, set RSUSREXTID for Program.
Using this, you can create mappings for all users or a subset of users. For more information, seeSAP Note 1254821.

31
Note: You can get the Identity Provider name from SAML2 transaction screen.
Once you have mapped the User ID, perform a check by selecting Test Mode. Once you havechecked the user mapping entries for correctness in the table view, and ensure to uncheck the TestMode.
6. Trouble ShootingThe following section provides information on how to troubleshoot issues encountered while configuringSAML 2.0. To debug SAML at SAP NetWeaver ABAP, see the following links
a. Troubleshooting SAML 2.0 Scenariosb. Common Problems encountered when configuring SAML 2.0 for AS ABAPc. Single Sign on With SAML 2.0d. http://wiki.scn.sap.com/wiki/display/BSP/Using+Proxies
For debugging SAML flow, activate the below service at SAP NetWeaver ABAP. Refer the linkDiagnosing SAML 2.0 Problems with the Security Diagnostic Tool for ABAP and also ensure youhave SEC_DIAG_TOOL_VIEWER role assigned to your user to view traces at following link:

32
https://<hostname>:<port>/sap/bc/webdynpro/sap/sec_diag_tool.
To test if SAP Netweaver ABAP server is pinged successfully via browser, use the following URL –https://<hostname>:<port>/sap/public/ping
By default, Internet Explorer (IE) 9 is the corporate portal(SAP Java Stack) web browser. We needto either disable default portal at the launch of IE or remove the logon modules from the ABAPServices.From the list of Logon Procedures, Delete both Logon Tickets and Assertion Tickets.
33
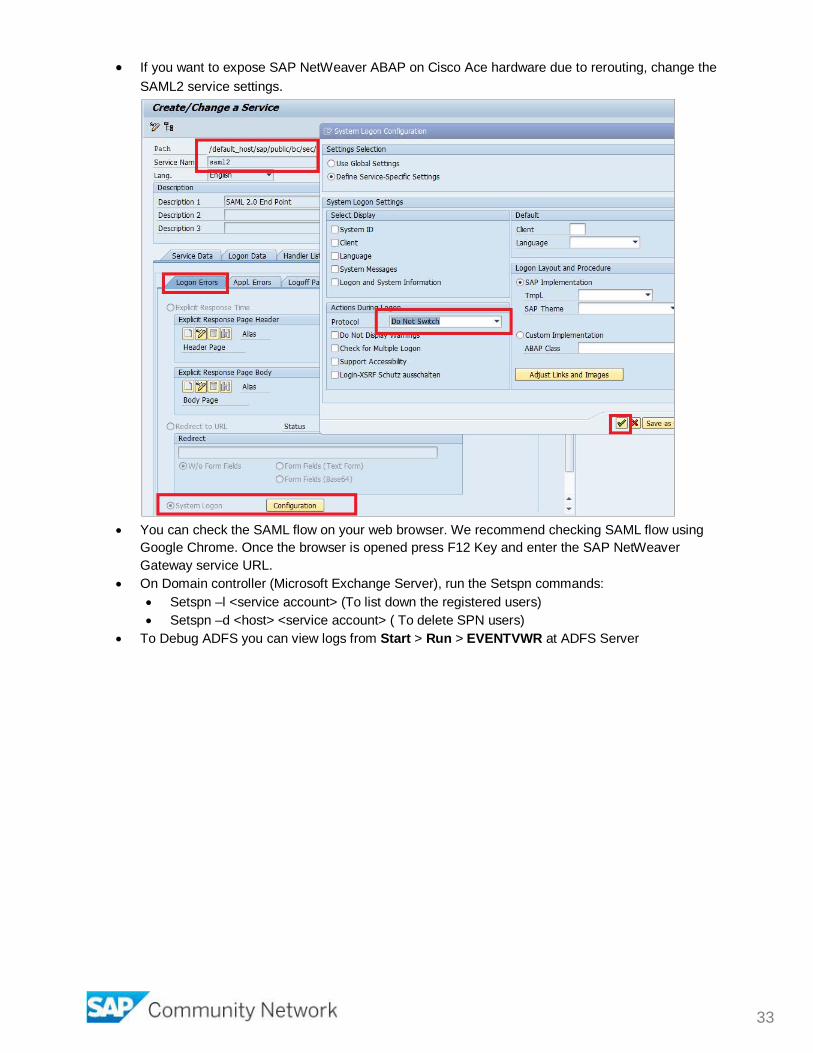
If you want to expose SAP NetWeaver ABAP on Cisco Ace hardware due to rerouting, change theSAML2 service settings.
You can check the SAML flow on your web browser. We recommend checking SAML flow usingGoogle Chrome. Once the browser is opened press F12 Key and enter the SAP NetWeaverGateway service URL.
On Domain controller (Microsoft Exchange Server), run the Setspn commands: Setspn –l <service account> (To list down the registered users) Setspn –d <host> <service account> ( To delete SPN users)
To Debug ADFS you can view logs from Start > Run > EVENTVWR at ADFS Server
34
Copyright© 2014 SAP SE or an SAP SE affiliate company. All rights reserved.No part of this publication may be reproduced or transmitted in anyform or for any purpose without the express permission of SAP SE.The information contained herein may be changed without prior notice.Some software products marketed by SAP SE and its distributors contain proprietary software componentsof other software vendors. National product specifications may vary.These materials are provided by SAP SE and its affiliated companies (“SAP SE Group”) for informationalpurposes only, without representation or warranty of any kind, and SAP SE Group shall not be liable forerrors or omissions with respect to the materials. The only warranties for SAP SE Group products andservices are those that are set forth in the express warranty statements accompanying such products andservices, if any. Nothing herein should be construed as constituting an additional warranty.SAP SE and other SAP SE products and services mentioned herein as well as their respective logos aretrademarks or registered trademarks of SAP SE in Germany and other countries.Please seehttp://www.sap.com/corporate-en/legal/copyright/index.epx#trademark
for additional trademark information and notices.