safe & sound fleecy - sunbeam new zealand | leader in ... · safe & sound fleecy ... made...
TRANSCRIPT

Please read these instructions carefullyand retain for future reference.
Safe & Sound FleecyMachine Washable Electric Blanket with Sleepsmart Control
Instruction Booklet

Contents
Sunbeam’s Safety Precautions 2
Safety Precautions for your Electric Blanket 3
Sunbeam’s Total Safety System 4
Keeping Warm and Healthy 4
Features of your Safe & Sound Fleecy 5
Fitting your Electric Blanket 6
Using your Sleepsmart Control 7
Setting the clock 7Programming your settings 8Activating the Preheat function 9Timer operation 10Manual operation 11
Care and Cleaning 12

2
Sunbeam are very safety conscious when designing and manufacturing consumer products,but it is essential that the product user alsoexercise care when using an electrical appliance.Listed below are precautions which are essentialfor the safe use of an electrical appliance:
• Read carefully and save all the instructionsprovided with an appliance.
• Always turn the power off at the power outletbefore you insert or remove a plug. Remove by grasping the plug - do not pull on the cord.
• Do not use your appliance with an extensioncord unless this cord has been checked and tested by a qualified technician or service person.
• Always use your appliance from a power outlet of the voltage (A.C. only) marked on the appliance.
• Close supervision is necessary when yourappliance is being used near children or infirm persons.
• Never leave an appliance unattended while in use.
• Young children should be supervised to ensurethat they do not play with the appliance.
• Do not use an appliance for any purpose other than its intended use.
• Do not place an appliance on or near a hot gasflame, electric element or on a heated oven.Do not place on top of any other appliance.
• Do not let the power cord of an appliance hangover the edge of a table or bench top or touchany hot surface.
• For safety reasons and to avoid maintenance by unskilled persons, some appliances are‘sealed’ using tamperproof screws. Suchappliances should always be returned to thenearest Sunbeam Appointed Service Centre for adjustment or repair if required.
• Do not operate any electrical appliance with adamaged cord or after the appliance has beendropped or damaged in any manner. If damageis suspected, return the appliance to thenearest Sunbeam Appointed Service Centre for examination, repair or adjustment.
• For additional protection, Sunbeamrecommend the use of a residual currentdevice (RCD) with a tripping current notexceeding 30mA in the electrical circuitsupplying power to your appliances.
• Do not immerse the appliance in water or any other liquid unless recommended.
If you have any concerns regarding the performance and use of your appliance, please visit www.sunbeam.com.au or contact the Sunbeam Consumer Service Line. Ensure the above safety precautions are understood.
Sunbeam’s Safety Precautions

3
If you have any concerns regarding the performance and use of your appliance, please visit www.sunbeam.com.au or contact the Sunbeam Consumer Service Line. Ensure the above safety precautions are understood.
Sunbeam’s Safety Precautions
• Do not use your electric blanket on or under awaterbed.
• Do not use on an adjustable bed.• Do not switch the blanket on if moist or wet.• Do not allow the blanket heating wires to lie
over the edge of the mattress.• Do not use pins, needles, safety pins or other
sharp items on your electric blanket.• Do not dry clean your electric blanket.• Use only as an underblanket.• Examine periodically for signs of wear or
damage on the blanket cords. If there are suchsigns, or the blanket has been misused, returnit to an authorised service agent for inspection.
• Each day check that the electric blanket issmooth, flat and properly secured on themattress. Do not use if the blanket is folded,rucked or creased.
• Only use your electric blanket with the controlssupplied or marked equivalent.
• Do not use with infants, infirm persons, orpersons insensitive to heat.
• Parents or guardians must preset the controlsfor young children, unless the child has beenadequately instructed on how to operate thecontrol safely.
• Do not use heavy or dense overlays, as theymay lead to overheating of the electric blanket.
• This electric blanket is not intended for use inhospitals.
Important instructions – retain forfuture use.

4
All Sunbeam Safe & Sound electric blanketsfeature our Total Safety System, whichprotects them from overheating. The uniquecircuitry within the blanket senses anyabnormal temperature variations in the
heating cable, and automatically shuts theblanket off should it ever start to overheat.So you will always sleep safely and soundly.
Sunbeam’s Total Safety System
Keeping warm and healthyDid you know that your mattress couldcontain up to 2 litres of moisture? Combinethis with the skin cells that you shed everyday, and you have a warm, humidenvironment that is the perfect breedingground for dust mites – a known trigger ofasthma and allergy symptoms.
Regular use of your electric blanket willremove the moisture from your mattress tokeep your bed dry and healthy.
Before using your electric blanket for the firsttime, Sunbeam recommend that you operatethe blanket at maximum heat for 2-3 hoursto eliminate the moisture from the mattress.See the section titled Before First Use onpage 7 for complete instructions.

5
Your Safe & Sound Fleecy electric blanket has the following features:
Sleepsmart controlThe 10 heat electronic control allows you tosave your own personalised settings,including the time you want the blanket toturn on and off and at which heat setting.You can also program a preheat function.
Boost functionThe boost function is ideal for preheating thebed, or for a burst of heat during the night.Pressing the boost button heats the blanketto maximum temperature (setting H) for 30minutes. At the end of the 30 minute boostperiod, the blanket returns to heat the settingthat the control was set to before the boostbutton was activated.The boost function can be used in bothmanual and timer modes.
Preheat functionThe Preheat function automatically switchesyour blanket on to maximum heat (H) for 30minutes at a preprogrammed time. Simplyprogram the start time and activate thePreheat function to ensure your bed is toastywarm before hopping in.
See page 7 for instructions on how to operatethe Sleepsmart control and the Boost andPreheat functions.
Fleecy woolMade from 100% pure new wool pile, yourSafe & Sound Fleecy is perfect on the bed allyear round as a comfortable underlay. Thewool pile allows the air to circulate aroundyour body, keeping you warm in winter andcool in summer.
Cosy feet heatingThe heating wires are concentrated at thebase of the blanket to deliver extra heataround your feet, while keeping the rest ofyour body comfortably warm.
Fitted designThe fitted skirt and extra strong elastic cordkeep the blanket flat and taut on themattress, and make it easier to fit andremove from the bed.For instructions on how to fit your Safe &Sound Fleecy electric blanket, see page 6.
Machine washableThe detachable controls and waterproofelement make your electric blanket safe tomachine wash and tumble dry.For instructions on how to launder your Safe& Sound Fleecy electric blanket, see the Careand Cleaning section on page 12.
Safe & Sound Fleecy

6
Fitting your electric blanketPlace the electric blanket on your mattresswith the woollen fleece facing upwards andthe control sockets on the underside of theblanket, nearest to the head of the bed.Ensure the heating wires do not extend underthe pillows (see Figure 1).
Pull the elastic cord inside the fitted skirtover the top corners of the mattress. To fitthe foot of the bed, pull from the centre ofthe blanket to the foot of the bed, and fit onecorner at a time while holding the centre (seeFigure 2). Ensure the fitted skirt and elasticcord go completely under the mattress. Pullon the edges of the blanket to ensure that itis flat and square on the mattress.
Connecting the controlsTo connect the controls, remove one of thecorners of the blanket at the head of the bed.Pass the connector plug through thetriangular hole in the fitted skirt and underthe blanket. Push it into the socket, makingsure that the securing flap is pressed firmlyover the pin on the connector (see Figure 3).Repeat on the other side if required. Plug thecontrols into a 230-240V power outlet andturn the power on.Caution: The cord and controls must be keptoutside the bed and away from external heatingsources, such as heaters and lamps. Do notcover the control.
Fitting your electric blanket
Figure 1.
Figure 3.
Figure 2.

7
The innovative Sleepsmart control allows youto program your electric blanket to switch onand off automatically at your desired timeand heat setting. It also allows for a preheatfunction to be activated.Alternatively, the control can be used in manual mode.
Before first useEnsure the control is connected to theblanket, the plug is connected to the poweroutlet and the power is switched on.Before using your electric blanket for the firsttime, Sunbeam recommends that you heatthe blanket at maximum heat (H) for two tothree hours to evaporate any moisture in themattress. Repeat this process every fewmonths to maintain a dry, healthy bed.
Setting the clockBefore you can program the timer, you mustset the time clock on the control.Note: the clock will automatically beginkeeping time if the correct time is not set.The correct time does not need to be set tooperate the control in manual mode.1. Ensure the mode selector switch is in the
OFF position (as shown in Figure 4).2. Press the mode button once. The hour
digits will flash to indicate that this is theelement you are adjusting.
3. Use the up/down arrow buttons (▲▼) toselect the hour, ensuring that AM or PMappears as applicable. Holding down theup or down arrow will allow fastadjustment.
4. Press the mode button again. Theminutes digits will flash.
5. Use the up/down arrows (▲▼) to selectthe minutes.
6. Press the mode button again to save thetime.
Using your Sleepsmart control
Figure 4.
Preheat functionindicator
Timer operateindicator
Time
Temperaturesetting and
icon
Up arrow
Boost button
LCD screen
Down arrow
Modeselectorswitch Figure 5.

8
Setting the start timeThe start time is the time at which you wantthe blanket to switch on. Note: the correct time must be set on theclock for the timer function to operate.1. Move the selector switch to the Timer
position. The word ‘TIMER’ will appear onthe LCD screen.
2. Press the mode button until the word‘START’ flashes on the LCD screen, alongwith the hours digits as shown in figure 6.
3. Use the up/down arrows (▲▼) to select thedesired start hour. Holding down the up ordown arrow will allow fast adjustment.
4. Press the mode button again. Theminutes digits will flash.
5. Use the up/down arrows (▲▼) to selectthe desired start minutes (if required).
Note: Red indicates flashing items.
Setting the finish time1. Once the desired start time is set, press
the mode button again so that the word‘FINISH’, along with the hours digits,flashes on the screen, as shown in Figure 7.
2. Use the up/down arrows (▲▼) to selectthe desired finish hour. Holding down theup or down arrow will allow fastadjustment.
3. Press the mode button again. Theminutes digits will flash.
4. Use the up/down arrows (▲▼) to selectthe minutes.
Selecting the heat setting1. Press the mode button until the temperature
iconá, temperature setting and flash word‘TEMP’ on the LCD screen, as shown inFigure 8.
2. Use the up/down arrows (▲▼) to selectthe desired heat setting for yourpreprogrammed operation, as shownbelow. When scrolling through the heatsettings, a single beep will sound whenthe minimum heat setting (0) is reached,and two beeps will sound when themaximum setting (H) is reached.0 = Off1, 2, 3 = low heat settings4, 5, 6 = medium heat settings7, 8, 9 = high heat settingsH = maximum heat setting
Using your Sleepsmart control (continued)
Figure 6.
Figure 7.

9
Use the high and maximum heat settingsto preheat your bed only. Do not sleepwith your blanket on these settings formore than 30 minutes. Sunbeamrecommends that you do not use anysetting above setting 4 for overnight use.
Activating the preheat functionThe Preheat function automatically switchesthe blanket on to maximum heat (H) for 30minutes at a preprogrammed time. If you have a program saved, the control willswitch on at the preset time and preheat tomaximum (H) for 30 minutes before revertingto the pre-programmed heat setting.1. To activate the preheat function, press the
mode button until the word ‘PREHEAT’flashes on the LCD screen, as shown inFigure 9.
2. Use the up/down arrows (▲▼) to select‘ON’ to activate the preheat function or‘OFF’ to deactivate it.
Saving your personalised settingsOnce you have selected your desired start andfinish times, selected your preferred heatsetting, and activated the Preheat function (if desired), you will need to save your program.Press the mode button until the Timer icon ¹appears in the top right corner of the LCDscreen, as shown in Figure 10. This indicatesthat your programmed settings have been saved. To activate your saved program, move themode selector switch to the Timer position.
Using your Sleepsmart control (continued)
Figure 8.
Figure 9.
Figure 10.
10
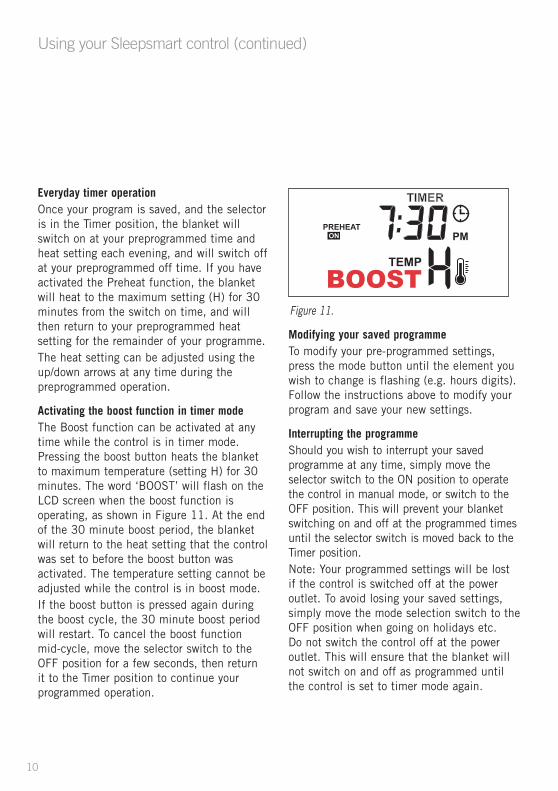
Everyday timer operationOnce your program is saved, and the selectoris in the Timer position, the blanket willswitch on at your preprogrammed time andheat setting each evening, and will switch offat your preprogrammed off time. If you haveactivated the Preheat function, the blanketwill heat to the maximum setting (H) for 30minutes from the switch on time, and willthen return to your preprogrammed heatsetting for the remainder of your programme.The heat setting can be adjusted using theup/down arrows at any time during thepreprogrammed operation.
Activating the boost function in timer modeThe Boost function can be activated at anytime while the control is in timer mode.Pressing the boost button heats the blanketto maximum temperature (setting H) for 30minutes. The word ‘BOOST’ will flash on theLCD screen when the boost function isoperating, as shown in Figure 11. At the endof the 30 minute boost period, the blanketwill return to the heat setting that the controlwas set to before the boost button wasactivated. The temperature setting cannot beadjusted while the control is in boost mode.If the boost button is pressed again duringthe boost cycle, the 30 minute boost periodwill restart. To cancel the boost function mid-cycle, move the selector switch to theOFF position for a few seconds, then return it to the Timer position to continue yourprogrammed operation.
Modifying your saved programmeTo modify your pre-programmed settings,press the mode button until the element youwish to change is flashing (e.g. hours digits).Follow the instructions above to modify yourprogram and save your new settings.
Interrupting the programmeShould you wish to interrupt your savedprogramme at any time, simply move theselector switch to the ON position to operatethe control in manual mode, or switch to theOFF position. This will prevent your blanketswitching on and off at the programmed timesuntil the selector switch is moved back to theTimer position.Note: Your programmed settings will be lostif the control is switched off at the poweroutlet. To avoid losing your saved settings,simply move the mode selection switch to theOFF position when going on holidays etc. Do not switch the control off at the poweroutlet. This will ensure that the blanket willnot switch on and off as programmed untilthe control is set to timer mode again.
Using your Sleepsmart control (continued)
Figure 11.

11
Manual operationYour timer control can also be used in as islike any other manual control. To use yourcontrol in manual mode, move the modeselection switch to the ON position. The word‘ON’ will appear on the LCD screen.Use the up/down arrows (▲▼) to select yourdesired heat setting, as indicated below. Theselected heat setting displays in the bottomright corner of the LCD, as shown in Figure 12.
0 = Off1, 2, 3 = low heat settings4, 5, 6 = medium heat settings7, 8, 9 = high heat settingsH = maximum heat setting
To help you select the desired temperature inthe dark, an audible beep will sound whensetting 0 is reached, and two beeps willsound when the maximum (H) setting isreached.
Activating the boost function in manual modeThe Boost button can be operated while thecontrol is in manual mode. Pressing theboost button heats the blanket to maximumtemperature (setting H) for 30 minutes. The word ‘BOOST’ will flash on the LCDscreen when the boost function is operating,as shown in Figure 13.At the end of the 30 minute boost period,the blanket will return to heat the settingthat the control was set to before the boostbutton was activated.The temperature setting cannot be adjustedwhile the control is in boost mode.If the boost button is pressed again duringthe boost cycle, the 30 minute boost periodwill restart. To cancel the boost function mid-cycle, move the selector switch to theOFF position for a few seconds, then return it to the Timer position to continue yourprogrammed operation.To turn the control off, simply move themode selector to the OFF position.
Using your Sleepsmart control (continued)
Figure 12.
Figure 13.

12
All Safe & Sound electric blankets featuredetachable controls and waterproof heatingelements, making them fully immersible andsafe to wash by hand or machine.Before cleaning your electric blanket, ensurethat the controls are unplugged from theblanket.
Spot CleaningSponge the affected area using a neutralwool detergent or mild soap flakes mixedwith lukewarm water. Sponge twice withclean water to remove detergent. Removeexcess water by compressing the wet areabetween two towels.
Hand WashingWash the blanket in lukewarm water with aneutral wool detergent or mild soap flakes.Soak for five minutes, then gently squeezethe soapy water through the fabric. Rinsethoroughly in clean, lukewarm water thendrain excess water from the blanket. Do notwring.
Machine WashingTake your electric blanket to a commerciallaundry or wash in a domestic washingmachine (size permitting). Wash on WOOL orDELICATES cycle with a neutral wooldetergent or mild soap flakes, below 40°C.Do not use high speed or extra spin cycles.
Line DryingDrape the blanket across several lines of yourclothesline. Do not use pegs on the wiredareas. Do not dry with a hair dryer or heater.Ensure that the blanket and control socketsare completely dry before using again.
Machine DryingTumble dry your blanket on LOW setting for15 minutes MAXIMUM. Smooth the blanketby gently pulling any creases out of thefabric. Line dry to ensure the blanket andcontrols are completely dry before use. Donot dry with a hair dryer or heater.
Storing your BlanketYour electric blanket can remain on the bedall year round as a comfortable underblanket.Simply remove the controls and store untilwinter. If you wish to remove the blanket from yourbed when not in use, roll or fold it looselyand store in a blanket bag or the bag it wassupplied in. Avoid pressing sharp creasesinto the blanket. Do not place heavy items on top of yourelectric blanket when storing.
Care and cleaning

and ‘Safe & Sound’ are registered trademarks of Sunbeam Corporation. Made in New Zealand. Due to minor changes in design or otherwise, the product you buy may differ from the one shown in this leaflet. Backed by Sunbeam‘s 3 Year Replacement Guarantee and National Service Network.© Copyright. SUNBEAM CORPORATION LIMITED 2003.(INCORPORATED IN N.S.W.) A.C.N. 000 006 77Sunbeam Corporation is a division of GUD Holdings Ltd.For more information or advice on this or any other Sunbeam appliance, visit www.sunbeam.com.au or contact the Sunbeam Consumer Service Line.Australia 1800 025 059 New Zealand (09) 912 0747.

Consumer HotlineAustralia
1800 025 059
New Zealand
(09) 912 0747
www.sunbeam.com.au