safe and secure safety training series · the safe and secure safety training series is about...
TRANSCRIPT

Safe and Secure
Safety Training Series
TRAINING MODULES: 1 – Creating a Place Where Safety Happens 2 – Identifying Job Hazards 3 – Avoiding Injuries Using Ergonomics 4 – Preventing Slips, Trips and Falls

2
TRAINERS GUIDE
Table of Contents
Page
1. Overview – Safe and Secure Safety Training Series 3 2. Training Aids and Strategies 5
3. Class Planning Check List, Class Schedule and
Documentation Check List 7
4. Module 1 – Creating a Place Where Safety Happens 11 5. Module 2 – Identifying Job Hazards 29 6. Module 3 – Avoiding Injuries Using Ergonomics 44
7. Module 4 – Preventing Slips, Trips and Falls 58
8. Material Resources for The Safe and Secure Training Series 76
9. Disclaimer 77
10. Susan Harwood Safety Training Grant Program
Advisory Team and Contributors 78

3
1. Overview - Safe and Secure Safety Training Series
The Telamon Corporation is pleased to be the recipient of a Susan Harwood grant from OSHA. Through
this grant, Telamon is able to develop and present the Safe and Secure Safety Training Series.
New demands from changing lifestyles and dietary choices have prompted expansion in the poultry
industry on Delmarva. The workforce has grown and become very diverse and poultry processing methods
have changed. There has been heightened attention to additional and different hazards that confront
employees in the poultry industry. The Safe and Secure Safety Training Series developed has been developed
for the Poultry Processing Industry to address that need by focusing on particular industry hazards and
preventive measures.
The Safe and Secure Safety Training Series is about providing safety and security not only for one’s
self, but for their family and their community. It is about creating a 24/7 safety awareness model that reaches
beyond the workplace into the community and home. Employers and employees have a mutual responsibility
to see safety happen. Workers in the poultry industry have one of the most difficult and physically demanding
jobs in food processing, therefore, the likelihood of injuries increases.
For this reason, it is critical that everyone give his or her time and attention to ensuring health and
safety at all times. SAFE and SECURE is about shared ownership of responsibility. Everybody knows that
reduction in injuries; accidents and occupational illnesses lead to increased productivity, reduction in costs
and an increase in profits. It not only benefits the employer and industry, but the employee and community.
Because poultry companies are committed to creating a culture of safety, all safety training will become part
of a larger plan for behavioral transformation. This will help lead to organizational success, both for the
employer and employee.

4
1. Overview - Safe and Secure Safety Training Series - continued
The Safe and Secure Safety Training Series consists of the following modules:
Module 1 – Creating a Place Where Safety Happens Module 2 – Identifying Job Hazards
Module 3 – Avoiding Injuries Using Ergonomics
Module 4 – Preventing Slips, Trips and Falls

5
2. Training Aids and Strategies
Goal Setting – Goal setting is one of the proven mechanisms for facilitating optimal learning. Goal setting
directs attention. Begin each session by reminding participants of the overarching goal of creating a culture of
safety by promoting an injury-free workplace. Then review the goals and learning objectives of each session.
Training Aids
Training Aids used may include:
– PowerPoint presentations, overheads, case studies and other visual aids
– Videos, tape recordings or other electronic media
– Worksheets and other handouts
Worked Examples – Worked Examples minimize unproductive mental work. A worked example is a step-by-
step demonstration of how to solve a problem or complete a task.
Problem-Based Learning – Problem-based Learning is type of collaborative learning in which a group of
learners begin their learning with a problem discussion.
Elaboration – Elaboration on a problem is an effective means for facilitating the understanding of problem-
relevant information and involves giving examples and making application. Elaborating on the topic by giving
examples and discussing applications can help the learner retain the information and sustain learning, both of
which will have an impact on a safe environment.
6
2. Training Aids and Strategies - continued
Individual and Group Active Learning Activities – Individual and Group active learning activities may be
utilized and incorporated into the training modules. These activities encourage participant involvement and
enhance the learning experience by allowing participants to actively engage in the learning process, providing
opportunities to apply information, ask questions and for the trainer to check and confirm participant’s
understanding of the material and learning objectives. The benefits of using Active Learning Activities include
increased retention and transfer of new information and increased motivation.
Active Learning Activities will consist of Individual and Group Activities and may include:
Role play: participants practice new behavior by assuming a character or role, personality or attitude
other than their own.
Group discussions: participants discuss issues together and present ideas and opinions to others.
Case studies: participants work individually or in groups to analyze and discuss a real or fictional
situation with critical decision points.
Interactive storytelling: participants listen to a story and make appropriate decisions about what
should happen at decision points.
Task groups: participants work together to complete a task.
Brainstorming: participants quickly contribute ideas for solving a problem, discuss the ideas together,
and eventually revisit the list to refine it by selecting the strongest ideas for continued focus of
discussion.
Skills practice: participants work in small groups to practice new skills.
7
3. Class Planning Check List, Class Schedule and Documentation
Check List
1. Class Planning Check List – page 8
2. Class Schedule – page 9
3. Class Documentation Schedule – page 10

8
TELAMON CORPORATION Susan Harwood Safety Training
TRAINING CLASS PLANNING CHECK LIST
Training Topic: ____________________ Date: _________ Language: English ___ Spanish ___ Creole ___ Other ___ Location of Training: _____________________ Trainer: _______________
Item Check Complete
1 Directions to Location of Training
2 Lap Top Computer, Cables
3 Power Point Clicker - check battery
4 Extension cord, power supply
5 Projector and Cables
6 Projector Screen - if applicable
7 Power Point Presentation - loaded on Laptop, flash drive and hard copy for back-up
8 Class Sign in Roster – copies
9 Smile Survey – copies
10 Learning Survey - Pre /Post - copies
11 Class Handouts,etc. - copies
12 Easel, Flip Chart, Markers and Tape
13 Pens / Pencils
14 Clip Boards
15 Incentives, Door Prizes, etc.
16 Water, Sodas
17 Snacks
18 Lunch Plan
19 Paper Plates, Napkins
20 Certificates
21
22
23
24
25
26
27

9
TELAMON CORPORATION Susan Harwood Safety Training
TRAINING CLASS SCHEDULE
Training Topic: ____________________ Date: _________ Location of Training: _____________________ Trainer: _______________
Task Minutes - Plan Minutes - Actual
1 Set Up Room Prior To Class 30
2 Welcome / Ice Breaker 3
3 Ground Rules 3
4 Safety Training Purpose 5
5 Sign-In Sheet 5
6 Pre-Class Test 8
7 Learning Objectives 5
8 Training Presentation – Part 1 40
9 Quick Break 10
10 Training Presentation – Part 2 40
11 Review Learning Objectives 5
12 Post-Class Test 6
13 Smile Survey 5
14 Needs Assessment (if applicable) 10
15 Door Prizes, Certificates 15
Total Minutes 160
16 Break Down Room After Class 30
Or, If A Second Class
17 Sign-In Sheet 5
18 Pre-Class Test 8
19 Learning Objectives 5
20 Training Presentation – Part 1 40
21 Quick Break 10
22 Training Presentation – Part 2 40
23 Review Learning Objectives 5
24 Post-Class Test 6
25 Smile Survey 5
26 Door Prizes, Certificates 15
Total Minutes 139
27 Break Down Room After Class 30
10
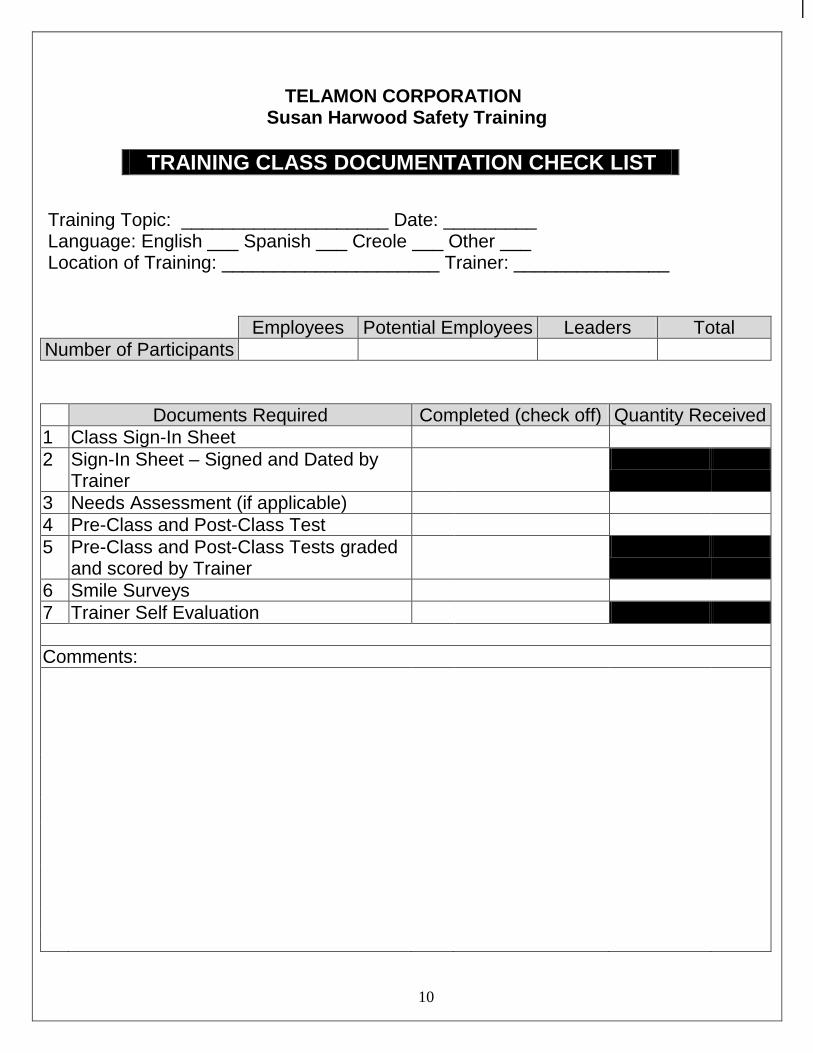
TELAMON CORPORATION Susan Harwood Safety Training
TRAINING CLASS DOCUMENTATION CHECK LIST
Training Topic: ____________________ Date: _________ Language: English ___ Spanish ___ Creole ___ Other ___ Location of Training: _____________________ Trainer: _______________
Employees Potential Employees Leaders Total
Number of Participants
Documents Required Completed (check off) Quantity Received
1 Class Sign-In Sheet
2 Sign-In Sheet – Signed and Dated by Trainer
3 Needs Assessment (if applicable)
4 Pre-Class and Post-Class Test
5 Pre-Class and Post-Class Tests graded and scored by Trainer
6 Smile Surveys
7 Trainer Self Evaluation
Comments:

11
4. Module 1 – Creating a Place Where Safety Happens
Module 1 - Creating a Place Where Safety Happens, consists of three sessions:
Session 1: SMART Conversations
Session 2: Characteristics of SMART Conversations
Session 3: Strategies for Creating SMART Conversations
These sessions are for anyone in a place of leadership in the poultry industry. If you have anyone under
your sphere of influence, you are a leader. This cornerstone module will create the framework for future
training and help ensure effectiveness.
LEARNING OBJECTIVES: Module 1 - Creating a Place Where Safety Happens
By learning to engage in SMART conversations, participants will learn to:
Empower relationships and environments where both employer and employee can work together
to help improve conditions in their workplace.
Decrease fear and anxiety on the job, and their confidence in their ability to do the job will increase
resulting in reduced injuries and incidents.

12
You can’t move forward, if you are talking backwards.
Module 1 – Creating a Place Where Safety Happens - Session 1: SMART Conversations
What is safety culture? Safety culture is the environment where the attitudes, behaviors and
perceptions of all workers are reflected in the health and safety of the workplace. One way to measure or
gauge those attitudes, behaviors and perceptions is by listening to the conversations that take place around
you. Though certain behaviors, such as posting required safety information is definitely a part of safety
culture, by itself, it does not indicate a high level of safety culture. The types of conversations that occur in a
workplace where safety culture exists are SMART conversations. We hear a lot about SMART goals – ones that
are specific, measurable, achievable, realistic and time-bound. SMART conversations are similar. Similarly,
how you might ask? They are specific in that they focus on the desired
outcome or safety goal. They are measurable because they are
quantifiable. Participants of SMART conversations leave the
conversation feeling like the task is achievable. “I can do this!”
Closely related to achievable is realistic. Is the request being made within the realm of possibility?
Leaders have to be careful not to put demands on workers where the variables or processes that lead to a
successful outcome are outside of their control. When asking workers to partner in safety and health goals, it
should always be accompanied by a reasonable timeframe. In summary, SMART conversations are defined as
goal-oriented dialogue that motivates and guides the participants of that dialogue into a place of health and
safety.
13
Module 1 - Creating a Place Where Safety Happens - Session 1: SMART Conversations
The key to creating SMART conversations lies in a leader’s ability to develop the skill set of asking the
right questions, depositing the right feedback, as well as listening and looking for the right cues. As skills are
developed, SMART conversations begin to take place and powerful things
happen. Soon, it becomes part of the culture. Powerful questions open up
an employee’s ability to think. When communications are declarative and
one-way it has the ability to shut down thinking. When a person’s thinking
is not being activated and stimulated it limits or prohibits their ability to
attend to the task at hand. A lack of attentiveness results in increased
incidents and loss of profit.
14
Module 1 - Creating a Place Where Safety Happens - Session 1: SMART Conversations
QUESTIONS - Check for Understanding
1. Which of the following is not an indicator of safety culture in the workplace?
a. Attitude
b. OSHA Posters - ANSWER
c. Behaviors
d. Perceptions
2. What is a skill that is most important to have when measuring the effectiveness of the safety culture in
your workplace?
ANSWER: Listening
3. SMART conversations that move employers and employees alike in a forward direction toward health
and safety have what type of orientation?
ANSWER: Goal
4. Can you think of a situation where a worker was not motivated and misunderstood direction based on
your conversation or dialogue? How could you change it to be more goal-oriented? Discussion.
PAIRED ACTIVITY
Divide participants into pairs and have them discuss question 4. above for 10 minutes. Bring the group back together and ask for volunteers to share. If there seems to be a hesitation, the facilitator may need to get the discussion started by sharing a personal experience.
15
Module 1 - Creating a Place Where Safety Happens - Session 1: SMART Conversations
You may be asking yourself does it really matter or is this just a bunch of hype. Wagner and Harter in
12: The Elements of Great Managing wanted to answer that question for you, so they conducted a Gallup poll
of over ten million employees and managers about employee engagement to find out.
The answer: Employees and workers need to know they are valued.
HANDOUT (give participants the handout “12 Elements for Employee Engagement”)
The results of their survey produced “12 Elements for Employee Engagement”.
1. I know what is expected of me at work.
2. I have the materials and equipment I need to do my work right.
3. At work, I have the opportunity to do what I do best every day.
4. In the last 7 days, I have received recognition or praise for doing good work.
5. My supervisor or someone at work seems to care about me as a person.
6. There is someone at work that encourages my development.
7. At work, my opinion seems to count.
8. The mission or purpose of my company makes me feel my job is important.
9. My associates or fellow employees are committed to doing quality work.
10. I have a best friend at work.
11. In the last 6 months, someone at work has talked to me about my progress.
12. This last year, I have had opportunities at work to learn and grow.

16
LIKERT SCALE
1- Chicken is dead. 2- Chicken is
running around with his head cut off.
3- Chicken could be doing better.
4- Chicken is doing well.
5- Chicken is showing off in
the marketplace.
Module 1 - Creating a Place Where Safety Happens - Session 1: SMART Conversations
ACTIVITY to Check for Understanding
A Likert scale is a tool used to survey a group’s level of agreement or
disagreement. Using the Likert scale in Figure 1, rank your level of
agreement with how well you engage in or model the findings in the
Gallup Poll study. For example: 1- Chicken is dead would equate to
STRONGLY DISAGREE, 2- DISAGREE, 3- NEUTRAL, 4- AGREE and finally 5-
STRONGLY AGREE. Create some group discussion by reviewing each
element and having participants rank themselves on a scale from 1 to 5.
Refer to the Handout “12 Elements for Employee Engagement”.
Element Rating Element Rating
1 7
2 8
3 9
4 10
5 11
6 12

17
Module 1 - Creating a Place Where Safety Happens - Session 1: SMART Conversations
Do you need more evidence? In a recent integrative review of safety research, safety culture was
found to be an indicator of reduced injuries and illnesses in the workplace. It’s clear. The human factors field
dominates research on occupational safety. To help organizations identify job applicants who are likely to
engage in safe and productive behaviors, Hogan Assessment System developed personality-based scales to
predict safety-related behaviors. After many years working with companies, Hogan discovered a correlation
between an employee’s personality traits and their propensity to safety.
They found that conscientiousness and safety-related job outcomes indicated that individuals who
are inattentive to detail, unreliable and have difficulty following rules are – as you would suspect - more likely
to have accidents or injuries.
You may not be able to change another person’s personality, but if you can identify traits that influence safety
and work toward developing the SMART conversations and strategies that help to encourage and foster those
traits, it serves to reason that it would have an impact. In their research, Hogan found that employees who
possess a compliant and teachable spirit, exhibit confidence and stability and are aware of their surroundings
are the same employees who exhibit safer behaviors.

18
Module 1 - Creating a Place Where Safety Happens - Session 1: SMART Conversations
Let’s take a closer look at some of the traits.
Encouraging Compliance
Leadership is responsible for making employees feel comfortable sharing their thoughts about
potentially serious matters with the assurance that they will be heard and a resolution found.
Building Confidence
Creating an environment where strength of character and human value is placed as a high priority
builds confidence in workers. In turn, this confidence acts as a preventive measure against the pressures that
arise from an anxiety-filled workplace that leads to careless mistakes.
Model Stability
Do employees and workers know what to expect from you when you come
out on the floor? The ability to maintain emotional control while working is an
indicator of a safe working environment. A person who easily loses their temper
and flies off the handle is more likely to have an accident and cause an injury not
only for themselves but by others as well. Leadership’s role is to model emotional
stability at all times.
Create Awareness
Finding innovative ways to create awareness in an environment where a worker is tasked with the
responsibility of performing repetitive tasks for an extended period of time is a challenging one. The ability to
create awareness will aid employees in completing work more carefully, avoiding unnecessary risks.

19
Module 1 - Creating a Place Where Safety Happens - Session 1: SMART Conversations
Stay Teachable
People who know everything are hard to teach. Maintaining an open spirit that allows you to learn
new things is critical for creating a safe environment. In addition, it allows you to hear and capture valuable
information that may be shared by employees. If leaders are not careful they can slip into a closed mindset
that prevents them from hearing and valuing what workers have to contribute. Remember, the worker is the
one performing the job. Who better to have insight and give input?
QUESTIONS - Check for Understanding
1. Which trait do you feel you most exemplify?
______ Encourage Compliance ______ Building Confidence ______ Model Stability ______ Create Awareness ______ Stay Teachable
2. In which trait or area do you feel you have the most potential for growth?
______ Encourage Compliance ______ Building Confidence ______ Model Stability ______ Create Awareness ______ Stay Teachable
3. Which trait, if successfully modeled and implemented, would bring the greatest benefit to your
specific work area or situation?
______ Encourage Compliance ______ Building Confidence ______ Model Stability ______ Create Awareness
______ Stay Teachable
20
Module 1 - Creating a Place Where Safety Happens - Session 2: Characteristics of SMART Conversations
By having SMART conversations, employers can begin to engage employees and by asking
meaningful questions and engaging in powerful dialogue, they will begin to build the skills and behaviors that
lead to the safety culture that they so desire. In Session 1 of this module, you learned about some of the traits
that are indicators for safer behavior and how leadership and management need to learn ways and strategies
for cultivating and encouraging the development of those traits in their workers. You also learned that SMART
conversations are goal-directed – they lead participants in the direction of the goal of an injury-free
workplace. SMART conversations begin with you, the leader. One proverb reads, “if you want a friend, you
must first be a friend.” Similarly, if you want employees to respond positively and constructively, then you
must first offer them something positive and constructive which to respond.
In this session, we will look at some of the characteristics that identify a conversation as SMART.
They include, but are not limited to, the following attributes.
Position Yourself as a Coach
Positioning yourself as a coach requires that you transition from supervisor to advisor. Coaching helps
others put together missing puzzle pieces. It helps move them forward, facilitating those “aha” moments.
When we don’t take the time to lead and guide in this way and instead rattle off directives and quotas only,
we miss the opportunity to help employees develop their character and competency. We rob them of the
ability to come up with their own solution, connect their own dots. Coaching is about giving people the
privilege of their own insights; allowing them to go through their own processes.
21
Module 1 - Creating a Place Where Safety Happens - Session 2: Characteristics of SMART
Conversations
Frame Safety Standards as Personal Learning Goals
By taking the safety standards and framing them as personal learning goals that are results-oriented
and action-based, you not only enter into a relationship, but you begin to help build a sense of ownership in
the other person. This shared sense of ownership fosters a spirit of collaboration resulting in all parties
working together toward a common goal – an injury-free workplace.
Ensure the Conversation is Two-Way
A great leader knows not only how to lead, but how to follow. Being open and willing to listen to the
ideas of others not only builds confidence in that person, but also allows the leader to possibly view a
situation from a different perspective and see how their decisions affect others. Remember, before you can
ask powerful questions, you first have to be able to listen. Feedback needs to be timely and specific. Start
with positive comments such as, “Thank you for your contribution to the team.” Regular feedback can pre-
empt conflict.
Position the Other Person for Growth
By ensuring the conversation is two-way, you are now able to gather valuable information and in
return provide instructional feedback that will position that other person for growth. Learning that is not
interactive and that is only one-way stays on the surface. It is not absorbed and is easily lost. Facilitating
learning through SMART conversations makes it personal and when it becomes personal, it becomes
connected.

22
Module 1 - Creating a Place Where Safety Happens - Session 2: Characteristics of SMART
Conversations
SCRIPTED EXAMPLES - Check for Understanding
If you are in a group setting, you can provide participants with some scripted examples. Listed below are
some examples, you may think of others. After you have shared the examples, ask volunteers to share some
of their own.
Scripted Examples
1. “Winston, I like how you take it upon yourself to make sure that all the paperwork is in order; that
tells me that you really care about the quality of work that you do. I am going to make sure others
know about your excellent work ethic.”
2. “Billy, you seem to be a very conscientious worker. When you have time, I would like you to write
down ways you would improve safety in your work area and get them to me.”
3. “Jose, others can’t help but notice your positive attitude toward your work. I want you to know
that you are a great role model for your co-workers and I really do appreciate it.”
23
Module 1 - Creating a Place Where Safety Happens - Session 3: Strategies for Facilitating
SMART Conversations
In this session, we will take what we have learned about SMART conversations and provide you with
some strategies through which to implement this new information. The strategies will take the form of
messages.
Message #1 – Be Prepared.
As leaders, it is your responsibility to work with others to produce desired results. You do this by
asking questions and creating dialogue that bring clarity, confront and encourage thinking. The first and most
important message or strategy is to be prepared! It is not suggested, unless you have a lot of experience and
practice, to attempt to do this off the cuff. It is recommended that you reflect on experiences with employees
and co-workers and work on developing your own pool of questions. Questions invite people to reflect.
Asking a powerful, sincere question has the effect of disengaging the automatic pilot response the worker
typically offers. Taking the time to develop these powerful questions and then looking for opportunities to
use them will help others begin to feel valued as a person. You should keep in mind the possible settings that
SMART conversations could take place. The time available may dictate the intensity of the question. One
model for developing powerful questions is the GROW model.
The GROW acronym stands for:
G - GOAL,
R - REALITY,
O- OPTIONS, and
W - WILL.

24
Module 1 - Session 3: Strategies for Facilitating SMART Conversations
GOAL questions talk about the agenda or what do we desire to accomplish
Scenario – You overhear a worker complaining about production goals.
“Sal, I understand you feel the benchmarks are too high. What would make them more realistic for you?
REALITY questions deal with the starting point.
Scenario - A worker has had repeated trips to first aid.
“Lois, I see you have been to first aid three times in the last month. Tell me about the common factors that
occur before each incident.”
OPTIONS questions talk about possibilities.
Scenario – Someone repeatedly leaves a pallet jack in the walkway.
“Betty, I noticed that someone keeps leaving the pallet jack in the middle of the walk way. What would be
three possible ways you would suggest addressing this so it doesn’t happen again?
WILL questions are about action steps.
Scenario – Safety audit is scheduled in three weeks.
“Sam, you know we have that safety audit in three weeks and the goal is no findings. Can you think of any
obstacles that might get in the way of us reaching or obtaining our goal?”
25
Module 1 - Session 3: Strategies for Facilitating SMART Conversations
Message #2 – Practice Makes Pretty Good (You Will Never Be Perfect).
In order to practice SMART conversations and be a catalyst for change either with workers or other
leaders you have to recognize what is going on around you. You have to be willing to share your observations
in ways that stimulate input and interest.
It is always a good idea to be sensitive to the worker. The object is not to embarrass someone or make them
feel uncomfortable. Therefore, at times, less personal exposure may be preferred. As you work at creating
SMART conversations, you may find that some of your questions and techniques need to be tweaked – that is
why we call it practice.
Message #3 – Don’t Be a Stranger.
Anyone in a place of leadership and responsibility can often feel there is not enough time to get
everything done. For someone working in a job where you have to stay in one position for an extended period
of time with limited interaction, a lack of presence from your supervisor or management can be interpreted as
a lack of interest. Workers question management’s ability to make decisions regarding their work area or job
when they have never or have seldom been there.
Workers interpret the presence of management as a symbol of how they rate safety, which supports
the goal of an injury-free workplace.
Some responsibilities of management carry more weight and have the propensity for greater impact than
others, being visibly present in the work area is one of those responsibilities. It has been said, “the one most
present wins”.
26
Learning looks inward and makes adjustments; blaming looks out,
and makes excuses.
Module 1 - Session 3: Strategies for Facilitating SMART Conversations
Message #4 – Let Them Know They Matter.
If cost cutting as well as cost savings is a product of safety, then – supportive of the research
discussed earlier - employee welfare should be at the top of the list. The need for leadership to express care
and concerns for their workers cannot be understated. Taking the time to show employees that they are
valued, asking them for their opinions and validating their concerns and ideas can transform a resistant
workplace into a collaborative one. If workers get the idea from management that production takes
precedence over safety, the risk of accidents and injuries increases. Making comments about rush orders or
pending deadlines only serves to put pressure on the worker. Rather than pressure, encourage, empower and
motivate the workers with SMART conversations that will have the effect of accomplishing the desired goal of
getting the work done. Line leaders and supervisors
may underestimate the potential for positive
influence their position possesses.
Message #5 – Take Ownership.
By doing your part to transform your workplace into a collaborative one, you communicate to the worker that
safety is everyone’s responsibility. It is important for management to lead by example, by following through
with commitments and ensuring worker training needs are met.

27
Module 1 - Session 3: Strategies for Facilitating SMART Conversations
Message #6 – Accountability is Integrity.
Accountability is a welcomed occasion of any employer or employee committed to safety and health.
This is another area where modeled behavior by management speaks volumes. For example, a supervisor or
line leader would never walk through a work area without the proper personal protective equipment (PPE).
Challenging and empowering workers, through word or deed, toward compliance at the level of PPE is not
only good leadership, but is a preventive measure in avoiding potential accidents or injuries. It wouldn’t make
much sense to watch a worker walk by with improper shoes and not question or help them obtain appropriate
equipment and then write them up when they go around the corner and slip. The application of safety and
health standards should be consistent across the board. It is reasonable for workers to expect that standards
will be applied without waver. This commitment from management lets workers know that their employer is
reliable and dependable.
Message #7 – If You Mean It, Say It.
The level of importance you place on the information you wish workers to know, should dictate the
way you communicate that information. Simply posting a memo on a plant-wide bulletin board does not cut
it. Make sure to follow up any important written reminder or directive with a verbal contact.
One inexpensive idea for getting the word out is through LCD panels. They can be posted in work
areas that are frequented like locker rooms, bathrooms and break rooms. Some cafeterias have televisions
where you can repeat video safety reminders or offer encouragement and gratitude for a job well done.

28
Module 1 - Session 3: Strategies for Facilitating SMART Conversations
REVIEW
Some of the things you will see in people who engage in SMART conversations is that they:
1. Position Themselves as a __________. Answer - coach
2. Frame Safety Standards as Personal ___________Goals. Answer - learning
3. Ensure the Conversation is __________. Answer – two- way
4. Position the Other Person for __________. Answer – growth
5. What is the most important strategy for engaging in SMART conversations?
1. Be confident
2. Be on-time
3. Be prepared
4. Be informed
6. What for words does the GROW acronym represent?
G – Goal
R - Reality
O - Options
W - Will

29
5. Module 2 – Identifying Job Hazards
Module 2 – Identifying Job Hazards, consists of two sessions:
Session 1: Hazards – What are They?
Session 2: Hazards – How Can I Prevent Them?
LEARNING OBJECTIVES: Module 2 – Identifying Job Hazards
Participants will learn to:
Indentify Job Hazards
Review Sources of Information on Hazards
Understand Hazard Control and Prevention Methods

30
Module 2 – Identifying Job Hazards - Session 1: Hazards – What are They?
Identifying Hazards
In this session, facilitators will practice the art of SMART conversations which were discussed in
Module 1 - Creating a Place Where Safety Happens. It is critical to think about health and safety hazards on
their jobs and share concerns and ideas with each other. The goal of a company’s health and safety program
is to create an injury-free workplace. The most effective way to do this is to eliminate or reduce the hazards
that cause those injuries and illnesses. Remember, a reduction in injuries, accidents and occupational illnesses
lead to increased productivity, reduction in costs, reduction in turnover, better employee moral, and an
increase in profits. This is not only beneficial to the employer and industry, but as well to the employee and
community at large.
When conducting a job or hazard analysis, you typically look for concerns in the following areas:
facilities,
processes,
environment,
materials, and
equipment.

31
Module 2 – Identifying Job Hazards - Session 1: Hazards – What are They?
Health and safety hazards in the workplace include those things that cause stress or are a potential risk
to a worker’s physical or emotional well being. In order to prevent injuries, it is important to use the
systematic approach to hazard analysis that includes the following 3 steps:
1. Identify
2. Evaluate
3. Control
Identify
In order to eliminate or reduce hazards, a company first needs to identify the problems and concerns
(hazards) that could cause worker injuries. Hazards are not always obvious; so in order to identify the hazard
a person must first be familiar with the poultry industry, their work area and the recommended work
practices.
Evaluate
Once hazards have been identified, they need to be evaluated for priority. It is not possible to fix
everything at once. The biggest concern may often be the hazards that are most serious – those that could
cause the most serious injuries or illnesses. There are times when the hazard of most concern will be the one
affecting the most people. Still other times, the hazard with the highest priority is the easiest to get corrected
because it can render the quickest results.
Control
The third step is to select the most appropriate and effective control measures for those particular
hazards. The topic of methods of control will be addressed in Session 2.
32
Module 2 - Identifying Job Hazards - Session 1: Hazards – What are They?
GROUP ACTIVITY - Check for Understanding (groups of 3-5 participants) 10-15 minutes
Before beginning this activity, remind participants of the goal of creating an injury-free workplace and
emphasize that fully engaging in this training activity will help improve their ability to identify hazards and
make strides toward reaching the goal.
In groups, ask participants to generate a list of health and safety hazards that may occur in their work
areas. Divide participants into groups of three to five.
HANDOUT – give participants the handout “Problems in Poultry”
Once participants have been placed in groups, disseminate “Problems in Poultry” handout and review
instructions. As a facilitator/trainer, make yourself available during the activity in case participants have
questions.
Groups should be given about 10-15 minutes (depending on time available) to share some of the
health and safety hazards issues that have experienced in their work areas. Each group will select three issues
or hazards to share with the group. Participants then reconvene, share their lists and discuss their findings. As
individuals share, you may record the information on a flip chart. Give each group an opportunity to share,
making note of any repeats.
There are several different work areas within the poultry process. Recognize that all participants may
not be from the same work area. Participants from different work areas will point out different concerns.
Make sure you validate and encourage all responses. If there are similarities, ask participants why they think
these issues are of concern across work areas. One reason for creating some discussion after you have
surveyed the group is so that participants can experience a more meaningful learning experience.
33
Module 2 - Identifying Job Hazards - Session 1: Hazards – What are They? Sources of Information
The importance of staying informed about hazards cannot be understated. Employers and employees
alike cannot be reminded enough about the direct relationship between an injury-free workplace and their
quality of life. Being an informed and self-directed learner means that you seek out information that not only
improves your work, but that benefits you, your workplace and your community. Staying informed increases
your awareness and helps you to more readily identify hazards.
Employees should never be afraid to ask questions. No one is an island unto themselves. Employers
and co-workers can be great sources of information. As leadership begins to use and employ the ideas and
strategies of SMART conversation – building a culture of safety and modeling the traits discussed earlier –
asking the difficult questions should become a natural course of action.
There are many types of hazards in poultry processing – obvious ones as well as those that are hidden
– and many sources for learning about those hazards. Knowing what to ask and where to look is important for
any worker striving toward the goal of an injury-free workplace. There are several sources which exist for
finding information. Some of them include co-workers, the employer, government resources and other
miscellaneous sources.

34
Module 2 - Identifying Job Hazards - Session 1: Hazards – What are They?
ACTIVITY - Check for Understanding 10-15 minutes
HANDOUT – give participants the handout “Where to Look”
In this activity, participants will pair up with a neighbor to develop a list of the kinds of information
that might be found under each category mentioned above by using a worksheet that has already been
prepared (Where to Look Handout). The facilitator/trainer can suggest that participants think about the kinds
of information they have received which helped them identify or understand more about a particular hazard
or hazards in their workplaces. If they lack experience with this, ask them what information they could
receive that would help them to identify or understand the hazards in their workplace. Give paired learners
10-15 minutes to complete this activity.
See sample chart on the following page for details. Depending on the
training or work setting, the facilitator/trainer could assign the task of retrieving a
particular piece of information from one of the sources discussed.

35
Module 2 - Identifying Job Hazards - Session 1: Hazards – What are They?
A completed chart could look something like this:
WHERE TO LOOK?
Co-workers Employer Government Other
Surveys
Body and Hazard
Mapping
Asking questions
Making
Observations
OSHA 300 Log
MSDSs
First Aid logs
Accident/incident
reports
OSHA inspection
data
OSHA web site info
NIOSH Hot Line
info
EPA info and data
Manufacturers
information
Health and Safety
websites
Trade journals
Health and Safety
organizations
Health and Safety
training (orientation,
other online
resources)
University studies
(cooperative
extensions)
36
Module 2 - Identifying Job Hazards - Session 2: Hazards – How Can I Prevent Them?
In this session, participants will learn about a “health and safety process model” for identifying,
evaluating and controlling (eliminating or reducing) workplace safety and health hazards. Elimination is the
most effective way to reduce the hazards that cause those injuries and illnesses. Learning ways to eliminate or
reduce hazards is called “controlling” hazards. Not only is it important to be and stay informed so that you can
identify hazards, it is equally important to control the hazards after they are identified.
Following the 3-step approach discussed earlier, hazards are identified, and then there is a need for
them to be prioritized for correction. As mentioned, not everything will be able to be corrected immediately.
There needs to be a list of priorities – those hazards that need attention immediately, those hazards that
should be looked at next, and so forth. The company will need to discuss what makes the most sense
depending on the particular hazards and conditions in that workplace.
After you have identified and evaluated the hazard, the third step in the systematic approach to hazard
analysis is control. Methods of hazard control provide the most effective way to protect them from a
particular hazard. Industry has established a list of control methods to help workers and employers effectively
control hazards.
37
Module 2 - Identifying Job Hazards - Session 2: Hazards – How Can I Prevent Them?
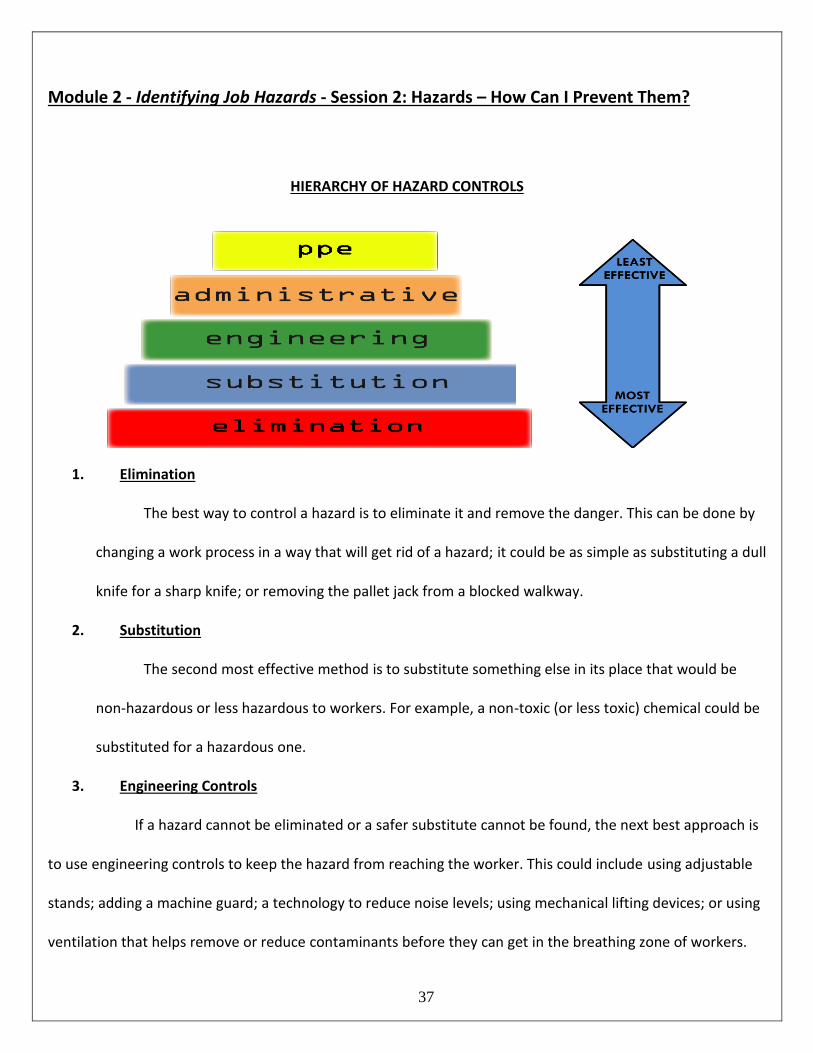
HIERARCHY OF HAZARD CONTROLS
1. Elimination
The best way to control a hazard is to eliminate it and remove the danger. This can be done by
changing a work process in a way that will get rid of a hazard; it could be as simple as substituting a dull
knife for a sharp knife; or removing the pallet jack from a blocked walkway.
2. Substitution
The second most effective method is to substitute something else in its place that would be
non-hazardous or less hazardous to workers. For example, a non-toxic (or less toxic) chemical could be
substituted for a hazardous one.
3. Engineering Controls
If a hazard cannot be eliminated or a safer substitute cannot be found, the next best approach is
to use engineering controls to keep the hazard from reaching the worker. This could include using adjustable
stands; adding a machine guard; a technology to reduce noise levels; using mechanical lifting devices; or using
ventilation that helps remove or reduce contaminants before they can get in the breathing zone of workers.

38
Module 2 - Identifying Job Hazards - Session 2: Hazards – How Can I Prevent Them?
4. Administrative Controls (Training and Work Practices)
If engineering controls are not available, administrative controls should be the next
consideration. Administrative controls involve changes in workplace policies and procedures. They can
include such things as:
Warning alarms
Labeling systems
Job Rotation
Training
5. Personal Protective Equipment
The use of personal protective equipment (PPE) is a way of controlling hazards by placing
protective equipment directly on workers' bodies. Examples of personal protective equipment include:
respirators, gloves, protective clothing, hard hats, goggles, and ear plugs.
Personal protective equipment is the least effective method for protecting workers from
hazards. PPE should be used in combination with more effective ways of hazard control. It should
never be used in place of other more effective hazard control methods.
39
Module 2 - Identifying Job Hazards - Session 2: Hazards – How Can I Prevent Them?
GROUP ACTIVITY – Hazard Scenario Control and Prevention - Check for Understanding (groups of 3-5
participants) 10-15 minutes
Research shows that in order to have new information encoded into memory and transferred for long
term storage it is beneficial to activate prior knowledge. Engaging participants in pre-questions or pre-
discussion before giving instruction can assist them to absorb and retain the new information more
effectively. The following activity can be used before and after instruction has been provided. If the
facilitator/trainer chooses to use prior to instruction, then they would revisit at the end.
In a group, provide participants with a list of possible hazards that someone might encounter when
working in poultry. They may be compiled on a handout or written on a flipchart in front of the room.
Below is one example, you can add to this list or create your own. Discuss in what situations these
hazards might occur and the types of control and possible solution that could be used to prevent injury within
each scenario. Have participants share other examples.
Bending at waist to reach into tubs or lift tubs of product.
Forceful gripping
Ergonomic hazards from use of scissors and knives
Standing for long periods of time
Reaching to access product, saws, or machine load areas
Cuts and lacerations
Reaching up, forward or to the side to access shackle
Slips, trips and falls
Forceful hand exertions

40
Module 2 - Identifying Job Hazards - Session 2: Hazards – How Can I Prevent Them?
GROUP ACTIVITY - Check for Understanding (groups of 3-5 participants) 10-15 minutes - continued
An extension of this exercise or activity would be to present participants with a problem-based
scenario and create a discussion of why this is not a safe practice. Participants can then offer a recommended
work practice or solution for preventing this hazard. Below are examples you can use or work with
participants to create your own. Discuss how you might control for hazards in each of the situations or how
you may have done things differently.
Scenario #1 - There are times when a person may take an adjustable stand and stack it on top of another
adjustable stand to reach an area where they can’t reach, such as a drip pan or other overhead area.
Adjustable stands or ergonomic stands are used so that people of varying heights can work at the same
workstation. Someone might do this because they find it easier to use materials (stands) that are right there or
readily available in the work area rather than retrieving a ladder. A discussion regarding this scenario would
be that this is an unsafe practice because of the two stands stacked on top of each other are not stable and a
slip/trip/fall, struck by, or sprain/strain can result. Instead of stacking stands, one solution would be to get a
safe-ready ladder to reach spaces not readily accessible.
Scenario #2 - Whenever working with knives or scissors people may have a tendency to stab the meat
(product) with the blade and either dragging it towards them or lifts it and brings it towards them to trim. This
is a very unsafe practice because the blade could cut through the meat and depending on the force being used
could result in a puncture or cut to the person’s face or abdomen. Many people get in this poor/unsafe habit
of “stabbing” the product because it tends to stick to the conveyor belts. The desired practice is to use the
protected non-knife/scissor hand to reach for and retrieve the product for trimming/cutting.

41
Module 2 - Identifying Job Hazards - Session 2: Hazards – How Can I Prevent Them?
GROUP ACTIVITY - Check for Understanding (groups of 3-5 participants) - 10-15 minutes - continued
Scenario #3 - Not properly steeling (maintaining) knives prior to each use can cause many issues. First,
additional force can be required to both make the desired cut and to hold onto the knife itself; this added
force can cause cumulative trauma disorders (injuries that get worse the more times it happens). Second,
using a dull knife and applying more force to the blade can cause a person to lose control of it causing a cut or
puncture wound to either the person or the worker next to them (buddy cut). Third, the use of dull knives
may cause a person to become “backed up” in their production count or reasonable expectancy (number of
pieces a person is reasonably expected to produce/cut/trim in a specific amount of time). This happens
because as the knife becomes dull, it doesn’t cut as well. The person may become frustrated and unable to
perform at the same speed. When they fall behind this presents another issue in that they are now crowding
their co-workers by invading their working space making the likelihood of a “buddy cut” all the more likely or
probable. These situations can be avoided to some degree by practicing good knife skills, knife steeling and
sharpening techniques, and by educating workers on when and how to properly use knife steels (either
ergonomic or hand).

42
Module 2 - Identifying Job Hazards - Session 2: Hazards – How Can I Prevent Them?
Review:
1. A job Hazard is:
1. Any job that can cause extreme danger risks.
2. Something that can kill you.
3. Anything in the workplace that can cause stress or potential injury to a person’s physical, mental or
emotional well-being.
4. All of the above.
5. None of the above.
2. What is an area that you would commonly look for a job hazard? 1. Equipment
2. Environment
3. Materials
4. Facilities
5. Processes
6. All of the above
7. None of the above
3. What are the 3 Steps to conducting a hazard analysis?
A. 1) teamwork 2) observation 3) elimination
B. 1) identify 2) evaluate 3) control
C. 1) brainstorm 2) observe 3) control
4. If you are eliminating or reducing hazards, you are said to be controlling hazards.

43
Module 2 - Identifying Job Hazards - Session 2: Hazards – How Can I Prevent Them?
Review:
5. What is the hierarchy of hazard control from most important to least important?
A. 1. PPE 2. Administrative 3. Engineering 4. Substitution 5. Elimination
B. 1. Elimination 2. Substitution 3. Engineering 4. Administrative 5. PPE
C. 1. PPE 2. Elimination 3. Engineering 4. Substitution 5. Administrative

44
6. Module 3 – Avoiding Injuries Using Ergonomics
Module 3 –Avoiding Injuries Using Ergonomics, consists of one session.
Session 1: Using Ergonomics
Module 3 –Session: 1. Using Ergonomics
LEARNING OBJECTIVES: Module 3 – Avoiding Injuries Using Ergonomics
In this module participants will learn:
• The Definition of Ergonomics and Musculoskeletal Disorders
• The Goal of Ergonomic Work Design
• Ergonomics Impact and Cost
• Ergonomic Risk Factors
• Prevention of MSD’s
• Ergonomic Solutions
• Recommended Ergonomic Training
45
Module 3 –Avoiding Injuries Using Ergonomics – Session 1: Using Ergonomics
In support of an awareness of a culture of safety and in pursuit of the goal of an injury-free workplace,
protecting the worker from injury is a shared responsibility between both employer and employee. A
workplace that makes safety a top priority and who has created a culture of safety is one that has an ongoing
effort to implement engineering and administrative controls regarding identified hazards. In addition to
engineering and administrative controls, PPE is a type of ergonomic control.
Employers use these controls to prevent musculoskeletal disorders (MSD’s) caused by poor work
design and practice. The method commonly used for the prevention of MSD’s is ergonomics.
What is ergonomics?
Ergonomics comes from two Greek words:
Ergon - meaning work and
Nomoi - meaning natural laws.
Combined, the two words mean the science of work and a person’s relationship to the work.
Ergonomics is the science of fitting the work to the worker, rather than the worker straining or overextending
to fit the work.
Ergonomic work design includes designing equipment, tools, work stations and job tasks to conform to the
capability of the worker so workers do not have to overextend themselves, helping prevent work related
musculoskeletal disorders (MSDs).
46
Module 3 –Avoiding Injuries Using Ergonomics – Session 1: Using Ergonomics
What are MDS’s?
Work related MSD’s occur from repeated overexertion, exposure to repetitive, forceful and or awkward tasks
not associated with one specific event and include illnesses and injuries to:
• nerves
• tendons
• muscles and
• supporting structures of the hands, wrists, elbows, shoulders, neck and low back
There are a number of things that can contribute to MSD’s. MSD’s develop gradually from repeated stress to a
particular body part and are also called “overuse” or “wear-and-tear” repetitive strain disorders.
Ergonomics Impact and Cost
“Of the reported 1.5 million workplace related injuries per year, about half ( 50%) are directly
attributed to ergonomic related injuries..."
U.S. Department of Labor
"The costs of ergonomic related injuries and their related impacts to U.S. businesses are
estimated to exceed $120 billion per year."
National Safety Council
If ergonomics is neglected in the workplace, it could lead down a path to injuries, absenteeism, high
turnover rates, a reduction in product quality and ultimately an increase in costs to the employer.

47
Module 3 –Avoiding Injuries Using Ergonomics – Session 1: Using Ergonomics
The goal of a good ergonomics program and work design is to:
1. help improve worker comfort, health and safety
2. prevent repetitive strain injuries which can develop over time
3. reduce the number and severity of work-related MSDs
Many jobs are physically demanding and can create added discomfort and strain the body.
When attempting to prevent MSD’s , it is important to understand the risk factors associated with ergonomics.
Many job tasks involve risk factors, including:
1. Force
2. Repetition
3. Posture (awkward and static)
4. Vibration and
5. Contact Stress
• All risk factors have been identified as increasing the risk of incurring an injury or illness
• Excessive exposure to these risk factors can lead to MSD’s

48
Module 3 –Avoiding Injuries Using Ergonomics – Session 1: Using Ergonomics
a. Force
Jobs tasks that require force (that do not cause immediate injury) put higher loads on the joints and
connective tissues. Force is an ergonomic stressor caused by lifting, pushing, pulling, grasping and pinching
items in the work environment. Lifting heavy objects high, outside a person’s normal range of reach, places
force on the back as well as the neck and shoulders. Force is often required to handle and control equipment,
tools, raw materials and finished products. Tasks that require forceful exertions that don’t result in acute
injury place higher loads on the joints and connective tissues. Prolonged or recurrent exertions of this type can
cause feelings of fatigue and may lead to musculoskeletal problems when there isn’t adequate time for rest or
recovery.
For example, force required to make a particular cut either with a knife or scissors, can contribute to
MSD’s. Increasing the applied force increases muscle effort, decreases circulation to the muscles and causes
greater muscle fatigue. Effort required to make a particular cut, either with a knife or scissors, can depend
upon the sharpness of the tool. A dull instrument requires more force or exertion. Forceful gripping may cause
pressure on nerves from muscles or tendons, as may repeated movement. Hand and arm motions may include
grasping, turning, applying pressure and pinching. These movements frequently result in stressful hand and
wrist positions. Compression or pressure to nerves (and blood vessels) can also occur when tool handles are
squeezed in the palm.

49
Module 3 –Avoiding Injuries Using Ergonomics – Session 1: Using Ergonomics
b. Repetition
Job tasks that require repetitive motion can, over time cause fatigue in the connective tissues and wear
them out. Repetition involves performing the same motion or series of motions repeatedly as well as
frequently. Effects of repetitive motions from performing the same work activities increase when awkward
postures and forceful exertions are involved. The longer the period of continuous work, the longer the
necessary recovery or rest time required.
c. Posture
There are postures that our joints can absorb more easily than others. The closer to the extreme of a
joint’s range of movement, the less capable the joint is and the more susceptible to injury. An extreme
posture can cause stress in the joints reducing the blood flow. Body postures that deviate from normal resting
or neutral positions place unnecessary stress on muscles, tendons and bones are referred to awkward.
Awkward postures include reaching above shoulder height, kneeling, bending the head over to look in hard-to-
see areas, improper cutting and twisting the body while lifting. Awkward hand motions are sometimes used
to separate meat from chicken bones. One hand may hold meat while the other hand is holding the knife to
make a specific cut. Static postures are those held for a long period of time that can place stress on the body,
particularly if the posture is awkward. Static postures can accelerate the development of fatigue and
discomfort.

50
Module 3 –Avoiding Injuries Using Ergonomics – Session 1: Using Ergonomics
4 . Vibration
The body experiences stress when using vibrating objects such as tools or while standing on a vibrating
platform. Vibration can lead to reduced blood flow to the exposed body part causing stiffness and numbness
in the affected area. Vibration is the physical exposure to tools or machinery that moves back and forth really
fast. Standing on a vibrating platform can lead to digestive and back disorders.
5. Contact Stress
Contact stress occurs with physical contact between the body and sharp or blunt edges of tools,
equipment and products. This is a dynamic force applied to the body, like when you use a hammer. The body
responds to impact stress by limiting blood flow to the exposed body part.
Other Factors
In addition to the factors listed above, other factors in poultry processing such as gloves and
temperature are as important. Working with gloves that fit too tight restricts the blood flow to the fingers and
causesnumbness in the fingers; in addition, working with gloves that are too big limit dexterity and makes
gripping more difficult. Gloves also increase the amount of force that a worker must exert in order to handle
objects.
In some processing areas, poultry products must be kept at or below 40 degrees. Exposure to
temperatures below 40 degrees F for more than two hours can limit blood flow to the extremities, which can
cause numbness and in the hands and fingers and reduce grip strength. PPE, such as rubber aprons and
gloves, are recommended for these types of work areas.
51
Module 3 –Avoiding Injuries Using Ergonomics – Session 1: Using Ergonomics
INDIVIDUAL ACTIVITY - Check for Understanding - 10-15 minutes Participants will identify and raise awareness of health and safety risks in the workplace by engaging in
a body mapping activity. Body mapping involves workers identifying their own work-related injuries and
illnesses by indicating (representing injuries, illnesses, and stresses) on a drawing of a body. Body mapping is a
tool that can be used by employers and workers to identify any reoccurring injuries and help develop priorities
for hazard prevention and correction.
Body mapping involves workers identifying their own work-related injuries and illnesses by placing indicators
on a drawing of a body.
HANDOUT – “Body Mapping Activity”
Give participants the Body Mapping Activity handout and ask them to remember specific and
personal work-related injuries, illnesses and stresses from the past or present. Participants can work
individually or in pairs to show on the body map parts of their body that have been affected.
52
Module 3 –Avoiding Injuries Using Ergonomics – Session 1: Using Ergonomics
Prevention
• When your body is under too much strain it will let you know.
• Effective treatment of pain and strain requires paying attention to early warning signs.
Early warning signs of strain include:
Swelling
Numbness
Tingling
Discomfort
Burning Sensations
Irritation
Insomnia
Stiffness
You can experience these early warning signs in your back, neck, shoulder, elbows, forearms, wrists
and hands. Using the debone work area as an example, these different body parts performing varied work
functions can experience or be subjected to various ergonomic stress factors.
53
Module 3 –Avoiding Injuries Using Ergonomics – Session 1: Using Ergonomics
Back
There are several examples of back stressors. For instance, a person in the position of loader bends
over repeatedly to remove product from a bin and is engaged in repetition causing stress on the back.
Workers on the processing line cannot leave their station and after standing for long periods of time can
experience static force. Workers engaged in cutting and pulling meat from the bone have to do so at high
rates of speed. Failure to keep up can result in chasing product down the line taking the worker out of their
own space. This twisting puts your body in an awkward position and can cause not only injury to you, but to
others.
Preventive measures that can be used to take some of the added pressure off the back are wearing
insoles, putting down an ergo mat, changing stance, shifting weight, and wearing proper footwear. In
addition, engaging proper work practices (cutting and pulling techniques) pre-shift and periodic upper
body/back/neck exercises, and keeping work tools (scissors and knives) sharp help a worker keep pace and
avoid unnecessary twisting.
Neck and Shoulder
A person’s stature is a consideration when working on the processing line. A person who is too tall
often stoops over. The static force caused by bending over not only causes pressure on the back, but neck as
well. Persons who are short tend to engage in improper reaching. The improper reaching takes a worker out
of the normal body range and causes undue pressure on neck and shoulders. A worker in a position where
what they do affects the person beside them, as in a poultry processing line, must be much focused, staying
on task. This intense concentration can often result in a worker having their head bent over for extended
periods of time.
54
Module 3 –Avoiding Injuries Using Ergonomics – Session 1: Using Ergonomics
Elbows
Workers who engage in what sometimes is referred to as the “lazy cut” are workers who attempt to
make cuts while propping on their elbows. Not only is this an improper work practice, it puts pressure on the
nerve in the elbow, leading to increase risk of injury, i.e., tennis elbow.
When handling and reaching for product the elbows should be kept close to the torso. Repetitive,
elevated reaches when loading or lifting product causes stress to the elbow and should also be avoided.
Forearms, Wrists, and Hands
Different products (leg, thigh, breast, and wing) require different cuts and some cuts are right to left,
others left to right. Using in-line knives can force a worker to bend their wrist in order to exert the force
needed to control the knife. In addition, improper cutting methods and dull knives can place added pressure
from undue force on the forearms, wrists and hands. Also, scissors can rub on the sides of fingers, causing
pressure and compression to nerves of the fingers.
As previously noted, sharper knives reduce the force needed to make a cut. Good knife steeling
equipment should be readily available for each worker required to use a knife. Bent handle knives to allow
cuts to be made with straight wrists is another control.
To help avoid and prevent MSD’s, report early warning signs and pain to your supervisor as soon
as it occurs.

55
Module 3 –Avoiding Injuries Using Ergonomics – Session 1: Using Ergonomics
INDIVIDUAL ACTIVITY – “ErgoAid”- 5-10 minutes
HANDOUT – Ergonomics Exercise Aid “ErgoAid”
VIDEO – “Ergonomic Exercises"
In addition to the preventive measures mentioned above, warm-up exercises and stretch breaks
can also help relieve pressure, reduce pain and prevent injuries. Using the excerpt “ErgoAid” from A Guide to
Safe Work Practices in the Poultry Processing Industry from the North Carolina Department of Labor
Occupational Safety and Health Division, model some exercises that workers might try. Show video on
“Ergonomic Exercises” and give participants an opportunity to demonstrate the exercises with the video.
Ergonomic Solutions
Ergonomic solutions for poultry processing include:
• engineering changes to workstations and equipment
• work practices
• personal protective equipment (PPE)
• administrative actions
Administrative solutions can be used to reduce the duration, frequency, and degree of exposure to risk
factors and include:
• Job rotation
• Conditioning, or break-in period for new employees
• Cross-training employees
• Preventive maintenance on equipment

56
Module 3 –Avoiding Injuries Using Ergonomics – Session 1: Using Ergonomics
Ergonomic Training
Recommended Training
• Care and use of knives
• Use of special tools and devices
• Use of safety equipment
• Use of personal protective equipment (PPE) related to MSD prevention (such as the proper fit
of gloves)
• Use of proper lifting techniques and lifting devices
57
Module 3 –Avoiding Injuries Using Ergonomics – Session 1: Using Ergonomics
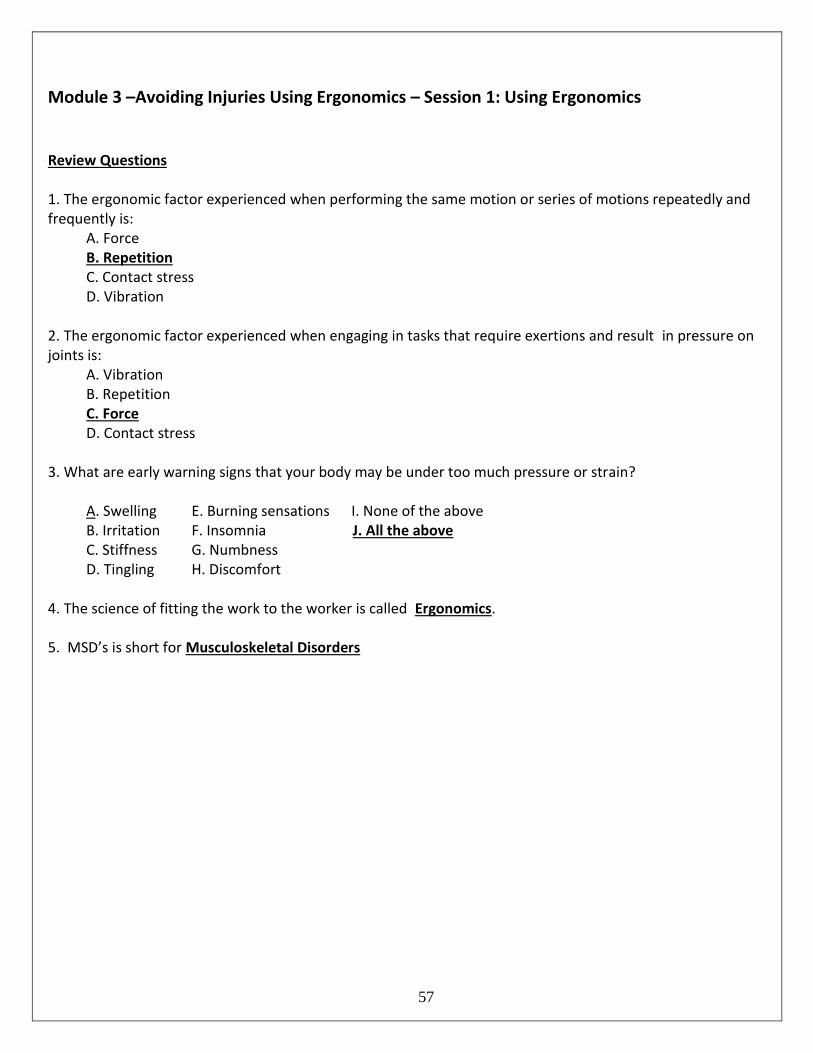
Review Questions 1. The ergonomic factor experienced when performing the same motion or series of motions repeatedly and frequently is:
A. Force B. Repetition C. Contact stress D. Vibration
2. The ergonomic factor experienced when engaging in tasks that require exertions and result in pressure on joints is:
A. Vibration B. Repetition C. Force D. Contact stress
3. What are early warning signs that your body may be under too much pressure or strain?
A. Swelling E. Burning sensations I. None of the above B. Irritation F. Insomnia J. All the above C. Stiffness G. Numbness D. Tingling H. Discomfort
4. The science of fitting the work to the worker is called Ergonomics. 5. MSD’s is short for Musculoskeletal Disorders

58
7. Module 4 – Preventing Slips, Trips and Falls
Module 4 – Preventing Slips, Trips and Falls, consists of two sessions.
Session 1: Causes of Slips, Trips and Falls
Session 2: Preventing Slips, Trips and Falls
GROUP ACTIVITY - (Ice Breaker) (groups of 3-5 participants) 5-10 minutes
Divide class into groups of 3-5 participants. Ask participants to introduce themselves to the other group
members - name, where they work and their job. Ask each group to select one activity to complete: select #1,
# 2, #3 or #4. #1. Identify several slip, trip or fall hazardous conditions they have observed in their workplace
#2. Identify several accidents and related injuries they have seen resulting from slips, trips or falls #3. Identify
several behaviors they have observed that could have resulted in a slips, trips or falls, OR Answer the question:
“Are all slips, trips and falls preventable” - yes or no? - and why or why not?
Ask for a volunteer representative to share their group information with the class.
59
Module 4 –Preventing Slips, Trips and Falls - Session: 1. Causes of Slips, Trips and Falls
LEARNING OBJECTIVES: Module 4 – Preventing Slips, Trips and Falls
• Slip, Trip and Fall Statistics and Costs
• Injuries resulting from Slips, Trips and Falls
• Definitions of Slips, Trips and Falls
• Causes of Slips, Trips and Falls
• 3 Steps for Preventing Slips, Trips and Falls
• Behaviors for Preventing Slips, Trips and Falls
Why is STF Training Needed?
According to the U. S. Department of Labor, slips, trips, and falls constitute the majority of general
industry mishaps. This particular category of mishaps causes 15 percent of all accidental deaths and is second
only to motor vehicles as a cause of fatalities.
Likewise in covered state agencies, slips, trips, and falls are among the most frequent type of
reported injuries and have so far averaged approximately 25 percent of reported claims in any given fiscal
year. Based on in-depth investigations and detailed analysis of reported claims, many of them could have been
prevented. In this presentation, we will discuss the circumstances surrounding these types of mishaps and
recommend preventive practices to reduce or significantly mitigate the number and seriousness of injuries
from slips, trips, and falls.
Why is fall protection important?
Falls are among the most common causes of serious work related injuries and deaths. Employers
must set up the work place to prevent employees from falling off of overhead platforms, elevated work
stations or into holes in the floor and walls.
60
Module 4 –Preventing Slips, Trips and Falls - Session: 1. Causes of Slips, Trips and Falls
Slips and Falls
Floors and work areas in poultry processing will be wet because of the wet process and frequent cleaning
required for sanitary reasons. Similarly, grease or fat from the birds will make floors and work areas slippery.
Standing and walking in work areas with slippery floors increases the potential for slips and falls.
Preventive Measures
Good drainage is essential for work areas where there is wet processing. Boots and nonskid soles and floor
mats with nonskid surfaces can be used to reduce the potential for slips and falls. Routinely scheduled
cleaning during the work shift helps maintain a sanitary work environment and reduces the buildup of grease
and fat. Aisles and passageways where mechanical handling equipment is used should be clearly marked and
be of sufficient size for safe clearance.

61
Module 4 –Preventing Slips, Trips and Falls - Session: 1. Causes of Slips, Trips and Falls
OSHA standards applying to Slips, Trips and Falls
• Special standards have not been adopted for the poultry industry.
• Workers in the poultry industry are protected by the act and by general and specific occupational
safety and health standards, such as the General Duty Clause and the following:
– 29 CFR 1910 Subpart D
– 29 CFR 1910.22—Walking/Working Surfaces—This standard covers floor conditions, including wet
surfaces
Statistics – Slips, Trips, Falls
According to the U. S. Department of Labor, Slips, Trips, and Falls make up the majority of general
industry accidents.
• 15% of accidental deaths are caused by Slips, Trips and Falls
• 15% to 20% of all workers compensation costs are due to Slips, Trips and Falls
Costs – to the Worker
– Lost wages & out-of-pocket expenses
– Pain
– Temporary or permanent disability
– Reduced quality of life
– Depression
– Death
Costs – to the Employer
– Loss of productivity & business
– Increased industrial insurance premiums
– Costs associated with training replacement worker

62
Module 4 –Preventing Slips, Trips and Falls - Session: 1. Causes of Slips, Trips and Falls
Injuries – Slips, Trips, Falls
• Sprains & strains
• Bruises & contusions
• Fractures
• Abrasions & lacerations
63
Module 4 –Preventing Slips, Trips and Falls - Session: 1. Causes of Slips, Trips and Falls
Definitions -
Slips
• Slips occur when there is too little friction or traction between your feet (footwear) and the
walking or working surface, and you lose your balance ..
• Slips can result in falls
Trips
• Trips occur when your foot (or lower leg) hits an object and your upper body continues moving,
throwing you off balance.
or
• When you step down to a lower surface and lose your balance.
Falls
• Falls occur when you are too far off your center of balance – either at the same level or a lower
level.

64
Module 4 –Preventing Slips, Trips and Falls - Session: 1. Causes of Slips, Trips and Falls
Causes - Slips
• By understanding causes of slips, trips, and falls, you can learn to identify and prevent needless
and painful injuries.
1. Items of the floors or walking Surfaces
Product
Ice
Fat
Feathers
Cardboard
Plastic
Water
2. Walking from one surface onto another
Tile to vinyl
Carpet to vinyl
Concrete to tile
3. Sloped Walking surfaces
4. Loose rugs or floor mats
5. Ramps without slip resistant surfaces
6. Climbing up and down ladders
7. Boots and shoes with wet, greasy or oily soles
8. Walking from one area to another - from processing area to cooler or freezer
9. Climbing on and off trucks, trailers and forklifts
65
Module 4 –Preventing Slips, Trips and Falls - Session: 1. Causes of Slips, Trips and Falls
Causes - Slips
10. Weather hazards – rain, sleet, ice, snow, hail, frost
11. Improper or worn out foot wear
Causes – Trips, Falls
1. Items and obstacles in or across aisles and walkways
Wash down hoses
Pallets
Employee stands
Electrical cords
Pallet jacks
Boxes
2. Changes in elevation or levels
Steps
Stands
Ramps
3. Rumpled or rolled up floor mats or carpet
66
Module 4 – Preventing Slips, Trips and Falls - Session: 2. Preventing Slips, Trips and Falls
Causes – Trips, Falls – continued
4.. Steps
Damaged
Uneven or irregular
5. Uneven surfaces
6. Floor drain covers - missing or not properly in place
Unsafe Conditions Causing - Slips, Trips and Falls
• Poor lighting
• Glare
• Shadows
• Bulky PPE
• Improper footwear
• Excess noise or temperature
• Fog or misty conditions
• Poor housekeeping
• Improper cleaning methods & products
• Inadequate or missing signage

67
Module 4 –Preventing Slips, Trips and Falls - Session: 1. Causes of Slips, Trips and Falls
Unsafe Behaviors Causing - Slips, Trips and Falls
• Carrying or moving cumbersome objects or simply too many objects at one time
• Not paying attention to surroundings or walking distracted
• Taking shortcuts – not using designated walkways
• Being in a hurry and rushing
• Not observing posted signage
• Entering unauthorized or restricted areas

68
Module 4 –Preventing Slips, Trips and Falls - Session: 1. Causes of Slips, Trips and Falls
GROUP ACTIVITY - Check for Understanding (groups of 3-5 participants) 10-15 minutes
Divide class into groups of 3-5 participants. Using the information just presented on the causes of slips,
trips and falls, as it relates to their plant, ask them to identify:
1. UNSAFE CONDITIONS and
2. UNSAFE BEHAVIORS
that can cause SLIPS, TRIPS and FALLS.
Have a representative from each group share with the class the unsafe conditions and unsafe behaviors
identified by their group.
INDIVIDUAL ACTIVITY – Check for Understanding
Review several slides depicting unsafe conditions and unsafe behaviors and encouraging participation, ask the
participants “what’s wrong with this picture”. Engage the class in a discussion to reinforce understanding and
awareness of unsafe conditions.
69
Module 4 – Preventing Slips, Trips and Falls - Session: 2. Preventing Slips, Trips and Falls
Don’t SLIP up on Safety - Don’t FALL for Hazards!
There’s a way to PREVENT every slip, trip, and fall.
Now that the participants understand causes of Slips, Trips, and Falls, they are ready to learn how
they can prevent needless and painful injuries by
Preventing Slips, Trips and Falls
ALL SLIPS, TRIPS AND FALLS ARE PREVENTABLE!!
3 STEPS FOR PREVENTING - SLIPS, TRIPS, FALLS
Step #1 – Recognize
Step #2 – Evaluate
Step #3 – Control
Behaviors for preventing Slips, Trips and Falls
Do not hurry – give yourself enough time
Watch where you are walking
Walk - do not run
Stay alert at all times
Extra care when carrying objects
Keep safety glasses clean
Be aware of work stand heights, positions and levels
Pay attention to work environmental conditions
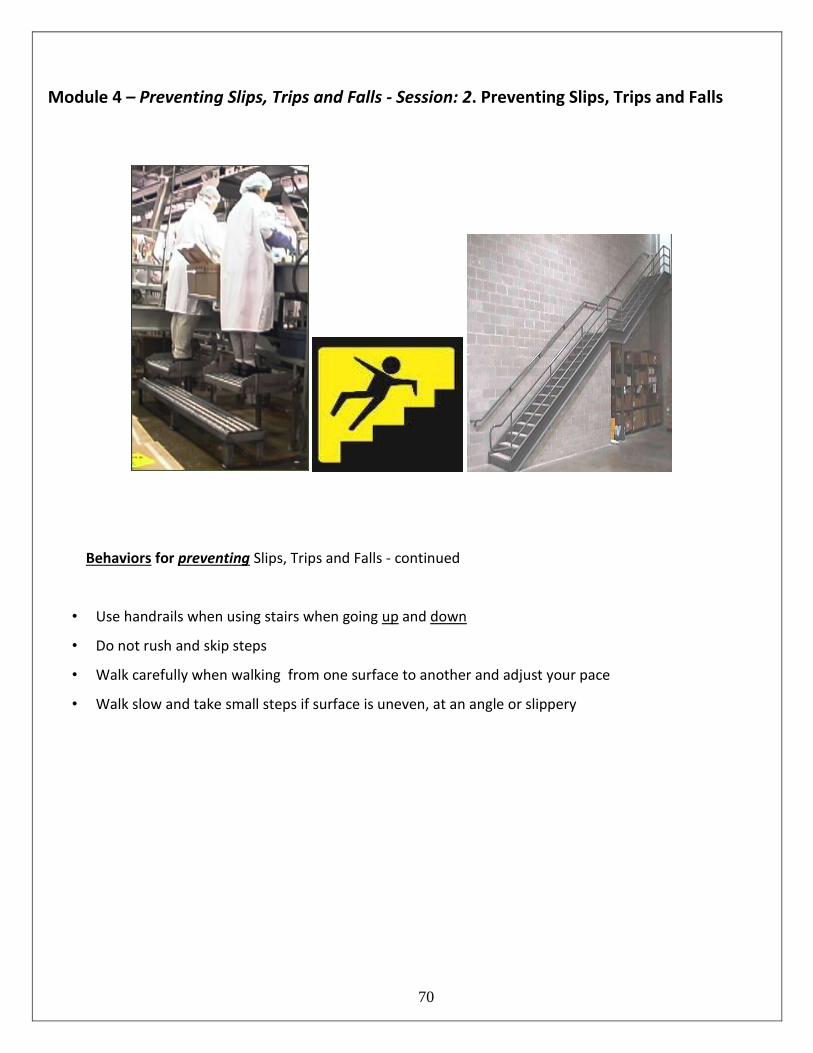
70
Module 4 – Preventing Slips, Trips and Falls - Session: 2. Preventing Slips, Trips and Falls
Behaviors for preventing Slips, Trips and Falls - continued
• Use handrails when using stairs when going up and down
• Do not rush and skip steps
• Walk carefully when walking from one surface to another and adjust your pace
• Walk slow and take small steps if surface is uneven, at an angle or slippery
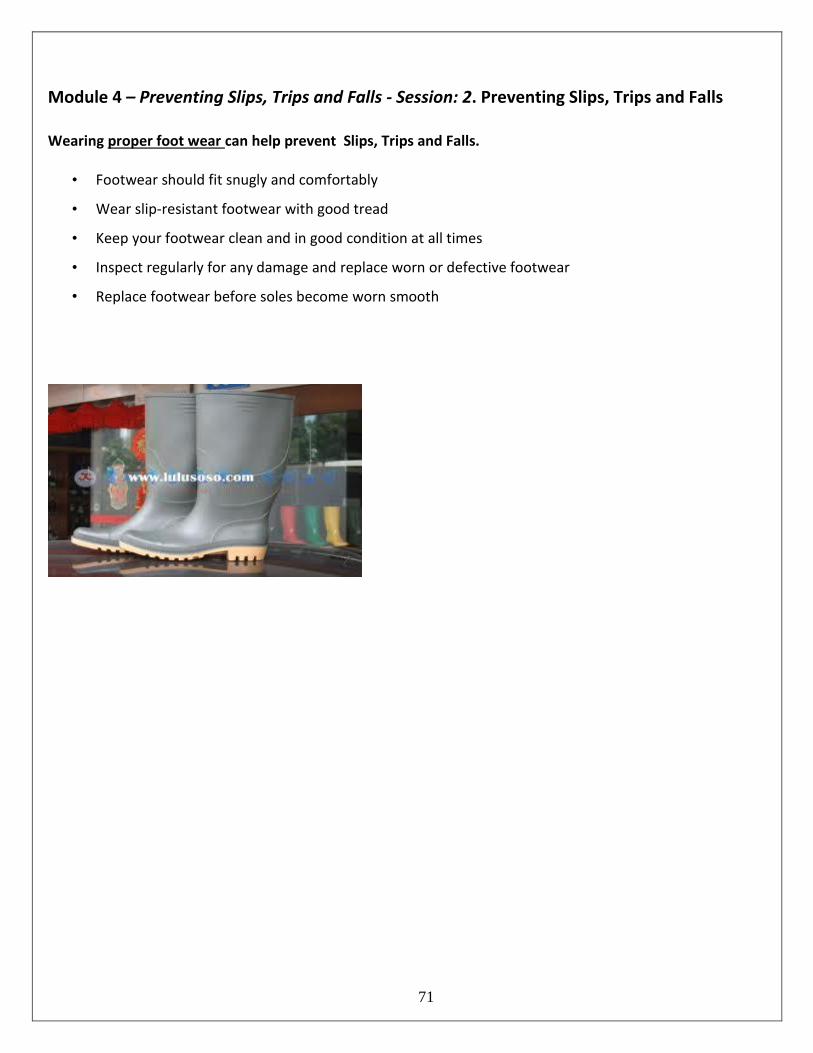
71
Module 4 – Preventing Slips, Trips and Falls - Session: 2. Preventing Slips, Trips and Falls
Wearing proper foot wear can help prevent Slips, Trips and Falls.
• Footwear should fit snugly and comfortably
• Wear slip-resistant footwear with good tread
• Keep your footwear clean and in good condition at all times
• Inspect regularly for any damage and replace worn or defective footwear
• Replace footwear before soles become worn smooth

72
Module 4 – Preventing Slips, Trips and Falls - Session: 2. Preventing Slips, Trips and Falls
Maintain good housekeeping for preventing Slips, Trips and Falls
• Clean up spills immediately
• Mark spills and wet areas
• Mop or sweep debris from floor
• Rugs and mats not bunched up
• Keep walkways, aisles and stairs clear
• Roll up wash down hoses immediately after use
Portable Ladders
• Do not jump off ladder – step down carefully
• Face ladder at all times
• Stepladders 20' maximum
• Ladders and safety feet in good condition
• Ladders inspected frequently
• Ladders with defects withdrawn from service for repair or destruction and tagged or marked as
"Dangerous, Do Not Use."
• Tops of ordinary types of step ladders shall never be used as steps
• Have a good hand hold before stepping up or down
• Ladders not placed in front of doors unless door is blocked open, locked or guarded

73
Module 4 – Preventing Slips, Trips and Falls - Session: 2. Preventing Slips, Trips and Falls
CONTROLLING UNSAFE CONDITIONS
If you cannot fix the unsafe condition yourself then:
1. Immediately report all unsafe conditions to your supervisor or manager
2. Alert or warn others in the area
• Mark the area or stay there until help arrives
3. Unsafe conditions not fixed in a timely manner
• Notify the Plant Safety Officer
Reinforce Safe Behaviors:
BE

74
Module 4 – Preventing Slips, Trips and Falls - Session: 2. Preventing Slips, Trips and Falls
GROUP ACTIVITY - Check for Understanding (groups of 3-5 participants) 10-15 minutes
Ask the participants to Practice the 3 Steps for Preventing Slips, Trips and Falls By Identifying Ways To:
Step # 1. RECOGNIZE
Step # 2. EVALUATE
Step # 3. CONTROL
UNSAFE CONDITIONS and BEHAVIORS
Ask for volunteers to share their group information with the participants.
GROUP DISCUSSION
Lead and engage the participants in a discussion
• Participants take hundreds of steps every day, but how many of those steps do they take
seriously?
• Why do you think all Slips, Trips and Falls are Preventable?
DON’T BECOME A STATISTIC!
All Accidents
Are PREVENTABLE!
Falling Properly
If you do fall, you can reduce the chance of serious injury if you:
1. Bend your elbows and knees and use your legs and arms to help absorb the fall
2. Get medical attention after the fall to treat anything torn, sprained or broken
3. Roll with the fall; don’t reach out and let your body crumple and roll.
75
Module 4 – Preventing Slips, Trips and Falls - Session: 2. Preventing Slips, Trips and Falls
REVIEW - LEARNING OBJECTIVES
1. What ____% of accidental deaths are due to Slip, Trips and Falls? Answer - 15%
2. What are some of the costs of Slips, Trips and Falls to:
Employer – loss of production and business, higher insurance costs, training
replacement workers
Employee – lost wages, pain, disability, reduced quality of life, depression, death
2. Name some injuries resulting from Slips, Trips and Falls? Sprains and strains, bruises and contusions,
fractures, abrasions and lacerations
3. All Slips, Trips and Falls are Preventable – True or False? Why?
4. All Slips, Trips and Falls can be Prevented by Controlling unsafe:
___ACTS___ and
___CONDITIONS___
5. 3 Steps for Preventing Slips, Trips and Falls are:
1. Recognize 2. Evaluate 3. Control True or False?
6. Wearing proper footwear will help prevent Slips, Trips and Falls. True or False?
7. You can use the top step of a step ladder if you are in a hurry. True or False?
QUESTIONS???
RESOURCES FOR MORE INFO ON SLIPS, TRIPS, FALLS
• https://www.osha.gov/dte/grant_materials/fy06/46e0-ht10-06.html
• National Safety Council
76
Material Resources
For The
TRAINERS GUIDE
Safe and Secure
Safety Training Series
1. Poultry Processing Industry eTool (http://www.osha.gov/SLTC/etools/poultry/) 2. North Carolina Department of Labor Occupational Safety and Health Division, A Guide to Safe Work Practices in the Poultry Processing Industry 3. http://www.oshainfo.gatech.edu/ergo-training/trainer.html 4. United Food and Commercial Workers International Union, A Safety Committee Guide for the Workplace, www.ufcw.org.
5. OSHA 29 CFR 1910. 21(b)(8) – General Descriptions and Definitions
www.osha.gov/pls/oshaweb/owadisp.show_document?p_table=
STANDARDS&p_id=9713&p_text_version=FALSE#1910.21(b)(8)
6. OSHA 29 CFR 1910.24 – Fixed Industrial Stairs
www.osha.gov/pls/oshaweb/owadisp.show_document?p_table=
STANDARDS&p_id=9716&p_text_version=FALSE
7. https://www.osha.gov/dte/grant_materials/fy06/46e0-ht10-06.html
8. National Safety Council: PowerPoint, Module 3 Evaluating Slip, Trip and Fall Hazards
9. Washington State Department of Labor and Industries: PowerPoint May, 2010 - Slips, Trips and Falls Module 1 and Module 2
77
Disclaimer
This material was produced under grant number SH-22311-11-60-F-37 from the
Occupational Safety and Health Administration, U.S. Department of
Labor. It does not necessarily reflect the views or policies of the U.S.
Department of Labor, nor does mention of trade names, commercial
products, or organizations imply endorsement by the U.S. Government.
Telamon Corporation is an equal opportunity provider and
employer. Auxiliary aids and services are available upon request
to individuals with disabilities.
78
Susan Harwood Safety Training Grant Program
Advisory Team and Contributors:
Mike Sebach, Program Coordinator, Telamon Corporation
Debra Stewart, Risk Management Specialist, Telamon Corporation
Jennifer Shahan, State Director, Telamon Corporation
Elizabeth Eades-Guerrero, Regional EHS Mgr, Tyson Foods
Sam Fulginiti, Safety Manager, Amick Farms
Stephen Ridgell, Program Specialist, MOSH
Special thanks to:
Elizabeth Eades-Guerrero
and
Sam Fulginiti
for their guidance and input.