rpc plugin userguide
TRANSCRIPT
8/4/2019 RPC Plugin UserGuide
http://slidepdf.com/reader/full/rpc-plugin-userguide 1/21
RPC
form•Z RPC PluginUser’s Guide

8/4/2019 RPC Plugin UserGuide
http://slidepdf.com/reader/full/rpc-plugin-userguide 2/21
RPC
October 2007
COPYRIGHT: © AutoDesSys, Inc., 2006. All rights reserved.
No part of this publication may be reproduced, stored in a retrieval system, transcribed, transmitted, or translated intoany language in any form by any means without the written permission of AutoDesSys, Inc.
TRADEMARKS: form•Z®, RenderZone®, and RadioZity® are registered trademarks of AutoDesSys, Inc.
LightWorks® is a registered trademark of LightWork Design Limited. ACIS® is a registered trademark of Spatial Technology, Inc.Apple, Macintosh, Power Macintosh, and the MacOS logo are registered trademarks or trademarks of Apple Computer, Inc.
Microsoft, Windows, and the Windows logo are registered t rademarks or trademarks of Microsoft Corporation.All other products mentioned in this document are registered trademarks or trademarks of their respective owners.
8/4/2019 RPC Plugin UserGuide
http://slidepdf.com/reader/full/rpc-plugin-userguide 3/21
RPC
Contents
1 Introduction: What is Rich Photorealistic Content? 4
2 Installation and setup 6 2.1 General installation 6 2.2 Network Render Client installation 73 Using RPC Features
3.1 Creating RPC objects 8
3.2 Creating RPC aids 9 3.3 Editing RPC objects 0 3.4 Populating proxies with objects 3.5 Converting objects to proxies
4 RPC Tutorial
4.1 Basics 4.2 Creating and editing multiple RPC objects at once 4 4.2.1 Creating proxies 4 4.2.2 Random transformations 6 4.2.3 Focus aid 7 4.2.4 Attractors and repulsors 8 4.3 Adding motion to RPC objects 9 4.3.1 Animating 2.5D RPC objects 9 4.3.2 Animating 3.5D RPC objects 05 Known issues

8/4/2019 RPC Plugin UserGuide
http://slidepdf.com/reader/full/rpc-plugin-userguide 4/21
RPC4
1 Introduction
The RPC plugin for form•Z (Windows version 6.1.0 and higher) enables Archvision’s RPC(Rich Photorealistic Content) product to be used in form•Z. It allows the user to place realistic
looking entities, such as people, furniture or cars without the overhead of a large number ofpolygons and excessive texture maps. This is achieved by using a set of photographed imagesand textures to generate a realistic image of each object. The RPC tools provide easy ways to
create massive numbers of objects such as crowds, forests and parking lots. The plugin comeswith a set of sample RPC content. Additional content can be acquired from Archvision (www.
archvision.com).
The plugin adds a new object type to form•Z referred to as an RPC object. The RPC object isa reference to an instance of RPC content or one of four types of RPC aids used to construct a
scene full of RPC content. The plugin adds ve tools to form•Z for placing and modifying RPCobjects. In form•Z’s non-realistic rendering modes, such as wireframe, RPC objects are displayedin a preview fashion using a rough outline of the object. When the RenderZone rendering
mode is selected, the full rendered image of the RPC object is shown in the scene.
There are 5 varieties of RPC content. Each
hase different characteristics as follows:
2D: A 2D RPC object always shows the samerendered image, regardless of how the camerais oriented (see Figure 1.1.1). That is, the im-
age will always look the same regardless ofthe viewer’s orientation.
2.5D: This is the same as a 2D RPC object,except it can be animated. For example, it mayshow two people having a conversation.
3D: This type of RPC object is the same asthe 2D RPC, but the image changes based
on the camera location. For example, in oneview, the rendered RPC may show the front of
a person. If the camera is rotated 180 degrees,the image will show the back of the person.
(Figure 1.1.2)
Figure 1.1.1: A 2D RPC object shown in (a)
Wireframe and (b) RenderZone.
a b
3.5D: This is the same as a 3D RPC object, except it can be animated. For example, you can
show a walking person and rotate the camera during the animation to see the back of the walk-ing person.

8/4/2019 RPC Plugin UserGuide
http://slidepdf.com/reader/full/rpc-plugin-userguide 5/21
RPC
3D+ (SMART): Unlike the previous types, which use a at polygon with a mapped photographictexture at rendering time, the 3D+ type actually uses a true 3D polygon mesh, both as a preview
and in RenderZone. The RenderZone mesh is usually more detailed and also maps a seriesof photographic textures on the mesh to give it a realistic look (Figure 1.1.3).
The RPC interface dialogs used by the form•Z RPC tools are supplied by Archvision and look a bitdifferent than a standard form•Z dialog. These same dialogs can also be found in other applications
that have adopted the RPC technology. A more detailed description of the form•Z RPC tools can be
found in the following sections of this document. Archvision also provides details about its interfacethrough its own electronic help interface. This help can be invoked by pressing the Help button in anyof the RPC dialogs. This help environment describes features of RPC and its related dialogs, but does
not contain information about the form•Z RPC tools. The help le can be accessed also by navigatingto the plugins folder of your form•Z installation, and opening the le “RPC.cmh” in the RPC folder.
a b
Figure 1.1.3: A 3D+ (SMART) RPC object shown in (a) Wireframe and (b) RenderZone.
a b
Figure 1.1.2: A 3D RPC object shown from the front and back in (a) Wireframe and (b) RenderZone.

8/4/2019 RPC Plugin UserGuide
http://slidepdf.com/reader/full/rpc-plugin-userguide 6/21
RPC
2 Installation and setup
2.1 General installation
The RPC technology and form•Z RPC plugin are currently only supported by Archvision on the32 bit Windows platform. The form•Z RPC plugin is compatible with form•Z 6.1.0 or later. To
install the form•Z RPC Plugin v6.0, run the installation program “Install RPC Plugin.exe” andfollow the prompts. This installer will put two items in place: the plug-in and sample RPC con-tent. The content contains RPC objects and images. (The default directory for RPC content is
“(Application Directory)/Plugins/RPC/RPC Samples”.) If you do not wish to install the samplecontent, please use the installer “Install RPC Plugin Solo.exe” instead, which will install the plug-
in, but does not install the sample RPC les. By default these installers will install the plugin in
the directory where your most recent form•Z version was installed.
The next step is to install the ACM (Archvision Content Manager). The ACM is a stand-aloneapplication that can run locally or on another machine on the network. The ACM’s function is toprovide the plugin with the location to the RPC content. You can use the provided ACM installer
or go to the Archvision website for the latest version of the ACM (www.archvision.com)
When using the RPC plugin for the rst time, it will most likely not be able to nd any RPC content,
even if the content has already been installed. The ACM needs to be directed to the content.
The plugin nds content in one of two ways:• It connects to the ACM, which directs the plug-in to the content. This is the recom-mended method.
• If the ACM is not available or is unable to run, the plugin will use a default path (“Appli-cation Directory)/Plugins/RPC/RPC Samples”). This path can be changed: Press the
Select RPC Content Path button in the RPC Object tool options window. Select
the directory where the RPC content is located.
When the plugin starts, it will try to connect either locally or via the network to the ACM depend-
ing on the settings saved in the RPCapi.ini le. The RPCapi.ini le contains the location of the
ACM executable and is generated automatically. To generate the RPCapi.ini le:• Inside form•Z, select the RPC Object tool.• From the RPC selector interface, click the Confgure Content button.
• Go to the Update tab.• If the desired behavior is to have the ACM run on the local machine then click on the
Local radio button, then browse for the location of the ACM executable. When the
RPC Object tool is selected in the future, the plugin will automatically start and connectto the ACM (if it is not already started).
• If you want to connect to an ACM already running on another machine click on theNetwork radio button and enter the address and port.
• Click on the Update button, this will update the settings and save to the RPC.ini le.

8/4/2019 RPC Plugin UserGuide
http://slidepdf.com/reader/full/rpc-plugin-userguide 7/21
7RPC
2.2 Network Render Client installation
In order to render form•Z les containing RPC objects, it will be necessary to install the RPC
plugin on each of the client machines. This can be done by copying the “RPC” folder from the
plugins folder inside the form•Z application to the plugins folder of the form•Z Render Client.Refer to the C:\Program Files\ArchVision\ArchVision Content Manager\ACM.chm help leunder the “Network Rendering” section for more details.
Finally, on each of the client machines, open the le “RPCapi.ini” and modify the location of theACM, typically this will involve setting the IP address to point to the RPC content server machine
which is running the ACM. Each time the ACM location is changed this .ini le will need to bemodied on each of the client machines.

8/4/2019 RPC Plugin UserGuide
http://slidepdf.com/reader/full/rpc-plugin-userguide 8/21
RPC8
3 RPC Tools
3.1 Creating RPC objects
RPC Object
The RPC Object tool is used to place an RPC object into the modeling environment. After
selecting the tool, the RPC object is placed by clicking on the desired location in the modelingwindow. The RPC object is created perpendicular to the currently active reference plane with
the origin of the RPC content placed at the click point. The dimensions of the RPC object canbe xed or created dynamically. The construction method is controlled by options in the RPCObject Options dialog, shown in Figure 3.1.1.
Construction Method: The options in this groupspecify the manner in which the RPC object is sized and
oriented.
Fixed: A single click determines the location, rota-tion and scale of the content. The object is oriented at a
zero degree rotation (aligned to the X axis of the referenceplane). The real-world dimensions of the RPC content are
used to determine the scale of the RPC object.
Dynamic Rotation: The rst click determines the location of the object. The second
click determines the orientation. The scale is set by the content as with the Fixed option.
Dynamic Rotation and Scale: The rst click determines the location of the object.The second click determines the orientation and scale.
Select RPC Content Path: This button allows one to select the directory in which RPCcontent les are located. It has no effect if the ACM is running.
The remainder of the dialog is used to select content and set to content-specic options. For
further details on the function of this dialog, please refer to the Archvision electronic help. TheHelp button invokes the RPC electronic manual.
Figure 3.1.1: The RPC Object Options dialog.

8/4/2019 RPC Plugin UserGuide
http://slidepdf.com/reader/full/rpc-plugin-userguide 9/21
9RPC
3.2 Creating RPC aids
RPC Aid
An RPC aid is a special RPC object with no content. There are four types of RPC aids: proxy,
focus, attractor, and repulsor. A proxy is a place-holder that can be lled with content.The other types of aids are used to effect other RPC objects. These aids are primarily used bythe Mass Populate tool described in section 3.4.
After selecting the tool, an RPC aid is placed by clicking on the desired location in the modeling
window. The RPC aide is created perpendicular to the currently active reference plane with theorigin of the RPC aid placed at the click point. The dimensions of the RPC aid can be xed or
created dynamically. This is controlled by options in the RPC Aid Options dialog, shown inFigure 3.2.1.
Construction Method: These options are identical tothose in the RPC Object Options dialog.
RPC Aid Type: Four types are contained in this group, asfollows.
Proxy: A place holder. Proxies are lled with contentusing the Mass Populate tool.
Focus: When populating proxies with content, nearbyRPC objects can be made to rotate toward a focus.
Attractor: Effects the placement of RPC objects intoproxies. The Mass Populate tool will randomly distribute RPC
objects and empty spaces into proxies. An attractor will makeit more likely nearby proxies will be lled with RPC objects,
rather than empty spaces.
Repulsor: As with the Attractor, this type effects the placement of RPC objects into
proxies. A repulsor will cause nearby Proxies to be more likely lled with empty spaces, ratherthan RPC objects.
Strength: Species the extent of the effects of focus, attractor and repulsor.
Figure 3.2.1:
The RPC Aid Options dialog.
8/4/2019 RPC Plugin UserGuide
http://slidepdf.com/reader/full/rpc-plugin-userguide 10/21
RPC0
3.3 Editing RPC objects
RPC Mass Edit
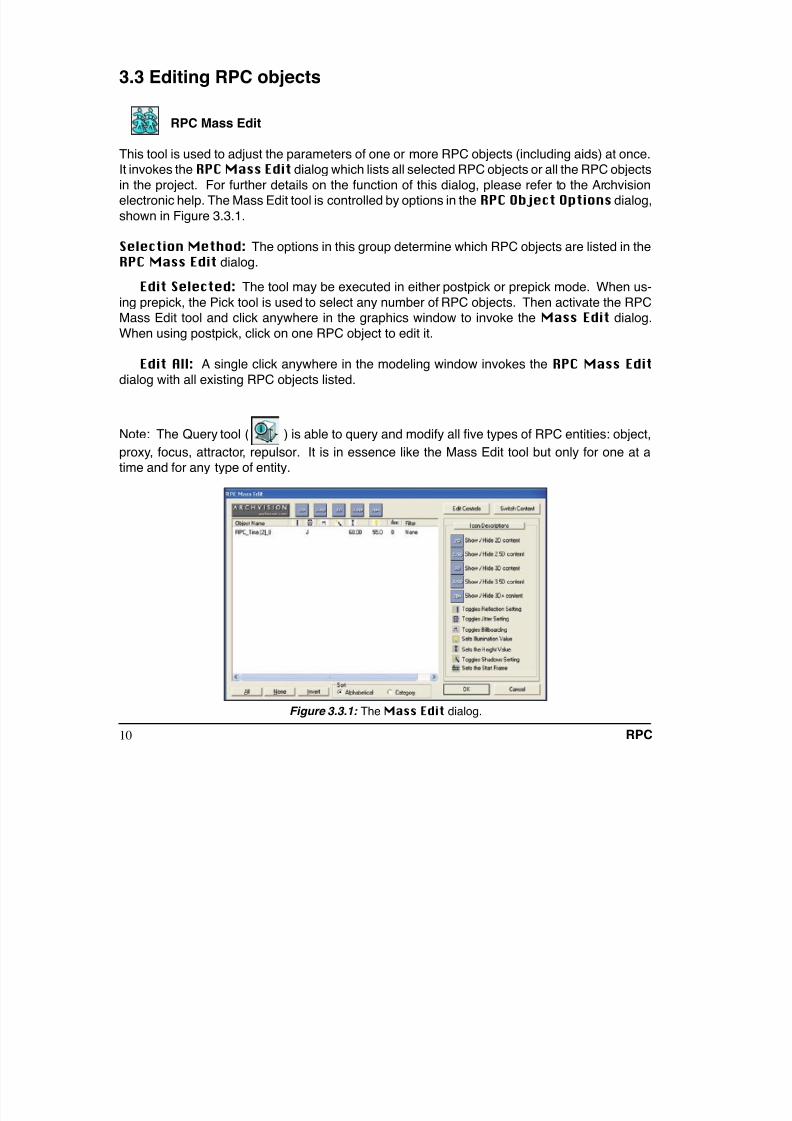
This tool is used to adjust the parameters of one or more RPC objects (including aids) at once.It invokes the RPC Mass Edit dialog which lists all selected RPC objects or all the RPC objects
in the project. For further details on the function of this dialog, please refer to the Archvisionelectronic help. The Mass Edit tool is controlled by options in the RPC Object Options dialog,
shown in Figure 3.3.1.
Selection Method: The options in this group determine which RPC objects are listed in the
RPC Mass Edit dialog.
Edit Selected: The tool may be executed in either postpick or prepick mode. When us-
ing prepick, the Pick tool is used to select any number of RPC objects. Then activate the RPCMass Edit tool and click anywhere in the graphics window to invoke the Mass Edit dialog.
When using postpick, click on one RPC object to edit it.
Edit All: A single click anywhere in the modeling window invokes the RPC Mass Edit
dialog with all existing RPC objects listed.
Note: The Query tool ( ) is able to query and modify all ve types of RPC entities: object,
proxy, focus, attractor, repulsor. It is in essence like the Mass Edit tool but only for one at atime and for any type of entity.
Figure 3.3.1: The Mass Edit dialog.

8/4/2019 RPC Plugin UserGuide
http://slidepdf.com/reader/full/rpc-plugin-userguide 11/21
RPC
3.4 Creating objects from proxies
RPC Mass Populate
This tool converts one or more RPC proxies into RPC objects. This is done through the RPCMass Populate dialog shown in Figure 3.4.1. For further details on the function of this dialog,please refer to the Archvision electronic help.
Unlike the Mass Edit tool, the Mass Populate tool will list all proxies, rather than listing only se-
lected proxies. With the tool active, click in the modeling window to display the Mass PopulateRule Set Editor. Inside the Rule Set Editor window, press the Use Scene Selection
button to highlight any pre-picked proxies. Select or deselect proxies by clicking on them in theProxy Selection window.
Using the scroll bar, attractors, repulsors, and focus aids can be accessed toward the bottomof the Mass Populate Rule Set Editor. The desired aids can be toggled by clicking on
them.
Figure 3.4.1: The Mass Populate dialog.

8/4/2019 RPC Plugin UserGuide
http://slidepdf.com/reader/full/rpc-plugin-userguide 12/21
RPC
3.5 Converting objects to proxies
RPC Convert Object to Proxy
This tool converts an object to a proxy – the opposite of the RPC Mass Populate tool. It canbe used on any RPC object in the scene. The result is a proxy entity which is indistinguishable
from a proxy created directly using the RPC Aid tool. Thus, objects and proxies can be easilyconverted back and forth.
Selection Method: The options in this group determine which RPC objects are converted
to a proxy.
Convert Picked: The tool may be executed in either postpick or prepick mode. Whenusing prepick, the Pick tool is used to select any number of RPC objects. Then activate the RPCConvert Object to Proxy tool and click anywhere in the graphics window to convert all selectedobjects. When using postpick, click on one RPC object to convert it.
Convert All: A single click anywhere in the modeling window converts all RPC objects to
proxies.
8/4/2019 RPC Plugin UserGuide
http://slidepdf.com/reader/full/rpc-plugin-userguide 13/21
RPC
4 RPC Tutorials
In this tutorial, we will cover the general aspects of using the RPC tools. We will start with creatinga few RPC objects. After that, the tutorial will show how multiple RPC objects can be created,
edited, and converted between types. Last, we will cover animating RPC objects.
4.1 Basics
Creating an RPC object is very simple.
Activate the RPC Object tool.
• Leave Construction Method on Fixed.• Select one of the content les in your RPC library.
• Simply click inside the modeling window to create the RPC object.
When creating objects that should have a certain scale, such as people, one will likely want to
use either Fixed or Dynamic Rotation. Both of these options keep the height xed at thescale intended for the particular content. For example, when creating RPC people, if the scale
of the object is too different from the real-life dimensions, the results will not look good. On theother hand, when creating trees, the scale should change from tree to tree in order to make
them appear more natural.
In order to control the scale of an object at creation, change the Construction Method to
Dynamic Rotation and Scale. Notice that the rst click denes the location of the RPCobject. The object will track the location of the mouse while awaiting the second click, rotating
and scaling the object in relation to the mouse position. Click a second time to complete theconstruction of the object.

8/4/2019 RPC Plugin UserGuide
http://slidepdf.com/reader/full/rpc-plugin-userguide 14/21
RPC4
4.2 Creating and editing multiple RPC objects at once
One of the most powerful operations in RPC is creating and editing many RPC objects with just
a few steps. In this case, we will create a set of proxies. Those proxies will control the positions
of the RPC objects, once the proxies have been “populated” or lled in with RPC content.
When populating proxies, one can introduce randomness to many of the aspects of the RPCobjects. One can randomly distribute different types of content among the proxies. RPC can
randomly leave a percentage of those proxies empty. The attributes of the RPC objects canbe randomly set within ranges (like rotation and height), to give a more natural orientation tothe objects.
RPC Aids can be used to help orient objects when populating proxies. Repulsors cause emptyspaces to be more likely nearby their locations. Attractors make it more likely that nearby prox-
ies get lled with content. These aids help to quickly create crowds of people that appear to belooking in certain direction(s). The aids can also help to populate a parking lot so that cars are
more likely to be closer to the entrance of a building.
4.2.1 Creating proxies
Create a set of proxies to experiment with some ofthese features:
Activate the RPC Aid tool.
• Set Construction Method to Fixed.
• Set RPC Aid Type to Proxy.• Click in the modeling window to create
the proxy.
Use the Move tool in conjunction with
Multi-Copy to create an array of proxies.
Now that many proxies are built, ll them with content.
Activate the Mass Populate tool.
• Click in the modeling window.• The Rule Set Editor will appear.• In the highest subwindow, Proxy Selection, click the Select All button.
• All the proxies will highlight.• In the second subwindow down, Content Selection, click Select Content.
• In the Mass Selection window, put check marks next to the content to be used toll in the proxies. For now, select one RPC object to use for content.
Figure 4.2.1.1: Array of proxies.
8/4/2019 RPC Plugin UserGuide
http://slidepdf.com/reader/full/rpc-plugin-userguide 15/21
RPC
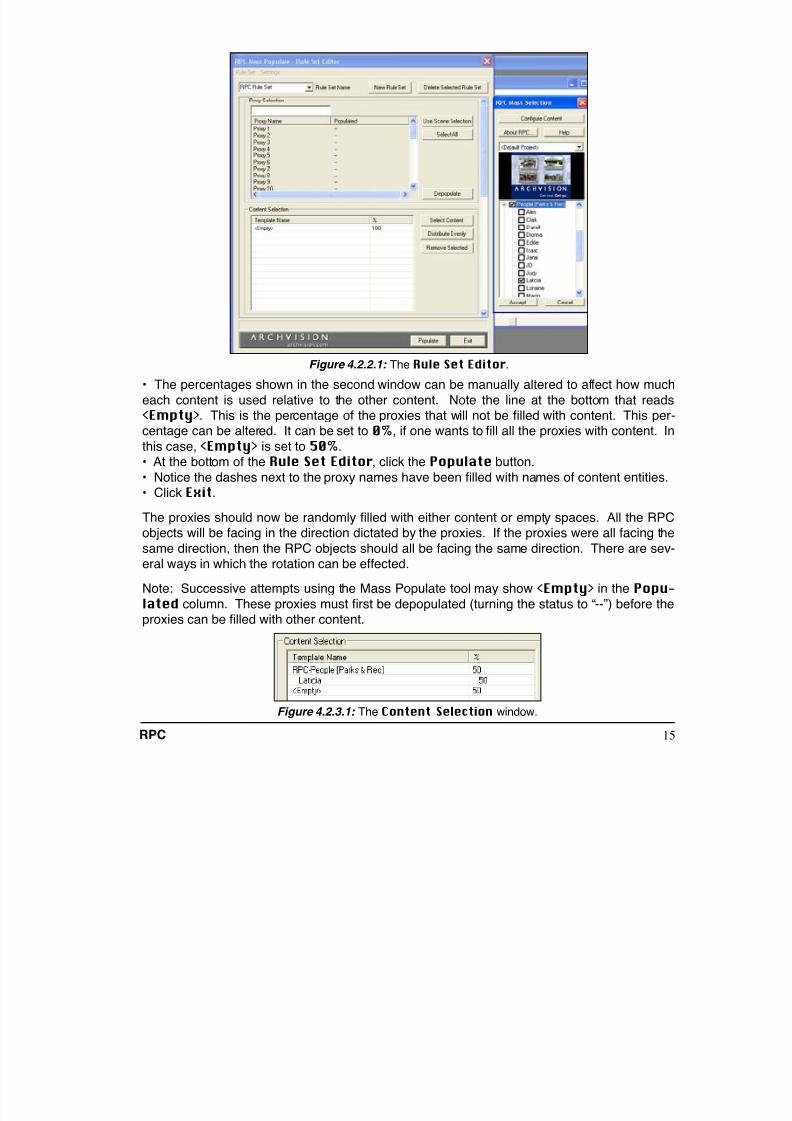
• The percentages shown in the second window can be manually altered to affect how much
each content is used relative to the other content. Note the line at the bottom that reads
<Empty>. This is the percentage of the proxies that will not be lled with content. This per-centage can be altered. It can be set to 0%, if one wants to ll all the proxies with content. In
this case, <Empty> is set to 50%.• At the bottom of the Rule Set Editor, click the Populate button.
• Notice the dashes next to the proxy names have been lled with names of content entities.• Click Exit.
The proxies should now be randomly lled with either content or empty spaces. All the RPCobjects will be facing in the direction dictated by the proxies. If the proxies were all facing the
same direction, then the RPC objects should all be facing the same direction. There are sev-eral ways in which the rotation can be effected.
Note: Successive attempts using the Mass Populate tool may show <Empty> in the Popu-lated column. These proxies must rst be depopulated (turning the status to “--”) before theproxies can be lled with other content.
Figure 4.2.2.1: The Rule Set Editor.
Figure 4.2.3.1: The Content Selection window.

8/4/2019 RPC Plugin UserGuide
http://slidepdf.com/reader/full/rpc-plugin-userguide 16/21
RPC6
4.2.2 Random transformations
Random transformations can be applied to the RPC objects.
Activate the Object to Proxy tool.
• Choose the option Convert All.• Click in the modeling window to convert all the objects back to proxies.
Activate the Mass Populate tool and click in the modeling window.
• Next to the highest subframe, click the Select All button.• You may have some proxies with <Empty> listed as their current setting. If so, click
the Depopulate button.
• Using the scroll bar, look down at the bottom of the Rule Set Editor.• At the bottom, there is a subwindow called Random Transforms.
• Highlight Z Rotation.
• Click Add Transform.• To the right, set a random range for the RPC objects to be rotated. Step can be used to
set an increment for the random transformation. In this case, if the objects should only be
rotated in multiples of 10 degrees, Step should be set to 10.• Next, click the Populate button to ll in the proxies.
• Click Exit.• The proxies should be populated with randomly facing objects.
Figure 4.2.2.1: The Random transformations window.
Figure 4.2.2.2: Randomly rotated RPC objects.Axon View Top View

8/4/2019 RPC Plugin UserGuide
http://slidepdf.com/reader/full/rpc-plugin-userguide 17/21
7RPC
4.2.3 Focus aid
Rotation of RPC objects can also be effected using a focus aid.
Activate the Object to Proxy tool.
• Choose the option Convert All.
• Click in the modeling window toconvert all the objects back to proxies.
Notice that the proxies remain facing in ran-
dom directions.
Activate the RPC Aid tool.
• Select the Focus option.
• Click in the window to place a focus where the RPC objects should turn to face.Activate the Mass Populate tool and click in the modeling window.
• Next to the highest subframe, click the Select All button.• You may have some proxies with <Empty> listed as their current setting. If so, click the
Depopulate button.• Scroll down inside the Rule Set Editor to a subwindow called Focus Selection.
• Place a check mark next to the focus object.• Strength can be adjusted so that objects turn fully or partially to face the focus object.
There can also be multiple focus objects that compete for the attention of RPC objects.• Scroll down to the subwindow called Random Transforms.• If the rotation transformation is still shown, click Delete to remove the additional
rotation effecting the RPC objects.• Next, click the Populate button to ll in the proxies. (There should still be content in
the second subwindow.)• Click Exit.
• The RPC objects should be rotated toward the focus.
Figure 4.2.3.1: Focus object
Figure 4.2.3.2: Focus selection.Figure 4.2.3.3: RPC objects turned
toward focus.

8/4/2019 RPC Plugin UserGuide
http://slidepdf.com/reader/full/rpc-plugin-userguide 18/21
RPC8
4.2.4 Attractors and repulsors
The relative distribution of empty spaces and RPC content can be effected using attractors and
repulsors.
Activate the Object to Proxy tool.
• Choose the option Convert All.• Click in the modeling window to convert
all the objects back to proxies.
Activate the RPC Aid tool.
• Select the Attractor option.• Click in the window to place an attractor
in an area where more RPC objects are
desired instead of empty spaces.
Activate the Mass Populate tool andclick in the modeling window.
• Next to the highest subframe, click theSelect All button.
• You may have some proxies that have<Empty> listed as their current setting.
If so, click the Depopulate button.• In the second subwindow, Content
Selection, change the percentage next
to <Empty> to 50%. (Note: if <Empty> is set to 0%, attractors and repulsors
have no effect.)• Scroll down in the Rule Set Editor to
the subwindow Attractor Selection.• Place a check mark next to the attractor.
• Click Populate.• Click Exit.
Attractors and repulsors do not move proxies or
objects. They only change the likelyhood of aproxy being lled with content. Notice in Figure4.2.4.4 the empty spaces tend to be farther away
from the attractor and, conversely, the proxies
closer to the attractor are more likely to be lled.
Figure 4.2.4.1: Attractor object.
Figure 4.2.4.2: Set <Empty> to 0%.
Figure 4.2.4.3: Attractor selection.
Figure 4.2.4.4: Results of attractor.

8/4/2019 RPC Plugin UserGuide
http://slidepdf.com/reader/full/rpc-plugin-userguide 19/21
9RPC
4.3 Adding motion to RPC objects
Some RPC content is animated. 2.5D objects are basically movies applied to billboards. Anexample might be two people having a conversation. 3.5D objects not only appear to be 3
dimensional, but also appear to be in motion. One example is a walking person. Another ex-ample is rolling wheels on an animated vehicle.
4.3.1 Animating 2D RPC objects
The steps required to animate an RPC object are similar to creating a static RPC object. Thereis one additional step: setting the current frame of the RPC object to change over time.
Activate the RPC Object tool.
• Select a 2.5D object to add.
Notice the window inside the RPC tool options will show a
number, 600 in this case, as well as the word “Motion.” 600indicates the number of frames in the animation. The ani-
mation is 20 seconds long at 30 frames per second and isdesigned to loop.
• Place a 2.5D object in the project.• Activate the Keyframe tool.• Click on the RPC object.
• Open the Animation Editor and locate the RPC object.
• Highlight the track labeled“Frame Time.”
• Add a keyframe to this track.
The values for Frame Time are in units
of seconds.• Set the keyframe to a time of 20
seconds and a value of 20.• Set both keyframe leads to
Linear.
The RPC object is now ready to be rendered.
Figure 4.3.1.1: 2.5D content.
Figure 4.3.1.2: Animation Editor.

8/4/2019 RPC Plugin UserGuide
http://slidepdf.com/reader/full/rpc-plugin-userguide 20/21
RPC0
4.3.2 Animating 3D RPC objects
As with any object in form•Z, RPC objects can be animated. When animating certain RPCobjects, it is also possible to animate the RPC content. For example, some RPC people are
designed to appear as though they are walking.
Activate the RPC Object tool.
• Create a 3D RPC object at the world origin bytyping “0,0,0” in the Prompts palette.
• Make the person point along the Y axis, if it isn’talready.
• Keyframe the person.
• Open the Animation Editor.• Add a second keyframe to the Position Y ofthe person with a value of 40’ at 10 seconds.
If the animation is rendered at this point, the image rendered for the RPC object will not change,giving the appearance the person is sliding across the ground. Make the person walk by key-
framing the track Frame Time. RPC people walk at roughly 4 ft/sec (1.22 m/sec) if FrameTime is set to increase 1 unit every second. To make the walking motion work correctly, make
a second keyframe in Frame Time at 10 seconds with a value of 10. A walking person couldbe altered to walk faster or slower by adjusting these values, but too much deviation will causeunrealistic results.
Figure 4.3.2.1: 3D content.
Figure 4.3.2.2: Animation Editor.
8/4/2019 RPC Plugin UserGuide
http://slidepdf.com/reader/full/rpc-plugin-userguide 21/21
RPC
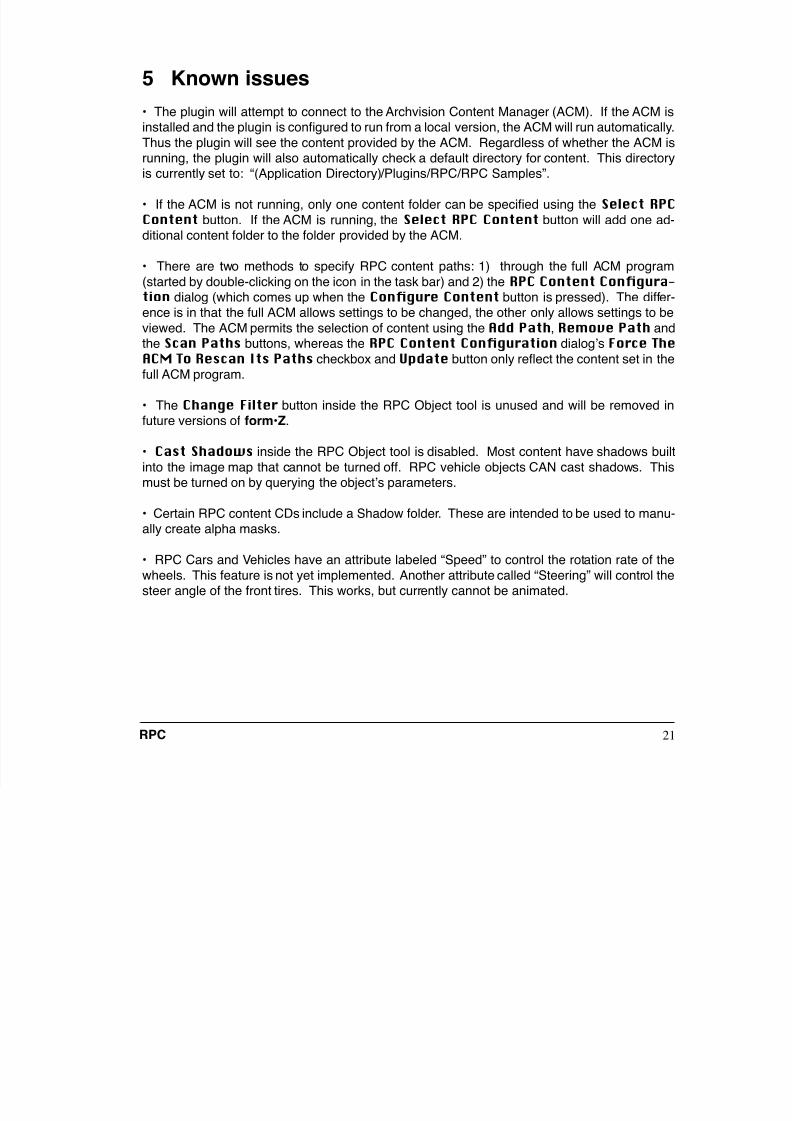
5 Known issues
• The plugin will attempt to connect to the Archvision Content Manager (ACM). If the ACM isinstalled and the plugin is congured to run from a local version, the ACM will run automatically.
Thus the plugin will see the content provided by the ACM. Regardless of whether the ACM isrunning, the plugin will also automatically check a default directory for content. This directoryis currently set to: “(Application Directory)/Plugins/RPC/RPC Samples”.
• If the ACM is not running, only one content folder can be specied using the Select RPCContent button. If the ACM is running, the Select RPC Content button will add one ad-ditional content folder to the folder provided by the ACM.
• There are two methods to specify RPC content paths: 1) through the full ACM program
(started by double-clicking on the icon in the task bar) and 2) the RPC Content Congura-tion dialog (which comes up when the Congure Content button is pressed). The differ-ence is in that the full ACM allows settings to be changed, the other only allows settings to be
viewed. The ACM permits the selection of content using the Add Path, Remove Path andthe Scan Paths buttons, whereas the RPC Content Conguration dialog’s Force TheACM To Rescan Its Paths checkbox and Update button only reect the content set in thefull ACM program.
• The Change Filter button inside the RPC Object tool is unused and will be removed in
future versions of form•Z.
• Cast Shadows inside the RPC Object tool is disabled. Most content have shadows built
into the image map that cannot be turned off. RPC vehicle objects CAN cast shadows. Thismust be turned on by querying the object’s parameters.
• Certain RPC content CDs include a Shadow folder. These are intended to be used to manu-ally create alpha masks.
• RPC Cars and Vehicles have an attribute labeled “Speed” to control the rotation rate of thewheels. This feature is not yet implemented. Another attribute called “Steering” will control thesteer angle of the front tires. This works, but currently cannot be animated.