rn telemetry user manual · 2020-03-02 · before connecting the telemetry system, check if there...
TRANSCRIPT

1
RN TELEMETRY USER MANUAL
Handbook
RACE-NAVIGATOR.COM

2
TABLE OF CONTENT
1. PACKAGE CONTENT .................................................................................................................... 5
2. SIM CARD AND ANTENNAS MOUNTING ................................................................................ 5
3. SETTING UP THE MODEM ......................................................................................................... 6
4. STATUSES ....................................................................................................................................... 7
5. CONNECTING TO RN .................................................................................................................... 8
6. RN TELEMETRY – COMPATIBILITY & INSTALLATION ........................................................ 9
7. DATA TRANSFER USAGE ......................................................................................................... 10
8. MAIN MENU ................................................................................................................................ 10
9. NAVIGATIONS & PROFILES..................................................................................................... 11
10. TELEMETRY APP SIGNING-IN ................................................................................................ 12
11. TELEMETRY APP OVERVIEW ................................................................................................. 13
12. DETAILS VIEW ............................................................................................................................ 14
12.1. DASHBOARD .............................................................................................................................. 15
12.2. CAN DATA .................................................................................................................................... 16
12.3. LAPS & SECTORS ....................................................................................................................... 18

3
13. TEAM ORDERS .......................................................................................................................... 19
14. EXPORT LAP DATA ................................................................................................................... 20
15. IMPORT DATA IN RN ANALYZER FOR WINDOWS ........................................................... 20
16. SPECTATOR MODE .................................................................................................................. 22
4
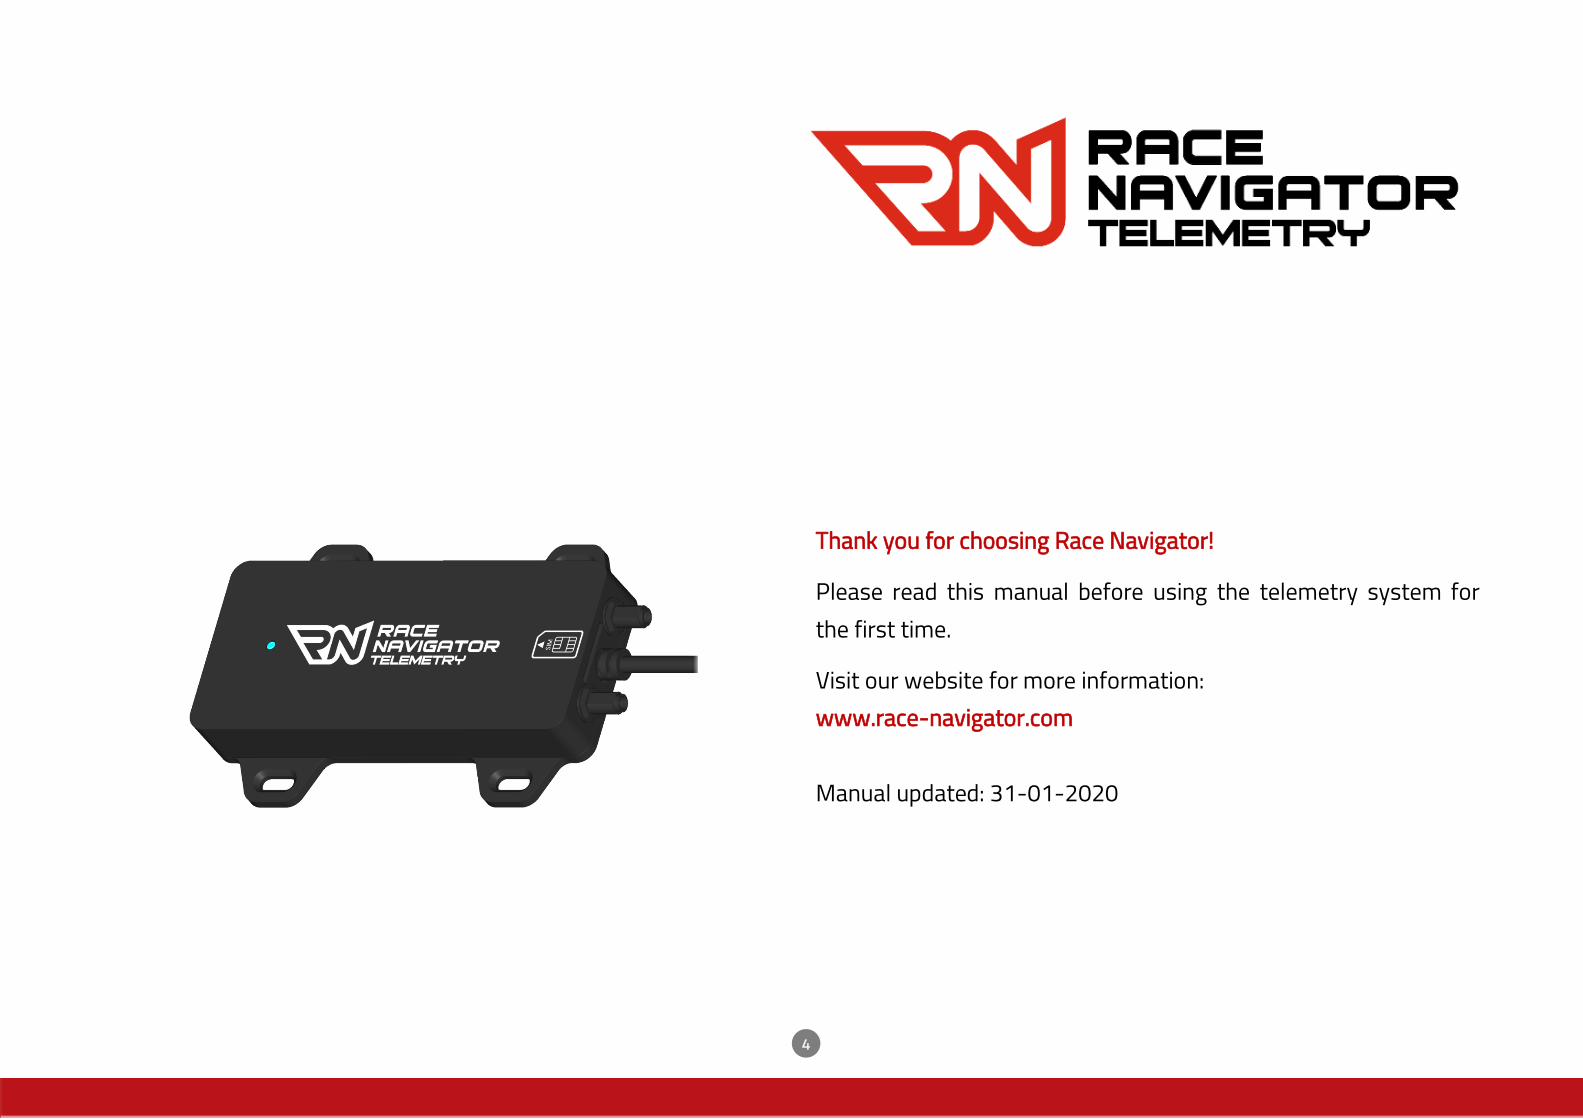
Thank you for choosing Race Navigator!
Please read this manual before using the telemetry system for
the first time.
Visit our website for more information:
www.race-navigator.com
Manual updated: 31-01-2020

5
1. PACKAGE CONTENT
Delivery scope
Take the Race Navigator Telemetry system out of the box and
check the content:
• Race Navigator Telemetry modem
• 2x LTE window mounted antennas
2. SIM CARD AND ANTENNAS MOUNTING
SIM card
This modem is using a standard size SIM card.
Slide the SIM card into the slot above the USB cable outlet until it
locks in (a properly locked card should not stick out of the slot). To
unlock the card, just press on it with something thin (i.e. your
fingernail).
LTE Antennas
Plug and screw both antenna connectors into the modem like
shown in the picture. Place the antennas on the flat window
surface.
To receive the highest signal strength place one antenna (1) on the
front windscreen and the second (2) on the rear side window.
1
2

6
3. SETTING UP THE MODEM
Before you start using the LTE modem with the RN device, a quick
settings check is recommended.
Connect the USB cable of the modem to your PC.
As soon as the modem is booted up completely, the configuration
website will open in your browser.
Go to Settings->Profile Management. Check if the proper name of
the operator is entered in the “APN:” check box.
Example of German APN settings:
Your operator should provide these settings in the documentation
included with the SIM card or on the website.

7
4. STATUSES
The led diode indicates statuses of the Modem:
State Color Blinking frequency Status description
- Off - The USB-Modem is removed
Blinking Green Twice per 2s The USB Modem is powered on.
Blinking Green Once per 0,2s The software of the USB-Modem is being updated.
Blinking Green Once per 2s The USB-Modem is registering with a 2G network.
Solid Green - The USB-Modem is connected to a 2G network
Blinking Blue Once per 2s The USB- Modem is registering with a 3G/3G+ network
Solid Blue - The USB-Modem is connected to a 3G/3G+ network
Blinking Cyan Once per 2s The USB-Modem is registering with a 4G network.
Solid Cyan - The USB-Modem is connected to a 4G network

8
5. CONNECTING TO RN
Before connecting the Telemetry system, check if there is any
update available for your Race Navigator. Only the latest software
version will be fully stable when working with the Telemetry
system.
To connect the modem to a Race Navigator, simply connect the
USB plug to an unused USB port in your RN device. After
connecting, a LTE icon appears on the status bar of RN device.
• Red icon – Modem detected, signal not available right
now (could be because of no sim card, no internet
connection, no signal detected)
• White icon – connected; amount of white bars indicates
quality:
- Poor
- Fair
- Good

9
6. RN TELEMETRY – COMPATIBILITY & INSTALLATION
Compatibility
The RN Telemetry application is compatible with all PCs with
Windows 10 operating system. The application requires stable
Internet connection.
Download from Microsoft Store
Installation is simple: open the Microsoft Store app and search for
“RN Telemetry”. On the list of results, click on the app with the
name "RN Telemetry" and on the application site, click on the GET
button. Wait for the installation process to finish and start the RN
Telemetry application.

10
7. DATA TRANSFER USAGE
You can calculate how much data are used by the telemetry system
during standard operation using the table from below:
Time of operation Data used
1 hour 30 MB
2 hours 60 MB
4 hours 120 MB
12 hours 360 MB
24 hours 720 MB
Please mind that this data transfer is valid for a standard operation,
that means recording of data while driving on the track.
The system is using much less data transfer when a car is standing
or no recording is on.
8. MAIN MENU
After first start-up, the application displays a screen with two work
modes to choose:
Spectator Mode - displays main info, does not require signing up,
Team Mode – more advanced mode, designed to be used by teams,
requires signing up to access.

11
9. NAVIGATIONS & PROFILES
To return to the previous view, use the arrow on the left side of the
window’s top bar.
In the profile section, the name of your account and the currently
selected profile are displayed. To log out, click the icon.
You can save custom setups for indicators in different profiles by
adding profiles for each setup. Enter the profile settings by clicking
on .

12
10. TELEMETRY APP SIGNING-IN
For log in: it is necessary to use a valid account for your team.
Please use the account registered for your products by RN Vision.
If you don’t have an registered account yet, please contact RN
Vision support by email: [email protected].

13
11. TELEMETRY APP OVERVIEW
After signing in, the application displays the current events. Click on
one of the events to enter the overview screen.
Now you can see the map focused on the track with all cars
connected visible and a list of them with basic info. Use the two
available buttons:
To enter the details view or to communicate with cars (Team order).

14
12. DETAILS VIEW
In this view you can observe detailed data from the Race Navigator.

15
12.1. DASHBOARD
On the main dashboard section you can see the following
information:
• Car info: driver’s name and car name (named like in the RN
device)
• Lap number
• Current lap time
• Speed
• RPMs
• Gear counter
• Throttle & Brake position bars
• G-force
On the map you can find:
• Car position marker
• Auto follow switch – disabling map following marker of
selected car
• GPS and LTE range bar indicator
• Sector time boxes
Map size depends on the number of channels – if more than four
are selected, the map is scaled down:
Current time
Throttle
position
G-Force
Sectors times
Current GPS speed
Engine’s RPM
Gear Counter
LTE Range
Lap Number Driver’s name & Car model
Brake position
GPS Range Selected car’s colour of marker
16
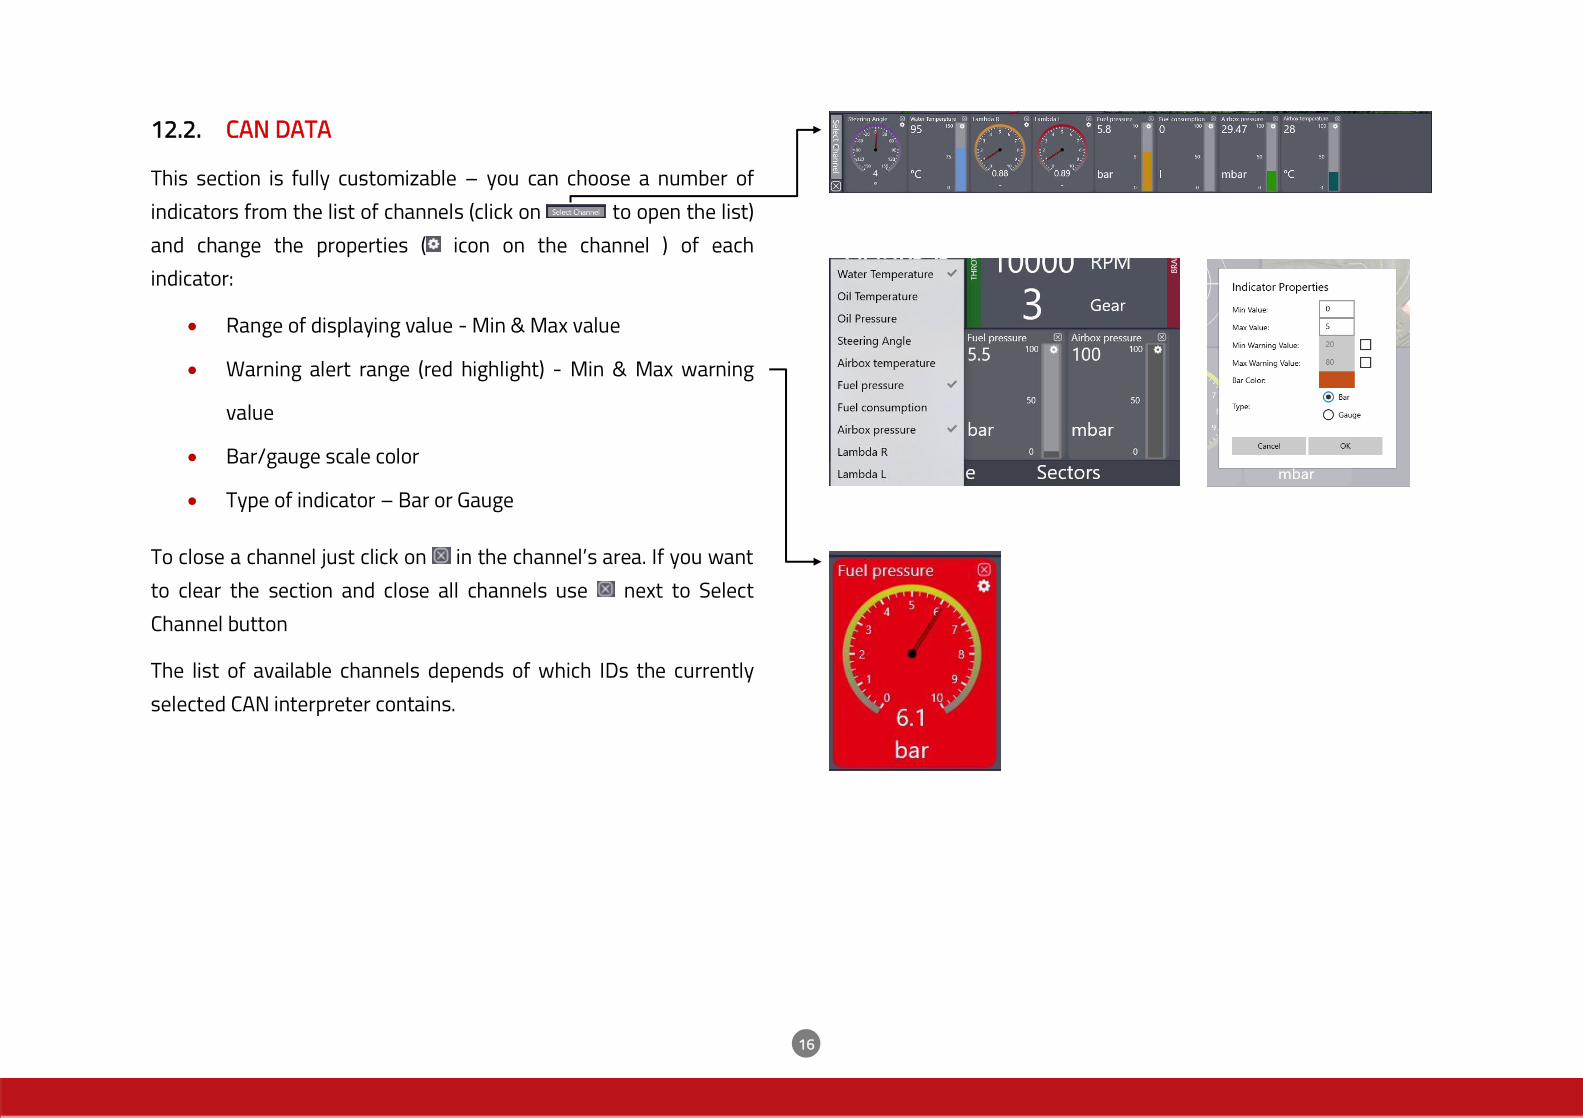
12.2. CAN DATA
This section is fully customizable – you can choose a number of
indicators from the list of channels (click on to open the list)
and change the properties ( icon on the channel ) of each
indicator:
• Range of displaying value - Min & Max value
• Warning alert range (red highlight) - Min & Max warning
value
• Bar/gauge scale color
• Type of indicator – Bar or Gauge
To close a channel just click on in the channel’s area. If you want
to clear the section and close all channels use next to Select
Channel button
The list of available channels depends of which IDs the currently
selected CAN interpreter contains.

17
Depending on the type of connection there will be a different set of
data available.
OBD2 Plug connection has a limited number of channels available :
• RPM
• Throttle
• Water Temperature
• Oil Temperature*
*Available in not all cases
For additional channels it is necessary to use CAN cable connection.
The types of channels depends on what is available in the CAN
protocol of car. A list of all channel is available in the Selecting CAN
of Car menu in the RN device.
List of additional channels through CAN connection (examples):
• Brake
• Gear
• Steering Angle
• Fuel pressure
• Airbox temperature
• Fuel consumption
• Airbox pressure
• Lambda L
• Lambda R
• Tire temperatures and pressures
• Etc.

18
12.3. LAPS & SECTORS
In this section you can see a list of all laps from the current event
with their times and sectors times.
Shown sectors are based on the standard track definitions
including sector definitions of our systems.
Sectors with best time are colored green.
Use for downloading lap data (See 14 EXPORT LAP DATA).
Use the button to jump into the communication dialog.

19
13. TEAM ORDERS
You can open the TEAM ORDERS communication dialog from the
main view (See: 11 TELEMETRY APP OVERVIEW) or from the
DETAILS VIEW by using the button on the top of the LAPS
AND SECTORS section.
In this dialog you can send instant messages to all currently
connected drivers from your team. All previous messages are
visible in the history area on the right side of this view.
Sent messages will appear instantly on the screen of the receiving
RN device and (if the screen was not tapped) remain there for 10
seconds.

20
14. EXPORT LAP DATA
While in the details view of the car click on the icon located in the
lap section to download the chosen lap’s data. Select a destination
directory to save the data on your drive.
15. IMPORT DATA IN RN ANALYZER FOR WINDOWS
Start the Analyzer Software for Windows (download it here:
https://www.race-navigator.com/en/rn-apps/). Go to the
IMPORT dialog, select a path (RN Telemetry app export destination
folder) and wait until the list of laps and events will be loaded.

21
When list of laps from this folder appears, just click on the
download button of the chosen laps.
Remember! Only laps data are exported from the RN Telemetry
app. Video files are not available to import.
The downloaded laps can now be analyzed – just go to the
ANALYZER dialog and select them.
For more info about using RN Analyzer for Windows check its
manual.

22
16. SPECTATOR MODE
This special view is designed for public view. Everybody can access
this view – signing in is not required.
In this mode, it is not possible to communicate with the driver or to
display detailed data from the car.
The car’s visibility can be disabled in the telemetry system on
request so that the car is not displayed in the spectator mode.
23
CONTACT US
RACE-NAVIGATOR.COM
RN Vision GmbH
Am Nordpark 1
41069 Mönchengladbach
Germany
Fon: +49 2161 63 970 11
Fax: +49 2161 63 970 12
E-Mail: [email protected]
www: www.race-navigator.com