repairing a vibrating r1200c oval mirror - internodeshirrens/bike/repairing a vibrating r1200c...
TRANSCRIPT

Page 1 of 7
Repairing a Vibrating R1200C Oval Mirror
1. Start by removing the black plastic cover on the back of the mirror housing. I accomplished this
with a small pocket knife but any thin metal item should work. Be careful not to scratch the
chrome as it seems fairly delicate. Work around the perimeter slowly nudging it straight out
little by little until it is off. Make sure that the mirror is face down on a surface or held in place
with masking tape depending on how wobbly your mirrors are.
2. The problem – here is the problem that causes the mirrors to wobble, in the picture below you
will notice two holes in the chrome mirror housing that have clips in them, if your mirror is
wobbling one or more is most likely broken or getting ready to break:
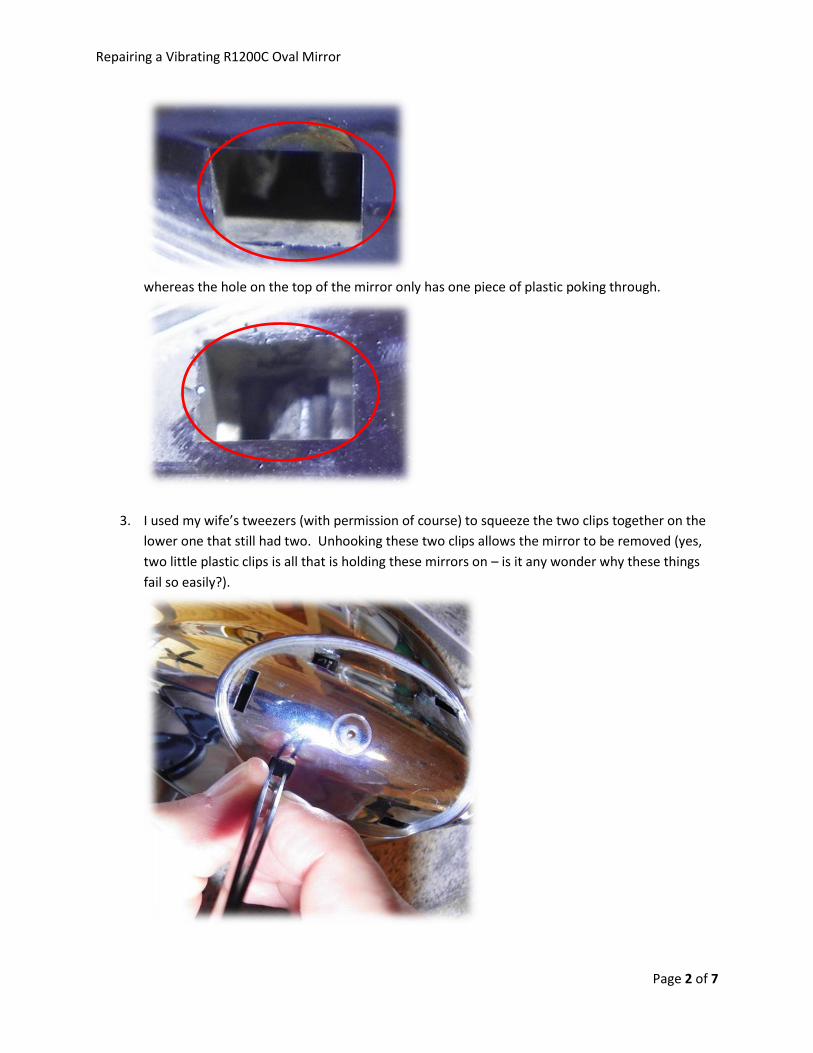
Below is a close-up of the lower clip in the image above, notice that there are two pieces of
plastic sticking through
Repairing a Vibrating R1200C Oval Mirror
Page 2 of 7
whereas the hole on the top of the mirror only has one piece of plastic poking through.
3. I used my wife’s tweezers (with permission of course) to squeeze the two clips together on the
lower one that still had two. Unhooking these two clips allows the mirror to be removed (yes,
two little plastic clips is all that is holding these mirrors on – is it any wonder why these things
fail so easily?).

Repairing a Vibrating R1200C Oval Mirror
Page 3 of 7
4. Once the mirror is out of the housing it is clear to see both the problem and the feeble
mechanics of how the mirror is held in the housing. At this point I ate a Popsicle (more on that
later).
Clips are spread by the black
plastic retainer on the back
side of the mirror housing
removed in step 1.
The Culprit!
The broken clip.
Close-up view of the
receptacles where the clips
attach.

Repairing a Vibrating R1200C Oval Mirror
Page 4 of 7
5. This step and the next are more easily accomplished with a helper. Once the mirror was apart I
cleaned all surfaces with rubbing alcohol and then used standard kitchen and bath silicone to
place a bead around the interior perimeter of the chrome housing. Be careful not to get too
close to the adjusting nut. There is a slightly raised ridge around the inside, this is approximately
where the mirror sets so I used that as a guide and made sure to keep the bead of silicone safely
behind/below that point.
I think when I do the other side I will put some grease on the adjusting nut so that in case any
silicone comes in contact it will not stick. I used plenty of silicone to make sure there was ample
surface area for the mirror to grab on to.

Repairing a Vibrating R1200C Oval Mirror
Page 5 of 7
6. I then laid the mirror face down and ran a mating bead of silicone around the perimeter of its
backing plate.
7. I used the popsicle stick from step 4 (yum) to even out any high spots on the silicone beads on
both parts because things got a little sloppy as you have seen.
Repairing a Vibrating R1200C Oval Mirror
Page 6 of 7
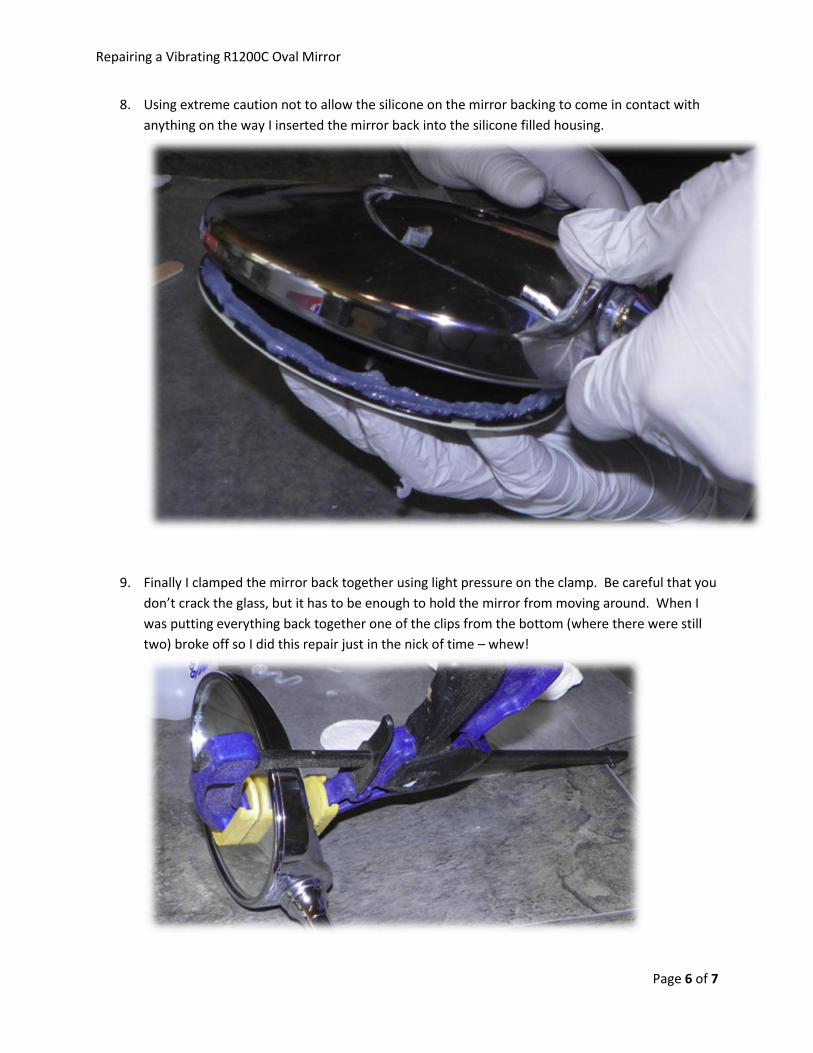
8. Using extreme caution not to allow the silicone on the mirror backing to come in contact with
anything on the way I inserted the mirror back into the silicone filled housing.
9. Finally I clamped the mirror back together using light pressure on the clamp. Be careful that you
don’t crack the glass, but it has to be enough to hold the mirror from moving around. When I
was putting everything back together one of the clips from the bottom (where there were still
two) broke off so I did this repair just in the nick of time – whew!

Repairing a Vibrating R1200C Oval Mirror
Page 7 of 7
10. I left the clamped assembly to cure for 3 or 4 days in the oven (my garage) before unclamping in
order to make sure all that silicone I glopped in there had an opportunity to reach strength
before riding with it.
11. Reinstall the mirror on the bike, push the black plastic cover on the back of the housing and the
only trace of the repair is that the mirror no longer vibrates, images reflected back are rock solid
all the time.
One unexpected benefit of this repair is due to the voluminous amount of silicone I used the
added weight has seemed to reduce some of the vibration on my right handgrip. Next up, the
left mirror to balance things out