renos wallet setup - · pdf fileunpack the file and move it to the folder you plan to use...
TRANSCRIPT

Renos Local Wallet Masternode Setup
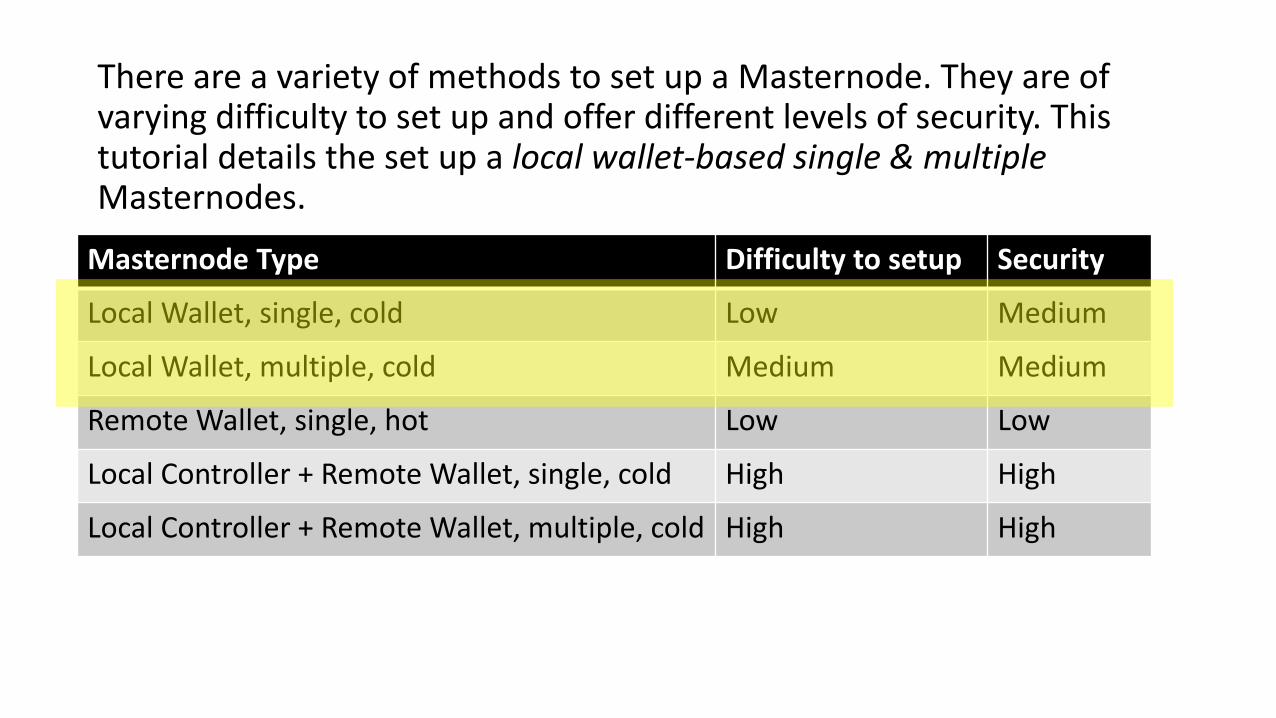
There are a variety of methods to set up a Masternode. They are of varying difficulty to set up and offer different levels of security. This tutorial details the set up a local wallet-based single & multiple Masternodes.
Masternode Type Difficulty to setup Security
Local Wallet, single, cold Low Medium
Local Wallet, multiple, cold Medium Medium
Remote Wallet, single, hot Low Low
Local Controller + Remote Wallet, single, cold High High
Local Controller + Remote Wallet, multiple, cold High High

Creating and Syncing a Single Renos Wallet

Download the wallet
Visit https://renoscoin.com , click on Wallet and download the Windows (or Linux) wallet.

Unpack the file and move it to the folder you plan to use for the wallet.
Unpack the wallet

Load the RenosCoin Wallet program and wait for the wallet to sync with the blockchain. An up-to-date blockchain can be found here: http://renoscoin.blockexplorer.pro/
Sync the wallet

Encrypt your wallet by clicking Settings > Encrypt wallet. Select a complex password to use. RenosCoin wallet will encrypt and then automatically close. Re-open the program.
Encrypt the wallet

Starting a Single Masternode

Navigate to the a) “RenosNodes” tab, b) click “My RenosNodes”, and c) “Create”. Enter an “Alias” which is the name of the node and “Address” which is your external IP address of the node and port. (XXX.XXX.XXX.XXX:57155) – 57155 is recommend port but any port can be used. If you don’t know your IP address, search “What is my IP” in Google.
Create RenosNode
a
b
c

Navigate to Settings > Options > Display tab.
Click to enable “Coin Control”.
Enable coin controls

Go to the “Receive” Tab, select the MN label, then click “Copy Address” below.
Copy Masternode address
a
b

Send money to the wallet
Visit the exchange where your coins are held and send 30,000.01 to the Masternodeaddress. The extra 0.01 is for the transfer fee.
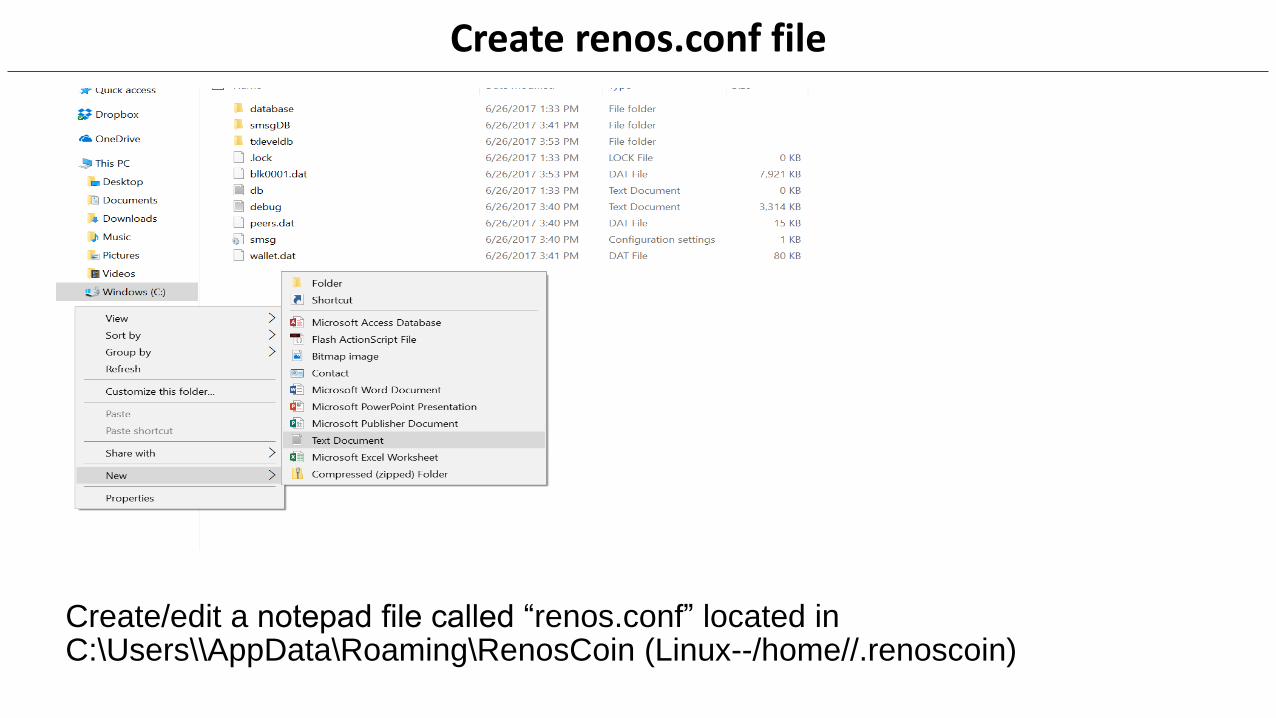
Create renos.conf file
Create/edit a notepad file called “renos.conf” located in C:\Users\\AppData\Roaming\RenosCoin (Linux--/home//.renoscoin)

Go to a) “RenosNodes” tab, click b) “My RenosNodes”, and select your node and click c) “Get Config”
Open RenosCoin configuration file
a c
b

rpcallowip=127.0.0.1rpcuser=REPLACEMEWITHUSERNAMErpcpassword=REPLACEMEWITHSTRONSPASSWORDstaking=0server=1listen=1port=REPLACEMEWITHYOURPORTMasternode=1Masternodeaddr=XXX.XX.XXX.XXX:57155Masternodeprivkey=AUTOMATICALLYGENERATED
Copy and paste the information from the RenosCoin configuration window into the renos.conf file. Update the highlighted information of the config. Save the file.
Modify RenosCoin.conf file

Start your Masternode
Start your Masternode by going to a) “RenosNodes”, then b) “My RenosNodes”, then select your Masternode. Finally, click c) “Start”.
a
c
b

Confirm that your Masternode is running by moving to the Masternode list on the “RenosNodes Network” tab. Your Masternode will be on the top of the list at line 1. When you first start the Masternode, the “Active” time should read 00m:00s.
Confirm your Masternode is started

Check your Masternode earnings remotely by visiting: http://renoscoin.blockexplorer.pro/ and pasting your address into the search field.
Monitoring your Masternode

Creating Multiple Local Renos Masternodes
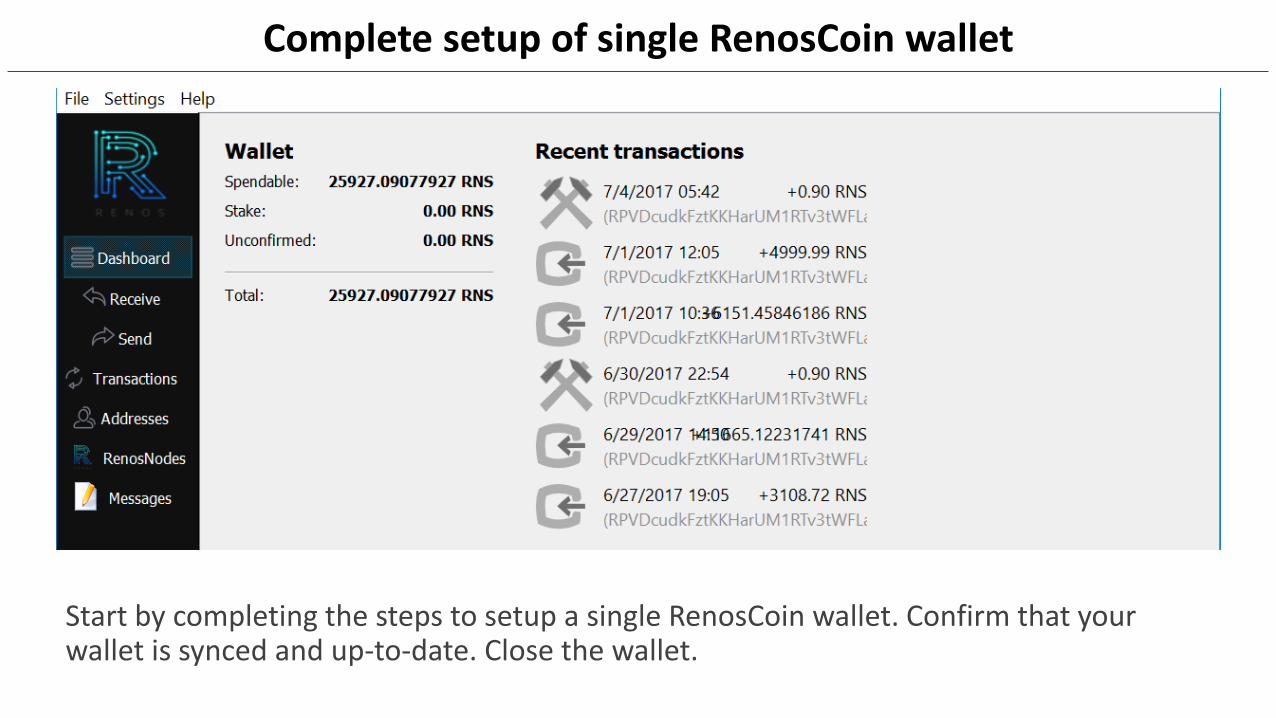
Start by completing the steps to setup a single RenosCoin wallet. Confirm that your wallet is synced and up-to-date. Close the wallet.
Complete setup of single RenosCoin wallet

Create multiple data directories
Navigate to C:\Users\USERNAME\AppData\Roaming\RenosCoinCopy the RenosCoin folder and paste it. Rename the copies until you have the same amount of folders as you do Masternodes. Example: RenosCoin, RenosCoin1, RenosCoin2, etc…
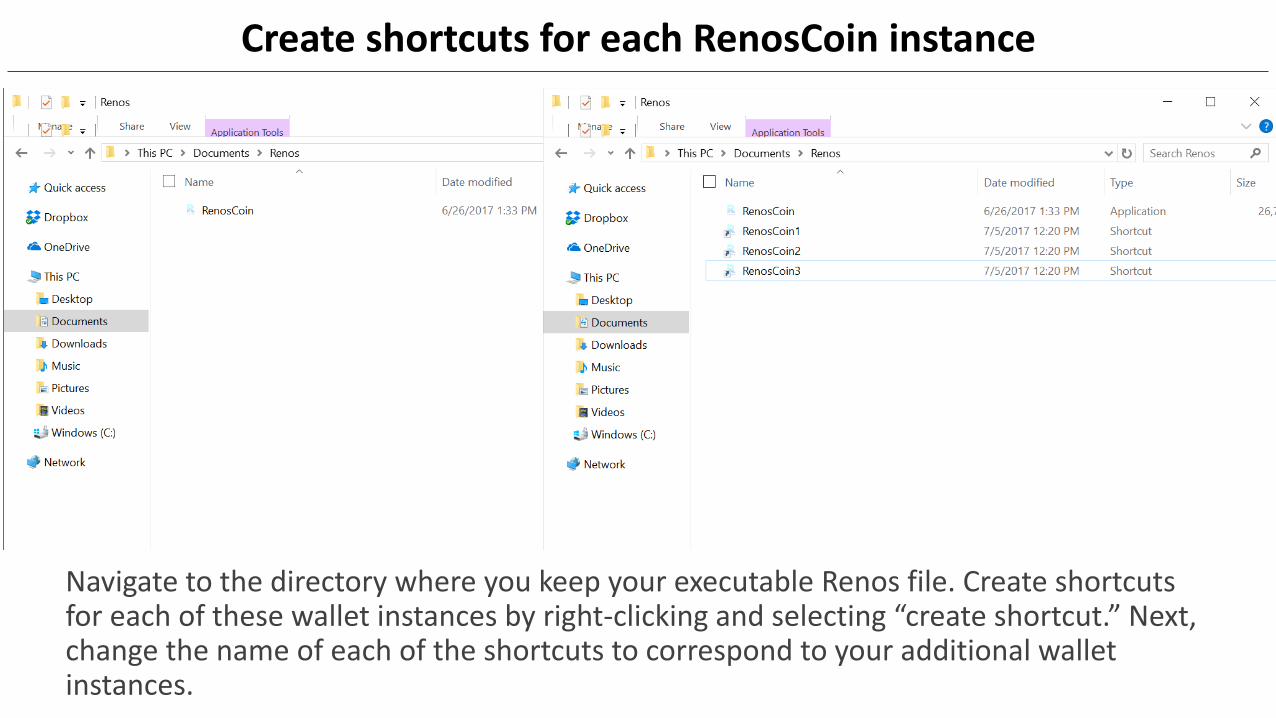
Navigate to the directory where you keep your executable Renos file. Create shortcuts for each of these wallet instances by right-clicking and selecting “create shortcut.” Next, change the name of each of the shortcuts to correspond to your additional wallet instances.
Create shortcuts for each RenosCoin instance

To link these shortcuts to the data directories, right click each shortcut and add the following above to the end of the string of text in the “Target” box. For Linux simply start the daemon with the following commands for each directory$ ./renosd –datadir=../.renoscoin1 //
Link the target of each shortcut to the wallet instance
Change target to:“C:\..\RENOSFOLDER\RenosCoin.exe -datadir=C:\Users\USERNAME\AppData\Roaming\RenosCoin1 -listen=0”

To start each Masternode, follow the instructions to start single Masternodes. Complete these steps for each RenosCoin instance.
Start multiple Masternodes individually

Renos Local Wallet Masternode Setup Guide ver1.1, 7/7/17Written by @mwettergreen based on text from @bl4ckhttps://renoscoin.com

Troubleshooting
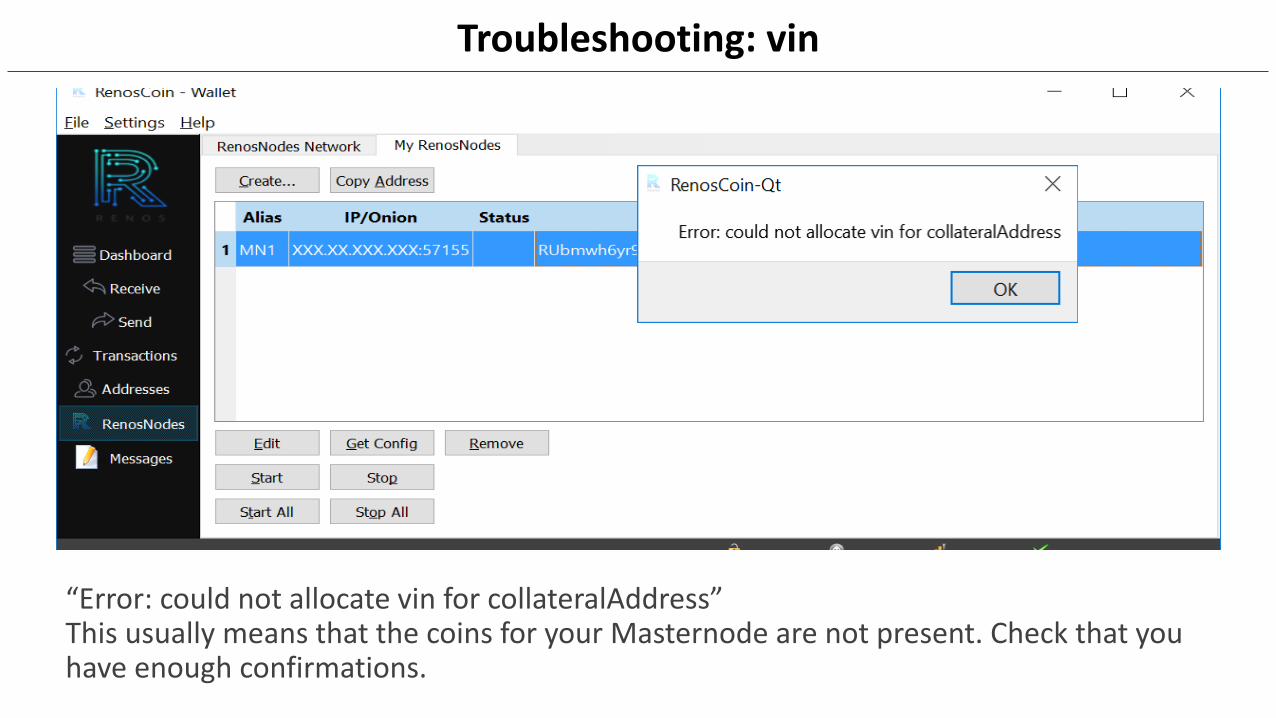
“Error: could not allocate vin for collateralAddress”This usually means that the coins for your Masternode are not present. Check that you have enough confirmations.
Troubleshooting: vin

Troubleshooting: port closed
• If you receive an error that your port is closed, try this tutorial: How to open ports in Windows 10
• http://www.tomshardware.com/faq/id-3114787/open-firewall-ports-windows.html
• Check that the port is open with this tool: http://canyouseeme.org/