removal and installation of dana 44 ball joints - j10mike · removal and installation of dana 44...
TRANSCRIPT

Removal and installation of Dana 44 ball joints – 1990 Grand Wagoneer NOTE: This is my first attempt at replacing ball joints. The job seems to be straight forward. I worked straight from the directions in the factory shop manual.
1. These are the tools needed to perform this job.

2. Remove lower ball joint nut.
3. Remove upper ball joint cotter pin and castle nut.

4. Partially unloosen split ring and take a large hammer and pound out the steering knuckle.
5. Place steering knuckle upside down in vise.

6. Remove lower ball joint snap ring.
7. Remove lower ball joint.

8. Remove upper ball joint.
9. Install lower ball joint.
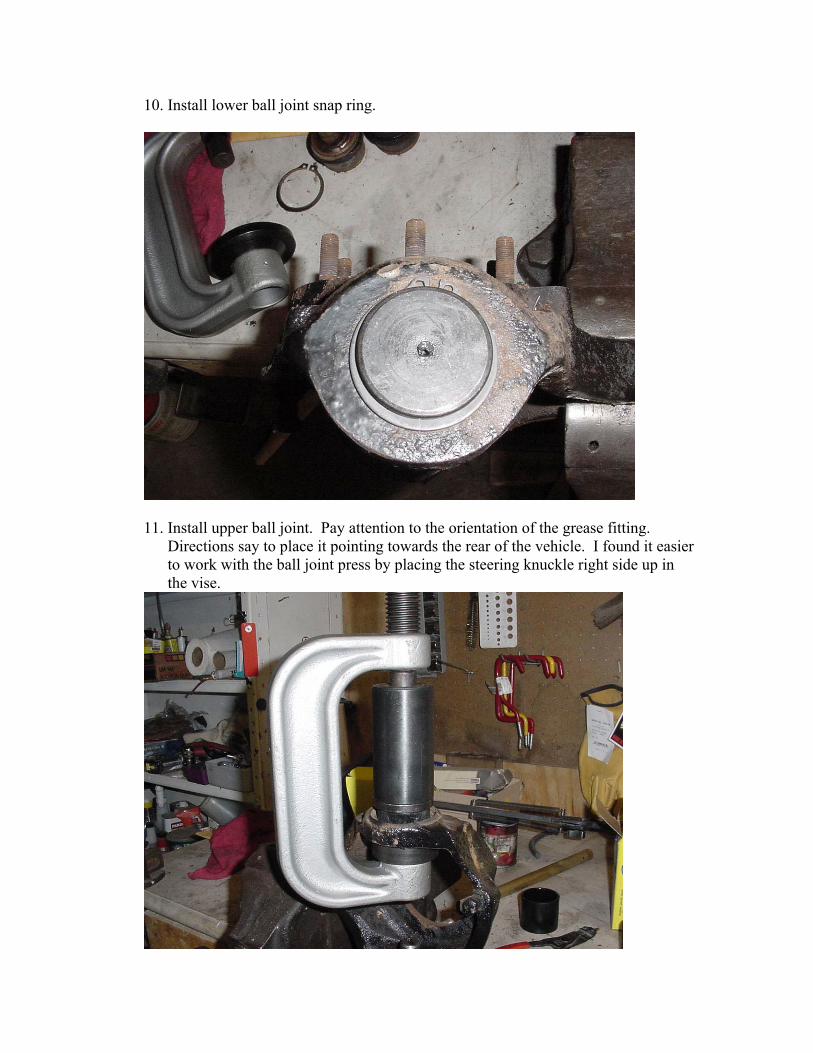
10. Install lower ball joint snap ring.
11. Install upper ball joint. Pay attention to the orientation of the grease fitting.
Directions say to place it pointing towards the rear of the vehicle. I found it easier to work with the ball joint press by placing the steering knuckle right side up in the vise.
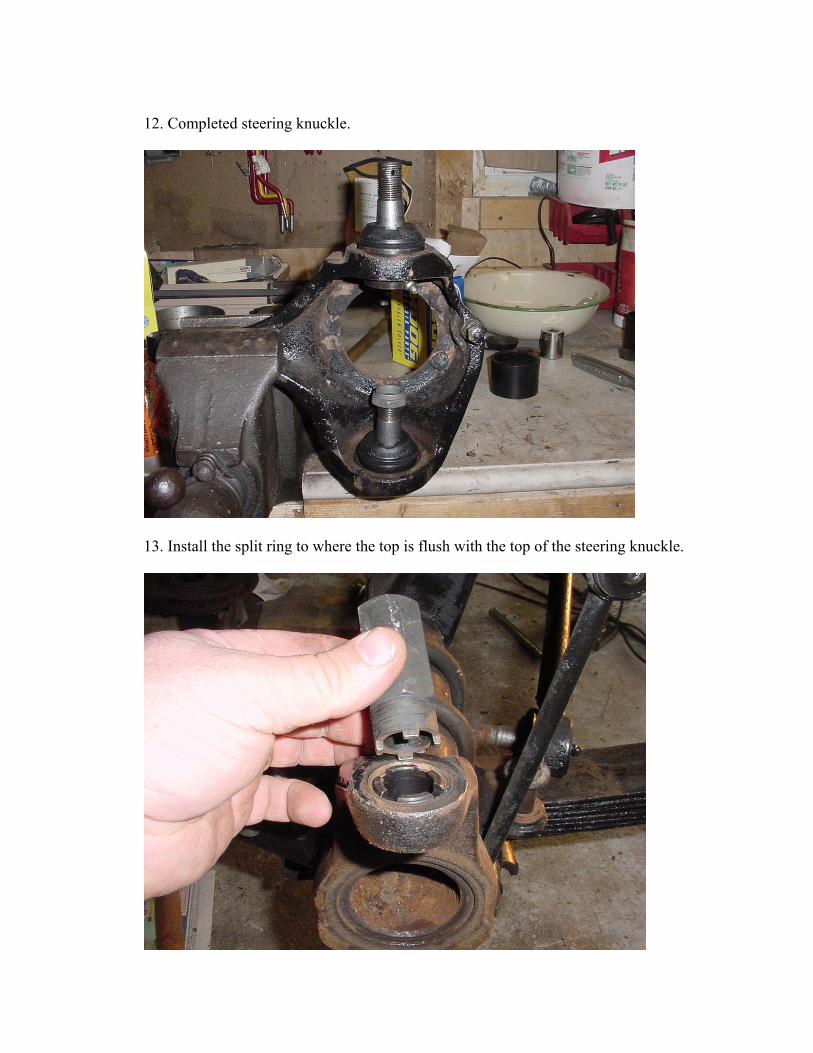
12. Completed steering knuckle.
13. Install the split ring to where the top is flush with the top of the steering knuckle.

14. Place steering knuckle back on the vehicle, place a hydraulic jack underneath to
push the knuckle into place and torque the lower nut to 70 ft lbs.
15. Install and torque the split ring to 50 ft lbs.

16. Install the castle nut to 100 ft lbs and install the cotter pin.