remote motor control - 17. telekomunikacioni forum telfor...
TRANSCRIPT
17th Telecommunications forum TELFOR 2009 Serbia, Belgrade, November 24-26, 2009.
Abstract — This paper presents a comparison between two
motor controls in LabVIEW. The main idea is to generate a
trapezoidal signal which drives the DC motor and then to
measure the RPM with a counter. The first experiment uses
PXI equipment and a PIC microcontroller, the second
experiment uses PXI equipment and CompactRIO. To make
it more interesting we made it possible to be controlled
remotely over the internet (http://plst.etc.upt.ro).
Keywords — CompactRIO, FPGA, LabVIEW, motor
control, PID, PXI, remote server, RPM, trapezoidal signal,
web.
I. INTRODUCTION
HIS paper presents a very interesting experiment, a
comparison between two types of motor controls, one
that uses PXI and a PIC microcontroller and the other
which uses PXI and CompactRIO. The PXI equipment is
used to generate the trapezoidal signal and to measure the
RPM. The signal generator drives the motors in a
trapezoidal shape of acceleration. The RPM measuring
method is similar to an old computer mouse with steel
ball. On the motor is a disk with slots, and that disk is
placed between an optocoupler. The opcoupler is
connected to a counter, when the disk spins, the counter
gets the signals. With LabVIEW and simple mathematics
we can convert the frequency to RPM and represent it on a
Waveform Graph. The experiment is almost complete,
why the PIC microcontroller and the CompactRIO gets the
main importance? The answer is that we are working with
motors and they need pretty high current to work. The
other fact is that they have an inertia, in other words they
will not respond to your controls immediately, they have
to be controlled all the time and make corrections if they
go beyond threshold values. One of the best controls it’s a
PID control. The first experiment uses de the PID made in
the microcontroller and the amplifying with some
integrated circuits from the demonstration board. The
second experiment uses the PID from LabVIEW and needs
no amplifying, because the signal is generated with PXI
DC Power board that can give enough current. Mainly in
this paper will see if the PID written in ASM, running on a
PIC microcontroller, or the PID written in LabVIEW,
running on CompactRIO’s FPGA, is better.
Aurel Gontean is with Applied Electronics Department, Faculty of
Electronics and Telecommunications, “Politehnica” University of
Timişoara, România (e-mail: [email protected]).
Roland Szabó is Master student, Faculty of Electronics and
Telecommunications, “Politehnica” University of Timişoara, România
(e-mail: [email protected]).
II. PXI AND PIC MICROCONTROLLER EXPERIMENT
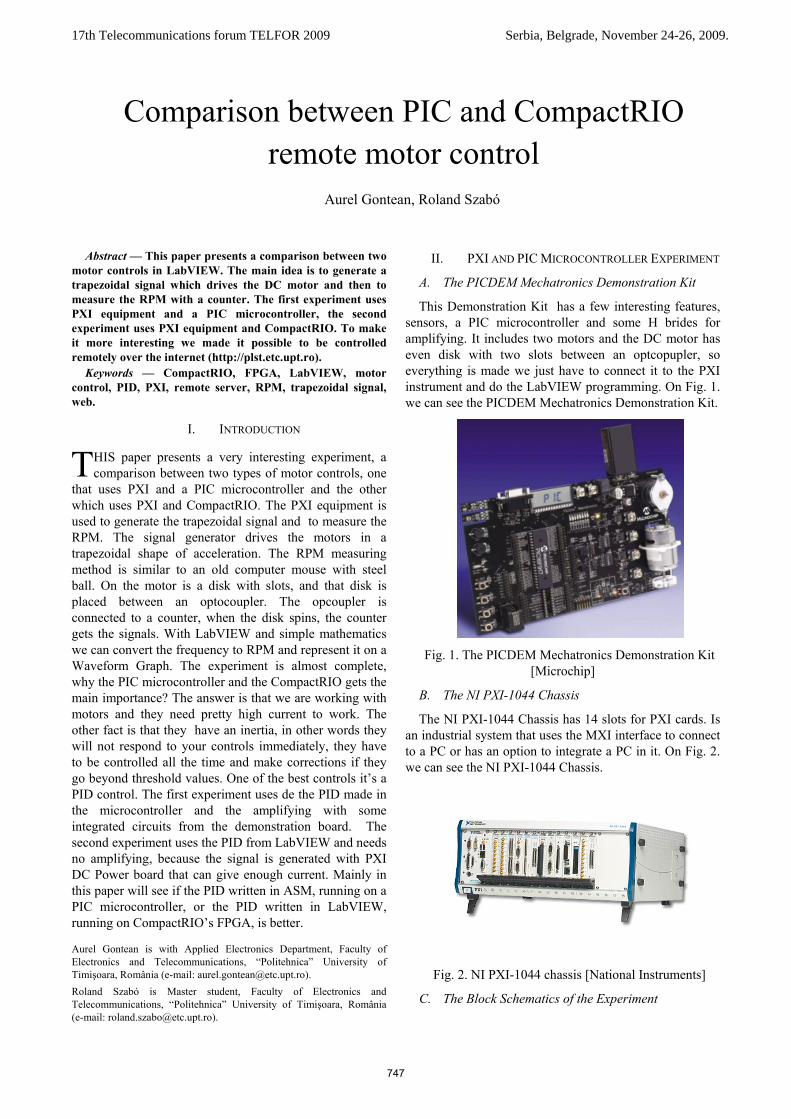
A. The PICDEM Mechatronics Demonstration Kit
This Demonstration Kit has a few interesting features,
sensors, a PIC microcontroller and some H brides for
amplifying. It includes two motors and the DC motor has
even disk with two slots between an optcopupler, so
everything is made we just have to connect it to the PXI
instrument and do the LabVIEW programming. On Fig. 1.
we can see the PICDEM Mechatronics Demonstration Kit.
Fig. 1. The PICDEM Mechatronics Demonstration Kit
[Microchip]
B. The NI PXI-1044 Chassis
The NI PXI-1044 Chassis has 14 slots for PXI cards. Is
an industrial system that uses the MXI interface to connect
to a PC or has an option to integrate a PC in it. On Fig. 2.
we can see the NI PXI-1044 Chassis.
Fig. 2. NI PXI-1044 chassis [National Instruments]
C. The Block Schematics of the Experiment
T
Comparison between PIC and CompactRIO
remote motor control
Aurel Gontean, Roland Szabó
747

On Fig. 3. We can see the block schematics of the
experiment, how everything is connected.
Fig. 3. The block schematics of the experiment
D. The Front Panel of the Experiment
The instrument uses two instruments: the NI PXI-6115
Multifunction DAQ for the trapezoidal signal generation
and the NI PXI-6608 for the counter. There are two
waveform graphs one shows the mathematical signal that
is made for the motor acceleration, the other is the actual
measured RPM. The two should be identical and most of
the times is. There are two indicators, one shows the
frequency and the other shows the RPM. There is a dial
control to set the numbers of the slots for the motor’s disk.
The PICDEM Mechatronics Demonstration Kit has a disk
on the motor with two slots, but we can use a four slotted
disk for higher accuracy and then we have to change de
dial’s position. We have a filter button for filtering the
signal, we used a median filter. The other control’s and
indicators are default for configuring the instrument. The
most important controls are the ones in the right of the first
Waveform Graph with the labels Points and Angles. These
are for configuring the trapezoidal signal. The formula for
obtaining the trapezoidal shape is represented on formula
(1). Np is the number of points; Uminr,Uminf are the minimal
voltages for rise and fall; A is the amplitude of the signal;
U0 is the start voltage.
��� · ���� � � ���� · ����� � � ��
� (1)
Now we can see easily that in our case: 0,0003 * 10000 =
5 - 2. On Fig. 4. We can see the Front Panel of the
experiment.
Fig. 4. The Front Panel of the experiment
E. The Block Diagram of the Experiment
The Block Diagram is represented on Fig. 5. We can see
that there are two While loops that work in parallel. One
for generating and the other for reading the RPM. In the
first loop we can see the method used for generating the
trapeze. The method is using three For loops, each for
every side of the trapeze. One for the rising edge, one for
the continuous part and one for the falling edge. The three
For loops are put together and this way forming a trapeze.
In the second loop we can see the reading of the
frequency from the counter and converting it in RPM with
a simple formula that is shown on formula (2). Ns is the
number of slots of the disk that is on the motor and f is the
frequency.
��� ���
· 60 � (2)
We can see the median filter and we can see a dividing
with 100, that is because we included a conditioning
circuit between the counter and the optocoupler this is
because the signal was not high enough for the counter.
The conditioning circuit amplifies with 100, so we have to
compensate that amplifying with diving with 100.
748

Fig. 5. The Block Diagram of the experiment
III. PXI AND COMPACTRIO EXPERIMENT
A. The ComapctRIO System
This system is very robust, supports shock up to 50g,
and temperatures between -40 – 70 °C. It has 4 or 8 slots
for instruments. The chassis has an FPGA backbone and
the controller runs a real-time operating system called
VxWorks Wind River. The operating system is so good
that it has even it’s own web and FTP server. The
CompactRIO system is programmed via Ethernet. A
picture of it is on Fig. 6.
Fig. 6. The CompactRIO system [National Intruments]
B. The Block Schematics of the Experiment
The block schematics is shown on Fig. 7. We can see
some difference between the two block schematics (Fig. 3.
and Fig. 7.) Fig. 7. it’s a little bit more complicated, but
works better it uses both PXI and CompactRIO chassis.
But the PID on the FPGA seems to do a better job than the
one on the PIC microcontroller. We can see that for the H-
Bridge it’s used an NI 9505 for the signal generator an NI
PXI-4110 DC Power Source and for the counter an NI
PXI-6733, which is a High Speed Voltage Output, but it
has counter input too, so we used it.
Fig. 7. CompactRIO block schematics
C. The CompactRIO front Panel
For the CompactRIO there are two ways of making a
remote web controlled application, we can use the
CompactRIO connected directly to the internet using it’s
own built in web server, or make a separate web server on
another computer. We chose the second one because it’s
more secure and of course it has better resources, our web
server has 4GB of RAM and our CompactRIO has only
64MB of RAM. Making this made the experiment harder,
because the way of our measurement is very long. This
way the optcoupler reeds the value, send it to the NI 9505
H-Bridge then it send the information to the CompactRIO
FPGA chassis then the information is sent to the real-time
controller and after that all of it is sent trough a cross-over
Ethernet cable to the second network card of the PC and
then the computer sends the information to the first
749

network card of the PC and after that all the information is
sent to the Internet. This way we had to make a VI for
every step of our information sending and we had to give a
specific attention of the propagation times, because the
information travels a really long way. One VI is for the
FPGA (Fig. 8.), one for the real-time OS (Fig. 9.), one for
sending the data to the network from the real-time OS to
Windows OS (Fig. 10) and one for the Windows OS (Fig.
11.). The interesting fact is that the Front Panels are almost
identical, the difference is between the Block Diagrams.
There is an another front panel, the Windows interface,
which is similar to Fig. 4. On the FPGA Front Panel (Fig.
8.) We can see some buttons and LEDs that controls and
indicates the real LEDs from the NI 9505 H-Bridge a
control for setting the PID values, the Current Setpoint
value, the Current Limit, the Current Feedback and we can
read the PWM Duty Cycle value.
Fig. 8. The FPGA Front Panel
D. The CompactRIO Block Diagrams
In this section we let the pictures to do the talking the
important thing is that the front panel is the same only the
Block diagrams are different.
Fig .9. Block Diagram of the real-time operating system
Fig. 10. Block Diagram of the real-time operating system for sending the data to the PC on Ethernet
Fig. 11. Block Diagram of the Windows operating system
IV. CONCLUSION
CompactRIO FPGA PID was complicated to build, but
it worked better on a longer period then PICDEM
Mechatronics PID.
REFERENCES
[1] Mihela Lascu, Advanced programming techniques in LabVIEW,
Politehnica Publishing House, Timişoara, 2007.
[2] * * * National Instruments, CompactRIO™ and LabVIEW™
Development Fundamentals – Course Manual, 2008.
[3] * * * National Instruments, LabVIEW™ Data Acquisition and
Signal Conditioning Exercises, 2008.
[4] * * * National Instruments, Data Acquisition and Signal
Conditioning – Course Manual, 2008.
[5] * * * National Instruments, LabVIEW™ Basics II: Development –
Course Manual, 2007.
[6] * * * National Instruments, LabVIEW™ Basics II: Introduction –
Course Manual, 2007.
750