remote lighting kit - the home depot€¦ · · 2017-04-12remote lighting kit . table of contents...
TRANSCRIPT

Remote Lighting Kit

Table of Contents Lighting Kit Overview 2
System Requirements 3
Basic Concepts of Wireless Routers and Networks 4
Basic Concepts of Network Light Bulbs 8
Planning Your Lighting Network 9
Manually Powering Light Bulbs on and Off 11
Gateway Overview 13
Gateway Indicators 14
Remote Control Overview 15
Remote Control Indicators 16
Installation and Setup 17
Smart Device Application 27
Network Connection 27
My Lights 28
Smart Controls 30
Settings 35
Managing Rooms 37
Managing Lighting Groups 39
Managing Lights and Fixtures 40
Remote Access 45
Web Application 47
Smart Controls 49
My Home 52
Settings 55
Remote Control 56
General Remote Control Concepts 56
Remote Control Setup 58
Turning Lights on and Off 60
Brightening and Dimming Lights 61
Assigning and Changing a Light Bulb’s Lighting GroupError! Bookmark not defined. Adding and Removing Light Bulbs Error! Bookmark not defined. Cloning a Remote Control Error! Bookmark not defined. Replacing Batteries 62
Resetting the Remote Control 62
Troubleshooting 64
Safety Information 68

Product Specifications 70

Lighting Kit Overview
The TCP lighting kit includes a wireless smart lighting system that helps make the lighting in your home more
energy efficient and easier to manage. The kit includes CFL light bulbs and a
remote control that work together to help you manage your lighting wirelessly.
Your lighting kit also includes a GreenWave Reality Gateway, which provides an
enhanced network connection to your light bulbs. This Gateway connection allows
you to use your Web browser, smartphone, or other smart devices to set up and
manage your home lighting system as well as set up user-defined schedules and
other controls for automatically turning your lighting on or off.
Note: This guide uses the term “smart device” to refer to a Smartphone, Tablet (or iTouch),
or TV.
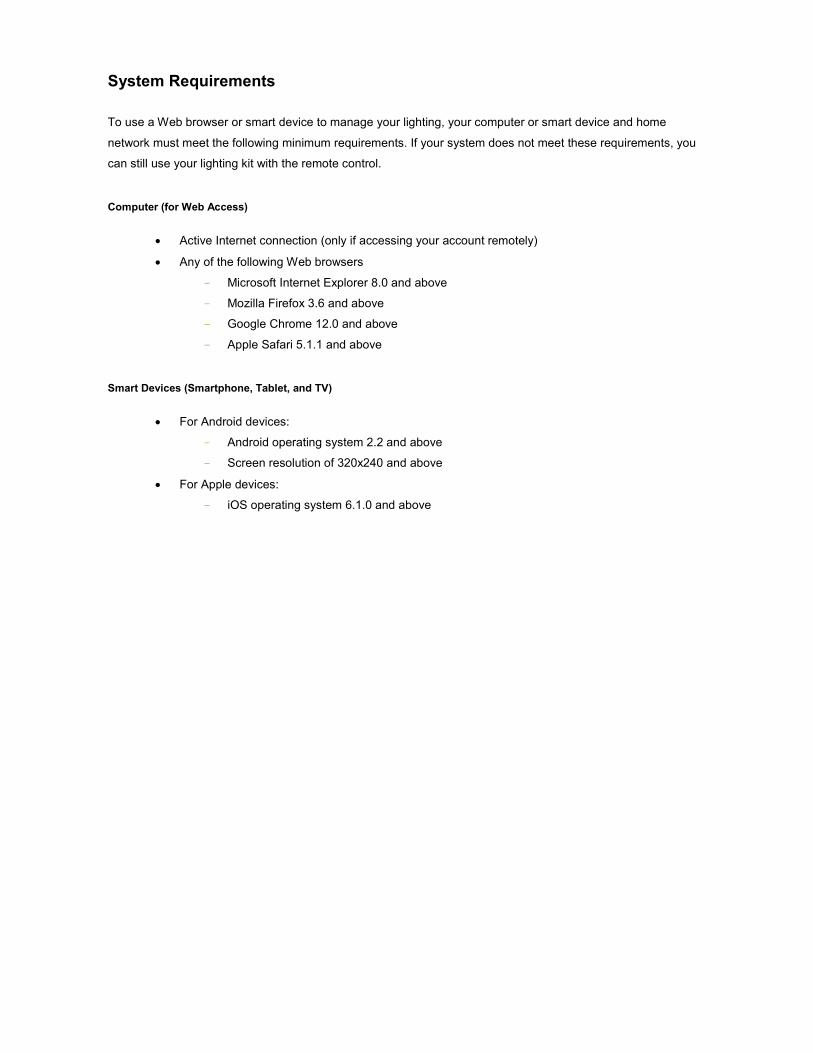
System Requirements
To use a Web browser or smart device to manage your lighting, your computer or smart device and home
network must meet the following minimum requirements. If your system does not meet these requirements, you
can still use your lighting kit with the remote control.
Computer (for Web Access)
• Active Internet connection (only if accessing your account remotely)
• Any of the following Web browsers
- Microsoft Internet Explorer 8.0 and above
- Mozilla Firefox 3.6 and above
- Google Chrome 12.0 and above
- Apple Safari 5.1.1 and above
Smart Devices (Smartphone, Tablet, and TV)
• For Android devices:
- Android operating system 2.2 and above
- Screen resolution of 320x240 and above
• For Apple devices:
- iOS operating system 6.1.0 and above

Wireless Router
For the smart device application to manage your lighting locally within your home, your home network must use a
wireless router to which your smart device is connected. While you can also connect remotely to your lighting
network over the Internet or mobile data connection, it is not practical to do on a day-to-day basis at home. There
are no requirements for the type of wireless router, as long as your smart device and Gateway are able to
connect to it. Refer to your smart device’s documentation for more information on connecting it to your home
network.
Note: Your network lighting is designed for a wireless home network and not a corporate network.
Basic Concepts of Wireless Routers and Networks
Many homes today have a home network router to allow multiple devices in the home to connect to the Internet
as well as each other. Many people use a wireless router as their network router so that they are not tethered by
a cable that physically connects them to the router. For example, most modern laptop computers and smart
devices have internal wireless hardware that allows you to connect them to a wireless router without a physical
cable.
Modem and Router Connection
In a typical home network configuration, the router (wireless or not) connects to a modem, which in turn connects
to the Internet. For example, cable companies and DSL providers often provide their customers with a modem

that connects directly to the cable company or DSL provider’s network and thus to the Internet. You could
connect a computer directly to this modem so that you can access the Internet through your computer’s Web
browser or other applications. However, many people connect a router to the modem instead to allow for multiple
computers and devices to all share the same connection to the Internet through one modem. The router also
allows the attached computers and devices to connect with one another.
Wireless Network
Before wireless networking became common, routers only allowed for computers and devices to connect
physically through cables. This limited where you could place your computer or device based on the location of
the router and the length of the cable. With the advent of wireless networking in the home (commonly referred to
as “wi-fi”), many routers began including wireless technology in addition to the physical cable connections. This
type of wireless router allows you to connect a wireless-enabled device from anywhere around the home as long
as the wireless radio signal can be maintained. Many of the computers and devices built today come with internal
wireless hardware so that they are ready to connect to your wireless network. As a wireless device, a smart
device can connect to a wireless network, and applications installed on the smart device (including the lighting
application) use that network connection to access the Internet or other devices on the home network.
Since any wireless device within radio range can connect to a wireless router (and thus the corresponding home
network), wireless routers allow you to set up a user name and password so that wireless devices must be
authenticated in order to connect. Modern smart devices support this type of wireless infrastructure. Typically,
when you set up your wireless settings on your smart device, you store the user name and password for your
wireless network so that your smart device is always connected when in range of your home network.

Wireless Lighting Network
Wireless lighting utilizes the router’s wireless technology to allow you to control and manage the lights from a
smart device. To do this, the Gateway in the lighting kit is built to communicate with the wireless light bulbs.
Since the Gateway connects to the wireless router, other devices connected to that same router (such as your
smart device) can access the Gateway.
With your wireless light bulbs connected to the Gateway, your smart device can control them as long as the
smart device is running the appropriate application. The lighting application enables your smart device to connect
to the Gateway through the home wireless router connection and in turn control and manage the attached
network lighting.
Local vs. Remote Connection
In networking, the following terms are used to describe how a device may be connecting to the network:
• Local refers to a network connection when the device is connected directly to that network’s router.
For example, when you are at home, your smart device or Web browser (through your computer)
would be connected to your wireless router and therefore would be connected locally. You would
not have to use an Internet or mobile data connection because your smart device is already
connected directly through your router. It can access your lighting network locally because your
lighting network is also attached to the same router (through the Gateway).
• Remote (not to be confused with remote control) refers to a network connection when the device is
not connected directly to that network’s router. In this case, the device uses an Internet or mobile

data connection to reach your network router. For example, if you are at work and need to access
your network, you would access it remotely. With a remote connection, your device typically uses
some form of authentication so that your network router knows that it can trust your device when it
requests a connection. With the lighting network, you must have a password-protected online
account to which you log in through a smart device. This authenticated login lets your network
know that it is safe to accept the connection.
Example of Wireless Network
The following illustration shows an example of a wireless home network with lighting:
Basic Concepts of Network Light Bulbs
Network light bulbs work with your light fixtures the same way as standard light bulbs. They are different,
however, in a couple of ways:
• The lighting element in the light bulb uses energy-efficient technology.
• The light bulb includes wireless technology that allows the light bulb to connect to a network and be
managed remotely.
Because the light bulbs can be connected to a network, you have greater flexibility in how you use them. For
example, you can program your lighting network so that when you press a button upon arriving home, an
entryway and a hallway light turn on. Or when you go to bed, your remote control can turn off all lights on the
network. You can also use your smartphone to control your lighting network and set up schedules to
automatically turn your lights on and off at predefined times.
Maximum Number of Network Light Bulbs
There is a limit to the number of light bulbs at which the performance of the lighting network begins to decrease.
For example, the time it takes a light bulb to respond may start to increase if too many light bulbs are installed on
the lighting network. Testing has shown that the lighting network should be set to a maximum of 250 light bulbs
to maintain reliability in performance.

Planning Your Lighting Network
Whether you have only one wireless light bulb or replacing your entire home with wireless light bulbs, you should
plan how you want the lighting on your network to behave. For example, if you only have one light bulb you might
want to place it in a central location that would be optimum for turning on and off when you are away or arrive
home. If you have multiple light bulbs, however, you might want to set them up in rooms and lighting groups to
be able to better manage them across your home.
Note: Light fixtures that have dimmer controls are not recommended for your network light bulbs. However, they can be used if
the dimmer level is set to 100%.
Rooms
When organizing your network light bulbs, you can set them up into rooms. Then you can use your smart device
to turn on and off light fixtures in selected rooms. A room is a set of network light bulbs that exist in a physical
room in your home and can be controlled through your smart device or Web browser. For example, a bedroom in
your home might have two light fixtures with network light bulbs and one fixture with a standard light bulb. The
two network light bulbs in that bedroom are organized under that room. If you were to turn on all lights in that
room, both network light bulbs would turn on.
Note: You cannot use your remote control to set up or control rooms.

Multi-fixture Lights
When installing light bulbs or setting up lighting groups, you should consider how you want multi-fixture lights to
behave. Since power to the light has to remain on (so that you can access the light bulb from your smart device
or remote control) you would use either all network light bulbs in a multi-fixture light or no network light bulbs at
all.
When setting up your lighting through your smart device (which you will do in the Smart Device Application
chapter), you will see that you can set up a “virtual” light fixture. This means that you can set up any grouping of
light bulbs to operate (turn on and off together) as one multi-fixture light. Typically you will only use this feature to
set up an actual multi-fixture light. However, you could also use it in cases where you have multiple lights that
you want to behave as a multi-fixture light (for example, if you have two separate desk lamps that you want to
operate together).
Network Range
If you are using a smart device or Web browser, then your network range is virtually unlimited since you can
access your lights through the Internet. As long as your Gateway is connected to the Internet through a router,
you could access your lighting network through your smart device or Web browser from a remote location.
For most of the time, you will likely access your lighting through your smart device when you are at home, in
which case your smart device connects through your home network instead of the Internet. In this case, the
range for your smart device is limited by the range of your wireless router.

Manually Powering Light Bulbs On and Off
Wireless light bulbs are powered through light fixtures the same way standard light bulbs are. However, you must
leave the light fixtures in the on position so that power is available when using your smart device or remote
control to turn the wireless light bulbs on and off. If power is removed from a light bulb, whether from power
failure or from manually turning off the light fixture, the light bulb will turn off. When power is restored, all network
light bulbs affected by the power failure, regardless of whether they were previously on or off, will automatically
turn on at full brightness. The affected light bulbs will maintain their previous network settings so that you do not
have to reassign names and rooms or reprogram Smart Controls.
Controlling Lights without Your Smart Device or Remote Control
If your smart device or remote control is not available and you want to turn on a network light bulb, you can
manually turn off the light fixture and then turn it back on. The intentional power failure and restoration will cause
the light bulb to power on. You can then turn the light off later when your smart device or remote control is
available.
Similarly, if you want to turn off a network light bulb without your smart device or remote control, you can
manually turn off the light fixture. Remember, though, that the light bulb cannot be controlled again with your
smart device (including Smart Controls) or remote control until you turn power back on to the fixture. Also, when
you eventually power the fixture back on, the affected light bulb will automatically turn on as discussed above.

Power Failure with Wireless Light Bulbs
During a power failure, network light bulbs will turn off since there will be no power being supplied to the affected
fixtures. Since all affected light bulbs power on when power is restored, you will have to use your smart device or
remote control to turn off any light bulbs you do not want to keep on. Remember, your Smart Controls will still
work and continue to turn on or off any programmed light bulbs.
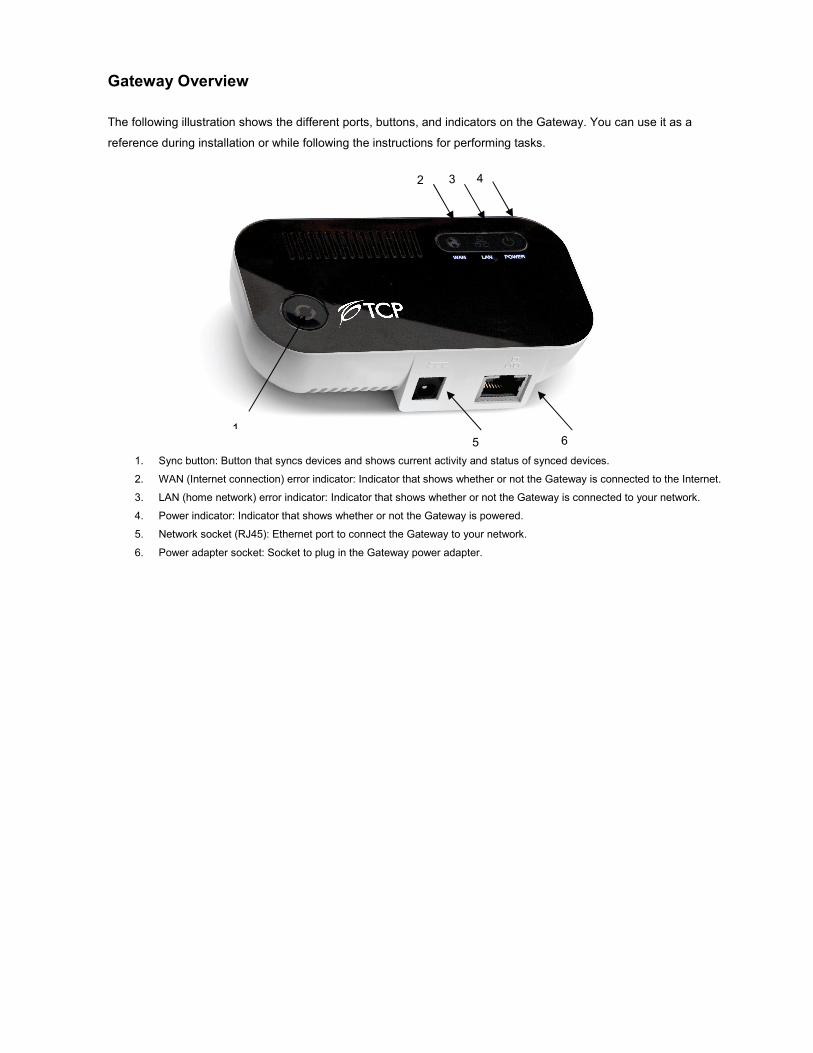
Gateway Overview
The following illustration shows the different ports, buttons, and indicators on the Gateway. You can use it as a
reference during installation or while following the instructions for performing tasks.
1. Sync button: Button that syncs devices and shows current activity and status of synced devices.
2. WAN (Internet connection) error indicator: Indicator that shows whether or not the Gateway is connected to the Internet.
3. LAN (home network) error indicator: Indicator that shows whether or not the Gateway is connected to your network.
4. Power indicator: Indicator that shows whether or not the Gateway is powered.
5. Network socket (RJ45): Ethernet port to connect the Gateway to your network.
6. Power adapter socket: Socket to plug in the Gateway power adapter.
1
5 6
2 3 4

Gateway Indicators
Your Gateway has indicators that display the following patterns and colors to show you its current status:
Power indicator—off (no color): Gateway is off.
Power indicator—steady white: Gateway is on.
Network indicator—off (no color): Gateway is connected to the network.
Network indicator—red: Gateway is not connected to the network. Check that the Gateway is connected to your network router.
Internet indicator—off (no color): Gateway is connected to the Internet.
Internet indicator—red: Gateway is not connected to the Internet. Check that your network router has an active Internet connection.
Sync button—two green bars rotating clockwise: Gateway is in inclusion mode to connect with light bulbs. When inclusion is successful, the rotating bars stop and all bars turn green for several seconds (flashing bars mean inclusion was unsuccessful).
Sync button—two green bars rotating counter-clockwise: Gateway is in exclusion mode to disconnect from light bulbs. When exclusion is successful, the rotating bars stop and all bars turn green for several seconds (flashing bars mean exclusion was unsuccessful).
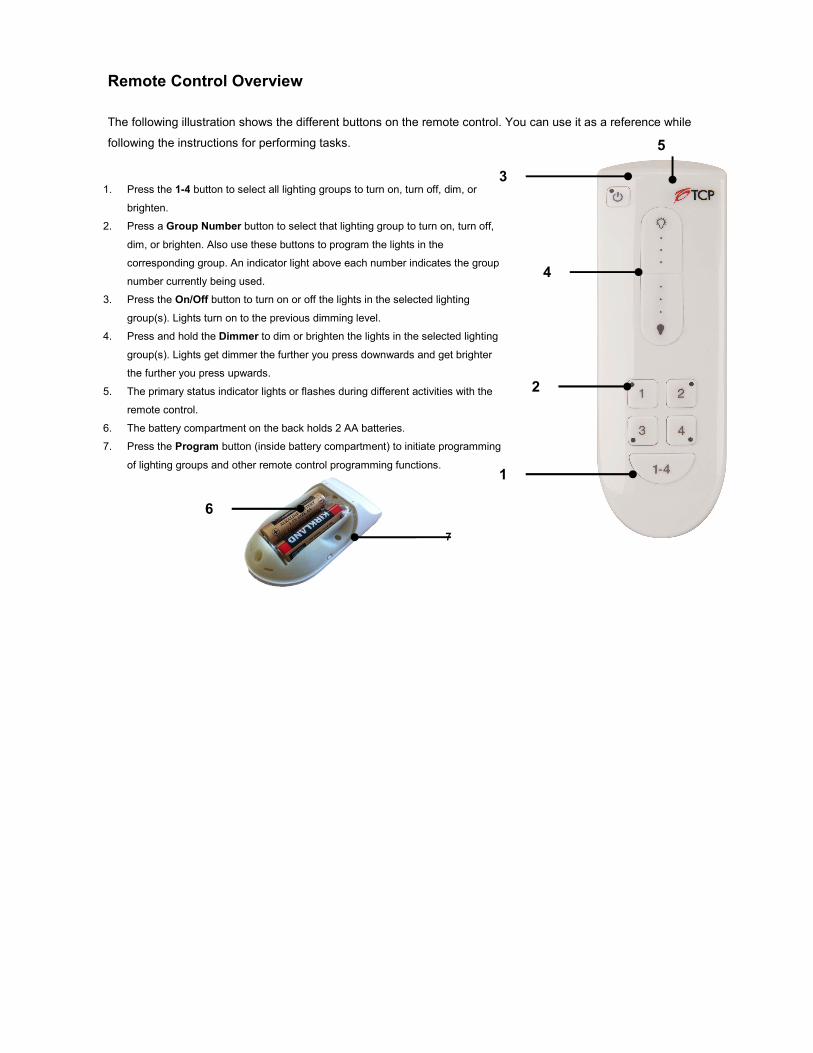
Remote Control Overview
The following illustration shows the different buttons on the remote control. You can use it as a reference while
following the instructions for performing tasks.
4
2
5
1
3 1. Press the 1-4 button to select all lighting groups to turn on, turn off, dim, or
brighten.
2. Press a Group Number button to select that lighting group to turn on, turn off,
dim, or brighten. Also use these buttons to program the lights in the
corresponding group. An indicator light above each number indicates the group
number currently being used.
3. Press the On/Off button to turn on or off the lights in the selected lighting
group(s). Lights turn on to the previous dimming level.
4. Press and hold the Dimmer to dim or brighten the lights in the selected lighting
group(s). Lights get dimmer the further you press downwards and get brighter
the further you press upwards.
5. The primary status indicator lights or flashes during different activities with the
remote control.
6. The battery compartment on the back holds 2 AA batteries.
7. Press the Program button (inside battery compartment) to initiate programming
of lighting groups and other remote control programming functions.
6
7

Remote Control Indicators
The remote control has four group number indicator lights and one primary status indicator light that display the
following patterns to show you the remote control’s status during different processes:
Process Indicator and Description
Initial Remote Control Setup
Primary indicator flashes steadily: During the process of installing batteries for the first time, the remote control is determining the best signal for your lighting system.
Adding Light Bulbs to Network
Group number indicator flashes steadily: The corresponding lighting group is the active group for the new light bulbs to join.
Primary indicator flashes rapidly: The remote control has found a new light bulb within range. After the light bulb is successfully added to the network, the indicator stops flashing.
Primary indicator turns on solid: The light bulb has been successfully added to the network.
Removing Light Bulbs from Network
Group number indicator and primary indicator flash slowly for 30 seconds: One or more light bulbs have been removed.
Working with One Lighting Group
Group number indicator turns on, and primary indicator remains off: The corresponding lighting group has been selected, and its last state was off.
Group number indicator and primary indicator turn on: The corresponding lighting group has been selected, and its last state was something other than off (for example, lighting group was on or was dimmed to a certain level).
Working with All Lighting Groups
All group number indicators turn on, and primary indicator remains off: All lighting groups have been selected, and their last state was off.
All group number indicators and primary indicator turn on: All lighting groups have been selected, and their last state was something other than off (for example, lighting groups were on or were dimmed to a certain level).
Cloning the Remote Control
Primary indicator flashes steadily: The remote control is in cloning mode.
Primary indicator flashes rapidly: The remote controls are transferring data between each other.
Primary indicator turns on solid: Both remote controls have finished the cloning process successfully.
Group number indicators flash steadily for 2 seconds: The cloning process timed out or failed.

Installation and Setup
Installation of your lighting kit includes the following tasks:
1. Reset any existing network light bulbs, if you previously installed them from a remote control-only
kit.
2. Install the Gateway.
3. Download and install the smart device application.
4. Install the light bulbs on your network.
5. Set up the light bulbs in the smart device application
6. If you will be using the remote control with your lighting network, then you must also prepare it for
use.
Note: Also see the installation tips at the end of this chapter.

1. Reset Existing Network Light Bulbs, if Any
If you are not upgrading from a remote control lighting kit, you can skip this step. If you are upgrading
from a remote control lighting kit, then you must reset all light bulbs that you previously installed as part of that
kit’s setup. The easiest way to reset all light bulbs is to do so through the original remote control (the remote
control that came with the kit you are upgrading):
Note: If the original remote control is not available, you can reset the original light bulbs manually. To do so, refer to the
Remote Control chapter.
1. Make sure power to the fixtures containing the light bulbs you want to reset is turned ON.
2. Remove the battery cover from the back of the original remote control so that you have access to the
Program button.
3. On the remote control:
a. Press and hold the Program button.
b. While pressing the Program button, press and release the On/Off button (keep the Program
button pressed).
c. While still pressing the Program button, press and release the 1-4 button.
d. While still pressing the Program button, press and release the On/Off button again.
e. Release the Program button. All group number indicator lights and the primary indicator light
flash slowly for 30 seconds while the light bulbs are removed.

When the light bulbs have been removed from the network, they will brighten and dim, at which time
you can add them to your new network.
2. Install the Gateway
Since the Gateway connects to your home network router, make sure you have space near your router where
you can place the Gateway. You can also mount the Gateway to your wall (discussed in the next section). Use
the following steps to install the gateway:
1. Make sure your router is already connected to your
home network.
2. Connect the Gateway to any available port in your
router using the included Ethernet cable.
3. Power the Gateway by plugging it into an electrical
outlet using the included power adapter. The
Gateway illuminates while it is attempting to
connect to the Internet.
4. Verify that the Gateway is connected. The
Gateway is connected when both the network indicator and the Internet indicator turn off, the sync
button is green, and the power indicator is white

Mounting the Gateway on a Wall
You can mount the Gateway to a wall with screws, using the mounting slots located on the back of the Gateway.
As shown in the illustration, you should use two self
(also refer to the corresponding illustration callouts):
1. 5.3 mm
2. 15 mm
3. M3
Screw the self-tapping screws into the wall, level with a
distance of 60 mm between the center point of the two
screw heads. Hang the Gateway by sliding the holes
on the back of the unit over the screws and
pressing the Gateway downward until it is secure.
You can mount the Gateway to a wall with screws, using the mounting slots located on the back of the Gateway.
As shown in the illustration, you should use two self-tapping screws for mounting with the following dimensions
ding illustration callouts):
into the wall, level with a
m between the center point of the two
. Hang the Gateway by sliding the holes
on the back of the unit over the screws and then gently
pressing the Gateway downward until it is secure.
You can mount the Gateway to a wall with screws, using the mounting slots located on the back of the Gateway.
tapping screws for mounting with the following dimensions

3. Download and Install the Smart Device Application
The smart device application installs like other applications you may already have on your smart device. At the
application download site for your device, search for TCP Lighting. When you find the application, simply
download and install it. Refer to the Smart Device Application chapter for more information about the
application’s basic user interface.
Startup and Login
Make sure your smart device is connected to and in range of your wireless router, and then start the application
on your smart device. When the application starts, it automatically searches for your Gateway through your
wireless router. If the application finds a Gateway on your local network, it automatically connects to the
associated lighting network.
Note: For future connections, if your smart device does not find a local Gateway, it will try to access your Gateway remotely via
the Internet or mobile data connection. For your smart device to connect remotely to your Gateway you must already have
created an online account (explained next) and your Gateway must be connected to the Internet (for example, through your
router).
Account Setup
Most of the time, you will probably access your lighting network when you are at home and connected to your
home network. However, if you want to have access to your lighting kit remotely through the Internet or a mobile

data connection, you must first set up an online account. This account will provide authentication for you when
you access your lighting kit remotely. You must remain connected locally to your lighting network when you
create your account.
To set up your account:
1. Tap the Settings menu at the bottom of the page.
2. When the Settings page opens, tap Setup Remote Access.
3. When the Account Setup page opens, type your email address and password (you must enter
your password twice to confirm it).
4. Tap Save.
5. A message opens when your account is created successfully. Tap Ok to close the message. If an
error should occur, a message opens to guide you through correcting the issue.
6. When your account is created, we automatically send you an email to confirm your new account
and email address. You must follow the instructions in the confirmation email for your
account to be activated.
4. Install Light Bulbs on Network
The light bulbs in your lighting kit already come pre-connected to the Gateway; however, you must still install the
light bulbs so that the Gateway can find them on the network.

Note: If you are installing a new light bulb that did not come with your kit (for example, if you reset network light bulbs from a
remote control kit), then you must manually connect the light wirelessly to your Gateway. In this case, you should
access your Gateway during the steps below as you will have to press its sync button to engage the network connection.
Before installing the light bulbs, determine the appropriate locations in your home for installing them. The
Lighting Kit Overview chapter provides information on planning your lighting network. When you are ready to
install the light bulbs, perform the following steps:
1. Turn power OFF to the light fixtures where you will be installing the network light bulbs.
2. Remove any existing standard
3. Install each network light bulb into the light fixtures as you would any standard light bulb.
4. Turn power on to the light fixtures.
5. If you are installing only light bulbs that came with your kit, you
are also installing light bulb
bulbs from a remote control kit
a. When you turn power on,
wirelessly to your Gateway.
b. Press the sync button
activity indicator begins to display a clockwise rotating pattern.
c. When the light bulbs are
brightness. Press the sync button
search process (otherwise the Gateway will stop the search process
automatically in five minutes
If you are installing a new light bulb that did not come with your kit (for example, if you reset network light bulbs from a
remote control kit), then you must manually connect the light wirelessly to your Gateway. In this case, you should
access your Gateway during the steps below as you will have to press its sync button to engage the network connection.
Before installing the light bulbs, determine the appropriate locations in your home for installing them. The
chapter provides information on planning your lighting network. When you are ready to
install the light bulbs, perform the following steps:
to the light fixtures where you will be installing the network light bulbs.
standard light bulbs from the light fixtures.
Install each network light bulb into the light fixtures as you would any standard light bulb.
Turn power on to the light fixtures.
If you are installing only light bulbs that came with your kit, you can skip this step. However, i
installing light bulbs that did not come with your kit (for example, if you reset
s from a remote control kit), then you must connect them to your Gateway:
When you turn power on, the light bulbs will brighten and dim while attempting to
wirelessly to your Gateway.
ress the sync button on the Gateway once to enable the connection. The
activity indicator begins to display a clockwise rotating pattern.
are connected to your Gateway, they turn on to full
ress the sync button on the Gateway again to stop the network
(otherwise the Gateway will stop the search process
automatically in five minutes after finding the most recent light bulb).
If you are installing a new light bulb that did not come with your kit (for example, if you reset network light bulbs from a
remote control kit), then you must manually connect the light wirelessly to your Gateway. In this case, you should be ready to
access your Gateway during the steps below as you will have to press its sync button to engage the network connection.
Before installing the light bulbs, determine the appropriate locations in your home for installing them. The
chapter provides information on planning your lighting network. When you are ready to
to the light fixtures where you will be installing the network light bulbs.
Install each network light bulb into the light fixtures as you would any standard light bulb.
can skip this step. However, if you
if you reset network light
attempting to connect
6. If a light fixture has a dimmer control (not recommended), set the dimmer level to full brightness.
7. Leave the light fixture switches
5. Set up Light Bulbs in Application
With your light bulbs, Gateway, and application
your network:
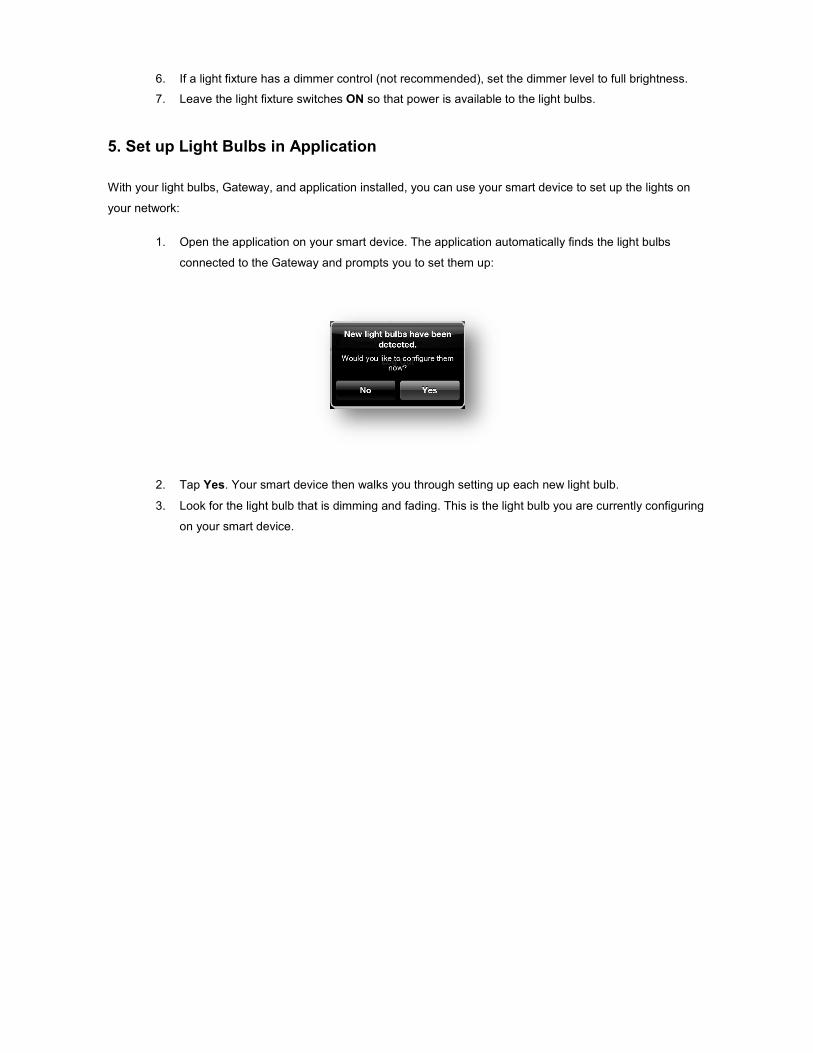
1. Open the application on your smart device. The application automatically finds the light bulbs
connected to the Gateway and
2. Tap Yes. Your smart device then walks you through setting up each new light bulb.
3. Look for the light bulb that is dimming and fading. This is the light bulb you are currently configuring
on your smart device.
a light fixture has a dimmer control (not recommended), set the dimmer level to full brightness.
Leave the light fixture switches ON so that power is available to the light bulbs.
Light Bulbs in Application
application installed, you can use your smart device to set up
Open the application on your smart device. The application automatically finds the light bulbs
connected to the Gateway and prompts you to set them up:
ur smart device then walks you through setting up each new light bulb.
Look for the light bulb that is dimming and fading. This is the light bulb you are currently configuring
a light fixture has a dimmer control (not recommended), set the dimmer level to full brightness.
set up the lights on
Open the application on your smart device. The application automatically finds the light bulbs
Look for the light bulb that is dimming and fading. This is the light bulb you are currently configuring
4. The setup wizard guides you through specifying a name light, assigning a room for the light, and
selecting an icon (or taking a picture of the light) to help identify the light.
5. Repeat these steps for each flashing light bulb.
Note: If you skip setting up light bulbs during installation, the light bulbs automatically get grouped under the black room color.
You can update the light bulb settings any time using the information in the Smart Device Application chapter.
6. Prepare the Remote Control (Optional)
If you will be using the remote control with your lighting network, then you must also prepare it for use. Refer to
the steps in the Remote Control chapter. Also, if you are upgrading from a remote control lighting kit, then you
must manually connect the old remote control to your Gateway. These steps are also provided in the Remote
Control chapter.
Installation Tips
Review the safety information. Be sure to review the information contained in the “Safety Information” chapter
for important safety information you should follow.
Keep radio signals clear. The hardware in your lighting kit has antennas built-in for radio communication. Just
as you might experience reception problems on your mobile phone inside a building, the hardware in your
lighting kit can have trouble communicating if their radio signals are blocked by obstacles such as large metal
panels or walls containing wire mesh. When placing these devices in your home, imagine invisible lines

connecting between them. Try to keep these lines clear from obstruction as much as possible. Place your
Gateway at least 5 feet (1.5 meters) above floor level to promote reception.

Smart Device Application
The smart device application makes working with your network lighting easy by allowing you to use your
Smartphone, Tablet (or iTouch), or TV to set up, manage, and control your lights. Using your smart device, you
can configure lights into rooms and lighting groups, turn lights on and off, set up Smart Controls to automatically
control lights, and much more.
Network Connection
When you start the smart device application, it automatically searches for your Gateway through your wireless
router. If the application finds a Gateway on your local network, it automatically connects to the associated
lighting network. If your smart device does not find a local Gateway, it will try to access your Gateway remotely
via the Internet or mobile data connection. For your smart device to connect remotely to your Gateway you must
already have created an online account (discusses in the Installation and Setup chapter) and your Gateway must
be connected to the Internet (for example, through your router).

Note: This connection process applies to any local network and Gateway in range of your smart device. For example, if you
are at a friend’s home and they have a similar lighting kit set up, your smart device application will connect to their lighting
Gateway if you are connected to their local network through their wireless router (which means your friend would have given
you access to log in to their home network). To access your own network remotely, you would have to log out of the application
and then log in again using your online account information.
My Lights
You can control your lighting network from your smart device by accessing the My Lights page. This page
shows all of your light bulbs and fixtures available on your lighting network, sorted by rooms and room colors.

Room and room color
Swipe screen left or right to navigate rooms
My Lights menu
Tap to access this page.
Room on/off
Tap corresponding button to turn
on or off all lights in the room.
Light bulb dimmer
Drag left to dim or drag right to brighten light bulb
Light bulb/fixture control
Tap to turn light bulb/fixture on or off. Light turns on to the most recent dimmer setting. Swipe screen up and down to access all light bulbs/fixtures if the room contains more than can fit on one page.
Room dimmer
Tap to open dimmer control to dim or
brighten all lights in room.
bulb dimmer
Drag left to dim or drag right to brighten
Light bulb/fixture control
Tap to turn light bulb/fixture on or off. Light turns on to the most recent dimmer setting. Swipe screen up and down to access all light bulbs/fixtures
oom contains more than can fit
Room dimmer
Tap to open dimmer control to dim or
brighten all lights in room.

Smart Controls
Smart Controls allow you to set up user-defined schedules and other controls for automatically turning your
lighting on or off. For example, you can set up a Smart Control schedule that automatically turns on selected
lights at sunset and then turns the light bulbs back off at midnight. Smart Controls can control one or more light
bulbs, light fixtures, or entire rooms.
Keep in mind that activating a Smart Control is a different action than turning on lights. A Smart Control could be
set up to turn lights on, turn lights off, or a combination of both. Activating a Smart Control simply takes whatever
action that Smart Control is set up to perform.
You can activate, create, and edit Smart Controls on the Smart Control page. This page includes default Smart
Controls as well as your own custom Smart Controls.

Smart Control menu
Tap to access this page.
Smart Control list
Tap to activate the corresponding
Smart Control.
Create Smart Control
Tap to start wizard to create your own custom Smart Control.
Default Smart Controls
Home, AwaySmart Controls that come preconfigured.
Custom Smart Controls
Swipe the arrow to edit the settings of a custom Smart Control or to access the delete feature to remove the custom Smart Control.
Default Smart Controls
Away, and Night are default Smart Controls that come preconfigured.
Custom Smart Controls
Swipe the arrow to edit the settings of a custom Smart Control or to access the delete feature to remove the custom Smart Control.

Default Smart Controls
The Smart Control page includes a set of default Smart Controls that come preconfigured within the application:
• The Home Smart Control is typically used when people return home after being away. This Smart
Control turns on any light, along with their most recent dimmer level, that was previously on when
the Away Smart Control was activated (for example, when everyone left the house).
• The Away Smart Control is typically used when everyone leaves the house (for example, when
going to school or work for the day). This Smart Control saves the current state of the lights on your
network (whether they are on or off and what dimmer level they might be at) and then turns off all
lights. It saves the current state of your lights to make it easier for you when you return home and
activate the Home Smart Control.
• The Night Smart Control is typically used when everyone goes to bed for the night. This Smart
Control turns off all lights on your network. Unlike the Away Smart Control, the Night Smart Control
does not remember the state of your lights before turning them off.
Custom Smart Controls
In addition to the default Smart Controls, you can create your own custom Smart Controls. There are two types
of custom Smart Controls:
• A schedule Smart Control allows you to automatically turn on and off lights based on the day and
time. For example, you could use this Smart Control to have selected lights automatically turn on at
sunset and turn off at midnight.
• A lighting scene Smart Control allows you to set up combinations of lights to turn on and off. For
example, you could use this Smart Control to activate the Smart Control (by tapping it on the Smart
Control page) to turn on lights in some rooms while turning off lights in other rooms.
To create a custom Smart Control:
1. Tap the Smart Control menu at the bottom of the page
2. When the Smart Control page opens, tap Create New Smart Control. A setup wizard guides you
through setting up your Smart Control.
3. On the first page of the wizard, tap Choose Name to type a name for your new Smart Control, and
tap Choose Icon to select an icon to associate with it. When you are ready to continue, tap Next.
4. Tap Schedule or Lighting Scene for the type of Smart Control you want to create.
5. Tap to select the rooms, lights, and/or fixtures you want to turn on or off with this Smart Control,
and then tap Next.
6. For the selected rooms, tap the option to turn lights on or off. For selected lights and fixtures, drag
the slider control to set dimmer level when light turns on. Tap Next when you are ready to continue.
7. If you are creating a schedule Smart Control:
a. Optionally, tap the ON/OFF, ON, or OFF options to limit the view to only those settings (for
example, if you only want to schedule the lights to turn both on and off, then tap the ON
option).
b. Tap Turn On to set the time of day for activating the Smart Control. Remember, activating the
Smart Control is not the same as turning lights on. Activating the Smart Control means that the
Smart Control will take the action you set in step 6 at the time you schedule. After you tap

Turn On, you must set the time of day you want to activate the Smart Control. You have two
options for setting this time:
• Sunrise/Sunset activates the Smart Control at sunrise or sunset (whichever you
select). By using this option the actual activation time will automatically change as the
time of sunrise and sunset changes throughout the year.
• Set Time activates the Smart Control at the exact time of day you specify.
c. Tap Turn Off to set the time of day for deactivating the Smart Control. Remember,
deactivating the Smart Control is not the same as turning lights off. Activating the Smart
Control means that the Smart Control will reverse the action you set in step 6 at the time you
schedule. After you tap Turn Off, you must set the time of day you want to deactivate the
Smart Control. You have two options for setting this time:
• Sunrise/Sunset deactivates the Smart Control at sunrise or sunset (whichever you
select). By using this option the actual deactivation time will automatically change as
the time of sunrise and sunset changes throughout the year.
• Set Time deactivates the Smart Control at the exact time of day you specify.
d. Tap Days of Week to select the days you want the Smart Control to run (at the
activation/deactivation times specified above).
e. After the days and times are set, tap Next.
8. Confirm your selections. Tap an item if you want to change it. Tap Confirm to save the Smart
Control.

Settings
The Settings page allows you to perform such tasks as edit lights, create fixtures, manage rooms, and add new
light bulbs. You can also access this page if you want to set up your online account for remote access to your
lighting network (discussed in the Installation and Setup chapter) or to log out of the application.

Your lights and fixtures
Tap to view the list of all lights and fixtures on your network, create a new fixture, or edit settings for a light or fixture.
Add new lights
Tap if you have added a new light bulb to your network and need to have the application connect it to the gateway.
Log out
Tap to log out of the application.
Settings menu
Tap to access this page.
Set up remote access
Tap to set up your online account to access your lighting network remotely (discussed in the Setup chapter).
Manage rooms
Tap to perform such tasks as create a new room, rename a room, change a room color, room.
Settings menu
Tap to access this page.
Set up remote access
Tap to set up your online account to access your lighting network remotely (discussed in the Installation and
chapter).
Manage rooms
Tap to perform such tasks as create a new room, rename a room, change a room color, and organize lights into a

Managing Rooms
Creating a New Room
You can create rooms to represent the physical rooms in your home and group their corresponding lights. To
create a room:
1. Tap the Settings menu at the bottom of the page.
2. When the Settings page opens, tap Manage Rooms.
3. When the Manage Rooms page opens, tap Create New Room.
4. On the Create New Room page:
a. Tap Enter Room Name to type a name for your new room.
b. Tap Edit Color to select a color to represent the room.
c. Under Lights, select the lights and fixtures located in the room you are creating, or tap Add
More Lights if you added new light bulbs that have not yet been assigned to a room.
d. When you finished setting the room properties, tap Save.
Editing a Room
To edit a room, including the lights and fixtures assigned to the room:
1. Tap the Settings menu at the bottom of the page.
2. When the Settings page opens, tap Manage Rooms.
3. When the Manage Rooms page opens, tap the room you want to edit.

4. When the room page opens, tap any of the items you want to edit (such as the
and make your edits.
5. To remove a light or fixture from the room, click that light
6. To add a light or fixture to the room, tap
7. When you are finished with your edits, tap
About the Black Room Color
When new light bulbs are added to your network, they initially are assigned by default to the black room color as
an “unknown” room. Typically, during the setup wizard for a new light bulb, you assign a specific room and room
ap any of the items you want to edit (such as the room name or
To remove a light or fixture from the room, click that light’s or fixture’s removal icon:
To add a light or fixture to the room, tap Add More Lights.
When you are finished with your edits, tap Save.
When new light bulbs are added to your network, they initially are assigned by default to the black room color as
an “unknown” room. Typically, during the setup wizard for a new light bulb, you assign a specific room and room
Removal icon
Tap to remove the light or fixture from room.
name or color),
When new light bulbs are added to your network, they initially are assigned by default to the black room color as
an “unknown” room. Typically, during the setup wizard for a new light bulb, you assign a specific room and room
e the light or fixture from

color for the new bulb. However, if you skip the setup wizard process, the light bulb remains grouped under the
black room color. You can move a light bulb to a different room and room color at any time (refer to the Settings
section later in this chapter).
Managing Lighting Groups
You can organize your light bulbs into lighting groups so that you can control groups of them together through
your remote control (refer to the Remote Control chapter). To add or remove a light bulb from a lighting group:
1. Tap the Settings menu at the bottom of the page.
2. When the Settings page opens, tap Your Lights & Fixtures.
3. When the Lights & Fixtures page opens, tap the light bulb you want to add or remove from a
lighting group. The Light page opens and the selected light begins to dim and brighten to help you
physically identify it.
4. Tap Choose Lighting Group.
5. When the Lighting Groups page opens, tap the lighting group numbers to add or remove the light
bulb from those lighting groups. The light bulb belongs to a lighting group when the number is
shaded. You can add the light bulb to as many as all four lighting groups.

Managing Lights and Fixtures
Adding Light Bulbs to Your Network
When you first set up your lighting network, the application walks you through setting up all of the light bulbs in
your kit. If you add a new light bulb to your network, you must connect to and set up that light bulb.
perform this procedure to add new light bulbs, be sure you can access your Gateway since it is part of the
installation process. The following procedure allows you to add one or more light bulbs:
1. Turn power OFF to the light fixtures where you will be installing the new network light
2. Remove any existing standard light bulbs from the light fixtures.
Selected Lighting Group
The light bulb belongs to a lighting
group if the number is shaded.
and Fixtures
When you first set up your lighting network, the application walks you through setting up all of the light bulbs in
your kit. If you add a new light bulb to your network, you must connect to and set up that light bulb.
d new light bulbs, be sure you can access your Gateway since it is part of the
The following procedure allows you to add one or more light bulbs:
to the light fixtures where you will be installing the new network light bulbs.
Remove any existing standard light bulbs from the light fixtures.
Unselected Lighting Group
The light bulb does not belong to a lighting group if the number is not shaded.
When you first set up your lighting network, the application walks you through setting up all of the light bulbs in
your kit. If you add a new light bulb to your network, you must connect to and set up that light bulb. When you
d new light bulbs, be sure you can access your Gateway since it is part of the
bulbs.
Unselected Lighting Group
The light bulb does not belong to a lighting group if the number is not

3. Install the new network light bulb into the light fixtures as you would any standard light bulb.
4. Turn power on to the light fixtures. The light bulbs will brighten and dim while attem
connect wirelessly to your Gateway.
5. Press the sync button on the Gateway once to enable the connection. The activity
indicator begins to display a clockwise rotating pattern.
6. When the light bulbs are connected to your Gateway, they turn on to ful
Press the sync button on the Gateway again to stop the network search process
(otherwise the Gateway will stop the search process
recent light bulb).
7. If a light fixture has a dimmer control
8. Leave the light fixture switches
9. In your application, tap the Settings
10. When the Settings page opens, tap
11. Your smart device begins searching for light bulbs that are not already set up on your network. When a
light bulb is identified, it begins to dim and fade. It may take several moments until your smart device
finishes searching for new light bulbs.
bulbs:
Install the new network light bulb into the light fixtures as you would any standard light bulb.
Turn power on to the light fixtures. The light bulbs will brighten and dim while attempting to
connect wirelessly to your Gateway.
Press the sync button on the Gateway once to enable the connection. The activity
indicator begins to display a clockwise rotating pattern.
When the light bulbs are connected to your Gateway, they turn on to full brightness.
Press the sync button on the Gateway again to stop the network search process
(otherwise the Gateway will stop the search process automatically in five minutes after finding the most
If a light fixture has a dimmer control (not recommended), set the dimmer level to full brightness.
Leave the light fixture switches ON so that power is available to the light bulbs.
Settings menu at the bottom of the page.
page opens, tap Add New Lights.
Your smart device begins searching for light bulbs that are not already set up on your network. When a
light bulb is identified, it begins to dim and fade. It may take several moments until your smart device
finishes searching for new light bulbs. When it has finished, it confirms that it has detected new light
Install the new network light bulb into the light fixtures as you would any standard light bulb.
pting to
five minutes after finding the most
(not recommended), set the dimmer level to full brightness.
Your smart device begins searching for light bulbs that are not already set up on your network. When a
light bulb is identified, it begins to dim and fade. It may take several moments until your smart device
When it has finished, it confirms that it has detected new light

12. Tap Yes. Your smart device then walks you through setting up each new light bulb.
13. Look for the light bulb that is dimming and fading. This is the light bulb you are currently
your smart device.
14. The setup wizard guides you through specifying a n
selecting an icon (or taking a picture of the light) to help identify the light
Creating a Fixture
You can set up any grouping of light bulbs to operate as one multi
feature to set up an actual multi-fixture light. However, you could also use it in cases where you have multiple
lights that you want to behave as a multi
. Your smart device then walks you through setting up each new light bulb.
Look for the light bulb that is dimming and fading. This is the light bulb you are currently
The setup wizard guides you through specifying a name light, assigning a room for the light
selecting an icon (or taking a picture of the light) to help identify the light.
ng of light bulbs to operate as one multi-fixture light. Typically you would use this
fixture light. However, you could also use it in cases where you have multiple
lights that you want to behave as a multi-fixture light. For example, you might have two separate desk lamps that
Look for the light bulb that is dimming and fading. This is the light bulb you are currently configuring on
for the light, and
fixture light. Typically you would use this
fixture light. However, you could also use it in cases where you have multiple
For example, you might have two separate desk lamps that

you want to control together. You could create a fixture that includes both of them so that you can control them
together as if they were part of one light fixture. Then you could perform tasks on that fixture, such as turn it on or
off, dim or brighten the lights, or create a Smart Control that controls it.
To create a fixture:
1. Tap the Settings menu at the bottom of the page
2. When the Settings page opens, tap Your Lights & Fixtures.
3. When the Lights & Fixtures page opens, tap Create New Fixture.
4. On the Fixture page:
a. Tap Choose Name to type a name for your new fixture.
b. Tap Choose Room to select or create the room where your fixture will be located.
c. Tap Choose Icon to select an icon to associate with the fixture. You can select from any of the
following types of icons:
• Default Icons include standard light bulb icons that come with the application.
• Saved Images allows you to select a picture that exists on your smart device.
• Create New allows you to use your smart device’s camera to take a picture (usually
of the light or fixture) to use as the icon.
d. Tap Select Additional Bulb to add each of the light bulbs you want to include in the fixture.
e. When you finished setting the fixture properties, tap Save.
Editing a Light or Fixture
Before starting this procedure, make sure the light or fixture you are editing is powered on.To edit a light or
fixture on your network:
1. Tap the Settings menu at the bottom of the page.
2. When the Settings page opens, tap Your Lights & Fixtures.
3. When the Lights & Fixtures page opens, tap the light or fixture you want to edit. The Light/Fixture
page opens and the selected light or fixture begins to dim and brighten to help you physically identify it.
4. Tap any of the items you want to edit (such as the name or room), and make your edits.
5. When you are finished with your edits, tap Save.
Removing a Light or Fixture from Your Network
Before starting this procedure, make sure the light or fixture you are removing is powered on.To remove a light or
fixture from your network:
1. Tap the Settings menu at the bottom of the page.
2. When the Settings page opens, tap Your Lights & Fixtures.
3. When the Lights & Fixtures page opens, tap the light or fixture you want to remove. The Light/Fixture
page opens and the selected light or fixture begins to dim and brighten to help you physically identify it.
4. Tap Delete.
5. When prompted, confirm that you want to delete the light or fixture.

Removing a Light Bulb Manually
If the Smart device, Web browser, or handheld remote control is not available you can remove a light bulb from
the network by turning power to the light fixture off and on three times consecutively to reset the light bulb.
During this process, leave the power off for at least two seconds and then on for one second (after the third
cycle, leave the power on). When the light bulb has been removed from the network, it will brighten and dim
continually.
Remote Access
After you have created an online account (discussed in the Installation and Setup chapter), you can access your
lighting network remotely. When you start the application, it automatically tries to find a Gateway on any network
to which you may be connected. If the application does not find a Gateway, it opens a login page for you to enter
your user name (email address) and password to access your lighting network remotely. Once you have
successfully logged in, you can manage your lighting network the same way as if you were connected locally.
If your application does find a Gateway, it connects to the lighting network attached to that Gateway. For
example, if you are at a friend’s home and they have a similar lighting kit set up, your application will connect to
their lighting Gateway if you are connected to their local network through their wireless router (which means your
friend would have given you access to log in to their home network). To access your own network remotely, you
would have to log off of the application and then log in again using your online account information. To do so:
1. When you start the application, tap the Settings menu at the bottom of the page.

2. When the Settings page opens, tap Log Out. The application logs you off of the current network and
opens the login page for you to log in to your own account.
3. On the login page enter your user name (email address) and password, and then tap Login.
4. Once you have successfully logged in, you can manage your lighting network the same way as if you
were connected locally.
Forgotten Password
If you forget your password, you can reset it:
1. Access the login page (discussed above) as if you were going to log in to your account.
2. Tap Login without entering your user information. When your login attempt fails, the Reset Password
page opens.
3. Type the email address associated with your account (this is the same as your user name), and then
tap Ok. A confirmation email is sent to your email address.
4. When you receive the confirmation email, click the link to approve the password reset and specify a
new password.

Web Application
While you will typically use the lighting application on your smart device to manage your lighting network, you
can also use your computer’s Web browser to access our Web-based application to manage your lighting
network. The Web application has the same options as your smart device application for managing and
controlling your lights.
Web Application and Your Network
To use the Web application with your lighting network, your computer must be connected to your local network
(connected to your network router). The Web application run directly from your Gateway and no Internet
connection is necessary. You cannot connect to the Web application remotely (only the smart device application
can connect remotely).

Accessing the Web Application
You can access the Web application on your computer using any of the Web browsers listed in the System
Requirements chapter. Use either of the following Web addresses, depending on your type of system:
• On a PC: lighting
• On a Mac: lighting.local

Smart Controls
As with the smart device application, you can access the
default Smart Controls and your own custom Smart Controls
Smart Control menu
Click to access this page.
New Smart Control
Click to start wizard to create a custom Smart Control.
Options
Button appears when you place mouse over the Smart Control. Click button to open popup menu:
Details/Edit: Change
properties of the Smart Control.
Delete: Delete a custom
Smart Control.
Pause Schedule: Prevent the schedule from activating the Smart Control.
Start Schedule: Restart a paused Smart Control schedule.
Sort: Cursor changes to
allow you to drag Smart Controls to change the order they appear in the list.
As with the smart device application, you can access the Smart Control page to create, edit, and
and your own custom Smart Controls:
create, edit, and activate
Default Smart Controls
Home, Away, and Night are
default Smart Controls that come preconfigured.
Smart Control toolbar
Click an icon to quickly activate
that Smart Control.
Override Smart Controls
Click to turn on or off. When turned off, scheduled Smart Controls will not activate.

Light Selection in Smart Controls
When creating or editing a Smart Control, the selection page allows you to select the lights and rooms you want
to control:
View items to select
Click the All tab to access all rooms and lights together on one page. Click the Rooms tab to access available lights room-by-room. Under the Rooms tab, use the carousel
to select a specific room.
Available items
Drag any of the available rooms or lights to the left side to include them in the Smart Control. Drag them back from the left side to remove them from the Smart Control.
Back
Click to return to the previous
page.
Included items
Drag any of the available rooms or lights from the right side to include them in the Smart Control. For a schedule Smart Control, all of the selected items turn on and off together. For a lighting scene, you can also specify on, off, and dimmer settings for each item individually, allowing you to turn on and off lights differently, depending on your needs.

Schedule Setting in Smart Controls
When creating or editing a schedule or lighting scene Smart Control, the schedule page allows you to specify the
days and times to activate and deactivate the Smart Co
Back
Click to return to the previous page.
Day selection
Select the days of the week you want the Smart Control to run. You can select every day of the week, only weekdays, or only weekends. Or you can create a custom schedule by selecting specific days of the week.
Target options
Click the + button to add a
new target (a time at which lights are turned on or off) to the schedule. You can have multiple targets. Click the - button to remove a selected target from the schedule.
When creating or editing a schedule or lighting scene Smart Control, the schedule page allows you to specify the
days and times to activate and deactivate the Smart Control:
When creating or editing a schedule or lighting scene Smart Control, the schedule page allows you to specify the
Target schedule slider
Drag the target slider to the time you want the Smart Control to activate or deactivate.
Activation
Click the box to specify whether you want the Smart Control to activate (On) or deactivate (Off) at the
scheduled time.
Sunrise and Sunset
Use these icons to set the scheduled time to sunrise or sunset. The time adjusts automatically throughout the year as sunrise and sunset changes. Drag the target schedule slider close to the icon, and then click the icon to snap the slider into place.

My Home
The My Home page allows you to control your lighting network. This page
smart device application and provides access to
My Home menu
Click to access this page.
Room card selection
Click a room card to bring it to the front, or click the left or right arrows to bring each room card to the front, one at a time.
Energy use
View the current and average energy use for the lights in the selected room.
Room access
Click to edit room properties or manage all lights in the entire room.
page allows you to control your lighting network. This page is similar to the My Lights
provides access to all of your light bulbs and fixtures on your lighting networ
My Lights page in the
all of your light bulbs and fixtures on your lighting network:
Smart Control toolbar
Click an icon to quickly activate that Smart Control.
Light or fixture access
Click to edit or manage a specific light or fixture.

Room Selection from My Home Page
When you select a room on the My Home
Edit room
Click to open the wizard to identify and rename the selected room.
Back
Click to return to the My
Home main page.
Change room
Click to change the room and color associated with the selected light bulb or fixture. This feature is usually used when you physically move the light to
another room in your home.
Room Selection from My Home Page
My Home page, you can manage all of the lights and fixtures in that room:
page, you can manage all of the lights and fixtures in that room:
Room controls
Control the lighting for all lights and fixtures in the entire room. Click a button to power on or off all lighting, and drag the slider to set the dimmer setting for all lights when they are on.
Light control
Click the icon to open a page to edit or manage only that light. Drag the slider to set the dimmer setting for only the selected light.

Light or Fixture Selection from My Home Page
When you select a specific light bulb or fixture on the
different properties for that light:
Back
Click to return to the My
Home main page.
Power buttons
Click to power on or off the light.
Dimmer
Drag the slider to set the dimmer setting when the light is powered on.
Light or Fixture Selection from My Home Page
When you select a specific light bulb or fixture on the My Home page or on the Room page, you can manage page, you can manage
Smart Controls
Click an icon in the toolbar to quickly activate that Smart Control, or click the Smart Control tab to access the Smart Controls that control the selected light.
Statistics
View information about the
selected light.
Delete
Click to remove the light bulb from your network.
Lighting group
Click a number to assign the light to the selected lighting group for use with your remote
control.

Settings
The Settings page in the Web application is different from the
the Web application, the Settings page contains only information that is applicable for advanced users or
technicians.
page in the Web application is different from the Settings page in the smart device application. In
page contains only information that is applicable for advanced users or
page in the smart device application. In
page contains only information that is applicable for advanced users or
Remote Control
You can use the remote control when it is not convenient to use your smart device to control your lighting. This
chapter provides general concepts about the remote control, steps for setting up the remote control for use, and
steps for general remote control operation.
Note: Some tasks in this chapter require pressing the Program button, which is located inside the battery compartment on the
back of the remote control. Be sure to press this button only as directed in the instructions. Pressing it an additional time during
remote control programming mode immediately cancels the current operation.
General Remote Control Concepts
While you will probably use your smart device to control your lighting most of the time, there may be times when
it is more convenient to use the remote control. Here a few concepts that is specific to the remote control.

Lighting Groups
When organizing your network light bulbs, you can set them up into lighting groups. Then you can use your
remote control to turn on and off light bulbs in selected lighting groups. A lighting group is a set of network light
bulbs that you can control together through your remote control. For example, you might have a lighting group
that includes light bulbs on the same floor. Or you might have a group that includes hallway and entryway lights,
making it easy to turn on or off with your remote control as you arrive or leave home. All light bulbs in the same
group turn on and off together and brighten or dim to the same level. Your remote control has controls for four
lighting groups.
Note: You can set up a lighting group using your smart device or Web browser; however, you can only control lighting groups
(for example, turn light bulbs on or off) through your remote control.
The following limitations apply when working with network light bulbs and lighting groups:
• If you use your remote control to set up your lighting groups, then a light bulb can belong to only 1
lighting group. If you use your smart device or Web browser to set up your light bulbs, then a light
bulb can belong to 4 lighting groups.
• Your remote control can control up to 4 different lighting groups. If you add additional remote
controls to your network, each of them can control 4 additional lighting groups.
• Each Remote can control 250 light bulbs, which can be divided up among the 4 lighting groups.

Remote Control Range
When using your remote control, you must be within range of your lighting network for the remote control to be
able to control your lighting. However, this does not mean that it has to be within range of all network light bulbs.
Since the light bulbs are interconnected across the network, they can pass commands to each other as long as
they are within network range of each other. This means that a nearby light bulb can receive your remote control
command and pass that command across the network of connected light bulbs, ultimately to a light bulb you
want to control in a distant room. Because of this effect, larger homes would make better use of having more
network light bulbs spread across the home, maintaining a distance that allows each light bulb to communicate
with one another.
Note: Operating the remote control too close to a network light bulb could interfere with the remote control’s signal. When
operating the remote control, you should hold it at least 1 foot (.3 meters) away from any of your network light bulbs.
Remote Control Setup
Preparing Your Remote for Use
Before you can use the remote control with your network lighting, you must first prepare it. Remove the battery
compartment cover from the back of the remote control, and insert two AA alkaline batteries (included). The first
time you insert batteries, the primary indicator light flashes while the remote control determines the best signal
for your lighting system. When this process is complete, the indicator light will remain on for approximately five
seconds. When the indicator light turns off, your remote control is ready.

Once this process is complete, you can use the remote control as discuss
Connecting a New or Pre-existing Remote Control to the Gateway
The remote control in your lighting kit is already connected to your Gateway by default, so it is ready to use after
you prepare it as discussed above. However,
connect a remote control to your Gateway:
• If you are adding a new remote control to your network
• If you are upgrading your lighting network from a remote control kit and would like to use the o
remote control with your new network
• If you performed a factory reset on your remote control and need to re
To physically connect a new or pre-existing remote control to the Gateway:
1. Make sure your remote control is in range
from the back of the remote control so that you have access to the
2. On the Gateway, press the sync button once. The activity indicator begins to display
a clockwise rotating pattern.
3. On the remote control, press and hold
4. While pressing the Program button, press the
5. Release the Program button. The primary
control connects with the Gateway
is complete, you can use the remote control as discussed in the rest of this chapter.
Remote Control to the Gateway
The remote control in your lighting kit is already connected to your Gateway by default, so it is ready to use after
you prepare it as discussed above. However, there are a few situations in which you would have to manually
connect a remote control to your Gateway:
If you are adding a new remote control to your network
If you are upgrading your lighting network from a remote control kit and would like to use the o
remote control with your new network
If you performed a factory reset on your remote control and need to re-connect it to the
existing remote control to the Gateway:
Make sure your remote control is in range of the Gateway. Remove the battery cover
from the back of the remote control so that you have access to the Program button.
, press the sync button once. The activity indicator begins to display
press and hold the Program button.
button, press the 1-4 button three times consecutively.
The primary indicator light on the remote control flashes while the remote
control connects with the Gateway. When this process is complete, the indicator light will remain on for
ed in the rest of this chapter.
The remote control in your lighting kit is already connected to your Gateway by default, so it is ready to use after
there are a few situations in which you would have to manually
If you are upgrading your lighting network from a remote control kit and would like to use the old
connect it to the Gateway
light on the remote control flashes while the remote
light will remain on for

approximately five seconds. When the indicator light turns off, your remote control is connected to the
Gateway.
6. Press the sync button on the Gateway again to stop the network search process (otherwise the
Gateway will stop the search process automatically in two and a half minutes).
Note: The remote control loses the ability to add bulbs to the lighting network, delete light bulbs from the lighting network, and
clone a remote control once it joins the lighting Gateway.
Turning Lights On and Off
To turn lights on and off, you must turn on and off an entire lighting group:
1. Press the Group Number button for the lighting group you want to turn on or off. If you want to turn on
or off ALL lighting groups, press the 1-4 button.
2. Press the On/Off button. If the lights were previously off, they will turn on. If the lights were previously
on, they will turn off.
Note: The previously selected group (or all groups, if selected) remains the active group on the remote control. To take action
on that same group again, you do not have to press the group button again.

Brightening and Dimming Lights
You can brighten and dim your lights even if though they are not connected to a fixture with a dimmer switch.
CFL light bulbs, which typically do not brighten or dim, can also brighten and dim on your network. To set the
brightness level of lights, you must set the level for an entire lighting group:
1. Press the Group Number button for the lighting group you want to dim or brighten. If you want to dim or
brighten ALL lighting groups, press the 1-4 button.
2. To dim the lights in the selected group(s), press and hold the left side of the dimmer button. Release the
button when the lights reach the level you want. Lights will dim more the further to the left you press.
3. To brighten the lights in the selected group(s), press and hold the right side of the dimmer. Release the
button when the lights reach the level you want. Lights will brighten more the further to the right you
press. They automatically stop when they reach full brightness.
The lights in the group will remember the latest brightness level when you turn them off and on.
Note: The previously selected group (or all groups, if selected) remains the active group on the remote control. To take action
on that same group again, you do not have to press the group button again.

Replacing Batteries
Your remote control uses two AA 1.5V alkaline batteries (included). To replace the batteries, remove the battery
cover from the back of the remote control and remove the old batteries. Insert the new batteries as indicated in
the battery compartment.
CAUTION: RISK OF EXPLOSION IF BATTERY IS REPLACED BY AN INCORRECT TYPE.
DISPOSE OF USED BATTERIES ACCORDING TO THE INSTRUCTIONS.
Resetting the Remote Control
You can reset the remote control back to the original default settings from the factory. This may be useful if you
want to put a cloned remote control back to its standalone settings. Typically, though, factory reset is not a
common procedure and you should be certain you want to do so since you will lose any network settings you
previously programmed onto the remote control.
If you are sure you want to reset the remote control, use the following steps:
1. Remove the battery cover from the back of the remote control.
2. Remove the batteries from the remote control.
3. Press and hold the Program button.
4. While still pressing the Program button, reinsert the batteries into the remote control.
5. Release the Program button.

The remote control is returned to its default factory settings. To use it again, you must follow the original
installation instructions. After the factory reset, you must reset all light bulbs in the network based on your group
plan by following the procedure in the Light Bulb Tasks chapter to remove light bulbs from the network, followed
by the procedure to add a new light bulb to the network.

Troubleshooting
If you are having problems with your lighting system, refer to the following sections for possible troubleshooting
solutions.
Light Bulb Not Responding During Installation
When you add a new light bulb to the network (or if you add a previously existing light bulb that you removed
from the network), the light bulb should brighten and dim during the installation process to indicate that it is
searching for a network. If for any reason the light bulb does not brighten and dim (if it remains full bright), then
turn power to the light fixture off and on four times consecutively to reset the light bulb. The light bulb should then
start to brighten and dim once it is reset, which is usually within 10 seconds after the fourth off/on cycle.
Light Bulb Accidentally Removed from Network
It is possible for a network light bulb to be accidentally removed from the network. For example, if someone turns
power off and on four times consecutively to the light fixture, the attached light bulb will reset and remove itself

from the network. If this happens, follow the procedure in the Light Bulb Tasks chapter to add a new light bulb to
the network.
Resetting Your Light Bulbs
If you are unable to fix issues that arise with your lighting system, you can reset your light bulbs as a last resort.
To do so, follow the procedure in the Light Bulb Tasks chapter to remove light bulbs from the network, followed
by the procedure to add a new light bulb to the network.
Problems with Remote Control
Depending on the problem you are having with the remote control, there are several possible solutions:
• Replace batteries. If the remote control is not functioning and the indicator lights do not light when
you press the buttons, then the batteries may need replacement. Refer to the Remote Control
Operation chapter for instructions on inserting new batteries into the remote control.
• Turn power to light fixture on. If you manually turn the power switch off for a light fixture, then
power will not be available to the light bulb when you use the remote control to turn the light on and
off. Be sure the appropriate light fixtures are left in the on position. If necessary, refer to the section
on power failure in the Lighting Kit Overview chapter.
• Place remote control at an adequate distance from light bulb. Not only must you ensure the
remote control is within range of the nearest network light bulb, you must also ensure it is not too
close. Operating the remote control too close to a network light bulb could interfere with the remote

control’s signal. You should hold the remote control at least 1 foot (.3 meters) away from any of
your network light bulbs.
• Reset the remote control. If the remote control is not functioning correctly but the batteries are
new, then you may have to reset the remote control to its default factory settings. The factory reset
process is as discussed in the Remote Control Operation chapter.
• Replace a lost or broken remote control. If you have an additional remote control that was
previously programmed to be identical to the your original remote control (cloning your original
remote control, as discussed in the Remote Control Operation chapter), then you can use that
clone the same way as your original without losing any of your network or light settings. However, if
you do not have an additional identical remote control, then there is no way to retrieve your settings
from the lost or broken remote control. The only option in this case is to reset your entire lighting
system, as discussed earlier in this chapter.
Problems with the Gateway
Depending on the problem you are having with the Gateway, there are several possible solutions:
• Check cables and power connection. If the Gateway is not functioning and/or the indicator lights
do not light correctly, then double check all of your cables and power connection. Make sure the
Gateway is plugged in to an outlet in your home that is receiving electrical power. Refer to the
Installation chapter for instructions on connecting cables and power.
• Reset the Gateway firmware (software permanently installed on the Gateway). If the Gateway
is not functioning correctly and you have ensured that the cables and power are connected
correctly, you may have to reset the Gateway firmware. You should perform this task only as a last

resort. First make sure you have an Internet connection through the router to which your Gateway
is attached, and remove power from the Gateway. Then press and hold the Gateway’s sync button
while reapplying power. This process forces the Gateway to connect to our server via the Internet
so that the server can reset its firmware. When this is completed, you may have to set up your
lighting network again as discussed in the Installation chapter.

Safety Information
Batteries
Use only AA 1.5V alkaline batteries.
WARNING: Batteries can explode, or leak and can cause injury or fire. To reduce this risk:
• Carefully follow all instructions and warnings on the battery label and package.
• Always insert batteries correctly with regard to polarity (+ and -) marked on the battery and the
equipment.
• Do not short battery terminals.
• Do not mix old and new batteries. Replace all of them at the same time with new batteries of the
same brand and type.
• Remove dead batteries immediately and follow local regulations for safe disposal.
• Do not dispose of batteries in fire.
• Keep batteries out of reach of children.

• Transporting batteries can possibly cause fires if the battery terminals inadvertently come in contact
with conductive materials such as keys, coins, hand tools, etc. The US Department of
Transportation Hazardous Material Regulations (HMR) actually prohibits transporting batteries in
commerce or on airplanes (i.e. packed in suitcases and carryon luggage) UNLESS they are
properly protected from short circuits. So when transporting individual batteries, make sure that the
battery terminals are protected and well insulated from materials that could contact them and cause
a short circuit.
Indoor Use Only
The hardware in your lighting kit should be used only in dry, indoor locations. Do not use the hardware in high-
humidity locations such as greenhouses, saunas, washrooms, or patios. Do not use the hardware in locations
where it can get wet such as near aquariums or running water.
Do Not Disassemble
The hardware in your lighting kit has no user-serviceable parts inside. In case of persisting malfunction, please
contact Customer Service to arrange for repair at a certified service location. Do not attempt to disassemble the
hardware for any reason.

Disposing of Your Used Product
This product complies with the WEEE Directive (2002/96/EC) marking
requirements. The affixed label indicates that you must not discard this electrical /
electronic product in domestic household waste.
WEEE Product Category - With reference to the equipment types in the WEEE
Directive Annex 1, this product is classed as category 3 “IT and
Telecommunications Equipment.”
DO NOT DISPOSE IN DOMESTIC HOUSEHOLD WASTE - To return unwanted products, contact your local
GreenWave Reality office for more information (see contact information in the back of manual).

Product Specifications
Light Bulbs
CFL
Radio Frequency 2.4GHz
Features On, Off, Dim
Light Intensity 1100lm
Color Temperature Warm White
(2700K)
Color Range Index 82
Wattage 23W
Equivalent Wattage
(Incandescent Replacement) 100W
Voltage 120V/60Hz
Remote Control
Radio Frequency 2.4GHz
Operating Temperature 0°C ~ +40°C
Storage Temperature -20°C ~ +60°C
Operating Humidity 20% ~ 85% RH
Storage Humidity 5% ~ 95% RH
Battery 2 x AA
Battery Lifetime
(For Included Batteries) Estimated 12 Months

Gateway
Model GL30000, GL30002-A GL32200, GL32202-A
2.4GHz Radio Frequency ● ●
Z-Wave Radio Frequency N/A 908.42MHz
RJ45 Port for LAN/WAN network connection
● ●
Operating Temperature 0°C ~ +40°C 0°C ~ +40°C
Storage Temperature -20°C ~ +60°C -20°C ~ +60°C
Operating Humidity 20% ~ 85% RH 20% ~ 85% RH
Storage Humidity 5% ~ 95% RH 5% ~ 95% RH
Size 120 x 60 x 33 mm 120 x 60 x 33 mm
Weight 101 g 101 g
Power Adapter
Plug Type A Type A
Input 100-240V ~50/60Hz,
0.18A 100-240V ~50/60Hz,
0.18A
Output +5V DC, 1A +5V DC, 1A

Federal Communication Commission Interference Statement
This equipment has been tested and found to comply with the limits for a Class B digital device, pursuant to Part 15 of the FCC Rules. These limits are designed to provide reasonable protection against harmful interference in a residential installation. This equipment generates, uses and can radiate radio frequency energy and, if not installed and used in accordance with the instructions, may cause harmful interference to radio communications. However, there is no guarantee that interference will not occur in a particular installation. If this equipment does cause harmful interference to radio or television reception, which can be determined by turning the equipment off and on, the user is encouraged to try to correct the interference by one of the following measures:
• Reorient or relocate the receiving antenna.
• Increase the separation between the equipment and receiver.
• Connect the equipment into an outlet on a circuit different from that to which the receiver is connected.
• Consult the dealer or an experienced radio/TV technician for help. FCC Caution: Any changes or modifications not expressly approved by the party responsible for compliance could void the user's authority to operate this equipment. This device complies with Part 15 of the FCC Rules. Operation is subject to the following two conditions: (1) This device may not cause harmful interference, and (2) this device must accept any interference received, including interference that may cause undesired operation.
IMPORTANT NOTE:
Radiation Exposure Statement:
This equipment complies with FCC radiation exposure limits set forth for an uncontrolled environment. This equipment should be installed and operated with a minimum distance of 20cm between the radiator and your body.

Declaration(s) of Conformity
These CE Marked GreenWave Reality products incorporating Radio and Telecoms Terminal Equipment functionality are in compliance with the essential requirements and other relevant provisions of Directive 1999/5/EC. A copy of the original CE Declaration of Conformity is on file and available upon request for all CE Marked GreenWave Reality products. Please visit www.greenwavereality.com to obtain a copy of the Declaration. The use of such device might not be harmonized throughout EU and EFTA Member States. The Final Integrator of the product shall check that the use of such devices for power node are allowed for placing on the market in any particular Member State.