release notes - capital · pdf filedo not have rdbms access. ... systems. if y ou are...
TRANSCRIPT

Version 1.9.2
Release Notes
January 2010
By
Capital Software Corporation
Copyright 2010

Table of Contents
1 ENTERPRISE-Q INSTALLATION REQUIREMENTS................................................................. 1
2 INSTALLING ENTERPRISE-Q V1.9.2............................................................................................ 2
3 UPGRADING TO ENTERPRISE-Q V1.9.2...................................................................................... 3
3.1 UPGRADING ENTERPRISE-Q FOR WINDOWS.................................................................................. 3 3.2 UPGRADING ENTERPRISE-Q FOR UNIX ......................................................................................... 4 3.3 UPGRADE NOTES.......................................................................................................................... 5
4 ITM 6.X SUPPORT ............................................................................................................................ 6
5 DATABASE SCHEMA MODIFICATIONS .................................................................................... 7
6 ENTERPRISE-Q INTERFACE AND NAVIGATION .................................................................... 8
6.1 TREE-MENU WINDOW .................................................................................................................. 9 6.2 TABLE INTERFACE ENHANCEMENTS .......................................................................................... 12 6.3 FAST TABLE INTERFACE............................................................................................................. 15 6.4 OTHER INTERFACE ENHANCEMENTS .......................................................................................... 18
7 NEW APPLICATIONS.................................................................................................................... 20
7.1 ENDPOINT FILE EDITOR.............................................................................................................. 20 7.2 NEWS AND ANNOUNCEMENTS.................................................................................................... 24 7.3 CUSTOM REPORTS ...................................................................................................................... 27 7.4 DASHBOARDS ............................................................................................................................. 37 7.5 EP HEALTH REPORT................................................................................................................... 41 7.6 EP HEALTH CHECK TRANSACTION ............................................................................................ 43 7.7 AWSTATS .................................................................................................................................. 45
8 ENHANCEMENTS .......................................................................................................................... 46
8.1 SCREENS.CFG.............................................................................................................................. 46 8.2 EQSCHEDULER .......................................................................................................................... 47 8.3 RULES PROCESSING.................................................................................................................... 54 8.4 RUN ACTION PAGE ..................................................................................................................... 55 8.5 TRANSACTION ENHANCEMENTS................................................................................................. 57 8.6 EQSERVER ENHANCEMENTS...................................................................................................... 58 8.7 NEW/ENHANCED UTILITIES........................................................................................................ 59 8.8 MISCELLANEOUS........................................................................................................................ 60
9 ENTERPRISE-Q V1.9.2 BUG FIXES FROM V1.9........................................................................ 61

enterprise-Q v1.9.2 Capital Software Corporation
Release Notes January 2010
All Rights Reserved © 2010 1
1 enterprise-Q Installation Requirements
enterprise-Q v1.9.2 compliant software:
1. Tivoli Framework 3.2 or higher.
The system should be setup as a TMR Server or Managed Node. The latest
version of Tivoli Framework to complete eQ validation testing in a lab
environment is v4.1.1.
2. Netscape 4.x web browser, Mozilla 1.x or Microsoft Internet Explorer 4.x or greater
enabled to support JavaScript.
The latest tested version of Microsoft Internet Explorer is version 8. The latest
tested version of Netscape Navigator is 6.2. The latest tested version of Mozilla
browser is 1.6. Displaying dynamic pull-down menus is not supported under
Netscape Navigator and Mozilla browsers.
The following items are optional:
1. Apache web server v1.3.6 or greater
enterprise-Q comes with Apache Web Server which may be installed and
configured during enterprise-Q installation. If necessary the enterprise-Q may
work with pre-installed Apache web server. Currently the latest tested version of
Apache web server is v1.3.26, and the latest tested version of Apache2 web server
is v2.0.43.
2. MySQL 3.23.xx for Win32, or Oracle Server 7.x or higher, or Oracle Client
(SQL*Net) capable of connecting to Oracle Server on another host, or DB2
Client/Server 7.2.
The latest tested version of MySQL is 3.23.33.
The latest tested version of Oracle is 9.xx (both 32- and 64-bit versions).
The latest tested version of DB2 is 7.2.
enterprise-Q v1.9.2 includes comprehensive support for SQLite for those customers that
do not have RDBMS access. No server or client software of any kind is required to use
enterprise-Q with SQLite. SQLite is supported on all platforms. Please, visit
www.enterprise-Q.com for the most recent information on supported software. For
detailed installation instructions please refer to the enterprise-Q v1.9.2 Installation
Guide.

enterprise-Q v1.9.2 Capital Software Corporation
Release Notes January 2010
All Rights Reserved © 2010 2
2 Installing enterprise-Q v1.9.2 If you are installing enterprise-Q on a new system (not upgrading an existing enterprise-
Q installation), please following the installation procedures documented in the
enterprise-Q v1.9.2 Installation Guide available at the following web address:
http://www.capitalsoftware.com/support/document.html
Some noteworthy items regarding the installation of enterprise-Q v1.9.2 versus versions
previous to v1.9.2 include:
1. enterprise-Q can now be installed without the need for Tivoli Framework. As such,
the user is prompted if Tivoli Framework is installed.
2. enterprise-Q now includes AWStats, a web-based application used to report web
statistics on usage.
3. When installing on AIX, enterprise-Q comes with Apache version 2.2.8, which
supports LDAP authentication.
4. When installing on *nix-based systems, enterprise-Q now comes with a file named
‘install/PostInstall.sh’ which, when run as ‘root’ user, copies enterprise-Q startup
scripts to ‘/etc/init.d’ and then creates symbolic links to automatically start enterprise-
Q on boot.
5. If ITM 6 support is true, then the user prompted for CANDLEHOME if this
environment variable is not already defined.
6. User prompted before overwriting the following directories, if they already exist:
<eq>/perl5
<eq>/apache
<eq>/awstats
7. Additional variables stored in /etc/EQ/setup_env.pl include:
$xc_TIVOLI_FWRK = Set to one (1) or zero (0) indication support for
Framework (1) or not (0).
$xc_CANDLEHOME = ITM 6 installation directory.
$xc_ITM6_SUPPORT = Set to one (1) or zero (0) indication support for ITM 6
(1) or not (0).
$xc_ITM6_TEPSLOGIN = Set to one (1) or zero (0) indication support for TEPS
login command (1) or not (0).
$xc_ITM6_VERSION = Determined by running either cinfo (*nix) or kincinfo
(Windows) and parsing the results for the product code ‘ms’, such as
‘06210001’.

enterprise-Q v1.9.2 Capital Software Corporation
Release Notes January 2010
All Rights Reserved © 2010 3
3 Upgrading to enterprise-Q v1.9.2
The following sections describe upgrading enterprise-Q for both Windows and Unix
systems. If you are upgrading enterprise-Q, you may also need the document linked
above.
3.1 Upgrading enterprise-Q for Windows Following these steps to upgrade enterprise-Q running under Windows:
1. Download enterprise-Q v1.9.2 for Windows from http://www.capitalsoftware.com/.
2. Stop the following enterprise-Q services: EQServer, EQICMon, EQMDMon,
EQSPMon and EQTMMon.
3. Copy the contents of the enterprise-Q directory to another (backup) directory. The
contents of the backup directory will be used by the upgrade script to determine what
parts of enterprise-Q were customized, and apply these customizations to the new
enterprise-Q installation.
4. Uninstall old version of enterprise-Q. To do this, click on the Windows Start button,
then choose Programs | enterprise-Q | Uninstall enterprise-Q
5. Delete all files in the qstore subdirectory of the old EQ installation directory.
6. Install enterprise-Q v1.9.2 in the same directory where old version of EQ was
installed as described in the enterprise-Q v1.9.2 Installation Guide. If you use
MySQL, do not reinstall MySQL database. Also, if you want to keep the data in the
enterprise-Q database tables, do not re-create EQ tables when prompted!
7. After successfully installing enterprise-Q v1.9.2, switch to the install subdirectory
under enterprise-Q directory and run the upgrade script:
cd <eq>\install
EQupgrade <eq> <backup_dir>
Where:
<eq> - Directory where enterprise-Q is installed.
<backup_dir> - Directory where previous version of enterprise-Q was copied.

enterprise-Q v1.9.2 Capital Software Corporation
Release Notes January 2010
All Rights Reserved © 2010 4
3.2 Upgrading enterprise-Q for Unix Following these steps to upgrade enterprise-Q running under Unix:
1. Download enterprise-Q v1.9.2 for your platform.
2. Uninstall old version of enterprise-Q. To do this, execute the following commands
using the enterprise-Q account (i.e. the user account that was used to install
enterprise-Q):
cd <eq>/install
./InstEQ uninstall
Uninstalling enterprise-Q stops enterprise-Q processes and removes all EQ-related
cron jobs, but it does not remove any files from EQ directory. Do not try to remove
any EQ files as these will be used by the upgrade script to set enterprise-Q v1.9.2 in
exactly the same way as the old EQ installation.
3. Rename EQ directory. For example, if the path to your EQ directory is /opt/EQ then
execute the following command:
mv /opt/EQ /opt/EQ.backup
The contents of the backup directory will be used by the upgrade script to determine
what parts of enterprise-Q were customized, and apply similar customizations to the
new enterprise-Q installation.
4. During the upgrade procedure, many of the files in the backup directory will be
copied to the new installation. To expedite the upgrade process, you may want to
delete some files in the backup directory at this time, such as old logfiles located in
<eq-backup>/logs and its subdirectories, and everything in <eq-backup>/temp.
5. Install enterprise-Q v1.9.2 in the same directory where the old version of EQ was
installed as described in the enterprise-Q v1.9.2 Installation Guide. Do not re-create
RDBMS EQ tables!
6. After successfully installing enterprise-Q v1.9, switch to the install subdirectory
under enterprise-Q directory and run the upgrade script:
cd <eq>/install
./EQupgrade <eq> <backup_dir>
Where:
<eq> - Directory where EQ v1.9.2 is installed.
<backup_dir> - Directory where old version of EQ was copied.
enterprise-Q v1.9.2 Capital Software Corporation
Release Notes January 2010
All Rights Reserved © 2010 5
3.3 Upgrade Notes The upgrade script will transfer the following EQ configuration data from the backup
directory to the new installation:
All transactions (including custom transactions) in the EQ queue.
EQ Users, user templates and user groups.
Any extra custom screens the customer may have added.
Any extra custom transactions the customer may have added, including user
transactions.
All EQ Scripts created by the customer.
AutoAV and AutoInventory configuration files.
Default values for individual actions and action groups.
EQ Classes created by the customer.
Preferences for all EQ Users (including eqadmin).
Configuration of EQServer.
Configuration of the other enterprise-Q process daemons/services.
All enterprise-Q logfiles.
GUI configuration parameters for normal users and endusers.
Cleanup configuration data from cfg/eqmgmt.cfg configuration file.
Endpoint management configuration data.
Lists of actions and nodes.
Any cross-reference files created by EQ users.
The following information is changed/reset during upgrade:
All users and groups are granted 'default' access to new enterprise-Q web pages and
transactions. So, if a user's default is 'Access/Modify', the user will be granted access
to the new pages.
All transaction groups manually commented out in the groups.cfg configuration file
by the customer are re-enabled. If necessary the customer can disable transaction
groups from the "EQ GUI Configuration" afterwards.
All transactions manually disabled in the trans.cfg file will be re-enabled.

enterprise-Q v1.9.2 Capital Software Corporation
Release Notes January 2010
All Rights Reserved © 2010 6
4 ITM 6.x Support
enterprise-Q v1.9.2 includes support for ITM 6. Some of the major ITM-related
enhancements include:
Multi-Hub TEMS – Manage all objects (Managed Systems, MSLs, Situations,
etc.) from multiple Hub TEMS environments from a single ‘pane-of-glass’.
ITM 6.2.1 Support – Comprehensive support for latest release of ITM 6.x,
including new features added to the product.
Situation Overrides – Easily manage all situation overrides.
Asynchronous Agent Deployment/Configuration – Support for this new
capability.
Tracking Activated/Deactivated Situations – Confidently activate/deactivate
individual situations for a given ITM agent with enterprise-Q audit tracking.
ITM Agent Real-Time Reports – Quick and easy report generation for all types
of ITM Agents, including OS, database, Universal Agents, and Agent Builder
Agents.
Please see the enterprise-Q v1.9.2 ITM 6 Integration Guide for more details.

enterprise-Q v1.9.2 Capital Software Corporation
Release Notes January 2010
All Rights Reserved © 2010 7
5 Database Schema Modifications This section documents changes to the enterprise-Q database schema in the release.
Moved EQ_ITM_TEMS table to file named cfg/itm/HTEMS.ini
Removed TEMSID column from the following tables: EQ_ITM_AGENTS
EQ_ITM_MSLS
EQ_ITM_SITS
EQ_ITM_AGENT2MSL
EQ_ITM_AGENT2SIT
EQ_ITM_SITDETAILS
The TEMSID column was a keyed column for these tables. Please contact your DBA
to convert data in these tables to the new definitions.
Added DISABLED column to the EQ_ITM_AGENT2SIT table. Set to zero (0) for false,
one(1) for true.
Added EQ_SCHED_AUDIT table to database. Please see the table definition in the file
for your database vendor:
o Oracle – install/inst_ora.sql
o DB2 – install/inst_db2.sql
o MySQL – install/inst_my.sql
o SQLite – install/inst_sqlite.sql
o These are the table columns:
TIME – Universal Time Stamp when data is inserted/updated in the database.
SID – Schedule ID.
MACD – Modify, Add, Change, Delete flag.
T_EQUSER – User who initiated the action.
T_EQGROUP – User’s group
T_TRANS – Transaction name.
T_PROFILE – Transaction profile, if present.
T_TARGETTYPE – Target type, like Endpoint, Managed System, etc.
T_TARGETS – Comma-separated list of targets.
SCHEDARGS - Schedule arguments, such as T_SCHED_TIME, T_SCHED_OCCURS, etc.
TRANSARGS – Transaction arguments, such as T_BATCHMAX, T_SKIP, etc.
APPARGS – Application arguments. That is, non-reserved keyword/value pairs.

enterprise-Q v1.9.2 Capital Software Corporation
Release Notes January 2010
All Rights Reserved © 2010 8
6 enterprise-Q Interface and Navigation
enterprise-Q v1.9.2 offers three different ways of getting access to any EQ page:
Using tree-menu navigation located on the left side of each page. Please see next
chapter for detailed description of this menu. This menu is new to enterprise-Q
v1.9.2.
Using pull-down menu (if enabled in user preferences). Updated version of this menu
in enterprise-Q v1.9.2 is compatible with wider range of browsers, and, when
necessary, it adjusts position of sub-menus such that they stay completely visible on
the screen.
Using front EQ page and secondary menu pages. Enhancements to this menu are
described in the "Other general interface enhancements" section.
enterprise-Q v1.9 also offered tab interface. This interface was discontinued and is no
longer supported.

enterprise-Q v1.9.2 Capital Software Corporation
Release Notes January 2010
All Rights Reserved © 2010 9
6.1 Tree-menu Window enterprise-Q v1.9.2 includes tree navigation menu located on the left side of each page.
Here is an partial screen shot of this menu with the ‘EQ Management Tools’ section
expanded:
The menu can be used to quickly access any enterprise-Q screen and to submit new
transactions to the EQ queue. The top part of the menu window contains SCREENS and
ACTIONS tabs, and Refresh and Maximize/Minimize icons:
SCREENS tab - displays a list of of all enterprise-Q screens. The screens in the
tab are grouped by functionality, similar to how they are grouped on the
enterprise-Q front page and in the pull-down menu. All group and sub-group
names have black triangles in front of them, and screen names don't have the
triangles. Click on any group or sub-group name to expand it. Click on any
expanded group or sub-group to collapse it. To access any EQ screen click on the
EQ screen name. Last accessed screen is automatically highlighted and added to a
"Recent Pages" section at the bottom of the menu window.
ACTIONS tab - displays a list of all available actions. The actions are grouped in
the same way how they are grouped on the "Perform Action" page. Action groups
can be distinguished from individual actions by a black triangle in front of them.
Clicking on the action group name expands the group if it's currently collapsed, or
collapses it if it's currently expanded. Clicking on the action name brings
"Perform Action" page for the action. Last clicked action is automatically

enterprise-Q v1.9.2 Capital Software Corporation
Release Notes January 2010
All Rights Reserved © 2010 10
highlighted in the menu. Unlike the screens, the actions are not added to the
"Recent Pages" section at the bottom of the menu window.
Refresh icon - clicking on the icon reloads the list of all available screens and
actions. This also resets the state of the tree menu: the SCREENS tab is selected,
all screen and action groups in the SCREENS and ACTIONS tabs are collapsed,
and the "Recent Pages" section is cleared. The Refresh icon is convenient when
new EQ pages, custom reports or dashboards are added to the enterprise-Q,
and/or existing pages, custom reports and dashboards are renamed or removed,
and/or access to the pages, reports or dashboards is changed, and a user wants to
view updated list of available screens without reloading all other EQ pages.
Minimize/Maximize icon - minimizes the width of the menu window or restores
original width of the window. By default, the menu window is displayed in
maximized form, i.e. it is fully visible. When the menu window is maximized,
clicking on the Minimize/Maximize icon minimizes the window - hides most of
the window and displays only a small part of it. When a mouse cursor is moved
over that part, the menu window is temporarily expanded to its normal size.
Moving the mouse cursor away from the expanded window hides the window
again. Clicking on the Minimize/Maximize icon when the window is temporarily
expanded maximizes the window, that is makes the window permanently
expanded - the menu window will stay expanded regardless of whether a mouse
cursor is located over the window or not. The menu remembers
Minimize/Maximize state of the window, and automatically restores it when new
set of enterprise-Q pages is opened in a browser.
Besides expanding and collapsing individual screen / action groups, and accessing
individual actions, both SCREENS and ACTIONS tabs allow the user to control how all
screen / action groups are displayed in the window:
Collapse - All groups in the currently selected tab are collapsed
Expand - All groups in the currently selected tab are expanded.
List - hides all groups and sub-group names and displays all screens or actions in
alphabetical order.
The List option above is useful when you remember screen or action name, but don't
remember in which group the screen or action is located. Another very convenient way of
finding a screen or an action is to use a Search feature located just above the list of
screens and actions:
To find an action or a screen, type in the full or partial action/screen name and then pause
for a half second. The menu will locate all matching actions or pages, make them visible
by expanding action / screen groups and sub-groups, and highlight all matching names.
The search highlighting will be turned off as soon as you click on any screen or action
name in the menu.

enterprise-Q v1.9.2 Capital Software Corporation
Release Notes January 2010
All Rights Reserved © 2010 11
Depending on your browser settings and screen width you may find that the width of the
tree menu window is too narrow or too wide. To change the width of the window move
the mouse pointer over the right edge of the window (the pointer cursor may change to
"resize" cursor), press the left mouse and then drag the window border to the left or right.
Release the left mouse once you finished adjusting the width of the menu window. The
new window width is remembered by the menu, and will be used every time you open a
new set of EQ pages.
Bottom part of the menu page contains recently accessed enterprise-Q pages (screens):
Every time you click on a screen name in the tree menu, the screen name is added to the
top of the Recent Pages section. The section displays only five recent screens, and does
not display screens accessed through the ACTIONS tab, front page of enterprise-Q,
bookmarks, or pull-down menu.

enterprise-Q v1.9.2 Capital Software Corporation
Release Notes January 2010
All Rights Reserved © 2010 12
6.2 Table Interface Enhancements Many enterprise-Q pages use unified generic table interface to display table data.
enterprise-Q v1.9.2 adds new features to the table interface, and introduces new way of
generating data tables.
Usually data tables include "Report Settings" supplemental table that is used to view or
control such main data table settings as sorting, grouping, highlighting, etc. In enterprise-
Q v1.9 the settings table has always been displayed before the main data table. Updated
version of the "Report Settings" table no longer has fixed position - if necessary, it can be
moved below the main data table by clicking on the Move Down (white down arrow)
icon in the left corner of the table header:
The "Report Settings" table, located on the bottom of the page, can be moved above the
main data table by clicking on the Move Up (white up arrow) icon in the left corner of
the table header. Table position is remembered by enterprise-Q interface for each EQ
page.
The "Report Settings" table now includes additional Displays as option which specifies
whether the data is displayed in text or graphical format:
Table option - displays data as text in a data table. This is the default.
Graph - displays data as a graph with single or multiple sets of dots (markers),
optionally connected by lines, using numerical data from two columns from the
main data table. When the Graph option is selected, the "Report Setting" table
switches to an alternative set of table options:
X Axis Data - select the name of the column that contains either numeric data or
timestamps. This data will be used to determine each dot's X axis position. Check
the "Data contains timestamp" option if the column contains date/time
(timestamp).
Y Axis Data - select the name of the column that contains numeric data which
will be used to determine Y axis position for each dot. Y Axis Data cannot refer
to the same column as the X Axis Data.
Data set label - select the name of the column that contains data set label. One of
the features of the Graph display method is ability to display multiple sets of
data, where each dataset has its own marker type and/or color. By default, the
Data set label option is set to a single data set, that is all dots on the graph will be

enterprise-Q v1.9.2 Capital Software Corporation
Release Notes January 2010
All Rights Reserved © 2010 13
displayed using the same marker and/or color. If Connect dots by line option (see
below) is selected then all points will be connected together. If the Data set label
option is set to any column name, then the Graph will group all table rows by the
data in the Data set label column, assume that each group of data is a separate
data set, and draw dots in each data set using different marker and/or color. If
Connect dots by line option is selected then all dots, that belong to the same data
set, will be connected together. Data set label column cannot be set to columns to
columns already selected in Y Axis Data and X Axis Data pull-down menus.
Connect dots by line - by default each dot on the graph is displayed as a marker.
When this option is checked the Graph draws a line that will connect all dots from
the same dataset.
As an example, let's assume that the main data table contains the following rows:
Row number X data Y data Data set
1 05/01/09 3 Endpoints
2 05/08/09 4 Managed Nodes
3 05/15/09 6 Endpoints
4 05/22/09 8 Managed Nodes
If the Data set label is set to a single dataset then the Graph will draw 4 markers
using the same marker type and color. Setting the Connect dots by line option for
this graph will result in a single broken line connecting all 4 dots. If the Data set
label is set to the "Data set" column then the dots corresponding to the first and
third rows will be drawn using one marker type, and dots corresponding to the
second and forth rows will be drawn using different marker type. Turning on
Connect dots by line option will result in two lines drawn on the graph - one is
from the first to the third dot, and the second is from the second to the forth dot.
Pie Chart - displays data as a pie chart using data from two columns from the
main data table. When the Pie Chart option is selected, the "Report Setting" table
switches to an alternative set of table options:
Column containing labels - select the name of the column that contains labels
that will be displayed for each section of the chart.
Column containing values - select the name of the column that contains numeric
data for the pie chart. The chart will be split into a number of sections that is equal
to the number of rows with non-zero data in the main data table. The size of each
section will be proportional to the data value, and the label for each section will
be taken from the Column containing labels column.
As an example, let's assume that the main data table contains the following data:
Row number Label Data
1 Endpoints 2

enterprise-Q v1.9.2 Capital Software Corporation
Release Notes January 2010
All Rights Reserved © 2010 14
2 Managed Nodes 1
3 Managed Systems 1
The pie chart for this table will consist of three sections: 2 quarters of the chart
will be labeled "Endpoints", one quarter of the chart will be labeled "Managed
Nodes" and remaining one quarter of the chart will be labeled "Managed
Systems".
Pie Chart (Counts) - displays data as a pie chart using data from one column
from the main data table. When the Pie Chart (Counts) option is selected, the
"Report Setting" table switches to an alternative set of table options:
Use data from column - select column name containing any type of data. For
each data value in this column the chart will determine the number of rows that
have exactly this value. Resulting pie chart will be split into a number of sections
equal to the number of unique data values in the column, and the size of each
section will be proportional to the number of rows that have specific data value.
As an example, let's assume that the main data table has the following rows:
Row number Data
1 Endpoint
2 Managed Node
3 Endpoint
The pie chart for this table will display two sections - 2/3rd of the circle will be
labeled "Endpoint", and 1/3rd of the circle will be labeled "Managed Node".
The Display as option and all graph- and chart-related options are remembered by
enterprise-Q interface on per-page basis, and are automatically restored next time you
access the same page.
The main data table doesn't have new options or controls, but the appearance of its
control line, containing "Sort", "Hide", and "Group" icons has changed. The control line
was broken into two separate lines:
The first line now contains the "Sort" icon (and indicator), "Group" and "Hide" icons, and
the second line contains column names.

enterprise-Q v1.9.2 Capital Software Corporation
Release Notes January 2010
All Rights Reserved © 2010 15
6.3 Fast Table Interface "Classical" data table interface, that existed in enterprise-Q v1.9 and earlier, and still
supported in v1.9.2, performs all data processing and HTML code generation on the
server side. Every time a user changes any setting in the table (sorting, grouping, hide
columns, highlighting, etc), the following steps are performed:
1. The browser submits page information to the enterprise-Q server,
2. The server retrieves raw data from data source, processes it according to table
settings, and generates HTML code,
3. The server sends generated HTML code back to the browser,
4. The browser renders new page.
The steps above usually take negligible amount of time under best conditions, i.e. when
both user system and enterprise-Q server are fast, have plenty of memory and located on
the same network. In real world this is not always the case. The first and third steps may
take much longer if the network connection between user's computer and enterprise-Q
server is slow. The second step may take longer if the page data is not cached or if the
cache has expired. The forth step takes longer if the generated table contains thousands
and thousands of rows. The goal of a new Fast table interface is to improve the page
update speed by eliminating three of the four steps above. When the fast table interface is
enabled, the table data is sent to the browser only once, and all data processing is shifted
to the client side, i,e, handled directly in the browser. All subsequent page updates,
associated with changes in table settings, are performed locally in user's browser. This
makes sorting, filtering, etc almost instantaneous for small tables (up to 100 rows).
The main disadvantage of the fast table interface comes from the fact that all processing
is done in a browser. While modern browsers can display tables with 10,000 rows or
more, they still cannot handle both processing and displaying of large amounts of data.
For this reason the fast table interface comes disabled by default in enterprise-Q v1.9.2.
The maximum amount of data, that can be safely handled by the fast table interface,
depends on the version of user's browser. Internet Explorer 6 and 7 can handle up to
1,000 or 2,000 rows of data. Firefox v2.x and v3.x can handle up to 10,000 rows of data.
If average data table size in your environment is substantially smaller than the maximum
data table size then you can consider enabling the fast table interface. To enable it please
go to the "User Preferences" page, and enable the "Fast Table Interface (best for Firefox
users)" option located in the "Global interface settings" section.
In addition to advantages of the fast table interface mentioned above, the interface
includes the following improvements over the classical data table interface:

enterprise-Q v1.9.2 Capital Software Corporation
Release Notes January 2010
All Rights Reserved © 2010 16
Multi-column sort - sorts table data using data from up to three columns. "Sort table"
field in the "Report Settings" table now includes three pull-down menus with column
names:
The first menu (on the left) selects primary sorting column, the second menu selects
secondary sorting column, and the third menu selects the tertiary sorting column. Data
sorting is performed exactly in the same way as in the classical table interface when only
the primary column is selected. When two or three columns are selected then the rows in
the table are sorted using data in the primary column first. If two rows have exactly the
same data in the primary column then the order of rows is determined by data in the
secondary column, and, if the data is the same in both columns, then the order is
determined by data in the tertiary column. The icons for primary, secondary and tertiary
sorting columns look different from the classical table interface:
or - primary sorting column
or - secondary sorting column
or - tertiary sorting column
Clicking on the icon or column name always changes the sorting order of the column:
Clicking on the icon or associated column name changes column's sorting
order to ascending.
Clicking on any red-color triangle pointing down, or associated column name,
changes sorting order to descending.
Clicking on any red-color triangle pointing up, or associated column name,
removes data sorting from the column.
In addition to this, when a secondary or tertiary icon, or associated column name, is
clicked:
the column becomes primary sorting column
the column, that was primary before, becomes secondary

enterprise-Q v1.9.2 Capital Software Corporation
Release Notes January 2010
All Rights Reserved © 2010 17
remaining sorting column becomes tertiary.
Clicking on a column name that is not currently sorted makes it a primary sorting
column. The old primary sorting column becomes secondary, the old secondary column
becomes tertiary, and the old tertiary column becomes unsorted.
Data paging - divides all rows in the table into multiple pages, and adds a page
navigation. Data paging is an effective way to make page navigation simpler, and at the
same time speed-up to some extent sorting, filtering and other page operations. When a
"Page size" field in the "Report Settings" table is set to any non-zero value, the data in the
table is divided into one or more pages, each containing "Page size" rows. If the total
number of pages is greater than 1 then the following page navigation is added before the
main data table:
The same page navigation is added after the main table if the number of rows in the table
is greater than 20.
Current page number is displayed in the page navigation as a plain text (without
underlining). To go to previous or next page, click on the "Prev" or "Next" link
respectively. You can also click on any page number to go directly to that page. To
disable data paging clear the value from the "Page size" field in the "Report Settings"
table, or set it to 0.
On-the-fly filtering - allows users to filter rows by entering filter text directly on the
page. By default, the fast table interface displays "F" icon in the first control line, and
also displays two additional control lines with filter condition and filter text fields:
The "F" icon in the first control line can be used to switch between three different states:
Display filter condition and filter text lines. This is the default.
Display filter text line and hide the line with filter conditions. In this mode filter
condition for all columns is forced to "Includes".
Hide filter condition and filter text lines.
To filter rows by data in any column select desired filtering condition in that column and
type-in text into the filter text field. The main data table will be automatically refreshed
after half-second interval.
All new table settings used by the fast table interface are remembered on per-page basis,
and are automatically restored next time a user accesses the same page.
enterprise-Q v1.9.2 Capital Software Corporation
Release Notes January 2010
All Rights Reserved © 2010 18
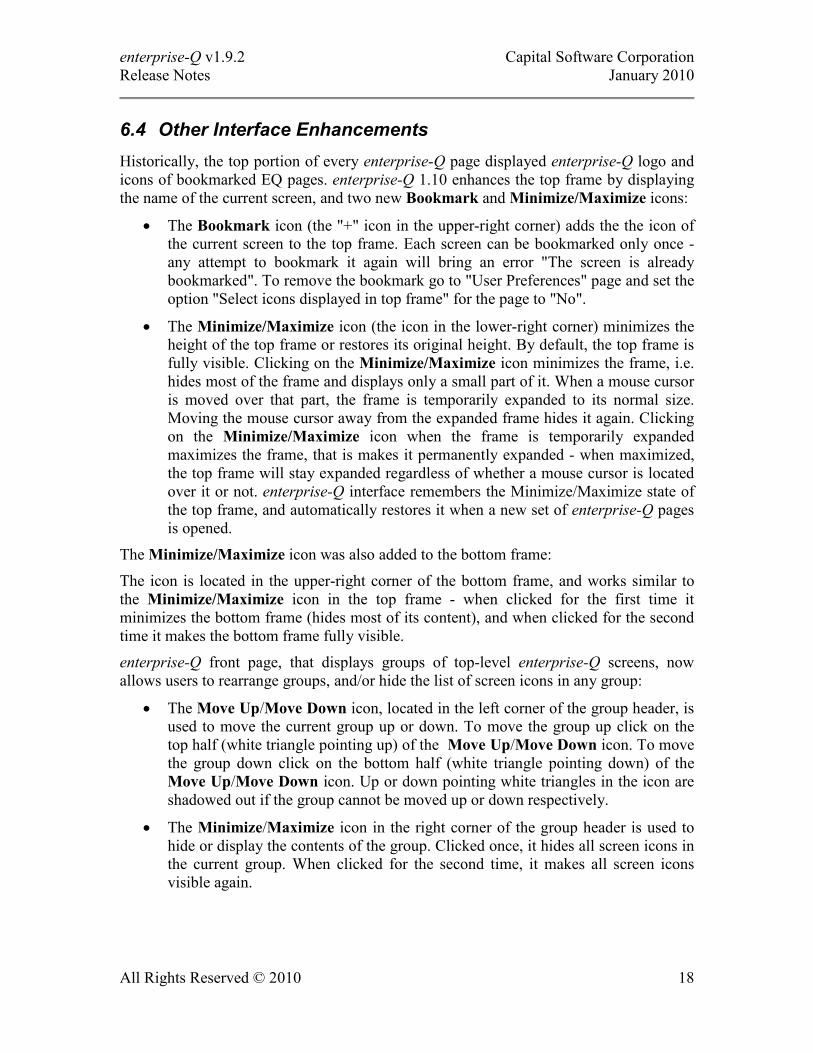
6.4 Other Interface Enhancements Historically, the top portion of every enterprise-Q page displayed enterprise-Q logo and
icons of bookmarked EQ pages. enterprise-Q 1.10 enhances the top frame by displaying
the name of the current screen, and two new Bookmark and Minimize/Maximize icons:
The Bookmark icon (the "+" icon in the upper-right corner) adds the the icon of
the current screen to the top frame. Each screen can be bookmarked only once -
any attempt to bookmark it again will bring an error "The screen is already
bookmarked". To remove the bookmark go to "User Preferences" page and set the
option "Select icons displayed in top frame" for the page to "No".
The Minimize/Maximize icon (the icon in the lower-right corner) minimizes the
height of the top frame or restores its original height. By default, the top frame is
fully visible. Clicking on the Minimize/Maximize icon minimizes the frame, i.e.
hides most of the frame and displays only a small part of it. When a mouse cursor
is moved over that part, the frame is temporarily expanded to its normal size.
Moving the mouse cursor away from the expanded frame hides it again. Clicking
on the Minimize/Maximize icon when the frame is temporarily expanded
maximizes the frame, that is makes it permanently expanded - when maximized,
the top frame will stay expanded regardless of whether a mouse cursor is located
over it or not. enterprise-Q interface remembers the Minimize/Maximize state of
the top frame, and automatically restores it when a new set of enterprise-Q pages
is opened.
The Minimize/Maximize icon was also added to the bottom frame:
The icon is located in the upper-right corner of the bottom frame, and works similar to
the Minimize/Maximize icon in the top frame - when clicked for the first time it
minimizes the bottom frame (hides most of its content), and when clicked for the second
time it makes the bottom frame fully visible.
enterprise-Q front page, that displays groups of top-level enterprise-Q screens, now
allows users to rearrange groups, and/or hide the list of screen icons in any group:
The Move Up/Move Down icon, located in the left corner of the group header, is
used to move the current group up or down. To move the group up click on the
top half (white triangle pointing up) of the Move Up/Move Down icon. To move
the group down click on the bottom half (white triangle pointing down) of the
Move Up/Move Down icon. Up or down pointing white triangles in the icon are
shadowed out if the group cannot be moved up or down respectively.
The Minimize/Maximize icon in the right corner of the group header is used to
hide or display the contents of the group. Clicked once, it hides all screen icons in
the current group. When clicked for the second time, it makes all screen icons
visible again.

enterprise-Q v1.9.2 Capital Software Corporation
Release Notes January 2010
All Rights Reserved © 2010 19
Current state (minimized/maximized) and position of all groups is automatically stored
whenever the state and position are changed, and restored when a user opens a new set of
EQ pages.
Re-arranging and minimizing the groups functions were also added to other screens that
display second-level groups of screens (for example, on the "EQ configuration" page) and
to the Perform Action page.
Many enterprise-Q pages utilize generic "Browse Files" popup window, which allows
users to select files and/or directories on local and remote systems. The Browse window
in enterprise-Q v1.9.2 has been enhanced to limit user's access to one or several
directories. When user's access to directories is limited, the Browse window will display
only the "Files" selection scrollbox:
When user is allowed to access more than one directory, but not every directory on the
system, the window will display a Directory pull-down menu with directory names at the
bottom of the window (see picture above). When user selects any directory name from
the Directory pull-down menu, except the current one, the screen will automatically
refresh and display a list of files in selected directory. If user is allowed to access only
one directory, then the Directory field will display the name of that directory, and the
user won't be allowed to change directory name.
Another enhancement in the "Browse Files" popup window concerns the Filter field. To
filter a list of files on the "Browse Files" page in enterprise-Q v1.9 it was necessary to
type in a partial of full file name in the Filter field, and click on the "Filter" button. The
page would then refresh and display the filtered list of files. enterprise-Q v1.9.2
simplifies this process. To filter the list of files in v1.9.2 you need to type a filter string
(partial or full file name), and pause for half-second. The list of files will be immediately
updated to match the entered filter string.

enterprise-Q v1.9.2 Capital Software Corporation
Release Notes January 2010
All Rights Reserved © 2010 20
7 New Applications
All screen-shots depicting data in the standard enterprise-Q table format include the
standard enterprise-Q table manipulation capabilities, such as:
Column filtering, sorting, grouping, and hiding
Checking a group of displayed records and acting upon them, such as deleting
Please note that sample screen-shots may show only a subset of the columns available.
That is, some table columns were hidden for clarity and/or space considerations.
7.1 Endpoint File Editor New Endpoint File Editor page, called "EP File Editor" in enterprise-Q interface,
allows users to retrieve any file from any endpoint, edit the file and save it back. The "EP
File Editor" page can be found in the "Node Management" group of pages. Initially, the
page displays two or three fields that allow users to select file location:
Endpoint Name - the name of the endpoint where the file resides. Once you type
in three or more characters from the endpoint name, a pull-down menu with a list
of matching endpoint names will be displayed right under the field. You can
continue to type the endpoint name, you can click on the endpoint name in the
pull-down menu, or you can press "Down Arrow" key on a keyboard to switch to
the pull-down menu and then select the endpoint name using keyboard. The text's
color in the field will change to green when the typed text exactly matches
existing endpoint name. If the typed text does not match any existing endpoint
name then the text color will change to red.
You can optionally select endpoint name from from the list of endpoints. To do
this click on the Choose button, select desired endpoint from the list of endpoints
in the popup window, and click on the Set & Close button.
Directory - Directory name where endpoint is located. This field will not be
displayed if the "Endpoint File Editor" page is configured to access only one
directory on the endpoint. Instead of typing in the directory name, you can click
on the Browse (Open folder) icon located next to the File Name field, and select
both directory and file names in the popup window.
File Name - name of the file you want to edit. You can also click on the Browse
(Open folder) icon located next to the field, and select the file in the popup
window.
Once you selected the endpoint, directory and file names click on the Load File button to
edit the file. The contents of the file will be opened in a new window (only top portion of
the window is displayed below):
You can edit the file directly in the popup window. To save the changes click on the Save
File button. If the file was not changed then the page will show "File was not changed"
error.

enterprise-Q v1.9.2 Capital Software Corporation
Release Notes January 2010
All Rights Reserved © 2010 21
If you've made changes to the file on the page, and you want to restore original version of
the file, click on the Re-Load button. To cancel editing the file, click on the Close
button.
7.1.1 Customizing Endpoint File Editor Page
"Endpoint File Editor" page that comes by default in enterprise-Q v1.9.2, allows users to
edit any file in any directory on endpoints. This type of access is not suitable in
production environments, where non-privileged users should have access only to certain
files and/or directories. enterprise-Q provides two ways of limiting user's access to files
on endpoints:
1. The "Endpoint File Editor" page can be customized to allow access only to certain
directories and/or to files that match pre-determined mask.
2. Access to the "Endpoint File Editor" page can be limited only to EQ
administrators, or disabled completely. EQ administrators can create one or more
additional "File Editor" pages that allow limited access to files (different pages
may have different level of access), and allow access to those pages only to
certain groups of users.
Use the steps below to create a new File Editor page, that looks and works similar to the
"Endpoint File Editor" page:
Copy the file <EQ_directory>/cfg/epmgmt/EP_FILE_EDITOR.edit as a file with
different name, but with the same extension. For example:
cd <EQ_directory>/cfg/epmgmt/
cp EP_FILE_EDITOR.edit ONLY_TXT_FILES.edit
Replace <EQ_directory> with directory name where enterprise-Q is installed.
Please use only letters, digits and '_' (underscore) characters in the file name.
Edit the file <EQ_directory>/cfg/screens.cfg and find a line which starts from
"EP_FILE_EDITOR". Copy that line, and change the "EP_FILE_EDITOR" text
in the copied line to a name of the file that your created in the cfg/epmgmt/
directory. In the example above, the name was "ONLY_TXT_FILES". Please
note that the copied line has two instances of the "EP_FILE_EDITOR" text - both
instances should be replaced! Change "EP File Editor" screen name in the copied
line to different name.
Refresh the tree-menu navigation page, or, if you use pull-down menu navigation, refresh
the current page, to see the newly created File Editor page.
To customize the "Endpoint File Editor" page, or a copy of that page, edit the *.edit file
associated with the page. To customize original "Endpoint File Editor" page you will
need to edit the file <EQ_directory>/cfg/epmgmt/EP_FILE_EDITOR.edit. The file may
contain the following parameters:
MASK- this parameter specifies the mask which will match all files that users are
allowed to see in the "Browse Files" popup window. All files, that do not match

enterprise-Q v1.9.2 Capital Software Corporation
Release Notes January 2010
All Rights Reserved © 2010 22
the mask, won't be displayed by the "Browse Files" window. The mask may
contain special characters * and ?, which work in the same way how they work on
Windows and UNIX command line - the * character matches zero or more
characters, and the ? character matches exactly one character. Set the MASK
parameter to *, or comment it, if you want to display all files. Example,
MASK = *.txt
DIR - this parameter specifies directory which users are allowed to access. To
specify multiple allowed directories, put each directory name on a separate line
with DIR parameter. You can safely mix Unix and Windows directory names as
the Browse window will use only directories that are appropriate for endpoint's
operating system: Windows directories, containing drive letters, will only be used
on Windows endpoints, and non-Windows directories (without drive letter) will
only be used on non-Windows endpoints. Set the DIR parameter to * to allow
users to access all directories. Example,
DIR = C:/temp
DIR = /tmp
BACKUP - this parameter specifies path where the File Editor page stores old
and new versions of modified files. If the BACKUP path is relative then the page
pre-pends it with the path to enterprise-Q installation directory. Depending on the
settings of the BACKUP_DIRS parameter, the backup files may be stored in
<BACKUP>/<ep> directory or <BACKUP>/<ep>/<path_to_file> directory.
Please see BACKUP_DIRS parameter for more information. In both cases the
page will store old version of the file as a file:
<file_name>.<time>.<user_name>.bak
Where:
<file_name> is the name of the edited file,
<time> is a UNIX timestamp,
<user_name> is the name of the user who edited the file.
New version of the file will be stored as:
<file_name>.<time>.<user_name>.new
The File Editor page will not create backup versions of the modified files if the
BACKUP parameter is missing or blank. Example,
BACKUP = C:\temp\backup
BACKUP_DIRS - this parameter controls how backup files are stored in the
backup directory. If the parameter is set to 1 then, within the BACKUP directory,
the File Editor page creates a set of subdirectories that matches all subdirectories
in the path of edited file. For example, if the name of the edited file is
"/tmp/config.txt", and the BACKUP parameter is set to "/opt/EQ/backup", then
the File Editor page will create backup files in the
"/opt/EQ/backup/<endpoint_name>/tmp/" directory. The "File Editor" page treats

enterprise-Q v1.9.2 Capital Software Corporation
Release Notes January 2010
All Rights Reserved © 2010 23
a drive letter in the edited file path as a subdirectory name. For example, if the
name of edited file is "C:/temp/config.txt" then the backup files will be created in
"/opt/EQ/backup/<endpoint_name>/c/temp/" directory.
If the BACKUP_DIRS parameter is blank or set to 0 then the File Editor page
stores all files in the "<BACKUP>/<endpoint_name>/" directory. Example:
BACKUP_DIRS = 1
VALIDATION - this parameter specifies the name of a script or a program that
performs a validation of the modified file content before the content is saved on
the endpoint. If the VALIDATION parameter has extension ".pl" then it will be
executed as:
<path_to_perl>/perl <VALIDATION> <new_file_content>
Where <new_file_content> is the name of the file with the content that needs to
be validated. If the VALIDATION script or program doesn't have the ".pl"
extension then it will be executed as:
<VALIDATION> <new_file_content>
The VALIDATION script should read the file <new_file_content>, perform
validation, and, depending on validation results, do the following:
◦ Exit with status 0 if the validation succeeded,
◦ Print an error on standard output or standard error, and exit with non-zero
status if the validation failed. Printed message will be displayed as an error by
the "File Editor" page.
If VALIDATION parameter is blank then no content validation will be
performed by the "File Editor" page. Example:
VALIDATION = /opt/EQ/scripts/validate_config.pl
NOTE: Make sure you use ".pl" extension for perl scripts on Windows system,
otherwise saving operation may hang!
enterprise-Q v1.9.2 Capital Software Corporation
Release Notes January 2010
All Rights Reserved © 2010 24
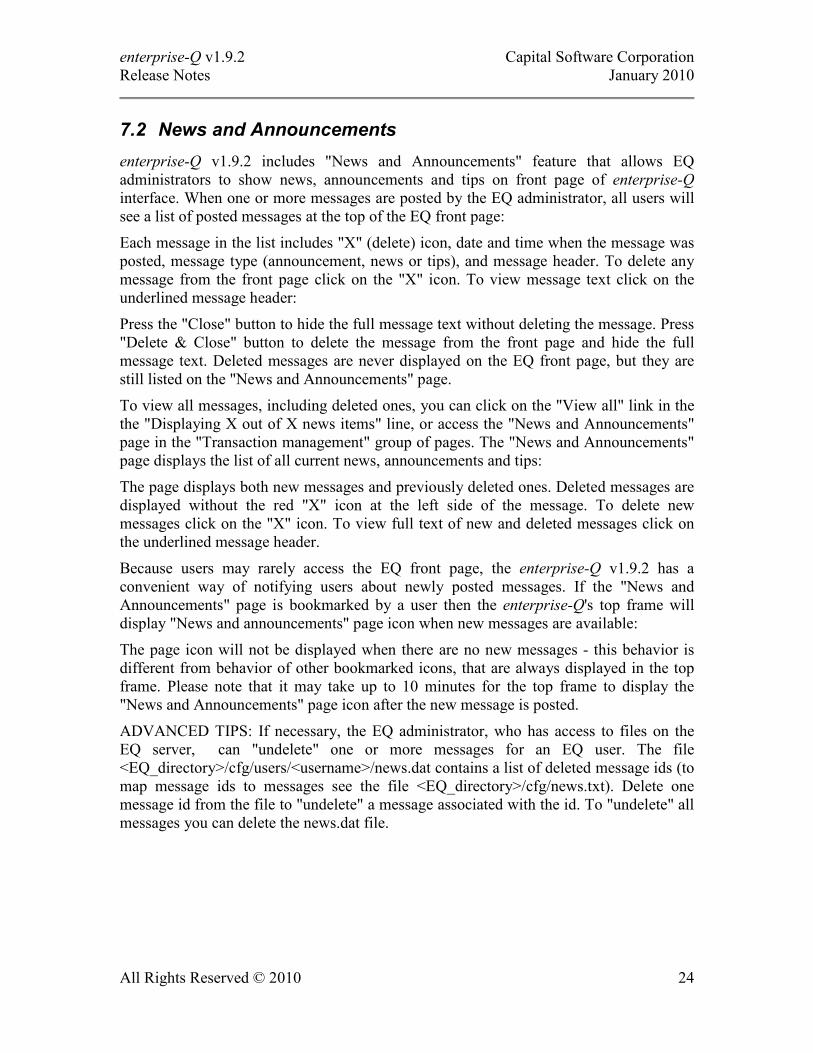
7.2 News and Announcements enterprise-Q v1.9.2 includes "News and Announcements" feature that allows EQ
administrators to show news, announcements and tips on front page of enterprise-Q
interface. When one or more messages are posted by the EQ administrator, all users will
see a list of posted messages at the top of the EQ front page:
Each message in the list includes "X" (delete) icon, date and time when the message was
posted, message type (announcement, news or tips), and message header. To delete any
message from the front page click on the "X" icon. To view message text click on the
underlined message header:
Press the "Close" button to hide the full message text without deleting the message. Press
"Delete & Close" button to delete the message from the front page and hide the full
message text. Deleted messages are never displayed on the EQ front page, but they are
still listed on the "News and Announcements" page.
To view all messages, including deleted ones, you can click on the "View all" link in the
the "Displaying X out of X news items" line, or access the "News and Announcements"
page in the "Transaction management" group of pages. The "News and Announcements"
page displays the list of all current news, announcements and tips:
The page displays both new messages and previously deleted ones. Deleted messages are
displayed without the red "X" icon at the left side of the message. To delete new
messages click on the "X" icon. To view full text of new and deleted messages click on
the underlined message header.
Because users may rarely access the EQ front page, the enterprise-Q v1.9.2 has a
convenient way of notifying users about newly posted messages. If the "News and
Announcements" page is bookmarked by a user then the enterprise-Q's top frame will
display "News and announcements" page icon when new messages are available:
The page icon will not be displayed when there are no new messages - this behavior is
different from behavior of other bookmarked icons, that are always displayed in the top
frame. Please note that it may take up to 10 minutes for the top frame to display the
"News and Announcements" page icon after the new message is posted.
ADVANCED TIPS: If necessary, the EQ administrator, who has access to files on the
EQ server, can "undelete" one or more messages for an EQ user. The file
<EQ_directory>/cfg/users/<username>/news.dat contains a list of deleted message ids (to
map message ids to messages see the file <EQ_directory>/cfg/news.txt). Delete one
message id from the file to "undelete" a message associated with the id. To "undelete" all
messages you can delete the news.dat file.

enterprise-Q v1.9.2 Capital Software Corporation
Release Notes January 2010
All Rights Reserved © 2010 25
7.2.1 News and Announcements Edit Page
News and Announcements edit page can be used to post new messages, edit existing
messages or delete obsolete ones. To access the page go to "EQ Management Tools" ->
"EQ Configuration" -> "EQ Configuration" page group and then click on the "Edit News"
link. The page displays a list of currently active messages, and includes a line for a new
message:
Each line contains the following fields:
Message type - specify whether the message is an announcement, news or a tip.
The message type is displayed before the message header on the EQ font page and
on the "News and Announcements" page.
Header text - type in the text that will be displayed as a message header on the
EQ front page and on the "News and Announcements" page. The header text may
contain HTML code.
Content - optional content of the message. The content may contain HTML code.
Please do not use double quotes within the HTML code. For example, this HTML
code will be properly displayed:
<a href='http://www.capitalsoftware.com/'>Capital Software</a>
This HTML code will not work:
<a href="http://www.capitalsoftware.com/">Capital Software</a>
If you specify a URL as a content then the header text on the EQ front page and
on the "News and Announcements" page will be linked to this URL. The URL
should start from "http://..." or "https://". If the content is not specified then the
message header on the EQ front page and on the "News and Announcements"
page will be shown as a plain text, not as a link.
On/Off - check this checkbox to mark current message for deletion, or for moving
it up or down in the list of messages.
All manual modifications in the list of messages, along with Delete Records, Move Up
and Move Down operations, are performed in memory. While these operations affect
what you see on the screen, they are not visible to other users. Press the Save Data button
to save the changes to the disk, and, thus, make them visible to all EQ users.
In addition to the Save Data button, the page has the following buttons:
Update Screen - Refreshes the screen and adds a new message to the list of
existing messages. "New message" line will be cleared after the refresh, which
allows you to add another new message.
Delete Records - Deletes all records that have checked On/Off checkboxes.
Move Up - Moves all checked records up by one record. All checked records, that
don't have one unchecked record above them, will not be moved.

enterprise-Q v1.9.2 Capital Software Corporation
Release Notes January 2010
All Rights Reserved © 2010 26
Move Down - Moves all checked records down by one record. All checked
records, that don't have one unchecked record below them, will not be moved.
Undo Changes - Undoes all changes made to the "Message Type", "Header
Text", "Content" and "On/Off" fields in the list of messages since the last page
save, update, delete or move operation.
Reload Data From File - Undoes all changes made to the list of messages since
the last page save.

enterprise-Q v1.9.2 Capital Software Corporation
Release Notes January 2010
All Rights Reserved © 2010 27
7.3 Custom Reports enterprise-Q v1.9.2 comes with a "custom report" feature, that can be used to collect data
from a variety of sources, including a relational database, a program or a script, external
or local webserver, and display the data in text or graphical format. Custom reports can
be created on per-user basis, or they can be made accessible to all users. Please see the
following chapters for information on how to manage and run custom reports.
7.3.1 Managing Custom Reports
The process of creation of publicly accessible custom reports is different from the process
of creation of other EQ resources and/or configuration files. All reports, created by a
user, are stored in user's local directory, and they are accessible only by that user. To
make a report available for all users, the report should be published. Published reports are
stored separately from user's local reports, cannot be edited, but can be overwritten with a
new version of user's local report. Public version of the report can be deleted by un-
publishing it. Please note that published reports can be overwritten or unpublished only
by a user who published the report! If a user creates a report with the same name as a
report published by another user, and publishes the report, that report will co-exist with
the original report, and all EQ users will see two reports with the same name.
To create new or manage existing custom reports, go to EQ Management Tools -> EQ
Configuration -> EQ Configuration -> Manage Custom Reports page. The page shows all
existing custom reports for the user, and allows the user to modify or delete existing
custom reports, create a new one, and publish or unpublish the report. For each existing
custom report the page displays report name, published status and modification status:
Report Name - Name of the report that was given to it when it was created. Click
on the report name to edit the report. Please note that only user's version of the
report can be edited. If the report was previously published then the published
version of the report can be changed by modifying user's version of the report,
and then publishing the modified version.
Published? - Displays published status of the report. Previously published reports
have status "Yes". Not published reports have status "No".
Status - Displays modification status of the report. Certain operations, like delete
and undelete operations, are performed in memory and are not carried out
immediately. To make those actions permanent the user needs to press on the
Save Changes button. If any record in the list of records was deleted, but the

enterprise-Q v1.9.2 Capital Software Corporation
Release Notes January 2010
All Rights Reserved © 2010 28
Save Changes button was not pressed yet, the page will show record's status as
"Deleted". All unchanged records have status "Unchanged".
On/Off - this checkbox allows EQ user to mark current report for delete,
undelete, publish or unpublish operations.
The "Manage Custom Reports" page has the following buttons:
Update Screen - Refreshes the list of custom reports.
Show Deleted - displays unchanged custom reports, as well as custom reports,
that were deleted after the last Save Changes operation. All deleted reports have
the status "Deleted" in the list of reports.
Hide Deleted - Hides all reports that were marked for deletion.
Delete - Marks all reports with checked "On/Off" checkbox for deletion. These
reports are not deleted immediately - they are only deleted in memory (on the
screen), and to make the change permanent you will need to press on the Save
Changes button. Deleting records, that are already marked as "Deleted", does not
do anything. By default, all reports, marked as "Deleted", are not displayed in the
list of custom reports unless the Show Deleted button is pressed.
Undelete - Undeletes reports with marked "On/Off" checkbox. To see all
currently deleted records press on the Show Deleted button. Undeleting records,
that were not previously deleted, does no do anything.
Reload Data from File - Loads a list of custom reports from disk. This operation
discards all changes made to the list of custom reports in memory!
Save Changes - saves all changes to the list of custom reports to disk. This
operation carries out all delete and undelete operations.
Publish - Publishes all custom reports with checked "On/Off" checkbox.
Publishing a report, that was already published before, overwrite old public
version of the report with the latest user's local version. Unlike the delete and
undelete operations, that are delayed until the user presses the Save Changes
button, the Publish operation is carried out immediately.
UnPublish - Unpublishes all custom reports with checked "On/Off" checkbox.
Unpublishing a report, that was not published before, does nothing. Like the
Publish operation, the UnPublish operation is carried out immediately.
7.3.2 Creating/Editing Custom Report
"Edit Custom Report" page can be accessed by clicking on the report name or on the
"Create New Report" link on the "Manage Custom Reports" page. The "Edit Custom
Report" page displays basic dashboard configuration, such as the report name,
description, and icon URL, and allows users to configure report's input parameters, the
source of data and display options:

enterprise-Q v1.9.2 Capital Software Corporation
Release Notes January 2010
All Rights Reserved © 2010 29
Report name - Specify the name of the report. The name may contain letters,
digits, spaces and special characters. Be careful when choosing the name - once
the custom report is created, the name cannot be changed! Because custom report
names are displayed in the tree-navigation menu panel on each EQ page, as well
as in the pull-down menu navigation, it is advisable to keep names short. Long
report names may wrap into several lines in the tree-navigation menu, or make the
pull-down navigation menu too wide.
Icon URL - specify URL of the icon associated with the custom report. This icon
will be displayed in the "Custom Report" screen group on the EQ front page. The
icon should reside in the <EQ_directory>/www/icons/ directory, or in a
subdirectory within that directory. If you want to use a custom-made icon for your
report then copy the icon to the <EQ_directory>/www/icons/ directory first. If the
icon URL is not provided then the EQ front page will display a generic icon for
the report.
Short report description - provide short description of the report. The
description is displayed as a tooltip text in the tree-navigation menu. It is also
displayed in the status line of the browser when a mouse is moved over the report
icon on the EQ front page. If the short description is not provided then the report
name will be used as a report description.
When a report is displayed on the "Run Custom Report" page, the page may optionally
prompt a user for additional information. This information, consisting up to 5 text or
numeric parameters, is commonly used to alter the way how report data is collected.
After user enters required information, the "Run Custom Report" page modifies some
pre-configured values (SQL statement, URL, etc) according to supplied parameters, and
passes them to the application, that uses passed values to gather report data. This
application is called "data source" later in this document. The additional parameters are
configured in the "Prompt user for information" section:
Currently, a user can define up to 5 additional parameters. For each parameter you can
specify display label, parameter type and attributes:
Label - the label, that will be displayed for current parameter on the "Run custom
Report" page when a user is prompted for additional information.
Variable name - internal variable name associated with the parameter. The
variable name is not displayed anywhere on the final report, but it can be used to
embed user-supplied information into an SQL statement or other configuration
data, which later is passed to the data source application.
Type - parameter type. You can select from the following types:
A parameter of type "Text" is displayed as a text field, and accepts any text data.
A parameter of type "Number" is displayed as a text field and accepts only
positive or negative numbers.
A parameter of type "Checkbox" displays one or more checkboxes. The list of
checkboxes must be provided in the Choices field.

enterprise-Q v1.9.2 Capital Software Corporation
Release Notes January 2010
All Rights Reserved © 2010 30
A parameter of type "Radio button" displays one or more radio buttons. The list
of radio buttons must be provided in the Choices field.
A parameter of type "Pull-down menu" displays a pull-down menu. The list of
menu options must be provided in the Choices field.
Choices - this field contains a list of checkboxes, radio buttons or menu options
for the parameter. The list has the same format for all parameter types:
Label_1(Value_1) ... Label_N(Value_N)
Where:
Label_N is a display label for a checkbox, a radio button field or a pull-
down menu option,
Value_N is an internal value that will be passed to data source application
when the checkbox N is checked, radio button N is selected, or option N in
the menu is chosen.
Labels and values may contain spaces and special characters, but cannot contain
open and close parenthesis characters.
Flags - This field contains additional parameter attributes. Currently, only
"Required" attribute is supported. If the "Required" parameter attribute is checked
then a user will have to provide a non-zero and non-blank value for current
parameter on the "Run Custom Report" page before proceeding to the report
display page.
Default - parameter's default value. When default value is specified, the "Run
Custom Report" page will display the parameter field with default value already
filled-in.
Next section of the screen specifies the source of report data and how this data will be
collected:
Collect historical data - specifies whether the custom report page will keep
historical data or not. If the Collect historical data field is set to "Yes" then the
report will combine new data, collected from the data source, with previously
collected data, and display combined data. The "Run Custom Report" page
assumes that the date and time for all records is stored in a column named
"TIME" or "TIMESTAMP". If that column does not exists in the collected data
then the page will automatically add the "TIMESTAMP" column with local date
and time to every record retrieved from the data source.
If the Collect historical data field is set to "No" then the final report will not include any
previously collected data.

enterprise-Q v1.9.2 Capital Software Corporation
Release Notes January 2010
All Rights Reserved © 2010 31
Data update interval (seconds) - specifies time interval between subsequent
custom report page updates. During each update, the custom report page retrieves
new set of data from the data source, combines it with previously retrieved data
(only if the Collect historical data field is set to "Yes"), and displays the data as
a table, a graph or a pie chart. If update interval is set to 0, or is blank, then the
data on the "Run Custom Report" page will not be automatically updated, but it
can be updated manually by clicking on the Refresh button.
Run application / statement - specify the type of application that will generate
report data. "Run Custom Report" page can select data from a relational database,
get it from a Perl script or pull it from an external website using ITM SOAP
service.
Remaining fields in the "Retrieve report data" section will vary depending on user
selection in the Run application / statement field. If the "Perl script" option is selected
in that field then the following configuration parameters are displayed:
Perl script - path to the perl script. The script should reside on the EQ server. To
browse files on the EQ server you can click on the "Browse" icon located next to
the Perl script field.
Perl function - Name of the function that returns data. This parameter is optional.
If this parameter is provided then the perl script should include a function with the
Perl function name. All additional report parameters, supplied by a user on the
"Run Custom Report" page, will be passed to the function as function parameters.
The function should return data as a reference to an array or arrays - each record
in that array represents one set of data, and each column in the data set should
match a column in the "Custom report display options" section. The function may
return a scalar value to indicate an error - in this case the scalar value is
considered an error text and it's displayed on the "Run Custom Report" page.
Example:
If the Perl function parameter is set to "GetData" then your perl script may
contain the following function:
sub GetData
{
my ($par) = @_;
return "Error: please pass a parameter\n"
if (!$par);
my @data = ( [ 'Endpoint', 100 ], [ 'ManagedNode', 2 ],
[ 'ManagedSystem', $par ] );
return \@data;
}

enterprise-Q v1.9.2 Capital Software Corporation
Release Notes January 2010
All Rights Reserved © 2010 32
This function returns three records with data, and each record contains two
columns.
Pass data to the script as - specify how to pass user-supplied parameters to the
script. If the "Function / script parameters" option is selected then all supplied
parameters will be passed on command line. If the "In environment variables"
options is selected then the custom report page will store the parameters in
environment variables. In this case each parameter can be accessed as
"$ENV{<variable_name>}", where <variable_name> is the variable name
assigned to the parameter.
If the "ITM SOAP service" option in the Run application / statement field is selected
then the following configuration parameters are displayed:
Monitoring agent name - type in the name and type of the monitoring agent. The
field should contain two-letter agent type at the end, like this:
<name>:<type>
or:
<name>:<type>#<HTEMS tag>
where <type> is a two-letter code that identifies agent type. For example, LZ
stands for Linux, and UX for Unix. If provided agent type is correct then a pull-
down menu, located next to the Object name field, will be updated with a list of
available object names.
Object name - Type in an object name. You can optionally select the name from
the pull-down menu next to the field. If the pull-down menu doesn't show any
choices then either the type in the Monitoring agent name field is incorrect, or
one or more ATM attribute files are missing from the <EQ_directory>/data/atr
directory. When an object name is selected in the pull-down menu, or correct
object name is typed in, pull-down menus next to the Attribute index name and
Attribute data name fields will be updated with valid choices.
Attribute index name - type in desired ITM attribute index name or select it in
the pull-down menu, located next to the Attribute index name field.
Attribute data name - type in desired ITM attribute data name or select it in the
pull-down menu, located next to the Attribute index name field.
If the "SQL statement" option in the Run application / statement field is selected then
the following configuration parameters are displayed:
Database vendor - select the vendor of your database. The enterprise-Q v1.9.2
supports DB2, MySQL, Oracle, and SQLite relational databases.

enterprise-Q v1.9.2 Capital Software Corporation
Release Notes January 2010
All Rights Reserved © 2010 33
SQL statement - Type in an SQL statement that will be executed. You can use
any valid SQL statement that selects data from the database. The SQL statement
may contain one or more user-supplied parameters. To insert any user-supplied
parameter in any place of the statement use the following syntax:
%<variable_name>%
where <variable_name> is the variable name associated with the parameter.
Please note that the parameters are inserted into the statement "as is", that is
without quotes, therefore make sure that the parameter are properly quoted and/or
does not contain invalid characters. Here is an example of an SQL statement that
retrieves endpoint name and one additional column for all endpoints in certain
location.:
SELECT label, %FIELD2%
FROM ENDPOINTS
WHERE location = '%LOCATION%'
Remaining fields in the "Retrieve report data" section will vary depending on database
vendor selection. The following fields will be displayed for DB2 database:
These fields are self-explanatory.
If the "MySQL" option was selected in the Database vendor field then the following
fields will be displayed:
If the "Oracle" option was selected in the Database vendor field then the following
fields will be displayed:
If the "SQLite" option was selected in the Database vendor field then the following
fields will be displayed:
Database file - type in the path to the SQLite database file, or click on the
Browse button to interactively select the file.
The Database account password field, displayed for DB2, MySQL and Oracle vendors,
does not allow a user to type in the password directly into the field. To specify new
password, click on the Check button, enter the password in two fields in a popup
window, and click on the Set button to save it. After you enter all required information
for selected database vendor, you can test connection to the database by clicking on the
Test Connection button.
NOTE: When you edit existing report configuration, the page for security reasons does
not read the database password from the configuration file, and the database account

enterprise-Q v1.9.2 Capital Software Corporation
Release Notes January 2010
All Rights Reserved © 2010 34
password field is not populated with real data. Set the the database password first if you
want to test database connection while changing existing report configuration.
The last section on the "Edit Custom Report" page contains report display options:
The Displays as option specifies how the data will be displayed - as a text or in graphical
format:
Table - displays data as a text in a data table. This is the default.
Graph - displays data as a graph using numerical data from two columns. When
the Graph option is selected, the "Report Setting" table displays two additional
fields:
Column with X Axis data - type in the number of the column that contains
numeric data. This data will be used to determine each dot's X axis position.
Column with Y Axis data - type in the number of the column that contains
numeric data which will be used to determine Y axis position for each dot.
Column with Y Axis data field cannot contain the same column number as the
Column with X Axis data field.
Pie Chart - displays data as a pie chart using data from two columns. When the
Pie Chart option is selected, two additional fields are displayed:
Column containing labels - type in the number of the column that contains labels
that will be displayed for each section of the chart.
Column containing values - type in the number of the column that contains
numeric data for the pie chart. The chart will be split into a number of sections
that is equal to the number of rows with non-zero data in input data. The size of
each section will be proportional to the data value, and the label for each section
will be taken from the Column containing labels column.
Pie Chart (Counts) - displays data as a pie chart using data from one column.
When the Pie Chart (Counts) option is selected, one additional field is displayed:
Column containing data - type in the number of the column containing any type
of data. For each data value in this column the chart will determine the number of
rows that have exactly this value. Resulting pie chart will be split into a number of
sections equal to the number of unique data values in the column, and the size of
each section will be proportional to the number of rows that have specific data
value.
Remaining fields in the "Custom report display options" section contain definitions of
data columns:
Column names are supplied by perl script - Specify whether column names are
supplied by perl script or not. This option is displayed only if the "Perl script"
option is selected in the Run application / statement field in the "Retrieve report

enterprise-Q v1.9.2 Capital Software Corporation
Release Notes January 2010
All Rights Reserved © 2010 35
data" section. If you set this option to "Yes" then make sure that your perl script
returns a list of column names as the very first record of an array of arrays.
# - Column number. These values are used to specify column numbers for
graphical display methods. The report can handle input data containing up to 7
columns.
Name - name of the column which will be displayed in a text (table) mode. If the
column name is not provided then the report will determine the name from input
data (database column name for SQL statements, or an attribute name for ITM
SOAP calls), or, if it cannot determine the name this way, will use the name
"Column <column_number>". Leave the column name blank if the Column
names are supplied by perl script field is set to "Yes".
Options - select how data will be displayed in the table, and what operations a
user will be able to perform in the table mode:
Sort - users will be able to sort data for the column.
Filter - users will be able to filter column data.
Group - users will be able to group column data.
Hide - users will be able to hide current column.
Center - Data will be displayed centered in the column.
Type - select type of data. "Default" type assumes that the data does not require
additional data processing. "Target" type assumes that this column contains target
type and target name in the form "<target_type>:<target_name>", and it will be
filtered according to user's authorization. The next three types, "Endpoint",
"Managed Node" and "Managed System", specify that the column contains target
name of type Endpoint, Managed Node or Managed System respectively, and that
the data will be filtered according to user's authorization.
The page contains the following buttons:
Update Screen - Refreshes the screen.
Undo Changes - Undoes all changes made to all fields on the page since the last
page update or save operation.
Reload Data From File - Undoes all changes made to all fields on the page since
the last page save operation.
Save Changes - saves report configuration to the disk.
7.3.3 Using Custom Reports To run any custom report go to the "Custom Reports" screen group and click on the
report name. Alternative way to run a report is to go to the "Run Custom Report" page,
located in the "Custom Reports" screen group, select desired report name from the list of
custom reports, and click on the Go button:

enterprise-Q v1.9.2 Capital Software Corporation
Release Notes January 2010
All Rights Reserved © 2010 36
To distinguish between public and user's local reports, all published reports in the tree-
navigation menu and in the pull-down have suffix "(P)", and all published reports on the
"Run Custom Report" page have suffix "(Published)".
If the report was configured to prompt user for additional information, the page will
display a list of parameters before displaying the report:
All parameters, that have default values specified on the report configuration page, have
default values already filled-in. Enter required parameters and click on the Run Report
button to view the report. If this is the first time you access the report then it will be
displayed in text or graphical mode as configured on the report configuration page. If you
already viewed this report in the past then the page will display the report using
text/graphics mode and other page settings that you set during your last visit to this page.
The report page uses EQ generic table interface to display report data. Please see generic
table interface documentation for more information.

enterprise-Q v1.9.2 Capital Software Corporation
Release Notes January 2010
All Rights Reserved © 2010 37
7.4 Dashboards Another new feature of the enterprise-Q v1.9.2, closely tied to custom reports, is called
"dashboard page". Dashboard is a custom page that displays a collection of custom
reports. Dashboards can be created on per-user basis, or they can be made accessible to
all users. Please see the following chapters for information on how to manage and use
dashboards.
7.4.1 Managing Dashboards
The process of creation of publicly accessible dashboards is similar to custom reports. All
dashboards, created by a user, are stored in user's local directory, and they are accessible
by that user only. To make a dashboard available to other users, the dashboard should be
published. Published dashboards are stored separately from user's local dashboards, they
cannot be edited, but can be overwritten with a new version of user's local dashboard.
Public version of the dashboard can be deleted by un-publishing it. It's important to note
that any published dashboard can be overwritten or unpublished only by a user who
published it in the first place! If a user creates and publishes a dashboard with the same
name as existing dashboard, published by another user, all EQ users will see two
dashboards with the same name.
To create new or manage existing dashboards, go to EQ Management Tools -> EQ
Configuration -> EQ Configuration -> Manage Dashboards page. The page shows all
existing dashboards for the user, allows the user to modify or delete existing dashboards,
create a new one, and publish or unpublish dashboards. For each existing dashboard the
page displays dashboard name, published status and modification status:
Dashboard Name - Name of the dashboard that was given to it when it was
created. Click on the name to edit dashboard configuration. Please note that only
user's version of the dashboard can be edited. If the dashboard was previously
published then the published version of the dashboard can be changed by
modifying user's version of the dashboard, and then publishing the modified user's
version.
Published? - Displays published status of the dashboard. Previously published
dashboards have status "Yes". Not published dashboards have status "No".
Status - Displays modification status of the dashboard. Certain operations, like
delete and undelete operations, are performed in memory and are not carried out
immediately. To make those actions permanent a user needs to press on the Save
Changes button. If a dashboard was deleted, but the Save Changes button was

enterprise-Q v1.9.2 Capital Software Corporation
Release Notes January 2010
All Rights Reserved © 2010 38
not pressed yet, the page will show dashboard's status as "Deleted". All
unchanged dashboards have status "Unchanged".
On/Off - this checkbox allows EQ user to mark current dashboard for delete,
undelete, publish or unpublish operations.
The "Manage Dashboards" page has the following buttons:
Update Screen - Refreshes the list of dashboards.
Show Deleted - displays unchanged dashboards, as well as dashboards, that were
deleted after the last Save Changes operation. All deleted dashboards are
displayed with status "Deleted".
Hide Deleted - Hides all dashboards that were marked for deletion.
Delete - Marks all dashboards with checked "On/Off" checkbox for deletion.
These dashboards are not deleted immediately - they are only deleted in memory,
and to make the changes permanent a user will have to press on the Save
Changes button. Deleting records, that are already marked as "Deleted", does not
do anything. By default, all dashboards, marked as "Deleted", are not displayed in
the list of dashboards unless the Show Deleted button is pressed.
Undelete - Undeletes dashboards with marked "On/Off" checkbox. To see all
currently deleted dashboards press on the Show Deleted button. Undeleting
dashboards, that were not previously deleted, does no do anything.
Reload Data from File - Loads a list of dashboards from disk. This operation
discards all changes made to the list of dashboards in memory!
Save Changes - saves all changes to the list of dashboards to disk. These
operations carries out all delete and undelete operations.
Publish - Publishes all dashboards with checked "On/Off" checkbox. Publishing
dashboard, that was already published before, overwrite old public version of the
dashboard with the latest user's local version. Unlike the delete and undelete
operations, that are delayed until the user presses the Save Changes button, the
Publish operation is carried out immediately.
UnPublish - Unpublishes all dashboards with checked "On/Off" checkbox.
Unpublishing a dashboard, that was not published before, does nothing. Like the
Publish operation, the UnPublish operation is carried out immediately.
7.4.2 Creating/Editing Dashboards
"Edit Dashboard" page can be accessed by clicking on the dashboard name or on the
"Create new dashboard" link on the "Manage Dashboards" page. The "Edit Dashboard"
page displays basic dashboard configuration, such as the name and layout size, and
allows users to configure each custom report included on the dashboard page:

enterprise-Q v1.9.2 Capital Software Corporation
Release Notes January 2010
All Rights Reserved © 2010 39
Dashboard name - Specify the name of the dashboard. The name may contain
letters, digits, spaces and special characters. Be careful when choosing the name -
once the dashboard is created, the dashboard name cannot be changed! Because
dashboard names are displayed in the tree-navigation menu panel on each EQ
page, as well as in the pull-down menu navigation, it is advisable to keep
dashboard names short. Long dashboard names may wrap into several lines in the
tree-navigation menu, or make the pull-down navigation menu too wide.
Dashboard size - the size of the dashboard layout. Each dashboard page is
divided into a grid, and each cell in this grid may contain one custom report.
Minimum number of rows and columns in the grid is 1, and the maximum number
of rows and columns is 16. This makes it possible for the user to create
dashboards containing only one custom report (1 x 1 dashboard) or as many as
256 custom reports (16 x 16 dashboard). The number of columns on the
dashboard page may be different from the number of rows, which allows creation
of 1 x 2, 2 x 3 and other rectangular-shape dashboards. After you specify the
number of rows and columns in the Dashboard size field, click on the Update
button to update "Dashboard Layout" section according to entered values. The
Update operation preserves all data that is currently entered in the "Dashboard
Layout" section.
The "Dashboard Layout" section contains a table with the number of rows and columns
as configured in the Dashboard size field, and with each table cell containing
configuration data for one custom report. Each custom report cell has two fields:
Select report - select custom report from a list of available custom reports. If no
report is not selected then the cell will be blank when the dashboard page will be
displayed to a user.
Update every ... seconds - Specify time interval, in seconds, between subsequent
automatic updates of the selected custom report. It is not recommended to set this
value lower than to 5 or 10 seconds (depending on the report). Each custom report
update may take one or two seconds, or even longer for reports with large

enterprise-Q v1.9.2 Capital Software Corporation
Release Notes January 2010
All Rights Reserved © 2010 40
amounts of data, or reports based on SOAP data. Setting time interval to a few
second value may result in continual page updates, which, in turn, may result in
higher load on the EQ server and high CPU utilization on user's computer. If the
Update every ... seconds parameter is set to 0, or not specified, then the custom
report will be displayed only once and will not be periodically updated.
Click on the Save Data button to save dashboard configuration.
7.4.3 Using Dashboards
To display any dashboard page go to the "Dashboards" screen group and click on the
dashboard name. Alternative way to display any dashboard page is to go to the "Show
Dashboard" page, located in the "Dashboards" screen group, select desired dashboard
name from the list of dashboards, and click on the Go button:
To distinguish between public and user's local dashboards, all published dashboards in
the tree-navigation menu and in the pull-down have suffix "(P)", and all published
dashboards on the "Show Dashboard" page have suffix "(Published)".
When the "Show Dashboard" page loads, it displays a table with the dashboard name and
names of custom reports in each table cell, and starts loading custom reports graphs and
table data. It may take up to 10 seconds before all custom reports are shown on the page:
Custom reports always use the text or graphics mode, that was specified during their
configuration. Currently, it is not possible to change report's mode from text to graphical,
or vice-versa, directly on the "Show Dashboard" page. If a custom report is displayed in
text mode, you may use many generic table manipulation features such as table sorting,
filtering, and so on. All custom reports, that were configured for periodic update, will be
automatically updated by the page, even if the page is located in a hidden tab in a
browser, or minimized. You can manually update any custom report on the page by
clicking on the icon, located in the top-right corner of each custom report's cell.

enterprise-Q v1.9.2 Capital Software Corporation
Release Notes January 2010
All Rights Reserved © 2010 41
7.5 EP Health Report Capital Software developed additional capabilities into enterprise-Q to aid in determining
and fixing problematic Endpoints.
EP Health Report – New webpage for showing the health of all Endpoint using
wepstatus –a locally, as well as on any/all interconnected TMR Servers.
EP Health Check – A new enterprise-Q transaction used for
troubleshooting/repairing ‘broken’ Endpoints.
This example shows the EP Health Report grouped based on the Gateway, and filtered
based on the Errors column containing a four (4). Like all other enterprise-Q tables, the
user can:
Save report as a CSV file for import into Excel.

enterprise-Q v1.9.2 Capital Software Corporation
Release Notes January 2010
All Rights Reserved © 2010 42
Save the list of checked nodes to a file for use as a target for one or more
transactions. Specifically, for queuing the EPHealthCheck transaction.

enterprise-Q v1.9.2 Capital Software Corporation
Release Notes January 2010
All Rights Reserved © 2010 43
7.6 EP Health Check Transaction A new transaction named EPHealthCheck was developed to check and correct
“unhealthy” Endpoints. This new transaction accepts the following keywords:
EXCLUDE_INTERP – Comma-separated list of INTERPs to exclude. Default: ''
EXCLUDE_IP - IP Addresses to exclude. Format: 1.1.1.1-1.1.1.255[, next range, ...].
Default: ''
EXCLUDE_LABEL - Label regex to exclude. Format: Perl regular expression. Default: ''
EXCLUDE_DAYS - Days for checking last method run. Default: '0'
DNS_RESOLUTION - Flag (0 or 1) for resolving EP name. Default: '1'
PING_EP - Flag (0 or 1) for pinging Endpoint. Default: '1'
WEB_ENABLED - Flag (0 or 1) for obtaining Endpoint web data. Default: '1'
EQDEBUG - Generate message to log file name <eq>/logs/EPHealthCheck/<ep>.log.
Default: '1'
TESTING - Suppress I/O to EQServer. Default: '0'
The EPHealthCheck.pl script reads keyword values from the file named:
<eq>/cfg/EPHealthCheck.cfg
Command line arguments override the configuration file settings. Note that this perl
script can also be run from the command line. For example:
EPHealthCheck.pl "T_TARGET=ep1;EXCLUDE_DAYS=1;TESTING=1"
The following is a partial screen shot for queuing EPHealthCheck using the enterprise-
Q web interface:
This screenshot shows the options for setting the associated keywords when queuing
EPHealthCheck. The transaction logic is as follows:
Check last_method_time returned from wep <ep> and continue if older than
EXCLUDE_DAYS;
Resolve IP address if DNS_RESOLUTION is true;
Ping Endpoint if PING_IP is true;

enterprise-Q v1.9.2 Capital Software Corporation
Release Notes January 2010
All Rights Reserved © 2010 44
Get Endpoint’s web data if WEB_ENABLED is true;
Run wep <ep> status then check for errors using wepstatus <ep>;
If there are errors, try to repair using wep <ep> repair –s [tap&accounts];
Run wepstatus <ep> again to see if repair worked.
After following these instructions, a new icon on the front page will appear under the
Node Management section to generate the EP Health Report, and a new icon will appear
on the Perform Action page under the Endpoint Management section to run the EP
Health Check transaction.
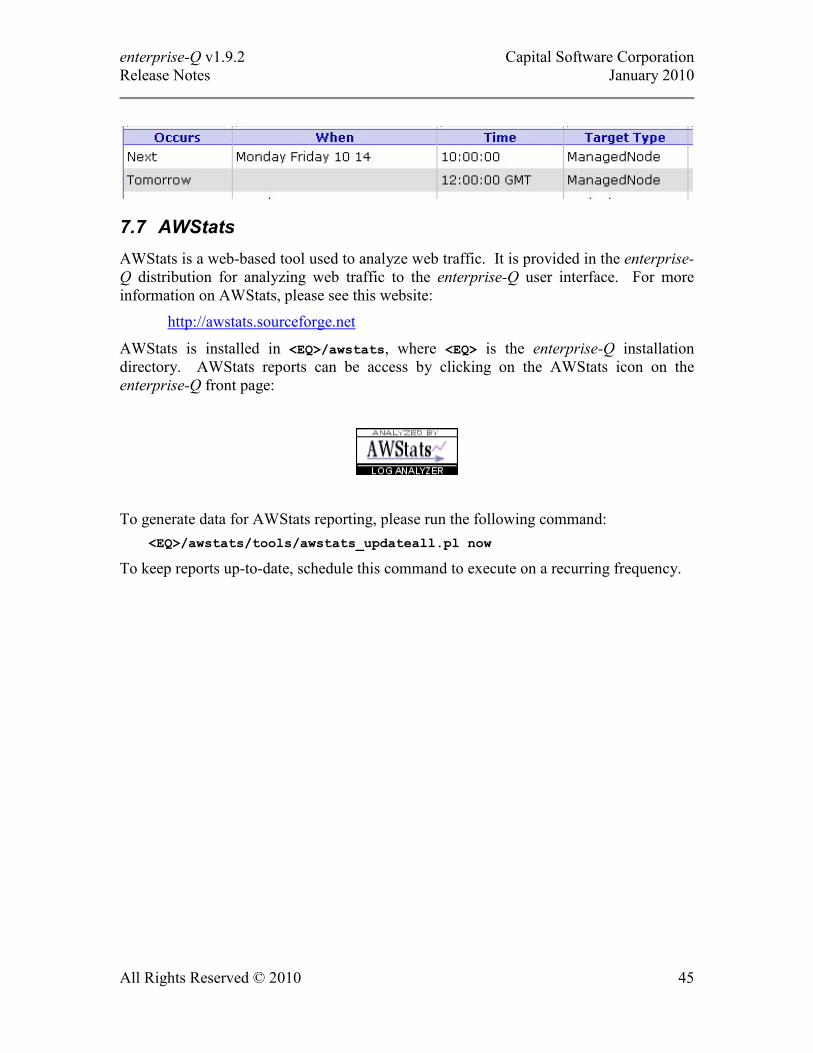
enterprise-Q v1.9.2 Capital Software Corporation
Release Notes January 2010
All Rights Reserved © 2010 45
7.7 AWStats AWStats is a web-based tool used to analyze web traffic. It is provided in the enterprise-
Q distribution for analyzing web traffic to the enterprise-Q user interface. For more
information on AWStats, please see this website:
http://awstats.sourceforge.net
AWStats is installed in <EQ>/awstats, where <EQ> is the enterprise-Q installation
directory. AWStats reports can be access by clicking on the AWStats icon on the
enterprise-Q front page:
To generate data for AWStats reporting, please run the following command:
<EQ>/awstats/tools/awstats_updateall.pl now
To keep reports up-to-date, schedule this command to execute on a recurring frequency.

enterprise-Q v1.9.2 Capital Software Corporation
Release Notes January 2010
All Rights Reserved © 2010 46
8 Enhancements
8.1 screens.cfg screens.cfg, located in the <EQ>/cfg subdirectory, stores information for the enterprise-Q
web interface to generate web pages. In this release of enterprise-Q, the third field is
broken into two fields - parent and group name. The parent can be set to ROOT (the
front page), or a Page ID (first column in file).
Here is an example taken from distributed screens.cfg file. In this example, each field
appears on a separate line for readability. We’ve also included a comment to explain
each line:
CONFIGURATION # Page ID
"EQ Configuration" # Text that appears under the icon on the page
ROOT # Parent Page ID or “ROOT” (front page)
"EQ Management Tools" # Group name under which icon appears
/icons/mtedteq.gif # Icon filename
/cgi-bin/menu.pl?SCREEN=CONFIGURATION # Must set SCREEN=<Page ID>
NO # Default for placing icon in top frame
"Edit EQ Configuration" # Browser status bar text
The entry shown above creates an icon on the front page (parent Page ID set to ROOT).
Other entries in screens.cfg can now reference CONFIGURATION as the parent page as
follows:
EDIT_USERS # Page ID
"Manage Users" # Text that appears under the icon
CONFIGURATION # Parent Page ID
"EQ Users" # Group name under which icon appears
/icons/mtedtusr.gif # Icon filename
/cgi-bin/config/edit_index.pl?DESC_FILE=edit_users # cgi-bin script to call
NO # Default for placing icon in top frame
"Edit list of existing EQ users" # Browser status bar text
Notice the parent Page ID is set to CONFIGURATION. After upgrading to enterprise-Q
v1.9.2, the customer must either manually modify screens.cfg or contact
[email protected] to arrange for conversion.

enterprise-Q v1.9.2 Capital Software Corporation
Release Notes January 2010
All Rights Reserved © 2010 47
8.2 EQScheduler This section describes the enhancements to the EQ Scheduler and related enterprise-Q
web pages to support these enhancements:
1. Scheduling enhancements allowing users to
a. Maintain an audit trail of all scheduled activities, and
b. Schedule targets separately.
2. Allow users to edit scheduled transactions, both the actual schedule and the
transaction arguments.
3. Provide an EQ Scheduler audit report
8.2.1 Transaction Scheduling Two additional prompts are now present in the Dispatch Options section of the Run
Action page.
EQ Scheduler Auditing – Controls whether or not records are generated for
storing into the EQ_SCHED_AUDIT table. Defaults to Yes.
Schedule Targets Separately – When set to Yes, each selected target will be
scheduled separately. When set to No, all targets will be scheduled under one
EQScheduler entry. Defaults to Yes.

enterprise-Q v1.9.2 Capital Software Corporation
Release Notes January 2010
All Rights Reserved © 2010 48

enterprise-Q v1.9.2 Capital Software Corporation
Release Notes January 2010
All Rights Reserved © 2010 49
8.2.2 Editing Scheduled Transaction Schedule The following screen shot shows the new pop-up menu which includes Transaction
Schedule as an option:
Clicking on the Transaction Schedule will pop-up a window similar to the following
screenshot:
The schedule can be modified by making changes, then clicking on the Save button.

enterprise-Q v1.9.2 Capital Software Corporation
Release Notes January 2010
All Rights Reserved © 2010 50
8.2.3 Editing Scheduled Transaction Arguments A save button was added to the Transaction Settings page, allowing the user to modify
transaction argument:

enterprise-Q v1.9.2 Capital Software Corporation
Release Notes January 2010
All Rights Reserved © 2010 51
8.2.4 Audit Report An Audit button was added to EQ Scheduler page. Clicking on the Audit button will
generate a pop-up window displaying the contents of the EQ_SCHED_AUDIT table.
Each entry in this report includes one of the following actions:
ADDED – Schedule entry added.
RESTORED – Schedule entry restored from disk when EQScheduler restarts.
QUEUED –Transaction queued for execution as scheduled.
EXECED – Transaction queued upon user request.
REMOVED – Scheduled entry removed due to no more occurrences scheduled.
DELETED – Scheduled entry removed entry upon user request.
MODIFIED – One or more arguments of the scheduled entry was modified.

enterprise-Q v1.9.2 Capital Software Corporation
Release Notes January 2010
All Rights Reserved © 2010 52
8.2.5 Technical Reference This section documents the technical details added to support the enhancements
described above.
T_MSG=Modify
In order to support the ability to modify a scheduled entry, we added a new message type
named MODIFY. The following keywords can be modified using this new message
type:
T_SCHED_TIME = [YYYY:MM:DD:]hh:mm:ss
T_SCHED_OCCURS = [Next:Every:Today:Tomorrow:Mins:On]
T_SCHED_MINS = Number of minutes when T_SCHED_OCCURS=Mins
T_SCHED_DAYS = Sunday Monday 1 15
T_SCHED_SEPARATE = 0 or 1, separate each target as a separately scheduled entry
T_SCHED_AUDIT = 0 or 1, flag to turn off (0) or on (1) EQScheduler audit trail
Modifying a scheduled entry requires the corresponding SID for the entry. Here is an
example:
T_MSG=Modify;SID=<sid>;T_SCHED_TIME=01:00:00
T_MSG=SockInfo
T_MSG=SockInfo - Displays current and maximum number of sockets.
T_MSG=DumpSID
T_MSG=DumpSID – Dumps information about all SID entries to the logfile.

enterprise-Q v1.9.2 Capital Software Corporation
Release Notes January 2010
All Rights Reserved © 2010 53
New Keywords and Value Possibilities
The following new keyword/value pairs are now possible for use in the T_MSG=Add and
T_MSG=Modify message types:
T_SCHED_TIMEZONE – This new keyword can be set to GMT instead of using the time
zone used by the enterprise-Q server host.
T_SCHED_AUDIT – Indicates whether or now the EQScheduler generates status entries
destined for the EQ_SCHED_AUDIT table. May be set to one (true) or zero (false). The
default setting is zero (0).
T_SCHED_SEPARATE – Indicates whether or now the EQScheduler generates a
separately scheduled entry for each target specified in the T_MSG=Add message. May
be set to one (true) or zero (false). The default setting is zero (0).
T_SCHED_OCCURS – Added support for specifying a date-certain using T_SCHED_OCCURS=On and including year, month, and date as in
T_SCHED_TIME=YYYY:MM:DD:hh:mm:ss

enterprise-Q v1.9.2 Capital Software Corporation
Release Notes January 2010
All Rights Reserved © 2010 54
8.3 Rules Processing All enterprise-Q rules now allow for a new data type: Script Result. Here is a screen
shot showing the prompt for this new data type:
When used, the Rules processing engine will run the script named
<EQ>/rulescripts/<rule>.pl, where <EQ> is the enterprise-Q installation directory,
and <rule> is the name of the rule. In the example screen shot above, notice the File
name at the top of the page is agent_exclude.rule. So, in this case, the name of the
<rule> script must be agent_exclude.pl.
The results (standard output) of running the script is then compared to the regular
expression specified in the Value field using the indicated operation (Contains in this
example). So, in the above example, if the standard output of running the script contains
the string ‘Includes’, then the statement is true, and the corresponding action is taken.
The enterprise-Q rules-based engine will pass arguments to the script on the command
line. The argument passed will be a semi-colon separated string containing all the other
data types and values, for example:
LABEL=<label>;IP=<ip>;INTERP=<interp>;…
The Script Result data type grants customers greater flexibility in creating dynamic rules,
such as automated load balancing.

enterprise-Q v1.9.2 Capital Software Corporation
Release Notes January 2010
All Rights Reserved © 2010 55
8.4 Run Action page The "Run Action" page now has the ability to re-select all targets, that were selected
during previous transaction submissions to the queue. To enable this feature, set the
option "Users can retrieve previously selected targets" on the "EQ GUI configuration"
page to "Yes":
When the feature is enabled, the "Run Action" page will remember selected targets for all
transactions submitted by the user. When the "Run Action" page is loaded, it will display
a list of all previously submitted transactions in the "Load previously submitted targets"
section of the page:
Select desired transaction from the pull-down menu and click on the Load Targets
button to load all targets for that transaction. You can preview the list of targets for any
transaction by selecting the transaction from the pull-down menu, and clicking on the
View list button.
NOTE: The "Run Action" page will store the list of targets for every transaction
submitted to the EQServer queue. For users, that submit many transactions to the queue,
the number of target lists may grow quite large. For these users we recommend to use
"Data cleanup configuration" page to set up a cleanup task which will remove all lists of
targets older than certain time interval. The lists of targets have extension ".state" and
they are stored in the <EQ_directory>/cfg/users/<user_name>/ directory.
The "Run Action" page in enterprise-Q v.10 includes new method of target selection,
called "Dynamic Double Scrollbox". This method can be enabled on the "User
preferences" page:
When the "Dynamic Double Scrollbox" method is enabled, the "Run Action" page will
display the following fields for each available target type:
The new method offers three different ways to select desired target(s):
Select from a list of all targets of specific type: Click on the Get all targets
button, and the button will be replaced with a scrollbox containing all targets of
current target type. Double click on any target in the scrollbox to move the target
into the list of selected targets.

enterprise-Q v1.9.2 Capital Software Corporation
Release Notes January 2010
All Rights Reserved © 2010 56
Add typed name to the list: type the name of the target into the Target: field and
click on the Add button to add this target to the list of currently selected targets.
Search for specific target: Type partial target name into the Search: field and
click on the Search button to search for all targets that match typed text. The
search is not case-sensitive, and will match all targets that have the text anywhere
in the name. A list of matching targets will be displayed as a scrollbox in place of
the Get all targets button. Double click on any target in the scrollbox to move the
target into the list of selected targets.

enterprise-Q v1.9.2 Capital Software Corporation
Release Notes January 2010
All Rights Reserved © 2010 57
8.5 Transaction Enhancements The following modifications are included in this release of enterprise-Q.
EPDelete - The Endpoint Delete transaction now includes support for the '-r' flag in
call to wdelep when TMR region of Endpoint is not that of the enterprise-Q host
server.
EPInstall - Special characters in a password caused problems in the regular
expression used to mask the password, so we had to use a different technique. Also,
we added support for installing an Endpoint on *nix using either SSH or RSH. Here
is a screen shot showing the new prompt for Platform:
EPRename - Increased wruntask timeout from 20 seconds to 300 seconds.
Tmw2kProfile – Added support for JRE Version using the '-v $tmjrever' switch to
'wdmdistrib' command. Here is a screen shot showing the new prompt for JRE
Version:
SoftwarePackage – Added support for 'wswdcfg -s continue_on_invalid_targets=y'
setting.
Subscribe - Removed T_MSGSTATUS=ONHOLD from T_MSG=STATUS for bad endpoints
causing the entry to remain in a FAILED state instead of an ONHOLD state.

enterprise-Q v1.9.2 Capital Software Corporation
Release Notes January 2010
All Rights Reserved © 2010 58
8.6 EQServer Enhancements This section documents enhancements to the EQServer process.
8.6.1 Deleting Multiple Message Queue Entries
Prior to this release, DELMREC required T_MID=<mid> to delete an individual entry. This
message type has been enhanced to allow multiple keyword/value pairs to be specified
such that all entries that match will be deleted. For example, the following message will
delete all entries that match the given keyword/value pairs:
T_MSG=DelMRec;T_TRAMS=SoftwarePackage;T_PROFILE=MSOffice
8.6.2 Adding Scheduled Entries
EQServer supports a new keyword named T_SCHEDULE that, when included in a
T_MSG=Add message, will add an entry to the EQScheduler using T_SCHED_OCCURS=On.
The value format is as follows:
T_MSG=Add;T_SCHEDULE=YYYY:MM:DD:hh:mm:ss
8.6.3 Transaction Force Success Reason
The T_MSG=ForceSuccess message now supports appending text to the reason field
(T_REASON). For example,
T_MSG=ForceSuccess;T_REASON=<reason for action>
To support this capability from the enterprise-Q UI, the following page pops-up when a
user clicks the Force Success button on the Queue Status web page.
The text entered by the user will be used to populate the T_REASON field in the
T_MSG=ForceSuccess message.

enterprise-Q v1.9.2 Capital Software Corporation
Release Notes January 2010
All Rights Reserved © 2010 59
8.7 New/Enhanced Utilities The following utilities have been added/enhanced in this release of enterprise-Q
CreateEQTaskTools.pl - This utility, located in the bin subdirectory, is used to
create the Tivoli Task dependency set required by some enterprise-Q provided Tivoli
Tasks. It has been enhanced to allow execution on a system other than the enterprise-
Q host. As such, an new switch has been added to specify the INI file used:
-i <inifile> - Specify the INI file (Default: ../cfg/EQTaskTools.ini).
Also, the output of the utility is now suitable for storing in sh/bat file, including
#/REM comments.
EQMsg2.pl - This utility, located in the bin subdirectory, is a Perl 5 alternative to the
binary utility named EQMsg[.exe]. This alternative version maintains cache file(s) of
the results in order to speed execution of repetitive use. Cache files are stored and
read using directories in this order: home, temp, cwd
TargetData.pl - This utility, located in the bin subdirectory, is used to display
records from enterprise-Q logs for given target. Usage:
TargetData.pl -t <target> [-s <start_date>] [-e <end_date>] [-v]
[-h]
-t = target names (value of T_TARGETS=target
-v = verbose prints additional info
-s = start_date in format YYYYMMMDD, like 2009JAN01
-e = end_date in format YYYYMMMDD, like 2009JAN10
-h = prints this screen
clean_temp.sh - This utility, located in the bin/cron subdirectory, now invokes
'~/.profile' prior to calling compiled version of script.
update_status.sh - This utility, located in the bin/cron subdirectory, now invokes
'~/.profile' prior to calling compiled version of script.

enterprise-Q v1.9.2 Capital Software Corporation
Release Notes January 2010
All Rights Reserved © 2010 60
8.8 Miscellaneous User Preference Default - Support for a default user preference file when one does
not exist. When a user logs in, the enterprise-Q web interface checks for a user
preference file. If the file named <username>.pref does not exist in the subdirectory
named <EQ>/cfg/auth, the file named default.pref is used. Otherwise, hard-
coded defaults are used.
query_report.pl - Added Create CSV Only button so that a user can create a CSV
file without having to generate the query report first. This is useful when the duration
of running the Tivoli Query takes so long that the browser times out.
Apache 2.2.8 for AIX - Upgraded Apache for AIX to support LDAP authentication
products, such as Site Minder.
ICMonLib.pl – This Perl script was updated to properly check and parse for the
string 'The following messages occurred'.

enterprise-Q v1.9.2 Capital Software Corporation
Release Notes January 2010
All Rights Reserved © 2010 61
9 enterprise-Q v1.9.2 Bug Fixes from v1.9
EQServer
o T_APPARGS: Replace double-quotes with single-quotes. Without this fix,
dangling (one without a ending) double-quote may cause EQServer process to
crash.
o Fix bug where StatusFileUpdate and ParmFileUpdate are stripping
"T_TRANS:T_PROFILE" to LAST colon (:), causing reporting problems for
T_PROFILE values that contain colons.
o Fix variable name in DumpSpecial routine.
EQMonLib.pl - Fixed bug with T_RESPONSE handling in SockIOCheck routine by
getting value from ProcessMsg and passing to SendResponse.
TMProbes.pl – Fixed regular expression in GetData routine.