redesigning your website using online presence builder · portal redesigning your website using...
TRANSCRIPT
Portal Redesigning your website using Online Presence Builder
Page 1 of 16
Redesigning your website using Online Presence Builder
Customer User Guide
Portal Redesigning your website using Online Presence Builder
Page 2 of 16
Contents 1 GETTING STARTED .................................................................................................................................... 3
2 PLANNING .................................................................................................................................................... 4
3 BACK UP YOUR WEBSITE ....................................................................................................................... 5
4 REFRESHING YOUR WEBSITE ............................................................................................................... 6
4.1 SETUP YOUR NEW ONLINE PRESENCE SITE ........................................................................................... 6
4.2 CUSTOMIZING YOUR ONLINE PRESENCE SITE ....................................................................................... 9
5 PREVIEWING YOUR WEBSITE .............................................................................................................. 15
6 PUBLISHING YOUR WEBSITE ............................................................................................................... 16
Portal Redesigning your website using Online Presence Builder
Page 3 of 16
1 Getting Started
There’s never been a better time to refresh your brand with a modern, mobile accessible website! With the new Online Presence Builder we’ve simplified the website building process as much as possible, giving small businesses like yours a unified brand experience across various devices and platforms.
The new Online Presence Builder will give you access to a variety of new tools and features to allow you to refresh your online presence in minutes:
• New, modern designs. Choose from engaging, SEO-friendly website themes that automatically look great on desktop, mobile and tablet devices.
• New website elements. We’ve added a ton of new features to add personality to your website. Easily add photo galleries, videos, buttons, Facebook and Twitter widgets, contact forms, appointment scheduling, Google maps, tables and lists and more.
• Add pages and layouts. Easily add multiple pages with different layouts such as galleries, menus, FAQ and more.
• New modern images. Access a full gallery of modern, professional images, ready to use on your website.
This guide will show you how to refresh your existing website, with the new Online Presence Builder.
Portal Redesigning your website using Online Presence Builder
Page 4 of 16
2 Planning Create a “website refresh” timeline to ensure that you follow all steps for a successful refresh of your website with the new tool. We also recommend informing your customers that you are enhancing your website to a newer, mobile-friendly version. This helps give the impression that your business is growing and staying up-to-date.
Here are the three basic steps to refreshing your website with the Online Presence Builder that we will cover throughout this guide:
Step 1:
• Back-up/save your current site’s content and images to your computer.
Step 2:
• Access the new Online Presence Builder and setup your new website • Start copying/pasting content in the new tool.
Step 3:
• Once content and images are entered, preview the new website (do not publish yet) to ensure it’s to your expectations.
• If the preview is to your satisfaction, hit Publish.
Portal Redesigning your website using Online Presence Builder
Page 5 of 16
3 Back up your Website Before you begin refreshing your website, we highly recommend that you make a backup of your current website content and images so that you can use them when building your new website.
To back up your images, simply open up your website in a browser and drag & drop the images onto your computer. Alternately, you can right-click each image on your site and choose “Save As”.
As an added precaution, we also suggesting copying and pasting your website content into a Word document or any other text editor of your choice, such as Notepad and organize it by section.
Here is an example template you can use. Home
<home page content goes here>
About Us
<about content goes here>
Services
<services content goes here>
Contact Us
<contact content goes here>
Portal Redesigning your website using Online Presence Builder
Page 6 of 16
4 Refreshing your Website Now that you’ve successfully backed up your logo, images and content, it’s time to access the Online Presence Builder to begin creating your new, mobile-ready website.
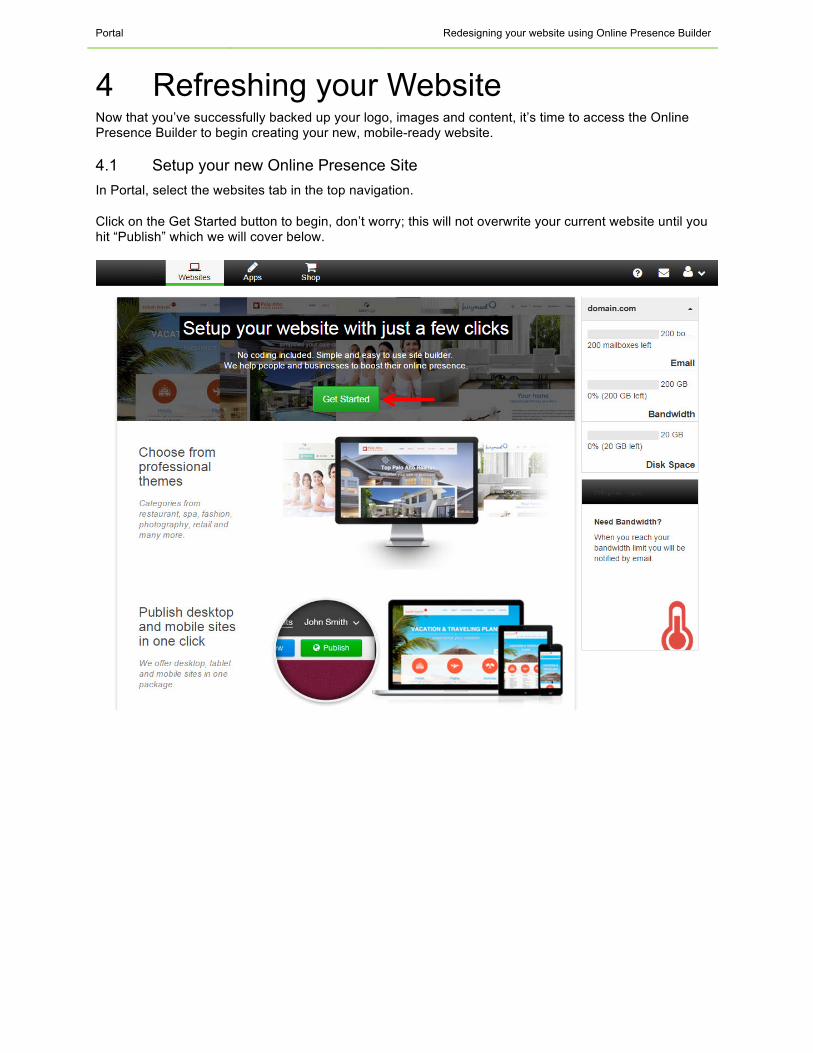
4.1 Setup your new Online Presence Site In Portal, select the websites tab in the top navigation.
Click on the Get Started button to begin, don’t worry; this will not overwrite your current website until you hit “Publish” which we will cover below.
Portal Redesigning your website using Online Presence Builder
Page 7 of 16
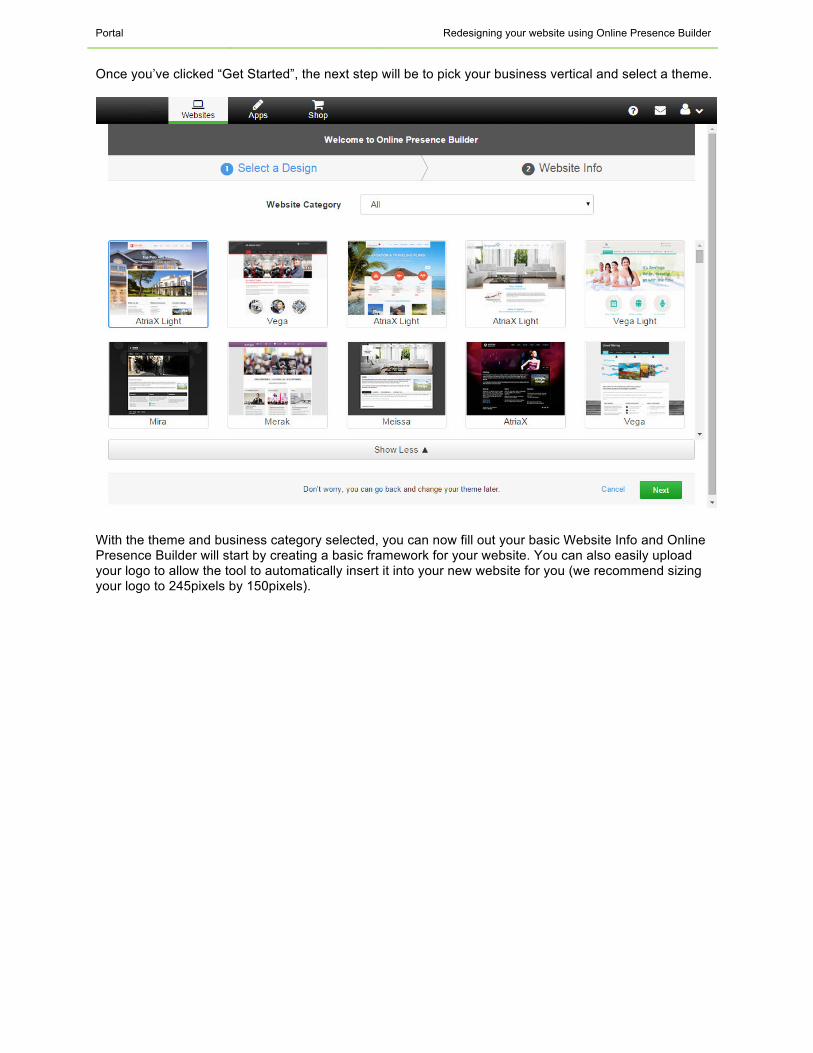
Once you’ve clicked “Get Started”, the next step will be to pick your business vertical and select a theme.
With the theme and business category selected, you can now fill out your basic Website Info and Online Presence Builder will start by creating a basic framework for your website. You can also easily upload your logo to allow the tool to automatically insert it into your new website for you (we recommend sizing your logo to 245pixels by 150pixels).
Portal Redesigning your website using Online Presence Builder
Page 8 of 16
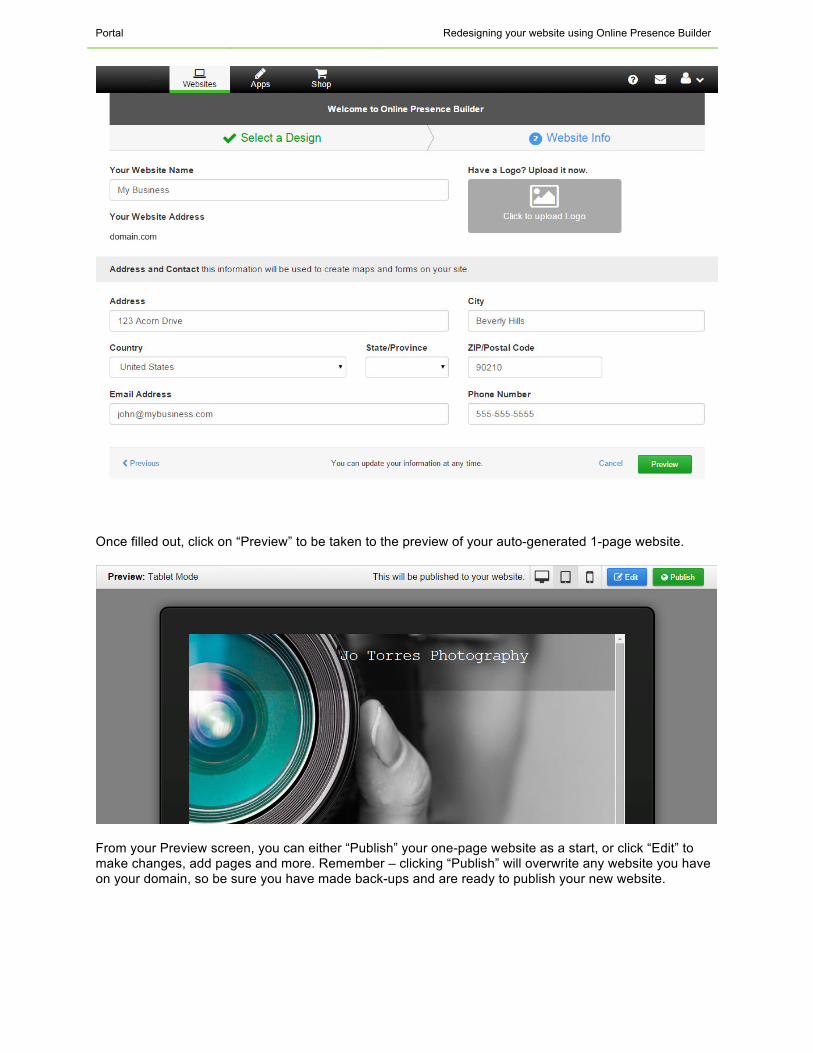
Once filled out, click on “Preview” to be taken to the preview of your auto-generated 1-page website.
From your Preview screen, you can either “Publish” your one-page website as a start, or click “Edit” to make changes, add pages and more. Remember – clicking “Publish” will overwrite any website you have on your domain, so be sure you have made back-ups and are ready to publish your new website.
Portal Redesigning your website using Online Presence Builder
Page 9 of 16
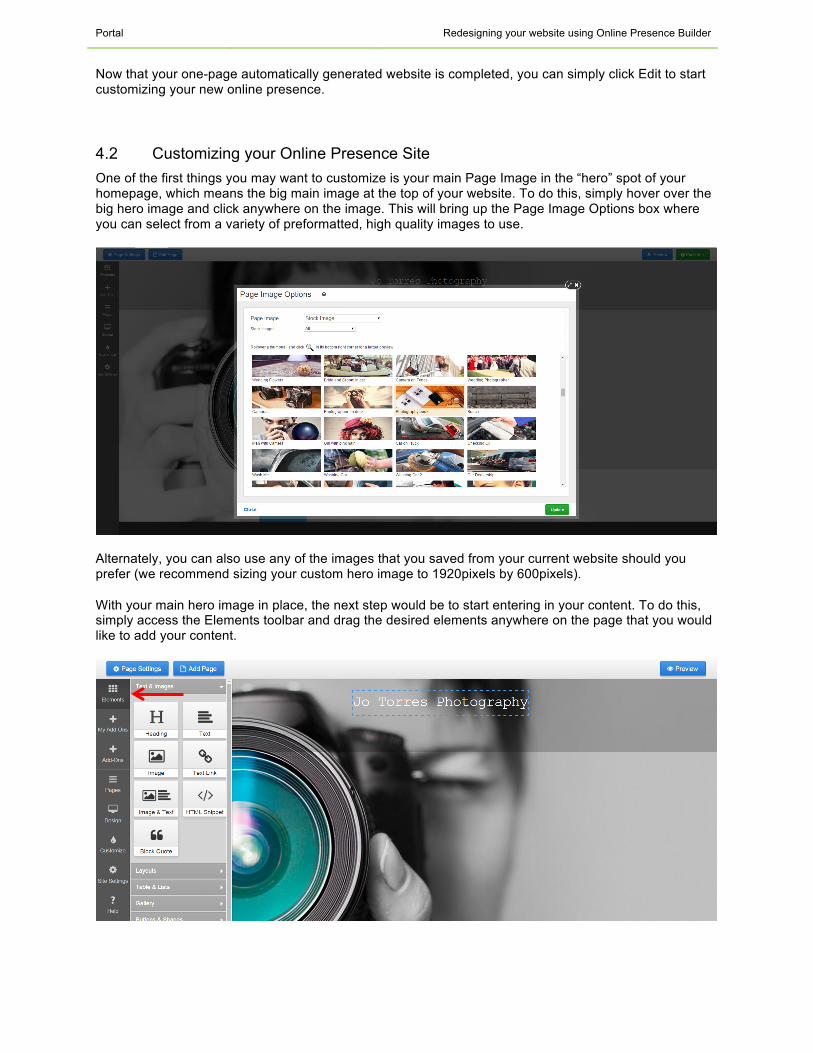
Now that your one-page automatically generated website is completed, you can simply click Edit to start customizing your new online presence.
4.2 Customizing your Online Presence Site One of the first things you may want to customize is your main Page Image in the “hero” spot of your homepage, which means the big main image at the top of your website. To do this, simply hover over the big hero image and click anywhere on the image. This will bring up the Page Image Options box where you can select from a variety of preformatted, high quality images to use.
Alternately, you can also use any of the images that you saved from your current website should you prefer (we recommend sizing your custom hero image to 1920pixels by 600pixels).
With your main hero image in place, the next step would be to start entering in your content. To do this, simply access the Elements toolbar and drag the desired elements anywhere on the page that you would like to add your content.
Portal Redesigning your website using Online Presence Builder
Page 10 of 16
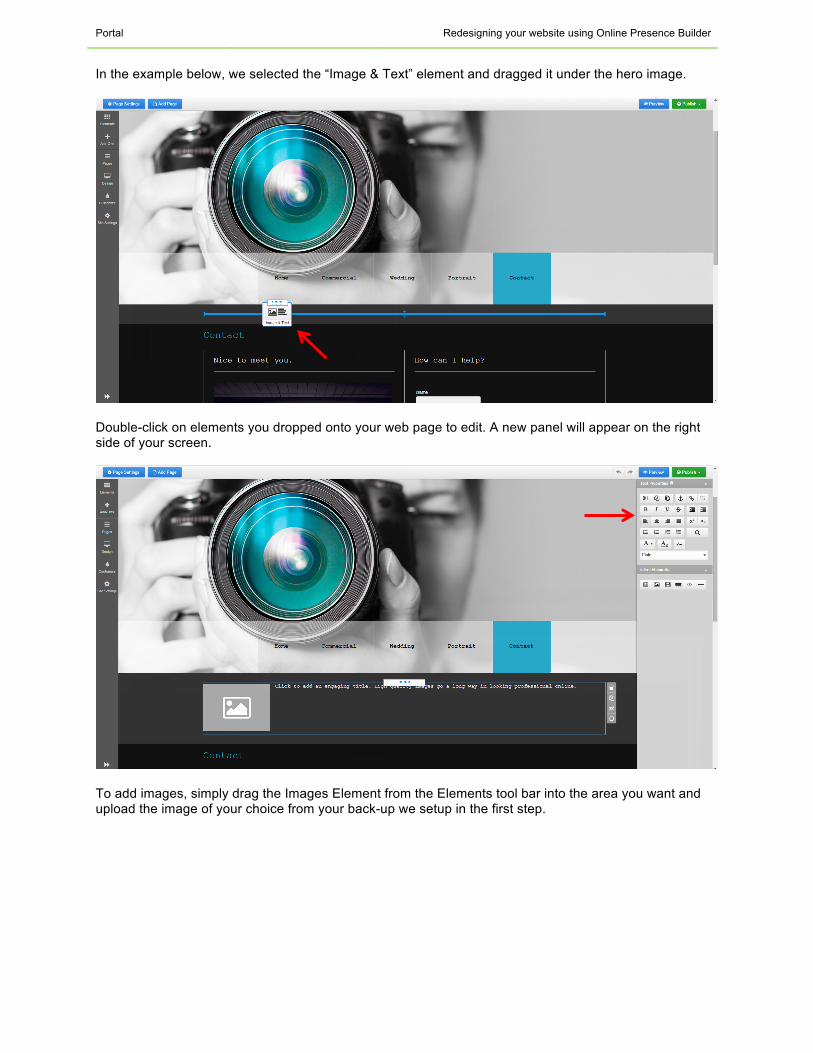
In the example below, we selected the “Image & Text” element and dragged it under the hero image.
Double-click on elements you dropped onto your web page to edit. A new panel will appear on the right side of your screen.
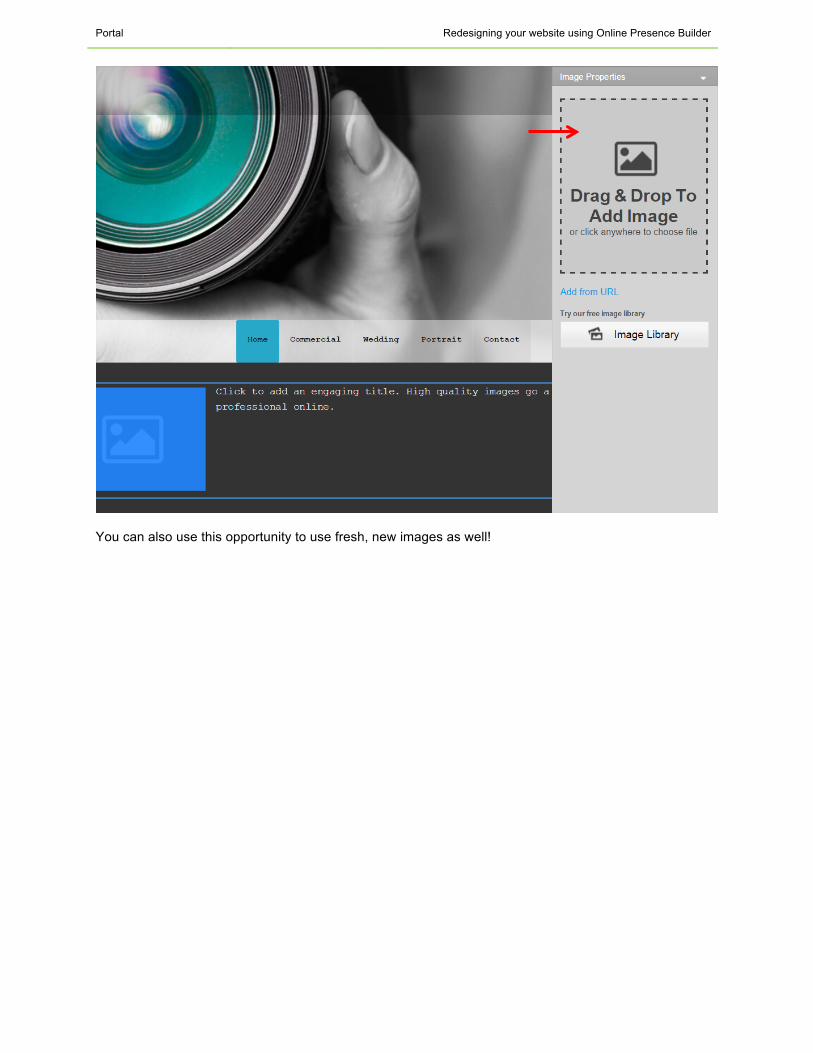
To add images, simply drag the Images Element from the Elements tool bar into the area you want and upload the image of your choice from your back-up we setup in the first step.
Portal Redesigning your website using Online Presence Builder
Page 11 of 16
You can also use this opportunity to use fresh, new images as well!
Portal Redesigning your website using Online Presence Builder
Page 12 of 16
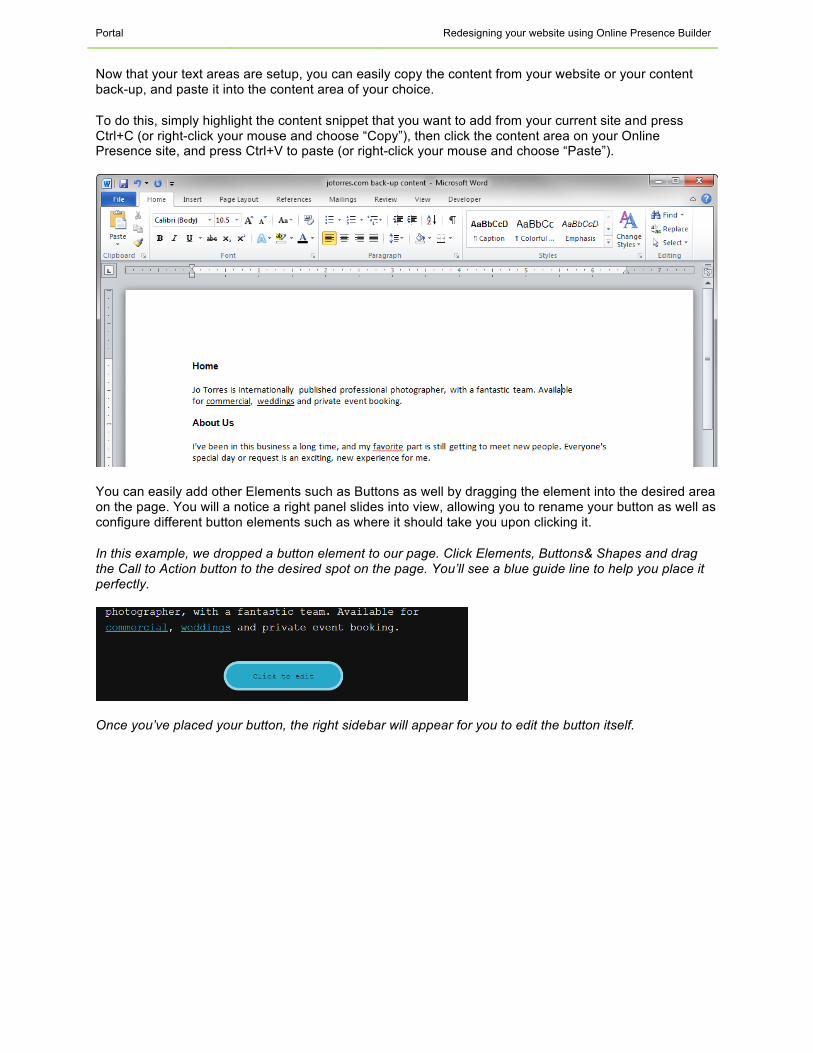
Now that your text areas are setup, you can easily copy the content from your website or your content back-up, and paste it into the content area of your choice.
To do this, simply highlight the content snippet that you want to add from your current site and press Ctrl+C (or right-click your mouse and choose “Copy”), then click the content area on your Online Presence site, and press Ctrl+V to paste (or right-click your mouse and choose “Paste”).
You can easily add other Elements such as Buttons as well by dragging the element into the desired area on the page. You will a notice a right panel slides into view, allowing you to rename your button as well as configure different button elements such as where it should take you upon clicking it.
In this example, we dropped a button element to our page. Click Elements, Buttons& Shapes and drag the Call to Action button to the desired spot on the page. You’ll see a blue guide line to help you place it perfectly.
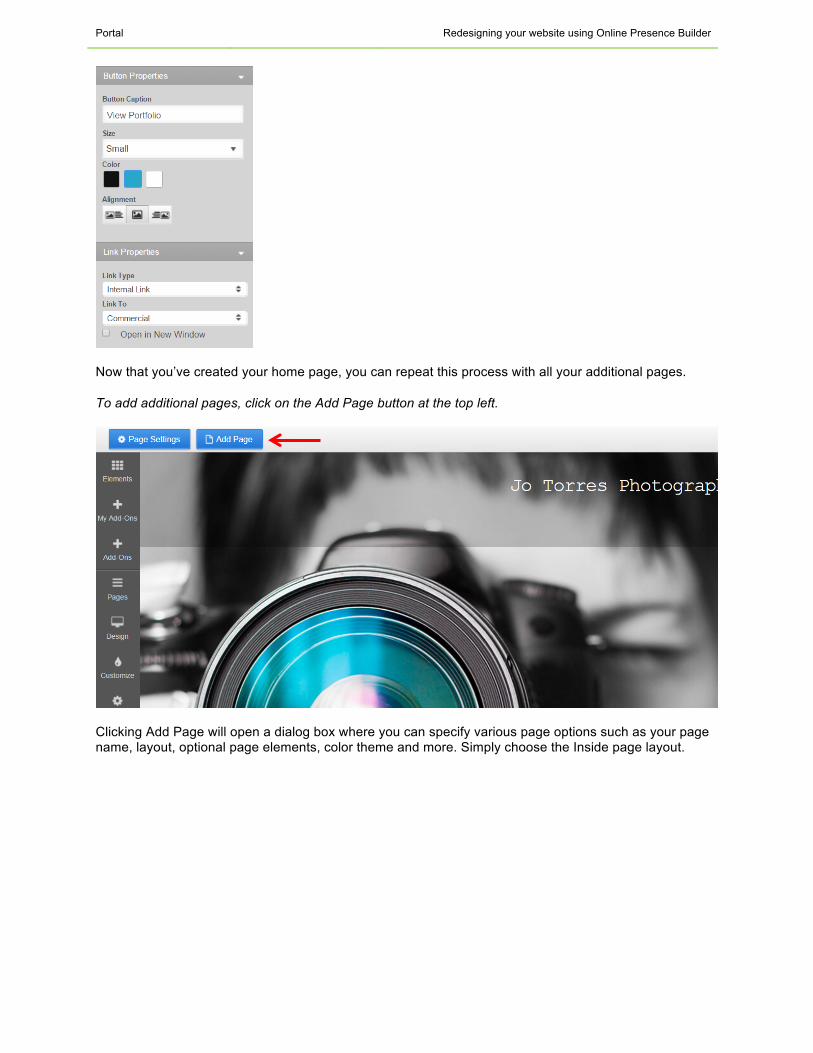
Once you’ve placed your button, the right sidebar will appear for you to edit the button itself.
Portal Redesigning your website using Online Presence Builder
Page 13 of 16
Now that you’ve created your home page, you can repeat this process with all your additional pages.
To add additional pages, click on the Add Page button at the top left.
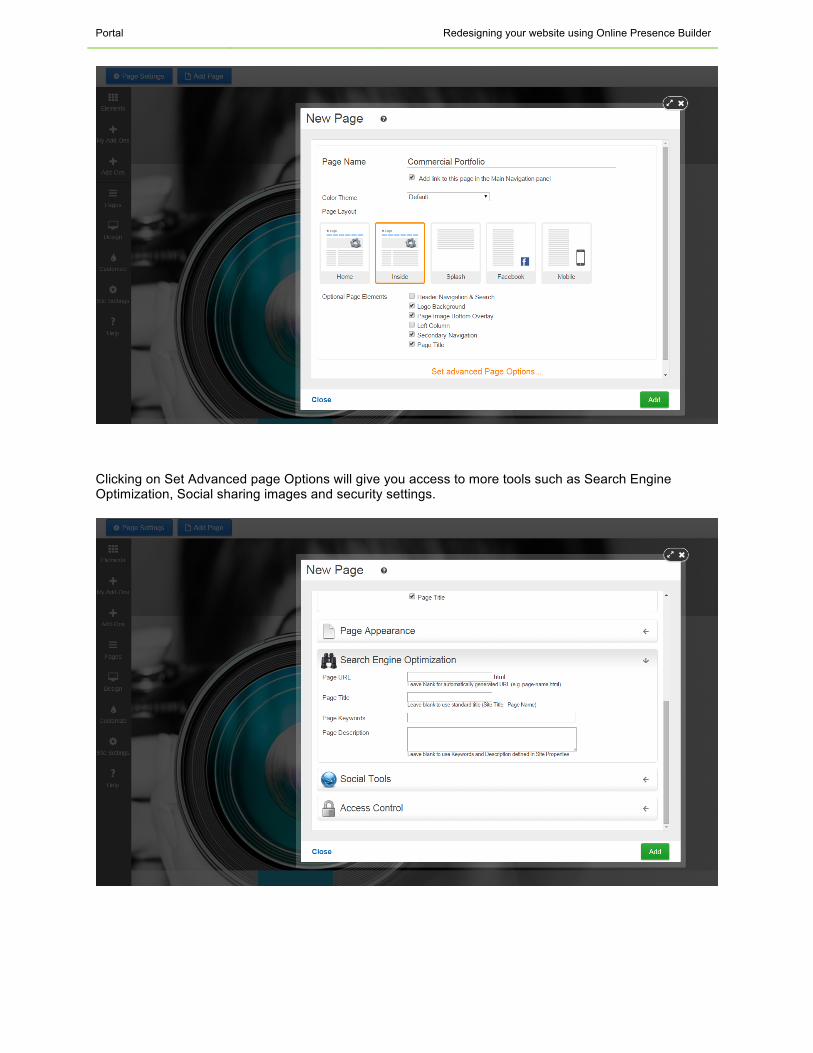
Clicking Add Page will open a dialog box where you can specify various page options such as your page name, layout, optional page elements, color theme and more. Simply choose the Inside page layout.
Portal Redesigning your website using Online Presence Builder
Page 14 of 16
Clicking on Set Advanced page Options will give you access to more tools such as Search Engine Optimization, Social sharing images and security settings.
Portal Redesigning your website using Online Presence Builder
Page 15 of 16
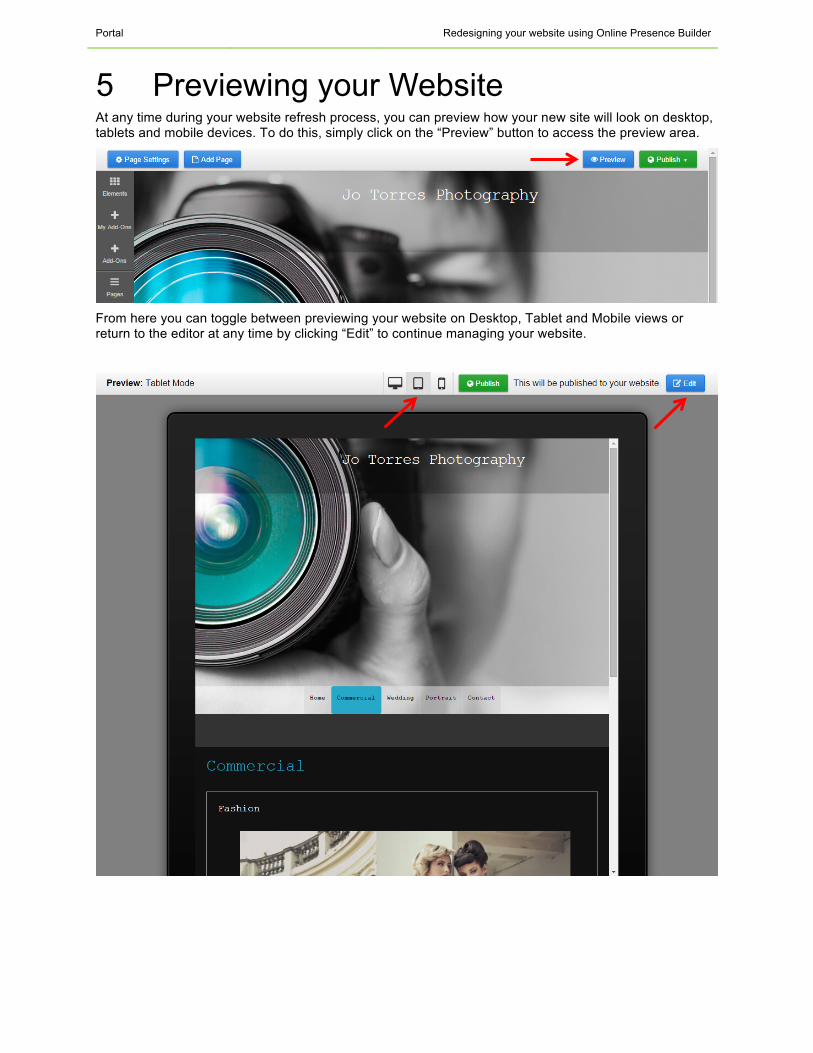
5 Previewing your Website At any time during your website refresh process, you can preview how your new site will look on desktop, tablets and mobile devices. To do this, simply click on the “Preview” button to access the preview area.
From here you can toggle between previewing your website on Desktop, Tablet and Mobile views or return to the editor at any time by clicking “Edit” to continue managing your website.
Portal Redesigning your website using Online Presence Builder
Page 16 of 16
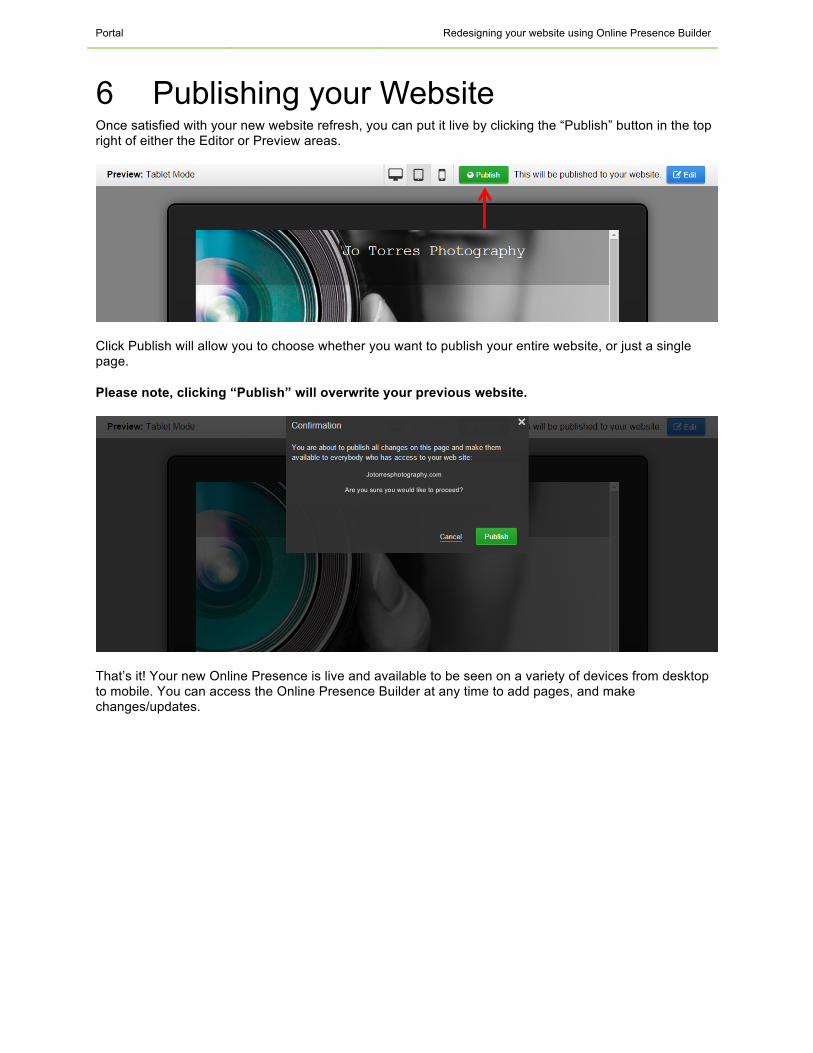
6 Publishing your Website Once satisfied with your new website refresh, you can put it live by clicking the “Publish” button in the top right of either the Editor or Preview areas.
Click Publish will allow you to choose whether you want to publish your entire website, or just a single page.
Please note, clicking “Publish” will overwrite your previous website.
That’s it! Your new Online Presence is live and available to be seen on a variety of devices from desktop to mobile. You can access the Online Presence Builder at any time to add pages, and make changes/updates.
Jotorresphotography.com
Are you sure you would like to proceed?